
Air Fryer Garlic Knots are the perfect mix of crispy and flavorful. If you love easy snacks, you’ll enjoy making these. With simple ingredients like pizza dough and garlic, you can whip up a batch in no time. Plus, they’re fun to make! I’ll guide you through each step, so you can impress your family and friends with this tasty treat. Let’s dive into the details!

Ingredients
Required Ingredients
– 1 package (13.8 oz) refrigerated pizza dough
– 4 tablespoons unsalted butter, melted
– 4 cloves garlic, minced
– 1 teaspoon dried parsley
– 1 teaspoon Italian seasoning
– ½ teaspoon salt
– ¼ teaspoon black pepper
To make these garlic knots, you need a few simple ingredients. The pizza dough serves as the base. You can use refrigerated dough from the store for ease. The garlic and seasonings bring the flavor. Don’t skip the garlic; it’s the star here!
Optional Ingredients
– Grated Parmesan cheese
If you want to add a cheesy touch, sprinkle some grated Parmesan cheese on top. It enhances the flavor and adds a nice finishing touch. This step is optional but highly recommended.
Measurement Information
For accurate results, use these measurements:
– Pizza Dough: 13.8 oz (1 package)
– Butter: 4 tablespoons, melted
– Garlic: 4 cloves, minced
– Dried Parsley: 1 teaspoon
– Italian Seasoning: 1 teaspoon
– Salt: ½ teaspoon
– Black Pepper: ¼ teaspoon
Measuring correctly is key. It ensures your knots turn out just right. Use a kitchen scale for the dough if you want precision. For the butter, melt it before measuring for the best results.
Step-by-Step Instructions
Preparation Steps
1. First, preheat your air fryer to 350°F (175°C). This step helps the knots cook evenly.
2. Next, take your refrigerated pizza dough. On a lightly floured surface, roll it out into a rectangle about 1/2 inch thick. Make sure it is smooth and even.
Knot Formation
1. Cut the dough into strips that are about 1-inch wide and 4 inches long. Use a sharp knife for clean edges.
2. Now, take each strip and tie it into a knot. Tuck the ends underneath to make a neat shape. Place the knots on a parchment-lined plate to keep them from sticking.
Air Frying Process
1. In a small bowl, mix melted butter, minced garlic, parsley, Italian seasoning, salt, and pepper. This garlic butter adds great flavor to the knots.
2. Brush each garlic knot with the garlic butter mixture. Make sure they get a good coating. You can save some of this mix for later.
3. Place the garlic knots in your air fryer basket. Keep them in a single layer, leaving space between each knot for air to flow.
4. Air fry the knots for about 7-10 minutes. They should turn golden brown and be cooked through.
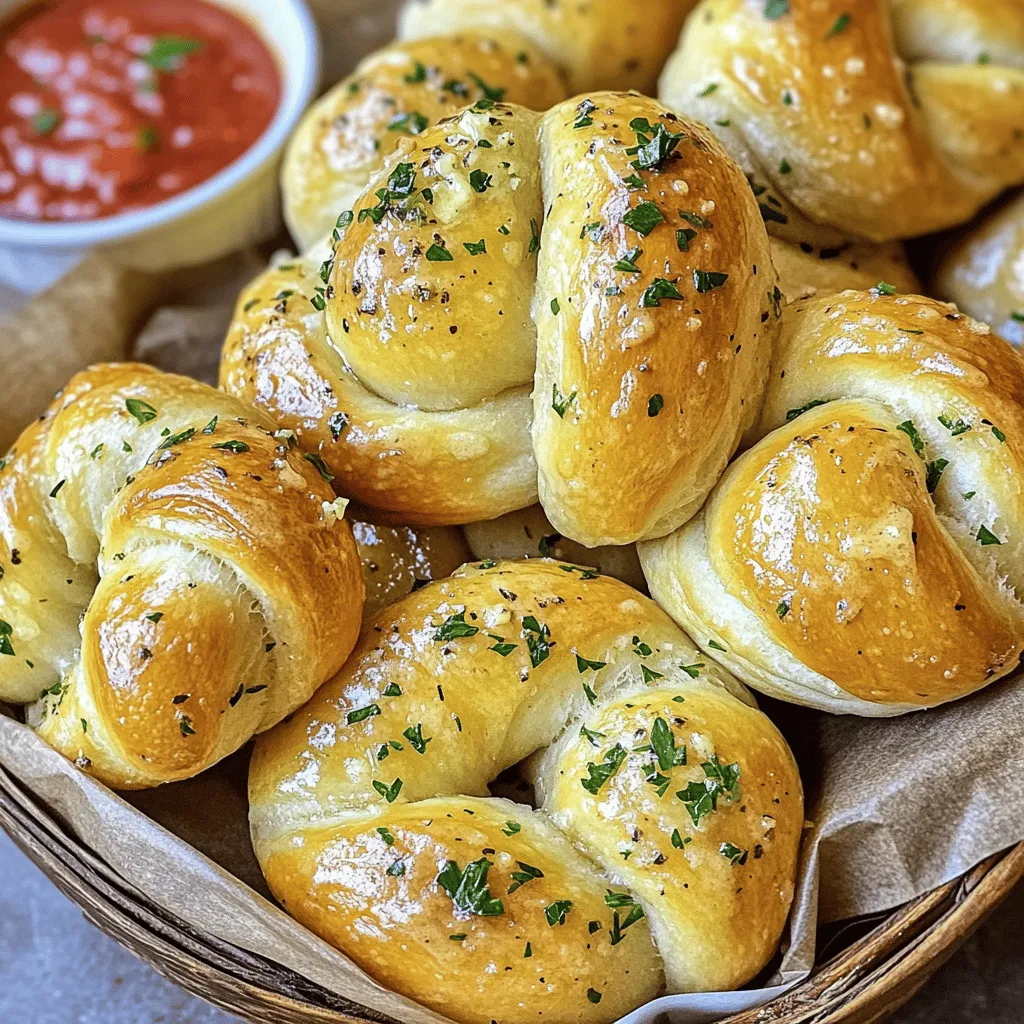
5. When they are done, take them out and brush them again with the reserved garlic butter. If you like, sprinkle some grated Parmesan cheese on top before serving.
Tips & Tricks
Ensuring Perfect Garlic Knots
To get evenly cooked garlic knots, follow these tips:
– Preheat your air fryer: Always set the air fryer to 350°F before cooking. This helps the knots cook evenly.
– Don’t overcrowd: Place knots in a single layer. Leave space between each knot for air to flow.
If you use a different air fryer model, adjust cooking time. Some air fryers may cook faster or slower. Check your knots around the 7-minute mark for golden color.
Enhancing Flavor
Want to boost the taste of your garlic knots? Here are some ideas:
– Add more herbs: Consider using fresh basil or oregano. These herbs bring vibrant flavor.
– Try different butter types: Use garlic-infused butter for a stronger garlic taste. You can also use herb butter for added depth.
Presentation Tips
Making your garlic knots look great is easy. Here are some serving ideas:
– Serve warm: Place the knots in a bread basket. Serve them right after cooking for the best taste.
– Garnish beautifully: Sprinkle fresh parsley on top for color. Serve with a small bowl of marinara sauce for dipping. This adds a fun touch!
Variations
Different Flavor Profiles
You can easily change the taste of your garlic knots. Adding cheese or fresh herbs gives them a new spin. For cheese, sprinkle grated Parmesan on top before serving. It melts perfectly and adds a salty kick. You can also mix in herbs like rosemary or thyme into the garlic butter for extra flavor. This makes each bite a burst of taste.
Dough Alternatives
If you want to save time, use frozen dough. Just thaw it according to package directions. It works great and saves prep time. You can also make homemade dough if you’re feeling adventurous. A simple mix of flour, water, yeast, and salt can create a nice base for your knots. Homemade dough adds a personal touch and flavor.
Dietary Adjustments
For those with gluten issues, you can make gluten-free garlic knots. Use gluten-free pizza dough, which is easy to find in most stores. The taste may differ slightly, but they still turn out delicious. Just follow the same steps to form and cook them. You won’t miss the gluten in these tasty treats!
Storage Info
Storing Leftovers
To keep your garlic knots fresh, place them in an airtight container. Make sure the knots are cool before sealing. This helps prevent sogginess. Store them in the fridge for up to three days. If you want to keep them longer, freezing is a great option.
Reheating Instructions
To reheat your garlic knots while keeping them crispy, use the air fryer. Set it to 350°F (175°C). Place the knots in the basket for about 3-5 minutes. This method revives their crunch and flavor. Avoid using the microwave, as it can make them soft and chewy.
Freezing Tips
For long-term storage, freeze the garlic knots after they cool. Wrap each knot in plastic wrap and place them in a freezer bag. This keeps them safe from freezer burn. They can last up to three months in the freezer. When ready to eat, simply reheat in the air fryer as mentioned before.
FAQs
How do I know if my garlic knots are cooked properly?
To check if your garlic knots are done, look for a golden brown color. The knots should feel firm to touch, not doughy. You can also insert a toothpick into the center. If it comes out clean, your knots are ready!
Can I make garlic knots ahead of time?
Yes, you can prepare garlic knots in advance. To do this, follow the steps up to brushing them with garlic butter. Then, store the unbaked knots in the fridge for up to 24 hours. When ready, brush them with butter and air fry as directed. This saves time and makes for a quick snack!
What to serve with air fryer garlic knots?
Air fryer garlic knots pair well with marinara sauce for dipping. You can also serve them with ranch dressing or garlic aioli. For a fresh touch, add a side of mixed greens or a simple salad. These pairings enhance the flavors and create a fun snack experience!
In this post, we covered how to make delicious air fryer garlic knots. We discussed required and optional ingredients, specifically dough, garlic, seasonings, and cheese. The guide detailed preparation steps and knot formation, along with specific cooking instructions. I shared tips for perfect knots and added flavor ideas. We explored variations, storage options, and answered common questions.
Making garlic knots at home is easy and fun. Enjoy your tasty treats, and feel free to get creative!
