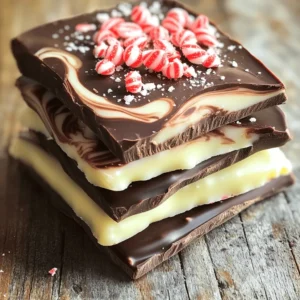
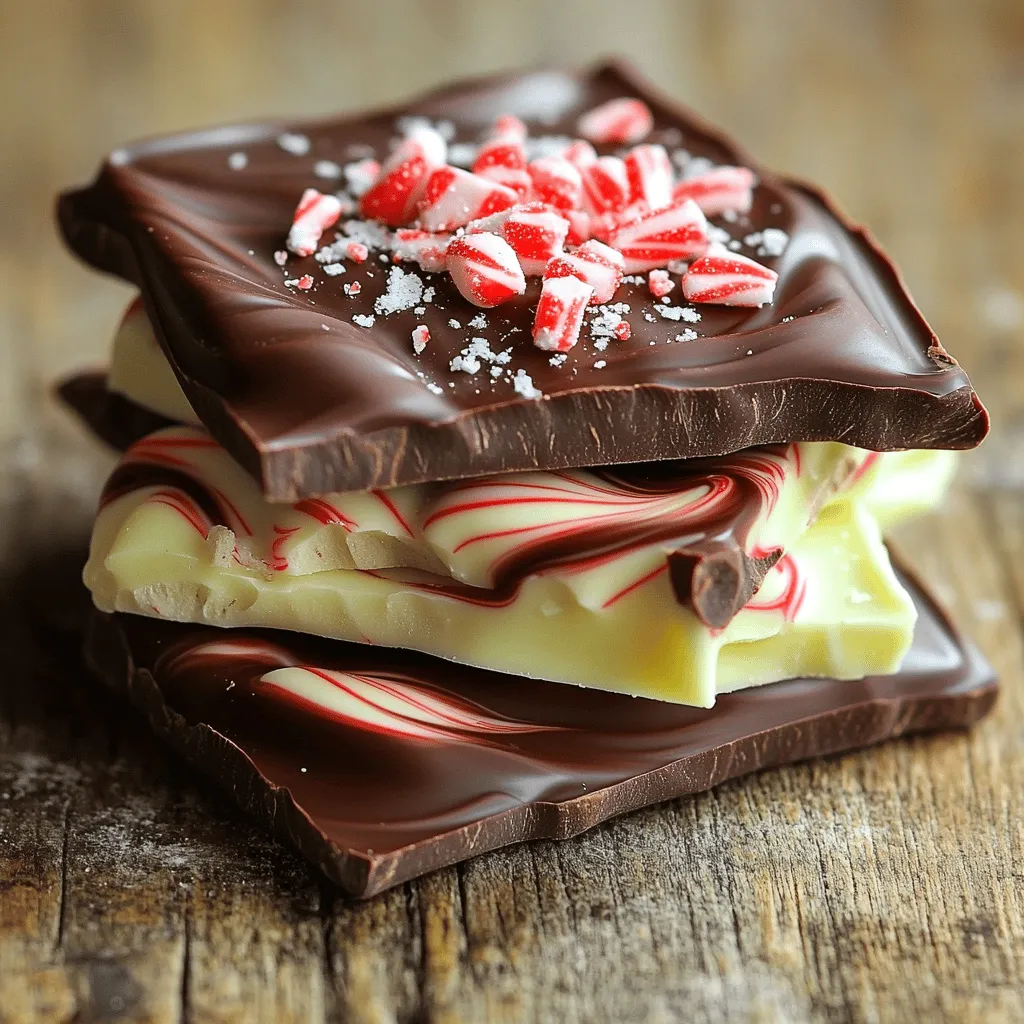
If you love sweet treats with a holiday flair, you’re in for a treat! My no-bake peppermint chocolate bark recipe is simple and fun to make. You only need a few ingredients, and you will impress everyone with your tasty creation. This delightful bark combines dark and white chocolate, peppermint, and a pinch of sea salt for that perfect crunch. Let’s dive into this easy recipe and start creating some delicious memories!

Ingredients
Main Ingredients
– 2 cups dark chocolate chips
– 1 cup white chocolate chips
– 1 teaspoon peppermint extract
– 1/2 cup crushed peppermint candies (such as candy canes)
– A pinch of sea salt
Optional Add-ins
– Different types of chocolate
– Nuts or seeds
– Dried fruits
Gathering your ingredients is the first step to making this delicious bark. The dark chocolate chips provide a rich base. White chocolate chips add sweetness and creaminess. Peppermint extract gives that fresh, minty flavor. Crushed peppermint candies add a nice crunch on top. A pinch of sea salt balances the sweetness.
You can also customize your bark! Try different types of chocolate like milk or semi-sweet. Adding nuts or seeds gives extra texture. Dried fruits can add a chewy bite. Mix and match to make it your own.
Step-by-Step Instructions
Preparation Steps
– Line an 8×8 inch baking dish with parchment paper. Leave some paper hanging over the edges. This helps with easy removal later.
– Gather your ingredients. You will need dark and white chocolate chips, peppermint extract, crushed peppermint candies, and sea salt.
Melting Chocolate
– For the dark chocolate, place 2 cups of chocolate chips in a microwave-safe bowl. Microwave for 30 seconds. Stir well. Repeat until the chocolate is smooth.
– For the white chocolate, use another bowl. Add 1 cup of white chocolate chips. Again, microwave for 30 seconds. Stir and repeat until smooth.
Assembling the Bark
– Pour the melted dark chocolate into your baking dish. Use a spatula to spread it evenly. Make sure it’s flat and even.
– Now, take the melted white chocolate and pour it over the dark chocolate. Use a toothpick to swirl the two chocolates together. This creates a pretty marble effect.
– While the chocolate is still warm, sprinkle the crushed peppermint candies on top. Add a pinch of sea salt for a nice contrast in flavor.
– Place the dish in the refrigerator for about 30 minutes. This helps the bark set completely. After 30 minutes, lift the bark out using the parchment paper. Cut into pieces with a sharp knife and enjoy!
Tips & Tricks
Perfect Melting Techniques
To melt chocolate without burning, use short bursts in the microwave. Heat it for 30 seconds, then stir. Check if it is soft. Repeat until the chocolate is smooth. This method keeps your chocolate from burning.
If you prefer, you can use a double boiler. Fill a pot with water and bring it to a simmer. Place a heat-safe bowl on top, making sure it does not touch the water. Add your chocolate to the bowl and stir until melted. This method gives great control over the heat.
Customizing Flavor and Texture
You can adjust the peppermint extract to fit your taste. Start with a small amount and add more if you want a stronger flavor. Just remember, peppermint can be strong, so go easy!
To change the thickness of your bark, adjust the layers of chocolate. You can use more dark or white chocolate. A thicker layer gives a richer bite, while a thinner layer is crispier.
Presentation Ideas
Cut your bark into fun shapes for a festive touch. Use a sharp knife to slice it into squares, triangles, or even holiday-themed shapes with cookie cutters.
When serving, place the pieces on a colorful platter. You can also add some whole candy canes for decoration. This makes it look great for holiday gatherings and parties.
Variations
Chocolate Variations
You can switch the dark chocolate chips for milk or semi-sweet chocolate. Milk chocolate gives a sweeter taste. Semi-sweet chocolate adds a nice balance. You can also try flavored chocolate, like raspberry or orange. These choices add fun twists to your bark.
Add-on Ideas
Add colorful sprinkles on top for a festive look. They make the bark pop! You can also swap out peppermint with other candies. Try crushed Oreos for a cookies and cream vibe. Or use nuts for a crunchy texture. Each choice makes your bark unique.
Dietary Adjustments
If you want to make this bark vegan, use dairy-free chocolate. Many brands offer great options. For a gluten-free version, check that your chocolate is gluten-free. This way, everyone can enjoy your yummy treat!
Storage Info
How to Store
To keep your no-bake peppermint chocolate bark fresh, use an airtight container. Glass or plastic containers work well. Store the bark in a cool, dry place or in the fridge. Avoid direct sunlight, as heat can melt the chocolate.
Shelf Life
You can store the peppermint chocolate bark for about two weeks. If you notice any discoloration or an off smell, it’s time to toss it. Look for a dull appearance or any signs of mold to check for spoilage.
Freezing Instructions
Yes, you can freeze peppermint chocolate bark! Wrap it tightly in plastic wrap or foil. Place it in a freezer-safe bag to prevent freezer burn. When ready to enjoy, thaw it in the fridge for a few hours. Avoid thawing at room temperature to keep the texture nice.
FAQs
Can I use chocolate bars instead of chips?
Yes, you can use chocolate bars instead of chips. Here are the pros and cons:
– Pros: Bars can have a richer taste. They melt smoothly and evenly.
– Cons: Chips hold their shape better. They may not melt as easily.
Using bars gives you a chance to pick high-quality chocolate. However, chips are often more convenient.
What can I use instead of peppermint extract?
If you don’t have peppermint extract, you can try these alternatives:
– Mint leaves: Use fresh mint for a natural flavor.
– Almond extract: This gives a nice, sweet taste.
– Vanilla extract: It adds warmth but lacks minty freshness.
Each option changes the flavor, so choose what you like best.
How do I know when the chocolate is fully set?
To check if your chocolate is ready, look for these signs:
– Firmness: Gently press the chocolate. It should feel hard.
– Shiny surface: Well-set chocolate looks glossy.
– No stickiness: The chocolate should not feel tacky to the touch.
If it meets these criteria, it’s ready for slicing. Enjoy the deliciousness!
This recipe for peppermint chocolate bark covers everything you need. You learned about the main ingredients, optional add-ins, and easy steps to make it. Plus, the tips help you get the perfect melt and look. You can also try different flavors or make it vegan. Store it right to enjoy it longer. This treat can brighten your holiday moments. Making peppermint bark is simple and fun. Enjoy experimenting with flavors and sharing with friends!