No-Bake Cookies & Cream Cheesecake Bars Delight

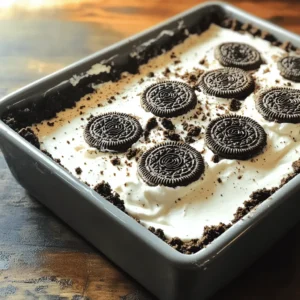
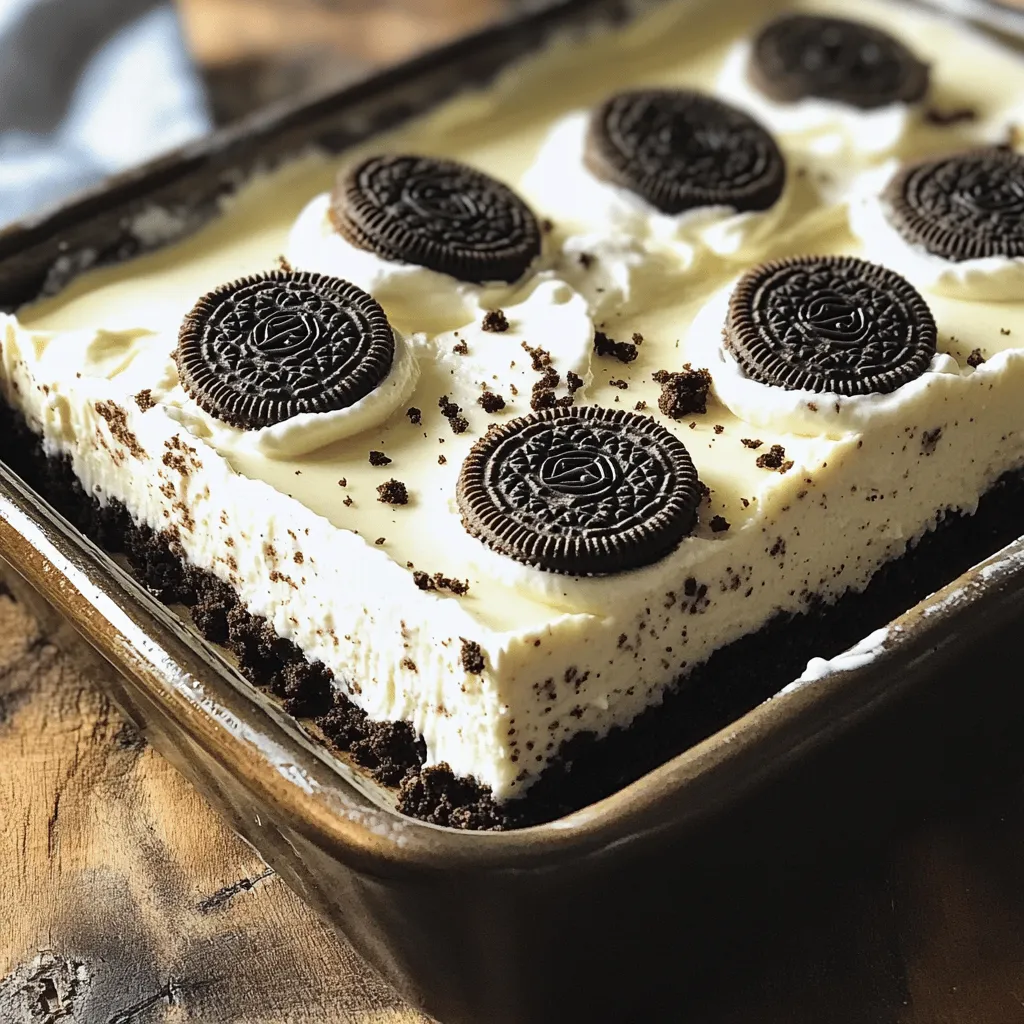
Want a sweet treat that’s simple and delicious? Let me introduce you to No-Bake Cookies & Cream Cheesecake Bars! These bars pack a creamy, dreamy flavor while skipping the baking step. You’ll mix Oreo cookie crumbs and rich cream cheese to create an easy dessert perfect for any occasion. Get ready to whip up a dessert that will impress your friends and family without hours in the kitchen!

- 1 ½ cups Oreo cookie crumbs - ½ cup unsalted butter, melted - 16 oz cream cheese, softened - ½ cup granulated sugar - 2 teaspoons vanilla extract - 1 ½ cups heavy whipping cream - 1 cup crushed Oreo cookies (for mixing into the cheesecake) - 2 tablespoons crushed Oreo cookies (for topping) When I make No-Bake Cookies & Cream Cheesecake Bars, I love the simple yet rich flavors. First, I gather my ingredients. The base uses Oreo cookie crumbs, which add that classic chocolate taste. Melting unsalted butter helps bind the crumbs together, creating a solid crust. Next, I focus on the cream cheese. It must be softened for a smooth texture. Granulated sugar sweetens the mix, while vanilla extract gives it a lovely aroma. Heavy whipping cream is key for fluffiness. I whip it until it forms stiff peaks. This step makes the cheesecake light and airy. Then, I add crushed Oreo cookies into the filling. This mix gives a nice crunch and enhances the flavor. Finally, I save some crushed cookies for the topping. They make the bars look appealing and add extra sweetness. Each ingredient plays an important role in the final product. 1. Combine Oreo cookie crumbs and melted butter: In a medium bowl, mix the Oreo cookie crumbs with melted butter. Make sure all the crumbs get coated well. The mix should look like wet sand. 2. Press into the baking dish: Take a 9x9-inch baking dish. Firmly press the crumb mix into the bottom. You want an even layer. 3. Refrigerate to set: Place the dish in the fridge for about 15-20 minutes. This helps the crust hold its shape. 1. Beat cream cheese until smooth: In a large bowl, beat the softened cream cheese using an electric mixer. Mix until it is creamy and smooth. 2. Add sugar and vanilla extract: Gradually mix in the granulated sugar and vanilla extract. Keep mixing until everything is well combined. 3. Whip heavy cream until stiff peaks: In a separate bowl, whip the heavy cream until it forms stiff peaks. This step adds a light, fluffy texture to your filling. 1. Fold whipped cream into cream cheese mixture: Gently fold the whipped cream into the cream cheese mix. Be careful not to deflate the whipped cream. 2. Stir in crushed Oreo cookies: Add the crushed Oreo cookies to the mixture. Stir until they are evenly mixed in. 3. Pour filling over crust: Pour the cheesecake filling over the chilled crust. Spread it out evenly. Tap the dish gently on the counter to let air bubbles escape. To whip cream to stiff peaks, start with cold heavy cream. Use a clean bowl and beaters. Whip the cream on medium speed. Watch closely as it thickens. When peaks form and hold their shape, stop mixing. This adds air and makes your cheesecake light. Room temperature cream cheese is key for a smooth filling. Cold cream cheese can be lumpy. Leave it out for about 30 minutes before mixing. This makes it easier to blend with the sugar and vanilla. Garnishes can make your cheesecake bars look extra special. Consider adding a sprig of mint on top. You can also drizzle chocolate syrup for a fun touch. Fresh berries add color and freshness. For pairing options, serve your bars with coffee or tea. The rich flavors of the cheesecake work well with these drinks. You can also enjoy them with fresh fruit for a nice contrast. One common mistake is over-folding the whipped cream. This can deflate the air you worked hard to create. Gently fold until just combined for a light texture. Another mistake is not chilling the bars long enough. They need at least four hours to set. If you can, chill overnight. This helps the flavors meld and makes slicing easier. {{image_2}} You can change the flavors of your no-bake cheesecake bars easily. - Chocolate version: Use chocolate sandwich cookies instead of Oreos. Mix in cocoa powder for a rich taste. - Mint cookies and cream: Add peppermint extract to the cream cheese mix. Use mint Oreos for extra flavor. If you have special dietary needs, you can still enjoy this treat. - Gluten-free options: Use gluten-free chocolate cookies for the crust. Make sure all ingredients are gluten-free. - Dairy-free alternatives: Replace cream cheese with a dairy-free cream cheese. Use coconut cream instead of heavy cream. Serving can be fun and creative. - Individual cups instead of bars: Layer the crust and filling in small cups. This makes for easy serving and a cute look. - Adding toppings like chocolate drizzle: Drizzle melted chocolate or a berry sauce on top. This adds a nice touch and extra flavor. To keep your cheesecake bars fresh, place them in an airtight container. This will keep them from drying out or absorbing other smells. You can store them in the fridge for up to five days. Make sure to cover them well if you don't have a container. Yes, you can freeze cheesecake bars! They freeze well and taste great later. To freeze them, first, cut the bars into pieces. Wrap each piece in plastic wrap. Then, place them in a freezer-safe bag or container. When you want to eat them, take out a piece and let it thaw in the fridge. This will keep the texture nice. Don't rush the thawing; it may take a few hours. Enjoy your cheesecake bars even after freezing! Yes, you can use other cookies. Graham crackers work well for a classic taste. Chocolate cookies add a richer flavor. Just crush them into fine crumbs and mix with melted butter, just like the Oreos. These cheesecake bars last about 5 days in the fridge. Store them in an airtight container to keep them fresh. If you want them to last longer, consider freezing them. Absolutely! This recipe is great for making ahead. You can make it a day or two before serving. Just allow enough time for chilling, usually at least 4 hours or overnight. If you want a lighter option, use whipped topping. You could also try coconut cream for a dairy-free choice. Just remember, the texture might change a little, but it will still be tasty! This blog post shared a tasty recipe for Oreo cheesecake bars. We discussed the key ingredients and detailed steps to make the crust and filling. Tips helped you avoid common mistakes and suggested ways to enhance your dessert. Variations showed how to customize flavors and presentations. Finally, we covered storage methods to keep your bars fresh. Enjoy creating this delicious treat! You'll impress friends and family with your cheesecake skills.

Ingredients

List of Ingredients

– 1 ½ cups Oreo cookie crumbs

– ½ cup unsalted butter, melted

– 16 oz cream cheese, softened

– ½ cup granulated sugar

– 2 teaspoons vanilla extract

– 1 ½ cups heavy whipping cream

– 1 cup crushed Oreo cookies (for mixing into the cheesecake)

– 2 tablespoons crushed Oreo cookies (for topping)

When I make No-Bake Cookies & Cream Cheesecake Bars, I love the simple yet rich flavors. First, I gather my ingredients. The base uses Oreo cookie crumbs, which add that classic chocolate taste. Melting unsalted butter helps bind the crumbs together, creating a solid crust.

Next, I focus on the cream cheese. It must be softened for a smooth texture. Granulated sugar sweetens the mix, while vanilla extract gives it a lovely aroma. Heavy whipping cream is key for fluffiness. I whip it until it forms stiff peaks. This step makes the cheesecake light and airy.

Then, I add crushed Oreo cookies into the filling. This mix gives a nice crunch and enhances the flavor. Finally, I save some crushed cookies for the topping. They make the bars look appealing and add extra sweetness. Each ingredient plays an important role in the final product.

Step-by-Step Instructions

Preparing the Crust

1. Combine Oreo cookie crumbs and melted butter: In a medium bowl, mix the Oreo cookie crumbs with melted butter. Make sure all the crumbs get coated well. The mix should look like wet sand.

2. Press into the baking dish: Take a 9×9-inch baking dish. Firmly press the crumb mix into the bottom. You want an even layer.

3. Refrigerate to set: Place the dish in the fridge for about 15-20 minutes. This helps the crust hold its shape.

Making the Cheesecake Filling

1. Beat cream cheese until smooth: In a large bowl, beat the softened cream cheese using an electric mixer. Mix until it is creamy and smooth.

2. Add sugar and vanilla extract: Gradually mix in the granulated sugar and vanilla extract. Keep mixing until everything is well combined.

3. Whip heavy cream until stiff peaks: In a separate bowl, whip the heavy cream until it forms stiff peaks. This step adds a light, fluffy texture to your filling.

Combining the Mixtures

1. Fold whipped cream into cream cheese mixture: Gently fold the whipped cream into the cream cheese mix. Be careful not to deflate the whipped cream.

2. Stir in crushed Oreo cookies: Add the crushed Oreo cookies to the mixture. Stir until they are evenly mixed in.

3. Pour filling over crust: Pour the cheesecake filling over the chilled crust. Spread it out evenly. Tap the dish gently on the counter to let air bubbles escape.

Tips & Tricks

Achieving the Perfect Texture

To whip cream to stiff peaks, start with cold heavy cream. Use a clean bowl and beaters. Whip the cream on medium speed. Watch closely as it thickens. When peaks form and hold their shape, stop mixing. This adds air and makes your cheesecake light.

Room temperature cream cheese is key for a smooth filling. Cold cream cheese can be lumpy. Leave it out for about 30 minutes before mixing. This makes it easier to blend with the sugar and vanilla.

Serving Suggestions

Garnishes can make your cheesecake bars look extra special. Consider adding a sprig of mint on top. You can also drizzle chocolate syrup for a fun touch. Fresh berries add color and freshness.

For pairing options, serve your bars with coffee or tea. The rich flavors of the cheesecake work well with these drinks. You can also enjoy them with fresh fruit for a nice contrast.

Common Mistakes to Avoid

One common mistake is over-folding the whipped cream. This can deflate the air you worked hard to create. Gently fold until just combined for a light texture.

Another mistake is not chilling the bars long enough. They need at least four hours to set. If you can, chill overnight. This helps the flavors meld and makes slicing easier.

Variations

Flavor Variations

You can change the flavors of your no-bake cheesecake bars easily.

Chocolate version: Use chocolate sandwich cookies instead of Oreos. Mix in cocoa powder for a rich taste.

Mint cookies and cream: Add peppermint extract to the cream cheese mix. Use mint Oreos for extra flavor.

Dietary Substitutions

If you have special dietary needs, you can still enjoy this treat.

Gluten-free options: Use gluten-free chocolate cookies for the crust. Make sure all ingredients are gluten-free.

Dairy-free alternatives: Replace cream cheese with a dairy-free cream cheese. Use coconut cream instead of heavy cream.

Presentation Variations

Serving can be fun and creative.

Individual cups instead of bars: Layer the crust and filling in small cups. This makes for easy serving and a cute look.

Adding toppings like chocolate drizzle: Drizzle melted chocolate or a berry sauce on top. This adds a nice touch and extra flavor.

Storage Info

How to Store Leftovers

To keep your cheesecake bars fresh, place them in an airtight container. This will keep them from drying out or absorbing other smells. You can store them in the fridge for up to five days. Make sure to cover them well if you don’t have a container.

Freezing Suggestions

Yes, you can freeze cheesecake bars! They freeze well and taste great later. To freeze them, first, cut the bars into pieces. Wrap each piece in plastic wrap. Then, place them in a freezer-safe bag or container. When you want to eat them, take out a piece and let it thaw in the fridge. This will keep the texture nice. Don’t rush the thawing; it may take a few hours. Enjoy your cheesecake bars even after freezing!

FAQs

Can I use different cookies for the crust?

Yes, you can use other cookies. Graham crackers work well for a classic taste. Chocolate cookies add a richer flavor. Just crush them into fine crumbs and mix with melted butter, just like the Oreos.

How long do these cheesecake bars last in the fridge?

These cheesecake bars last about 5 days in the fridge. Store them in an airtight container to keep them fresh. If you want them to last longer, consider freezing them.

Can I make this recipe ahead of time?

Absolutely! This recipe is great for making ahead. You can make it a day or two before serving. Just allow enough time for chilling, usually at least 4 hours or overnight.

What can I use instead of heavy whipping cream?

If you want a lighter option, use whipped topping. You could also try coconut cream for a dairy-free choice. Just remember, the texture might change a little, but it will still be tasty!

This blog post shared a tasty recipe for Oreo cheesecake bars. We discussed the key ingredients and detailed steps to make the crust and filling. Tips helped you avoid common mistakes and suggested ways to enhance your dessert. Variations showed how to customize flavors and presentations. Finally, we covered storage methods to keep your bars fresh.

Enjoy creating this delicious treat! You’ll impress friends and family with your cheesecake skills.

- 1 ½ cups Oreo cookie crumbs - ½ cup unsalted butter, melted - 16 oz cream cheese, softened - ½ cup granulated sugar - 2 teaspoons vanilla extract - 1 ½ cups heavy whipping cream - 1 cup crushed Oreo cookies (for mixing into the cheesecake) - 2 tablespoons crushed Oreo cookies (for topping) When I make No-Bake Cookies & Cream Cheesecake Bars, I love the simple yet rich flavors. First, I gather my ingredients. The base uses Oreo cookie crumbs, which add that classic chocolate taste. Melting unsalted butter helps bind the crumbs together, creating a solid crust. Next, I focus on the cream cheese. It must be softened for a smooth texture. Granulated sugar sweetens the mix, while vanilla extract gives it a lovely aroma. Heavy whipping cream is key for fluffiness. I whip it until it forms stiff peaks. This step makes the cheesecake light and airy. Then, I add crushed Oreo cookies into the filling. This mix gives a nice crunch and enhances the flavor. Finally, I save some crushed cookies for the topping. They make the bars look appealing and add extra sweetness. Each ingredient plays an important role in the final product. 1. Combine Oreo cookie crumbs and melted butter: In a medium bowl, mix the Oreo cookie crumbs with melted butter. Make sure all the crumbs get coated well. The mix should look like wet sand. 2. Press into the baking dish: Take a 9x9-inch baking dish. Firmly press the crumb mix into the bottom. You want an even layer. 3. Refrigerate to set: Place the dish in the fridge for about 15-20 minutes. This helps the crust hold its shape. 1. Beat cream cheese until smooth: In a large bowl, beat the softened cream cheese using an electric mixer. Mix until it is creamy and smooth. 2. Add sugar and vanilla extract: Gradually mix in the granulated sugar and vanilla extract. Keep mixing until everything is well combined. 3. Whip heavy cream until stiff peaks: In a separate bowl, whip the heavy cream until it forms stiff peaks. This step adds a light, fluffy texture to your filling. 1. Fold whipped cream into cream cheese mixture: Gently fold the whipped cream into the cream cheese mix. Be careful not to deflate the whipped cream. 2. Stir in crushed Oreo cookies: Add the crushed Oreo cookies to the mixture. Stir until they are evenly mixed in. 3. Pour filling over crust: Pour the cheesecake filling over the chilled crust. Spread it out evenly. Tap the dish gently on the counter to let air bubbles escape. To whip cream to stiff peaks, start with cold heavy cream. Use a clean bowl and beaters. Whip the cream on medium speed. Watch closely as it thickens. When peaks form and hold their shape, stop mixing. This adds air and makes your cheesecake light. Room temperature cream cheese is key for a smooth filling. Cold cream cheese can be lumpy. Leave it out for about 30 minutes before mixing. This makes it easier to blend with the sugar and vanilla. Garnishes can make your cheesecake bars look extra special. Consider adding a sprig of mint on top. You can also drizzle chocolate syrup for a fun touch. Fresh berries add color and freshness. For pairing options, serve your bars with coffee or tea. The rich flavors of the cheesecake work well with these drinks. You can also enjoy them with fresh fruit for a nice contrast. One common mistake is over-folding the whipped cream. This can deflate the air you worked hard to create. Gently fold until just combined for a light texture. Another mistake is not chilling the bars long enough. They need at least four hours to set. If you can, chill overnight. This helps the flavors meld and makes slicing easier. {{image_2}} You can change the flavors of your no-bake cheesecake bars easily. - Chocolate version: Use chocolate sandwich cookies instead of Oreos. Mix in cocoa powder for a rich taste. - Mint cookies and cream: Add peppermint extract to the cream cheese mix. Use mint Oreos for extra flavor. If you have special dietary needs, you can still enjoy this treat. - Gluten-free options: Use gluten-free chocolate cookies for the crust. Make sure all ingredients are gluten-free. - Dairy-free alternatives: Replace cream cheese with a dairy-free cream cheese. Use coconut cream instead of heavy cream. Serving can be fun and creative. - Individual cups instead of bars: Layer the crust and filling in small cups. This makes for easy serving and a cute look. - Adding toppings like chocolate drizzle: Drizzle melted chocolate or a berry sauce on top. This adds a nice touch and extra flavor. To keep your cheesecake bars fresh, place them in an airtight container. This will keep them from drying out or absorbing other smells. You can store them in the fridge for up to five days. Make sure to cover them well if you don't have a container. Yes, you can freeze cheesecake bars! They freeze well and taste great later. To freeze them, first, cut the bars into pieces. Wrap each piece in plastic wrap. Then, place them in a freezer-safe bag or container. When you want to eat them, take out a piece and let it thaw in the fridge. This will keep the texture nice. Don't rush the thawing; it may take a few hours. Enjoy your cheesecake bars even after freezing! Yes, you can use other cookies. Graham crackers work well for a classic taste. Chocolate cookies add a richer flavor. Just crush them into fine crumbs and mix with melted butter, just like the Oreos. These cheesecake bars last about 5 days in the fridge. Store them in an airtight container to keep them fresh. If you want them to last longer, consider freezing them. Absolutely! This recipe is great for making ahead. You can make it a day or two before serving. Just allow enough time for chilling, usually at least 4 hours or overnight. If you want a lighter option, use whipped topping. You could also try coconut cream for a dairy-free choice. Just remember, the texture might change a little, but it will still be tasty! This blog post shared a tasty recipe for Oreo cheesecake bars. We discussed the key ingredients and detailed steps to make the crust and filling. Tips helped you avoid common mistakes and suggested ways to enhance your dessert. Variations showed how to customize flavors and presentations. Finally, we covered storage methods to keep your bars fresh. Enjoy creating this delicious treat! You'll impress friends and family with your cheesecake skills.

No-Bake Cookies & Cream Cheesecake Bars

Indulge in the creamy goodness of No-Bake Cookies & Cream Cheesecake Bars! This easy recipe combines Oreo cookie crumbs, velvety cream cheese, and fluffy whipped cream to create a delightful dessert that everyone will love. Perfect for any occasion, these bars are a hit with kids and adults alike. Ready in just 20 minutes (plus chilling time), click through to discover the full recipe and treat yourself to this irresistible sweet treat!

Ingredients
  

1 ½ cups Oreo cookie crumbs

½ cup unsalted butter, melted

16 oz cream cheese, softened

½ cup granulated sugar

2 teaspoons vanilla extract

1 ½ cups heavy whipping cream

1 cup crushed Oreo cookies (for mixing into the cheesecake)

2 tablespoons crushed Oreo cookies (for topping)

Instructions
 

In a medium bowl, combine the Oreo cookie crumbs and melted butter. Mix until all the crumbs are coated and resemble wet sand.

    Press the crumb mixture firmly into the bottom of a 9x9-inch baking dish to form an even crust layer. Refrigerate for about 15-20 minutes to set.

      In a large mixing bowl, beat the softened cream cheese with an electric mixer until smooth and creamy.

        Gradually add the granulated sugar and vanilla extract, mixing until well combined.

          In a separate bowl, whip the heavy cream until stiff peaks form. This will create a light and fluffy texture for your cheesecake filling.

            Gently fold the whipped cream into the cream cheese mixture until fully incorporated. Be careful not to deflate the whipped cream.

              Stir in the crushed Oreo cookies until evenly distributed throughout the cheesecake batter.

                Pour the cheesecake filling over the chilled Oreo crust and spread it out evenly. Tap the dish gently on the counter to remove air bubbles.

                  Sprinkle the reserved crushed Oreo cookies on top as a garnish.

                    Cover the dish with plastic wrap and refrigerate for at least 4 hours (or overnight) until the cheesecake bars are firmly set.

                      Once set, slice into bars and serve chilled.

                        Prep Time: 20 minutes | Total Time: 4 hours 20 minutes | Servings: 12 bars