No Bake Reese’s Peanut Butter Bars Easy and Quick Treat

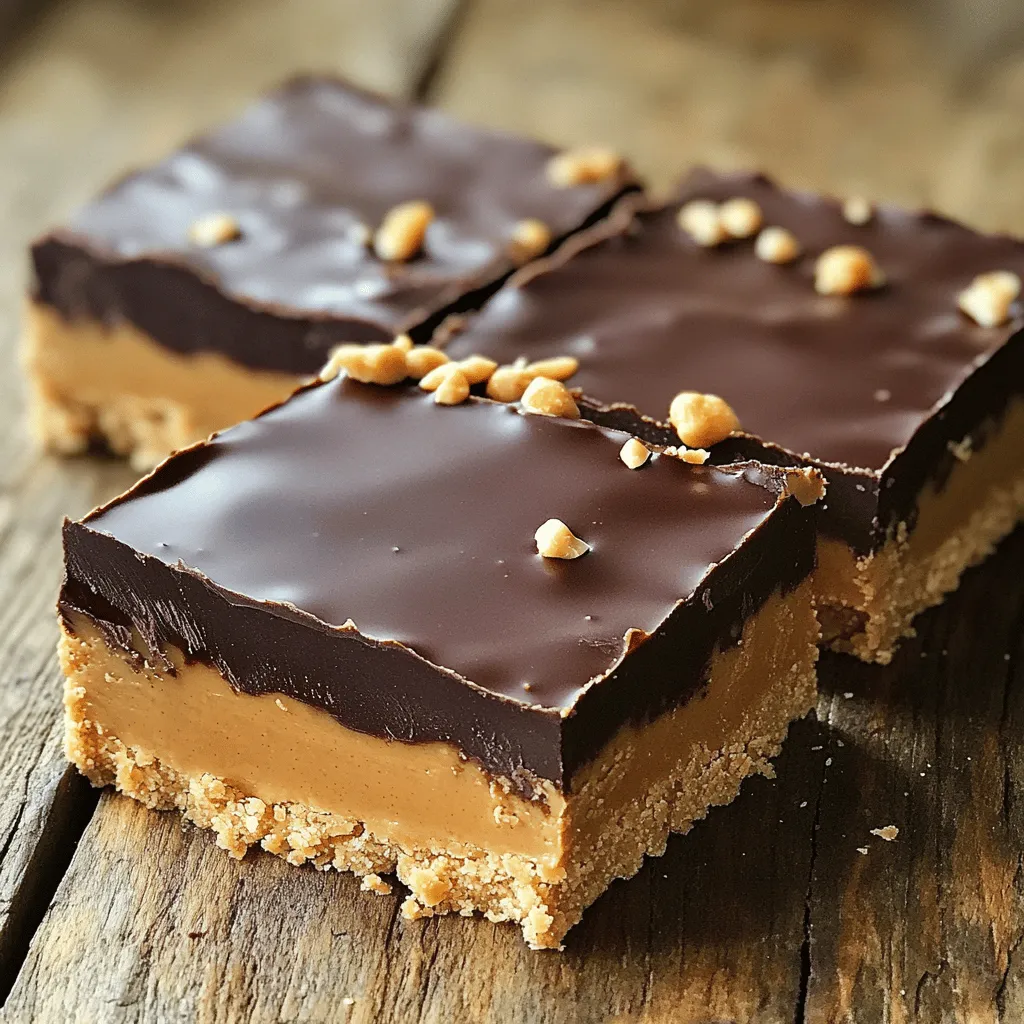
Get ready for a sweet treat that’s quick, easy, and requires no baking! My No Bake Reese’s Peanut Butter Bars combine creamy peanut butter and chocolate for a snack that hits all the right notes. Perfect for any occasion, you can whip these up in no time. Trust me, once you try these, you’ll want to share them with friends and family. Let’s dive into the delicious details!

To make these tasty bars, you need some key items: - 1 cup creamy peanut butter - 1/2 cup unsalted butter, melted - 1 cup graham cracker crumbs - 1 cup powdered sugar - 1 cup semi-sweet chocolate chips - 1/4 cup heavy cream - 1/2 teaspoon vanilla extract - Pinch of salt These ingredients create a rich, sweet flavor. The peanut butter gives a smooth base. The graham cracker crumbs add a nice crunch, while the chocolate on top makes it a treat. You can switch things up with these options: - Chopped peanuts (for garnish) - Sea salt (for a sweet-salty taste) - Different chocolate types like dark or white chocolate These extras let you play with flavors and textures. Try adding your favorite nuts or a sprinkle of sea salt to make it special. To make this easy treat, gather these tools: - Medium mixing bowl - Small saucepan - 8x8-inch baking dish - Parchment paper - Spatula Having the right tools helps keep the process smooth. It makes mixing and spreading simple, so you can focus on enjoying your sweet creation! Start by taking a medium bowl. Add 1 cup of creamy peanut butter and 1/2 cup of melted unsalted butter. Mix them well until they blend smoothly. You want a nice, creamy texture. This step is key for flavor. Next, add 1 cup of graham cracker crumbs and 1 cup of powdered sugar to the peanut butter mix. Sprinkle in a pinch of salt. Stir everything together until it forms a thick, sticky dough. This crust is what makes the bars special. Now, take a small saucepan and heat 1/4 cup of heavy cream over low heat. Watch closely until it begins to simmer but do not let it boil. Remove it from the heat and add 1 cup of semi-sweet chocolate chips. Stir until the chips melt and the mix becomes smooth. This ganache adds a rich layer. Line an 8x8-inch baking dish with parchment paper. Leave some paper hanging over the edges. This helps with easy removal. Press the peanut butter mixture into the bottom of the dish. Smooth it out with a spatula. Pour the chocolate ganache on top. Spread it evenly. If you want, sprinkle chopped peanuts on top for extra crunch. Refrigerate for at least 2 hours until the chocolate is firm. After chilling, lift the bars out using the parchment. Cut them into squares or rectangles. Enjoy your tasty treat! To get the perfect creamy peanut butter mix, start with smooth peanut butter. I use creamy peanut butter for this recipe. It blends well with melted butter. Make sure both are at room temperature. This helps them mix easily. Combine them in a bowl until they are smooth. Use a sturdy spatula to mix well. If you like, you can add a pinch of salt. This will enhance the flavor. The chocolate ganache is key to these bars. For rich taste, use semi-sweet chocolate chips. Heat heavy cream in a small saucepan. Bring it to a light simmer, but do not boil. Remove the pan from heat and add the chocolate chips. Stir until the chips melt completely. This creates a smooth ganache. Add vanilla extract for extra flavor. Spread the ganache evenly over the peanut butter layer. This makes each bite rich and tasty. For a fun touch, consider garnishing your bars. Chopped peanuts add a nice crunch. Sprinkle them on top of the chocolate layer. You can also drizzle extra melted chocolate for flair. Serve these bars chilled for the best taste. Cut them into squares or rectangles for serving. They make great treats for parties or snacks. Enjoy sharing them with friends and family! {{image_2}} You can make these bars gluten-free easily. Just swap out the graham cracker crumbs for gluten-free crumbs. You can find these at most stores. Check the labels to make sure they are safe. This way, everyone can enjoy them! Want to mix things up? Here are some fun ideas: - Add-ins: Toss in some mini marshmallows or chocolate chunks for extra sweetness. - Substitutes: Use almond butter instead of peanut butter for a nutty twist. - Flavoring: Stir in a bit of cocoa powder for a richer chocolate taste. Each choice adds new flavor and fun to the bars. These bars fit many occasions. For a party, cut them into small squares and serve on a big plate. Add colorful sprinkles for fun. For a picnic, wrap each bar in wax paper for easy sharing. Got a holiday? Top with festive decorations like holiday-themed sprinkles. No matter the event, these bars are a hit! To keep your no bake Reese’s peanut butter bars fresh, store them in an airtight container. Make sure the container seals well to keep out air. Place a piece of parchment paper between layers if stacking them. This will stop them from sticking together. You can also wrap each bar in plastic wrap for extra care. When stored properly in the fridge, the bars last up to one week. If you want them to last longer, you can freeze them. Just remember, the longer they sit, the more their flavor might fade. So, try to enjoy them fresh for the best taste! To freeze the bars, first cut them into squares. Wrap each piece in plastic wrap tightly. Then, place them in a freezer-safe bag or container. Be sure to label the bag with the date. They can stay in the freezer for about three months. When you're ready to eat, take them out and let them thaw in the fridge. Enjoy your tasty treats! Yes, you can use crunchy peanut butter. It adds nice texture. The bars will still hold together well. The flavor remains rich and tasty. Just mix it the same way as creamy. You can tell the bars are set when the chocolate top is firm. Press lightly on the chocolate. If it feels solid, they are ready. Refrigerate for at least 2 hours for best results. You can use crushed cookies, such as Oreos or Digestive biscuits. Another option is ground oats or almond flour. These will change the taste a bit but still make great bars. Yes, you can make these bars vegan. Use vegan butter and dairy-free chocolate chips. Replace heavy cream with coconut cream. These swaps will keep the bars delicious and vegan-friendly. No Bake Reese’s Peanut Butter Bars are easy and fun to make. We covered essential and optional ingredients, step-by-step instructions, and handy tips. You learned how to customize the bars and store them well. Remember, these treats can fit any diet or occasion. Trust your taste buds to guide you! Enjoy the process and be creative with flavors. These bars promise to impress, whether for yourself or friends. Now it’s time to make your own delicious batch!

Ingredients

Essential Ingredients for No Bake Reese’s Peanut Butter Bars

To make these tasty bars, you need some key items:

– 1 cup creamy peanut butter

– 1/2 cup unsalted butter, melted

– 1 cup graham cracker crumbs

– 1 cup powdered sugar

– 1 cup semi-sweet chocolate chips

– 1/4 cup heavy cream

– 1/2 teaspoon vanilla extract

– Pinch of salt

These ingredients create a rich, sweet flavor. The peanut butter gives a smooth base. The graham cracker crumbs add a nice crunch, while the chocolate on top makes it a treat.

Optional Ingredients for Variation

You can switch things up with these options:

– Chopped peanuts (for garnish)

– Sea salt (for a sweet-salty taste)

– Different chocolate types like dark or white chocolate

These extras let you play with flavors and textures. Try adding your favorite nuts or a sprinkle of sea salt to make it special.

Recommended Tools and Equipment

To make this easy treat, gather these tools:

– Medium mixing bowl

– Small saucepan

– 8×8-inch baking dish

– Parchment paper

– Spatula

Having the right tools helps keep the process smooth. It makes mixing and spreading simple, so you can focus on enjoying your sweet creation!

Step-by-Step Instructions

Mixing the Peanut Butter and Butter

Start by taking a medium bowl. Add 1 cup of creamy peanut butter and 1/2 cup of melted unsalted butter. Mix them well until they blend smoothly. You want a nice, creamy texture. This step is key for flavor.

Preparing the Crust Layer

Next, add 1 cup of graham cracker crumbs and 1 cup of powdered sugar to the peanut butter mix. Sprinkle in a pinch of salt. Stir everything together until it forms a thick, sticky dough. This crust is what makes the bars special.

Making the Chocolate Ganache

Now, take a small saucepan and heat 1/4 cup of heavy cream over low heat. Watch closely until it begins to simmer but do not let it boil. Remove it from the heat and add 1 cup of semi-sweet chocolate chips. Stir until the chips melt and the mix becomes smooth. This ganache adds a rich layer.

Assembling and Refrigerating the Bars

Line an 8×8-inch baking dish with parchment paper. Leave some paper hanging over the edges. This helps with easy removal. Press the peanut butter mixture into the bottom of the dish. Smooth it out with a spatula. Pour the chocolate ganache on top. Spread it evenly. If you want, sprinkle chopped peanuts on top for extra crunch. Refrigerate for at least 2 hours until the chocolate is firm. After chilling, lift the bars out using the parchment. Cut them into squares or rectangles. Enjoy your tasty treat!

Tips & Tricks

How to Achieve a Creamy Peanut Butter Mixture

To get the perfect creamy peanut butter mix, start with smooth peanut butter. I use creamy peanut butter for this recipe. It blends well with melted butter. Make sure both are at room temperature. This helps them mix easily. Combine them in a bowl until they are smooth. Use a sturdy spatula to mix well. If you like, you can add a pinch of salt. This will enhance the flavor.

Secrets to a Perfect Chocolate Ganache

The chocolate ganache is key to these bars. For rich taste, use semi-sweet chocolate chips. Heat heavy cream in a small saucepan. Bring it to a light simmer, but do not boil. Remove the pan from heat and add the chocolate chips. Stir until the chips melt completely. This creates a smooth ganache. Add vanilla extract for extra flavor. Spread the ganache evenly over the peanut butter layer. This makes each bite rich and tasty.

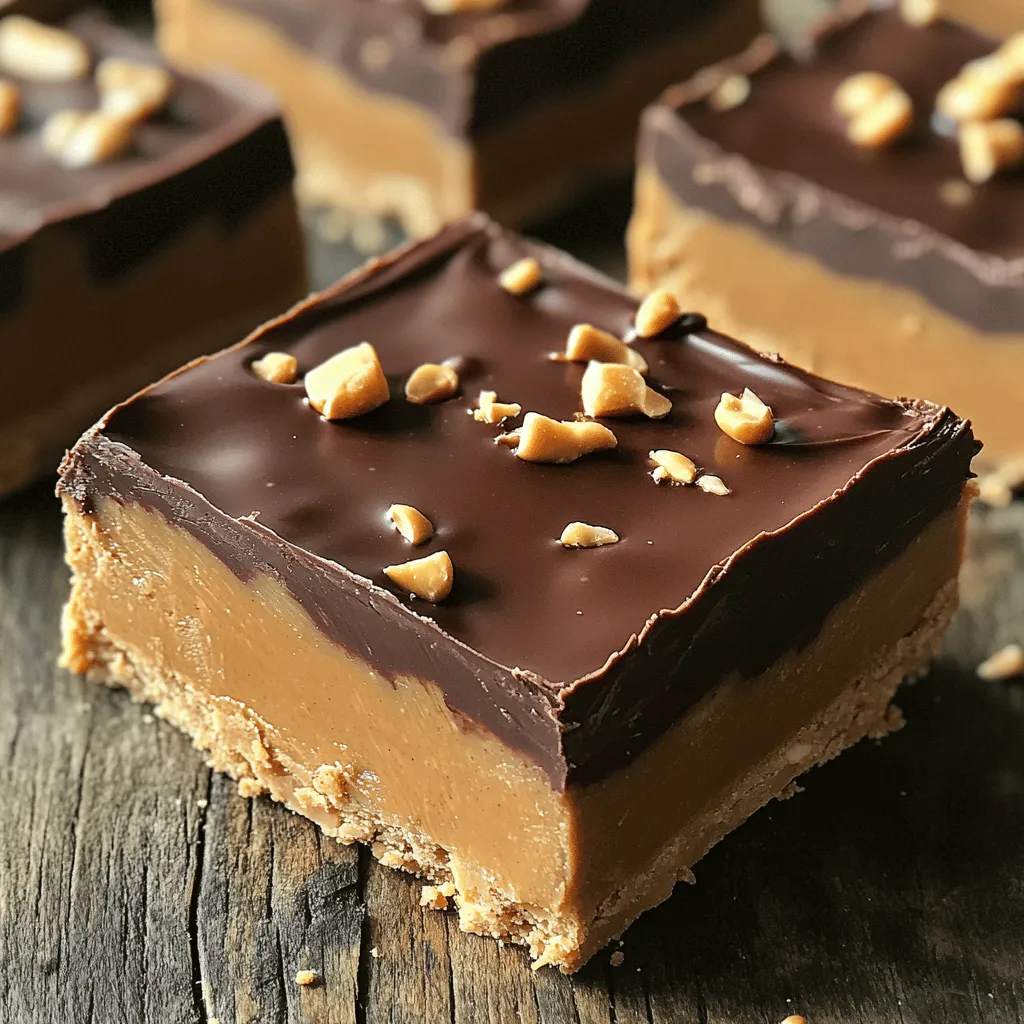
Serving Suggestions and Garnishes

For a fun touch, consider garnishing your bars. Chopped peanuts add a nice crunch. Sprinkle them on top of the chocolate layer. You can also drizzle extra melted chocolate for flair. Serve these bars chilled for the best taste. Cut them into squares or rectangles for serving. They make great treats for parties or snacks. Enjoy sharing them with friends and family!

Variations

Gluten-Free Options

You can make these bars gluten-free easily. Just swap out the graham cracker crumbs for gluten-free crumbs. You can find these at most stores. Check the labels to make sure they are safe. This way, everyone can enjoy them!

Flavor Variations

Want to mix things up? Here are some fun ideas:

Add-ins: Toss in some mini marshmallows or chocolate chunks for extra sweetness.

Substitutes: Use almond butter instead of peanut butter for a nutty twist.

Flavoring: Stir in a bit of cocoa powder for a richer chocolate taste.

Each choice adds new flavor and fun to the bars.

Serving Ideas for Different Occasions

These bars fit many occasions. For a party, cut them into small squares and serve on a big plate. Add colorful sprinkles for fun. For a picnic, wrap each bar in wax paper for easy sharing. Got a holiday? Top with festive decorations like holiday-themed sprinkles. No matter the event, these bars are a hit!

Storage Info

Best Practices for Storing Leftovers

To keep your no bake Reese’s peanut butter bars fresh, store them in an airtight container. Make sure the container seals well to keep out air. Place a piece of parchment paper between layers if stacking them. This will stop them from sticking together. You can also wrap each bar in plastic wrap for extra care.

How Long Do They Last?

When stored properly in the fridge, the bars last up to one week. If you want them to last longer, you can freeze them. Just remember, the longer they sit, the more their flavor might fade. So, try to enjoy them fresh for the best taste!

Freezing Tips for Peanut Butter Bars

To freeze the bars, first cut them into squares. Wrap each piece in plastic wrap tightly. Then, place them in a freezer-safe bag or container. Be sure to label the bag with the date. They can stay in the freezer for about three months. When you’re ready to eat, take them out and let them thaw in the fridge. Enjoy your tasty treats!

FAQs

Can I use crunchy peanut butter instead of creamy?

Yes, you can use crunchy peanut butter. It adds nice texture. The bars will still hold together well. The flavor remains rich and tasty. Just mix it the same way as creamy.

How do I know when the bars are set?

You can tell the bars are set when the chocolate top is firm. Press lightly on the chocolate. If it feels solid, they are ready. Refrigerate for at least 2 hours for best results.

What can I use instead of graham cracker crumbs?

You can use crushed cookies, such as Oreos or Digestive biscuits. Another option is ground oats or almond flour. These will change the taste a bit but still make great bars.

Can I make these bars vegan-friendly?

Yes, you can make these bars vegan. Use vegan butter and dairy-free chocolate chips. Replace heavy cream with coconut cream. These swaps will keep the bars delicious and vegan-friendly.

No Bake Reese’s Peanut Butter Bars are easy and fun to make. We covered essential and optional ingredients, step-by-step instructions, and handy tips. You learned how to customize the bars and store them well. Remember, these treats can fit any diet or occasion. Trust your taste buds to guide you! Enjoy the process and be creative with flavors. These bars promise to impress, whether for yourself or friends. Now it’s time to make your own delicious batch!

To make these tasty bars, you need some key items: - 1 cup creamy peanut butter - 1/2 cup unsalted butter, melted - 1 cup graham cracker crumbs - 1 cup powdered sugar - 1 cup semi-sweet chocolate chips - 1/4 cup heavy cream - 1/2 teaspoon vanilla extract - Pinch of salt These ingredients create a rich, sweet flavor. The peanut butter gives a smooth base. The graham cracker crumbs add a nice crunch, while the chocolate on top makes it a treat. You can switch things up with these options: - Chopped peanuts (for garnish) - Sea salt (for a sweet-salty taste) - Different chocolate types like dark or white chocolate These extras let you play with flavors and textures. Try adding your favorite nuts or a sprinkle of sea salt to make it special. To make this easy treat, gather these tools: - Medium mixing bowl - Small saucepan - 8x8-inch baking dish - Parchment paper - Spatula Having the right tools helps keep the process smooth. It makes mixing and spreading simple, so you can focus on enjoying your sweet creation! Start by taking a medium bowl. Add 1 cup of creamy peanut butter and 1/2 cup of melted unsalted butter. Mix them well until they blend smoothly. You want a nice, creamy texture. This step is key for flavor. Next, add 1 cup of graham cracker crumbs and 1 cup of powdered sugar to the peanut butter mix. Sprinkle in a pinch of salt. Stir everything together until it forms a thick, sticky dough. This crust is what makes the bars special. Now, take a small saucepan and heat 1/4 cup of heavy cream over low heat. Watch closely until it begins to simmer but do not let it boil. Remove it from the heat and add 1 cup of semi-sweet chocolate chips. Stir until the chips melt and the mix becomes smooth. This ganache adds a rich layer. Line an 8x8-inch baking dish with parchment paper. Leave some paper hanging over the edges. This helps with easy removal. Press the peanut butter mixture into the bottom of the dish. Smooth it out with a spatula. Pour the chocolate ganache on top. Spread it evenly. If you want, sprinkle chopped peanuts on top for extra crunch. Refrigerate for at least 2 hours until the chocolate is firm. After chilling, lift the bars out using the parchment. Cut them into squares or rectangles. Enjoy your tasty treat! To get the perfect creamy peanut butter mix, start with smooth peanut butter. I use creamy peanut butter for this recipe. It blends well with melted butter. Make sure both are at room temperature. This helps them mix easily. Combine them in a bowl until they are smooth. Use a sturdy spatula to mix well. If you like, you can add a pinch of salt. This will enhance the flavor. The chocolate ganache is key to these bars. For rich taste, use semi-sweet chocolate chips. Heat heavy cream in a small saucepan. Bring it to a light simmer, but do not boil. Remove the pan from heat and add the chocolate chips. Stir until the chips melt completely. This creates a smooth ganache. Add vanilla extract for extra flavor. Spread the ganache evenly over the peanut butter layer. This makes each bite rich and tasty. For a fun touch, consider garnishing your bars. Chopped peanuts add a nice crunch. Sprinkle them on top of the chocolate layer. You can also drizzle extra melted chocolate for flair. Serve these bars chilled for the best taste. Cut them into squares or rectangles for serving. They make great treats for parties or snacks. Enjoy sharing them with friends and family! {{image_2}} You can make these bars gluten-free easily. Just swap out the graham cracker crumbs for gluten-free crumbs. You can find these at most stores. Check the labels to make sure they are safe. This way, everyone can enjoy them! Want to mix things up? Here are some fun ideas: - Add-ins: Toss in some mini marshmallows or chocolate chunks for extra sweetness. - Substitutes: Use almond butter instead of peanut butter for a nutty twist. - Flavoring: Stir in a bit of cocoa powder for a richer chocolate taste. Each choice adds new flavor and fun to the bars. These bars fit many occasions. For a party, cut them into small squares and serve on a big plate. Add colorful sprinkles for fun. For a picnic, wrap each bar in wax paper for easy sharing. Got a holiday? Top with festive decorations like holiday-themed sprinkles. No matter the event, these bars are a hit! To keep your no bake Reese’s peanut butter bars fresh, store them in an airtight container. Make sure the container seals well to keep out air. Place a piece of parchment paper between layers if stacking them. This will stop them from sticking together. You can also wrap each bar in plastic wrap for extra care. When stored properly in the fridge, the bars last up to one week. If you want them to last longer, you can freeze them. Just remember, the longer they sit, the more their flavor might fade. So, try to enjoy them fresh for the best taste! To freeze the bars, first cut them into squares. Wrap each piece in plastic wrap tightly. Then, place them in a freezer-safe bag or container. Be sure to label the bag with the date. They can stay in the freezer for about three months. When you're ready to eat, take them out and let them thaw in the fridge. Enjoy your tasty treats! Yes, you can use crunchy peanut butter. It adds nice texture. The bars will still hold together well. The flavor remains rich and tasty. Just mix it the same way as creamy. You can tell the bars are set when the chocolate top is firm. Press lightly on the chocolate. If it feels solid, they are ready. Refrigerate for at least 2 hours for best results. You can use crushed cookies, such as Oreos or Digestive biscuits. Another option is ground oats or almond flour. These will change the taste a bit but still make great bars. Yes, you can make these bars vegan. Use vegan butter and dairy-free chocolate chips. Replace heavy cream with coconut cream. These swaps will keep the bars delicious and vegan-friendly. No Bake Reese’s Peanut Butter Bars are easy and fun to make. We covered essential and optional ingredients, step-by-step instructions, and handy tips. You learned how to customize the bars and store them well. Remember, these treats can fit any diet or occasion. Trust your taste buds to guide you! Enjoy the process and be creative with flavors. These bars promise to impress, whether for yourself or friends. Now it’s time to make your own delicious batch!

No Bake Reese’s Peanut Butter Bars

Indulge your sweet tooth with these Sweet & Crunchy No Bake Reese’s Peanut Butter Bars! This easy recipe combines creamy peanut butter, smooth chocolate, and a delightful crunch, making it the perfect treat for any occasion. In just 15 minutes, you can whip up these delicious bars, and after chilling, they’re ready to impress your friends and family. Click through to explore the full recipe and satisfy your cravings today!

Ingredients
  

1 cup creamy peanut butter

1/2 cup unsalted butter, melted

1 cup graham cracker crumbs

1 cup powdered sugar

1 cup semi-sweet chocolate chips

1/4 cup heavy cream

1/2 teaspoon vanilla extract

Pinch of salt

Chopped peanuts (for garnish, optional)

Instructions
 

In a medium bowl, mix the melted butter and creamy peanut butter until fully combined and smooth.

    Gradually add the graham cracker crumbs, powdered sugar, and a pinch of salt to the peanut butter mixture. Stir until it forms a thick, sticky dough.

      Line an 8x8-inch baking dish with parchment paper, leaving some overhang on the sides for easy removal.

        Press the peanut butter mixture evenly into the bottom of the prepared baking dish, smoothing it out with the back of a spatula.

          In a small saucepan, heat the heavy cream over low heat just until it begins to simmer (do not boil). Remove from heat and add the semi-sweet chocolate chips, stirring until they melt and the mixture is smooth.

            Stir in the vanilla extract into the chocolate mixture until combined. Pour the chocolate ganache over the peanut butter layer, spreading it evenly.

              Optional: Sprinkle chopped peanuts over the top for added crunch and garnish.

                Refrigerate the bars for at least 2 hours, or until the chocolate is set and firm.

                  Once chilled, lift the bars out of the baking dish using the parchment overhang and cut them into squares or rectangles as desired.

                    Prep Time: 15 minutes | Total Time: 2 hours 15 minutes | Servings: 16 bars