No Bake Chocolate Hazelnut Cheesecake Cups Delight

WANT TO SAVE THIS RECIPE?

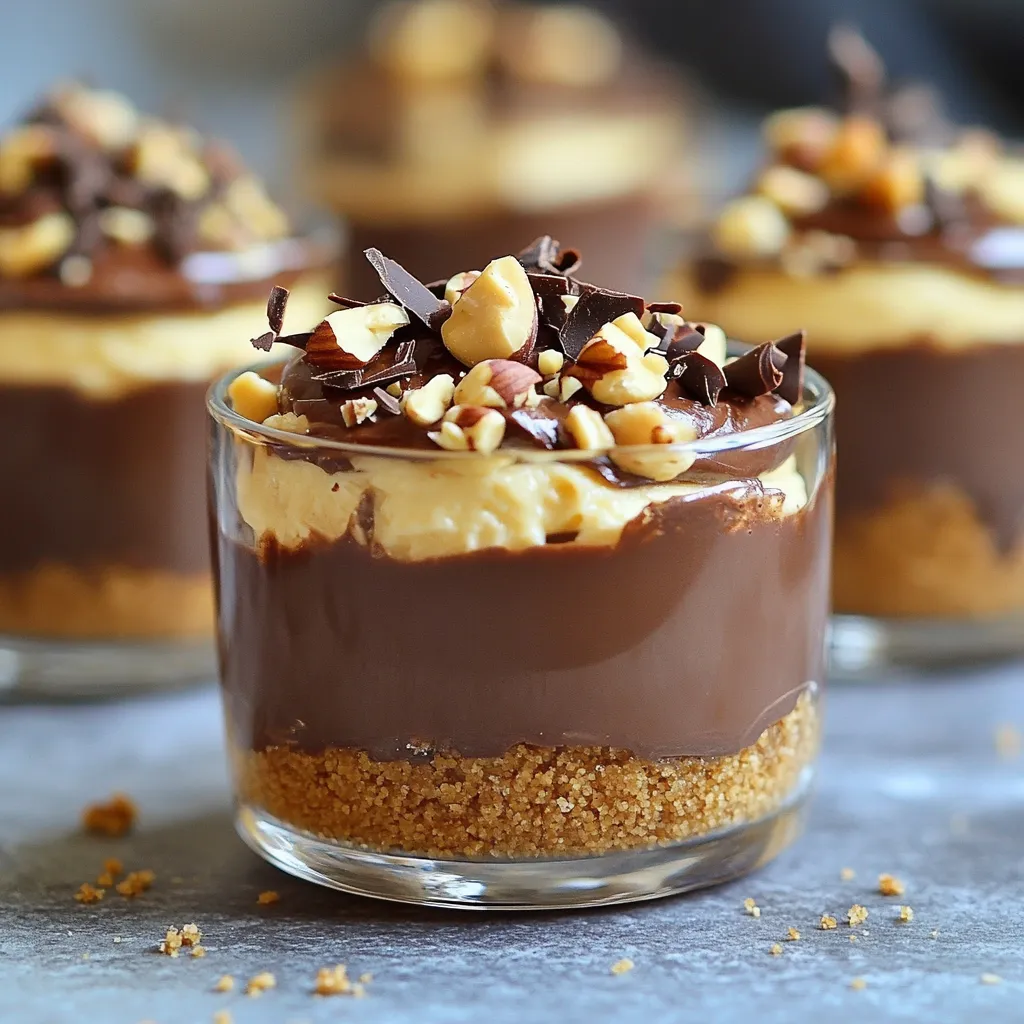
Craving a sweet treat that’s easy to make? You’re in the right place! These No Bake Chocolate Hazelnut Cheesecake Cups are rich, creamy, and sure to impress. Perfect for any occasion, they require no baking, making them simple and fun to create. I’ll guide you through each step, from prepping the graham cracker base to achieving the perfect texture. Get ready to delight your taste buds with this irresistible dessert!

- 1 cup crushed graham crackers - 4 tablespoons unsalted butter, melted - 1 cup cream cheese, softened - 1 cup Nutella or hazelnut spread - 1/2 cup powdered sugar - 1 teaspoon vanilla extract - 1 cup heavy whipping cream - 1/2 cup chopped hazelnuts (for garnish) - Dark chocolate shavings (for garnish) When measuring ingredients, use dry measuring cups for solids. Use liquid measuring cups for liquids. For sticky items like Nutella, lightly coat the cup with oil for easy pouring. Always level off dry ingredients with a spatula for accuracy. You can swap graham crackers for digestive biscuits if needed. If you want a lighter option, use low-fat cream cheese. For a nut-free version, try sunflower seed butter instead of hazelnut spread. If you do not have powdered sugar, blend granulated sugar until fine. To start, gather your ingredients. You need 1 cup of crushed graham crackers and 4 tablespoons of melted butter. In a mixing bowl, combine the crushed graham crackers with the melted butter. Mix them until the crumbs are well coated. This gives your base a rich flavor. Next, take serving cups or glasses. Spoon about 2 tablespoons of this mixture into each cup. Press down firmly to form a solid base. This step is key; it keeps your cheesecake filling from sinking. Now, let’s make the filling! You will need 1 cup of softened cream cheese. Place it in a bowl and beat it with an electric mixer until smooth. This makes the base creamy. Add 1 cup of Nutella, 1/2 cup of powdered sugar, and 1 teaspoon of vanilla extract to the cream cheese. Mix until everything is creamy and well combined. In another bowl, whip 1 cup of heavy cream until stiff peaks form. This means the cream should hold its shape. Gently fold this whipped cream into the Nutella mixture. Be careful here! You want to keep it light and fluffy. Now, it’s time to assemble! Spoon the chocolate hazelnut cheesecake filling over the graham cracker base in each cup. Smooth the tops with a spatula for a nice finish. Cover the cups with plastic wrap. Place them in the fridge for at least 4 hours or until set. This chilling time helps the flavors meld and the cheesecake firm up. Before you serve, garnish each cup with chopped hazelnuts and dark chocolate shavings. This adds a nice touch and extra crunch. Enjoy your delicious no-bake treat! To get the best texture in your cheesecake cups, focus on the cream cheese. Make sure it is softened. If it's too cold, it will clump up. Beat it well until it's smooth before adding any other ingredients. When you mix in the Nutella, it should be creamy and well-blended. The heavy cream is key too. When whipped, it must reach stiff peaks, which means it holds its shape well. This will make your cheesecake light and fluffy. Whipping cream is simple but needs some care. Start with cold heavy cream for better results. Use a clean bowl and beaters to avoid any unwanted flavors. Beat the cream on medium speed until it thickens. Switch to high speed to form stiff peaks. This means the cream should stand tall when you lift the whisk. Be gentle when you fold it into the Nutella mix. Use a spatula and fold slowly to keep the air in the cream. Garnishing adds a nice touch to your cheesecake cups. Chopped hazelnuts give a great crunch and nutty flavor. Dark chocolate shavings make it look fancy. You can sprinkle them on top before serving. For a bit of color, consider adding a sprig of mint. This will brighten up the dessert. Just remember to keep the garnishes simple and fresh for the best taste. {{image_2}} You can easily change the flavor of your cheesecake cups. For a fruity twist, try adding raspberry or strawberry puree to the filling. Just mix in 1/4 cup of the puree before folding in the whipped cream. This gives a nice balance to the rich chocolate. If you like coffee, add 1 tablespoon of instant coffee or espresso powder to the Nutella mix. It will enhance the chocolate flavor. You can also swap the Nutella for a peanut butter spread for a nutty spin. Toppings can make your cheesecake cups more special. Instead of chopped hazelnuts, try crushed cookies or candy bars. Crushed Oreos or toffee bits work well. You can also add fresh fruit like berries or banana slices on top. For a more decadent touch, drizzle melted chocolate or caramel over the finished cups. You could even add a dollop of whipped cream on top for extra creaminess. Making these cheesecake cups vegan is simple. Use dairy-free cream cheese and coconut cream instead of heavy cream. Look for a nut-free spread if you want to avoid nuts. You can also use maple syrup or agave syrup in place of powdered sugar. This way, you get to enjoy a tasty dessert while sticking to your dietary needs. To keep your no bake chocolate hazelnut cheesecake cups fresh, store them in the fridge. Use a covered container to protect them from other smells and flavors. This helps maintain their rich taste. If you made them in cups, you can leave them in their original cups. Just cover them tightly with plastic wrap. These cheesecake cups will stay fresh for about five days in the fridge. After that, the texture may change. If you notice any off smells, it's best to toss them. Always check for freshness before serving. You can freeze these cheesecake cups for later enjoyment. To freeze, wrap each cup tightly in plastic wrap. Then, place them in a freezer-safe bag or container. They can last up to two months in the freezer. When you're ready to eat, move the cups to the fridge for about four hours to thaw. This keeps the texture smooth and creamy. Avoid using the microwave, as it can change the consistency. Yes, you can use other nut spreads. Almond, cashew, or even peanut butter work well. Each spread brings a unique flavor to the cheesecake cups. Almond spread gives a sweet, nutty taste. Cashew spread adds creaminess, while peanut butter gives a classic flavor. You can even mix spreads for fun flavors. Just make sure you like the taste of the spread you choose. The cheesecake cups need at least four hours in the fridge. They should feel firm but still a bit soft. You can gently press the top with your finger. If it holds its shape, it’s ready. If it's still too wobbly, let it chill longer. After chilling, the cheesecake will hold well when you serve it. These cups are great for parties or special events. You can serve them in clear glasses for a pretty look. Add fresh berries on top for a splash of color. Whipped cream can add a fluffy touch. For a crunchy bite, sprinkle extra hazelnuts on top. You can also drizzle chocolate sauce for extra sweetness. These ideas make your dessert even more delightful! In this article, we explored how to make tasty chocolate hazelnut cheesecake cups. We covered important ingredients, measurement tips, and fun substitutes. You learned step-by-step instructions for the graham cracker base, the chocolate hazelnut filling, and assembly. We also shared tips for the perfect texture and creative variations. As you try this recipe, remember that great desserts come with practice. Enjoy being creative in the kitchen!

Ingredients

List of Ingredients

– 1 cup crushed graham crackers

– 4 tablespoons unsalted butter, melted

– 1 cup cream cheese, softened

– 1 cup Nutella or hazelnut spread

– 1/2 cup powdered sugar

– 1 teaspoon vanilla extract

– 1 cup heavy whipping cream

– 1/2 cup chopped hazelnuts (for garnish)

– Dark chocolate shavings (for garnish)

Measurement Tips

When measuring ingredients, use dry measuring cups for solids. Use liquid measuring cups for liquids. For sticky items like Nutella, lightly coat the cup with oil for easy pouring. Always level off dry ingredients with a spatula for accuracy.

Ingredient Substitutions

You can swap graham crackers for digestive biscuits if needed. If you want a lighter option, use low-fat cream cheese. For a nut-free version, try sunflower seed butter instead of hazelnut spread. If you do not have powdered sugar, blend granulated sugar until fine.

Step-by-Step Instructions

Preparing the Graham Cracker Base

To start, gather your ingredients. You need 1 cup of crushed graham crackers and 4 tablespoons of melted butter. In a mixing bowl, combine the crushed graham crackers with the melted butter. Mix them until the crumbs are well coated. This gives your base a rich flavor.

Next, take serving cups or glasses. Spoon about 2 tablespoons of this mixture into each cup. Press down firmly to form a solid base. This step is key; it keeps your cheesecake filling from sinking.

Making the Chocolate Hazelnut Filling

Now, let’s make the filling! You will need 1 cup of softened cream cheese. Place it in a bowl and beat it with an electric mixer until smooth. This makes the base creamy.

Add 1 cup of Nutella, 1/2 cup of powdered sugar, and 1 teaspoon of vanilla extract to the cream cheese. Mix until everything is creamy and well combined.

In another bowl, whip 1 cup of heavy cream until stiff peaks form. This means the cream should hold its shape. Gently fold this whipped cream into the Nutella mixture. Be careful here! You want to keep it light and fluffy.

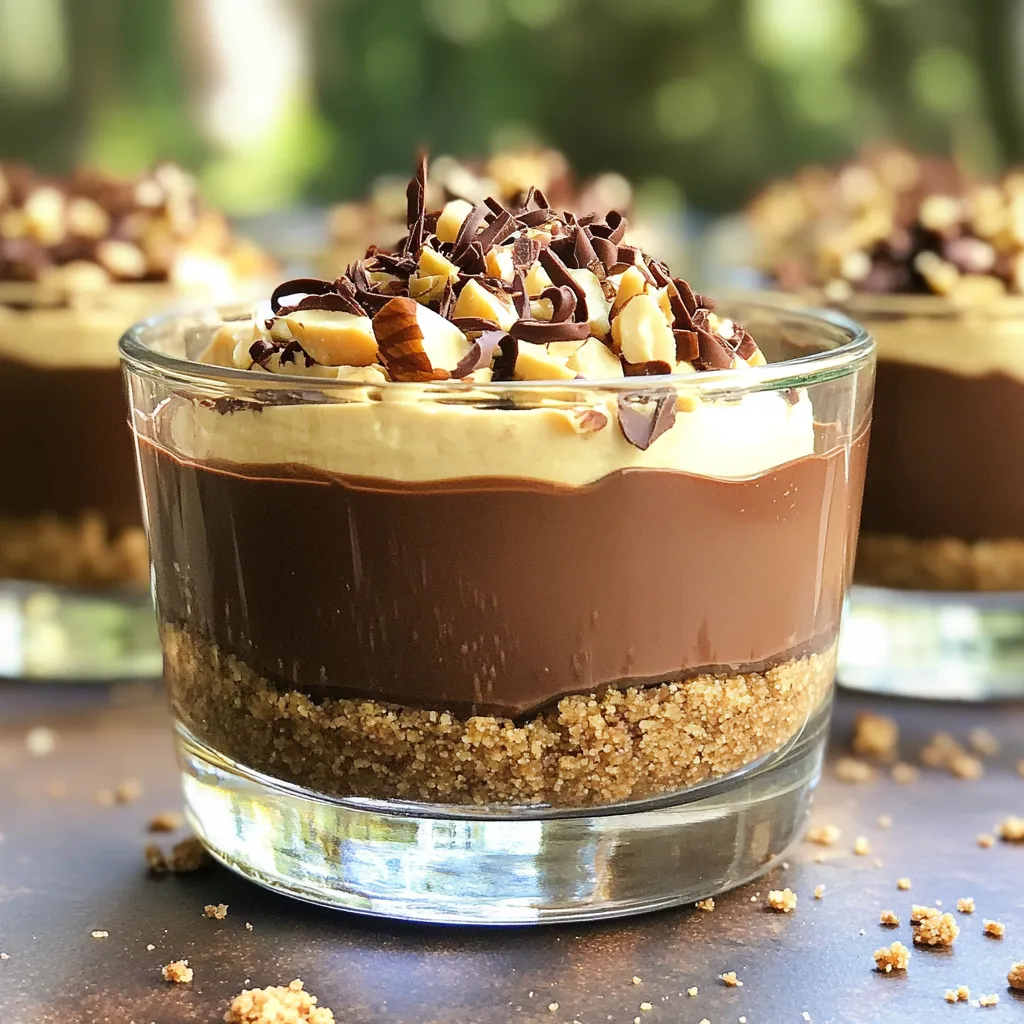
Assembling the Cheesecake Cups

Now, it’s time to assemble! Spoon the chocolate hazelnut cheesecake filling over the graham cracker base in each cup. Smooth the tops with a spatula for a nice finish.

Cover the cups with plastic wrap. Place them in the fridge for at least 4 hours or until set. This chilling time helps the flavors meld and the cheesecake firm up.

Before you serve, garnish each cup with chopped hazelnuts and dark chocolate shavings. This adds a nice touch and extra crunch. Enjoy your delicious no-bake treat!

Tips & Tricks

How to Achieve the Perfect Texture

To get the best texture in your cheesecake cups, focus on the cream cheese. Make sure it is softened. If it’s too cold, it will clump up. Beat it well until it’s smooth before adding any other ingredients. When you mix in the Nutella, it should be creamy and well-blended. The heavy cream is key too. When whipped, it must reach stiff peaks, which means it holds its shape well. This will make your cheesecake light and fluffy.

Techniques for Whipping Cream

Whipping cream is simple but needs some care. Start with cold heavy cream for better results. Use a clean bowl and beaters to avoid any unwanted flavors. Beat the cream on medium speed until it thickens. Switch to high speed to form stiff peaks. This means the cream should stand tall when you lift the whisk. Be gentle when you fold it into the Nutella mix. Use a spatula and fold slowly to keep the air in the cream.

Tips for Garnishing Your Cheesecake Cups

Garnishing adds a nice touch to your cheesecake cups. Chopped hazelnuts give a great crunch and nutty flavor. Dark chocolate shavings make it look fancy. You can sprinkle them on top before serving. For a bit of color, consider adding a sprig of mint. This will brighten up the dessert. Just remember to keep the garnishes simple and fresh for the best taste.

Variations

Chocolate Hazelnut Cheesecake with Different Flavors

You can easily change the flavor of your cheesecake cups. For a fruity twist, try adding raspberry or strawberry puree to the filling. Just mix in 1/4 cup of the puree before folding in the whipped cream. This gives a nice balance to the rich chocolate. If you like coffee, add 1 tablespoon of instant coffee or espresso powder to the Nutella mix. It will enhance the chocolate flavor. You can also swap the Nutella for a peanut butter spread for a nutty spin.

Alternate Toppings and Mix-ins

Toppings can make your cheesecake cups more special. Instead of chopped hazelnuts, try crushed cookies or candy bars. Crushed Oreos or toffee bits work well. You can also add fresh fruit like berries or banana slices on top. For a more decadent touch, drizzle melted chocolate or caramel over the finished cups. You could even add a dollop of whipped cream on top for extra creaminess.

Vegan and Dairy-Free Adaptations

Making these cheesecake cups vegan is simple. Use dairy-free cream cheese and coconut cream instead of heavy cream. Look for a nut-free spread if you want to avoid nuts. You can also use maple syrup or agave syrup in place of powdered sugar. This way, you get to enjoy a tasty dessert while sticking to your dietary needs.

Storage Info

Best Practices for Refrigeration

To keep your no bake chocolate hazelnut cheesecake cups fresh, store them in the fridge. Use a covered container to protect them from other smells and flavors. This helps maintain their rich taste. If you made them in cups, you can leave them in their original cups. Just cover them tightly with plastic wrap.

How Long the Cheesecake Cups Last

These cheesecake cups will stay fresh for about five days in the fridge. After that, the texture may change. If you notice any off smells, it’s best to toss them. Always check for freshness before serving.

Freezing Options and Thawing Tips

You can freeze these cheesecake cups for later enjoyment. To freeze, wrap each cup tightly in plastic wrap. Then, place them in a freezer-safe bag or container. They can last up to two months in the freezer. When you’re ready to eat, move the cups to the fridge for about four hours to thaw. This keeps the texture smooth and creamy. Avoid using the microwave, as it can change the consistency.

FAQs

Can I use other types of nut spreads?

Yes, you can use other nut spreads. Almond, cashew, or even peanut butter work well. Each spread brings a unique flavor to the cheesecake cups. Almond spread gives a sweet, nutty taste. Cashew spread adds creaminess, while peanut butter gives a classic flavor. You can even mix spreads for fun flavors. Just make sure you like the taste of the spread you choose.

How do I know when the cheesecake is set?

The cheesecake cups need at least four hours in the fridge. They should feel firm but still a bit soft. You can gently press the top with your finger. If it holds its shape, it’s ready. If it’s still too wobbly, let it chill longer. After chilling, the cheesecake will hold well when you serve it.

What are some serving suggestions for these dessert cups?

These cups are great for parties or special events. You can serve them in clear glasses for a pretty look. Add fresh berries on top for a splash of color. Whipped cream can add a fluffy touch. For a crunchy bite, sprinkle extra hazelnuts on top. You can also drizzle chocolate sauce for extra sweetness. These ideas make your dessert even more delightful!

In this article, we explored how to make tasty chocolate hazelnut cheesecake cups. We covered important ingredients, measurement tips, and fun substitutes. You learned step-by-step instructions for the graham cracker base, the chocolate hazelnut filling, and assembly. We also shared tips for the perfect texture and creative variations.

As you try this recipe, remember that great desserts come with practice. Enjoy being creative in the kitchen!

- 1 cup crushed graham crackers - 4 tablespoons unsalted butter, melted - 1 cup cream cheese, softened - 1 cup Nutella or hazelnut spread - 1/2 cup powdered sugar - 1 teaspoon vanilla extract - 1 cup heavy whipping cream - 1/2 cup chopped hazelnuts (for garnish) - Dark chocolate shavings (for garnish) When measuring ingredients, use dry measuring cups for solids. Use liquid measuring cups for liquids. For sticky items like Nutella, lightly coat the cup with oil for easy pouring. Always level off dry ingredients with a spatula for accuracy. You can swap graham crackers for digestive biscuits if needed. If you want a lighter option, use low-fat cream cheese. For a nut-free version, try sunflower seed butter instead of hazelnut spread. If you do not have powdered sugar, blend granulated sugar until fine. To start, gather your ingredients. You need 1 cup of crushed graham crackers and 4 tablespoons of melted butter. In a mixing bowl, combine the crushed graham crackers with the melted butter. Mix them until the crumbs are well coated. This gives your base a rich flavor. Next, take serving cups or glasses. Spoon about 2 tablespoons of this mixture into each cup. Press down firmly to form a solid base. This step is key; it keeps your cheesecake filling from sinking. Now, let’s make the filling! You will need 1 cup of softened cream cheese. Place it in a bowl and beat it with an electric mixer until smooth. This makes the base creamy. Add 1 cup of Nutella, 1/2 cup of powdered sugar, and 1 teaspoon of vanilla extract to the cream cheese. Mix until everything is creamy and well combined. In another bowl, whip 1 cup of heavy cream until stiff peaks form. This means the cream should hold its shape. Gently fold this whipped cream into the Nutella mixture. Be careful here! You want to keep it light and fluffy. Now, it’s time to assemble! Spoon the chocolate hazelnut cheesecake filling over the graham cracker base in each cup. Smooth the tops with a spatula for a nice finish. Cover the cups with plastic wrap. Place them in the fridge for at least 4 hours or until set. This chilling time helps the flavors meld and the cheesecake firm up. Before you serve, garnish each cup with chopped hazelnuts and dark chocolate shavings. This adds a nice touch and extra crunch. Enjoy your delicious no-bake treat! To get the best texture in your cheesecake cups, focus on the cream cheese. Make sure it is softened. If it's too cold, it will clump up. Beat it well until it's smooth before adding any other ingredients. When you mix in the Nutella, it should be creamy and well-blended. The heavy cream is key too. When whipped, it must reach stiff peaks, which means it holds its shape well. This will make your cheesecake light and fluffy. Whipping cream is simple but needs some care. Start with cold heavy cream for better results. Use a clean bowl and beaters to avoid any unwanted flavors. Beat the cream on medium speed until it thickens. Switch to high speed to form stiff peaks. This means the cream should stand tall when you lift the whisk. Be gentle when you fold it into the Nutella mix. Use a spatula and fold slowly to keep the air in the cream. Garnishing adds a nice touch to your cheesecake cups. Chopped hazelnuts give a great crunch and nutty flavor. Dark chocolate shavings make it look fancy. You can sprinkle them on top before serving. For a bit of color, consider adding a sprig of mint. This will brighten up the dessert. Just remember to keep the garnishes simple and fresh for the best taste. {{image_2}} You can easily change the flavor of your cheesecake cups. For a fruity twist, try adding raspberry or strawberry puree to the filling. Just mix in 1/4 cup of the puree before folding in the whipped cream. This gives a nice balance to the rich chocolate. If you like coffee, add 1 tablespoon of instant coffee or espresso powder to the Nutella mix. It will enhance the chocolate flavor. You can also swap the Nutella for a peanut butter spread for a nutty spin. Toppings can make your cheesecake cups more special. Instead of chopped hazelnuts, try crushed cookies or candy bars. Crushed Oreos or toffee bits work well. You can also add fresh fruit like berries or banana slices on top. For a more decadent touch, drizzle melted chocolate or caramel over the finished cups. You could even add a dollop of whipped cream on top for extra creaminess. Making these cheesecake cups vegan is simple. Use dairy-free cream cheese and coconut cream instead of heavy cream. Look for a nut-free spread if you want to avoid nuts. You can also use maple syrup or agave syrup in place of powdered sugar. This way, you get to enjoy a tasty dessert while sticking to your dietary needs. To keep your no bake chocolate hazelnut cheesecake cups fresh, store them in the fridge. Use a covered container to protect them from other smells and flavors. This helps maintain their rich taste. If you made them in cups, you can leave them in their original cups. Just cover them tightly with plastic wrap. These cheesecake cups will stay fresh for about five days in the fridge. After that, the texture may change. If you notice any off smells, it's best to toss them. Always check for freshness before serving. You can freeze these cheesecake cups for later enjoyment. To freeze, wrap each cup tightly in plastic wrap. Then, place them in a freezer-safe bag or container. They can last up to two months in the freezer. When you're ready to eat, move the cups to the fridge for about four hours to thaw. This keeps the texture smooth and creamy. Avoid using the microwave, as it can change the consistency. Yes, you can use other nut spreads. Almond, cashew, or even peanut butter work well. Each spread brings a unique flavor to the cheesecake cups. Almond spread gives a sweet, nutty taste. Cashew spread adds creaminess, while peanut butter gives a classic flavor. You can even mix spreads for fun flavors. Just make sure you like the taste of the spread you choose. The cheesecake cups need at least four hours in the fridge. They should feel firm but still a bit soft. You can gently press the top with your finger. If it holds its shape, it’s ready. If it's still too wobbly, let it chill longer. After chilling, the cheesecake will hold well when you serve it. These cups are great for parties or special events. You can serve them in clear glasses for a pretty look. Add fresh berries on top for a splash of color. Whipped cream can add a fluffy touch. For a crunchy bite, sprinkle extra hazelnuts on top. You can also drizzle chocolate sauce for extra sweetness. These ideas make your dessert even more delightful! In this article, we explored how to make tasty chocolate hazelnut cheesecake cups. We covered important ingredients, measurement tips, and fun substitutes. You learned step-by-step instructions for the graham cracker base, the chocolate hazelnut filling, and assembly. We also shared tips for the perfect texture and creative variations. As you try this recipe, remember that great desserts come with practice. Enjoy being creative in the kitchen!

No Bake Chocolate Hazelnut Cheesecake Cups

Indulge in the ultimate dessert with these No Bake Chocolate Hazelnut Cheesecake Cups! This easy recipe features a creamy Nutella filling atop a crunchy graham cracker base, perfect for any occasion. With just a handful of ingredients and simple steps, you’ll have a delicious treat ready in no time. Don’t miss out on the chance to delight your taste buds—click through to explore this delightful recipe and impress your friends and family!

Ingredients
  

1 cup crushed graham crackers

4 tablespoons unsalted butter, melted

1 cup cream cheese, softened

1 cup Nutella or hazelnut spread

1/2 cup powdered sugar

1 teaspoon vanilla extract

1 cup heavy whipping cream

1/2 cup chopped hazelnuts (for garnish)

Dark chocolate shavings (for garnish)

Instructions
 

In a mixing bowl, combine the crushed graham crackers and melted butter. Mix until the crumbs are evenly coated.

    Spoon about 2 tablespoons of the graham cracker mixture into the bottom of serving cups or glasses, pressing down to form a base.

      In a separate bowl, beat the softened cream cheese with an electric mixer until smooth.

        Add the Nutella, powdered sugar, and vanilla extract to the cream cheese. Continue mixing until fully incorporated and creamy.

          In another bowl, whip the heavy cream until stiff peaks form. Gently fold the whipped cream into the Nutella mixture until just combined. Be careful not to deflate the whipped cream.

            Spoon the chocolate hazelnut cheesecake filling over the graham cracker crust in the cups, smoothing the tops with a spatula.

              Cover the cups with plastic wrap and refrigerate for at least 4 hours or until set.

                Before serving, garnish each cup with chopped hazelnuts and dark chocolate shavings for an extra touch of elegance.

                  Prep Time: 20 minutes | Total Time: 4 hours 20 minutes | Servings: 6

                    WANT TO SAVE THIS RECIPE?