

Are you ready to elevate your grilling game with a burst of flavor? My Chili Lime Grilled Shrimp Skewers are the perfect choice for a summer barbecue or a quick weeknight meal. These skewers pack a tangy, spicy kick that will delight your taste buds. Follow along as I guide you through each step, from marinating to grilling. Let’s dive into this delicious recipe that’s sure to impress your family and friends!
Ingredients
Main Ingredients List
– 1 lb large shrimp, peeled and deveined
– 3 tablespoons olive oil
– Juice of 2 limes
– Zest of 1 lime
– 2 tablespoons honey
– 2 teaspoons chili powder
– 1 teaspoon cumin
– 1 teaspoon garlic powder
– 1/2 teaspoon salt
– 1/2 teaspoon black pepper
– Fresh cilantro for garnish
– Lime wedges for serving
The magic of these Chili Lime Grilled Shrimp Skewers starts with just a few simple ingredients. First, I use one pound of large shrimp. Make sure they are peeled and deveined for an easy bite. The shrimp soak up all the flavors from the marinade.
Next, I add three tablespoons of olive oil. This oil helps to keep the shrimp moist while grilling. Then, I squeeze the juice of two limes and add the zest of one lime. The lime juice adds a bright, fresh flavor that balances well with the sweetness of two tablespoons of honey.
I spice things up with two teaspoons of chili powder, one teaspoon of cumin, and one teaspoon of garlic powder. These spices bring warmth and depth to each bite. Don’t forget half a teaspoon of salt and black pepper for seasoning.
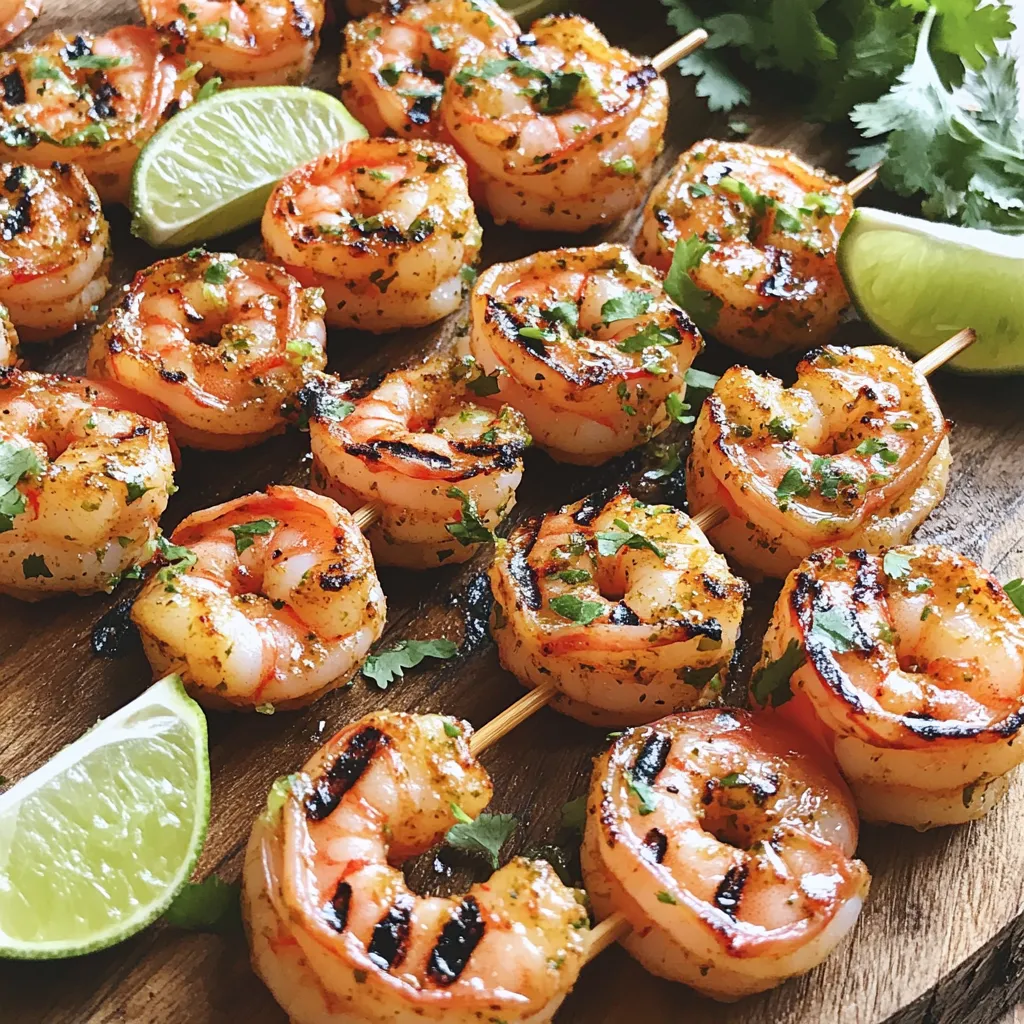
For the finishing touch, I use fresh cilantro as a garnish. It adds a nice pop of color and flavor. Serve with lime wedges for an extra zing. Each ingredient plays a role in creating a dish that is full of flavor and joy.
Step-by-Step Instructions
Marinating the Shrimp
To start, gather your ingredients for the marinade. In a mixing bowl, whisk together the following:
– 3 tablespoons olive oil
– Juice of 2 limes
– Zest of 1 lime
– 2 tablespoons honey
– 2 teaspoons chili powder
– 1 teaspoon cumin
– 1 teaspoon garlic powder
– 1/2 teaspoon salt
– 1/2 teaspoon black pepper
Whisk until everything blends well. This mix brings the chili lime flavor to life. Next, add 1 pound of large shrimp that are peeled and deveined. Make sure each shrimp gets fully coated in the marinade. Cover the bowl and place it in the refrigerator. Let it sit for at least 30 minutes. If you want more flavor, let it marinate for up to 1 hour.
Preparing the Grill and Skewers
While the shrimp absorbs all that tasty goodness, it’s time to prepare your grill. Preheat it to medium-high heat. This step is crucial for getting those lovely grill marks. If you’re using wooden skewers, soak them in water for about 30 minutes. Soaking prevents them from burning on the grill.
Grilling the Shrimp Skewers
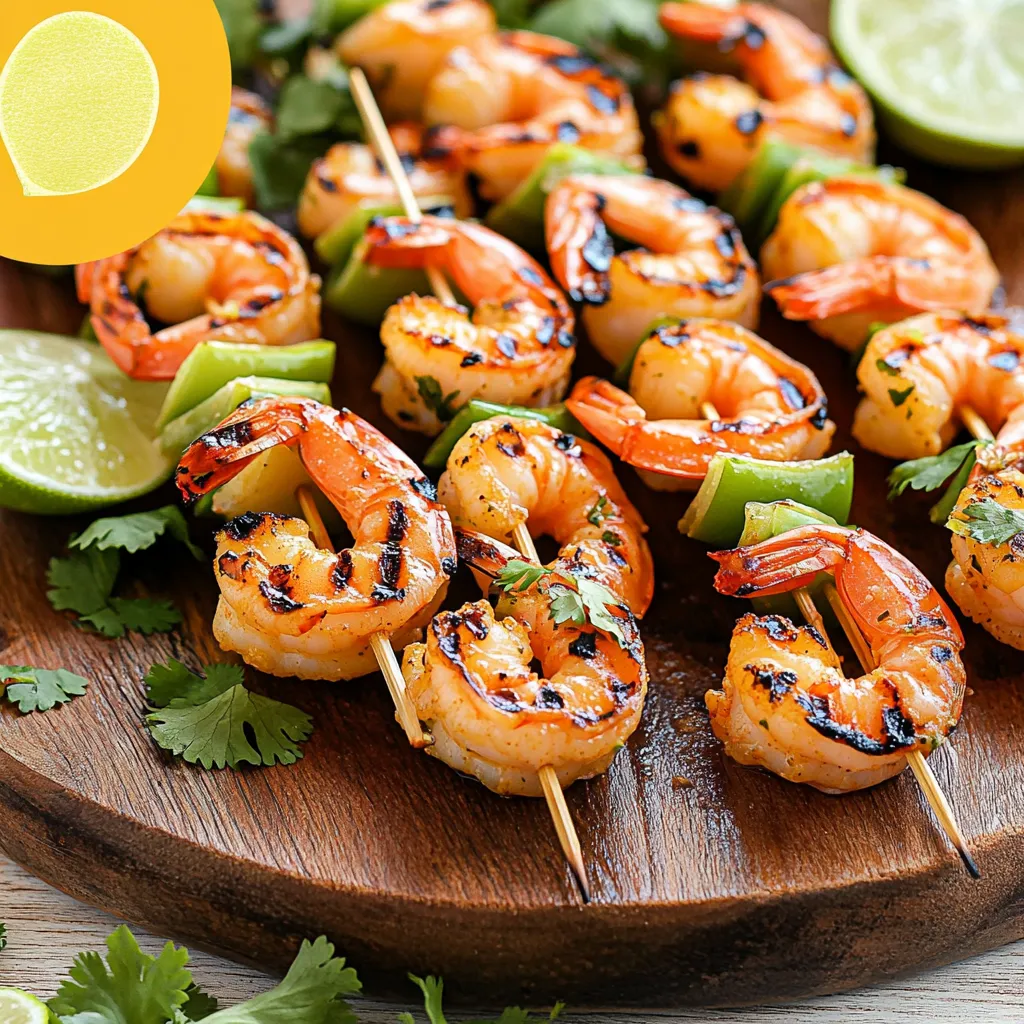
Now comes the fun part—grilling! Carefully thread the marinated shrimp onto the skewers. Aim for about 4 to 5 shrimp per skewer. Make sure they are close but not overcrowded. This allows them to cook evenly.
Place the skewers on the grill. Grill for about 2-3 minutes on each side. Watch closely as the shrimp turn opaque and develop nice grill marks. Be careful not to overcook; shrimp can become rubbery.
Once done, remove the skewers from the grill. For a fresh touch, sprinkle chopped cilantro over them. Serve right away with lime wedges on the side for a zesty kick. Enjoy your flavorful chili lime grilled shrimp skewers!
Tips & Tricks
Perfect Marinade Techniques
To make the best chili lime grilled shrimp skewers, use acid in your marinade. Lime juice brightens flavors and tenderizes shrimp. I recommend letting your shrimp marinate for at least 30 minutes. For a stronger taste, marinate for up to an hour. This gives the shrimp time to soak in all the delicious flavors.
Grilling Best Practices
Avoid overcooking your shrimp. Cook them for about 2-3 minutes on each side. When the shrimp turn opaque, they are ready. Check for nice grill marks, too. These marks show that your shrimp are grilling evenly and look great on the plate.
Presentation Suggestions
Garnish your skewers with freshly chopped cilantro. It adds color and flavor. Serve the skewers with lime wedges on the side. The extra squeeze of lime juice brings bright flavors to each bite. This simple touch makes your dish look and taste amazing.
Variations
Alternative Marinade Ideas
You can switch up the flavors in your marinade. Adding different spices or herbs can change the taste completely. Try using smoked paprika for a smoky touch or fresh basil for a bright flavor. You can also use sweeteners like agave or maple syrup. This adds a rich sweetness that balances the lime zest and chili spice. Experiment with what you have on hand for a fun twist!
Different Types of Shrimp
When choosing shrimp, you have options. Fresh shrimp offers the best flavor and texture. Look for shrimp that smell like the ocean. You can also use frozen shrimp, which can be just as good. If using frozen shrimp, ensure they are thawed before marinating. Always choose sustainable seafood. This means looking for shrimp that is caught or farmed in ways that do not harm the environment. Sustainable choices help protect our oceans.
Accompanying Side Dishes
Pairing your shrimp skewers with the right sides can make the meal shine. Fresh salads are a great choice. A simple green salad or a zesty corn salad with lime dressing works well. You could also serve it with grains like quinoa or rice for a filling dish. Don’t forget about sauces or dips! A creamy avocado dip or a tangy salsa can add extra flavor. These sides will complement the shrimp and make your meal more enjoyable.
Storage Info
Best Practices for Leftovers
To keep your chili lime grilled shrimp skewers fresh, store them properly. Place the cooked skewers in an airtight container. This helps lock in flavor and moisture. If you use a glass container, make sure it is safe for the fridge. You can keep them in the fridge for up to three days. If you want to store them longer, consider freezing. Wrap the skewers tightly in plastic wrap, then place them in a freezer bag. They will last up to three months in the freezer.
Reheating Tips
When you want to enjoy the shrimp again, reheating is key. The best method is to use a skillet. Heat it on medium-low heat and add a little olive oil. Place the skewers in the skillet. Cook for about 2-3 minutes on each side. This method helps keep the shrimp juicy and prevents dryness. You can also use the microwave if you’re short on time. Place the skewers on a microwave-safe plate. Cover them with a damp paper towel. Heat for about 30 seconds to 1 minute. This keeps the shrimp moist but may not keep the texture as nice. Always check that they are heated through before serving.
FAQs
Can I use frozen shrimp for this recipe?
Yes, you can use frozen shrimp! First, you need to thaw them. To do this, place the shrimp in a bowl of cold water. Change the water every 15 minutes until thawed. This usually takes about 30 minutes. After thawing, make sure to dry the shrimp well with paper towels. This helps the marinade stick better.
How do I know when the shrimp are done?
Cooked shrimp turn from gray to pink. They should also be firm and opaque. The best way to check is to cut one in half. If it is no longer translucent and has a nice curl, it’s done. Cook them for about 2-3 minutes on each side. Don’t overcook them. Overcooked shrimp can become rubbery.
Can I cook these skewers in the oven?
Yes, you can easily cook these skewers in the oven. Preheat your oven to 400°F (200°C). Place the shrimp skewers on a baking sheet lined with foil. Bake them for about 8-10 minutes. Make sure to turn them halfway. They are done when they are pink and opaque. Enjoy the same great taste even without a grill!
Grilling shrimp skewers is a simple and delicious process. By marinating shrimp, preparing your grill, and following best practices, you ensure great flavor. Experiment with different marinades and accompaniments to find your perfect dish. Remember to store and reheat leftovers to maintain taste. Whether you use fresh or frozen shrimp, this recipe offers tasty options for everyone. Enjoy the fun of grilling with family and friends, and savor the flavors you create.
