FREE DINNER EBOOK! Get your copy!
  • Cookie Policy
  • GDPR Policy
  • Disclaimer
  • Terms Of Use
  • Visit my other site: Fun Cookie Recipes
secrets pice kitchen
  • Home
  • Dinner
  • Desserts
  • Drinks
  • Appetizers
  • Contact
  • About
  • Privacy Policy
  • Home
  • Dinner
  • Desserts
  • Drinks
  • Appetizers
  • Contact
  • About
  • Privacy Policy
  • Cookie Policy
  • GDPR Policy
  • Disclaimer
  • Terms Of Use
Visit my other site: Fun Cookie Recipes

HOME / CATEGORIES /

Latest

Let’s gather everything you need for veggie packed egg muffins. This recipe is simple and quick, perfect for busy mornings or meal prep. Here’s what you’ll need: - 6 large eggs - 1/2 cup milk or non-dairy alternative - 1 cup chopped spinach - 1/2 cup diced bell pepper - 1/2 cup halved cherry tomatoes - 1/4 cup finely chopped red onion - 1/2 cup shredded cheese (cheddar or feta) - Seasoning: garlic powder, dried oregano, salt, and pepper - Olive oil spray for greasing Now, let’s talk about why these ingredients are great. Eggs are the star here, providing protein and flavor. Milk adds creaminess, making the muffins fluffy. Spinach gives a healthy green boost, while bell peppers and tomatoes add color and taste. Cheese makes everything better. Choose cheddar for a sharp bite or feta for a tangy twist. The seasonings tie it all together. Garlic powder and oregano add depth to every bite. Don’t forget the olive oil spray! It keeps the muffins from sticking to the pan. With these tasty ingredients, you’re set for a nutritious meal that’s easy to make. Enjoy the process, and get ready for something delicious! First, set your oven to 350°F (175°C). This is the perfect heat for baking. While the oven warms up, grab a muffin tin. Spray it with olive oil to stop the muffins from sticking. Make sure to cover each cup well. In a large bowl, crack 6 large eggs. Then, add 1/2 cup of milk. Whisk these together until you see bubbles. Next, toss in 1 cup of chopped spinach, 1/2 cup of diced bell pepper, 1/2 cup of halved cherry tomatoes, and 1/4 cup of finely chopped red onion. Stir it all well so the veggies mix with the eggs. For flavor, add 1 teaspoon of garlic powder, 1 teaspoon of dried oregano, and salt and pepper to taste. Mix until everything looks even. Pour the egg and veggie mixture into the muffin tin. Fill each cup about 3/4 full. Now, sprinkle 1/2 cup of shredded cheese on top of each muffin. Place the muffin tin in the oven and bake for 18 to 20 minutes. You want them to look golden on top and be set in the middle. When done, take them out and let them cool for a few minutes. Use a knife to help pop them out of the tin. Enjoy your veggie packed egg muffins! To get fluffy and tasty egg muffins, whisk the eggs well. The milk helps make them light. If you want a creamier texture, use heavy cream instead of milk. Don’t overbake them. Check for a light golden color on top. This means they are ready to come out. You can swap out the cheese for your favorite type. Try mozzarella or goat cheese for a different taste. For veggies, use whatever you like. Zucchini, mushrooms, or kale can work great too. Just chop them small so they cook evenly. These egg muffins are perfect for meal prep. Make a big batch on the weekend. Store them in the fridge for quick breakfasts. They can last up to five days. You can also freeze them for up to three months. Just reheat in the microwave for a fast meal. {{image_2}} You can mix and match veggies in these muffins. Try zucchini, mushrooms, or broccoli. Carrots add a nice crunch too. Get creative! Just remember to chop the veggies small. This helps them cook evenly and blend well with the eggs. You can also use frozen veggies. Just thaw and squeeze out excess moisture before adding them to the mix. Want to make these muffins heartier? Add cooked bacon or sausage! Chop the cooked meat into small pieces. Stir it into the egg mixture before you pour it into the muffin tin. This adds flavor and protein. Turkey bacon or chicken sausage are great alternatives, too. You can even use leftover rotisserie chicken. Just shred it and mix it in! If you want a dairy-free or vegan version, it's easy! Use a non-dairy milk like almond or oat. For the eggs, try a flax egg or chickpea flour mixed with water. The texture will change a bit, but the taste stays great. You can also skip the cheese or use a dairy-free cheese. Nutritional yeast gives a cheesy flavor, too. This way, everyone can enjoy these tasty muffins! You can store leftover veggie packed egg muffins in the fridge. Place them in an airtight container. They will stay fresh for up to 5 days. Make sure they cool down before sealing. This helps prevent moisture buildup. You can also use plastic wrap if you don’t have a container. To freeze your muffins, let them cool completely first. Then, wrap each muffin tightly in plastic wrap. Place the wrapped muffins in a freezer bag or an airtight container. They can last for up to 3 months in the freezer. Just remember to label the bag with the date. This way, you won’t forget when you made them! To reheat, you can use the microwave or oven. For the microwave, place a muffin on a plate and heat for about 30 seconds. If you prefer the oven, preheat it to 350°F (175°C). Then, place the muffins on a baking sheet for 10-15 minutes. This helps keep them warm and tasty. Enjoy them warm for the best flavor! Yes, you can make these muffins in advance. I often prepare them on Sundays. This way, I have healthy meals ready for the week. Just store them in the fridge after baking. They are easy to grab for breakfast or snacks. The best veggies for egg muffins include: - Spinach - Bell peppers - Tomatoes - Red onion Other great choices are zucchini, mushrooms, and broccoli. You can mix and match based on your taste. Fresh or frozen veggies both work well. Egg muffins last about 4 to 5 days in the fridge. Make sure to store them in an airtight container. This keeps them fresh and tasty. If you want them to last longer, consider freezing them. Yes, you can use egg whites instead of whole eggs. This cuts down on fat and calories. Just use about 1/4 cup of egg whites for each whole egg. This change still gives a nice texture and flavor. This blog post detailed how to make veggie-packed egg muffins. We covered ingredients, step-by-step directions, and helpful tips. You can customize them with your favorite veggies and cheeses. Storing and reheating them is easy too. Egg muffins are a great choice for meal prep. They offer healthy protein and can fit your taste. I hope you enjoy making these simple and tasty treats!

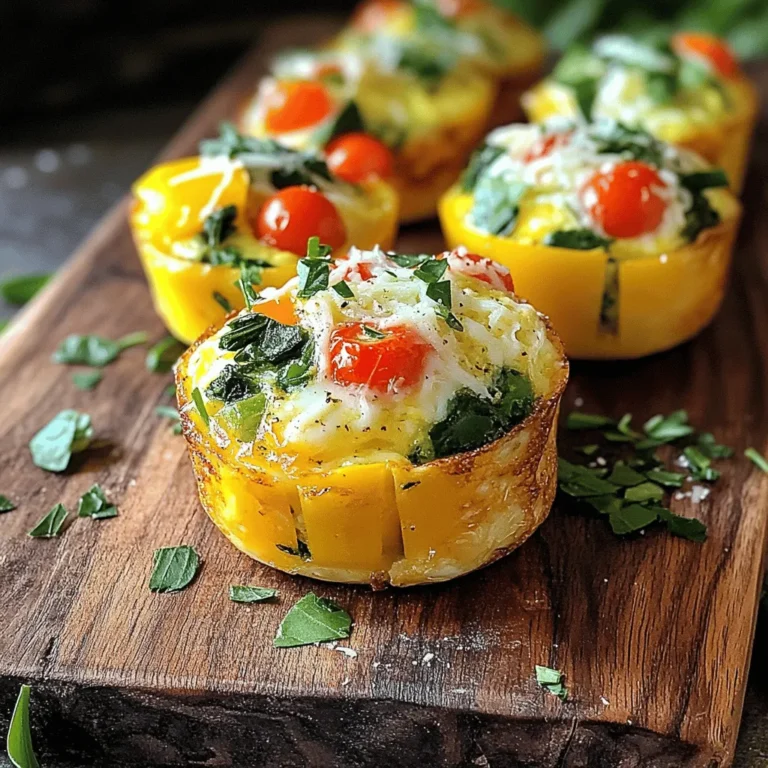
Veggie Packed Egg Muffins Easy and Nutritious Meal

- 2 large apples, peeled and diced - 1 cup rolled oats - 1 cup all-purpose flour - 1/2 cup brown sugar - 1/2 cup unsalted butter, melted - 1/2 teaspoon cinnamon - 1/4 teaspoon nutmeg - 1/4 teaspoon salt - 1/3 cup granulated sugar - 1 tablespoon lemon juice - 1 tablespoon cornstarch Gather these ingredients for your Apple Cinnamon Crumble Bars. Choose firm, tart apples like Granny Smith for great flavor. The oats and flour create a nice base and topping. Brown sugar adds warmth, while butter makes everything rich. A mix of spices like cinnamon and nutmeg gives this dish its cozy feel. - 8x8 inch baking dish - Parchment paper - Mixing bowls - Measuring cups and spoons - Oven You’ll need a few tools to make this recipe. An 8x8 inch baking dish works well for even baking. Parchment paper helps with easy removal. Use mixing bowls to combine your ingredients. Measuring cups and spoons ensure you get the right amounts. Finally, an oven will bake your bars to perfect, golden goodness. With these ingredients and tools ready, you're on your way to making delicious Apple Cinnamon Crumble Bars. Enjoy the process and the tasty results! - Preheat the oven to 350°F (175°C). - Line an 8x8 inch baking dish with parchment paper. First, you want to set your oven to 350°F. This helps the bars bake evenly. Next, take your baking dish and line it with parchment paper. Leave some overhang so you can lift the bars out easily later. - Combine diced apples with lemon juice and spices. - Let the mixture marinate for 10 minutes. In a mixing bowl, toss the diced apples with lemon juice, granulated sugar, cinnamon, nutmeg, and cornstarch. This mix will add flavor to the apples. Let it sit for about 10 minutes. This helps the apples soak up the spices. - Mix together the dry ingredients and melted butter. - Press half of the mixture into the baking dish. In another bowl, mix the rolled oats, all-purpose flour, brown sugar, melted butter, cinnamon, and salt. You want this to look crumbly. Press half of this mixture into the bottom of the baking dish. This will form a solid base for your bars. - Spread the marinated apples evenly over the base. - Sprinkle the remaining crumble topping over the apples. After you press the base, spread the marinated apples evenly over it. Then, take the remaining crumble mixture and sprinkle it on top of the apples. Make sure to cover all the apples so they stay nice and juicy. - Bake for 25-30 minutes. - Cool in the pan for 15 minutes before cutting. Now, place the baking dish in the oven. Bake for about 25 to 30 minutes. You want the top to be golden brown, and the apples should feel soft. Once done, let it cool in the pan for about 15 minutes. This makes cutting the bars easier. To get a great crumble, start with cold butter. Cold butter makes the crumble flaky. It helps create that nice, crunchy topping. When mixing the crumble, make sure not to overmix. You want a crumbly texture, not a paste. Mix just until you see some dry bits. This way, the bars stay light and airy. Adding vanilla extract to the apple filling really boosts the flavor. It gives the apples a warm, sweet note. You might also want to add nuts or raisins. They add a nice crunch and extra flavor. Walnuts or pecans work great. Raisins bring a chewy contrast to the soft apples. When serving, dust the bars with powdered sugar. It looks pretty and adds a touch of sweetness. Another great idea is to top them with vanilla ice cream or whipped cream. The cold cream contrasts nicely with the warm bars. This makes for a delightful treat that everyone will love! {{image_2}} You can make this recipe a bit better for you. Start by swapping out butter for coconut oil. It adds a nice hint of flavor and is a healthier fat. Next, use whole wheat flour instead of all-purpose flour. This change boosts fiber and gives your bars more nutrition. Want to mix it up? Try adding caramel to your apple filling for a richer taste. It gives each bite a sweet surprise! You can also experiment with different fruits. Pears or berries work great. Each fruit brings its own unique flavor. If you need a gluten-free treat, there are easy swaps. Use a gluten-free flour blend in place of regular flour. Just make sure the blend you pick works well for baking. Also, check that your oats are certified gluten-free. This ensures they are safe to eat. To keep your Apple Cinnamon Crumble Bars fresh, place them in an airtight container. This method helps keep the bars moist and tasty. You can store them in the fridge for up to a week. Make sure to check for any signs of spoilage before digging in! If you want to save some for later, freeze the uncut bars. Wrap them tightly in plastic wrap to prevent freezer burn. When you're ready to enjoy, simply thaw the bars at room temperature. This way, you can have a delicious treat whenever you like! For the best texture, reheat the bars in the oven. Set it to 350°F (175°C) and warm them for about 10 minutes. If you’re in a hurry, you can use the microwave for a quick reheating. Just be aware that the texture may become softer. Enjoy your warm, tasty treat! Apple Cinnamon Crumble Bars stay fresh in the fridge for about one week. Store them in an airtight container to keep them moist. If you want to keep them longer, freeze them. The bars can last up to three months in the freezer. Wrap each bar in plastic wrap, then place them in a freezer bag. When you're ready to eat, let them thaw in the fridge overnight. Yes, you can substitute apples with other fruits. Pears work well and give a nice flavor. You can also try peaches or berries for a twist. Each fruit will change the taste, but all will make tasty bars. Keep in mind; the texture may vary slightly depending on the fruit you choose. Look for a golden-brown top. The apples should be tender, and the crumble should look set. You can gently press down on the top. If it feels firm and not wet, it’s ready. Baking takes about 25-30 minutes. Keep an eye on them during the last few minutes to avoid overbaking. Yes, you can make these bars vegan. Substitute unsalted butter with coconut oil or vegan butter. Use maple syrup or coconut sugar instead of brown sugar for sweetness. Ensure that the oats and flour are vegan-friendly. This way, you can enjoy a delicious treat without using animal products! You learned how to make delicious Apple Cinnamon Crumble Bars. We covered all the key ingredients, tools, and steps to enjoy a sweet treat. Remember to consider flavor options and storage tips. You can customize these bars to fit your taste or dietary needs. Try adding nuts or substituting fruits for variety. With these tips, you can create a tasty dessert that everyone loves. Enjoy your baking journey and share these treats with friends and family!

Apple Cinnamon Crumble Bars Tasty and Simple Delight

- 1 lb ground chicken or turkey - 1/2 cup breadcrumbs - 1/4 cup fresh cilantro, chopped - 1 tablespoon fish sauce These main ingredients create the base of our meatballs. I prefer ground chicken for a lighter taste, but ground turkey works too. Breadcrumbs help bind the meatballs and keep them moist. Fresh cilantro adds a bright flavor. Fish sauce gives a savory kick that ties everything together. - 2 teaspoons grated ginger - 2 cloves garlic, minced - 1 tablespoon red curry paste Adding ginger and garlic amps up the flavor. Grated ginger gives warmth, while minced garlic brings depth. Red curry paste adds heat and spice. It’s a key ingredient in this dish. A little goes a long way in creating that authentic Thai taste. - 1 can (13.5 oz) coconut milk - 1 cup chicken broth - 1 red bell pepper, sliced - 1 cup sugar snap peas - 2 tablespoons lime juice Coconut milk forms the creamy base of the sauce. It blends well with chicken broth for a rich flavor. Red bell pepper adds sweetness and color, while sugar snap peas add crunch. A splash of lime juice brightens everything up. This mix creates a tasty sauce that pairs perfectly with the meatballs. - In a large bowl, combine: - 1 lb ground chicken or turkey - 1/2 cup breadcrumbs - 1/4 cup fresh cilantro, chopped - 1 tablespoon fish sauce - 2 teaspoons grated ginger - 2 cloves garlic, minced - Salt and pepper to taste Mix these ingredients until they blend well. This mixture will give your meatballs great flavor. - Now, form the mixture into meatballs about 1 inch in size. Place them on a baking sheet. This helps keep them from sticking together. - In a large skillet or wok, pour in: - 1 can (13.5 oz) coconut milk - 1 cup chicken broth Set the heat to medium. Stir in 1 tablespoon of red curry paste until it mixes well with the liquids. This will create a rich sauce. - Once the sauce simmers, gently add the meatballs to the skillet. Cover and cook them for about 10-12 minutes. Turn the meatballs occasionally. This helps them cook evenly and stay juicy. - After the meatballs are cooked, add: - 1 red bell pepper, sliced - 1 cup sugar snap peas Cook for an additional 3-5 minutes. This makes the vegetables tender but still crisp. - Stir in 2 tablespoons of lime juice. Taste and adjust with salt and pepper if needed. This adds a bright, fresh flavor to your dish. Now, serve the meatballs and curry sauce over cooked jasmine rice. Enjoy the delightful mix of flavors! To ensure your meatballs hold together, use the right mix of ground meat and breadcrumbs. Ground chicken or turkey works best. The breadcrumbs help bind the meat. Without them, your meatballs might fall apart. Cook the meatballs for about 10-12 minutes in the sauce. They should be firm and no longer pink inside. Turn them gently while cooking for even heat. You can check doneness with a meat thermometer. Aim for 165°F. Balancing spices is key. Start with red curry paste for heat. Add fish sauce for depth. Taste as you go. If the flavors seem off, adjust them. Add a bit more lime juice for brightness or sugar for sweetness. Want it spicier? Add more red curry paste or a pinch of chili flakes. For less heat, use less paste. You can also remove seeds from bell peppers. This helps tone down the spice. For the best pairing, serve these meatballs over jasmine rice. Its soft texture soaks up the sauce well. You can also use brown rice for a healthier option. Garnish with fresh cilantro for a pop of color. A squeeze of lime adds freshness. You can even add chopped peanuts for crunch. Enjoy your meal! {{image_2}} If you want to switch up the meat, try using ground pork or beef. These options bring their own flavors. For a lighter touch, you can choose ground turkey. It still works well and keeps the dish tasty. For those who prefer plant-based meals, you have great options too. Use lentils or chickpeas as a base for meatballs. You can also use store-bought vegan meat substitutes. These choices keep the dish hearty and satisfying. Want to change the flavor? You can add different curry pastes. Green or yellow curry paste will give a new twist. Each paste brings its own spice and depth. You can also try adding a dash of curry powder for extra warmth. Explore unique vegetables too. Try adding zucchini, carrots, or eggplant. These veggies soak up the sauce well and add color. You can even throw in some spinach for extra greens. It will make the dish even more colorful and healthy. You can embrace Thai-inspired twists by adding fresh herbs like basil or mint. These herbs boost the aroma and flavor. You might also consider adding a touch of tamarind for a bit of tang. If you want to get creative, think of fusion ideas. You could serve the meatballs with tortillas for a taco night. Another idea is to pair them with pasta, creating a Thai-Italian fusion. This makes the dish fun and unexpected! To keep your Thai Coconut Curry Meatballs fresh, store them in a sealed container. This helps keep out air and moisture. The meatballs will taste best if you eat them within three days. If you want to save them longer, freezing is a great option. In the fridge, the meatballs last about three days. After that, they may lose flavor and texture. Always check for any off smells or changes in color before eating. This ensures your dish remains safe and enjoyable. To freeze meatballs and sauce, let them cool first. Then, place them in freezer bags or containers. Make sure to remove as much air as possible. This helps prevent freezer burn. You can freeze both meatballs and sauce together or separately. When ready to enjoy frozen meatballs, thaw them overnight in the fridge. Reheat them in a skillet over medium heat. Add a splash of chicken broth or coconut milk to keep them moist. Heat until warmed through, about 10 minutes. For busy weeknights, make meatballs ahead of time. You can prepare them on the weekend and store them in the fridge. Portion them into meals for easy cooking during the week. Divide meatballs into single servings. This way, you can grab one from the fridge whenever you need a quick meal. Pair them with rice or veggies for a balanced dish. Yes, you can use other meats. Ground beef or pork works well too. For a lighter option, try ground turkey. If you prefer a meatless dish, plant-based meat substitutes are great. Just ensure they have enough flavor to match the spices in the recipe. Check the meatballs for an internal temperature of 165°F. You can also cut one open to check if it’s no longer pink inside. If the juices run clear, they are ready. Cooking time is about 10-12 minutes in the sauce. Keep an eye on them to avoid overcooking. Serve these meatballs over jasmine rice for a classic pairing. You can also try rice noodles for a fun twist. Fresh veggies like broccoli or a simple green salad brighten up the meal. A side of naan or crusty bread soaks up the tasty sauce too. You now have all the steps to make tasty Thai Coconut Curry Meatballs. We started with key ingredients, from ground chicken to fresh spices. Next, I shared instructions to create flavorful meatballs. Then, I gave tips for perfecting your dish and unique variations. Try these recipes for quick meals or special occasions. The flavors will impress everyone at your table. Enjoy the cooking process and have fun creating your own version!

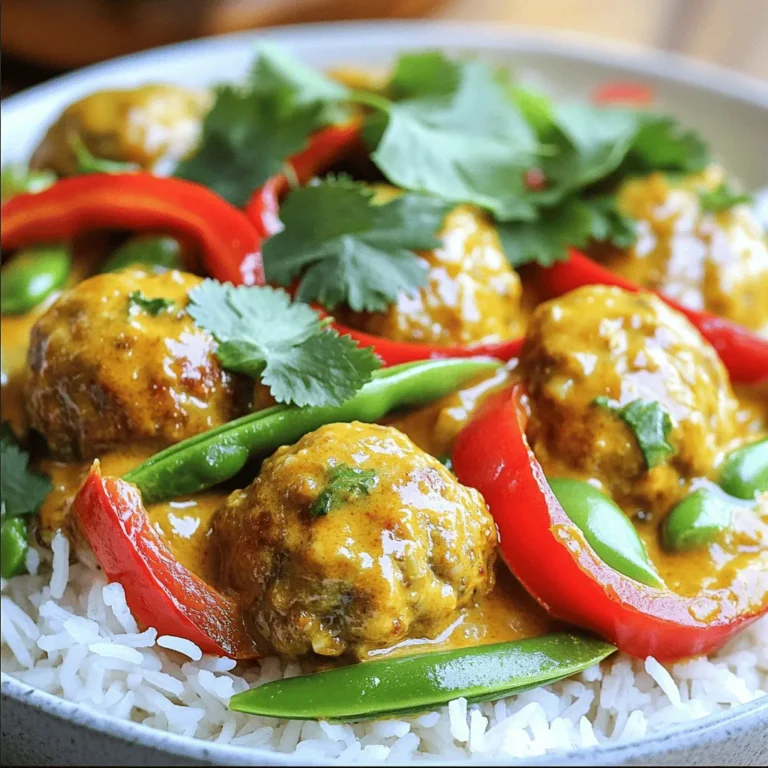
Thai Coconut Curry Meatballs Delightful and Simple Dish

- 1 cup couscous - 1 1/2 cups vegetable broth - 1 cup cherry tomatoes, halved - 1 cucumber, diced - 1/2 red onion, finely chopped - 1/2 cup Kalamata olives, sliced - 1/2 cup feta cheese, crumbled - 1/4 cup fresh parsley, chopped Couscous is the star of this salad. It is small, fluffy, and easy to cook. I use vegetable broth to give it a nice flavor. The fresh vegetables add color and crunch. Cherry tomatoes are sweet, while cucumbers are crisp. Red onions bring a bit of bite. Kalamata olives add a salty touch, and feta cheese gives a creamy finish. Fresh parsley brightens the dish with its green color. - 1/4 cup olive oil - 2 tablespoons lemon juice - 1 teaspoon dried oregano - Salt and pepper to taste The dressing is simple but full of flavor. I mix olive oil and lemon juice to create a bright taste. Dried oregano adds an earthy note. I always season it with salt and pepper to balance the flavors. - Saucepan - Mixing bowl - Whisk - Fork You will need a saucepan to cook the couscous. A mixing bowl is great for combining the salad. A whisk helps blend the dressing well. Lastly, a fork is perfect for fluffing the couscous. These tools make the process smooth and easy. - Boiling Vegetable Broth Start by pouring 1 and 1/2 cups of vegetable broth into a saucepan. Heat it on medium until it boils. Watch it closely so it doesn't boil over. - Adding Couscous Once the broth is boiling, remove the pot from the heat. Add 1 cup of couscous to the broth and stir it gently. Cover the pot with a lid and let it sit for about 5 minutes. This helps the couscous soak up all the flavor. - Cooling the Couscous After 5 minutes, use a fork to fluff the couscous. This step makes it light and airy. Set it aside to cool down while you prepare the salad. - Chopping Fresh Ingredients Take the time to chop your fresh vegetables. Dice 1 cucumber, halve 1 cup of cherry tomatoes, and finely chop 1/2 a red onion. Slice 1/2 cup of Kalamata olives. These add color and flavor. - Combining Ingredients in a Bowl In a large mixing bowl, combine the cooled couscous, chopped tomatoes, cucumber, onion, olives, and 1/2 cup of crumbled feta cheese. Add 1/4 cup of chopped fresh parsley for that fresh taste. - Preparing the Dressing In a small bowl, whisk together 1/4 cup of olive oil, 2 tablespoons of lemon juice, and 1 teaspoon of dried oregano. Season with salt and pepper to taste. This dressing pulls all the flavors together. - Mixing Salad and Dressing Pour the dressing over the couscous mixture. Gently toss everything together. Make sure each ingredient gets coated well in the dressing. - Adjusting Seasoning Taste the salad and adjust the seasoning if needed. You can add more salt, pepper, or lemon juice for extra flavor. - Chilling Time for Flavor Cover the salad and chill it in the refrigerator for at least 30 minutes. This helps the flavors blend and creates a refreshing dish perfect for any occasion. - Fluffing Techniques: After cooking, use a fork to fluff the couscous. This helps separate the grains and keeps it light. Fluffing is key for a great texture. - Letting Couscous Cool: Let your couscous cool for a bit before mixing it with other ingredients. Cooling helps it absorb flavors better. It also prevents the salad from becoming soggy. - Choosing Fresh Vegetables: Pick seasonal veggies for the best taste. Fresh cherry tomatoes and cucumbers make your salad crisp and bright. Adjust what you use based on what’s available. - Adding Seasonal Herbs: Fresh herbs like basil or mint can elevate your dish. They add color and flavor. Use what you find at the market or in your garden for the best result. - Presentation Tips: Serve the salad in a large bowl for a family-style meal. You can also plate it individually for a nice touch. A colorful bowl makes your salad pop. - Garnishing Ideas: Add whole olives and a sprig of parsley on top. This not only makes the dish look appealing but also adds a fresh flavor. Garnishes can really enhance the eating experience. {{image_2}} Gluten-Free Options If you need a gluten-free dish, try using quinoa instead of couscous. Quinoa cooks similarly and adds a nice texture. Just rinse it well before cooking. You can also use gluten-free couscous made from corn or rice. Vegan Adaptations To make this salad vegan, skip the feta cheese. You can use avocado for creaminess. Also, try adding nutritional yeast for a cheesy flavor without dairy. This keeps the dish light and flavorful. Protein Choices You can add cooked chicken for a heartier meal. If you prefer plant-based protein, chickpeas work great. They add a nice bite and are full of fiber. You can also use tuna or shrimp for a seafood twist. Different Cheeses If feta isn't your favorite, try goat cheese or even mozzarella. Each cheese gives a different taste. Goat cheese is tangy, while mozzarella is mild and creamy. Choose what you love best! Spice Suggestions To spice things up, add a pinch of red pepper flakes for heat. You could also sprinkle in some cumin for a warm flavor. Fresh herbs like mint or basil can brighten the dish, too. Alternative Dressings While olive oil and lemon juice are classic, you can experiment. Try a balsamic vinaigrette for a sweeter taste. A tahini dressing can add a nutty flavor that pairs well with the salad's ingredients. - Refrigeration Tips: Store the salad in an airtight container. Keep it in the fridge. It stays fresh for up to three days. Make sure to cool it down before placing it inside. This helps maintain texture and flavor. - Freezing Recommendations: Freezing is not ideal for this salad. The vegetables and feta may become mushy. If you must freeze, store only the couscous. Thaw it in the fridge before serving. - Timeline for Freshness: Enjoy the salad within three days for the best taste. After that, the flavors fade and ingredients lose their crunch. - Signs of Spoilage: Look for wilting vegetables or off smells. If it looks slimy or has a sour scent, it's best to discard it. - Best Practices for Serving Again: If you want to serve it cold, just take it out of the fridge. You can also gently reheat the couscous in the microwave. Add a splash of broth or water to keep it moist. - Recommended Storage Containers: Use glass or plastic containers with tight lids. These help keep the salad fresh and flavorful. Yes, you can! If you want a different texture, try larger couscous like pearl couscous. It has a chewy bite that adds fun to the salad. Quinoa is another great option. It is gluten-free and has a nutty flavor. Just remember to adjust the cooking time if you switch to quinoa. Cook it in water or broth for about 15 minutes until soft. You can store the salad for about 3 days in the fridge. Keep it in an airtight container for best results. The flavors will keep getting better as it sits. Just make sure to check for freshness before you eat it. If it smells off or looks strange, it’s best to toss it. To make your salad more filling, add protein! Here are some tasty ideas: - Grilled chicken for a hearty boost. - Canned chickpeas for a vegetarian option. - Shrimp for a seafood twist. - Hard-boiled eggs for extra richness. - Roasted nuts for crunch and healthy fats. Each option adds flavor and makes the dish more satisfying. Mediterranean Couscous Salad brings fresh flavors and healthy choices to your table. You learned how to cook couscous, mix in fresh vegetables, and create a tasty dressing. Tips for perfect texture and seasonal ingredients help you adapt this dish. Whether you choose gluten-free or vegan options, there’s a way to make it work. Store leftovers safely and enjoy later. This salad is easy to vary, making it a go-to recipe. Embrace the joy of cooking and enjoy every bite!

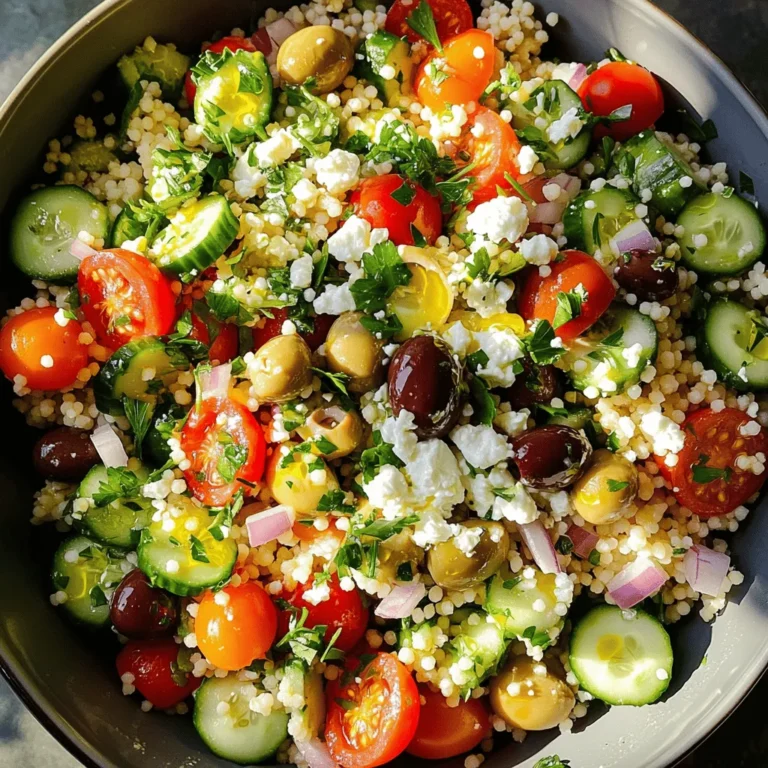
Mediterranean Couscous Salad Fresh and Tasty Recipe

To make crispy air fryer tofu nuggets, gather these main ingredients: - 14 oz firm tofu, pressed and cubed - 1 cup breadcrumbs (panko preferred) - 1/4 cup cornstarch - 1/2 cup plant-based milk (unsweetened) For a tasty flavor, use these seasonings and coatings: - 1/2 tsp garlic powder - 1/2 tsp onion powder - 1/2 tsp smoked paprika - 1/2 tsp salt - 1/4 tsp black pepper - Cooking spray or a light drizzle of olive oil To enhance your tofu nuggets, consider these dipping sauces: - Sweet chili sauce - Vegan ranch dressing - Soy sauce with sesame oil These ingredients and seasonings will give you delicious, crispy tofu nuggets. The panko breadcrumbs and cornstarch create a perfect crunch. The seasonings add depth and flavor. Choose your dip to match your taste. Enjoy your cooking adventure! To start, you need to press the tofu. This step gets rid of extra water. Use a tofu press or wrap the tofu in a clean towel. Place a heavy object on top. Let it sit for about 15-20 minutes. After pressing, cut the tofu into bite-sized cubes. This will help them cook evenly and get crispy. In one bowl, mix the dry ingredients. Combine cornstarch, garlic powder, onion powder, smoked paprika, salt, and black pepper. In another bowl, whisk together the plant-based milk and soy sauce. Take each tofu cube and dip it into the milk mix first. Make sure it's fully coated. Then, toss it in the dry mix until it is evenly covered. Repeat this for all the tofu cubes. Next, preheat your air fryer to 400°F (200°C) for about five minutes. Once heated, place the coated tofu in a single layer in the air fryer basket. It’s important not to overcrowd them. Lightly spray with cooking spray or drizzle a little olive oil over the cubes for extra crispiness. Air fry the nuggets for about 12-15 minutes. Shake the basket halfway through cooking to ensure even crispiness. When they are golden brown, they are ready to eat. Let them cool for a few minutes before serving. To get that perfect crunch on your tofu nuggets, follow these steps: - Press the Tofu: Always press your tofu to remove moisture. This step is key. - Use Panko Breadcrumbs: Panko gives a lighter, crispier coating than regular breadcrumbs. - Coat Evenly: Make sure each piece is coated well in the cornstarch mix. This helps with crispiness. - Don’t Overcrowd: Place the nuggets in a single layer in the air fryer. This allows hot air to reach all sides. - Spray Lightly: A light spray of cooking oil or a drizzle of olive oil adds to the crunch. When making tofu nuggets, keep these mistakes in mind: - Skipping the Pressing: Not pressing tofu leads to soggy nuggets. Always press before cooking. - Using Too Much Oil: While oil is good, too much can make the nuggets greasy. A light spray is enough. - Not Shaking the Basket: Failing to shake the basket halfway leads to uneven cooking. Shake it for best results. - Not Preheating the Air Fryer: Air fryers need to be hot before adding food. Always preheat for even cooking. To make your cooking easy, use these tools: - Air Fryer: The main tool for crispy tofu nuggets. - Tofu Press: Helps remove moisture effectively. - Mixing Bowls: For your coating mixtures. - Tongs: Useful for handling coated tofu without making a mess. - Cooking Spray: For even distribution of oil on your nuggets. {{image_2}} You can easily change the flavor of your tofu nuggets. Try adding different spices to the mix. Here are some ideas: - Curry Powder: Add 1 teaspoon for a warm, spicy kick. - Chili Powder: Mix in 1 teaspoon for a smoky flavor. - Italian Herbs: Use a blend of oregano, basil, and thyme for an herby taste. Feel free to mix and match these seasonings to find your favorite combo. This way, every batch feels fresh and exciting! Besides panko, you can use other coatings for your nuggets. Here are a few options: - Crushed Cornflakes: They add great crunch and texture. - Almond Flour: This gives a nutty flavor and is gluten-free. - Sesame Seeds: Coat your tofu in sesame seeds for a unique twist. Each option brings its own texture and flavor. Experiment to see what you enjoy most! Pair your crispy tofu nuggets with fun side dishes. Here are some of my favorites: - Steamed Broccoli: A healthy, crunchy side. - Sweet Potato Fries: A sweet and savory combo. - Rice or Quinoa: Serve them over rice for a filling meal. Don’t forget to add a tasty dipping sauce! Sweet chili or vegan ranch work well and add a nice touch. Enjoy your meal with friends or family for a fun dinner! You can store leftover tofu nuggets in an airtight container. Let them cool first. Place them in the fridge for up to three days. If you want to keep them longer, freezing is a great option. To reheat, use the air fryer for the best crunch. Set it to 350°F (175°C) for about 5 to 7 minutes. This will bring back the crispy texture. You can also use the oven at the same temperature. Just keep an eye on them to avoid burning. You can freeze these tofu nuggets before or after cooking. If you freeze them raw, coat them and place them in a single layer on a baking sheet. After they freeze solid, transfer them to a freezer bag. If you freeze them cooked, let them cool, then store in an airtight container. They can last up to three months in the freezer. No, soft tofu won’t work well for this recipe. It has too much moisture and will fall apart. Firm tofu holds its shape better. It also gives the nuggets a nice crunch. Using firm tofu helps achieve that crispy texture we all love. To press tofu, start by wrapping it in a clean towel. Place it on a plate and add a heavy object on top. A cast-iron skillet or a few cans work well. Let it sit for 15 to 30 minutes. This removes excess moisture. Dry tofu absorbs flavors better and becomes crispier when cooked. To make these nuggets gluten-free, swap soy sauce for tamari. Tamari is a gluten-free option that tastes similar. Use gluten-free breadcrumbs in place of regular breadcrumbs. This way, you can enjoy tasty nuggets without gluten. You get all the flavor and crunch without worry! This post covered how to make crispy air fryer tofu nuggets, from ingredients to serving. You learned about key ingredients, tasty coatings, and great sauces. I shared tips for perfect texture and tools that help. Plus, I gave ideas for flavor variations and storage tips. Enjoy making your delicious tofu nuggets at home. Experiment with new flavors and share them with friends! Happy cooking!

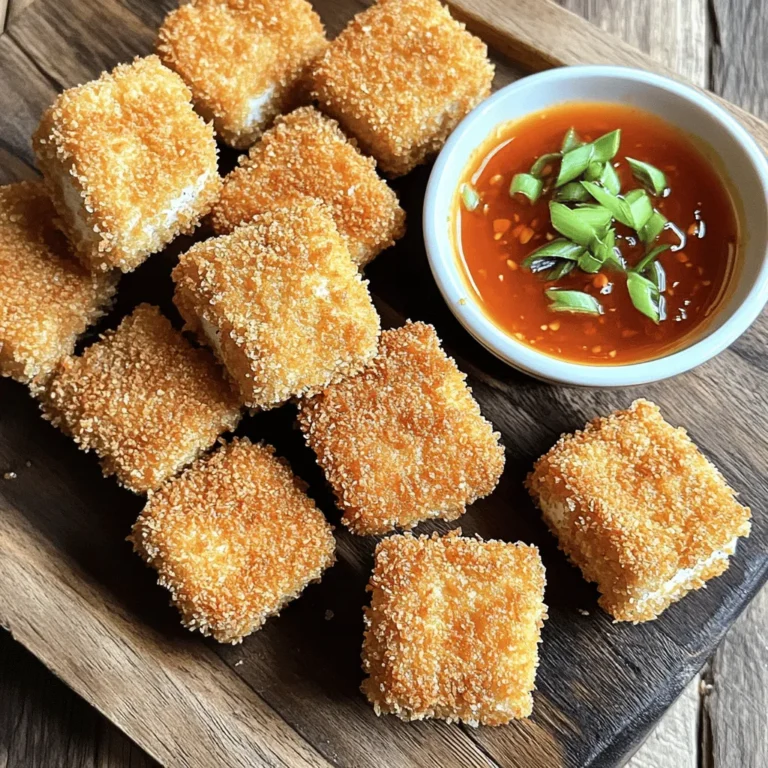
Crispy Air Fryer Tofu Nuggets Perfectly Easy Recipe

- 2 frozen bananas - 1 cup almond milk (or milk of choice) - 2 tablespoons unsweetened cocoa powder - 2 tablespoons natural peanut butter - 1 tablespoon honey or maple syrup (optional) - 1 teaspoon vanilla extract The main ingredients create a thick and creamy base for the smoothie bowl. The frozen bananas give it a nice chill and smoothness. Almond milk adds creaminess without being too heavy. Unsweetened cocoa powder gives the rich chocolate flavor. Natural peanut butter adds a nutty taste and protein. Honey or maple syrup adds sweetness, but it's optional. The vanilla extract brings all the flavors together. - Sliced bananas - Granola - Dark chocolate shavings - Chia seeds - Drizzle of peanut butter Toppings make your smoothie bowl fun and tasty. Sliced bananas add freshness and texture. Granola gives a crunchy bite. Dark chocolate shavings add a sweet touch of chocolate. Chia seeds are tiny but packed with nutrients. A drizzle of peanut butter on top adds extra flavor and richness. You can mix and match toppings based on what you like! - Step 1: Combine the frozen bananas, almond milk, cocoa powder, peanut butter, honey, and vanilla extract in a blender. - Step 2: Blend on high until smooth and creamy. Stop to scrape down the sides if needed. - Step 3: Pour the smoothie mixture into a bowl. - Step 4: Arrange your sliced bananas and granola on top of the smoothie base. - Step 5: Top with chia seeds, dark chocolate shavings, and a drizzle of peanut butter. - Step 6: Serve immediately for the best taste and texture. Follow these simple steps, and you'll create a delicious chocolate peanut butter smoothie bowl in no time! - Use frozen bananas for a creamier texture. They make your smoothie thick and rich. - Adjust almond milk to get your desired consistency. Add more for a thinner bowl. - Scrape down the sides of the blender for even blending. This helps to mix all ingredients well. - If you want extra sweetness, try adding honey or maple syrup. Start with one tablespoon. - You can also use alternate sweeteners for different diets. Stevia or agave work well too. {{image_2}} You can change up the taste of your smoothie bowl in simple ways. - Add spinach or kale: This gives a boost of greens without changing the flavor much. - Experiment with different nut butters: Almond or cashew butter can add new taste profiles. - Include protein powder: This adds more nutrition and makes it a filling meal. You can easily make this bowl fit your diet. - Dairy-free options: Use almond or coconut milk for a creamy base without dairy. - Gluten-free alternatives for toppings: Choose gluten-free granola to keep it safe for all diets. - Adjusting for vegan diets: Swap honey for maple syrup to keep it vegan-friendly. To store any leftover smoothie, place it in an airtight container. Keep it in the fridge for up to 24 hours. If you want to save it longer, consider freezing it. Pour the smoothie into ice cube trays for easy storage. Once frozen, pop the cubes into a bag. This way, you can enjoy smoothie cubes later. Can you re-blend the smoothie? Yes, you can! When you are ready to enjoy it again, just blend it again. Add a splash of milk to help with blending. This keeps the texture smooth and creamy. Avoid microwaving as it can change the texture and flavor. Re-blending is the best way to keep it delicious! To make this yummy smoothie bowl, follow these steps: 1. Combine Ingredients: In a blender, mix frozen bananas, almond milk, cocoa powder, peanut butter, honey (if you want it sweeter), and vanilla extract. 2. Blend: Blend the mix on high speed until it's smooth and creamy. Stop to scrape down the sides if needed. 3. Serve: Pour your thick smoothie into a bowl. 4. Add Toppings: Top it with sliced bananas, granola, chia seeds, dark chocolate shavings, and a drizzle of peanut butter. Enjoy it right away! Yes, you can use fresh bananas, but it will change the texture. Fresh bananas make the smoothie thinner and less creamy. If you want a thicker bowl, freeze your bananas before blending. This smoothie bowl packs many nutrients. Here are some benefits: - Bananas provide potassium and fiber. - Cocoa powder is rich in antioxidants. - Peanut butter adds healthy fats and protein. - Almond milk is lower in calories than regular milk. - Chia seeds offer omega-3 fatty acids and more fiber. You can get creative with toppings! Here are some ideas: - Use berries like strawberries or blueberries for a fruity touch. - Add nuts like almonds or walnuts for crunch. - Include seeds like pumpkin or sunflower seeds for extra nutrition. - Drizzle honey or maple syrup for added sweetness. - Experiment with coconut flakes or yogurt for a different flavor. Yes, you can prep this smoothie bowl ahead of time. Here's how: - Smoothie Base: Make the smoothie mix and store it in an airtight container in your fridge for up to 24 hours. - Toppings: Keep toppings separate until you are ready to eat. Adding them right before serving keeps them fresh. - Freezing: You can also freeze the smoothie base. Just blend it and pour it into a container. When you want to eat it, let it thaw before adding your toppings. This blog post shows how to make a tasty chocolate peanut butter smoothie bowl. We covered the main ingredients, step-by-step instructions, and helpful tips. Remember, using frozen bananas makes your smoothie creamy. You can also mix in different flavors or adjust toppings for your taste. Lastly, store leftovers properly to keep them fresh. Enjoy making this delicious treat that is both fun and healthy!

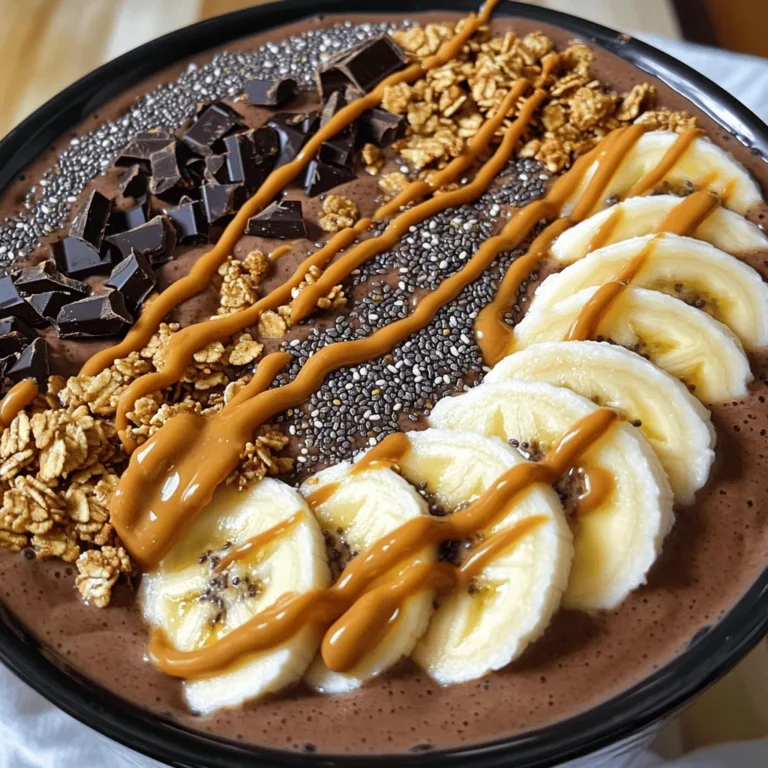
Chocolate Peanut Butter Smoothie Bowl Delicious Treat

- 1 pound large shrimp, peeled and deveined - 1 lemon, zested and juiced - 4 cloves garlic, minced - 2 tablespoons olive oil The main ingredients for this dish bring bright flavors and textures. Shrimp adds a sweet and tender bite. Lemon gives a fresh and zesty taste. Garlic adds depth and warmth. Olive oil helps tie it all together and keeps everything moist. - 1 teaspoon paprika - ½ teaspoon crushed red pepper flakes (adjust to taste) - Salt and pepper to taste - 1 cup cherry tomatoes, halved - 1 cup asparagus, trimmed and cut into 2-inch pieces The seasoning enhances the dish's flavor. Paprika adds a smoky note. Crushed red pepper flakes give it a kick. Salt and pepper balance everything out. Cherry tomatoes bring sweetness and juiciness, while asparagus adds a nice crunch and color. - Fresh parsley, chopped (for garnish) - Lemon wedges For garnishing, fresh parsley adds a pop of color and freshness. Lemon wedges are great for squeezing on top just before eating. They brighten the dish and add extra zing. - Preheat Oven Start by preheating your oven to 400°F (200°C). This ensures even cooking. - Combine Ingredients in a Bowl In a large bowl, mix 1 pound of shrimp with the zest and juice of 1 lemon. Add 4 minced garlic cloves, 2 tablespoons of olive oil, 1 teaspoon of paprika, and ½ teaspoon of crushed red pepper flakes. Season with salt and pepper. Toss the shrimp well until they are fully coated in the marinade. - Spreading the Shrimp Mixture Take a large sheet pan and spread the shrimp mixture evenly across it. Make sure the shrimp are not crowded. This helps them cook evenly. - Adding Cherry Tomatoes and Asparagus Next, add 1 cup of halved cherry tomatoes and 1 cup of trimmed asparagus cut into 2-inch pieces. Spread them around the shrimp. Drizzle a bit more olive oil and sprinkle with salt and pepper. - Baking Time and Temperature Place the sheet pan in your preheated oven and bake for about 10-12 minutes. The shrimp should turn pink and opaque, while the vegetables should be tender. - Checking Doneness It’s important to check that the shrimp are fully cooked and the veggies are tender. If the shrimp looks slightly translucent or rubbery, they need more time. Keep an eye on them! This method ensures a quick and flavorful dish that looks and tastes great. Knowing When Shrimp Are Done Shrimp cook quickly. Look for a pink color and a curl shape. The shrimp should be opaque all the way through. This usually takes around 10-12 minutes at 400°F. Avoiding Overcooked Shrimp Overcooked shrimp turn rubbery. To avoid this, watch closely as they bake. Remove them from the oven right when they are done. Marinating Tips Marinate shrimp for at least 15 minutes before cooking. This helps the flavors soak in. If you're short on time, even 5 minutes can help. Spice Adjustments Feel free to adjust spices to your taste. If you like it spicy, add more red pepper flakes. If you prefer milder flavors, reduce the amount. Rustic vs. Plated Presentation You can serve the dish directly from the sheet pan for a rustic look. This adds charm and makes clean-up easy. For a fancier touch, transfer it to a large serving platter. Garnishing Options Garnish with fresh parsley for color. You can also add lemon wedges on the side. They add freshness and let each person squeeze more lemon to their liking. {{image_2}} Using Different Vegetables You can swap out asparagus and cherry tomatoes for other veggies. Bell peppers, zucchini, or broccoli work well. Each adds a new twist to the dish. Just cut them to a similar size for even cooking. Alternatives to Shrimp If shrimp isn't your thing, try chicken or tofu. Both options absorb the flavors nicely. Cut chicken into bite-sized pieces. For tofu, use firm tofu and cube it. Both will still pair well with the lemon and garlic. Adding Herbs Fresh herbs can boost your dish. Try adding basil, dill, or thyme. Just chop them up and mix them in with the shrimp. This will brighten the flavors and add depth. Using Different Types of Citrus Lemon is classic, but lime or orange can also work. Lime adds a zesty kick, while orange brings a sweet note. Experiment with different citrus fruits to find your favorite. Suggested Side Dishes Pair this dish with rice or quinoa for a complete meal. They soak up the flavorful juices well. You could also serve it with a crisp green salad for added crunch. Pairing with Grains or Greens Consider serving the shrimp over a bed of spinach or arugula. These greens add freshness and a pop of color. You can also mix grains like farro or barley for a hearty touch. - How Long to Store Leftovers You can store leftovers in the fridge for up to three days. After that, the shrimp may lose freshness. - Proper Containment Use an airtight container to keep your shrimp fresh. This helps prevent odors and keeps moisture in. - Best Practices If you want to freeze leftovers, place them in a freezer-safe bag. Remove as much air as possible before sealing. This keeps the shrimp tasty. - Thawing Tips Thaw shrimp in the fridge overnight for the best results. You can also place the bag in cold water for a quick thaw. Avoid using hot water as it can cook the shrimp. - Oven vs. Microwave Reheating in the oven keeps the shrimp crispy. Set the oven to 350°F (175°C) and heat for about 10 minutes. The microwave is faster but may make the shrimp chewy. - Maintaining Texture and Flavor To keep flavor, add a splash of lemon juice before reheating. This can revive the taste and keep it fresh. For this recipe, large shrimp are best. They cook evenly and hold flavor well. Look for shrimp that are peeled and deveined. Fresh shrimp is ideal, but frozen works too. Just remember to thaw it before cooking. The size helps create a nice bite, making your dish more enjoyable. Yes, you can prep this dish ahead of time. Combine the shrimp and marinade and store it in the fridge. Just keep it in an airtight container. You can make it up to 24 hours in advance. When you are ready, just assemble and bake. This saves time on busy nights! To adjust spiciness, vary the crushed red pepper flakes. You can add more for heat or reduce it for a milder taste. If you want a bit of warmth, add a pinch. You can also include fresh chili slices for a different kick. Taste the marinade and find what works for you. Absolutely! This recipe is great for meal prep. You can divide the cooked shrimp and veggies into containers. Store them in the fridge for up to three days. Reheat in the oven or microwave when ready to eat. It helps keep meals quick and easy during the week. You can use many veggies in this dish. Bell peppers, zucchini, and broccoli work well. Carrots and snap peas add color and crunch too. Just ensure they are cut into similar sizes for even cooking. Feel free to mix and match your favorites to make it your own! This blog post covered how to make a tasty sheet-pan lemon garlic shrimp dish. We discussed main ingredients like shrimp, lemon, garlic, and vegetables. You learned simple steps for preparing, baking, and serving. Tips helped you avoid overcooking shrimp and enhance flavor. Finally, we explored variations and storage options. Now you have all the tools to create a flavorful meal. Enjoy sharing this dish with friends and family!

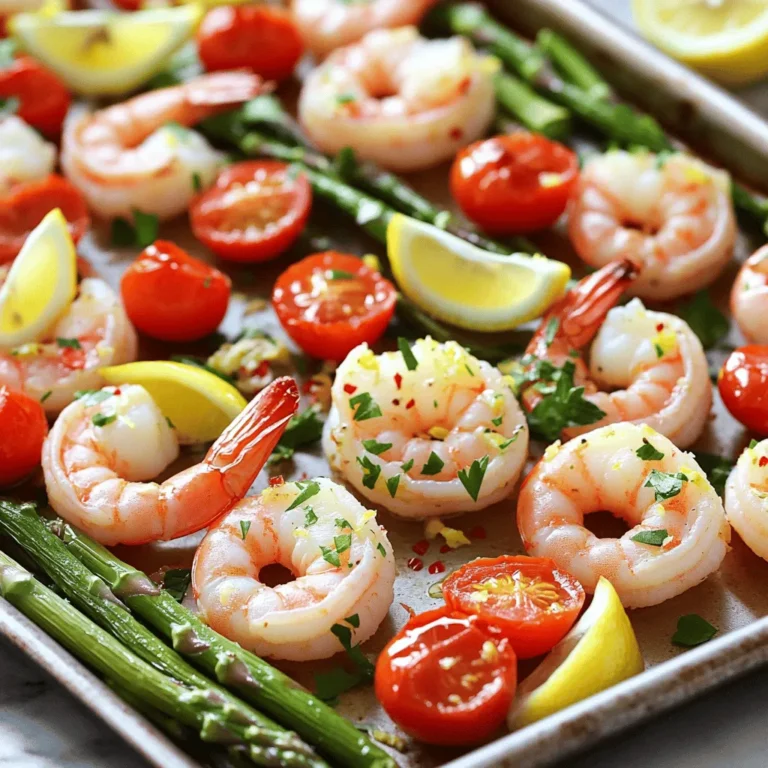
Sheet-Pan Lemon Garlic Shrimp Quick and Flavorful Dish

To make Raspberry Lemonade Cupcakes, gather these key ingredients: - 1 ½ cups all-purpose flour - 1 teaspoon baking powder - ½ teaspoon baking soda - ¼ teaspoon salt - ½ cup unsalted butter, softened - 1 cup granulated sugar - 2 large eggs - 2 teaspoons lemon zest - 1 teaspoon vanilla extract - ½ cup buttermilk - ½ cup fresh raspberries (plus extra for garnish) - 1 tablespoon lemon juice Each ingredient plays a vital role in the flavor and texture of the cupcakes. The flour provides structure, while the butter adds richness. Fresh raspberries bring a burst of flavor that pairs perfectly with lemon. Here are some handy conversions to help you out: - 1 cup = 240 ml - 1 tablespoon = 15 ml - 1 teaspoon = 5 ml These conversions help ensure you get the right measurements. Accurate measurements lead to better baking results. When picking fresh ingredients, look for these tips: - For raspberries, check for bright color and firmness. Avoid mushy ones. - Choose butter that is fresh and cold for creamy mixtures. - Select lemons that feel heavy for their size. This means they have more juice. Fresh ingredients make a big difference in taste. Always choose the best for your cupcakes. Start by gathering all your tools. You need a mixing bowl, an electric mixer, and a muffin tin. Line your 12-cup muffin tin with cupcake liners. This keeps cupcakes from sticking. Preheat your oven to 350°F (175°C). This step is key for even baking. Next, measure the dry ingredients carefully. You need 1 ½ cups of all-purpose flour, 1 teaspoon of baking powder, ½ teaspoon of baking soda, and ¼ teaspoon of salt. Mixing these dry items together helps the cupcakes rise perfectly. In a large mixing bowl, cream ½ cup of softened unsalted butter with 1 cup of granulated sugar. Use your electric mixer on medium speed. Mix for about 3-4 minutes until it looks light and fluffy. This step adds air, making your cupcakes soft. Now, add 2 large eggs, one at a time. Mix well after each egg. Then, stir in 2 teaspoons of lemon zest and 1 teaspoon of vanilla extract. These flavors give your cupcakes a bright taste. In a separate bowl, combine ½ cup of buttermilk and 1 tablespoon of lemon juice. Let it sit for a few minutes until it curdles. This will add moisture and flavor. Gradually add your dry mixture to the butter mixture. Do this while alternating with the buttermilk mix. Start and end with the flour mixture. Mix just until combined; over-mixing can make your cupcakes tough. Finally, gently fold in ½ cup of fresh raspberries. Be careful not to break them. You want those lovely raspberry pieces in your cupcakes. Now, it’s time to fill the cupcake liners. Divide the batter evenly among them, filling each about 2/3 full. This allows space for rising. Place the muffin tin in your preheated oven. Bake for 18-20 minutes. To check for doneness, insert a toothpick into the center. It should come out clean. Once baked, let the cupcakes cool in the pan for 5 minutes. Then, transfer them to a wire rack to cool completely. This helps them set and keeps the bottoms from getting soggy. After they cool, you can top them with whipped cream or lemon frosting. Add extra raspberries on top for a beautiful finish. Enjoy your delightful Raspberry Lemonade Cupcakes! When baking Raspberry Lemonade Cupcakes, avoid these common pitfalls: - Skipping the Room Temperature Ingredients: Make sure your butter and eggs are at room temperature. This helps them mix well. - Overmixing the Batter: Mix the batter just until combined. Overmixing can lead to dense cupcakes. - Not Measuring Properly: Use the correct measuring cups for dry and wet ingredients. This ensures the right texture and taste. To get light and fluffy cupcakes, follow these tips: - Cream Butter and Sugar Well: Beat the butter and sugar for 3-4 minutes. This adds air and makes your cupcakes rise. - Use Buttermilk: The acidity in buttermilk helps tenderize the batter. It gives your cupcakes a nice, moist texture. - Fold in Raspberries Gently: When adding raspberries, fold them gently. This keeps them whole and adds bursts of flavor. For perfect baking, stick to these guidelines: - Preheat Your Oven: Always preheat to 350°F (175°C) before baking. This ensures even cooking. - Check for Doneness: Bake for 18-20 minutes. Insert a toothpick in the center. It should come out clean when done. - Cool Properly: Let the cupcakes cool in the pan for 5 minutes. Then transfer them to a wire rack to cool completely. This helps them stay soft and not stick to the pan. {{image_2}} You can switch raspberries for strawberries. This change gives a new taste. Use the same amount of fresh strawberries. Chop them into small pieces. Mix them into the batter just like raspberries. You can also try blueberry lemonade or peach lemonade. Each fruit brings a fresh twist. If you need gluten-free cupcakes, replace the all-purpose flour. Use a gluten-free flour blend instead. Many brands work well for baking. Make sure it has xanthan gum for structure. Check labels to avoid gluten cross-contamination. The taste and texture will still be great! To make vegan cupcakes, swap the eggs for flax eggs. Mix 1 tablespoon of flaxseed meal with 3 tablespoons of water. Let it sit for a few minutes to thicken. Use plant-based butter instead of regular butter. For buttermilk, mix almond milk and vinegar. This keeps the cupcakes moist and flavorful. Each change keeps the delightful taste you love! After baking your Raspberry Lemonade Cupcakes, let them cool completely. Place them in an airtight container. This keeps them moist and fresh. If you have frosting on them, wait until the frosting sets. Use a layer of parchment paper to avoid sticking. Keep your cupcakes at room temperature for best flavor. If you have extra cupcakes, freezing is easy. First, let them cool. Wrap each cupcake tightly in plastic wrap. Then, put them in a freezer-safe bag or container. Label the bag with the date. Your cupcakes can stay fresh in the freezer for up to three months. To enjoy, thaw them in the fridge overnight. Frosted cupcakes last about 2-3 days at room temperature. Unfrosted cupcakes can last up to a week. Both types should stay in an airtight container. The frosting can make cupcakes soggy over time, so frost just before serving. This keeps your Raspberry Lemonade Cupcakes looking and tasting their best! Yes, you can use frozen raspberries. Just make sure to thaw them first. Drain any extra juice to avoid watery cupcakes. Frozen raspberries may break apart more, so mix them in gently. This way, you still get a nice burst of raspberry flavor in every bite. To adjust the sweetness, you can reduce the sugar. Try cutting the sugar by 1/4 cup for a less sweet treat. You can also add a pinch of salt to balance flavors. If you want more sweetness, drizzle some honey or syrup on top after baking. This gives you control over how sweet you like your cupcakes. The best way to frost these cupcakes is with lemon frosting or whipped cream. Start with a small amount of frosting on top. Use a spatula or piping bag for a pretty design. You can also add a few fresh raspberries on top for a nice look. This adds flavor and makes your cupcakes eye-catching. This blog post covered everything you need for perfect Raspberry Lemonade Cupcakes. We explored key ingredients, how to mix and bake, and even discussed tricks for a great texture. I shared tips on variations and storage too. Now, you have the tools to make your baking fun and tasty. Keep practicing, and don’t be afraid to try new flavors. Cupcakes can be simple or fancy, but they’ll always bring joy. Enjoy your baking adventure!

Raspberry Lemonade Cupcakes Delightful and Easy Recipe

- 1 lb beef stew meat - 1 medium onion, diced - 2 cloves garlic, minced - 8 oz mushrooms, sliced - 2 cups beef broth - 2 tablespoons Worcestershire sauce - 1 teaspoon Dijon mustard - 1/2 teaspoon paprika - 1 cup sour cream - 2 tablespoons all-purpose flour - 3 cups egg noodles - 2 tablespoons olive oil - Fresh parsley, chopped for garnish In this dish, the beef stew meat brings a rich, hearty flavor that makes this meal special. I love using diced onion and minced garlic for the base. They add sweetness and depth. Sliced mushrooms join in, giving that earthy touch to the sauce. For the sauce, I rely on beef broth for moisture and flavor. The Worcestershire sauce adds a nice umami kick. Dijon mustard gives it a hint of tang, and paprika adds warmth. The final touches make this meal creamy and filling. I use sour cream mixed with all-purpose flour to thicken the sauce and add richness. Egg noodles soak up the sauce perfectly, making every bite delightful. Olive oil helps sauté the veggies, while fresh parsley adds a pop of color on top. This beef stroganoff is easy to make and full of flavor. Each ingredient plays its part in creating a tasty comfort meal that everyone will love. - Sautéing onions and garlic: Start by setting your Instant Pot to sauté mode. Add 2 tablespoons of olive oil and let it heat. Toss in 1 medium diced onion and 2 minced garlic cloves. Sauté them until they smell great and the onion turns translucent. This takes about 2 to 3 minutes. - Adding mushrooms and browning the beef: Next, add 8 ounces of sliced mushrooms. Cook them for 4 to 5 minutes until they soften. Then, add 1 pound of beef stew meat cut into 1-inch pieces. Season with salt and pepper. Brown the beef for about 5 to 7 minutes, stirring often. - Adding liquids and seasonings: Now, pour in 2 cups of beef broth. Add 2 tablespoons of Worcestershire sauce, 1 teaspoon of Dijon mustard, and 1/2 teaspoon of paprika. It’s important to scrape the bottom of the pot to avoid any burns. - Pressure cooking instructions: Close the lid and set your Instant Pot to manual mode on high pressure for 20 minutes. Ensure the steam valve is in the sealing position for best results. - Mixing in sour cream and flour: When the cooking time ends, let the pressure release naturally for 10 minutes. Then, quick-release any remaining pressure. In a small bowl, mix 2 tablespoons of flour with 1 cup of sour cream until smooth. Stir this mixture into the beef stroganoff in the pot and mix well. - Cooking egg noodles in the Instant Pot: Set the Instant Pot to sauté mode again. Add 3 cups of egg noodles and stir. Cook for another 5 to 7 minutes until the noodles are tender. Check the seasoning and adjust salt and pepper to your taste before serving. To make your beef stroganoff shine, adjust the seasonings slightly. Add a bit more paprika for warmth or a dash of garlic powder for extra flavor. If you like a tangy kick, a splash of lemon juice can make a difference. For garnishes, fresh parsley adds color and brightness. You could also try a sprinkle of chives or a few mushrooms on top for flair. Sometimes, your Instant Pot might show a burn message. This usually happens if food sticks to the bottom. To avoid this, always scrape the pot after browning the beef. If you notice this error, add a bit more broth to help lift the stuck bits. To ensure your noodles cook perfectly, stir them well after adding them to the pot. This prevents clumping and helps them cook evenly. Prepare your ingredients the night before for a quick meal. Dice the onions, mince the garlic, and slice the mushrooms in advance. Store them in the fridge. You can also measure out the broth and seasonings ahead of time. For meal prep, consider doubling the recipe. You can freeze half for a busy day. Enjoy the comfort of beef stroganoff anytime with these easy tips! {{image_2}} You can easily switch meats in this recipe. Using chicken or turkey is great. Both options cook well in the Instant Pot and stay juicy. Just cut pieces similar in size to the beef. For a vegetarian or vegan option, use mushrooms and lentils. They add great texture and flavor. You can also use plant-based meat substitutes. This way, you keep the dish hearty and satisfying. Feel free to play with the sauce by adding different herbs or spices. Try thyme, rosemary, or even a bit of cayenne for heat. Each herb will change the flavor profile and keep things exciting. If you want a creamy sauce without sour cream, use coconut cream or cashew cream. Blend soaked cashews with water for a rich texture. This keeps the dish creamy and is perfect for those who avoid dairy. Pair beef stroganoff with crusty bread. It’s perfect for dipping in the sauce. You can also serve it with a fresh salad. The crispness of the greens balances the richness of the stroganoff. For leftovers, get creative! Try using it as a filling for stuffed peppers or a topping for baked potatoes. You can also make beef stroganoff sandwiches. Just layer it between two slices of bread for a quick meal. You can store leftover beef stroganoff in the fridge for up to three days. Place it in an airtight container to keep it fresh. When you are ready to eat, reheat it on the stove over low heat. Stir it often and add a splash of beef broth if it seems dry. You can also use the microwave. Heat in short bursts, stirring in between, until hot. To freeze beef stroganoff, let it cool completely first. Then, scoop it into freezer-safe containers. Leave some space at the top, as it will expand when frozen. You can freeze it for up to three months. When you want to enjoy it again, thaw it overnight in the fridge. Reheat it on the stove or in the microwave, adding a bit of broth or water if needed. This keeps the sauce smooth and creamy. Cooking beef stroganoff in the Instant Pot takes about 50 minutes total. Here’s a quick breakdown: - Prep Time: 15 minutes - Sauté Time: 10-12 minutes - Pressure Cooking Time: 20 minutes - Natural Release: 10 minutes - Quick Release: 5-7 minutes Once you start, the Instant Pot speeds up the cooking. You'll get tender beef and rich flavors in less time than traditional methods. Yes, you can use other meats for beef stroganoff. Here are some alternatives and their cooking times: - Chicken: Use boneless chicken thighs or breasts. Cook for 10 minutes under high pressure. - Pork: Pork tenderloin works well too. Cook for 15 minutes under high pressure. - Mushrooms: For a vegetarian option, use extra mushrooms. Cook for 5 minutes under high pressure. These options give you variety while still keeping the dish delicious. Beef stroganoff pairs well with several sides. Here are some popular choices: - Egg Noodles: The classic pairing! They soak up the sauce nicely. - Rice: White or brown rice complements the dish well. - Crusty Bread: Great for dipping into the creamy sauce. - Steamed Vegetables: Broccoli or green beans add color and freshness. These sides enhance the meal and make it more filling. You can mix and match based on your family’s favorites! Beef stroganoff is a hearty dish made with tender beef, savory seasonings, and creamy sauce. You learned how to prepare the ingredients, cook in an Instant Pot, and add final touches. Don’t forget the tips for perfecting flavors and avoiding common issues. You can even try flavorful variations like chicken or vegetarian options. Store leftovers properly for later enjoyment. With these steps, you'll create a meal everyone loves. Enjoy your cooking adventure and the tasty results!

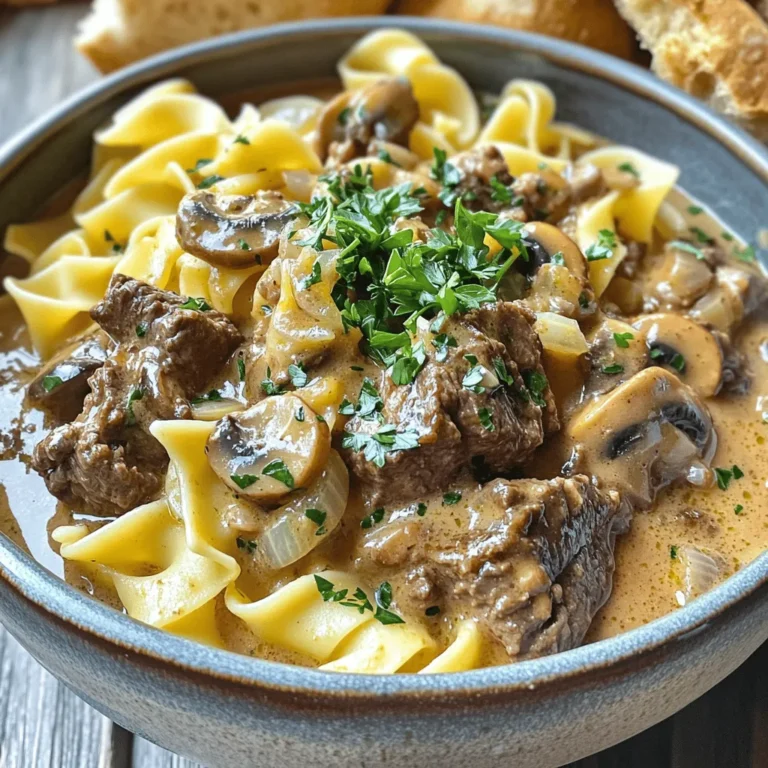
Instant Pot Beef Stroganoff Tasty Comfort Meal

- 8 oz cream cheese, softened - 1/2 cup powdered sugar - 1 tsp vanilla extract - 1/2 cup sour cream - 1 cup caramel sauce (store-bought or homemade) - 1 large apple (Granny Smith or Honeycrisp), diced - 1/2 teaspoon cinnamon - 1/4 cup chopped nuts (walnuts or pecans optional) - Graham crackers and apple slices for dipping To make the best Caramel Apple Cheesecake Dip, gather your ingredients first. Start with 8 ounces of cream cheese. This gives the dip its creamy base. Next, you need 1/2 cup of powdered sugar. This sweetens the dip just right. Add 1 teaspoon of vanilla extract for flavor. Then, use 1/2 cup of sour cream for added creaminess. Now, let's add the fun part: caramel! You will need 1 cup of caramel sauce. You can use store-bought or make your own if you prefer. Choose a large apple, like Granny Smith or Honeycrisp, and dice it. This adds a nice crunch. Don’t forget 1/2 teaspoon of cinnamon for a warm spice note. If you like nuts, 1/4 cup of chopped walnuts or pecans works great too. Finally, grab some graham crackers and apple slices for dipping. With these ingredients, you’ll create a rich, sweet dip that everyone will love. The mix of caramel, apples, and cream cheese makes for a delightful treat. To start, you need to beat the cream cheese until it is smooth. Take your softened cream cheese and place it in a medium mixing bowl. Using a hand mixer, mix it on low speed. Gradually increase the speed until it becomes fluffy and creamy. This step is key for a nice dip texture. Next, add the powdered sugar slowly. Mix well until it is fully combined. This will add sweetness to your dip. Now, add the vanilla extract and sour cream. Continue to mix until everything is creamy. This creates a rich base for your dip. Now, let’s add flavor! Pour in half a cup of caramel sauce. Save some for drizzling later. Gently stir to combine it with your cream mixture. Then, fold in the diced apples. This adds a fresh crunch. Be careful not to break the apple pieces; you want them intact. If you like, fold in the chopped nuts for more texture. Walnuts or pecans work well here. Once combined, transfer the dip to a serving bowl. Drizzle the rest of the caramel sauce on top. You can also sprinkle more cinnamon and nuts for extra flair. This dip shines when served with graham crackers and fresh apple slices. The sweet dip pairs perfectly with the crunchy crackers. You can arrange the crackers and apple slices around the dip for a beautiful spread. This makes it easy for guests to dive in. Enjoy your tasty treat at your next gathering! When making caramel apple cheesecake dip, the right apple makes a big difference. I recommend using Granny Smith or Honeycrisp apples. These apples have the right balance of tartness and sweetness. The tartness cuts through the rich dip. For extra flavor, add spices like cinnamon or nutmeg. A little sprinkle enhances the taste and gives warmth to each bite. If you have leftover dip, store it in an airtight container. Keep it in the fridge for up to three days. To use leftovers, try spreading the dip on toast or filling crepes. You can even swirl it into yogurt for a quick snack. This way, you won’t waste any tasty dip! You can prepare the dip a day in advance. Mix the cream cheese and other ingredients, but keep the apples out until serving. This keeps them fresh and crunchy. Store the dip in the fridge. Just before serving, fold in the apples and drizzle with caramel. It’s a nice time-saver for parties! {{image_2}} You can make this dip even more fun with simple flavor add-ins. Try adding chocolate for a sweet twist. Melt some chocolate and mix it in. You can also use chocolate chips for a quick touch. Peanut butter is another great option. Just stir in a few spoonfuls for a rich, nutty flavor. If you want to add more fruit, diced strawberries or pears work well too. They bring a fresh taste to the dip. If you need gluten-free options, use gluten-free graham crackers for dipping. You can also make this dip vegan. Swap the cream cheese for a vegan cream cheese. Use coconut cream or cashew cream for a rich taste. For those avoiding nuts, just leave out the chopped nuts. The dip still tastes great without them. How you serve the dip can make it even more special. Use a cute bowl or a small cast-iron skillet for a rustic look. You can also create a fun platter with sliced apples and graham crackers around the dip. For a party, use themed garnishes. Add Halloween sprinkles for a spooky vibe or fresh mint leaves for a spring touch. The way you present the dip can impress your guests and make the snack even more exciting. To keep your Caramel Apple Cheesecake Dip fresh, store it in an airtight container. It will last about 3 to 5 days in the fridge. Make sure to keep it covered to avoid it drying out. If you want to freeze it, you can do that too. Just use a freezer-safe container. It can stay good for up to 2 months in the freezer. When you want to eat it again, let it thaw in the fridge overnight. You might want to reheat the dip if it has been in the fridge. The best way to do this is in the microwave. Heat it in short bursts of 15 to 20 seconds. Stir it after each burst. This helps it heat evenly. Be careful not to overheat. If it gets too hot, the dip can become runny. The texture should stay creamy and smooth. If you freeze it, let it thaw first, then follow the same reheating tips. Yes, you can prepare this dip ahead of time. Mix the dip and store it in the fridge. It stays fresh for up to two days. Just keep it in an airtight container. Before serving, give it a quick stir. Drizzle some caramel sauce on top for extra flavor. If you need a cream cheese alternative, try using Greek yogurt or ricotta cheese. These options are lighter but still creamy. For a vegan choice, use cashew cream or coconut cream. Each option gives a different taste, so pick what you like best. Once made, the dip lasts about three days in the fridge. Store it in an airtight container. If you see any change in color or smell, it’s best to toss it. For the best taste, enjoy it within the first two days. In this blog, we explored how to make a tasty Caramel Apple Cheesecake Dip. You learned about the key ingredients like cream cheese and apples. I shared step-by-step instructions, tips on choosing apples, and how to store leftovers. Remember, you can add your favorite flavors too! This dip is perfect for gatherings and simple to make ahead. With these insights, you can impress your friends and family with a delightful treat. Enjoy crafting your dip and experimenting with new ideas!

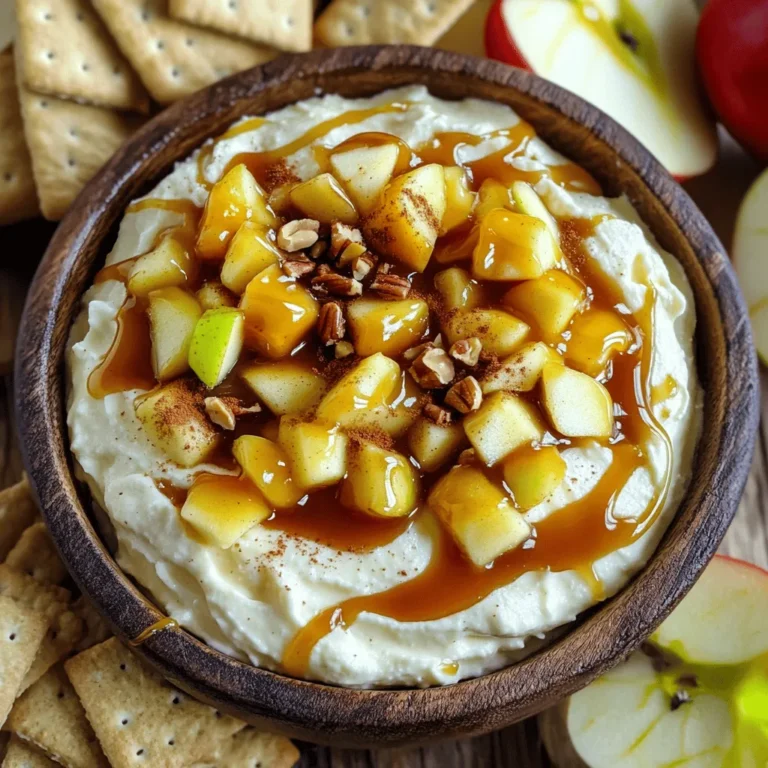
Caramel Apple Cheesecake Dip Delightful Party Snack

1 2 … 7 NEXT
secrets pice kitchen

explore

DessertsDinnerAppetizersDrinks

Our Policies

  • Cookie Policy
  • Copyright Policy
  • Disclaimer
  • GDPR Policy
  • Terms Of Use
Back to Top
  • About
  • Contact Us
  • Privacy Policy
© 2025 secrets pice kitchen