FREE DINNER EBOOK! Get your copy!
  • Cookie Policy
  • GDPR Policy
  • Disclaimer
  • Terms Of Use
  • Visit my other site: Fun Cookie Recipes
secrets pice kitchen
  • Home
  • Dinner
  • Desserts
  • Drinks
  • Appetizers
  • Contact
  • About
  • Privacy Policy
  • Home
  • Dinner
  • Desserts
  • Drinks
  • Appetizers
  • Contact
  • About
  • Privacy Policy
  • Cookie Policy
  • GDPR Policy
  • Disclaimer
  • Terms Of Use
Visit my other site: Fun Cookie Recipes

HOME / CATEGORIES /

Latest

- 2 cups pasta (fusilli or penne) - 1 cup sun-dried tomatoes (packed in oil) - 1 cup fresh basil leaves - 1/4 cup pine nuts or walnuts - 1/2 cup grated Parmesan cheese - 1/4 cup olive oil - Crushed red pepper flakes - Additional Parmesan and fresh basil for garnishing To make Sun-Dried Tomato Pesto Pasta, you need simple yet tasty ingredients. First, choose your pasta. Fusilli or penne works best. These shapes hold the sauce well. Next, grab sun-dried tomatoes. They add a rich, tangy flavor. Fresh basil gives a nice, herby taste. Pine nuts or walnuts add crunch and depth. Grated Parmesan cheese makes everything creamy and savory. Olive oil helps blend the pesto and adds richness. You can add crushed red pepper for a spicy kick. Finally, use more Parmesan and basil for a beautiful garnish. These ingredients come together to make a quick and delicious meal that is perfect for any day of the week. Start by boiling salted water in a large pot. The salt adds flavor to the pasta. Once the water boils, add 2 cups of fusilli or penne pasta. Cook the pasta according to the package instructions until it is al dente. This means it should be firm to the bite, not mushy. After cooking, drain the pasta but save about 1/2 cup of the pasta water for later. In a food processor, combine the main ingredients for the pesto. You will need 1 cup of sun-dried tomatoes, 1 cup of fresh basil leaves, 1/4 cup of pine nuts or walnuts, 1/2 cup of grated Parmesan cheese, and 2 cloves of minced garlic. Pulse the mixture until it is coarsely blended. Next, drizzle in 1/4 cup of olive oil while the food processor runs. This makes the pesto creamy. If your pesto is too thick, add the reserved pasta water a tablespoon at a time. Mix until you reach your desired consistency. Season with salt and pepper to taste. If you like some heat, add crushed red pepper flakes. In the pot you used for the pasta, add the cooked pasta. Pour the sun-dried tomato pesto over the pasta. Toss everything together until the pasta is fully coated in the pesto. To serve, transfer the pasta to plates. You can garnish it with more grated Parmesan and fresh basil leaves for an extra touch. Enjoy your quick and tasty meal! How to determine pasta doneness To check if your pasta is done, taste a piece. You want it to be firm but not hard. This is called al dente, meaning "to the tooth." If it feels soft, it might be overcooked. Importance of reserving pasta water Before draining your pasta, save some of the cooking water. This water is starchy and helps the pesto stick to the pasta. It also makes the sauce creamier. Just scoop out about half a cup before you drain. Storing pesto in the refrigerator If you have leftover pesto, store it in a clean jar. Make sure to cover the top with a thin layer of olive oil. This keeps it fresh and prevents browning. It will last about a week in the fridge. Freezing leftover pesto For longer storage, freeze your pesto. You can use ice cube trays for easy portions. Once frozen, transfer the cubes to a freezer bag. It stays good for up to six months. Just thaw it when you’re ready to use it! {{image_2}} You can switch nuts in the pesto. Pine nuts are great, but walnuts work well too. They add a different flavor that many enjoy. Try cashews for a creamier texture. You can also change the cheese. Parmesan is classic, but feta adds a tangy twist. Goat cheese makes it rich and smooth. For a nutty taste, use pecorino. To make a vegan version of Sun-Dried Tomato Pesto Pasta, skip the cheese. You can replace it with nutritional yeast. This gives a cheesy taste without dairy. If you need gluten-free options, use gluten-free pasta. Many brands have great textures. Rice or chickpea pasta can be fun choices. They hold the sauce well, making every bite tasty. To keep your Sun-Dried Tomato Pesto Pasta fresh, store it in an airtight container. This helps the pasta stay moist and tasty. Place it in the refrigerator right after it cools. It is best to eat it within three days. After that, the flavor may change. If you want to keep it longer, consider freezing it. The pasta can last up to three months in the freezer. Just remember to thaw it in the fridge before reheating. You can reheat your pasta in two ways: the microwave or the stovetop. If you choose the microwave, place the pasta in a bowl. Add a splash of water to keep it moist. Cover it with a lid or plastic wrap and heat for about one to two minutes. Check to see if it is warm enough. For stovetop reheating, put the pasta in a pan over low heat. Add a little olive oil or water to help with sticking. Stir it gently until warmed through. This method helps to keep the pasta's texture and flavor. Remember, don’t overheat it, or the pasta may become mushy. Enjoy your tasty meal! To make Sun-Dried Tomato Pesto, gather these ingredients: - 1 cup sun-dried tomatoes (packed in oil) - 1 cup fresh basil leaves - 1/4 cup pine nuts (or walnuts) - 1/2 cup grated Parmesan cheese - 2 cloves garlic, minced - 1/4 cup olive oil - Salt and pepper to taste First, combine the sun-dried tomatoes, basil, nuts, cheese, and garlic in a food processor. Pulse them until they blend well but remain coarse. Next, slowly add the olive oil while the processor runs. If the pesto is thick, add a bit of reserved pasta water until it is creamy. Season with salt and pepper, adjusting to your taste. Yes, you can use fresh tomatoes, but the flavor will change. Fresh tomatoes have more water and a milder taste. You should roast or dry them first for a richer flavor. For this recipe, sun-dried tomatoes work best. They give a strong, sweet taste that fresh tomatoes lack. Sun-Dried Tomato Pesto Pasta pairs well with many dishes. Here are a few ideas: - Grilled chicken or fish for added protein - A fresh green salad to balance the flavors - Garlic bread for a crunchy side - Roasted vegetables for extra nutrition These options will create a delicious meal that is satisfying and fun! This blog post covered making Sun-Dried Tomato Pesto Pasta. We discussed the key ingredients, steps for cooking pasta, and making pesto. You learned tips for storage and variations to fit your needs. Consider trying different nuts or cheeses to mix things up. I encourage you to make this dish your own. Enjoy the rich taste and simple process! Your kitchen will shine with flavors.

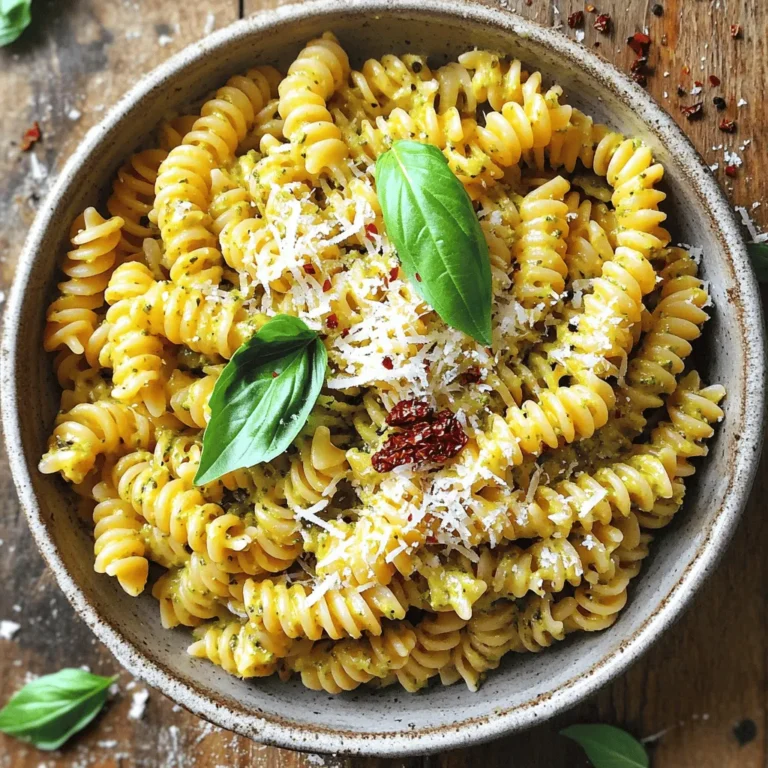
Sun-Dried Tomato Pesto Pasta Quick and Tasty Meal

- 6 large eggs - 1 ripe avocado, halved and pitted - 2 tablespoons plain Greek yogurt - 1 tablespoon lime juice - 1 teaspoon Dijon mustard - 1/2 teaspoon garlic powder - Salt and pepper to taste - 1/4 teaspoon cayenne pepper (optional) - Fresh cilantro, for garnish - Cherry tomatoes, halved, for serving To make avocado deviled eggs, you need several key ingredients. The main star is the avocado, which adds creaminess and flavor. You’ll also use Greek yogurt to make the filling rich and smooth. Lime juice brings a fresh kick, while Dijon mustard adds a nice zing. Garlic powder gives depth to the taste. You can adjust the seasoning with salt and pepper. If you like heat, cayenne pepper can give your eggs a spicy twist. The fresh cilantro adds a pop of color and flavor on top. Finally, halved cherry tomatoes serve as a tasty side. Gather these ingredients, and you’re ready to create a fun and tasty dish. To start, place the eggs in a pot. Cover them with cold water. Bring the water to a boil over medium heat. Once it boils, cover the pot and take it off the heat. Let the eggs sit for 10-12 minutes. After the timer goes off, move the eggs to an ice bath. You can also place them under cold running water. Let them cool for about 5 minutes. Once cool, gently peel the eggs under running water. This helps remove the shells easily. Next, slice each egg in half lengthwise. Carefully remove the yolks and place them in a mixing bowl. Set the egg whites aside on a serving platter. Now, add the avocado, Greek yogurt, lime juice, Dijon mustard, garlic powder, salt, pepper, and cayenne pepper to the bowl with the yolks. Use a fork to mash everything together. Mix until it is smooth and creamy. Take a spoon or a piping bag to fill each egg white half with the avocado mixture. Be generous with the filling! Finally, sprinkle fresh cilantro on top of the filled eggs for a pop of color. Serve them alongside halved cherry tomatoes for a fresh bite. Enjoy your tasty avocado deviled eggs! To hard-boil eggs, start with cold water. Place the eggs in a pot and cover them with water. Bring the water to a boil over medium heat. Once it boils, cover the pot and remove it from heat. Let it sit for 10-12 minutes. This method gives you firm whites and creamy yolks. To avoid lumps, use a ripe avocado. A ripe avocado mashes easily. Add the yolks to a bowl first. Then mix in the Greek yogurt and lime juice. Use a fork to mash everything together until smooth. If it seems too thick, add a bit more yogurt. This will help create a creamy filling. Presentation matters! For a pop of color, sprinkle fresh cilantro on top. You can also add a slice of cherry tomato next to each egg. This adds color and freshness. For extra flair, try a dash of cayenne pepper on top. These little touches make your dish look gourmet. {{image_2}} To add a kick to your avocado deviled eggs, try adding jalapeños. Chop fresh jalapeños finely and mix them into the filling. Start with just a little. You can always add more if you like it spicier. The heat from the jalapeños pairs well with the creamy avocado. This makes each bite exciting and flavorful. For a fresh twist, use basil pesto in your filling. Just swap out some Greek yogurt for a spoonful of pesto. This will add a rich, herby flavor. The pesto brings a pop of color too. It's a simple way to change the taste and impress your guests. You can even top the eggs with pine nuts for extra crunch. If you want a vegan version, replace Greek yogurt with plant-based yogurt. Look for options made from almond, coconut, or soy. These give a creamy texture without dairy. Add a splash of lemon juice for brightness. This way, you can enjoy tasty deviled eggs without animal products. To keep your avocado deviled eggs fresh, place them in a sealed container. Make sure the lid closes tightly. Store them in the fridge right after serving. This helps keep them cool and safe to eat later. Prepared avocado deviled eggs last about two days in the fridge. If you keep them in a sealed container, they will stay fresh longer. Always check them for any signs of spoilage before eating. To stop the avocado from turning brown, add lime juice to the filling. The acid in lime juice slows down browning. You can also cover the filling with plastic wrap. Press the wrap right onto the filling. This keeps air away and helps it stay fresh. Yes, you can make avocado deviled eggs ahead of time. To keep them fresh, prepare the filling and store it separately from the egg whites. This way, the avocado won't brown. You can fill the eggs just before serving. If you want to prep even earlier, hard-boil the eggs a day before. Then, cool and peel them. If you don't have Greek yogurt, you can use sour cream or plain yogurt. You can also try mashed silken tofu for a dairy-free option. This keeps the creamy texture while offering different flavors. Each option will give a unique taste to the filling. To boost flavor, try adding spices like smoked paprika or cayenne pepper. Fresh herbs like dill, chives, or cilantro also work well. You can even mix in some lime zest for extra brightness. Experiment with flavors to find your perfect combination! Avocado deviled eggs are a tasty treat you can make easily. We covered the ingredients, like eggs and avocado, and discussed how to cook and fill them. I shared tips for perfecting the eggs and ideas for variations. Remember, you can store any leftovers properly to keep them fresh. Whether you enjoy the classic or a spicy twist, these deviled eggs make a delicious snack. Try them out and impress your friends with your new skills!

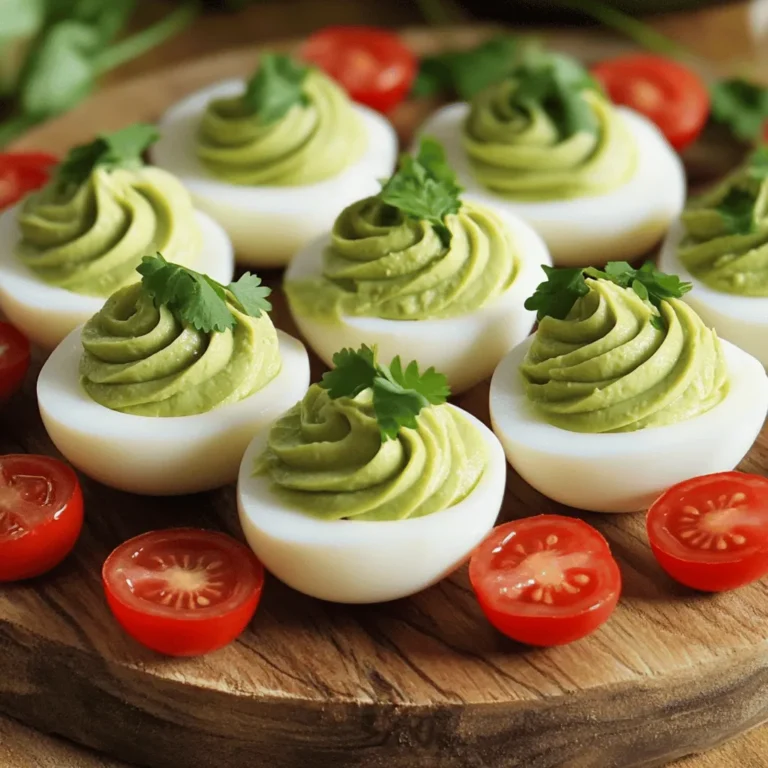
Avocado Deviled Eggs Simple and Tasty Recipe

- 1 cup frozen strawberries - 1 cup frozen blueberries - 1 cup frozen raspberries - 1 banana, sliced - 1 cup almond milk (or any milk of choice) - 2 tablespoons chia seeds - 1 tablespoon honey or maple syrup (optional) - Fresh berries and granola for topping - Mint leaves for garnish (optional) - Health benefits of strawberries: Strawberries are rich in vitamin C. They help boost your immune system. Their antioxidants fight free radicals, keeping your body healthy. - Advantages of blueberries: Blueberries are low in calories and high in fiber. They improve heart health and brain function. Eating them can lower the risk of heart disease. - Nutritional value of raspberries: Raspberries are full of vitamins and minerals. They are high in fiber, which aids digestion. Their antioxidants also support your skin and overall well-being. Using these ingredients, you create a smoothie bowl that is both tasty and good for you. Blending the Ingredients First, gather your frozen strawberries, blueberries, raspberries, banana, almond milk, and chia seeds. Add these to your blender. If you like, include honey or maple syrup for extra sweetness. Blend on high speed until everything is smooth and creamy. Achieving the Right Consistency Sometimes, the mix can be too thick. If that happens, simply add a little more almond milk. Blend again until you reach the perfect creamy texture. The goal is to have a thick smoothie that you can scoop with a spoon. Serving the Smoothie Bowl Once blended, it's time to serve. Spoon the smoothie into a bowl. Now comes the fun part—topping it! Add fresh berries, granola, and mint leaves for a nice look. If you want, drizzle some honey or maple syrup on top for added sweetness. High-quality images or video links for each step I recommend checking out video tutorials online. They show blending techniques and presentation tips that can help you get it right. Common mistakes to avoid - Don’t overload the blender. This can lead to uneven blending. - Use frozen fruits for a thick texture. Fresh fruits can make it too thin. - Avoid adding too much sweetener. Taste as you go to find your perfect level. To create a great smoothie bowl, blend your ingredients just right. Start with the frozen fruits. I use strawberries, blueberries, and raspberries. They add a nice, sweet taste. Add the banana slices for more flavor. When blending, keep it on high speed. This makes the smoothie creamy. If it feels too thick, pour in a little more almond milk. This helps achieve the right texture. Choosing the right milk is key. I recommend almond milk for a nutty flavor. You can also use coconut milk for a tropical twist. If you prefer dairy, whole milk works well too. Pick a milk that fits your taste! Balancing sweetness is important for the best smoothie bowl. Start with the natural sweetness from fruits. You can add honey or maple syrup if you want more. Just a little will do. Taste as you go to find the right mix. For creaminess, chia seeds are a great addition. They thicken the mixture and add healthy fats. Blend them in with your fruits. This gives your smoothie bowl an extra smooth texture. You can also add a spoonful of yogurt for creaminess. This adds a tangy flavor too. Enjoy experimenting to find your favorite blend! {{image_2}} You can easily change up your triple berry smoothie bowl. Use seasonal fruits for a fresh twist. Try mango, peaches, or even kiwi. Each fruit adds its own flavor. For toppings, get creative! You can add nuts like almonds or walnuts. Seeds like pumpkin or sunflower work well too. They add crunch and nutrition. You can also sprinkle on some coconut flakes or granola for extra texture. If you want a dairy-free option, use almond milk or coconut milk. Both give a creamy texture. You can also try oat milk or soy milk. Each milk adds a unique taste. For vegan adaptations, skip the honey and use maple syrup. This keeps it sweet without dairy. You can also use agave syrup as a sweetener. These small changes make your smoothie bowl fit any diet. After making your smoothie bowl, you may have some left over. If so, store it in the fridge. Use an airtight container to keep it fresh. The smoothie will stay good for up to 24 hours. When ready to eat, just stir it well. If it seems too thick, add a splash of milk. For longer storage, consider freezing the leftover smoothie. Pour the smoothie into ice cube trays or freezer bags. This way, you can keep it for up to three months. To enjoy, just blend the frozen cubes with a bit of milk. You will have a quick and tasty treat! If you have extra smoothie base, don't waste it! You can use it in other recipes. Pour it over oatmeal for a fruity breakfast. Blend it with yogurt for a creamy dessert. You can even add it to pancake batter for a berry twist. The options are endless! Get creative and enjoy your leftovers in new ways. Can I use fresh berries instead of frozen? Yes, you can use fresh berries! Using fresh berries makes the smoothie bowl lighter. However, frozen berries add a nice chill and creaminess. If you use fresh berries, consider adding some ice to keep it cold. How can I make this smoothie bowl more filling? To make the smoothie bowl more filling, add more banana or some oats. You could also mix in a scoop of protein powder. These additions give you energy and keep you full longer. Is it possible to prep this smoothie bowl ahead of time? Yes, you can prep this smoothie bowl ahead! Blend the ingredients and store them in the fridge. Just remember to add toppings right before serving. This keeps them fresh and crunchy. What are the best toppings for a smoothie bowl? Great toppings include fresh berries, granola, nuts, and seeds. You can also add nut butter or coconut flakes. These toppings add flavor, texture, and nutrients. How to adjust the recipe for more servings? To serve more people, simply double or triple the recipe. Just make sure your blender can handle the larger amount. You can blend in batches if needed. You now know how to make a tasty triple berry smoothie bowl. We explored the best ingredients and their health benefits. I provided step-by-step instructions, tips for perfecting your bowl, and ideas for variations. Feel free to customize your recipe with seasonal fruits and toppings. Remember, leftovers can be stored easily and reused in other meals. A smoothie bowl can fit into many diets, from dairy-free to vegan. Enjoy creating your unique blend and share it with friends!

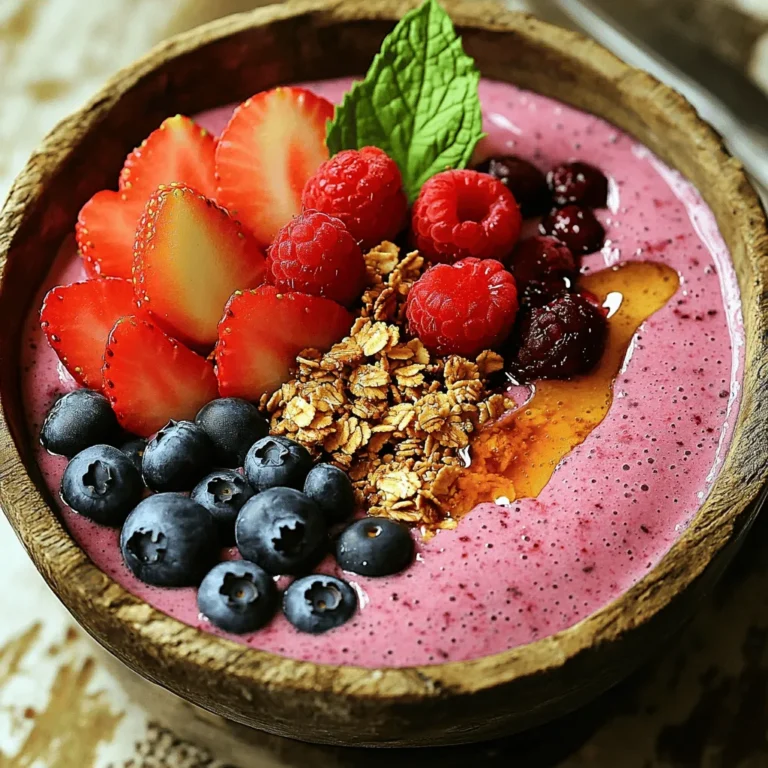
Triple Berry Smoothie Bowl Healthy and Delicious Treat

- 1 pound ground beef or ground turkey - 1/2 cup breadcrumbs (preferably panko for extra crunch) - 1/4 cup grated Parmesan cheese - 1 egg To make honey garlic meatballs, you need a solid base. You can choose either ground beef or ground turkey. Both options provide great flavor. Breadcrumbs help hold the meatballs together. I recommend using panko for a nice crunch. Adding grated Parmesan cheese gives that savory touch. Don't forget the egg; it binds everything. - 2 cloves garlic, minced - 1 tablespoon fresh ginger, minced - 1 teaspoon salt - 1/2 teaspoon black pepper - 1/2 teaspoon onion powder Flavor is key in these meatballs. Garlic and ginger add a warm, aromatic punch. Salt and black pepper balance the taste. Onion powder adds a hint of sweetness. Together, these ingredients create a mouthwatering profile. - 1/4 cup honey - 1/4 cup soy sauce (or tamari for gluten-free) - 1 tablespoon rice vinegar - 1 tablespoon sesame oil The sauce makes these meatballs special. Honey brings sweetness that pairs well with savory. Soy sauce adds umami and depth. Rice vinegar gives a tangy kick, while sesame oil adds richness. Together, they form a glaze that coats each meatball perfectly. - Preheat the oven: Start by preheating your oven to 400°F (200°C). This helps to cook the meatballs evenly. - Prepare the baking sheet: Line a baking sheet with parchment paper. This makes for easy cleanup and prevents sticking. - Mix meatball ingredients: In a large bowl, combine the ground beef or turkey, breadcrumbs, Parmesan cheese, egg, minced garlic, minced ginger, salt, black pepper, and onion powder. Mix everything well until it is all combined. - Forming meatballs: Use your hands to shape the mixture into small meatballs, about 1 inch in diameter. Place them on the baking sheet, giving them space. - Baking instructions: Bake the meatballs in your preheated oven for 15-20 minutes. They should be cooked through and browned on the outside. - Preparing honey garlic sauce: While the meatballs bake, make the sauce. In a small saucepan, mix honey, soy sauce, rice vinegar, and sesame oil. Heat over medium heat until it simmers. Stir occasionally and let it simmer for about 5 minutes until it thickens slightly. - Coating meatballs in sauce: Once the meatballs are done baking, take them out of the oven. Transfer them to the saucepan with the honey garlic sauce. Gently toss the meatballs to coat them in the sauce. - Serving suggestions: Plate your honey garlic meatballs on a platter. Drizzle any extra sauce over them. Garnish with sliced green onion and a sprinkle of sesame seeds for a beautiful finish. - Achieving the perfect texture: Use panko breadcrumbs. They add crunch and keep meatballs soft inside. Mix just enough, so they hold together but stay tender. Don’t overmix; that makes them tough. - Importance of seasoning: Seasoning is key. Salt and pepper enhance flavors. Add garlic and ginger for a punch. Taste the meat mixture before forming meatballs. Adjust spices as needed. - Adjusting sweetness and saltiness: Honey gives sweetness. Soy sauce adds salt. Start with equal parts honey and soy sauce. Taste as you stir. You can add more honey for sweet or more soy for salty. - Thickening the sauce: To thicken the sauce, let it simmer. This reduces it and enhances flavor. For a quicker fix, mix a little cornstarch with water. Stir it in and cook until thick. - Preventing dryness: To avoid dry meatballs, don’t cook them too long. Bake just until brown and firm. Adding cheese and egg helps keep them moist, too. - Ensuring even cooking: Make all meatballs the same size. This helps them cook evenly. Space them apart on the baking sheet, so they don’t steam each other. {{image_2}} You can change the meat in this recipe. Try using ground chicken or turkey instead of beef. This swap makes the meatballs lighter. For a plant-based option, choose lentils or chickpeas. They work well too! If you're avoiding gluten, use gluten-free breadcrumbs. You can also pick tamari instead of soy sauce. Both swaps keep the flavor strong while making the dish safe for those with gluten issues. Want to spice things up? Add some red pepper flakes or paprika to the meat mixture. Fresh herbs like basil or cilantro can also boost flavor. Experiment with these to find your perfect taste. You can also try different sauces. Instead of honey garlic, use teriyaki or barbecue sauce. Each sauce adds a new twist to the meatballs. How you serve these meatballs can change the meal. You can place them in a bowl with rice or noodles. This creates a cozy dish perfect for winter nights. Alternatively, serve them on skewers for a fun party snack. These meatballs are great for gatherings. They are easy to pick up and enjoy while mingling. After making honey garlic meatballs, store leftovers in the fridge. Place them in an airtight container. This keeps them fresh and tasty. Your meatballs will last about 3 to 4 days in the fridge. If you want to enjoy them later, make sure to cool them before storing. To freeze honey garlic meatballs, let them cool completely. Arrange them in a single layer on a baking sheet. Freeze for about 1 to 2 hours. Once frozen, transfer them to a freezer bag. Be sure to label the bag with the date. They can stay in the freezer for up to 3 months. When you want to eat them, thaw in the fridge overnight. Reheat in the oven at 350°F (175°C) for about 15 minutes. You can also microwave them for a quick meal. If you have busy weeknights, prep honey garlic meatballs ahead of time. You can mix and form the meatballs a day or two before. Just store them in the fridge until you're ready to cook. You can use these meatballs in many recipes. Serve them with rice, noodles, or in a salad. They are great for sandwiches or wraps too. Enjoy the versatility of honey garlic meatballs! Honey garlic meatballs last about 3 to 4 days in the fridge. Store them in an airtight container. Make sure they cool down first before sealing. This helps keep them fresh and tasty. Yes, you can put meatballs in the slow cooker. After baking them, place the meatballs in the slow cooker. Pour the honey garlic sauce over them. Cook on low for about 4 hours. This will keep them warm and flavorful. You have many options to serve with honey garlic meatballs. Try them with: - Steamed rice - Noodles - Vegetables - A fresh salad These sides complement the sweet and savory taste of the meatballs. You can make meatballs without breadcrumbs easily. Use cooked quinoa or oats as a binder. They work well and add a nice texture. You can also mash up some cooked beans or use grated vegetables. These options keep your meatballs moist and flavorful. Honey garlic meatballs are simple and fun to make. We covered the key ingredients like ground meat, seasonings, and sauce. You also learned the step-by-step process for perfecting their taste and texture. Remember to experiment with variations and storage tips for easy meal prep. Incorporate your favorite flavors and enjoy these meatballs in many ways. With these insights, cooking can be easy and enjoyable. Get creative and make this recipe your own!

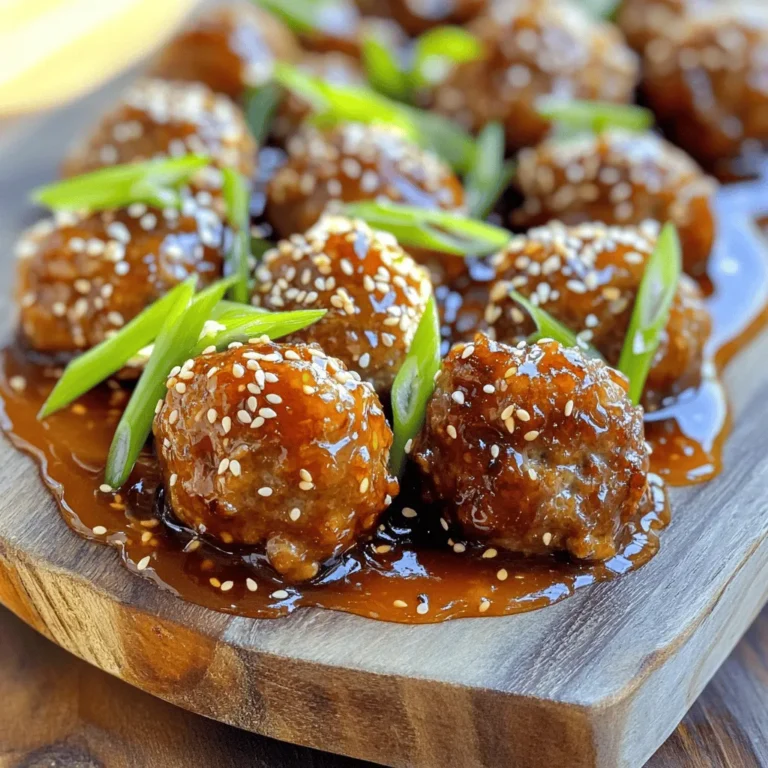
Honey Garlic Meatballs Simple and Flavorful Recipe

- 2 cups gluten-free oats - 1 cup almond flour - 1/2 cup coconut sugar - 1/2 teaspoon baking powder - 1/4 teaspoon salt - 1/2 cup coconut oil, melted - 2 cups fresh blueberries - 1 tablespoon lemon juice - 2 tablespoons honey or maple syrup - 1 teaspoon vanilla extract - 1/2 teaspoon cinnamon Gathering the right ingredients is key for these gluten-free blueberry crumble bars. First, you need gluten-free oats. They give the bars a hearty base. Almond flour adds a nice texture and flavor. Coconut sugar serves as a natural sweetener. It keeps the bars moist and rich. Baking powder helps the bars rise a bit. Salt enhances all the flavors. The melted coconut oil is important. It makes the crust crumbly and tasty. Fresh blueberries are the star of the show. Their sweetness bursts in every bite. Lemon juice brightens the blueberry flavor. Honey or maple syrup adds more sweetness. A splash of vanilla extract gives a warm aroma. Finally, cinnamon adds a comforting spice. With these ingredients, your bars will be delicious and satisfying. - 8x8-inch baking pan - Mixing bowls - Parchment paper - Measuring cups and spoons You will need a few tools to make this recipe easy. An 8x8-inch baking pan works perfectly for this dish. It helps shape the bars just right. Mixing bowls will hold your ingredients. Parchment paper is a must to line the pan. It keeps the bars from sticking. Measuring cups and spoons ensure you get the right amounts. With these ingredients and tools ready, you can create a delightful treat! 1. Preheat your oven to 350°F (175°C). 2. Line an 8x8-inch baking pan with parchment paper. Leave some paper hanging over the edges to lift the bars out later. 3. In a large mixing bowl, combine the following dry ingredients: - 2 cups gluten-free oats - 1 cup almond flour - 1/2 cup coconut sugar - 1/2 teaspoon baking powder - 1/4 teaspoon salt 4. Pour in 1/2 cup melted coconut oil. Mix until it looks crumbly. Reserve 1/2 cup of this mixture for the topping. 5. In a separate bowl, take 2 cups fresh blueberries. Toss them with: - 1 tablespoon lemon juice - 2 tablespoons honey or maple syrup - 1 teaspoon vanilla extract - 1/2 teaspoon cinnamon 6. Press the remaining oat mixture firmly into the bottom of the prepared baking pan. This will be your crust. 7. Spread the blueberry mixture evenly over the crust. 8. Sprinkle the reserved crumbly mixture on top of the blueberries. 9. Bake in the preheated oven for 30-35 minutes. The top should be golden brown, and the blueberries will be bubbly. 10. Let the bars cool in the pan for 15 minutes. Lift them out using the parchment paper. Cut into bars and enjoy! To get the best crumble texture, bake evenly. Start by preheating your oven to 350°F (175°C). This helps the bars cook just right. Make sure to use an 8x8-inch baking pan and line it with parchment paper. This step keeps your bars from sticking. When baking, look for a golden brown top. The blueberries should be bubbly. To check if the bars are done, stick a toothpick in the middle. If it comes out clean, they are ready. If it has wet batter, give them a few more minutes. For a beautiful presentation, serve these bars warm. You can also let them cool to room temperature. Drizzle a bit of honey or maple syrup on top for extra sweetness. Pairing these bars with a scoop of dairy-free vanilla ice cream makes them even better. The cool ice cream balances the warm, sweet blueberries. You can also add whipped cream for a rich treat. {{image_2}} You can change the fruit in these bars. Raspberries work great and add a nice tartness. Strawberries bring a sweet flavor that pairs well with the oats. You can also try blackberries or chopped peaches for a twist. Just keep the same amount of fruit to maintain balance. Each fruit gives a new taste to the bars. If you want to switch up the sweetener, you have options. Brown sugar can replace honey or maple syrup. Agave nectar is another choice for a milder flavor. You could even use stevia if you want to cut down on sugar. Each sweetener adds its own touch, so feel free to experiment. Want to add some crunch? Try mixing in nuts or seeds. Chopped almonds or walnuts give a great texture. Sunflower seeds or pumpkin seeds add a nice crunch too. These additions boost flavor and give your bars a fun twist. Just remember to chop them small enough to blend in well. To keep your gluten-free blueberry crumble bars fresh, store them in an airtight container. Place parchment paper between layers to prevent sticking. This method helps maintain their texture and flavor. You can keep them at room temperature for up to two days. If you want them to last longer, store them in the fridge. This keeps them safe and tasty for up to a week. Freezing these bars is easy and perfect for later enjoyment. First, let the bars cool completely. Then, cut them into squares. Wrap each square in plastic wrap. Place the wrapped bars in a freezer bag or airtight container. Label the bag with the date. You can freeze them for up to three months. When you want to eat one, take it out and let it thaw at room temperature. In the fridge, these bars last about one week. They stay fresh and delicious, thanks to the blueberries and oats. In the freezer, they last up to three months. This makes them a great option for meal prep or a quick snack. Enjoy them warm or cold, and you’ll always have a tasty treat on hand. Yes, you can make this recipe nut-free. Replace almond flour with sunflower seed flour or oat flour. For the fat, swap coconut oil with vegetable oil or olive oil. These options keep the texture and taste great while making the bars safe for those with nut allergies. The bars are done when the top is golden brown and the blueberries bubble. You can also gently press the top. If it feels firm and bounces back, it’s ready. Let them cool for a bit before slicing. This helps the texture set. Yes, frozen blueberries work well in this recipe. Thaw them first and drain any excess liquid. This prevents the bars from becoming too soggy. You can also add a bit more coconut flour to absorb extra moisture. You learned how to make tasty gluten-free blueberry crumble bars. We covered the main ingredients, tools, and step-by-step instructions. I shared tips on baking, serving, and variations to suit your taste. You now know storage methods and answers to common questions. Enjoy these bars fresh or frozen. They’re a simple treat for any occasion. I hope you try this recipe and enjoy every bite!

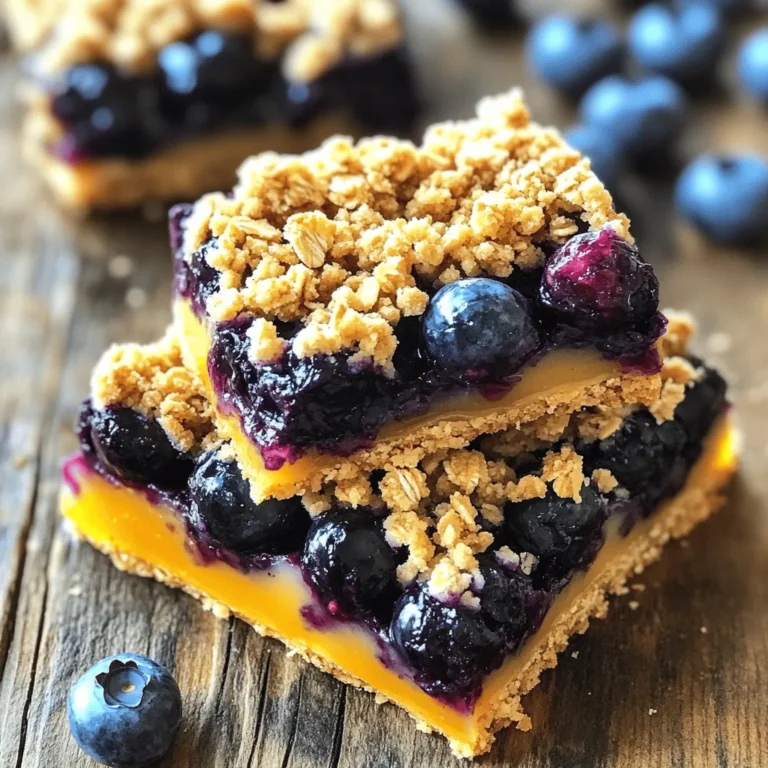
Gluten-Free Blueberry Crumble Bars Delightful Treat

- 1 cup coconut milk (canned or carton) - 1/4 cup chia seeds - 2 tablespoons honey or maple syrup - 1 ripe mango, diced - 1/2 cup Greek yogurt (plain or coconut-flavored) - 1/4 cup shredded coconut, toasted - Fresh mint leaves for garnish To make a Mango Coconut Chia Parfait, you need some key ingredients. First, choose between canned or carton coconut milk. This milk gives the parfait a creamy texture. Next, grab chia seeds. These tiny seeds will soak up the coconut milk and add a nice thickness. For sweetness, you can use honey or maple syrup. Both options work well. You will also need a ripe mango. The mango adds a burst of flavor and color. Don’t forget the Greek yogurt! It adds protein and creaminess. You can choose plain or coconut-flavored yogurt. For a crunchy touch, use shredded coconut. Toasting it makes it even tastier. Lastly, fresh mint leaves make a lovely garnish. They add a pop of color and fresh flavor. With these ingredients, you are ready to create a delicious and healthy treat. Each layer will taste amazing and look beautiful in your parfait glasses! To start, grab a mixing bowl. Whisk together 1 cup of coconut milk and 2 tablespoons of honey or maple syrup. Mix it well until smooth. Then, add 1/4 cup of chia seeds to this mixture. Stir it until the seeds are spread out evenly. Cover the bowl and pop it in the fridge. Let it chill for at least 4 hours, or overnight if you can wait. This will help the chia seeds soak up the milk and thicken. Once your chia mixture is ready, it’s time to build your parfait. Get your favorite glasses or bowls. Start by spooning a layer of the chia mix into the bottom of each glass. Next, add a layer of Greek yogurt. Use 1/2 cup of yogurt, either plain or coconut-flavored. After that, add a layer of diced mango. You’ll need one ripe mango, diced nicely. Repeat these layers until your glasses are full. Finish with a final layer of chia mixture on top. Now for the fun part! Top the last layer with 1/4 cup of toasted shredded coconut. Sprinkle it evenly for that crunchy texture. Add a few fresh mint leaves on top for a pop of color. Serve the parfait right away for the best taste. If you want, you can chill it for a bit to keep it cool. Enjoy this tasty and healthy treat! To get the best flavor, use ripe mango. A sweet mango makes a big difference. You can also toast the coconut for a deeper taste. Be sure to mix the chia seeds well. This helps them absorb the coconut milk evenly. Chill the mixture overnight for a thicker texture. This step is key for a great parfait. If you need to swap out items, go ahead! You can use almond milk instead of coconut milk. Maple syrup is a good alternative to honey. If you want a dairy-free option, choose dairy-free yogurt. You can also use any fruit you like instead of mango. Try berries or peaches for a fun twist. You can easily make this parfait ahead of time! Prepare the chia mixture the night before. Let it chill overnight. You can layer the parfait in the morning. This makes it a quick and easy breakfast. If you store it in the fridge, it stays fresh for up to two days. Just add the toppings right before you serve. {{image_2}} You can change up the fruit in this parfait. Try using pineapple, kiwi, or passion fruit. These fruits add bright flavors and colors. They mix well with coconut and chia. I love the sweet taste of ripe pineapple. It pairs so nicely with the creamy layers. If you want a vegan option, skip the Greek yogurt. Use coconut yogurt instead. It gives a nice creamy texture without dairy. For sweeteners, use agave syrup or maple syrup. Both work well and keep it vegan-friendly. You still get a tasty treat without animal products. To add more flavor, try spices like cinnamon or vanilla. A dash of vanilla extract can make it extra special. You can also mix in some nut butter for creaminess and taste. Almond butter or peanut butter adds a nice touch. Don't forget to experiment with different toppings, too! Store any leftover mango coconut chia parfait in an airtight container. Keep it in the fridge. It will stay fresh for about 2 to 3 days. If you see liquid separation, just stir it before eating. You can freeze the parfait, but it may change texture. Layer the parfait in a freezer-safe container. Leave some space at the top for expansion. It can last up to 2 months in the freezer. When ready to eat, thaw it in the fridge overnight. * Coconut milk: Canned coconut milk lasts about 5 years unopened. Once opened, use it within 3 to 4 days. * Chia seeds: They can last up to 2 years if stored in a cool, dry place. * Honey or maple syrup: Both can last indefinitely if sealed. * Ripe mango: Fresh mango lasts about 5 days at room temperature. Once cut, keep it in the fridge for up to 3 days. * Greek yogurt: It stays fresh in the fridge for about 1 to 3 weeks, depending on the sell-by date. * Shredded coconut: Unsweetened shredded coconut lasts up to 1 year if stored properly. Understanding how to store your parfait and its ingredients helps reduce waste and saves money. Chia seeds are tiny black seeds from the Salvia hispanica plant. They come from a flowering plant native to Mexico. These seeds have a mild flavor and lots of nutrients. When soaked in liquid, they swell and form a gel-like texture. This makes them great for puddings and parfaits. Chia seeds offer many health benefits. They are full of fiber, which helps with digestion. They also have protein, omega-3 fatty acids, and antioxidants. These seeds can help you feel full longer, which may aid in weight control. Plus, they can help support heart health and lower cholesterol levels. Absolutely! You can use any fruit you like in this parfait. Berries, bananas, or kiwi work well. Just make sure the fruit is ripe and fresh. Mixing different fruits can add more flavor and color to your parfait. Be creative and have fun with your choices! This blog post covered how to make a delicious chia parfait. You learned about key ingredients like coconut milk, chia seeds, and ripe mango. I shared easy steps for prepping, layering, and serving your parfait. Tips helped you with substitutions and making ahead. We explored variations, storage methods, and answered common questions. With these insights, you can create tasty and healthy parfaits that suit your needs. Enjoy experimenting with flavors and sharing this treat with others!

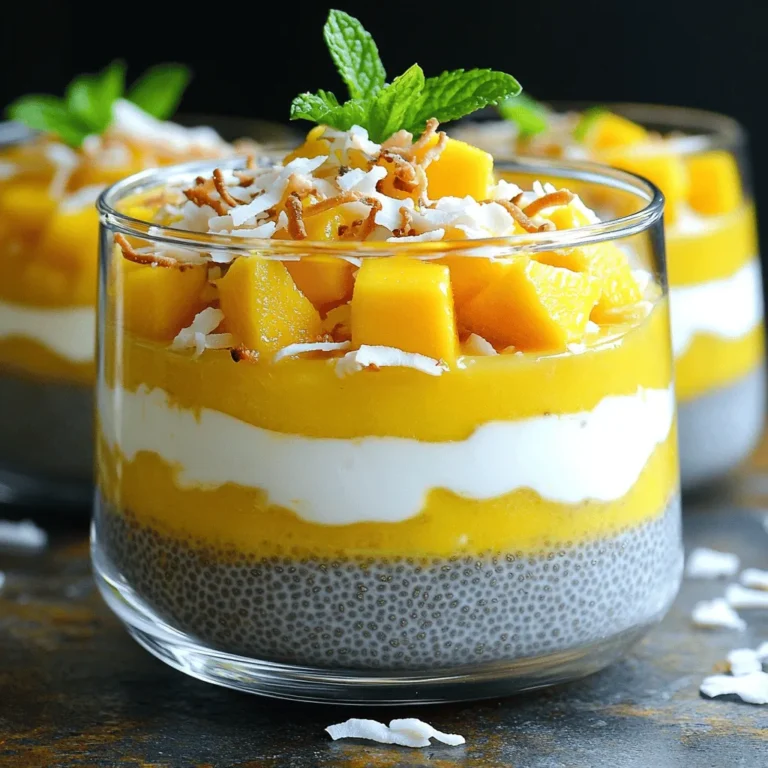
Mango Coconut Chia Parfait Tasty and Healthy Treat

- 2 cups corn tortillas, cut into strips - You can use flour tortillas if preferred. - 1 can black beans, drained and rinsed - Pinto beans work well as a swap. - 1 can diced tomatoes with green chilies - Fresh tomatoes and chopped jalapeños are a great substitute. - 1 cup bell peppers, diced (any color) - Feel free to mix colors for a fun look. - 1 cup zucchini, diced - Yellow squash is a nice alternative. - 1 cup corn (fresh, frozen, or canned) - Use sweet corn for a hint of sweetness. - 1 small red onion, finely chopped - Yellow onion adds a similar flavor. - 2 cloves garlic, minced - Garlic powder can replace fresh garlic if needed. - 2 cups enchilada sauce (store-bought or homemade) - You can use salsa if you like it spicier. - 1 teaspoon ground cumin - Coriander adds a similar depth of flavor. - 1 teaspoon chili powder - Use paprika for a milder taste. - 1/2 teaspoon smoked paprika - Regular paprika works if you don’t have smoked. - 1 1/2 cups shredded cheese (cheddar or a cheese blend) - Mozzarella gives a nice stretchy texture. - 2 tablespoons olive oil - Any cooking oil will work as a swap. - Salt and pepper to taste - Adjust to your flavor preference. - Fresh cilantro for garnish - Green onions add a nice touch too. - Avocado slices add creaminess. - A dollop of sour cream brightens each bite. - Jalapeños provide a spicy kick. - Extra cheese ensures a gooey finish. 1. Preheat the Oven: Start by preheating your oven to 375°F (190°C). This sets the stage for baking. 2. Sautéing the Vegetables: In a large skillet, pour in olive oil and heat it over medium heat. Add the chopped red onion and minced garlic. Cook them for about 3-4 minutes until the onion looks clear. 3. Add the Veggies: Toss in the diced bell peppers, zucchini, and corn. Stir this mix for 5-7 minutes until the veggies soften. Season with cumin, chili powder, smoked paprika, salt, and pepper. This will add great flavor to your dish. 4. Layering the Casserole: Grab a greased 9x13 inch baking dish. Start by spreading a layer of enchilada sauce at the bottom. Next, add half of the tortilla strips, half of the black beans, and half of the sautéed veggie mix. Top this layer with one cup of shredded cheese. 5. Repeat Layers: Now, add another layer. Pour more enchilada sauce, followed by the remaining tortilla strips, black beans, and veggie mix. Finish this layer with another cup of cheese. 6. Final Sauce and Cheese Layer: On top, sprinkle any leftover tortilla strips. Pour the last of the enchilada sauce over everything. Finally, add the last 1/2 cup of cheese evenly on top. 7. Bake: Cover your dish with foil and place it in the oven. Bake for 25 minutes. After that, take off the foil and bake for another 15 minutes, until the cheese is bubbly and golden brown. 8. Garnish and Serve: Once it’s baked, let the casserole cool for a few minutes. Before serving, sprinkle fresh cilantro on top for a bright touch. - How to ensure cheese is bubbly and golden: Bake your casserole covered for 25 minutes. Remove the foil and bake for another 15 minutes. This lets the cheese melt and get golden brown on top. - Making the casserole ahead of time: You can prepare the casserole a day before. Just layer all the ingredients as per the recipe. Cover it well and place it in the fridge. When ready to eat, bake it directly from the fridge. You might need to add a few extra minutes to the baking time. - Recommended cookware for best results: Use a 9x13 inch glass or ceramic baking dish. These materials heat evenly. They help cook the casserole just right. - Adding spices for extra kick: If you like heat, add diced jalapeños or a pinch of cayenne. These spices boost flavor without overpowering the dish. - Ingredient swaps for dietary preferences: Want to switch things up? Use sweet potatoes instead of zucchini for a sweet twist. You can also swap black beans with lentils for a different texture and taste. {{image_2}} For those who enjoy meat, you can easily add cooked chicken, ground beef, or turkey. Just mix it into the veggie layers. This adds more protein and heartiness. You can also swap out the vegetables. Use mushrooms, spinach, or eggplant for a different taste. Mix and match based on what you have. Fresh, seasonal veggies work best. For a gluten-free option, replace corn tortillas with gluten-free tortillas. You can also use quinoa or rice as a base instead. This keeps the dish satisfying and safe for gluten-sensitive eaters. This casserole pairs well with a simple green salad. A side of rice or beans can also enhance the meal. Serve it with sour cream or guacamole for extra flavor. For a fun twist, add sliced jalapeños on top before baking. This adds a spicy kick. You can also sprinkle fresh lime juice over the finished dish for brightness. Enjoy your veggie-loaded enchiladas with friends and family for a hearty meal! To store leftovers, let the casserole cool first. Then, cover it tightly with plastic wrap or foil. You can also use an airtight container. This way, it stays fresh for up to 4 days. When reheating, preheat your oven to 350°F (175°C). Place the casserole in and cover it with foil. Heat for about 20-25 minutes, or until it's warm throughout. If you prefer the cheese a bit crispy, remove the foil for the last 5 minutes. If you want to save some for later, freezing is easy. First, let the casserole cool completely. Then, slice it into portions. Wrap each piece in plastic wrap and place them in a freezer-safe bag. Label the bag with the date. This casserole can last up to 3 months in the freezer. When you’re ready to eat, take it out and thaw it in the fridge overnight. To reheat, set your oven to 350°F (175°C). Bake for about 30-35 minutes, or until heated through. Enjoy your tasty meal! Can I make this dish ahead of time? Yes, you can prepare the casserole ahead. Just assemble it and cover it. Store it in the fridge for up to two days. When ready to bake, add 10 minutes to the cooking time. What can I substitute for black beans? You can use pinto beans or kidney beans as a good swap. Chickpeas also work if you want a twist. Is this casserole spicy? The dish has a mild spice level. If you prefer more heat, add extra chili powder or diced jalapeños. Can I use store-bought enchilada sauce? Absolutely! Store-bought enchilada sauce saves time. Just make sure it is a brand you enjoy. How long does it last in the fridge? This casserole stays fresh for about 4 days in the fridge. Be sure to store it in an airtight container. How to adjust the recipe for large gatherings? To serve more people, double the recipe. Use a larger baking dish for all the layers. This way, everyone gets a hearty portion. Can I use different types of cheese? Yes, you can mix and match cheeses. Monterey Jack or pepper jack add great flavor. Feel free to experiment with your favorites! This post covered a delicious casserole recipe, including its key ingredients and steps. I shared tips to enhance flavor and cooking success. You learned about storage methods for leftovers too. Remember, this dish is flexible. You can switch ingredients and serve it in many ways. Whether for dinner or a gathering, it's sure to please. Enjoy cooking and sharing this tasty meal!

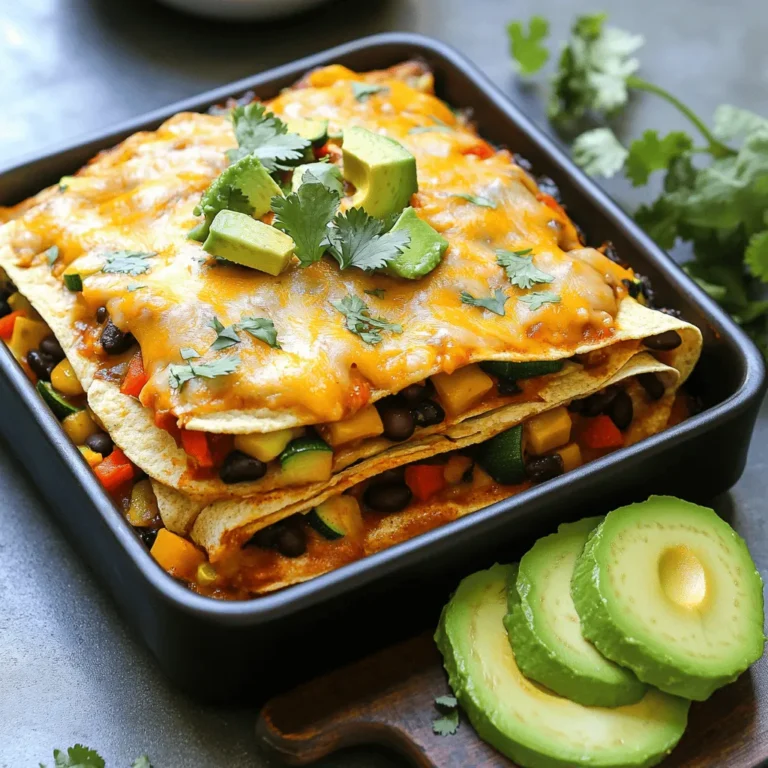
Veggie Loaded Enchilada Casserole Hearty and Tasty

- 1 cup acini di pepe pasta - 1 lb ground turkey or chicken - 1/2 cup grated Parmesan cheese - 1/4 cup fresh parsley, chopped - 1 teaspoon garlic powder - 1 teaspoon onion powder - 1/2 teaspoon salt - 1/2 teaspoon black pepper - 6 cups chicken broth - 2 cups fresh spinach or kale, chopped - 1 carrot, diced - 1 celery stalk, diced - 1/2 onion, finely chopped I love using fresh and simple ingredients. Each item shines in the soup. The acini di pepe pasta adds a fun texture. Ground turkey or chicken keeps it light and tasty. Grated Parmesan gives a rich, cheesy flavor. Fresh parsley adds a bright touch. When it comes to seasonings, garlic powder and onion powder boost the taste. Salt and black pepper round out the flavors. Chicken broth is the base, making the soup warm and comforting. For veggies, I choose spinach or kale. They add color and nutrients. Diced carrot and celery bring sweetness and crunch. The finely chopped onion adds depth. Each bite is a mix of flavors, making the soup a true delight. To start, I mix the ground turkey with Parmesan cheese, parsley, garlic powder, onion powder, salt, and pepper. This blend gives the meatballs a rich flavor. You want to mix it until everything is well combined. Next, I roll the mixture into small meatballs, about 1 inch in diameter. This size helps them cook evenly. In a large pot, I heat olive oil over medium heat. Then, I add the diced onion, carrot, and celery. These vegetables add sweetness and depth to the soup. I sauté them until they turn tender, which takes about 5 to 7 minutes. The smell fills the kitchen and sets the stage for a hearty meal. Now, I carefully add the meatballs to the pot. I want to brown them on all sides, which takes about 5 to 6 minutes. This step locks in their juices and flavor. Next, I pour in 6 cups of chicken broth and bring it to a boil. Once boiling, I reduce the heat to let it simmer for about 10 minutes. After that, I stir in 1 cup of acini di pepe pasta and the greens. I cook everything until the pasta is al dente, which takes another 8 to 10 minutes. The greens wilt nicely, adding color and nutrition. Now, the soup is ready to serve! For the best meatballs, use cold ingredients. Cold meat keeps a nice texture. Mix your ground turkey with cheese and spices in a bowl. Roll them into small balls, about one inch wide. This helps them stay juicy. When you brown them, don’t crowd the pot. This ensures even cooking and a nice brown color. Brighten your soup with fresh lemon juice. Just a squeeze adds a nice zing. For a richer taste, consider making your broth at home. Homemade broth is packed with flavor. It makes a big difference in your soup. When serving, add extra Parmesan on top. This adds creaminess and looks great. Don’t forget lemon wedges for a fresh touch. Pair your soup with crusty bread for dipping. This makes each bite even better. {{image_2}} You can switch up the main protein in your soup. Ground turkey works great, but you can also use chicken or beef. If you're looking for a plant-based option, try using lentils or chickpeas instead. For a quicker meal, use pre-cooked meatballs. Just drop them in the soup and heat through. Acini di pepe is traditional, but feel free to swap it out. Orzo or small shells work well too. If you need gluten-free options, use gluten-free pasta. It will still taste great and keep the soup hearty. Add more veggies to boost flavor and nutrition. Try adding peas, zucchini, or even diced bell peppers. You can also switch the greens. Swiss chard or even kale can add a nice twist. The more you experiment, the more fun your soup becomes! Keep leftovers in an airtight container for up to 3 days. This helps maintain flavor and freshness. When you want to enjoy it again, reheat the soup on the stovetop or microwave. Just heat it until it’s warm all the way through. You can freeze the soup without pasta for up to 3 months. This way, the soup keeps its best taste and texture. When you are ready to eat, just add the pasta when reheating. This keeps the pasta from getting mushy. Thaw the soup overnight in the fridge before reheating. This makes it easy to warm up. If the soup thickens too much while reheating, add a little broth. This will help bring back its perfect consistency. Italian Wedding Soup is a comforting dish with roots in Italian-American cuisine. Despite its name, it does not come from weddings. The name refers to the "marriage" of flavors from meatballs and greens. You will find small meatballs made from ground meat, usually turkey or chicken, along with leafy greens like spinach. The soup is hearty and often includes tiny pasta, like acini di pepe, which adds to its charm. This dish combines rich chicken broth with fresh and savory ingredients, creating a warm hug in a bowl. Yes, you can prepare Italian Wedding Soup ahead of time. First, make the meatballs and soup base. Store them separately in airtight containers. You can keep the soup in the fridge for up to three days. If you want to freeze it, leave out the pasta. This way, it stays fresh and tasty. When you are ready to eat, simply reheat the soup and add the pasta. This keeps everything from getting mushy. Italian Wedding Soup pairs well with many side dishes. Here are some great options: - Crusty bread for dipping - A fresh green salad with vinaigrette - Garlic bread for added flavor - A light pasta dish for a full meal These sides enhance the cozy experience of enjoying your delicious soup. This blog post offers a simple way to make a tasty Italian Wedding Soup. You learned about the main ingredients like turkey, pasta, and fresh vegetables. I shared step-by-step instructions for preparing the meatballs and cooking the soup. You also discovered tips for perfecting the meatballs and suggestions for variations. With this knowledge, you can enjoy a warm bowl that comforts and nourishes. So, grab your ingredients and get cooking!

Italian Wedding Soup Hearty Comfort Food Recipe

- 5 cups fresh baby spinach, washed and dried - 2 cups strawberries, hulled and sliced - 1/4 cup red onion, thinly sliced Fresh produce makes this salad bright and tasty. Baby spinach brings a nice crunch and good nutrients. Strawberries add sweetness and color. Red onion gives a mild bite that balances the flavors. - 1/2 cup sliced almonds, toasted - 1/4 cup feta cheese, crumbled Nuts and cheese add texture and depth. Toasted sliced almonds give a warm, nutty flavor. Feta cheese adds creaminess and a salty touch, making each bite rich and satisfying. - 1/3 cup olive oil - 2 tablespoons apple cider vinegar - 1 tablespoon honey The dressing ties the salad together. Olive oil brings smoothness, while apple cider vinegar adds a tangy kick. Honey sweetens the mix, balancing the salad's flavors perfectly. Mix these ingredients to create a bright and vibrant dish that everyone will love! To make the dressing, grab a small bowl or jar. Add the olive oil, apple cider vinegar, honey, and Dijon mustard. Then, sprinkle in some salt and pepper. Whisk or shake the mixture until it blends well. This blending is called emulsification. It helps mix oil and vinegar smoothly. If you want a thicker dressing, add a bit more honey. To toast the almonds, use a dry skillet. Heat it over medium heat. Add the sliced almonds and stir them often. Keep an eye on them as they cook. This takes about 3 to 5 minutes. You want them golden and fragrant, not burnt. Once they are ready, take them off the heat and let them cool. Toasting adds a nice crunch to the salad. In a large salad bowl, start layering the ingredients. First, add the fresh baby spinach. Next, top it with the sliced strawberries, toasted almonds, red onion, and feta cheese. When it's time to dress the salad, drizzle the prepared dressing over it right before serving. Gently toss everything together. This way, each bite has a mix of flavors. Finally, sprinkle the poppy seeds on top for added crunch and a touch of beauty. Serve your salad in a large wooden bowl. The wood adds warmth and beauty. It highlights the fresh ingredients. For a fun touch, place whole strawberries on top. A sprinkle of poppy seeds adds a nice crunch. You can add herbs like mint or basil for a fresh twist. Fresh herbs boost flavor and add color. Try different cheeses like goat cheese or blue cheese for unique tastes. Each cheese brings a new layer of flavor. This salad pairs well with grilled chicken or shrimp. Adding protein makes it a complete meal. It works great for summer picnics or as a light lunch. You can serve it at gatherings or special occasions. The bright colors and flavors impress everyone. {{image_2}} You can change the fruits in your salad based on the season. In summer, try fresh peaches or blueberries. Both add a nice sweetness. In fall, apples work well too. You can also switch up the greens. Instead of spinach, you might like arugula or kale. These greens have a different taste that can make your salad exciting. If you want to make this salad vegan or dairy-free, leave out the feta cheese. You can use avocado for creaminess instead. For the dressing, choose maple syrup instead of honey to keep it vegan. If you need a gluten-free dressing, check that the mustard is gluten-free. This way, everyone can enjoy the salad without worry. To keep your leftover salad fresh, store it in an airtight container. This helps keep the spinach crisp and the strawberries juicy. If you have dressing left, keep it separate. This keeps the salad from getting soggy. Pour it over just before you eat. For the best taste, eat the salad within 1-2 days. After that, the spinach and strawberries may lose their freshness. Look for signs of spoilage. If the spinach turns brown or slimy, or if the strawberries smell sour, it's best to toss it. Always trust your senses when checking for freshness. Yes, you can make this salad ahead of time. To keep it fresh, prepare the ingredients separately. Store the spinach, strawberries, and other items in airtight containers. Mix the dressing in a jar and keep it in the fridge. When you are ready to eat, simply combine everything. This method keeps the salad crisp and tasty. If you need a substitute for poppy seeds, there are many options. You can use sesame seeds for a nutty flavor. Chia seeds also work well and add health benefits. For extra crunch, consider chopped nuts like walnuts or pecans. Each option brings a unique texture and taste to the salad. This salad can be great for meal prep. Store the spinach and strawberries in separate containers. Keep the dressing in a jar to avoid sogginess. When you want to eat, just mix them together. This way, you can enjoy fresh flavors throughout the week. Make sure to eat within a few days for the best taste. This blog post details a vibrant salad, focused on fresh produce, nuts, and tasty dressing. You learned how to prepare the dressing, toast almonds, and layer ingredients effectively. Presentation and flavor tricks enhance your salad’s appeal. You can even adjust this recipe to fit seasonal fruits or dietary needs. Lastly, proper storage tips will help keep your salad fresh. With these steps, you'll create a delicious dish perfect for any occasion. Enjoy making this salad your own!

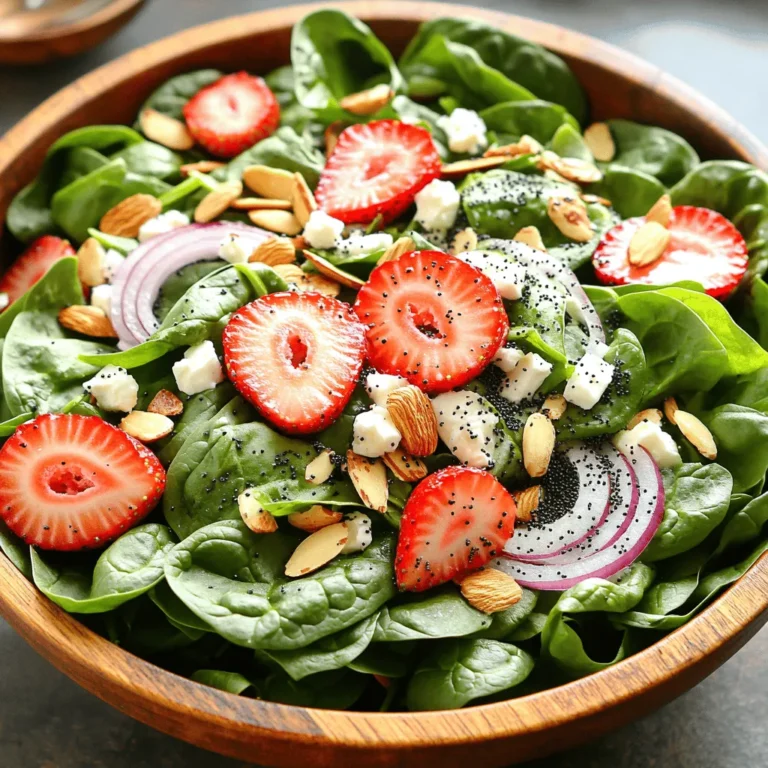
Strawberry Spinach Poppy Seed Salad Fresh and Flavorful

To make cheesy pull-apart garlic bread, you need a few key items: - 1 large round loaf of sourdough bread - 1 cup shredded mozzarella cheese - 1 cup shredded cheddar cheese - 5 tablespoons unsalted butter, melted - 4 cloves garlic, minced - 2 tablespoons fresh parsley, chopped - 1 teaspoon dried Italian herbs (oregano, basil) - Salt and pepper to taste These ingredients create a rich, cheesy, and flavorful treat that everyone will love. You can enhance your garlic bread with some optional ingredients: - 1/4 teaspoon red pepper flakes for a kick This little addition can bring a nice heat and depth to the bread. While mozzarella and cheddar are classic choices, you can mix things up: - Use gouda for creaminess. - Try parmesan for a sharp taste. - Add pepper jack for extra spice. Feel free to experiment! Combining different cheeses can give your garlic bread a unique twist. First, you need to gather your ingredients. Grab a large round loaf of sourdough bread. You'll also need shredded mozzarella and cheddar cheese, unsalted butter, garlic, parsley, and Italian herbs. Make sure your oven is preheated to 375°F (190°C). This step is key for perfect baking. Now, it’s time to slice the bread. Take your sourdough loaf and make diagonal cuts. Space them about 1 inch apart. Be careful not to cut all the way through; leave the bottom intact. After that, make similar cuts in the opposite direction. This will create a diamond pattern. This pattern helps with easy pulling apart later. In a small bowl, mix melted butter with minced garlic, chopped parsley, Italian herbs, and salt and pepper. If you want a kick, add red pepper flakes. Use a pastry brush to spread this garlic butter mixture between each cut in the bread. Be generous! Stuff the shredded mozzarella and cheddar cheese deep into each slice. The more cheese, the better the flavor! Wrap the loaf in aluminum foil and place it on a baking sheet. Bake for 15 minutes. After that, take off the foil and bake for another 10-15 minutes. You want the cheese to melt and the top to get golden and crispy. Once done, let it cool for a few minutes. Now, it's ready to pull apart and enjoy! To get that gooey, cheesy pull, use a mix of mozzarella and cheddar. Mozzarella melts wonderfully, while cheddar adds a rich flavor. Make sure to stuff the cheese deep into the cuts. This way, every bite is cheesy and satisfying. Also, don’t skimp on the butter mixture. It helps the cheese melt evenly and adds great flavor. One common mistake is cutting the bread too deep. You want the base intact to hold everything together. Avoid adding too much garlic butter. Too much can make it soggy. Lastly, don’t rush the baking time. The cheese needs enough time to melt and the top to crisp up. You can prepare this dish up to a day in advance. Slice the bread and brush it with the garlic butter. Then, wrap it tightly in foil and place it in the fridge. When ready to bake, just pop it in the oven straight from the fridge. Add a few extra minutes to ensure it heats through. This makes it easy for parties or family dinners. {{image_2}} You can make this dish spicy by adding red pepper flakes. Just mix in 1/4 teaspoon with your garlic butter. This addition gives the bread a nice kick. It’s perfect for those who love heat. The spicy flavor pairs well with the creamy cheese. You can adjust the amount based on your taste. If you want more heat, add more flakes. For a different twist, try using herb-infused olive oil instead of butter. Choose your favorite herbs like rosemary or thyme. Mix the oil with minced garlic for great flavor. Brush this mix between the bread cuts. This version is lighter but still full of taste. It also adds a nice aroma. The herbs will brighten the bread, making it more refreshing. You can get creative with cheese choices. While mozzarella and cheddar are great, other cheeses work too. Try using gouda for a smoky flavor. Feta adds a nice tang, while pepper jack gives extra spice. Mixing different cheeses can create a fun flavor profile. Experiment until you find your favorite combo. Each cheese brings its own unique taste to the bread. To keep your cheesy pull-apart garlic bread fresh, wrap it tightly in plastic wrap. You can also place it in an airtight container. This way, it stays soft and tasty for up to three days at room temperature. If you want to keep it longer, consider freezing it. When reheating, I suggest using the oven. Preheat it to 350°F (175°C). Wrap the garlic bread in foil to keep it soft. Heat for about 10-15 minutes. You can also reheat slices in a toaster oven for a few minutes. This method gives you a nice crispy outside. To freeze your garlic bread, slice it first if you wish. Wrap each piece in plastic wrap, then in foil. Place them in a freezer bag, removing excess air. When you’re ready to enjoy it, thaw in the fridge overnight. Reheat as mentioned above for the best results. Yes, you can switch the bread! Try a large round loaf of ciabatta or focaccia. Both have great textures and flavors. Just make sure they can hold the cheese and garlic butter well. To make this dish gluten-free, use a gluten-free bread. Many brands offer tasty gluten-free options now. Be sure to check the label to ensure it meets your needs. You have many tasty choices! Marinara sauce is classic and pairs well. You can also try ranch dressing or a creamy garlic dip. These sauces add flavor and fun to each bite. To keep the bread from getting soggy, make sure to brush the garlic butter mixture lightly. Avoid soaking the bread. Also, bake it in foil first, then unwrap it to crisp the top. This method helps keep it fluffy and delicious. This blog post covered all you need to make cheesy pull-apart garlic bread. We discussed essential and optional ingredients, plus the best cheese combos. I gave easy steps for prep, baking, and tips to avoid common mistakes. You learned great variations for added flavor and how to store leftovers. In the end, making this bread is simple and fun. Try it today for a tasty treat!

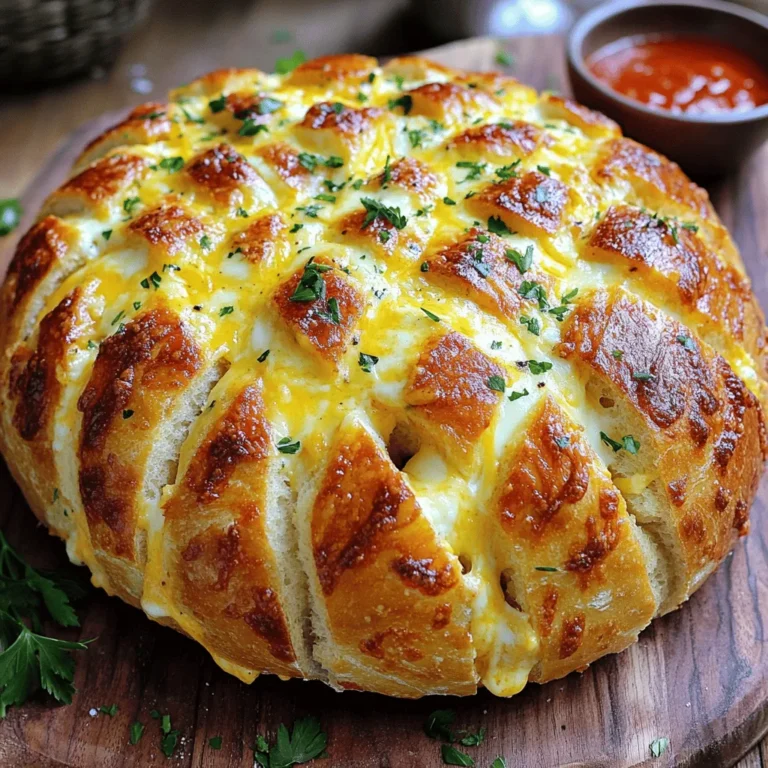
Cheesy Pull-Apart Garlic Bread Fluffy and Delicious Treat

PREV 1 2 3 … 7 NEXT
secrets pice kitchen

explore

DessertsDinnerAppetizersDrinks

Our Policies

  • Cookie Policy
  • Copyright Policy
  • Disclaimer
  • GDPR Policy
  • Terms Of Use
Back to Top
  • About
  • Contact Us
  • Privacy Policy
© 2025 secrets pice kitchen