FREE DINNER EBOOK! Get your copy!
  • Cookie Policy
  • GDPR Policy
  • Disclaimer
  • Terms Of Use
  • Visit my other site: Fun Cookie Recipes
secrets pice kitchen
  • Home
  • Dinner
  • Desserts
  • Drinks
  • Appetizers
  • Contact
  • About
  • Privacy Policy
  • Home
  • Dinner
  • Desserts
  • Drinks
  • Appetizers
  • Contact
  • About
  • Privacy Policy
  • Cookie Policy
  • GDPR Policy
  • Disclaimer
  • Terms Of Use
Visit my other site: Fun Cookie Recipes

HOME / CATEGORIES /

Latest

- 1 lb beef sirloin, thinly sliced - 1 red bell pepper, sliced - 1 cup broccoli florets - 1 cup snap peas - 3 cloves garlic, minced - 1 tablespoon fresh ginger, grated - 3 green onions, chopped - Zest of 1 orange - 1/2 cup fresh orange juice - 3 tablespoons soy sauce - 2 tablespoons honey - Salt and pepper to taste - Sesame seeds, for garnish This dish shines with fresh, bold flavors. The beef is tender and juicy, while the veggies add crunch. The ginger gives a warm spice, and the orange brightens it all up. Use fresh ingredients for the best taste. The sauce is sweet and tangy. The orange juice and zest bring a citrus punch. Soy sauce adds a savory depth, while honey sweetens the mix. This blend makes the dish pop with flavor. Using sesame seeds as a garnish adds a nice touch. They give a nutty flavor and look great on top. Enjoy this dish with rice or noodles for a complete meal. - Marinate the beef: Start by slicing 1 pound of beef sirloin into thin strips. In a bowl, toss the beef with 2 tablespoons of cornstarch, salt, and pepper. This helps to make the beef tender. Let it marinate for about 15 minutes. This short wait is key to a great dish. - Prepare the sauce: While the beef marinates, grab another bowl. Mix together 1/2 cup of fresh orange juice, 3 tablespoons of soy sauce, 2 tablespoons of honey, the grated ginger, and the zest of 1 orange. This sauce adds flavor and sweetness. - Stir fry the beef: Heat 1 tablespoon of vegetable oil in a large skillet over medium-high heat. Add in the marinated beef. Stir fry it for about 3 to 4 minutes. You want the beef to brown nicely and cook through. Once done, take the beef out of the skillet and set it aside. - Cook the vegetables: In the same skillet, add 1 more tablespoon of vegetable oil. Toss in 3 minced garlic cloves, the sliced red bell pepper, 1 cup of broccoli florets, and 1 cup of snap peas. Stir fry these for about 3 to 5 minutes. You want them to stay tender-crisp and colorful. - Combine ingredients in the skillet: Return the cooked beef back to the skillet with your veggies. Pour the orange sauce over everything. Toss it all together for about 2 to 3 minutes. Make sure every piece is coated well and heated through. - Finish and serve: Remove the skillet from the heat. Garnish your dish with 3 chopped green onions and some sesame seeds. Serve it hot over steamed rice or noodles for a complete meal. Enjoy your tasty creation! Cornstarch is key for a perfect beef stir fry. It helps keep the beef juicy and tender. When you coat the beef in cornstarch, it forms a nice crust. This crust locks in moisture and gives you that great texture. Let the beef marinate for about 15 minutes. This time allows the flavors to soak in. Don't rush this step; it makes a big difference in taste. Use a wok or a large skillet for stir-frying. These pans heat up quickly and cook food evenly. The high heat helps seal in flavors and gives the beef a nice sear. For tender-crisp veggies, cook them quickly over high heat. This keeps them bright and crunchy. Stir them often and don’t overcook. You want them to stay vibrant and flavorful. Serve your Orange Ginger Beef Stir Fry over steamed rice or noodles. This adds a nice base and helps soak up the sauce. For a pretty touch, sprinkle sesame seeds on top. They add a nice crunch and look great on the plate. You can also add chopped green onions for extra color and flavor. {{image_2}} You can switch the beef for chicken, shrimp, or tofu. Chicken works well and cooks quickly. Use boneless, skinless pieces for the best taste. Shrimp adds a light and sweet flavor. Just make sure they turn pink. Tofu is great for a plant-based meal. Choose firm tofu, press it, and cut it into cubes. This alternative will soak up all the tasty sauce. Feel free to mix in other vegetables. Carrots, bell peppers, or zucchini can add color and taste. You might also use bok choy or snow peas for a crunchy bite. Just remember to cut the veggies to similar sizes. This helps them cook evenly. You can also use frozen vegetables if fresh ones are not available. They are quick and easy. You can adjust the sauce to fit your taste. If you like it sweeter, add more honey. For a spicy kick, try adding red pepper flakes or sriracha. You can also reduce the soy sauce for less salt. Or, add more orange juice for a fruity flavor. Just mix and taste as you go. This lets you find the perfect balance for your meal. To store your Orange Ginger Beef Stir Fry, let it cool first. Place it in an airtight container. This keeps it fresh and safe. Store it in the fridge for up to three days. If you want to keep it longer, freezing is better. Always label your container with the date. To reheat your stir fry, use medium heat on the stove. This keeps the beef tender and the veggies crisp. Add a splash of water or broth if it seems dry. Stir it often for even heating. You can also use a microwave. Heat it in short bursts, stirring in between. This helps it warm up without overcooking. Yes, you can freeze Orange Ginger Beef Stir Fry! Pack it in a freezer-safe container. It can last up to three months in the freezer. When you’re ready to eat, thaw it in the fridge overnight. Then reheat as described above. Enjoy your tasty meal any time! To add some heat, you can use a few spicy items. Here are my top picks: - Red pepper flakes: Sprinkle some in the sauce for a nice kick. - Sriracha sauce: Mix a teaspoon into the sauce for bold flavor. - Fresh chili peppers: Slice and add them with the vegetables for extra spice. These options let you control the heat. Adjust based on your taste! Yes, you can meal prep this dish! Here are some tips: - Marinate the beef: You can marinate it a day in advance. This helps the flavors soak in. - Chop veggies: Prepare your vegetables a day ahead. Store them in the fridge. - Cook and store: You can cook the stir fry and keep it in the fridge. Just reheat when you’re ready to eat. Doing this saves time during busy days! This dish pairs well with many sides. Here are some great options: - Steamed rice: White or brown rice works great to soak up the sauce. - Noodles: Try egg noodles or rice noodles for a fun twist. - Salad: A fresh green salad can balance the meal nicely. These sides add texture and flavor to your meal! This blog post shared an easy recipe for Orange Ginger Beef Stir Fry. I outlined the main ingredients, steps for preparation, and tips to enhance flavor and presentation. You can even customize your stir fry with different proteins and veggies. In closing, this dish is simple yet rewarding. Whether you meal prep or whip it up for dinner, it delivers bright flavors and fresh textures. Enjoy this recipe and make it your own!

Orange Ginger Beef Stir Fry Flavorful and Easy Recipe

- 1 cup all-purpose flour - 1 teaspoon baking powder - 1/2 teaspoon baking soda - 1/4 teaspoon salt - 1 ripe banana, mashed - 1 cup buttermilk or dairy-free milk - 1 large egg or flax egg - 2 tablespoons honey or maple syrup - 1/2 teaspoon vanilla extract - 1/2 cup chocolate chips - Butter or cooking spray for greasing These ingredients come together to create a fun and tasty snack. The all-purpose flour gives the bites their structure. Baking powder and baking soda help them rise. The salt adds a nice contrast to the sweetness. The ripe banana gives moisture and flavor. Buttermilk or a dairy-free option keeps the batter rich and creamy. You can use either a large egg or a flax egg for a vegan choice. Honey or maple syrup sweetens the bites. The vanilla extract rounds out the flavor, while chocolate chips provide that beloved chocolatey goodness. Don't forget to grease your pan! This helps prevent sticking and gives a nice golden color. Each ingredient plays a key role. Together, they form the perfect blend for Chocolate Chip Banana Pancake Bites. Enjoy the process of mixing and cooking these delightful snacks. 1. Mixing dry ingredients: In a medium bowl, add 1 cup of all-purpose flour, 1 teaspoon of baking powder, 1/2 teaspoon of baking soda, and 1/4 teaspoon of salt. Whisk these together until well combined. This step ensures your pancake bites rise perfectly. 2. Combining wet ingredients: In another bowl, mash 1 ripe banana. Then, add 1 cup of buttermilk (or dairy-free milk if needed), 1 large egg (or a flax egg), 2 tablespoons of honey (or maple syrup), and 1/2 teaspoon of vanilla extract. Mix until smooth. This mixture gives your bites a lovely flavor. 3. Merging dry and wet ingredients carefully: Pour the wet mixture into the dry bowl. Gently stir until just combined. It’s fine if the batter has a few lumps. Overmixing can make your bites tough. 1. Preheating the skillet: Set your non-stick skillet or griddle over medium heat. Grease it lightly with butter or cooking spray to prevent sticking. 2. Cooking details and timing: Use a tablespoon to drop small rounds of batter onto the skillet. Cook for about 2-3 minutes. Watch for bubbles forming on the surface, and look for set edges. 3. Flipping and ensuring even cooking: Carefully flip each pancake bite once bubbles appear. Cook for another 1-2 minutes until they turn lightly golden. This gives you a nice, fluffy texture. - Presentation tips: Arrange the pancake bites on a platter. Dust them with powdered sugar and drizzle with extra honey or maple syrup. Add banana slices and a sprinkle of mini chocolate chips for a lovely look. - Suggested pairings and toppings: Serve these bites with fresh fruit or yogurt for a tasty breakfast. You can also enjoy them with nut butter for an extra protein boost. To make your pancake bites extra tasty, add spices. Cinnamon and nutmeg bring warmth and depth. Sprinkle in about half a teaspoon for each batch. You can also experiment with different types of chocolate chips. Dark chocolate, milk chocolate, or even white chocolate can change the whole vibe. Each adds a unique flavor twist. Getting the right temperature is key. Preheat your skillet or griddle to medium heat. This helps the bites cook evenly. If the heat is too low, they may turn out soggy. If it's too high, they might burn. Keep an eye on the cooking time. Avoid overmixing your batter. Stir until just combined. A few lumps are okay. This keeps your pancake bites light and fluffy. Overmixing can make them tough. You can easily make this recipe healthier. Swap all-purpose flour for whole wheat flour. This adds fiber and nutrients. You can also lower the sugar by using less honey or maple syrup. Try cutting it down by a tablespoon or two. You can even replace it with mashed banana to keep sweetness. {{image_2}} To make vegan chocolate chip banana pancake bites, you can swap a few ingredients. Instead of using a large egg, use a flax egg. To make a flax egg, mix one tablespoon of ground flaxseed with three tablespoons of water. Let it sit for a few minutes to thicken. For the buttermilk, choose any dairy-free milk like almond or oat milk. This keeps the recipe plant-based while still tasty. If you need a gluten-free version, you can use gluten-free flour blends. Look for a blend that works well for baking. Some good options include almond flour or coconut flour. You may need to adjust the liquid to get the right batter texture. Each flour behaves differently, so feel free to experiment until you find what you like best. Want to make your pancake bites even more fun? You can add different mix-ins! Try adding blueberries, raspberries, or chopped nuts like walnuts and pecans. These additions will give extra flavor and texture. Just fold them gently into the batter before cooking. You can create a unique bite each time! To store leftovers, let the pancake bites cool down first. Then, place them in an airtight container. You can keep them in the fridge for about three days. If you want to keep them fresh, separate layers with parchment paper. This helps to prevent sticking. Freezing pancake bites is simple. Start by letting them cool completely. Then, lay them flat on a baking sheet. Freeze for about one hour until they are firm. After that, transfer them to a freezer-safe bag. They can last up to three months in the freezer. Be sure to label the bag with the date. Reheating pancake bites without losing texture is key. For the best results, use your oven. Preheat it to 350°F. Place the bites on a baking sheet. Heat for about 10 minutes until warm. You can also use a microwave. Just warm them for 15-20 seconds at a time, checking to avoid sogginess. Enjoy them warm for the best taste! To make your pancake bites fluffier, focus on a few key points. First, use fresh baking powder and baking soda. These ingredients help the batter rise. Second, do not overmix the batter. Mixing too much makes the bites dense. Stir until just combined, leaving some lumps. Lastly, let the batter rest for a few minutes. This allows air bubbles to form, which adds fluffiness. Yes, you can make these pancake bites without eggs. For a great egg substitute, use a flax egg. To make a flax egg, mix one tablespoon of ground flaxseed with three tablespoons of water. Let it sit for about five minutes until it thickens. You can also use unsweetened applesauce or mashed banana as an alternative. Each option keeps your bites tasty and moist. Cook the pancake bites for about 2-3 minutes on one side. Look for bubbles forming on the surface. When the edges look set, it’s time to flip. Cook for another 1-2 minutes until they are lightly golden. This timing ensures a perfect texture. Always check the center to make sure they are cooked through. Yes, these pancake bites are great for meal prep. You can make a batch ahead of time and store them. Let them cool, then place them in an airtight container. Keep them in the fridge for up to five days or freeze for up to three months. When you're ready to eat, just reheat in the microwave or toaster. This makes for a quick, tasty snack or breakfast option! We covered all the key steps to make tasty pancake bites. From mixing the right ingredients to cooking them perfectly, it's all about balance. You can easily make these treats healthier or adjust them to your diet. Feel free to experiment with flavors and mix-ins. Remember, these bites are quick to prepare and fun to share. Enjoy your delicious results and make breakfast more exciting!

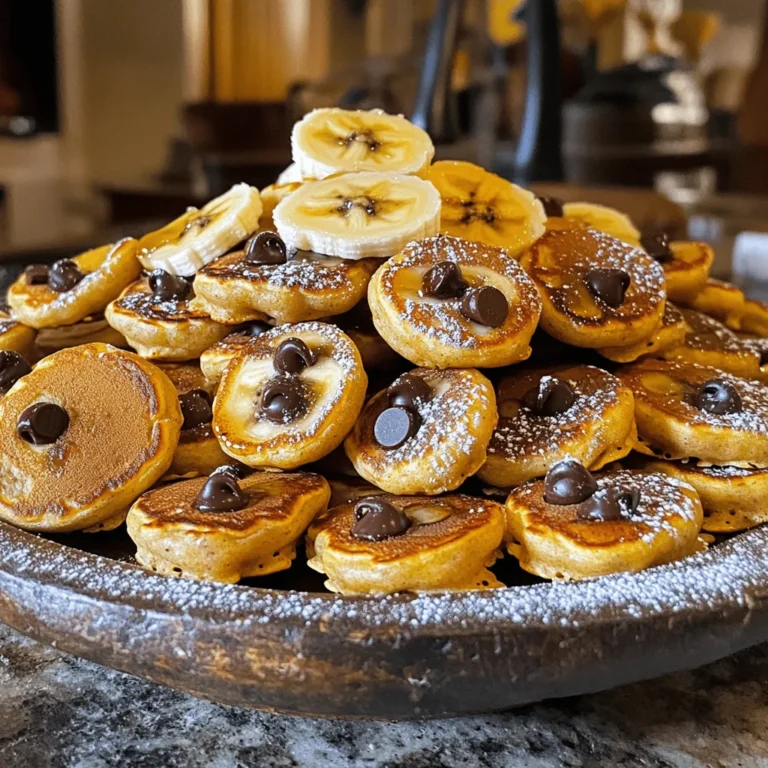
Chocolate Chip Banana Pancake Bites Delightful Snack

To make Caprese stuffed portobello mushrooms, you will need: - 4 large portobello mushrooms, stems removed - 1 cup cherry tomatoes, halved - 1 cup fresh mozzarella balls, halved - 1/4 cup fresh basil leaves, chopped - 2 tablespoons balsamic glaze - 1 tablespoon olive oil - 2 cloves garlic, minced - Salt and pepper to taste - Optional: 1/4 teaspoon red pepper flakes for a kick Fresh ingredients make a big difference in taste. When choosing your portobello mushrooms, look for ones that are firm and dry. Avoid mushrooms that feel slimy. For the tomatoes, pick bright, ripe ones. They should smell sweet. Use fresh mozzarella for the best flavor. It should be soft and creamy. Fresh basil is key; choose vibrant, green leaves. You can swap ingredients if needed. For mushrooms, try large caps like shiitake. Instead of cherry tomatoes, use diced regular tomatoes. You can use any cheese, like feta or goat cheese, instead of mozzarella. For a lighter option, skip the cheese and add more herbs. If you want spice, add more red pepper flakes! Start by gathering your ingredients. You will need: - 4 large portobello mushrooms, stems removed - 1 cup cherry tomatoes, halved - 1 cup fresh mozzarella balls, halved - 1/4 cup fresh basil leaves, chopped - 2 tablespoons balsamic glaze - 1 tablespoon olive oil - 2 cloves garlic, minced - Salt and pepper to taste - Optional: 1/4 teaspoon red pepper flakes for a kick First, preheat your oven to 375°F (190°C). This step is key for even cooking. In a mixing bowl, combine the halved cherry tomatoes, mozzarella balls, minced garlic, and chopped basil. Then, drizzle the olive oil and balsamic glaze over the mixture. Season with salt, pepper, and red pepper flakes if you like some heat. Now, gently toss everything together until well coated. Next, place the portobello mushrooms on a baking sheet lined with parchment paper, gill side up. This helps keep the juices in. Generously spoon the Caprese mixture into each mushroom. Fill them to the brim for a tasty bite. Now, it’s time to bake! Slide the baking sheet into your preheated oven. Bake for 20-25 minutes. The mushrooms should become tender, and the cheese will melt and bubble. Keep an eye on them to avoid overcooking. Once baked, remove the mushrooms from the oven and let them cool for a couple of minutes. This helps prevent burns. For a lovely presentation, serve them on a platter. Garnish with fresh basil leaves and drizzle with more balsamic glaze. This adds a pop of color and flavor. These stuffed mushrooms are not just a dish; they are a feast for the eyes and the palate! To keep your mushrooms firm, start with fresh portobellos. Clean them gently with a damp cloth. Do not soak them in water. When you bake, place them gill side up. This helps the moisture escape. You can also roast the mushrooms for a few minutes before adding the filling. This step removes excess water and makes them less soggy. Seasoning is key to a great dish. I like to use salt and pepper for basic flavor. For a little heat, add red pepper flakes. Fresh basil adds a nice touch, too. Use quality balsamic glaze for a sweet and tangy kick. Drizzling it on top after baking makes everything pop. Don't forget to taste the filling before you stuff the mushrooms. Adjust the seasoning to your liking. You can prepare these mushrooms ahead of time. Stuff the mushrooms and cover them in the fridge. Bake them when you're ready to serve. This makes them great for parties. You can also pre-mix the filling and store it in a container. Just stuff the mushrooms right before baking. This way, you save time and impress your guests! {{image_2}} You can easily make Caprese stuffed portobello mushrooms more hearty. Add ingredients like cooked quinoa or couscous. These grains add bulk and texture, making the dish more filling. You might also enjoy adding roasted red peppers or artichoke hearts. They add a nice flavor twist. To make this dish vegan, swap out the mozzarella for vegan cheese. Many brands offer plant-based mozzarella that melts well. You can also use tofu for a protein boost. Just press it to remove water and cube it. Drizzle the stuffed mushrooms with a little olive oil and balsamic glaze. This will keep the dish tasty and vibrant. Get creative with toppings! You can sprinkle pine nuts or walnuts for a crunchy texture. Fresh herbs like oregano or thyme can elevate the flavor. If you like heat, consider adding jalapeños or a dash of hot sauce. A pinch of smoked paprika can also add a lovely depth. Enjoy the fun of making this dish your own! To store leftover Caprese stuffed portobello mushrooms, let them cool first. Place them in an airtight container. Keep the container in the fridge. This helps keep the mushrooms fresh for up to three days. Make sure to label the container with the date. This way, you know when they need to be eaten. Reheating these stuffed mushrooms is easy. Preheat your oven to 350°F (175°C). Place the mushrooms on a baking sheet. Cover them with foil to keep them moist. Heat for about 10-15 minutes. Check if they are warm all the way through. You can also use a microwave. Place the mushrooms on a plate and cover them. Heat for 1-2 minutes, but be careful not to overcook them. You can freeze these mushrooms for later use. First, let them cool completely. Place them in a single layer on a baking sheet. Freeze them for about an hour. After they are frozen, transfer them to a freezer-safe bag. Make sure to remove as much air as possible. Label the bag with the date. They can last for up to three months in the freezer. When ready to eat, thaw them in the fridge overnight before reheating. One common mistake is overcooking the mushrooms. Mushrooms can turn tough if baked too long. Always check them after 20 minutes. Another mistake is not seasoning enough. Add salt and pepper to bring out the flavors. Also, don’t skip the balsamic glaze. It adds a sweet touch that makes the dish pop. Lastly, be careful not to overcrowd the mushrooms with filling. They should be stuffed but not overflowing. This helps them cook evenly. Yes, you can prepare the mushrooms ahead of time. You can stuff the portobellos and store them in the fridge. Just cover them with plastic wrap. They will stay fresh for about a day. When ready to eat, bake them as directed. You may need to add a few extra minutes to the baking time if they are cold. These stuffed mushrooms pair well with a light salad. A simple arugula or mixed greens salad works great. You can also serve them with crusty bread to soak up the balsamic glaze. If you're feeling fancy, pair them with a glass of white wine. This dish is versatile and can fit many meal plans. We've covered how to make delicious Caprese stuffed Portobello mushrooms. You learned about ingredients, how to prepare and bake them, and tips for better flavor. Remember, avoid soggy mushrooms and use fresh ingredients. Consider variations for different diets, like vegetarian or vegan options. Storing and reheating leftovers can keep this dish tasty. With these steps, you can impress anyone at your table. Enjoy your cooking and savor those flavors!

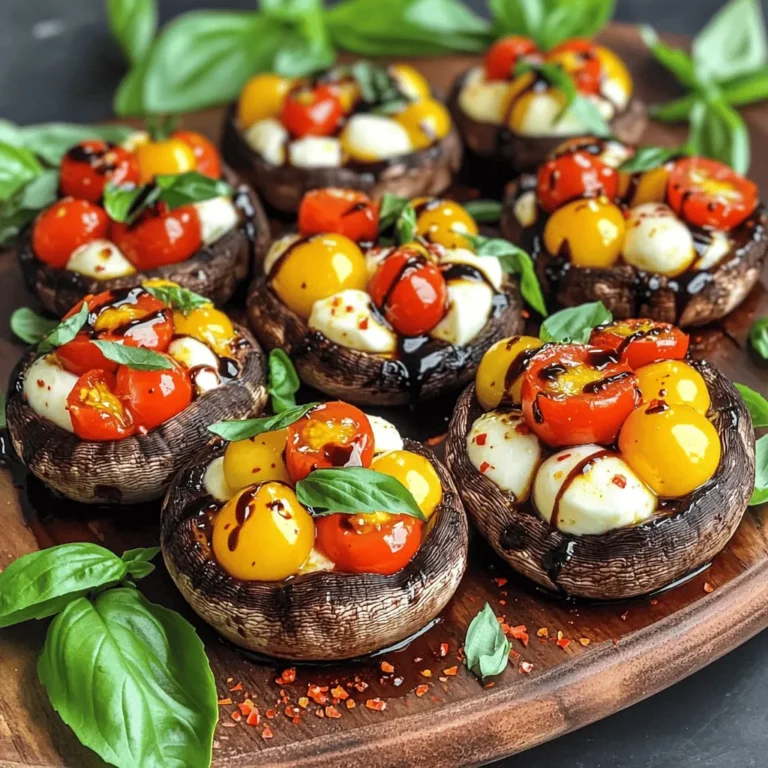
Caprese Stuffed Portobello Mushrooms Delightful Dish

- 2 cups Greek yogurt (plain or flavored) - 2 tablespoons honey or maple syrup - 1 cup mixed berries (strawberries, blueberries, raspberries) - 1/4 cup dark chocolate chips - 1/4 cup granola - A pinch of sea salt This frozen yogurt bark is simple and fun to make. You need Greek yogurt, which gives it a creamy base. You can choose plain yogurt or one with flavor. I often use honey or maple syrup to sweeten it. This adds a nice touch without being too sweet. Berries are the stars of the show. I love using a mix of strawberries, blueberries, and raspberries. They bring bright colors and fresh flavors. You can also add some dark chocolate chips for a sweet crunch. Granola gives a nice texture, too. Lastly, a sprinkle of sea salt can really boost the taste. Each ingredient plays a part. The yogurt is creamy, the sweetener adds sweetness, and the berries provide freshness. Together, they create a healthy treat you’ll love! First, mix 2 cups of Greek yogurt with 2 tablespoons of honey or maple syrup in a bowl. Stir until it blends well. Next, line a baking sheet with parchment paper. This helps you take the bark out easily later. Then, pour the yogurt mixture onto the baking sheet. Spread it evenly to about 1/2 inch thick. Now, it’s time to add toppings. Take 1 cup of mixed berries—like strawberries, blueberries, and raspberries. Press them gently into the yogurt layer. This helps the berries stick. If you want, sprinkle 1/4 cup of dark chocolate chips and 1/4 cup of granola on top. These add great texture and taste. Before freezing, add a pinch of sea salt to the top. This enhances the flavors. Place the baking sheet in the freezer. Let it freeze for 3 to 4 hours until it is solid. Once frozen, break the yogurt bark into pieces of your choice. Enjoy your healthy treat! When making frozen yogurt bark, you can choose between plain or flavored yogurt. Plain yogurt gives you control over sweetness. Flavored yogurt offers added taste but may have more sugar. For a creamy texture, Greek yogurt is the best choice. It is thick and rich, making your bark satisfying. If you prefer a dairy-free option, use coconut yogurt or almond yogurt. Both provide a nice texture without the dairy. Check the labels for added sugars and flavors. This will help you pick the healthiest choice for your bark. You can enhance the flavor of your frozen yogurt bark in fun ways. Consider adding a pinch of cinnamon or vanilla extract. These simple ingredients can change the taste without a lot of effort. You can also try almond or coconut extract for a different twist. For berry substitutions, try using peaches or mangoes. These fruits add a sweet and tropical touch. You can also mix in some nuts or seeds for extra crunch. This adds both flavor and nutrition to your treat. Serving your yogurt bark can be a fun part of the process. Use a decorative plate or a slate board to make it pop. Scatter whole berries around the bark for color. This adds a fresh and inviting look. You can also cut the bark into fun shapes. Use cookie cutters for stars or hearts. This makes your treat more playful, especially for kids. Serve with a scoop of yogurt or a drizzle of honey for added flair. {{image_2}} You can mix and match fruits in your yogurt bark. Try using raspberries, strawberries, or blueberries. Each berry adds its own flavor. You can also use bananas, peaches, or mangoes. Seasonal fruits work great too. In summer, use fresh peaches. In winter, try pomegranate seeds for a pop of color. Adding nuts or seeds boosts crunch and nutrition. Almonds, walnuts, or chia seeds make great choices. Just sprinkle them on top before freezing. If you want a dairy-free option, swap Greek yogurt for plant-based yogurt. Almond or coconut yogurt works well. This way, everyone can enjoy a tasty treat. If you love chocolate, add different kinds. Try milk or white chocolate chips for a sweet twist. You can also layer nut butter on top for richness. Almond or peanut butter adds creaminess and flavor. This makes your frozen yogurt bark even more exciting and fun to eat. To store your frozen yogurt bark, wrap it well. Use plastic wrap or a sealable bag. This keeps out air and protects the flavor. I like to cut the bark into pieces first. Then, place them in an airtight container. This makes it easy to grab a piece later. To keep the flavor fresh, avoid stacking pieces directly on top of each other. Instead, place a layer of parchment paper between them. This helps prevent sticking. Remember, the colder your freezer, the better your bark will stay fresh. When it’s time to serve, take the bark from the freezer. You can thaw it in the fridge for about 15 to 20 minutes. This method helps it stay firm. If you need it faster, leave it at room temperature for a few minutes. To prevent melting while serving, keep the bark on a chilled plate. You can use ice beneath the plate for extra coolness. This way, it stays firm while you enjoy it. Your frozen yogurt bark can last up to two months in the freezer. To keep it tasting great, try to eat it within the first month. After that, it might lose some flavor. Signs of spoilage include ice crystals forming on the bark or a change in color. If you notice these signs, it’s best to toss it out. Always trust your senses—if it doesn’t look or smell right, don’t eat it. Frozen yogurt bark can last up to two months in the freezer. To keep it fresh, store it in an airtight container. Ensure it is well-wrapped to prevent freezer burn. Always check for ice crystals before eating; this can mean it’s losing quality. Yes, you can use many types of berries! Fresh strawberries, blueberries, and raspberries work best. If fresh berries are not available, frozen berries are a great choice too. Just make sure to thaw them first. This makes them easier to press into the yogurt. They will still taste great! This recipe is very flexible! To make it vegan, swap Greek yogurt for a plant-based yogurt. For gluten-free options, check that your granola is gluten-free. If you want a low-sugar treat, skip the honey or use a sugar substitute. These changes can make the bark fit your diet perfectly! In this post, we explored how to make delicious frozen yogurt bark. We covered the main ingredients like Greek yogurt, honey, and mixed berries. You can add fun toppings, freeze your creation, and even customize it for your taste. Remember, using fresh fruits or healthy additions can make a big difference. Don't forget to store it right for the best flavor. Now, get creative and enjoy this tasty treat any time!

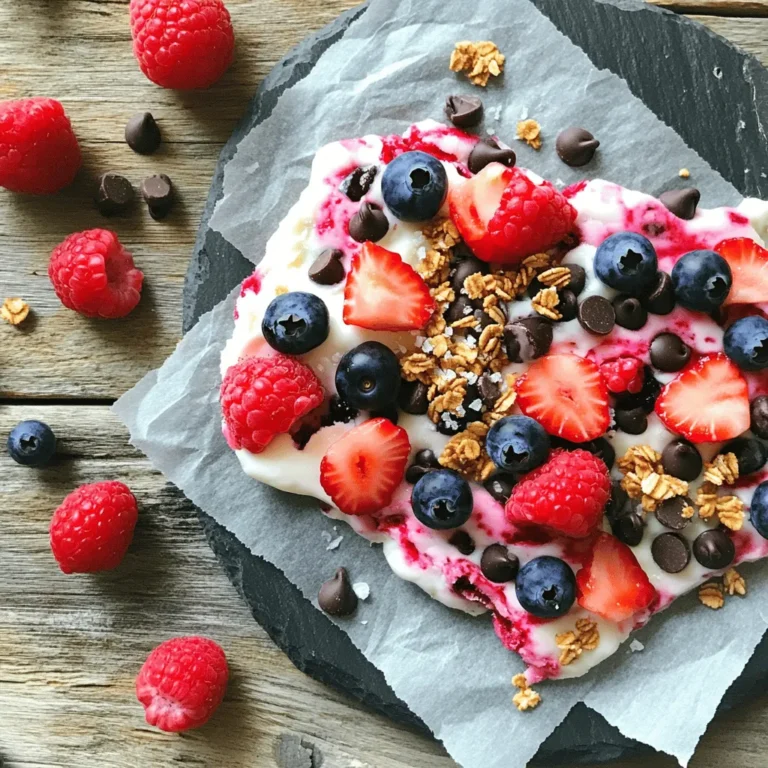
Frozen Yogurt Bark with Berries for a Healthy Treat

To create Cajun Chicken Alfredo Pasta, you'll need fresh ingredients for the best taste. Here’s what you’ll need: - 12 oz fettuccine pasta - 2 boneless, skinless chicken breasts - 2 tablespoons Cajun seasoning - 2 tablespoons olive oil - 4 cloves garlic, minced - 1 cup heavy cream - 1 cup grated Parmesan cheese - 1 cup fresh spinach - Salt and pepper to taste - Fresh parsley, chopped for garnish Gathering these ingredients is the first step to making a flavorful meal. The fettuccine pasta gives a nice, chewy texture. Chicken breasts add protein and heartiness to the dish. Cajun seasoning brings a kick of spice. Olive oil helps to cook the chicken and adds richness. Garlic adds a fragrant touch to the sauce. Heavy cream makes the Alfredo rich and creamy, while Parmesan cheese provides that classic cheesy flavor. Fresh spinach adds color and nutrition. Lastly, salt, pepper, and parsley bring all the flavors together. Now that you have your ingredients, you're ready to start cooking! Start by preparing a large pot of salted boiling water. The salt helps flavor the pasta. Add 12 ounces of fettuccine pasta to the boiling water. Cook it according to the package instructions until it is al dente, which usually takes about 10-12 minutes. Once cooked, drain the pasta but keep a little pasta water for later. While the pasta cooks, season 2 boneless, skinless chicken breasts. Sprinkle 2 tablespoons of Cajun seasoning on both sides. This adds great flavor. In a large skillet, heat 2 tablespoons of olive oil over medium-high heat. Add the seasoned chicken breasts and cook for about 6-7 minutes on each side. The chicken should be golden brown and cooked through. Remove the chicken from the skillet and let it rest for a few minutes before slicing it into strips. In the same skillet, reduce the heat to medium. Add 4 cloves of minced garlic and sauté for about 1 minute until it smells good. Then, pour in 1 cup of heavy cream. Stir constantly to keep it smooth. Bring the cream to a gentle simmer. Gradually stir in 1 cup of grated Parmesan cheese. Mix until it melts and becomes smooth. Finally, add 1 cup of fresh spinach, cooking it until it wilts, which takes about 2-3 minutes. Now, add the drained fettuccine to the Alfredo sauce. Toss it well to coat the pasta evenly. If the sauce seems too thick, add a little of that reserved pasta water to reach the right consistency. This makes it creamy and delicious. To serve, plate the pasta and top it with the sliced Cajun chicken. This adds a beautiful touch. Finally, garnish with chopped fresh parsley for a pop of color. Enjoy your flavorful meal! - Ensuring chicken is cooked through: Cook the chicken until it reaches 165°F. This keeps it safe to eat. A meat thermometer helps a lot here. Always let the chicken rest for a few minutes before slicing. This keeps the juices inside. - Achieving the perfect pasta texture: Cook fettuccine until it is al dente. This means it should be firm to the bite. Drain the pasta, but save a bit of the pasta water. This water helps adjust the sauce later. - Suggested spices for additional flavor: Besides Cajun seasoning, consider adding Italian herbs like oregano or thyme. You can also use a pinch of smoked paprika for a deeper taste. - Adjusting spice levels according to preference: If you want more heat, add cayenne pepper or extra Cajun seasoning. If you prefer less spice, cut back on the seasoning. Taste as you go to find your perfect balance. - Best practices for plating Alfredo pasta: Use a large bowl or plate. Twirl the pasta with a fork for a nice nest shape. Top it with the sliced Cajun chicken for a colorful look. - Ideas for garnishing: Chop fresh parsley and sprinkle it on top. This adds a pop of color. You can also add grated Parmesan cheese for extra flavor and a nice touch. {{image_2}} You can easily change the protein in this dish. Instead of chicken, try shrimp or sausage. Both options add unique flavors. If you want a vegetarian meal, use tofu or mushrooms. Tofu absorbs flavors well, while mushrooms give a nice texture. Want to mix things up with the sauce? Adding sun-dried tomatoes or roasted red peppers gives a burst of flavor. For a spicy kick, toss in more Cajun seasoning. This will heat things up and make each bite exciting. You don’t have to stick with fettuccine. Whole wheat or gluten-free pasta can work great too. Whole wheat adds fiber, while gluten-free options cater to those with dietary restrictions. You can even try different pasta shapes like penne or rotini for fun. Each shape holds the sauce differently, making each meal unique. To store your Cajun Chicken Alfredo Pasta, let it cool first. Place the leftovers in an airtight container. This helps keep the flavors fresh. You can store it in the fridge for up to three days. Use glass or plastic containers with tight lids for best results. Make sure to label your containers with the date. This way, you know when to use them. You can also freeze Cajun Chicken Alfredo Pasta. First, let it cool completely. Then, portion it into freezer-safe bags or containers. Remove as much air as you can to prevent freezer burn. It can stay good for up to three months in the freezer. To reheat, just take it out and thaw in the fridge overnight. You can warm it up in a skillet over low heat. Add a splash of cream or pasta water to help it come back to life. Stir well as it heats to ensure even warming. Enjoy your tasty meal again! Cajun Chicken Alfredo Pasta is a rich dish that combines flavors. It features fettuccine pasta, tender chicken, and a creamy sauce. The Cajun seasoning adds a spicy kick. The dish includes garlic, heavy cream, Parmesan cheese, and fresh spinach. Each bite offers a mix of creamy and spicy tastes that makes it special. Yes, you can prepare Cajun Chicken Alfredo in advance. Cook the pasta and chicken, then store them separately. Keep the sauce in the fridge too. When ready to eat, reheat everything together. This keeps the flavors fresh and tasty. Just remember to add a splash of water to the sauce if it thickens. Pair Cajun Chicken Alfredo with fresh salads or garlic bread. A simple green salad with vinaigrette works great. You can also serve steamed vegetables like broccoli or green beans. These sides balance the richness of the pasta and add color to your plate. To add more heat, use extra Cajun seasoning on the chicken. You can also add red pepper flakes to the sauce. Another option is to mix in diced jalapeños or hot sauce. Adjust the spice level to match your taste for a flavorful kick! Cajun Chicken Alfredo Pasta is a tasty mix of fettuccine, chicken, and rich sauce. You learned how to cook each part, from pasta to sauce. I shared tips on flavor and presentation, plus fun ingredient swaps to try. Keep these ideas in mind for your next meal. Enjoy crafting your own delicious version, and make it your own! You can't go wrong with this dish.

Cajun Chicken Alfredo Pasta Flavorful Weeknight Meal

The key to great loaded veggie quesadillas is fresh vegetables. Here’s what you need: - 1 cup bell peppers (red, yellow, and green), thinly sliced - 1 medium zucchini, sliced - 1 cup mushrooms, sliced - 1 cup fresh spinach - 1 small red onion, thinly sliced These veggies add color and flavor. You can mix and match as you like. Cheese makes these quesadillas creamy and delicious. I suggest: - 1 cup shredded cheese (cheddar, mozzarella, or a blend) Choose your favorite cheese or try a mix for more taste. The cheese melts well and adds richness. Don’t forget the extras! Use these to enhance your dish: - Fresh cilantro, chopped (for garnish) - Sour cream or Greek yogurt (for serving) These condiments add a refreshing touch. They also balance the flavors of the quesadillas. You can even try hot sauce if you like some heat. Start by washing all your veggies. Thinly slice the bell peppers, zucchini, and red onion. Slice the mushrooms and set them aside. In a large skillet, heat 2 tablespoons of olive oil over medium heat. Add the sliced bell peppers, zucchini, mushrooms, and red onion. Sauté these for about 5 to 7 minutes until they soften. Next, add 1 cup of fresh spinach, 1 teaspoon of garlic powder, 1 teaspoon of smoked paprika, salt, and pepper. Cook for another 2 minutes until the spinach wilts. Turn off the heat and let the veggies cool for a moment. Now, grab 4 large flour tortillas. Lay two tortillas on a clean surface. On one half of each tortilla, spread the sautéed veggie mix evenly. Sprinkle 1 cup of shredded cheese over the veggies. Fold each tortilla in half to form a half-moon shape. Ensure the filling stays inside as you fold. This is where the fun begins! Put the skillet back on the heat. If needed, add a bit more olive oil. Carefully place the quesadillas in the skillet. Cook them for about 3 to 4 minutes on each side. You want them golden brown and crispy, with the cheese melted inside. If you need to, cook in batches to avoid crowding the pan. After cooking, remove the quesadillas from the skillet. Let them cool slightly, then slice into wedges. Garnish with fresh cilantro. Serve with sour cream or Greek yogurt on the side. Enjoy every bite! For loaded veggie quesadillas, I recommend using large flour tortillas. They are soft and easy to fold. You can also use whole wheat tortillas for a healthier option. Corn tortillas work too, but they may break when folded. Always choose fresh tortillas for the best taste. To make your quesadillas pop, use spices like garlic powder and smoked paprika. These spices add depth and warmth to the veggies. Feel free to add a pinch of cumin or chili powder for extra kick. Taste your filling as you go. Adjust the salt and pepper to your liking for a balanced flavor. When serving your quesadillas, cut them into wedges for easy sharing. Place them on a colorful platter and sprinkle fresh cilantro on top. Serve with sour cream or Greek yogurt for a creamy dip. You can also add salsa or guacamole on the side for more flavor options. Enjoy! {{image_2}} You can add protein to your Loaded Veggie Quesadillas for extra flavor. Cooked chicken, beef, or shrimp work well. You can also use beans like black beans or lentils. They add protein and keep the quesadillas hearty. Just mix them with the veggies when cooking. To make these quesadillas vegan or dairy-free, skip the cheese. Use a dairy-free cheese alternative or leave it out entirely. You can add extra avocado for creaminess. Using hummus as a spread also adds flavor and moisture. Feel free to swap the veggies based on what you like. Try corn, broccoli, or sweet potatoes for a twist. You can also add kale or arugula for a peppery flavor. Get creative and use up what you have in your fridge. The possibilities are endless! Once you make the loaded veggie quesadillas, let them cool. Place them in an airtight container. They will stay fresh in the fridge for up to three days. If you want to keep them longer, freezing is a great option. To freeze the quesadillas, wrap each one in plastic wrap. You can also use foil for extra protection. Place them in a freezer-safe bag or container. They can last up to two months in the freezer. When you're ready to eat, just take them out and let them thaw in the fridge overnight. To reheat, you have a few options. For the best results, use a skillet. Heat it over medium heat and add a little oil. Cook the quesadilla for about 3–4 minutes on each side. You can also use an oven at 350°F for 10–15 minutes. If you're short on time, a microwave works too. Just heat for 1–2 minutes, but the quesadilla may not be as crispy. Enjoy your loaded veggie quesadillas warmed up and ready to eat! Yes, you can make Loaded Veggie Quesadillas ahead of time. Prepare the filling and cook it. Let it cool, then store it in the fridge for up to two days. When you're ready to eat, fill your tortillas and cook them. This saves time and keeps your meal fresh. If you want to skip cheese, there are great options. Try using a nut-based cheese or a vegan cheese. You can also use avocado for creaminess. Nutritional yeast can add a cheesy flavor without dairy. Feel free to mix and match to find what you like best. To avoid soggy quesadillas, use less moisture in your filling. Make sure vegetables are cooked well and drained of any extra liquid. Use a good amount of cheese, as it helps bind the filling. Cook the quesadillas on high heat for a crispy finish. Enjoy them fresh for the best texture! Loaded veggie quesadillas are a tasty way to enjoy fresh ingredients. You learned about the best vegetables, cheeses, and condiments to use. I shared step-by-step instructions for preparing and cooking them perfectly. Useful tips helped you choose tortillas and enhance flavors. Plus, you found variations for protein and vegan options. Finally, I explained storage and reheating methods. With these insights, you can create delicious quesadillas that suit your tastes. Enjoy cooking and experimenting with all these fun ideas!

Loaded Veggie Quesadillas Tasty and Easy Recipe

- 1 cup rolled oats - 1/2 cup pumpkin puree - 1/3 cup almond butter (or peanut butter) - 1/4 cup honey or maple syrup - 1 teaspoon vanilla extract - 1 teaspoon pumpkin pie spice - 1/2 teaspoon cinnamon - 1/4 cup chia seeds - 1/4 cup shredded coconut (unsweetened) - Pinch of salt What are the health benefits of oats and pumpkin? Oats are rich in fiber. Fiber helps with digestion and keeps you full. They also provide energy. Pumpkin is low in calories and high in vitamins A and C. This makes it great for skin and eye health. What benefits do chia seeds and coconut offer? Chia seeds are tiny but mighty. They have protein, omega-3 fats, and fiber. These nutrients are great for heart health and weight management. Shredded coconut adds a yummy flavor. It also provides healthy fats, which can give you energy. Using these ingredients makes Pumpkin Spice Energy Balls not just tasty, but also good for you. They are a fun way to get nutrients while enjoying a snack! 1. First, grab a large mixing bowl. 2. Add 1 cup of rolled oats. 3. Then, mix in 1/2 cup of pumpkin puree. 4. Next, include 1/3 cup of almond butter or peanut butter. 5. Pour in 1/4 cup of honey or maple syrup. 6. Add 1 teaspoon of vanilla extract. 7. Stir well until everything blends together smoothly. 8. Now, it’s time to spice things up. 9. Sprinkle in 1 teaspoon of pumpkin pie spice. 10. Add 1/2 teaspoon of cinnamon for warmth. 11. Toss in 1/4 cup of chia seeds. 12. Follow with 1/4 cup of shredded coconut. 13. Finally, add a pinch of salt to balance the flavors. 14. Mix until all the spices and seeds are spread evenly. 1. Once mixed, it’s time to form the balls. 2. Use your hands to scoop out the mixture. 3. Roll it into small balls, about 1 inch wide. 4. If it feels sticky, don’t worry! 5. Lightly oil your hands or chill the mixture for 15 minutes. 6. This makes it easier to handle. 7. Place the balls on a baking sheet lined with parchment paper. 8. Keep them spaced apart so they don’t stick together. 1. Refrigerate the energy balls for at least 30 minutes. 2. Chilling helps them set and hold their shape. 3. Once firm, transfer them to an airtight container. 4. Store in the fridge for up to one week. 5. Enjoy them as a quick snack or energy boost! To make these energy balls just right, you can adjust the sweetness and texture. If you like it sweeter, add more honey or maple syrup. For a thicker texture, use less pumpkin puree or add extra oats. Freshness matters, too. Always use fresh pumpkin puree for the best taste. Store your ingredients properly to keep them fresh. Sealed containers work well for nuts and nut butters. For serving, arrange the energy balls in a rustic bowl. Dust them lightly with powdered cinnamon for a pretty touch. You can pair them with fresh apple slices for a fun dip. If you plan to gift them, use small jars or boxes. Wrap them with twine and add a label. This makes your gift look special and personal. {{image_2}} You can easily change the taste of your energy balls. Start by swapping the nut butter. Almond butter works well, but peanut butter adds a nice twist. For sweeteners, use honey or maple syrup. Both give a good flavor, but maple syrup is great for a vegan option. Feel free to add extra mix-ins. Chopped nuts like walnuts or pecans add crunch. You can also stir in dark chocolate chips for a sweet touch. Dried fruits like cranberries or raisins can bring in more flavor and chewiness. If you need a vegan option, stick with maple syrup and use almond butter. For gluten-free needs, make sure your oats are certified gluten-free. This keeps the snack safe for gluten-sensitive diets. For those with nut allergies, try sunflower seed butter instead of nut butter. You can still enjoy the energy balls without worry. Just remember to check all labels to ensure they fit your dietary needs. To keep your pumpkin spice energy balls fresh, store them in an airtight container. This helps seal in moisture and flavor. You can use a glass jar or a plastic container with a tight lid. The energy balls will last about one week in the fridge. After that, they may lose their taste and texture. You can freeze energy balls for longer storage. To freeze them, first, place the balls on a baking sheet in a single layer. Make sure they do not touch each other. Freeze them for about two hours until firm. After that, transfer the frozen balls to an airtight container or a freezer bag. They can stay in the freezer for up to three months. When you want to eat a frozen energy ball, take it out and let it thaw. You can leave it in the fridge overnight or at room temperature for about 30 minutes. These energy balls are great as a quick snack and still taste amazing after freezing! Pumpkin spice energy balls last about one week in the fridge. Store them in an airtight container. They stay fresh and tasty this way. If you want to keep them longer, freeze them. They can last up to three months in the freezer. Just make sure to wrap them well in plastic wrap or use a freezer-safe bag. When you’re ready to eat, thaw them in the fridge overnight. Yes, you can. If you don’t have pumpkin puree, try using sweet potato puree or applesauce. Sweet potato gives a nice flavor and texture. Applesauce adds moisture but may change the taste a bit. Each substitute will change the flavor slightly, so experiment to find what you like best. Keep in mind that each option maintains the energy balls' healthy profile. Absolutely! This recipe is great for kids. It has healthy ingredients like oats, pumpkin, and chia seeds. These provide energy and nutrients. The sweetness from honey or maple syrup is kid-friendly, too. You can even add some fun by letting kids help roll the balls. Serve them as an after-school snack or a healthy treat. Pair them with apple slices for a balanced snack! In this blog post, we explored how to make delicious pumpkin spice energy balls. We covered key ingredients, their health benefits, and step-by-step instructions for preparation. I shared tips for perfecting your recipe and creative ways to customize it for your taste. These energy balls are a fun snack option. They are healthy and easy to store or gift. Now, you can enjoy a tasty treat that fits your needs. Happy snacking!

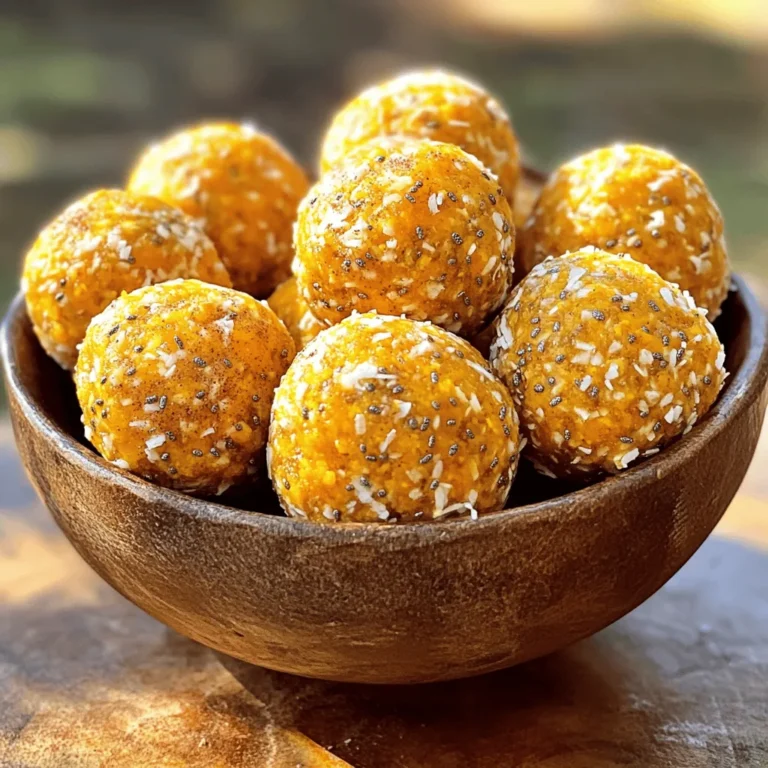
Pumpkin Spice Energy Balls Easy Healthy Snack Recipe

To make Cheesy Garlic Pull-Apart Bread, you need only a few key items. Here’s the list: - 1 large round loaf of bread (like sourdough or focaccia) - 1 cup shredded mozzarella cheese - 1/2 cup shredded cheddar cheese - 1/4 cup unsalted butter, melted - 4 cloves garlic, minced - 2 tablespoons fresh parsley, chopped - 1 teaspoon Italian seasoning - Salt and pepper to taste - 1/4 teaspoon red pepper flakes (optional for a kick!) These ingredients blend perfectly to create a warm, cheesy snack. The garlic and herbs give it an amazing aroma. When picking cheese, you want the best melt and flavor. I love using mozzarella for its gooey texture. It melts beautifully and stretches when you pull apart the bread. Cheddar adds a nice sharpness that contrasts well with the mild mozzarella. You can also try mixing in some provolone or gouda for a twist. Each cheese adds its own character, so feel free to experiment with your favorites. For this recipe, select a bread that has a sturdy crust and soft inside. Sourdough is a top choice because it has a slight tang that enhances the flavors. Focaccia is also great as it is fluffy and absorbs the garlic butter well. Avoid bread that is too soft, as it may fall apart when you cut it. A round loaf shape makes it easy to pull apart and share! Start by preheating your oven to 375°F (190°C). In a small bowl, mix together 1/4 cup of melted unsalted butter and 4 cloves of minced garlic. Add in 2 tablespoons of chopped fresh parsley, 1 teaspoon of Italian seasoning, and a pinch of salt and pepper. If you like heat, add 1/4 teaspoon of red pepper flakes. Stir until everything blends well. This mix will give your bread an amazing flavor. Take your large round loaf of bread, like sourdough or focaccia. Place it on a cutting board. Use a sharp knife to make deep cuts in the bread, forming a crosshatch pattern. Make sure to cut deep enough to create pockets but do not cut all the way through. This step is key! It allows the garlic butter and cheese to seep into the bread. Now it’s time to stuff your bread. Grab a spoon or a brush. Carefully drizzle the garlic butter mixture into the cuts you made. Make sure it goes deep into those crevices. Then, take 1 cup of shredded mozzarella cheese and 1/2 cup of shredded cheddar cheese. Stuff it into the cuts, pushing down to fill each pocket generously. This is where the magic happens! Your bread will become cheesy and flavorful. Now you're ready to bake! To get that gooey, melted cheese, use fresh cheese. Shredded cheese melts better than blocks. Mix mozzarella with cheddar for a tasty blend. Stuff the cheese deep into the bread cuts. This helps the cheese melt evenly. Bake the bread wrapped in foil first. This traps steam and keeps the bread soft. Unwrap it for the last few minutes. This gives you that nice, golden top. One common mistake is cutting the bread too deep. You want cuts but not all the way through. This keeps the bread intact. Another mistake is not using enough garlic butter. More butter means more flavor! Don't rush the baking. Follow the times in the recipe. If you take it out too soon, the cheese won’t melt well. Serve your pull-apart bread warm for the best taste. A wooden board looks nice for serving. Add extra parsley on top for color. A small bowl of marinara sauce pairs well for dipping. You can also try it with a side of ranch dressing. This adds a fun twist to your snack! {{image_2}} Want a kick in your cheesy bread? Add red pepper flakes! This spice brings heat and flavor. Simply mix 1/4 teaspoon of red pepper flakes into your garlic butter. This small tweak can make a big difference. You’ll enjoy a warm, spicy bite with each piece. You can change the flavor by using fresh herbs. Try basil, thyme, or rosemary. Each herb gives a new taste. Chop about two tablespoons of your chosen herb and mix it into the garlic butter. This adds freshness and depth. Experiment to find your favorite mix! While mozzarella and cheddar are great, don’t stop there! Try gouda or pepper jack for a twist. These cheeses melt well and add unique flavors. Mix different kinds for a cheesy surprise. Use equal parts of each cheese for balance. Your pull-apart bread will become a fun cheese adventure! To keep your leftover cheesy garlic pull-apart bread fresh, wrap it well. Use plastic wrap or foil. This keeps moisture in and air out. Store it at room temperature for one to two days. For longer storage, you should consider freezing. When you're ready to enjoy leftover bread, preheat your oven to 350°F (175°C). Place the bread in foil to keep it from drying out. Heat for about 10 to 15 minutes. This makes the cheese melty again and warms the bread perfectly. If you want to save your pull-apart bread for later, freezing is a great option. Wrap the bread tightly in plastic wrap, then again in foil. This prevents freezer burn. You can keep it frozen for up to three months. When you want to eat it, let it thaw in the fridge overnight before reheating. Yes, you can use gluten-free bread. Just choose a sturdy loaf. Sourdough or focaccia works well. The texture may differ, but the flavor still shines. Make sure to check the gluten-free bread for freshness. This bread tastes best fresh, but it can last for two days. Store it in an airtight bag at room temperature. If you want it to last longer, consider freezing it. Just make sure to wrap it tightly in foil. You can prepare the garlic butter mix and cut the bread ahead of time. Just store the bread in the fridge until you are ready to bake. When you are ready, stuff it with cheese and bake as directed. Enjoy the warm, cheesy goodness! Cheesy garlic pull-apart bread is a tasty treat that’s easy to make. We covered the key ingredients, from choosing the right cheese to selecting bread types. I shared steps to prepare the garlic butter and stuff the bread. You learned various tips to ensure perfect cheese melt and avoid common mistakes. We also explored fun variations, storage tips, and answered your FAQs. Enjoy experimenting with flavors and making this dish your own. With these tips, you can impress everyone with your cooking skills.

Cheesy Garlic Pull-Apart Bread Irresistible Snack Delight

To make delicious blackberry lemon scones, gather these ingredients: - 2 cups all-purpose flour - 1/2 cup granulated sugar - 1 tablespoon baking powder - 1/2 teaspoon salt - 1/2 cup unsalted butter, cold and cubed - 1 cup fresh blackberries, halved - Zest of 1 lemon - 1/2 cup heavy cream - 1 large egg - 1 teaspoon vanilla extract - Extra sugar for sprinkling on top If you need to convert measurements, here are some helpful tips: - 1 cup = 8 ounces - 1 tablespoon = 3 teaspoons - 1/2 cup = 4 ounces These conversions can help you adjust the recipe based on what you have at home. Using fresh ingredients makes a big difference in flavor. Fresh blackberries provide juicy bursts in each bite. The zest of lemon adds a bright note that lifts the scones. Cold butter helps create a flaky texture. Always choose the best ingredients you can find for great results. Freshness ensures your scones taste amazing! First, I set my oven to 400°F (200°C). This temperature helps the scones rise nicely. I line my baking sheet with parchment paper. This makes it easy to clean up later. In a large mixing bowl, I whisk together the flour, sugar, baking powder, and salt. Each ingredient plays a role. The flour gives structure, while sugar adds sweetness. Baking powder helps the scones rise, and salt enhances flavor. Next, I add the cold, cubed butter to my dry mixture. I use a pastry cutter or my fingers to mix it in. I want the mix to look like coarse crumbs. Then, I gently fold in the halved blackberries and lemon zest. I take care not to break the berries. They add bursts of flavor and color. In a separate bowl, I whisk together the heavy cream, egg, and vanilla extract. This mixture adds moisture and richness to the scones. The cream makes them tender, while the egg adds structure. I pour the wet mix into the dry mix and stir until just combined. I don’t overmix, or the scones may become tough. Next, I turn the dough onto a floured surface and gently knead it a couple of times. I pat the dough into a circle about 1-inch thick. Using a knife, I cut the dough into 8 wedges. I place them on my prepared baking sheet. I brush the tops with a bit of extra cream and sprinkle sugar on top. This gives a sweet crust. I bake them for 15-20 minutes until they are golden brown on top. After baking, I let them cool slightly before transferring them to a wire rack. Enjoy your scones warm! To get the best scone texture, keep your butter cold. Cold butter makes flaky layers. Cut the butter into small cubes before adding it to the flour. Mix until it looks like coarse crumbs. This step helps create that light and airy texture we love. When mixing wet and dry ingredients, do not overmix. You want a few lumps to stay. This keeps the scones tender. One common mistake is using warm butter. Warm butter makes the dough too soft. Another issue is overworking the dough. Knead it just enough to bring it together. If you break the blackberries too much, they will turn mushy. Handle them gently while folding them in the dough. Lastly, don’t skip the sugar sprinkle on top. It adds a crunchy finish! To boost flavor, try adding a touch of almond extract. It pairs well with lemon and blackberry. You can also mix in nuts for added crunch. Walnuts or pecans go great with these scones. For a fun twist, add a little fresh thyme for an earthy taste. You can also serve them with lemon glaze or honey for a sweet touch. {{image_2}} You can switch blackberries for other berries. Raspberries, blueberries, or strawberries work great. Each berry brings a unique flavor. Raspberries add a tart kick, while strawberries give a sweet taste. Just be sure to adjust the amount as some berries are bigger than others. Use about 1 cup of whatever berry you choose. This keeps your scones fresh and fun! Want to mix it up? Add more citrus! Try orange or lime zest along with lemon. This boosts the flavor and gives a nice zing. Add about 1 tablespoon of zest. You can even add a splash of juice for extra taste. Just keep an eye on the wet ingredients so the dough stays right. You can make these scones gluten-free! Use a good gluten-free flour mix instead of all-purpose flour. Look for a mix that has xanthan gum. This helps the scones hold together. You might need to add a bit more liquid. Start with an extra tablespoon of cream if the dough seems dry. Enjoy your tasty treat, gluten-free! To keep your leftover scones fresh, place them in an airtight container. They can stay at room temperature for up to two days. If you want to keep them longer, try the fridge. Just make sure they are completely cool before you store them. If you have extra scones, freezing is a great option. Wrap each scone in plastic wrap. Then, place them in a freezer bag or container. This way, they can last for up to three months. When you're ready to eat, just pull them out and thaw them. To reheat scones, preheat your oven to 350°F (175°C). Place the scones on a baking sheet. Heat them for about 10 minutes. This method keeps them warm and soft. You can also use a microwave, but they may become a bit soggy. For best results, stick with the oven. You can tell scones are done when they turn golden brown on top. The edges should look firm, and a toothpick inserted in the center should come out clean. If the scones are still wet in the middle, they need more time in the oven. Keep an eye on them from the 15-minute mark onwards. This will help you avoid over-baking. Yes, you can make the dough in advance. Shape it into a disc and wrap it well in plastic wrap. Then refrigerate it for up to 24 hours. When you are ready to bake, just cut the dough into wedges and follow the baking steps. This saves time for a busy morning or a special brunch. Blackberry lemon scones are delightful on their own, but you can enhance them further. Serve them warm with clotted cream or butter. A drizzle of lemon glaze adds a sweet and tangy touch. Pair them with a nice cup of tea or coffee for a perfect snack. You could also add fresh fruit for extra flavor. You can use frozen blackberries if fresh ones are not available. Just keep in mind that frozen berries may release more juice. This can make the scones a bit wetter. To avoid this, do not thaw the berries before adding them to the dough. Fold them in gently to keep the dough from getting too wet. Heavy cream adds richness and moisture to the scones. It helps create a tender texture. If you do not have heavy cream, you can substitute it with half-and-half or whole milk. However, the scones may not be as rich. If you want the same texture, consider adding a bit more butter. In this blog post, we covered key ingredients for making scones, including measurement tips and the need for freshness. We walked through easy steps to bake perfect scones and shared helpful tips for great results. Variations let you get creative, and proper storage keeps your scones fresh. Remember, baking is fun and allows room for your personal twist. Use these insights to make your scone journey enjoyable and tasty. Happy baking!

Blackberry Lemon Scones Simple and Tasty Recipe

To make Spaghetti Squash Bolognese, gather these items: - 1 medium spaghetti squash - 1 tablespoon olive oil - 1 onion, finely chopped - 2 cloves garlic, minced - 1 carrot, diced - 1 celery stalk, diced - 1 bell pepper (any color), diced - 1 zucchini, diced - 1 (14 oz) can crushed tomatoes - 1 tablespoon tomato paste - 1 teaspoon dried oregano - 1 teaspoon dried basil - Salt and pepper to taste - Fresh basil leaves for garnish For a fresh twist, consider using: - Fresh basil instead of dried - A mix of colorful bell peppers - Seasonal veggies like spinach or mushrooms These fresh ingredients boost flavor and nutrition. They add color and texture too. You might already have these in your kitchen: - Olive oil - Garlic - Canned crushed tomatoes - Tomato paste - Dried herbs like oregano and basil - Salt and pepper These pantry staples make the sauce rich. They create that classic Bolognese taste. First, preheat your oven to 400°F (200°C). Cut the spaghetti squash in half lengthwise. Be careful while cutting! Scoop out the seeds with a spoon. Drizzle a bit of olive oil inside each half. Then, sprinkle with salt and pepper. Place the squash cut side down on a baking sheet. Bake it for 30-40 minutes. You want it soft enough to scrape with a fork. While the squash bakes, heat olive oil in a large skillet over medium heat. Add the chopped onion and sauté until it looks clear, about 3-4 minutes. Next, stir in the minced garlic, diced carrot, celery, and bell pepper. Cook for another 5 minutes. This makes the veggies tender. Then, add the diced zucchini and cook until it gets soft. Pour in the crushed tomatoes and add the tomato paste, oregano, basil, salt, and pepper. Mix well. Lower the heat and let it simmer for 15-20 minutes. Stir it occasionally to blend the flavors. Once the spaghetti squash is done, take it out from the oven. Let it cool for a few minutes. Use a fork to scrape the flesh into spaghetti-like strands. Place these strands on a plate. Top with your Bolognese sauce, and don’t forget to garnish with fresh basil leaves. Enjoy your healthy and delicious meal! To get a rich Bolognese flavor, start with good olive oil. Sauté the onion until it turns clear. This step builds a tasty base. Add garlic next for a nice aroma. Using fresh herbs like basil and oregano makes a big difference. If you want a bit more depth, add a splash of red wine while the sauce simmers. Let it cook slowly for about 20 minutes. This time lets the flavors mix well. Cooking spaghetti squash is simple but needs care. Start by cutting the squash in half. Scoop out the seeds before seasoning. Drizzle olive oil inside and sprinkle salt and pepper. Make sure to place it cut side down on a baking sheet. Bake it at 400°F for 30 to 40 minutes. You know it’s ready when you can scrape the flesh easily with a fork. When serving, use a fork to create the noodle strands. Place the strands on a plate and top with the Bolognese sauce. A few fresh basil leaves on top add color and taste. If you like cheese, sprinkle some grated Parmesan for extra flavor. This dish pairs well with a simple green salad or crusty bread. Enjoy your healthy meal! {{image_2}} You can easily make this dish vegetarian or vegan. Simply skip the meat and use extra veggies. For a vegan twist, swap in vegetable broth for added taste. You can also add lentils or chickpeas for protein. These swaps keep the dish hearty and flavorful. If you want more protein in your meal, add ground turkey or beef. You can also use plant-based proteins like tempeh or lentils. Just brown them in the skillet before adding the vegetables. This way, you keep the rich flavor of Bolognese while boosting nutrition. Feel free to adjust the spices to suit your taste. A pinch of red pepper flakes adds heat. Fresh herbs like thyme or rosemary can deepen the flavors. You can also try adding a splash of red wine for a richer sauce. Experimenting with spices makes each meal unique and exciting. After you enjoy your Spaghetti Squash Bolognese, store any leftovers in an airtight container. This keeps the dish fresh and tasty. You can keep it in the fridge for up to three days. Make sure to let the dish cool down before sealing it. This step helps prevent moisture build-up inside the container. To reheat, you can use a microwave or a stovetop. If using a microwave, place the portion on a plate and cover it with a damp paper towel. Heat for about 1-2 minutes, checking if it’s warm throughout. For stovetop reheating, warm the Bolognese sauce in a pan over low heat until it’s hot. Stir occasionally to avoid burning. If you want to save your Spaghetti Squash Bolognese for later, freezing is a great option. First, let the dish cool completely. Then, pack it in a freezer-safe container. You can also use freezer bags for easy storage. Squeeze out as much air as possible before sealing. This can keep the dish good for about three months. When you're ready to eat, thaw it overnight in the fridge before reheating. Yes, you can! Other squash types like butternut or acorn squash work well. They have a sweet taste that adds flavor. Keep in mind, they may not have the same noodle-like texture. You might need to adjust cooking times based on the squash type. Experimenting can lead to fun new dishes. You will know it's done when the flesh is soft. After baking for 30-40 minutes, poke it with a fork. If it easily scrapes into strands, it is ready. If it feels firm or hard, bake it a little longer. Trust your fork; it is the best test! Spaghetti squash is low in calories but high in nutrients. It is rich in vitamins A and C, which help your body. It also has fiber, which is good for digestion. Plus, it is a great low-carb alternative to regular pasta. Eating it can help you feel full and satisfied. We explored how to make a great Bolognese sauce with spaghetti squash. We covered ingredients, step-by-step cooking, and helpful tips. You also learned about tasty variations and storage methods. Remember, cooking is about finding what you enjoy. Try different spices and flavors to make this dish your own. Don't be afraid to mix things up and have fun. Happy cooking!

Spaghetti Squash Bolognese Flavorful and Easy Recipe

PREV 1 … 4 5 6 … 8 NEXT
secrets pice kitchen

explore

DessertsDinnerAppetizersDrinks

Our Policies

  • Cookie Policy
  • Copyright Policy
  • Disclaimer
  • GDPR Policy
  • Terms Of Use
Back to Top
  • About
  • Contact Us
  • Privacy Policy
© 2025 secrets pice kitchen