FREE DINNER EBOOK! Get your copy!
  • Cookie Policy
  • GDPR Policy
  • Disclaimer
  • Terms Of Use
  • Visit my other site: Fun Cookie Recipes
secrets pice kitchen
  • Home
  • Dinner
  • Desserts
  • Drinks
  • Appetizers
  • Contact
  • About
  • Privacy Policy
  • Home
  • Dinner
  • Desserts
  • Drinks
  • Appetizers
  • Contact
  • About
  • Privacy Policy
  • Cookie Policy
  • GDPR Policy
  • Disclaimer
  • Terms Of Use
Visit my other site: Fun Cookie Recipes

HOME / CATEGORIES /

Latest

- 2 cups cooked chicken, shredded - 1 (8 oz) package cream cheese, softened - 1 cup buffalo sauce (adjust to taste) - 1 cup ranch dressing - 1 cup shredded cheddar cheese - 1/2 cup blue cheese crumbles (optional) - 1/4 cup chopped green onions (for garnish) - Tortilla chips or celery sticks (for serving) To make buffalo chicken dip, you need some simple ingredients. Start with 2 cups of cooked chicken. Shredded works best. Then grab an 8-ounce package of cream cheese. Make sure it’s softened. Next, you need 1 cup of buffalo sauce. Adjust this to your taste. Some like it spicy! You will also need 1 cup of ranch dressing. This adds creaminess and flavor. Don't forget 1 cup of shredded cheddar cheese for that gooey goodness. If you like strong flavors, add 1/2 cup of blue cheese crumbles. This is optional but delicious! Finally, for garnish, chop 1/4 cup of green onions. They add a nice pop of color. Serve your dip with tortilla chips or celery sticks for dipping. This mix of flavors makes the best buffalo chicken dip! - Combine 2 cups of cooked, shredded chicken with 1 package of softened cream cheese. - Add 1 cup of buffalo sauce and 1 cup of ranch dressing. - Stir until well mixed. This creates a rich base for your dip. - Cover the slow cooker and set it to low for 2 hours. - Stir occasionally for even heating. This helps all the flavors blend perfectly. - After 2 hours, add 1 cup of shredded cheddar cheese and ½ cup of blue cheese crumbles, if you like. - Stir to combine, then cover and cook for an additional 30 minutes. - This step makes the dip creamy and cheesy, just how we want it! To make buffalo dip just right, taste your sauce. If it’s too spicy, add more cream cheese or ranch dressing. This reduces heat and gives it a creamy texture. You can also mix mild buffalo sauce with hot sauce. This way, you control the spice level. If you need a dairy-free option, use vegan cream cheese and ranch. These swaps work well without losing flavor. Tortilla chips and celery sticks are perfect for dipping. They add crunch and freshness. You can also serve it with carrot sticks or crackers for variety. Want to make it a meal? Pair it with a light salad or some veggies. This adds balance and makes it filling. Remember to keep it warm in the slow cooker while serving. Everyone can enjoy it straight from the pot! {{image_2}} You can make this dip healthier with a few swaps. Use low-fat cream cheese instead of regular. This change cuts fat without losing flavor. You can also switch ranch dressing for a low-fat version. These small changes make a big difference. Another option is to use Greek yogurt instead of cream cheese. Greek yogurt adds creaminess and protein. It gives the dip a nice tangy taste too. You won’t miss the cream cheese at all! Want to switch things up? Try using different sauces. Barbecue sauce can give a sweet twist. Chipotle sauce adds a smoky kick. Both options can change the whole dip experience. You can also add extra spices to enhance flavor. Try garlic powder or smoked paprika for depth. A pinch of cayenne can give it a spicy edge. Don’t be afraid to experiment! Each variation can create a new favorite dish. After you finish making your buffalo chicken dip, let it cool down. Leave it in the slow cooker for about 30 minutes. This helps it drop to a safe temperature. Once it cools, transfer the dip to an airtight container. Store it in the refrigerator. It can last up to four days. If you have a lot left, you can freeze it. Use a freezer-safe container, and it will stay good for up to three months. When you want to enjoy your dip again, reheating is easy. If using a microwave, place it in a bowl. Heat for one minute, stir, then heat in 30-second bursts. This keeps it hot and creamy. If you prefer the slow cooker, set it on low. Stir every 10 minutes for even heating. Both methods work well to keep the texture and flavor intact. Remember to taste and adjust the seasoning as needed for the best experience. Yes, you can use raw chicken. To cook raw chicken in the slow cooker, add it to the pot with the other ingredients. First, season the chicken with salt and pepper. Then, combine it with cream cheese, buffalo sauce, and ranch dressing. Cook on low for 4 to 6 hours. Make sure the chicken reaches an internal temperature of 165°F. Afterward, shred the chicken before serving. Buffalo chicken dip pairs well with many dippers and sides. Here are some popular options: - Tortilla chips - Celery sticks - Carrot sticks - Pita chips - Crackers - Sliced baguette You can also serve it with veggie platters for a fresh touch. Buffalo chicken dip lasts about 3 to 4 days in the fridge. To check for freshness, look for changes in smell or texture. If it smells off or has mold, it’s best to throw it away. Always store leftovers in an airtight container for the best quality. You now have a complete guide for making buffalo chicken dip. We covered the key ingredients, step-by-step instructions, and tips for success. You learned how to adjust flavors and explore tasty variations. Remember to store your dip wisely and reheat it properly. Enjoy this dish with friends and family. It's perfect for any gathering. With these steps, you can create a crowd-pleaser that everyone will love.

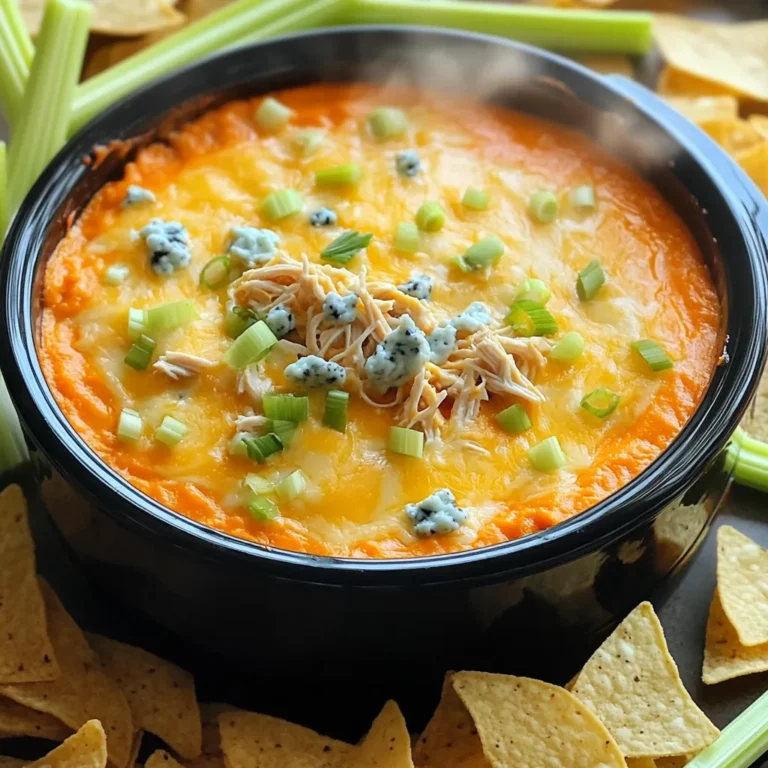
Buffalo Chicken Dip Slow Cooker Simple and Delicious

- 1 ½ cups graham cracker crumbs - ⅓ cup sugar - ½ cup unsalted butter, melted - 2 cups cream cheese, softened - 1 cup powdered sugar - 1 teaspoon vanilla extract - 1 cup heavy whipping cream - 2 cups fresh strawberries, hulled and sliced - ¼ cup strawberry jam Using fresh, ripe strawberries is key. Look for bright red berries with no soft spots. Choose high-quality cream cheese for a rich taste. I prefer unsalted butter for better control over sweetness. Use pure vanilla extract for the best flavor. You can swap graham cracker crumbs with crushed cookies or even nuts for a twist. If you need a dairy-free option, use a plant-based cream cheese. For the sweetener, maple syrup or honey can replace powdered sugar. Use a different fruit jam if you want to change the flavor. Start by mixing graham cracker crumbs, sugar, and melted butter in a bowl. Use a fork to combine them well. This mix should be crumbly but stick together when pressed. Next, take a 9x9 inch baking dish. Press the crumb mixture firmly into the bottom. Make sure it is even. Now, place the dish in the fridge while you make the filling. In a large bowl, beat the softened cream cheese until it is smooth. Add the powdered sugar and vanilla extract slowly. Keep beating until the mix is creamy and well combined. In a different bowl, whip the heavy cream until stiff peaks form. Gently fold the whipped cream into the cream cheese mix. This step adds lightness to your filling. Now it’s time to build your bars. Spread half of the cheesecake filling over the crust. Next, layer half of the sliced strawberries on top. Spoon half of the strawberry jam over the berries. Then, add the rest of the cheesecake filling on top. Finally, add the remaining strawberries and jam. This creates tasty layers. Cover the baking dish with plastic wrap. Place it in the fridge for at least 4 hours to set. For the best flavor, leave it overnight. When ready to serve, lift the bars out of the dish. Cut them into squares. Enjoy them chilled for a refreshing treat! To get that perfect no-bake texture, keep these tips in mind: - Use soft cream cheese. It blends easier, making your filling smooth. - Whip the cream well. You want stiff peaks for a light texture. - Fold gently. This helps keep the air in the whipped cream. - Chill long enough. Let it sit for at least four hours, or better, overnight. For a stunning presentation, I suggest adding a few finishing touches: - Top with strawberries. Place a fresh slice on each bar for color. - Drizzle with jam. A bit of strawberry jam adds shine and flavor. - Use a clean knife. Wipe the knife after each cut for neat slices. - Serve on a nice plate. A beautiful plate makes it more inviting. Avoid these common mistakes for the best results: - Skipping the chilling step. Don’t rush this; it’s key to setting. - Overmixing the cream. This can make it grainy instead of fluffy. - Not pressing the crust firmly. A loose crust will crumble when cut. - Using cold cream cheese. Cold cheese makes mixing harder and lumpy. {{image_2}} You can switch up the fruit on these bars easily. Try using blueberries or raspberries. Both fruits add a nice tartness. You can also use sliced peaches or even bananas for a fun twist. The key is to pick fruits that pair well with cream cheese. Fresh fruit keeps the bars bright and tasty. For a different flavor, you can change the vanilla extract. Use almond extract for a nutty taste. You can also add lemon zest for a fresh citrus kick. If you love chocolate, mix in cocoa powder or melted chocolate. These changes make the cheesecake just as creamy and delicious. To make this recipe gluten-free, swap graham crackers for gluten-free ones. Use almond flour or oat flour for the crust. For a vegan option, try using coconut cream instead of cream cheese. You can also use a dairy-free whipped cream. These swaps keep the bars rich and smooth without animal products. To store leftover strawberry shortcake cheesecake bars, place them in an airtight container. Keep them in the refrigerator. They will stay fresh for about 3 to 5 days. If you want to keep them longer, consider freezing. You can freeze these cheesecake bars for up to 2 months. First, cut them into squares. Then, wrap each piece tightly in plastic wrap. Place the wrapped bars in a freezer-safe bag or container. Make sure to label it with the date. To keep your cheesecake bars fresh, always use clean utensils when serving. Avoid leaving them out at room temperature for too long. If possible, serve them chilled right from the fridge. This will keep the texture creamy and delicious. Enjoy them cold for the best taste! Yes, you can make these cheesecake bars ahead of time. They taste great after chilling in the fridge. I suggest making them the night before. This way, the flavors blend well together. Just cover them with plastic wrap before chilling. The cheesecake bars are set when they feel firm to the touch. After at least four hours in the fridge, check if they hold their shape. You can also use a toothpick. If it comes out clean, they are ready. Yes, you can use frozen strawberries if fresh ones are not available. Just thaw them first and drain any extra juice. This helps keep the bars from becoming too watery. The flavor will still be delicious! These bars pair well with whipped cream or a scoop of vanilla ice cream. You can also add more fresh strawberries on top. A drizzle of chocolate sauce adds a fun twist too! This blog post covered the key steps to make delicious cheesecake bars. We discussed the best ingredients, how to prepare them, and shared tips for perfect results. You learned about variations to suit your taste and how to store leftovers properly. Making cheesecake bars can be fun and easy. Use the tips here to impress your friends and family. Enjoy experimenting with flavors, and remember to avoid common mistakes. With practice, you’ll master this treat and delight everyone who tries it.

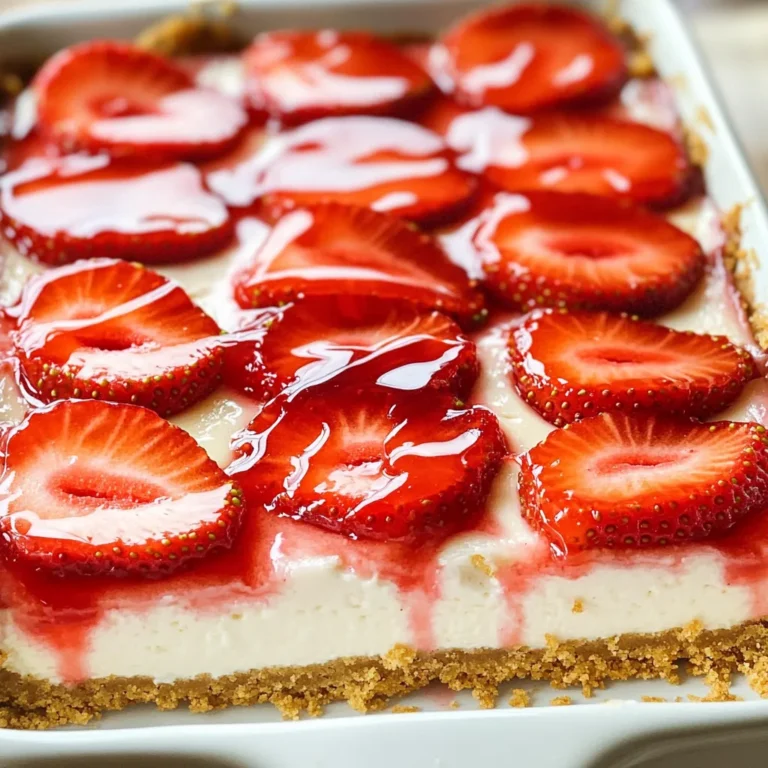
Strawberry Shortcake Cheesecake Bars Simple No Bake

- 1 pound maple-flavored chicken sausage, sliced into rounds - 1 medium butternut squash, peeled and cubed - 1 red bell pepper, sliced - 1 red onion, cut into wedges - 2 tablespoons olive oil - 2 tablespoons pure maple syrup - 1 teaspoon dried thyme - 1 teaspoon garlic powder - 1 teaspoon smoked paprika - Salt and pepper to taste - Chopped fresh parsley for garnish (optional) You need 1 pound of sausage. Use a medium butternut squash for the best flavor. One red bell pepper and one red onion give great color and taste. Measure out 2 tablespoons of olive oil and maple syrup. Use 1 teaspoon each of thyme, garlic powder, and smoked paprika. Finally, add salt and pepper based on your taste. If you can’t find maple sausage, try turkey or pork sausage. For a veggie twist, swap sausage for chickpeas or lentils. If butternut squash is not available, use acorn squash or sweet potatoes. Bell peppers can be replaced with zucchini or carrots for a different taste. You can use fresh herbs instead of dried thyme for a brighter flavor. 1. Preheat the oven to 400°F (200°C). This helps your food cook evenly. 2. Prepare the veggies. Take 1 medium butternut squash, peel it, and cube it. 3. Slice a red bell pepper and cut a red onion into wedges. 4. Mix them together in a large bowl. 5. Add flavor. Drizzle 2 tablespoons of olive oil and 2 tablespoons of pure maple syrup over the veggies. 6. Season the mix with 1 teaspoon of dried thyme, 1 teaspoon of garlic powder, and 1 teaspoon of smoked paprika. Sprinkle salt and pepper to taste. 7. Toss everything well until the veggies are coated. 1. Spread the veggies out in a single layer on a large sheet pan. 2. Add the sausage. Slice 1 pound of maple-flavored chicken sausage into rounds. Scatter them over the veggies. 3. Roast in the oven for 25-30 minutes. Stir halfway through for even cooking. 4. Check for doneness. The squash should be tender and the sausage heated through. 1. Remove the sheet pan from the oven and let it cool for a few minutes. 2. Garnish with chopped fresh parsley if you like. 3. Serve warm and enjoy your tasty Maple Sausage and Squash Sheet Pan Dinner! To get the best roast, cut your veggies evenly. This helps them cook at the same rate. Check on them halfway through. Give everything a good stir to help with even cooking. Look for a nice caramelization on the squash and sausage. This adds great flavor to your dish. Want to boost flavor? Try adding a splash of balsamic vinegar before roasting. It adds a tangy kick. You can also sprinkle some crushed red pepper flakes for heat. Fresh herbs like rosemary or sage can brighten the dish. Adding garlic cloves will give a rich taste. You can prep this dish ahead of time. Chop the squash and veggies a day before. Store them in the fridge in an airtight container. You can also slice the sausage ahead of time. When you’re ready, just toss everything on the sheet pan. This makes dinner quick and easy. Enjoy a tasty meal without the fuss! {{image_2}} You can change ingredients to fit your taste. For the sausage, try turkey or pork. This gives you different flavors. If you want a meatless option, use chickpeas or tofu. You can also switch butternut squash for sweet potatoes or acorn squash. Both options work well and add great taste. For the peppers, yellow or green bell peppers can be used instead of red. To change the flavor, you can add spices. Try adding cumin for a warm taste. If you like heat, sprinkle in some red pepper flakes. For a fresh touch, add lemon juice or zest before serving. You can also mix in some fresh herbs, like rosemary or sage. These herbs pair well with squash and sausage. This dish can easily fit many diets. For gluten-free eaters, make sure to check the sausage label. Many brands offer gluten-free options. If you are low-carb, skip the squash and use cauliflower instead. This keeps the meal light but still filling. For a vegan meal, use plant-based sausage and skip the maple syrup. You can use agave syrup instead for sweetness. After cooking, let the dish cool down. Store leftovers in an airtight container. Place it in the fridge. Enjoy it within three to four days for the best taste. The maple sausage and squash should stay fresh. If you want to save some for later, freezing works well. Allow the dish to cool fully. Transfer it to a freezer-safe container. Make sure to label it with the date. It can last up to three months in the freezer. When you are ready to eat, just thaw it in the fridge overnight. To reheat, use the oven for the best results. Preheat your oven to 350°F (175°C). Place the dish in an oven-safe dish and cover it with foil. Heat for about 20 minutes, or until warmed through. You can also use the microwave. Just heat in short intervals, stirring in between. Enjoy your meal just like the first time! You can pair this dish with a simple green salad. A light vinaigrette works well. Garlic bread is another great side. It adds a nice crunch and flavor. For a heartier meal, serve it with quinoa or rice. These grains soak up the juices well. You can also add a dollop of yogurt for creaminess. This mix of flavors balances the sweetness of the meal. Yes, you can use any sausage you like. Try pork, turkey, or even plant-based sausage. Each type will bring its own flavor. Just make sure to adjust the cooking time. Some sausages may cook faster or slower than chicken sausage. Always check to make sure they are fully cooked. The key is to enjoy the flavors that you love. The squash is done when it is tender. You can check this with a fork. If it goes in easily, it's ready. Roasting time is around 25-30 minutes at 400°F. Keep an eye on it and stir halfway through. The edges may brown a bit, and that’s fine. It adds a nice flavor and texture. This blog post guides you through the ingredients for a Maple Sausage and Squash Sheet Pan Dinner. You have a detailed ingredient list and measurements, along with tasty alternatives. I provided step-by-step instructions for preparation, roasting, and serving. You can use tips to perfect your roast and enhance flavor. Variations let you swap ingredients and adjust for dietary needs. Lastly, storage info ensures your meal stays fresh. Enjoy your delicious creation and make it your own!

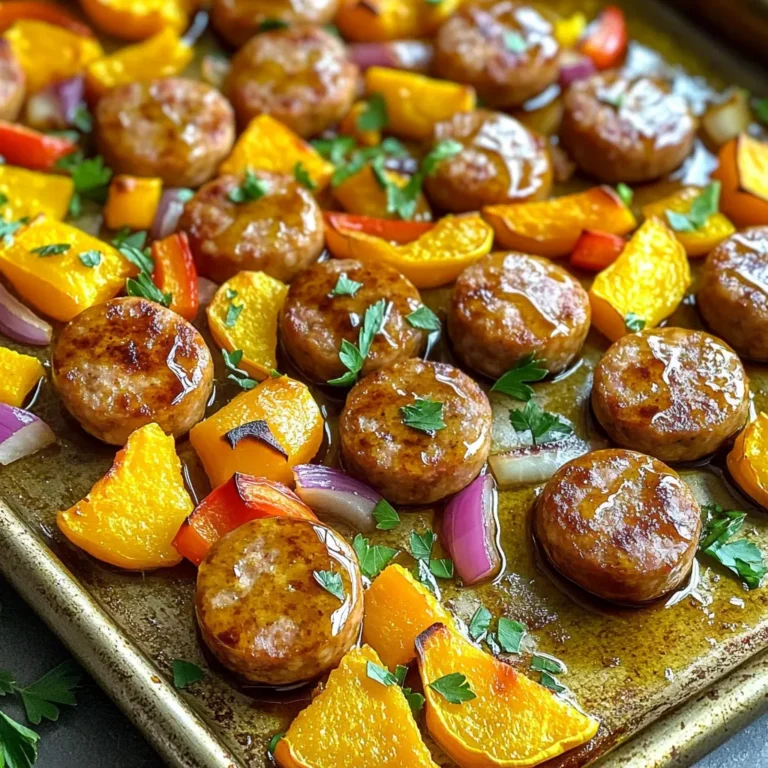
Maple Sausage and Squash Sheet Pan Dinner Delight

When making Air Fryer Honey Mustard Brussels Sprouts, you need fresh and simple ingredients. Here is what you will need: - 1 lb Brussels sprouts, trimmed and halved - 2 tablespoons honey - 2 tablespoons Dijon mustard - 2 tablespoons olive oil - 1 teaspoon garlic powder - 1/2 teaspoon salt - 1/4 teaspoon black pepper - 1/4 teaspoon smoked paprika - Fresh parsley, for garnish Each ingredient plays a key role in creating a tasty dish. The Brussels sprouts provide the base, while honey and Dijon mustard make the perfect sweet and tangy sauce. Olive oil helps them crisp up nicely in the air fryer. Garlic powder adds depth, and the spices bring warmth and flavor. Finally, fresh parsley gives a pop of color and freshness. When you gather these ingredients, you set the stage for a delightful meal. In a large bowl, I first whisk together the following: - 2 tablespoons honey - 2 tablespoons Dijon mustard - 2 tablespoons olive oil - 1 teaspoon garlic powder - 1/2 teaspoon salt - 1/4 teaspoon black pepper - 1/4 teaspoon smoked paprika This mix combines sweet and tangy flavors. You want a smooth, creamy dressing that covers the sprouts well. Next, I add the halved Brussels sprouts to the bowl. I toss them in the honey mustard dressing. Make sure each sprout is well coated. This step is key for flavor. The dressing clings to the sprouts, making them tasty. Now it’s time to preheat the air fryer. I set it to 375°F (190°C) for about 5 minutes. Then, I place the coated Brussels sprouts in the basket. I arrange them in a single layer. If you have too many, cook them in batches. I air fry the Brussels sprouts for 15-18 minutes. I shake the basket halfway through. This helps them cook evenly. When they turn golden brown and crispy, they are ready. Once done, I carefully remove them and transfer them to a serving platter. For a nice touch, I garnish them with fresh parsley. To get crispy Brussels sprouts, set your air fryer to 375°F. This temperature works well for even cooking. Remember to shake the basket halfway through. This helps the sprouts cook evenly and get that nice crunch. If you run out of honey, maple syrup works great. It adds sweetness without changing the flavor too much. If you lack Dijon mustard, try yellow mustard. It has a different taste but will still add some zing. For a pretty presentation, use a rustic bowl. Add a drizzle of honey on top for shine. A sprig of parsley adds a nice touch of color. You can also serve these Brussels sprouts with grilled chicken or fish for a complete meal. {{image_2}} You can change the taste of your Air Fryer Honey Mustard Brussels Sprouts easily. By adding spices, you can make this dish your own. For a kick, try adding a pinch of cayenne pepper. If you enjoy herbs, mix in some thyme or rosemary. You can also sprinkle some Parmesan cheese on the sprouts before air frying. This gives a rich and savory flavor that pairs well with the honey mustard. Making this dish vegan is simple. Replace honey with maple syrup or agave nectar. These are great substitutes that keep the sweetness. You can also use a vegan mustard. This way, your Air Fryer Honey Mustard Brussels Sprouts remain tasty and plant-based. Your vegan friends will love them! You can adjust this recipe for different times of the year. In the fall, add a touch of nutmeg for warmth. During the spring, mix in some fresh lemon juice for brightness. If it’s summer, throw in some diced tomatoes after cooking for extra color and flavor. These small changes keep the dish fresh and exciting for any occasion. To keep your cooked Brussels sprouts fresh, store them in an airtight container. Make sure they cool down first. They can stay in the fridge for up to three days. If you want to keep them longer, consider freezing them. To reheat leftover Brussels sprouts, use your air fryer. Set it to 350°F (175°C). Heat for about 5 to 7 minutes. This method helps keep them crispy. You can also use an oven for reheating. Just spread them on a baking sheet and heat at 350°F (175°C) for 10 to 15 minutes. To freeze Brussels sprouts, first ensure they are fully cooked and cooled. Place them in a single layer on a baking sheet. Freeze them for one to two hours until solid. Then, transfer them to a freezer bag. They can last up to three months in the freezer. When ready to eat, thaw them overnight in the fridge, then reheat. For crispy Brussels sprouts, cook them for 15 to 18 minutes at 375°F (190°C). Make sure to shake the basket halfway through to help them cook evenly. This timing gives you a nice golden brown finish and a crunchy outside. Yes, you can use frozen Brussels sprouts! However, they may not get as crispy as fresh ones. If using frozen sprouts, air fry them for about 20 to 25 minutes. Shake the basket a few times during cooking. Thawing them first can also help improve the texture. Honey mustard Brussels sprouts pair well with many dishes. Here are some tasty options: - Grilled chicken or fish - Quinoa or rice for a grain base - A fresh green salad for added crunch - Roasted potatoes for a comforting side - A hearty steak for a delicious main dish These combinations can elevate your meal and make it truly special. Enjoy experimenting! This blog post covered the key ingredients and steps for making Honey Mustard Brussels Sprouts. I shared tips for achieving the perfect crisp and suggested ingredient swaps. There's also room for creative variations and storage tips. In making this dish, you get a tasty side that works for any meal. Enjoy these sprouts fresh or reheated! Try adding your spin to make it truly yours. Cooking should be fun, and I hope this encourages you to experiment!

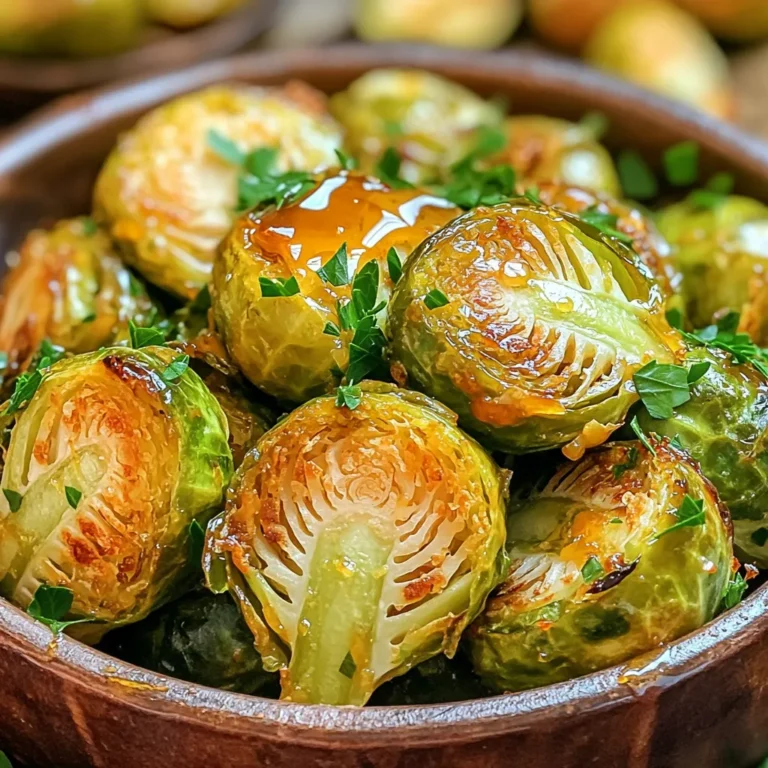
Air Fryer Honey Mustard Brussels Sprouts Delight

- 1 lb flank steak - Vegetables: bell pepper, broccoli, carrot - Sauce Ingredients: soy sauce, honey, rice vinegar, cornstarch The main ingredients in this stir-fry are simple yet flavorful. Start with 1 lb of flank steak. This cut is tender and works well in stir-fry. Slice it thin against the grain for the best texture. Next, choose vibrant vegetables. A bell pepper adds crunch and color. Broccoli florets bring nutrients and a nice bite. Finally, add a julienned carrot for sweetness and crunch. These veggies will cook quickly and stay crisp. For the sauce, use low-sodium soy sauce. It gives flavor without too much salt. Honey adds a touch of sweetness. Rice vinegar gives a hint of tang. Lastly, mix cornstarch with water to thicken the sauce. This will help coat the beef and veggies nicely. - Sesame seeds - Chopped green onions Garnishes can elevate your dish. Sprinkle sesame seeds over the stir-fry for a nutty flavor and crunch. Chopped green onions add freshness and color. Both make your meal look as good as it tastes. - Cooked jasmine rice - Noodles Serve your stir-fry over cooked jasmine rice or noodles. Jasmine rice is fluffy and fragrant, pairing well with the beef. Noodles, on the other hand, soak up the sauce beautifully. Choose whichever you prefer for a satisfying meal. First, take your flank steak and slice it thinly against the grain. This helps make the beef tender. Place the beef in a medium bowl. Next, add 2 tablespoons of sesame oil, 2 cloves of minced garlic, and 1 tablespoon of minced ginger. Mix well to coat the beef. I recommend letting it marinate for at least 15 minutes. This step adds flavor and makes the beef juicier. Heat a large skillet or wok over medium-high heat. Add 1 tablespoon of sesame oil once it’s hot. Now, add the marinated beef to the skillet in a single layer. This is key! Cooking in a single layer ensures even cooking. Sear the beef for about 1-2 minutes on each side. It should be browned but not fully cooked. Remove the beef from the skillet and set it aside for now. In the same skillet, toss in your sliced bell pepper, broccoli florets, and julienned carrots. Stir-fry these vegetables for about 3-4 minutes. You want them to be tender-crisp, meaning they should still have a slight crunch. This keeps their bright colors and nutrients intact. While the veggies are cooking, let’s make the sauce. In a small bowl, mix together 1/4 cup of low-sodium soy sauce, 2 tablespoons of honey, 1 tablespoon of rice vinegar, and 2 teaspoons of cornstarch mixed with 2 tablespoons of water. Stir well until smooth. This mixture will thicken up nicely when added to the stir-fry. Now it’s time to bring it all together! Return the seared beef to the skillet with the cooked vegetables. Pour the sauce over the mixture and stir well. Cook everything together for an additional 2-3 minutes. This allows the beef to finish cooking and the sauce to thicken. Once done, your stir-fry is ready to be served hot! Enjoy it over a bed of jasmine rice or noodles for a delightful meal. To get that restaurant taste, you need high heat. A hot skillet helps sear the beef quickly, locking in juices. This creates a great crust and rich flavor. - Use a wok or large skillet for best results. - Don't crowd the pan. Cook the beef in one layer. This technique allows for even cooking and flavor. To get your beef just right, adjust cooking times. For medium-rare, cook for about 2 minutes per side. If you prefer it well-done, add a minute or two. For vegetables, aim for a tender-crisp texture. Stir-fry them for about 3-4 minutes. - Broccoli should be bright green. - Carrots should maintain some crunch. Serve your stir-fry with jasmine rice or noodles. Both options soak up the sauce well. Pair it with a light beverage, like green tea or a crisp white wine. These drinks balance the flavors nicely. - For a fun twist, try a fruity soda. - Fresh fruit can also make a nice side. {{image_2}} You can easily swap the flank steak for chicken or tofu. If you use chicken, cut it into thin strips. For tofu, press it to remove water, then cube it. Each protein has its cooking time. Chicken cooks faster; it needs about 4-5 minutes until fully done. Tofu should be cooked until golden brown, which takes about 6-7 minutes. Adjust your timing to get it just right. Get creative with your veggies! You can mix and match based on what’s in season. Try snap peas, bok choy, or zucchini for a fresh twist. Adding more greens? Spinach or kale works well. Just toss them in during the last minute of cooking. This way, they stay bright and crunchy. Want to add a kick? Toss in some chili flakes for heat. Just a pinch can elevate the dish. You can also try different sauces. Teriyaki or hoisin sauce can bring a sweet note. Experiment to find your favorite flavor. Each choice can change the dish in fun ways. To keep your sesame ginger beef stir-fry fresh, store leftovers in an airtight container. This helps keep moisture in while avoiding smells from other foods. You should eat the leftovers within 3 to 4 days for the best taste and safety. When reheating stir-fry, use a pan or skillet over medium heat. This method warms the dish evenly. Avoid the microwave if you can, as it often makes vegetables soggy. Stir occasionally to keep everything hot but still crisp. To freeze your stir-fry, let it cool completely first. Place it in a freezer-safe container or bag. Make sure to remove as much air as possible to prevent freezer burn. It will last up to 3 months. When ready to eat, thaw it overnight in the fridge before reheating. This keeps the texture and flavor intact. You can add more spices and sauces to boost flavor. Try adding: - Red pepper flakes for heat - A splash of lime juice for brightness - A teaspoon of hoisin sauce for sweetness - Fresh herbs like cilantro for freshness Mix these in when cooking the beef or vegetables. Experiment to find what you enjoy most! Yes, you can use other cuts of beef. Here are some options: - Sirloin: Tender and flavorful, great for stir-fry. - Ribeye: Rich and juicy, adds a nice taste. - Round steak: Leaner, may need marination for tenderness. Each cut changes the taste and texture, so choose what you like best. This recipe can be made gluten-free. Use these alternatives: - Tamari instead of soy sauce - Coconut aminos as a soy sauce substitute Both options give great flavor without gluten. Check labels to ensure they meet your needs. Yes, you can prep this meal ahead. Here are some tips: - Marinate the beef the night before for deeper flavor. - Chop vegetables in advance and store in the fridge. - Cook the stir-fry and let it cool before storing. You can keep it in the fridge for up to three days. Reheat before serving for the best taste! This blog post covered making a flavorful stir-fry with flank steak and fresh veggies. You learned about key ingredients, marinating beef, and cooking methods. I shared tips to enhance flavor and customize your dish to your taste. Remember, stir-frying is about high heat and quick cooking. Enjoy this dish with rice or noodles for a satisfying meal. Don’t hesitate to experiment with proteins and vegetables. Happy cooking!

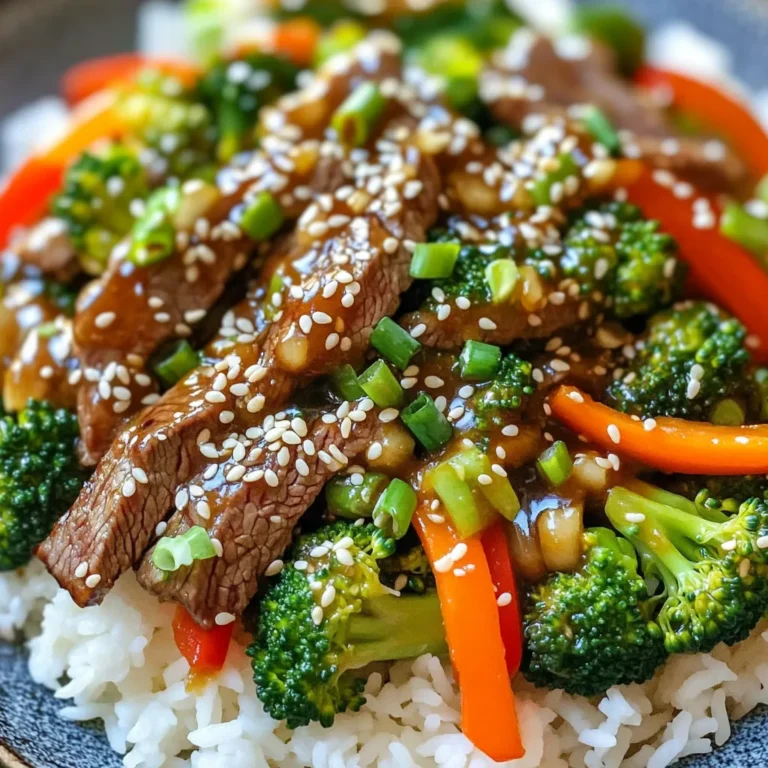
Sesame Ginger Beef Stir-Fry Irresistible Takeout Substitute

- 6 cups mixed greens (arugula, spinach, and romaine) - 1 cup cooked quinoa - 1 cup roasted butternut squash, diced - 1 cup cooked chicken breast, diced - 1/2 cup crumbled feta cheese - 1/2 cup dried cranberries - 1/4 cup chopped pecans - 2 hard-boiled eggs, sliced - 1 avocado, diced I love using mixed greens in this salad. They add color and crunch. Arugula gives a peppery bite, while spinach and romaine keep it fresh. The cooked quinoa adds protein and a nice nutty flavor. Roasted butternut squash brings natural sweetness. I often roast it with a little olive oil and salt for the best taste. The diced chicken breast makes this salad hearty. You can use leftovers or rotisserie chicken. Crumbled feta cheese adds a salty kick. Dried cranberries provide a tart sweetness, which I find delightful. Chopped pecans add a nice crunch and richness. The hard-boiled eggs give extra protein and creaminess. Finally, diced avocado adds a buttery flavor that elevates the whole dish. - 3 tablespoons maple syrup - 2 tablespoons Dijon mustard - 1/4 cup olive oil - 1 tablespoon apple cider vinegar - Salt and pepper to taste For the Maple Dijon dressing, I combine maple syrup and Dijon mustard. This mix gives a sweet and tangy flavor. Olive oil makes the dressing smooth and rich. I add apple cider vinegar for a bright taste. Finally, I sprinkle in salt and pepper to enhance all the flavors. Whisking these together creates a tasty dressing that ties the salad together beautifully. Roasting the butternut squash Start by preheating your oven to 400°F (200°C). Take your diced butternut squash and toss it with a bit of olive oil, salt, and pepper. Spread the squash on a baking sheet. Roast it for about 20 minutes. The squash should be tender and slightly caramelized. This adds a sweet and rich flavor to your salad. Cooking quinoa While the squash roasts, rinse 1/3 cup of quinoa under cold water. In a small pot, add the rinsed quinoa and 2/3 cup water. Bring this mixture to a boil. Lower the heat and cover the pot. Let it simmer for about 15 minutes. The water should be absorbed by the quinoa. Fluff it with a fork, then let it cool. Whisking together the dressing ingredients In a small bowl, combine 3 tablespoons of maple syrup, 2 tablespoons of Dijon mustard, 1/4 cup of olive oil, and 1 tablespoon of apple cider vinegar. Add a pinch of salt and pepper for taste. Whisk everything together until it blends into a smooth dressing. This Maple Dijon dressing will add a sweet and tangy kick to your salad. Layering salad components and adding toppings Grab a large bowl or platter. Start with 6 cups of mixed greens as your base. On top of the greens, layer the cooked quinoa, roasted butternut squash, and diced chicken breast. Sprinkle 1/2 cup of crumbled feta cheese, 1/2 cup of dried cranberries, and 1/4 cup of chopped pecans over these ingredients. Next, neatly arrange 2 sliced hard-boiled eggs and the diced avocado on top. Right before serving, drizzle the Maple Dijon dressing over the salad. You can also add extra salt and pepper to taste. If you want, gently toss the salad to mix all the flavors together. Enjoy every bite of this colorful and tasty Harvest Cobb Salad! To make the best Maple Dijon dressing, balance is key. You want sweet from the maple syrup and tangy from the Dijon mustard. Start with three tablespoons of maple syrup to add sweetness. Then, mix in two tablespoons of Dijon mustard for that nice tang. Add a quarter cup of olive oil to make it smooth. Finally, a tablespoon of apple cider vinegar adds a punch. Taste as you mix. Adjust the sweetness or tang as needed. Freshness matters in your Harvest Cobb Salad. Use mixed greens like arugula, spinach, and romaine for great flavor. These greens add crunch and nutrition. Seasonal produce makes a big difference too. Roasted butternut squash gives a warm touch. Choose ripe avocados for creaminess. Using fresh, high-quality ingredients takes your salad to the next level. A well-arranged salad is a feast for the eyes. Start by layering the mixed greens at the base of your bowl. Then, add the colorful quinoa, squash, and chicken. Sprinkle crumbled feta cheese evenly over the top. Add dried cranberries and chopped pecans for a nice contrast. Finally, place the sliced eggs and diced avocado on top. This makes your salad look inviting and delicious. {{image_2}} You can change some ingredients in the Harvest Cobb Salad. For quinoa, try using cooked farro or brown rice. Both give a nice texture. If you want a different protein, use grilled shrimp or chickpeas for a veggie option. For cheese, goat cheese works great instead of feta. It brings a creamy touch. If you’re not a fan of maple Dijon, try ranch or balsamic vinaigrette. A lemon vinaigrette can add a bright flavor too. You can even make a yogurt-based dressing for a creamy option. Each dressing gives a new taste to the salad. You can adapt this salad for each season. In spring, add fresh peas and radishes. In summer, toss in diced tomatoes and corn. For fall, use roasted sweet potatoes and pomegranate seeds. In winter, add roasted beets and citrus segments. Each season brings its own twist to the Harvest Cobb Salad. To keep your Harvest Cobb Salad fresh, store it in an airtight container. Layer the ingredients wisely. Place the greens at the bottom to prevent wilting. Keep the dressing separate until you are ready to eat. This keeps everything crisp and tasty. You can enjoy leftovers for up to three days in the fridge. For the Maple Dijon dressing, use a clean jar with a lid. Store it in the fridge for up to one week. Before using, give it a good shake to mix the ingredients. If the dressing thickens, add a little water or olive oil to thin it out. This keeps the flavors bright and zesty. You can save time by prepping parts of the salad ahead. Cook the quinoa and roast the butternut squash a day before. Store them separately in the fridge. Chop your veggies and store them in airtight bags. You can also make the dressing in advance. This way, you’ll have a quick, healthy meal ready to go when you need it. Yes, you can make this salad ahead of time. To keep it fresh, store the ingredients separately. Here are some tips: - Prep the greens: Wash and dry the mixed greens, then store them in an airtight container. - Cooked ingredients: Store the quinoa, chicken, and butternut squash in separate containers. - Dress the salad: Add the Maple Dijon dressing just before serving. This keeps the greens crisp. If you do not have maple syrup, there are great substitutes. Use honey for a similar sweetness. Agave nectar is another option. You can also use brown sugar mixed with a bit of water. Each option gives a different flavor but works well in the dressing. Yes, the Harvest Cobb Salad can be gluten-free. Use gluten-free quinoa and check that your Dijon mustard is gluten-free as well. All other ingredients in the salad are naturally gluten-free. Enjoy this meal without worry! The Harvest Cobb Salad brings together fresh greens, quinoa, and delicious toppings. We covered the key ingredients, simple steps, and tips to enhance flavor. Don't forget the maple Dijon dressing that ties it all together. Feel free to mix and match for your tastes, and store leftovers properly for later enjoyment. This salad suits any season and can be prepped ahead of time. Enjoy creating a colorful, tasty dish that packs nutrients and flavor in every bite. Your salad journey starts here!

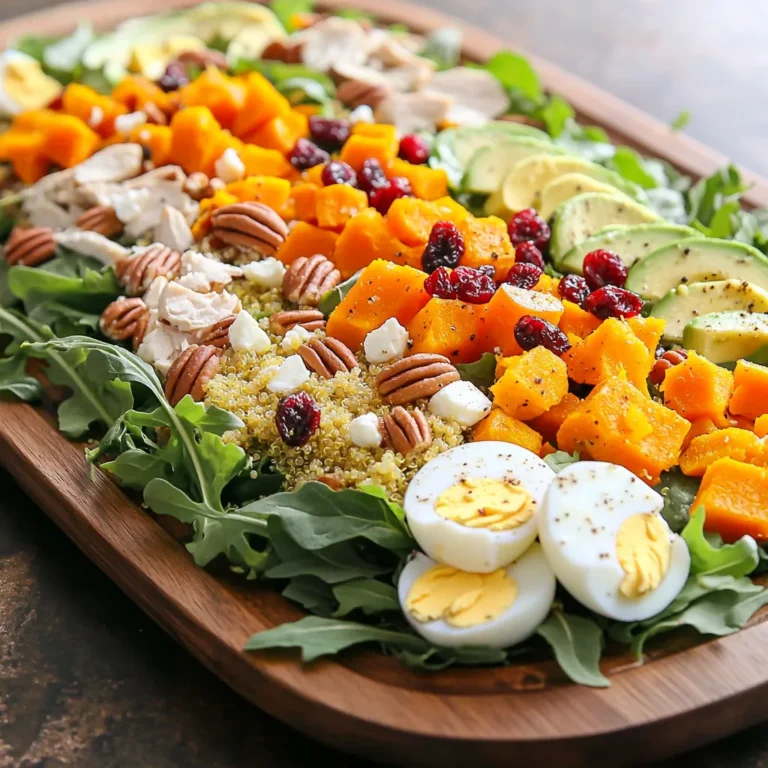
Harvest Cobb Salad with Maple Dijon Flavor Boost

To make tasty garlic knots, you need just a few simple items: - 1 can (8 oz) refrigerated pizza dough - 1/4 cup unsalted butter, melted - 4 cloves garlic, minced - 1 teaspoon dried oregano - 1 teaspoon dried basil - 1/2 teaspoon salt These ingredients create the base flavor and texture. The pizza dough gives the knots their shape. The melted butter and garlic add rich flavor, while the herbs make it aromatic. You can add a few optional items to change the taste: - 1/4 teaspoon red pepper flakes (optional) - Fresh parsley, chopped (for garnish) Red pepper flakes give a nice kick. Fresh parsley adds color and freshness. Feel free to play with these to match your taste. You will need some basic tools to prepare the garlic knots: - Rolling pin - Parchment paper - Baking sheet or plate - Small mixing bowl - Air fryer These tools help you roll the dough, mix the butter, and cook the knots evenly. With these items, you can make these delicious bites easily. First, you need to preheat your air fryer to 375°F (190°C). This step ensures even cooking. Next, dust a clean surface with flour. Unroll the refrigerated pizza dough and roll it out to about 1/4 inch thick. Using a knife or pizza cutter, slice the dough into strips. Each strip should be about 1 inch wide and 6 inches long. Now, take each strip and tie it into a neat knot. This is easy and fun! Place your knots on a plate lined with parchment paper. This helps prevent sticking. In a small bowl, mix melted butter, minced garlic, oregano, basil, salt, and red pepper flakes. Brush half of this garlic herb butter over your knots. Then, place the knots in a single layer in the air fryer basket. Make sure not to overcrowd them. Cook for about 8-10 minutes. Flip the knots halfway through for even browning. They are ready when they turn golden brown. Once cooked, take them out and brush with the remaining garlic butter mix. Add fresh chopped parsley for a pop of color. Enjoy your delightful garlic knots! To make your garlic knots soft on the inside and crisp on the outside, follow a few simple steps. First, roll out your pizza dough evenly. Aim for about 1/4 inch thick. This thickness helps the knots cook evenly. The air fryer does its magic by circulating hot air, so don’t overcrowd the basket. Each knot needs space to puff up and crisp. While the classic garlic and herb taste is fantastic, you can switch it up. Try adding cheese inside the knots or sprinkle some parmesan on top. For a kick, mix in jalapeños or crushed red pepper. You can also use fresh herbs like thyme or rosemary for a garden flavor. Get creative and make these knots your own! Avoid a few common traps to ensure success. First, don’t skip preheating your air fryer; it’s key to a nice texture. Second, be careful with the butter mixture. If it’s too hot, it may cook the dough too fast. Lastly, don’t forget to flip the knots halfway through cooking. This helps them brown evenly and taste great. {{image_2}} For a tasty twist, you can add cheese to your garlic knots. Use mozzarella or cheddar. When shaping the dough, place a small piece of cheese inside each knot before tying it. This method adds a gooey surprise inside each bite. The melted cheese pairs well with the garlic and herb butter. Your guests will love the cheesy goodness! Do you want some heat? Add fresh or pickled jalapeños to your knots. You can mix some diced jalapeños into the garlic herb butter. Brush this spicy mix onto the knots before cooking. This variation gives a nice kick to the savory flavor. Enjoy the perfect blend of spice and garlic! If you want a milder option, stick to fragrant herbs. You can use thyme, rosemary, or even dill. Just swap out the garlic for these herbs in your butter mix. Brush this on the knots before cooking. These herb knots offer a fresh taste without the strong garlic flavor. Perfect for herb lovers! You can store leftover garlic knots in an airtight container. Let them cool first. Place them in the fridge for up to three days. If you want to keep them longer, consider freezing. To reheat garlic knots, use the air fryer for best results. Set it to 350°F (175°C). Heat the knots for about 3-5 minutes. This keeps them warm and crispy. You can also use an oven. Wrap them in foil to prevent drying out. To freeze garlic knots, place them in a single layer on a baking sheet. Freeze them for about an hour. Once firm, transfer the knots to a freezer bag. Remove as much air as possible. You can freeze them for up to three months. When ready to eat, just reheat them in the air fryer or oven. Yes, you can use homemade dough. Make sure it is soft and easy to handle. For best results, let it rest before shaping. This helps the dough stretch well. Homemade dough adds a personal touch and taste. You should air fry garlic knots at 375°F (190°C) for 8-10 minutes. Check them halfway through and flip for even cooking. If your air fryer runs hot, start with 8 minutes. For colder knots, add a minute or two. Garlic knots pair well with many dishes. Try serving them with marinara sauce for dipping. They also go great with salads or soups. You can even enjoy them as a side with pasta or pizza. Yes, these garlic knots are great for meal prep. You can make them ahead and store them in the fridge. Just reheat them in the air fryer for a few minutes. This keeps them warm and crispy. Enjoy them anytime! In this article, we explored making garlic knots from scratch. We covered essential ingredients and tools needed. You learned how to prepare the dough, shape the knots, and cook them in an air fryer. We also shared tips for perfect texture, seasoning ideas, and common mistakes to avoid. Don't forget about the fun variations, like cheese-stuffed or spicy garlic knots. Lastly, we discussed storage and reheating tips. Now, you have all the tools to make delicious garlic knots at home!

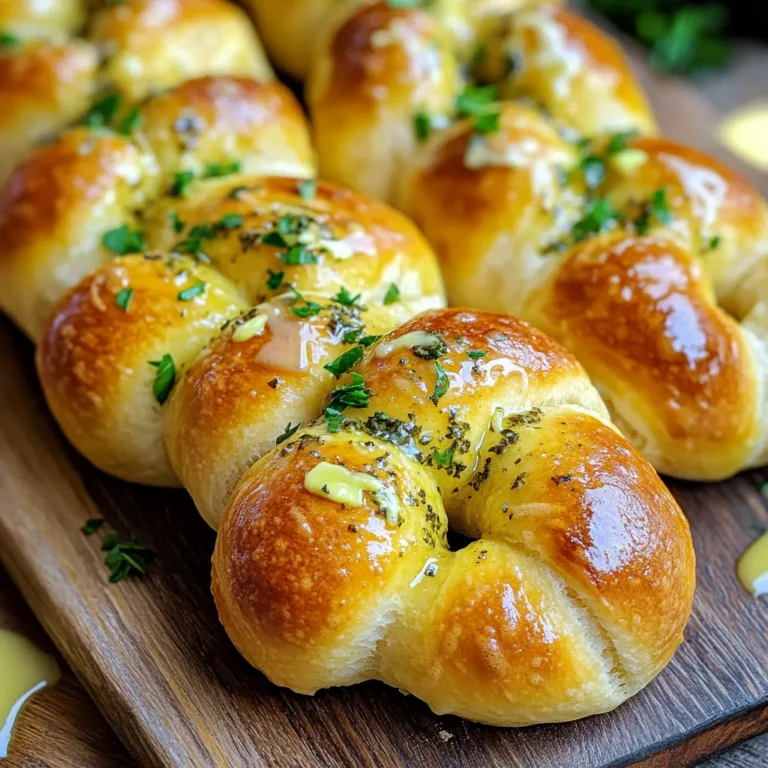
Air Fryer Garlic Knots with Herb Butter Delight

- 2 lbs beef ribs - 1 cup barbecue sauce - 1/2 cup honey - 1/4 cup soy sauce - 2 tablespoons apple cider vinegar - 1 tablespoon Dijon mustard - 2 cloves garlic, minced - 1 teaspoon ginger, minced - 1 teaspoon red pepper flakes - Fresh cilantro When making slow cooker sweet and spicy beef ribs, the right ingredients matter. Let’s break them down. First, the main ingredients create the base of the dish. Choose 2 lbs of beef ribs for a tender, juicy bite. A good barbecue sauce elevates the flavors, so pick your favorite brand. Honey adds a sweet touch, while soy sauce brings in a savory element. Next, we have the seasoning ingredients. Apple cider vinegar gives a nice zing. Prepare 2 tablespoons of it. A tablespoon of Dijon mustard adds depth. Minced garlic and ginger are a must for that aromatic kick. You only need 2 cloves of garlic and 1 teaspoon of ginger. For a little heat and flair, consider optional garnishes. Red pepper flakes can be adjusted based on your spice preference. Fresh cilantro adds a bright finish to your dish. Gather these ingredients, and you are on your way to a delightful meal! Start by seasoning the beef ribs. Use a good amount of salt and pepper. This step is key to bringing out the meat’s natural flavor. Without this initial seasoning, the ribs may taste bland. Next, it’s time to make the sauce. In a bowl, mix the barbecue sauce, honey, and soy sauce. Add in the apple cider vinegar, Dijon mustard, minced garlic, minced ginger, and red pepper flakes. Whisk everything together until fully blended. This sauce will give the ribs their sweet and spicy kick. Now, layer the ribs in the slow cooker. Pour the sauce over the ribs, ensuring they are well coated. You can choose to cook them on low for 6-8 hours or on high for 4-5 hours. The best sign of doneness is when the meat pulls away from the bone easily. Enjoy the aroma while they cook! To make your sweet and spicy beef ribs shine, you can adjust the sweetness and spice. Start with the honey and red pepper flakes. If you want it sweeter, add more honey. For extra heat, sprinkle in more red pepper flakes. Remember, taste as you go! To enhance the sauce consistency, you can strain it after cooking. This will give you a smoother texture. If it's too thick, add a splash of water or broth. If it’s too thin, simmer it on the stove until it thickens. When it comes to sides, think about what pairs well. Mashed potatoes or coleslaw are great choices. You can also serve the ribs with grilled corn or a fresh salad. These sides balance the rich flavors of the ribs nicely. Pair your meal with a cold drink. I suggest a light beer or a sparkling lemonade. These drinks cut through the sweetness and spice, making each bite even better. Choosing the right slow cooker is key. A 6-quart cooker works well for this recipe. It allows enough space for the beef ribs to cook evenly. For even cooking, make sure to layer the ribs properly. Place them in a single layer if possible. If you have to stack them, rotate them halfway through cooking. This ensures all sides get the same heat. {{image_2}} You can change the sauce to fit your taste. Teriyaki sauce adds a fun twist. If you prefer, use pork ribs instead of beef. They work well with the same sweet and spicy mix. To control spice, adjust the red pepper flakes. Use less if you want milder ribs. If you like heat, add fresh peppers. Jalapeños or serranos can kick up the flavor. You can make this dish in an Instant Pot. Cook on high for about 45 minutes. For oven-baking, preheat to 300°F. Bake the ribs in a covered dish for about three hours. This method gives a nice crust while keeping them tender. To keep your leftover sweet and spicy beef ribs tasty, store them in a safe way. First, let the ribs cool down to room temperature. Then, wrap them tightly in plastic wrap or aluminum foil. You can also place them in an airtight container. This keeps them fresh and prevents any odors from other foods. - Use glass or plastic containers with tight lids. - Label containers with the date to track freshness. If you want to save your beef ribs for later, freezing is a great option. Wrap the ribs well in plastic wrap, then place them in a freezer bag. Try to remove as much air as you can before sealing. This helps keep the ribs from freezer burn. - To thaw, move the ribs to the fridge overnight. - For reheating, place them in a slow cooker on low for a few hours. Proper storage helps keep your beef ribs safe and tasty. In the fridge, they last about 3 to 4 days. If you freeze them, they can last 2 to 6 months. Just remember, they stay best when stored properly. Cook beef ribs in a slow cooker for 6-8 hours on low or 4-5 hours on high. The low setting gives the meat time to break down, resulting in tender, juicy ribs. Always check for doneness. The meat should pull away from the bone easily when done. Yes, you can add vegetables! Carrots, potatoes, or onions work well. Chop them into large pieces. Place them at the bottom of the slow cooker, then add the ribs on top. This way, the veggies soak up all the tasty juices. If the ribs are tough, they likely needed more cooking time. Try putting them back in the slow cooker with some liquid. Cook on low for 1-2 more hours. You can also shred the meat and mix it with sauce to make a beef sandwich. In this guide, we explored how to make beef ribs in a slow cooker. We covered key ingredients, like barbecue sauce and soy sauce, which provide rich flavors. I also shared tips for seasoning and garnishing your dish, making it even better. Remember to adjust flavors and try different cooking methods, like the Instant Pot. Proper storage techniques ensure your leftovers last longer. Now, you have the tools to create delicious beef ribs tailored to your taste. Enjoy serving and sharing this hearty dish with family and friends!

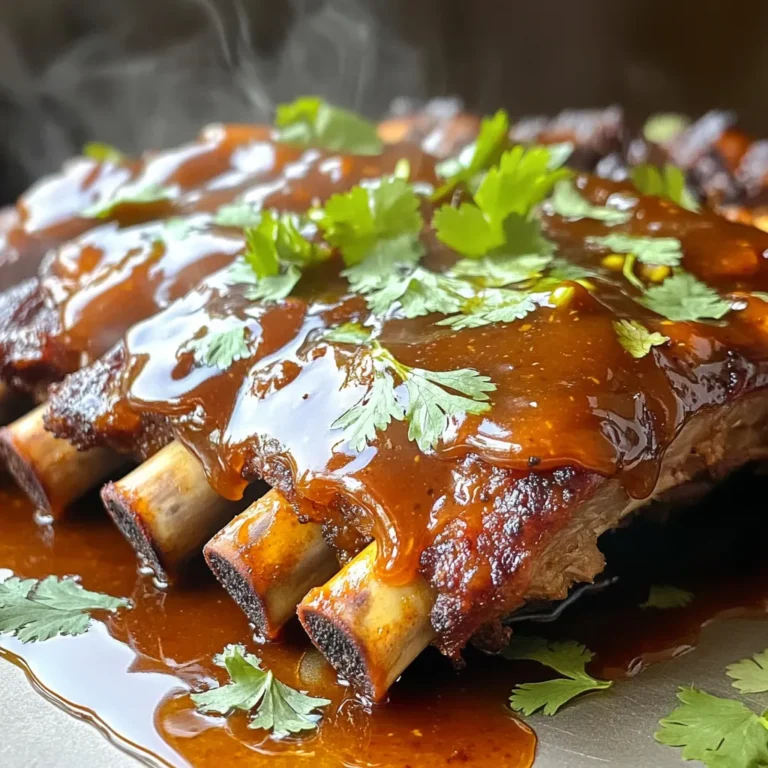
Slow Cooker Sweet & Spicy Beef Ribs Delight

- 1 tablespoon olive oil - 1 medium onion, diced - 2 cloves garlic, minced - 1 can (14 oz) crushed tomatoes - 4 cups vegetable broth - 1 package (16 oz) gnocchi - 1 cup fresh basil leaves, torn - 1 teaspoon dried oregano - 1 cup heavy cream or coconut cream - Grated Parmesan cheese (optional) - Salt and pepper I love using fresh and simple ingredients for this Tomato Basil Gnocchi Soup. Each ingredient plays a key role in building flavor. First, olive oil adds richness and helps cook the onion and garlic. The onion brings sweetness, while garlic adds a fragrant touch. Crushed tomatoes give the soup its base and vibrant color. Vegetable broth adds depth and warmth. Gnocchi, which is soft and pillowy, makes this soup hearty. Fresh basil is a must for a bright and aromatic finish. It pairs perfectly with the dried oregano. Heavy cream or coconut cream makes the soup creamy and smooth. If you like cheese, add grated Parmesan for extra flavor. Salt and pepper highlight all the tastes. Gather these ingredients for a comforting meal that warms the soul. - Sautéing onions and garlic Start by heating the olive oil in a large pot over medium heat. Add the diced onion. Cook for about 5 minutes until it softens. Next, stir in the minced garlic and cook for 1 more minute. You want the garlic to smell great, but don’t let it burn. - Combining ingredients Now, pour in the crushed tomatoes and vegetable broth. Stir until everything mixes well. Add the gnocchi, dried oregano, salt, and pepper. Bring the soup to a gentle simmer. Let it cook for 5-7 minutes, or until the gnocchi are tender. - Cooking gnocchi Keep an eye on the gnocchi. They will float when done. This means they are ready to eat! - Adding cream and basil Lower the heat and stir in the heavy cream or coconut cream. Then, add the torn basil leaves. Let the soup heat through for about 2-3 minutes. This gives it a rich taste and amazing aroma. - Adjusting seasoning Taste your soup and adjust the seasoning if needed. Add more salt or pepper based on your liking. This step makes sure every bite is perfect. - Serving suggestions Serve the soup hot. Top it with grated Parmesan cheese if you like. Add fresh basil leaves on top for a pop of color. Enjoy your comforting bowl of Tomato Basil Gnocchi Soup! How to know when gnocchi are done Gnocchi cook quickly, usually in about 5 to 7 minutes. They float to the top when done. If they sink, give them a little more time. The texture should be soft but not mushy. Taste one to check. You want that perfect chewy bite. Best practices for sautéing Start with medium heat. This lets the onions soften without burning. Stir occasionally for even cooking. When you add garlic, keep a close eye. It cooks fast and can burn easily. You want it fragrant, not brown. Dairy-free alternatives If you want a dairy-free version, use coconut cream. It adds creaminess without dairy. Almond milk or oat milk can also work, but they might change the flavor a bit. Adjust the seasoning to keep it tasty. Fresh vs. dried herbs Fresh basil gives a bright taste. Use about three times more fresh than dried. If you only have dried oregano, that’s fine too. It still adds great flavor. Just remember, dried herbs are stronger, so use them wisely. {{image_2}} You can make this soup even more delightful. One easy way is to add protein. Chicken or sausage works great. Cook the meat first, then add it to the pot. This adds flavor and makes the meal heartier. If you like heat, try adding chili flakes. Just a pinch can spice things up. You can adjust the amount based on your taste. This small change can transform your soup into a warm hug on a chilly day. For those who need gluten-free options, there are choices. Many stores sell gluten-free gnocchi. You can easily swap regular gnocchi for this option. It keeps the soup tasty and safe for everyone. If you want a vegan version, it's simple. Use coconut cream instead of heavy cream. This keeps the soup creamy without dairy. You can also skip the cheese for a fully plant-based meal. These changes ensure that everyone can enjoy this comforting soup. To store your leftover soup, let it cool first. Use an airtight container to keep it fresh. This soup lasts about 3 to 4 days in the fridge. When you want to eat it again, reheat it on the stove. Stir it often to warm it evenly. You can also use a microwave, but the stove gives better taste. To freeze gnocchi soup, allow it to cool completely. Pour it into freezer-safe bags or containers. Leave some space at the top for expansion. This soup can be frozen for up to 3 months. When you’re ready to eat, thaw it in the fridge overnight. Reheat it on the stove, adding a bit of broth if needed. Stir well to get the right texture again. Can I make this soup in advance? Yes, you can make the soup ahead of time. Just follow the recipe and cool it down. Store it in a sealed container. When you are ready to eat, warm it up on the stove. This soup tastes even better after a day in the fridge! How long does it last in the fridge? The soup lasts for about 3 to 4 days in the fridge. Keep it in an airtight container. Always check for any signs of spoilage before eating. What can I pair with Tomato Basil Gnocchi Soup? This soup pairs well with crusty bread or a fresh salad. Garlic bread is also a great choice to soak up the delicious broth. You can even serve it with a sprinkle of extra cheese on top. Is this recipe suitable for meal prepping? Yes, this recipe is great for meal prepping. You can make a big batch and portion it out. Just store each portion in a container. Reheat it when you are ready to enjoy a warm meal. This blog shared a simple recipe for Tomato Basil Gnocchi Soup. I covered the ingredients, cooking steps, and tips for a tasty dish. You learned how to sauté and combine flavors, plus variations and storage tips. Remember, you can adapt this recipe to fit your needs. Get creative with ingredients and try new flavors. Enjoy making this comforting soup for yourself or your family. Happy cooking!

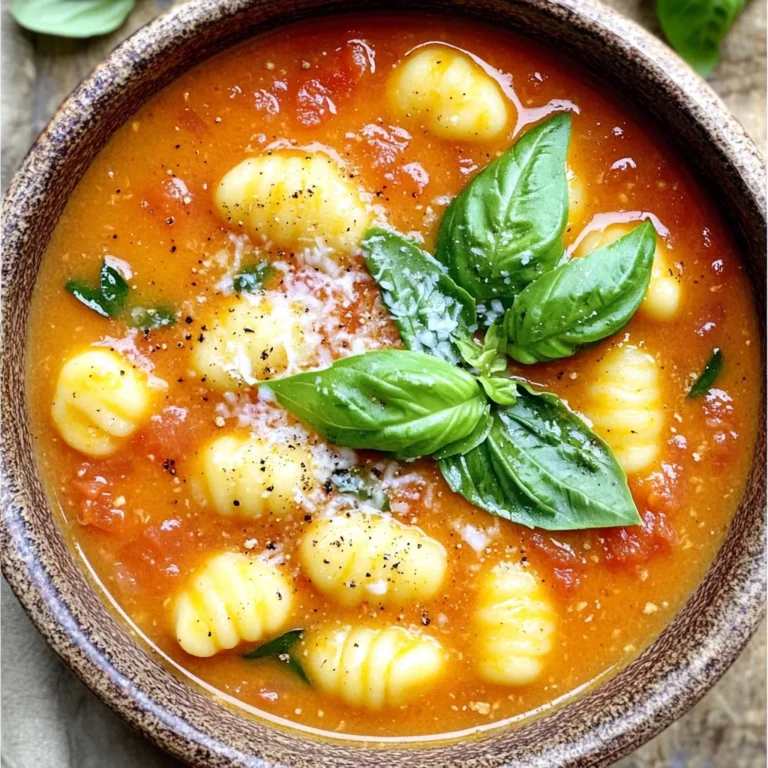
Tomato Basil Gnocchi Soup One Pot Comfort Meal

To make these no-bake lemon coconut bars, gather: - 1 ½ cups almond flour - 1 cup shredded unsweetened coconut - 1/3 cup maple syrup - 1/4 cup coconut oil, melted - 2 teaspoons vanilla extract - Zest of 2 lemons - 1/4 cup fresh lemon juice - A pinch of sea salt - Optional: Extra shredded coconut for garnish You can swap almond flour for oat flour or all-purpose flour if needed. Use agave syrup instead of maple syrup for a different taste. Coconut oil can be changed to unsalted butter. If you don’t have fresh lemons, lemon juice from a bottle works too. You can add a dash of lemon extract for extra flavor. Using fresh and high-quality ingredients makes a big difference. Fresh lemons provide a bright taste that enhances the bars. Good maple syrup adds natural sweetness, while pure vanilla extract boosts flavor. Quality coconut adds a rich texture. When you choose better ingredients, your bars will taste amazing and feel satisfying. Making no-bake lemon coconut bars is simple. You need basic tools like mixing bowls and a baking dish. Gather all your ingredients first. This makes the process smoother and more fun. You can prep in about 15 minutes. The bars will set in the fridge, so plan for at least two hours. 1. Mix Dry Ingredients: Start by combining the almond flour and shredded coconut in a medium bowl. Stir well until they blend nicely. 2. Mix Wet Ingredients: In another bowl, whisk together the maple syrup, melted coconut oil, vanilla extract, lemon zest, lemon juice, and a pinch of sea salt. Mix until smooth. 3. Combine Mixtures: Pour the wet mixture into the dry mixture. Stir until it forms a dough-like consistency. It should feel sticky but hold together. 4. Prepare the Baking Dish: Line an 8x8-inch baking dish with parchment paper. Leave some overhang for easy removal later. 5. Press the Mixture: Firmly press the mixture into the bottom of the dish. Make sure it’s even and compact so it sets well. 6. Chill: Refrigerate the bars for at least 2 hours. If you want them firmer, freeze for 30 to 60 minutes. Once set, use the parchment paper to lift the bars out of the dish. Cut them into squares or bars. For a lovely finish, sprinkle extra shredded coconut on top. These bars are perfect for snacks or dessert. Serve them cold for a refreshing treat! When making no-bake lemon coconut bars, I see some common mistakes. First, do not skip the salt. It enhances the flavors. Second, ensure your coconut oil is melted. If it's solid, your bars won't mix well. Lastly, press the mixture firmly into the dish. This helps the bars hold their shape when cut. To get the right texture, focus on your mixing. Combine the almond flour and coconut well. Then, mix the wet ingredients until smooth. When you combine both, stir until you see no dry spots. The mixture should feel like dough. If it’s too crumbly, add a bit more maple syrup. For a firmer bar, chill for longer in the fridge. I love serving these bars chilled. They taste great with a cup of tea or coffee. For a fun twist, add fresh fruit like berries on the side. You can also sprinkle extra coconut on top for a nice look. Another idea is to drizzle a bit of honey for added sweetness. Enjoy these bars as a snack or dessert! {{image_2}} You can make these bars your own by adding nuts or fruits. For a crunchy bite, try mixing in chopped almonds or walnuts. They add texture and flavor. If you prefer something fruity, consider adding dried cranberries or blueberries. They bring a nice sweetness and color to the bars. Just fold them in gently to keep the texture right. Want a low-carb or vegan version? You can swap out the almond flour for coconut flour. This change keeps the bars low in carbs. For a vegan twist, use agave syrup instead of maple syrup. This small shift keeps your snack plant-based. Always check your ingredients to ensure they fit your health goals. If you love holiday treats, you can change these bars for special occasions. For a festive touch, add a dash of cinnamon or nutmeg. This gives a warm, cozy flavor perfect for winter. You can also make them bright for a summer picnic. Add fresh fruit slices on top or a drizzle of dark chocolate. This makes them look special and taste amazing too. To keep your no-bake lemon coconut bars fresh, store them in an airtight container. Make sure to place parchment paper between layers if stacking. This prevents sticking and keeps them neat. You can store them in the fridge or at room temperature. For best taste, I recommend the fridge. When stored properly, these bars last about one week in the fridge. If you keep them at room temp, they will stay fresh for up to three days. Always check for any signs of spoilage before eating. The bars may lose some zest after a few days, but they remain tasty. You can freeze these bars if you want to store them longer. Wrap each bar in plastic wrap or foil. Then place them in a freezer-safe bag or container. They can last up to three months in the freezer. To enjoy, simply thaw them in the fridge overnight before serving. This way, you always have a sweet treat ready! Yes, you can try different flours. Almond flour gives a nutty taste and a soft texture. If you want a gluten-free option, you can use coconut flour. However, coconut flour absorbs more moisture. You may need to adjust the liquid in the recipe. For a more classic approach, you might consider oat flour. Remember, the taste and texture will change with each flour. You will know the bars are set after chilling them for at least two hours. They should feel firm to the touch. If you can press gently and the bars hold their shape, they are ready. For a firmer texture, try freezing them for about 30-60 minutes. This helps them set more quickly and makes cutting easier. Absolutely! These bars are great for meal prep. You can make them up to a week in advance. Just store them in the fridge in an airtight container. If you want to keep them longer, you can freeze them. They can last in the freezer for up to three months. Just remember to thaw them in the fridge before enjoying! In this post, we explored the essential ingredients and their quality. We walked through step-by-step cooking instructions and shared tips to avoid common mistakes. You learned about tasty variations and smart storage practices. Quality ingredients and good techniques make a big difference in your bars. With these insights, you're ready to create delicious treats that suit any occasion. Enjoy experimenting and make it your own!

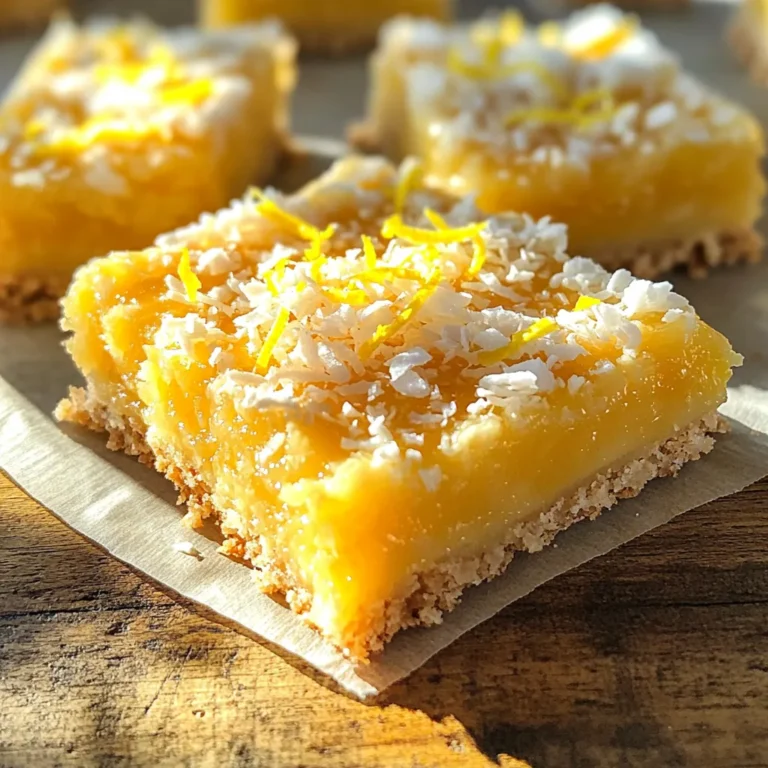
No-Bake Lemon Coconut Bars Delightful and Easy Snack

PREV 1 … 12 13 14 … 56 NEXT
secrets pice kitchen

explore

DessertsDinnerAppetizersDrinks

Our Policies

  • Cookie Policy
  • Copyright Policy
  • Disclaimer
  • GDPR Policy
  • Terms Of Use
Back to Top
  • About
  • Contact Us
  • Privacy Policy
© 2025 secrets pice kitchen