FREE DINNER EBOOK! Get your copy!
  • Cookie Policy
  • GDPR Policy
  • Disclaimer
  • Terms Of Use
  • Visit my other site: Fun Cookie Recipes
secrets pice kitchen
  • Home
  • Dinner
  • Desserts
  • Drinks
  • Appetizers
  • Contact
  • About
  • Privacy Policy
  • Home
  • Dinner
  • Desserts
  • Drinks
  • Appetizers
  • Contact
  • About
  • Privacy Policy
  • Cookie Policy
  • GDPR Policy
  • Disclaimer
  • Terms Of Use
Visit my other site: Fun Cookie Recipes

HOME / CATEGORIES /

Latest

- 8 oz (225g) cremini mushrooms, sliced - 2 tablespoons balsamic vinegar - 1 tablespoon olive oil - 1 clove garlic, minced - Salt and pepper to taste - 1 teaspoon fresh thyme leaves (or ½ teaspoon dried thyme) - 1 cup ricotta cheese - 4 slices of crusty bread (such as sourdough or ciabatta) - Fresh basil leaves for garnish - Optional: A drizzle of honey for sweetness If you can't find cremini mushrooms, you can use regular button mushrooms. They work well too. For balsamic vinegar, apple cider vinegar makes a nice swap, though the flavor will change. If you want a lighter cheese, use cottage cheese instead of ricotta. It will still taste great. For bread, any crusty loaf will do. French bread or whole grain is a good choice. Garnishes can take your toast to the next level. Fresh basil adds a nice touch. You can also try arugula for peppery flavor. A drizzle of honey adds sweetness that balances the tangy mushrooms. Crushed red pepper flakes can give a kick if you like heat. Enjoy playing with these options! Start by heating the olive oil in a skillet over medium heat. Add the minced garlic. Sauté for about 30 seconds until the garlic smells great. Then, add the sliced cremini mushrooms. Season them with a bit of salt and pepper. Sprinkle in the thyme leaves, too. Cook for about 5-7 minutes. You want the mushrooms to be tender and brown. After that, pour in the balsamic vinegar. Stir it all together and let it cook for another 2-3 minutes. The vinegar should reduce a little. When done, take it off the heat and set it aside. While the mushrooms cook, it’s time to toast the bread. You can use a toaster, oven, or skillet. Toast the slices until they are golden brown and crispy. This part adds a nice crunch to your toast. Now let's put it all together. Spread a generous layer of ricotta cheese on each slice of your toasted bread. Make sure you cover it well. Next, top each slice with the balsamic mushrooms. Spread them out evenly so every bite has flavor. If you like a hint of sweetness, drizzle a little honey over the mushrooms. Finally, add fresh basil leaves on top for a pop of color and taste. To get the best flavor from your mushrooms, start with a hot skillet. Heat the olive oil first. Add the garlic and let it sizzle for a bit. Then, toss in the sliced cremini mushrooms. They need space to brown well, so don’t crowd the pan. Stir them every now and then. Cook for about 5 to 7 minutes until golden. The balsamic vinegar adds a nice touch at the end. It thickens slightly and brings out the mushroom's deep flavor. For this toast, crusty bread works best. I love sourdough or ciabatta, but feel free to explore. Look for bread with a nice crust. This helps the toast hold up against the toppings. Toasting it until golden makes it crisp and delicious. You want a sturdy base that complements the creamy ricotta and savory mushrooms. To make your toast even better, try adding fresh herbs. Basil adds a nice pop of color and taste. You can also drizzle honey for a touch of sweetness. If you want a kick, a sprinkle of chili flakes works wonders too. Play around with flavors. There’s no wrong way to enjoy your balsamic mushroom ricotta toast! {{image_2}} You can easily make a vegan version of this toast. Instead of ricotta cheese, use a plant-based ricotta. Look for cashew or almond-based options. They provide a creamy texture without dairy. For the mushrooms, ensure your balsamic vinegar contains no animal products. Most balsamic vinegars are vegan. Add a sprinkle of nutritional yeast for a cheesy flavor boost. To make this dish gluten-free, swap the bread for a gluten-free option. Many brands make great gluten-free bread. Choose one that has a nice crust and texture. Check the label to ensure it meets your dietary needs. The rest of the recipe stays the same. You’ll still enjoy those yummy balsamic mushrooms. If you want to try a different cheese, go ahead! Goat cheese adds a tangy punch. Feta cheese brings a salty bite. Cream cheese offers a smooth spread. Each cheese changes the flavor but keeps it delicious. Feel free to experiment and find your favorite! To keep your Balsamic Mushroom Ricotta Toast fresh, store leftovers in an airtight container. Place the leftover mushrooms and ricotta cheese in separate containers. This will help maintain texture and flavor. Keep them in the fridge for up to three days. Avoid stacking the toast to prevent sogginess. When you’re ready to enjoy your toast again, reheat the mushrooms in a skillet. Heat them on low until warm. For the toast, place it in a toaster or oven for a few minutes. This will crisp it back up. Do not microwave the toast, as it can make it chewy. Store cremini mushrooms in a paper bag in the fridge. This helps them breathe and stay fresh longer. Keep ricotta cheese in its original container or a sealed plastic tub. Use it within a week for the best taste. To store bread, wrap it in a cloth and place it in a bread box or a paper bag. Avoid plastic, as it can make the bread soggy. If you need a change from ricotta, try cottage cheese. It has a similar look and texture. Cream cheese is another option, but it is richer and thicker. You could also use Greek yogurt for a tangy twist. Just remember that the taste will change with each choice. To prep ahead, cook the mushrooms and store them in the fridge. You can also toast the bread lightly. When you're ready to eat, just warm the mushrooms and toast the bread again. Spread the ricotta on the toast, then top with mushrooms. This way, you keep the crunch of the bread. Yes, you can use other mushrooms! Button mushrooms work well and are easy to find. Shiitake mushrooms add a nice, rich flavor. Portobello mushrooms are great for a meaty bite. Just make sure to slice them thinly for even cooking. Each type brings its own taste to the dish. This blog post covered key ingredients for your toast, cooking methods, and extra tips. You can swap ingredients and try different flavors. Storing your leftovers properly helps keep them fresh. Feel free to mix in vegan or gluten-free options for everyone. You now have all the tools to make your perfect mushroom toast. Enjoy the process and share your tasty results!

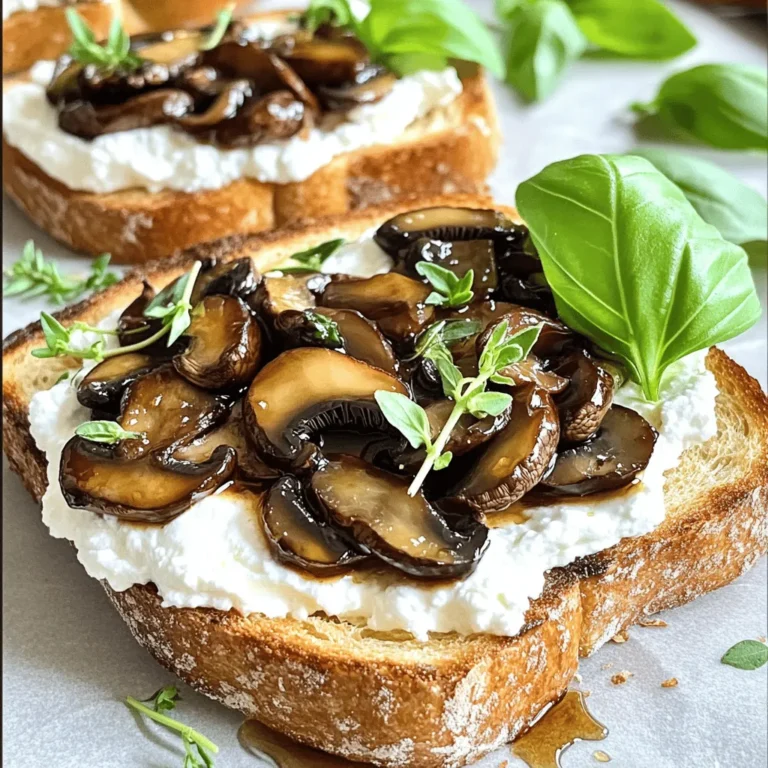
Balsamic Mushroom Ricotta Toast Savory Flavor Boost

To make the best Peanut Butter S’mores Bars, gather these simple ingredients: - 1 cup graham cracker crumbs - 1/2 cup all-purpose flour - 1/2 cup unsweetened cocoa powder - 1 teaspoon baking powder - 1/2 teaspoon salt - 1/2 cup unsalted butter, melted - 1 cup creamy peanut butter - 3/4 cup brown sugar, packed - 1/4 cup granulated sugar - 1 teaspoon vanilla extract - 1 large egg - 1 cup mini marshmallows - 1/2 cup chocolate chips (dark or milk chocolate) - Extra graham cracker crumbs for topping These ingredients blend to create a rich, gooey treat. You’ll love how they come together. The graham cracker crumbs add a sweet crunch. The cocoa powder brings in deep chocolate notes. Creamy peanut butter makes everything smooth and rich. Using mini marshmallows gives that classic s’mores feel. The chocolate chips add extra sweetness and meltiness. When you bake these bars, the flavors mix beautifully. Each bite will remind you of cozy campfire nights. First, set your oven to 350°F (175°C). This helps the bars bake evenly. Grease an 8x8-inch baking dish. You can also line it with parchment paper. This makes it easy to lift out the bars later. In a medium bowl, combine the dry items. Add 1 cup of graham cracker crumbs, 1/2 cup of all-purpose flour, and 1/2 cup of unsweetened cocoa powder. Next, mix in 1 teaspoon of baking powder and 1/2 teaspoon of salt. Stir well and put it aside. In another large bowl, melt 1/2 cup of unsalted butter. Whisk in 1 cup of creamy peanut butter. Then, add 3/4 cup of packed brown sugar and 1/4 cup of granulated sugar. Mix in 1 teaspoon of vanilla extract until the mixture is smooth. Now, crack in 1 large egg. Mix until fully blended. Gradually fold the dry mix into the wet mix. Stir gently until combined. The batter will be thick, which is just right. Next, fold in 1 cup of mini marshmallows and 1/2 cup of chocolate chips. Save some chocolate chips for later. Stir until everything is mixed well. Spread the batter evenly into your prepared dish. Sprinkle the saved chocolate chips and extra graham cracker crumbs on top. Bake in the oven for 25-30 minutes. A toothpick inserted in the center should come out mostly clean. Once baked, let the bars cool in the pan for at least 15 minutes. Use the parchment paper to lift them out. Cut into squares and serve. They taste great warm or at room temperature. For a fun twist, drizzle melted chocolate on top or add crushed graham crackers. Enjoy with a cold glass of milk! To get the best texture, use creamy peanut butter. It blends smoothly and keeps the bars moist. Make sure to mix the dry and wet ingredients well, but don't overmix. Overmixing can make the bars tough. The batter should be thick, which helps hold everything together. You can tell the bars are done when they look set. Insert a toothpick in the center. If it comes out with a few moist crumbs, they are ready. If it’s wet with batter, they need more time. Bake for 25 to 30 minutes for the perfect chewy bars. These bars taste best warm. Serve them on a decorative plate for a fun touch. You can drizzle melted chocolate on top for extra sweetness. A sprinkle of crushed graham crackers adds a nice crunch. Pair them with a glass of cold milk for a tasty treat. You can get creative with toppings! Try adding mini chocolate chips or extra marshmallows on top before baking. For a twist, add a pinch of sea salt. A scoop of vanilla ice cream on the side makes it even better. Each bite will be an irresistible treat! {{image_2}} You can make these bars gluten-free. Just swap the all-purpose flour for a gluten-free blend. Use a mix designed for baking. Make sure your graham crackers are also gluten-free. This way, everyone can enjoy them! To make these bars vegan, you need to make a few changes. First, use a plant-based butter instead of regular butter. Replace the egg with a flax egg. To make a flax egg, mix one tablespoon of ground flaxseed with three tablespoons of water. Let it sit for five minutes to thicken. Choose dairy-free chocolate chips, too. Your bars will still taste amazing! Feel free to get creative with mix-ins. Try adding chopped nuts like walnuts or pecans for crunch. You can also use dried fruit like cranberries or cherries for a sweet twist. Want extra chocolate? Add more chocolate chips or chunks. Each mix-in can give your Peanut Butter S’mores Bars a fun new flavor. Enjoy experimenting! To keep your Peanut Butter S’mores Bars fresh, store them in an airtight container. This helps maintain their chewy texture. Place a piece of parchment paper between layers to prevent sticking. Keep them at room temperature for up to five days. If your kitchen is warm, refrigerate them to avoid melting. Freezing these bars is a great option. Start by cooling them completely. Once cool, cut them into squares. Wrap each square in plastic wrap. Then, place them in a freezer bag. They can last up to three months in the freezer. When you crave a sweet treat, just thaw a piece at room temperature. For a warm treat, reheat your bars in the oven. Preheat the oven to 350°F (175°C). Place the bars on a baking sheet. Cover them with foil to keep them soft. Heat for about 10 minutes. You can also use a microwave. Heat one square for 15 to 20 seconds. Enjoy the gooey marshmallows and melted chocolate! Yes, you can use crunchy peanut butter. It will give your bars a nice texture. The bits of peanuts add some fun crunch. Just make sure you measure the same amount. These bars can last up to five days at room temperature. Store them in an airtight container. For longer storage, keep them in the fridge for up to a week. You can use crushed cookies like digestive biscuits or vanilla wafers. They will give a different flavor but still taste great. If you need a gluten-free option, try gluten-free graham crackers or almond flour. Absolutely! You can make them a day or two ahead. Just store them in an airtight container. They taste even better after resting for a while. These bars are not vegan or gluten-free as written. However, you can make them vegan with egg replacers. For gluten-free, use gluten-free flour and graham crackers. Always check labels for allergens. This blog shared a simple recipe for Peanut Butter S’mores Bars. We covered all the ingredients and each step. I offered tips for good texture and serving ideas. You learned about gluten-free and vegan options too. These bars are fun to make and perfect for sharing. Try different mix-ins for more flavor. Enjoy creating a delicious treat that your friends and family will love.

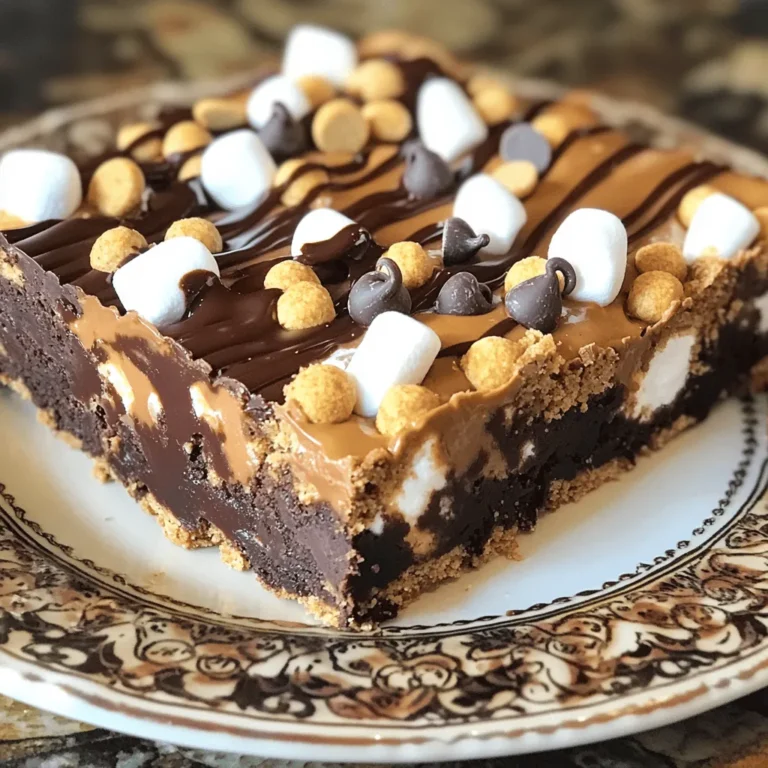
Peanut Butter S’mores Bars Irresistible Sweet Treat

- 1 ½ cups all-purpose flour - ½ cup granulated sugar - 1 tablespoon poppy seeds - 1 teaspoon baking powder - ½ teaspoon baking soda - ½ teaspoon salt - 1 large egg - ½ cup Greek yogurt - ¼ cup vegetable oil - 1 tablespoon lemon zest - 2 tablespoons lemon juice - 1 cup fresh raspberries (or frozen, thawed) - Optional: powdered sugar for dusting You can swap some ingredients for a unique twist. If you want a gluten-free option, use a gluten-free flour mix. Instead of granulated sugar, you can use coconut sugar for a deeper flavor. If you don't have Greek yogurt, try sour cream or regular yogurt. For a dairy-free option, use almond yogurt. You can replace vegetable oil with melted coconut oil for a hint of sweetness. Always choose ripe lemons for the best zest and juice. Look for plump raspberries that are bright in color. If using frozen raspberries, let them thaw and drain excess water. Check your baking powder and baking soda for freshness; old leavening agents can affect your muffins’ rise. Buying organic ingredients can offer more flavor and nutrients, so consider it for your lemons and yogurt. First, turn on your oven to 375°F (190°C). This step makes sure your muffins bake nicely. While the oven heats, prepare your muffin tin. You can either line it with paper liners or lightly grease it with oil. This will help your muffins come out easily after baking. In a large bowl, add the dry ingredients. Combine 1 ½ cups of all-purpose flour, ½ cup of granulated sugar, 1 tablespoon of poppy seeds, 1 teaspoon of baking powder, ½ teaspoon of baking soda, and ½ teaspoon of salt. Whisk these together. Make sure there are no lumps. This mix gives your muffins a nice texture. In another bowl, crack 1 large egg. Beat it well. Then, add ½ cup of Greek yogurt, ¼ cup of vegetable oil, 1 tablespoon of lemon zest, and 2 tablespoons of lemon juice. Mix these ingredients until they are smooth and creamy. This wet mixture adds moisture and flavor to your muffins. Now, pour the wet mixture into your bowl of dry ingredients. Gently stir them together. It’s important not to overmix. A few lumps are okay. Finally, fold in 1 cup of fresh raspberries. Be gentle so you don’t break them. Next, divide the batter evenly among the muffin cups. Fill each cup about ¾ full. Bake in your preheated oven for 18-20 minutes. You’ll know they are done when a toothpick comes out clean. Once baked, let the muffins cool in the pan for about 5 minutes. Then, transfer them to a wire rack to cool completely. If you like, dust them with powdered sugar for a sweet touch. To make your muffins fluffy, use room temperature ingredients. Cold eggs or yogurt can slow down the rise. Mix the dry and wet ingredients separately first. This helps keep the batter light. When you combine them, stir gently. Overmixing can make muffins tough. You can tweak the sugar in this recipe. If you like your muffins less sweet, cut the sugar by a quarter cup. For sweeter muffins, add an extra tablespoon of sugar. Tasting the batter before baking is a fun way to check. Just remember to keep it balanced with the tartness of the lemon and raspberries. One common mistake is filling the muffin cups too much. Fill each cup about three-quarters full. This allows room for the muffins to rise. Another mistake is not checking for doneness. Use a toothpick to test. If it comes out clean, your muffins are ready. Finally, don’t skip the cooling time. Letting them sit for a bit helps them firm up and enhances the flavor. {{image_2}} You can make these muffins gluten-free. Use a gluten-free flour blend instead of all-purpose flour. Look for a blend that includes xanthan gum. This helps the muffins hold their shape. Follow the same recipe steps. The taste will still be bright and fresh. Feel free to mix in other fruits. Blueberries or strawberries work well. You can also try adding nuts for crunch. Chopped almonds or walnuts add a nice texture. For a twist, add a hint of vanilla or almond extract. This will give your muffins a unique flavor. You can make these muffins vegan too. Replace the egg with a flaxseed egg. Mix one tablespoon of ground flaxseed with three tablespoons of water. Let it sit for five minutes until it thickens. Substitute Greek yogurt with a plant-based yogurt. Use coconut or almond yogurt for a creamy texture. These changes keep the muffins tasty and moist. To keep your lemon raspberry poppy seed muffins fresh, store them in an airtight container. This helps retain moisture and keeps them soft. Place a piece of parchment paper between the muffins to prevent sticking. You can store them at room temperature for up to three days. If you want to keep them longer, consider refrigerating them. Just remember to bring them back to room temperature before enjoying. Freezing muffins is a great way to enjoy them later. First, let your muffins cool completely. Then, wrap each muffin tightly in plastic wrap. Place the wrapped muffins in a freezer-safe bag. This method keeps them fresh for up to three months. When you're ready to eat, simply take out a muffin and let it thaw at room temperature. To reheat your muffins, you can use the microwave or the oven. For the microwave, place the muffin on a plate and heat it for about 15-20 seconds. This warms it up nicely. If you prefer the oven, preheat it to 350°F (175°C). Place the muffin on a baking sheet and heat for about 5-10 minutes. This method makes the muffin warm and slightly crispy on the outside. Enjoy your delicious muffins fresh! Yes, you can use frozen raspberries. Just thaw them first and drain any excess juice. This keeps the batter from getting too wet. Frozen berries work well and save time when fresh raspberries are not in season. They also taste great in muffins. If you don’t have Greek yogurt, try sour cream or buttermilk. Both add moisture and a slight tang. Another option is using plain yogurt, but it may make the muffins a bit softer. You can also use applesauce for a dairy-free choice. To make these muffins healthier, you can use whole wheat flour instead of all-purpose flour. This adds fiber and nutrients. You can also reduce the sugar by using honey or maple syrup. Adding nuts or seeds can boost protein and healthy fats. In this article, we explored how to make delicious muffins. We covered important ingredients, preparation steps, and helpful tips. I shared ways to customize your muffins to fit your taste. Storage info was included to keep your treats fresh longer. Remember, baking should be fun and creative. With these details, you can bake tasty muffins that everyone will enjoy. Keep experimenting to find your favorite flavor combinations!

Lemon Raspberry Poppy Seed Muffins Fresh and Flavorful

To make Tomato Basil Tortellini Soup, gather these fresh ingredients: - 2 cups vegetable broth - 1 can (14 oz) diced tomatoes, with juice - 1 cup fresh basil leaves, packed - 1 medium onion, chopped - 2 cloves garlic, minced - 1 cup heavy cream (or coconut cream for a dairy-free version) - 1 package (9 oz) cheese tortellini - 1 teaspoon dried oregano - 1 teaspoon salt - 1/2 teaspoon black pepper - 2 tablespoons olive oil - Grated Parmesan cheese for serving (optional) If you want a dairy-free soup, use coconut cream instead of heavy cream. This swap keeps the soup rich and creamy. For a gluten-free option, choose gluten-free tortellini. Many brands offer tasty gluten-free pasta that works well in this soup. Always check labels to ensure they meet your needs. Using fresh ingredients often gives the soup a bright flavor. Fresh basil and onion enhance the taste. However, canned tomatoes are great for convenience and still add good flavor. If you find fresh tomatoes in season, feel free to use them; just chop them up. They will add a lovely freshness to your soup. For the best results, balance both fresh and canned ingredients in your cooking. Start by gathering your ingredients. This makes cooking smooth and fun. In a large pot, heat 2 tablespoons of olive oil over medium heat. Add 1 chopped onion and sauté it for about 5 minutes. You want the onion to be soft and clear. Next, add 2 minced garlic cloves and cook for 1 more minute. This will make your kitchen smell amazing! Now, pour in 1 can of diced tomatoes, along with its juice. Add 2 cups of vegetable broth, 1 teaspoon of dried oregano, 1 teaspoon of salt, and 1/2 teaspoon of black pepper. Stir everything well and bring it to a gentle simmer. Let it cook for about 10 minutes. This helps the flavors blend nicely. After that, add 1 package of cheese tortellini, cooking according to the package's instructions. Usually, this takes around 3 to 5 minutes until they are soft. Then, lower the heat and stir in 1 cup of heavy cream, or use coconut cream for a dairy-free option. Mix it well to combine. Finally, toss in 1 cup of fresh basil leaves. Stir until they wilt a bit. Taste your soup and add more salt or pepper if needed. Your Tomato Basil Tortellini Soup is now ready to serve! To save time, chop your onion and garlic ahead of time. You can do this the night before. Keep them in the fridge in a sealed container. Also, use pre-packaged tortellini. It saves time and is super easy. If you’re feeling adventurous, you can even use leftover cooked tortellini. Just add it at the end to warm through. Another tip is to measure out all your ingredients before you start. This makes the cooking process quick and simple. Plus, it keeps you organized while cooking! One common mistake is rushing the sautéing of the onion. If you cook it too fast, it won’t become soft and sweet. Always give it time to cook slowly. Another mistake is adding the basil too early. If you add it too soon, it may lose its bright flavor. Wait until the very end before adding it to your soup. Lastly, don’t skip tasting your soup before serving. Adjust the seasoning to your liking. This ensures every bowl is delicious! To boost flavor, use fresh herbs. Fresh basil adds a bright taste. You can also add a pinch of red pepper flakes for a kick. If you like, try a splash of balsamic vinegar for depth. Don't forget to taste as you cook. Adjust salt and pepper to your liking. Cook the tortellini just until tender. Overcooking can make them mushy. Follow the package instructions closely. Stir the tortellini gently in the soup to avoid breaking them. If you want a firmer bite, cook them separately and add them just before serving. Garnish your soup with grated Parmesan cheese for richness. Fresh basil leaves on top add color and flavor. You can also drizzle a bit of olive oil for a nice finish. Serve with crusty bread or a side salad. It's a great way to soak up the tasty broth! {{image_2}} You can add protein to this soup for more nutrition. Cooked chicken works great. Just shred it and stir it in. You can also use white beans. They add creaminess and fiber. Mix them in with the tortellini for a hearty meal. For a vegetarian option, skip the chicken and use vegetable broth. You can also swap heavy cream for coconut cream. This keeps the soup rich and creamy. If you want it vegan, make sure the tortellini has no cheese. Many stores offer vegan tortellini now. In summer, you can use fresh veggies to brighten the soup. Try zucchini, corn, or bell peppers. Chop them and add them when you simmer the broth. This gives your soup a fresh taste and adds color. Seasonal swaps keep the meal fun and exciting! Store your leftover Tomato Basil Tortellini Soup in an airtight container. Let the soup cool down to room temperature first. This helps keep the flavors fresh. You can keep it in the fridge for up to three days. Make sure to label your container with the date. This way, you won't forget when you made it! If you want to keep the soup longer, freezing is a great idea. Use freezer-safe containers or bags. Leave some space in the container for the soup to expand as it freezes. The soup can last in the freezer for about three months. When you're ready to eat, just thaw it in the fridge overnight before reheating. To reheat your soup, pour it into a pot and warm it on low heat. Stir often to ensure even heating. You can also use the microwave. Just heat it in short bursts, stirring in between. If the soup seems thick, add a splash of vegetable broth or water. This helps bring back its creamy texture. Enjoy your tasty soup again! Yes, you can make this soup ahead of time. It tastes even better the next day. Just cook the soup as directed, then cool it before storing. Keep it in a sealed container in the fridge. When you are ready to eat, just reheat it on the stove. I recommend using cheese tortellini for the best flavor. It adds a rich creaminess to the soup. You can also use spinach or mushroom tortellini if you want a twist. Just check the package for cooking times. You can store the soup in the refrigerator for up to three days. Make sure to keep it in a tight container. If you want to keep it longer, consider freezing it. Just remember to leave out the cream until you are ready to eat. In this post, we covered how to make a delicious soup. You learned about the ingredients, including substitutes for your dietary needs. I shared detailed steps and tips to help you cook efficiently. We explored flavor boosters and variations for different tastes. Lastly, I provided storage advice to keep your soup fresh. Remember, cooking is fun and can be easy! Use these tips to create a soup that everyone will love. Enjoy your cooking journey!

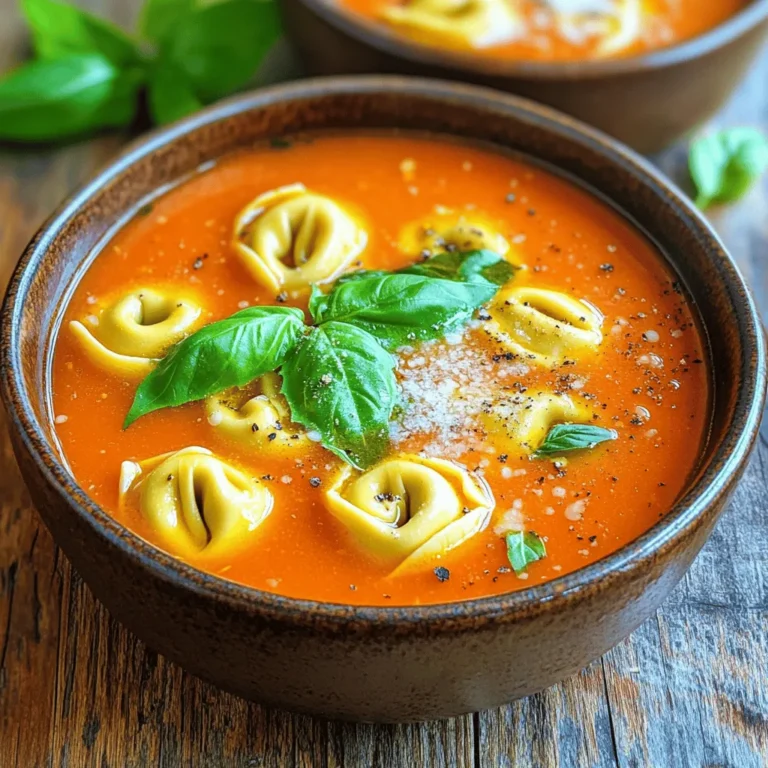
Tomato Basil Tortellini Soup Flavorful and Easy Recipe

For these teriyaki salmon bites, you need fresh, quality ingredients. Here’s what you need: - 1 lb fresh salmon fillet, skin removed and cut into bite-sized cubes - 2 green onions, sliced for garnish - Sesame seeds for garnish Using fresh salmon gives the best taste and texture. Make sure to cut it into even cubes. This helps them cook evenly. The marinade is key to flavor. It brings the dish to life. Here’s what you will mix: - 1/4 cup soy sauce - 2 tablespoons honey - 1 tablespoon rice vinegar - 1 tablespoon sesame oil - 1 teaspoon grated fresh ginger - 1 teaspoon minced garlic Combine these ingredients in a bowl. Whisk them together until smooth. This mix will soak into the salmon, adding sweet and savory notes. Garnishing makes your dish look great. It adds color and flavor. Use: - Sliced green onions - Sesame seeds After cooking, sprinkle these on top. They give a nice crunch and a pop of color. Your teriyaki salmon bites will look as good as they taste! To make the teriyaki marinade, grab a medium bowl. Combine 1/4 cup soy sauce, 2 tablespoons honey, 1 tablespoon rice vinegar, and 1 tablespoon sesame oil. Add 1 teaspoon grated fresh ginger and 1 teaspoon minced garlic. Whisk everything together until smooth. This mix gives your salmon its sweet and savory flavor. Take your 1 lb of fresh salmon fillet and cut it into bite-sized cubes. In the bowl with the marinade, gently add the salmon. Stir carefully to coat each piece. Make sure every cube is covered in sauce. Cover the bowl and place it in the fridge for at least 20 minutes. This time lets the flavors soak into the salmon. While the salmon marinates, get a nonstick skillet and heat it over medium heat. In a small bowl, mix 1 tablespoon cornstarch with 1 tablespoon water to create a slurry. After 20 minutes, take the salmon out of the fridge. Discard the extra marinade. Place the salmon bites in the hot skillet. Cook for 3-4 minutes on each side until golden brown. If there’s any marinade left, pour it into the skillet. Stir in the cornstarch slurry and let it cook for another minute. This step thickens the sauce and makes it sticky. Take the skillet off the heat. Let the salmon bites sit for a minute to absorb the flavors. Finally, garnish with sliced green onions and a sprinkle of sesame seeds. Enjoy your tasty teriyaki salmon bites! To get the best flavor, marinate your salmon well. Use fresh ingredients for the marinade. Mix soy sauce, honey, rice vinegar, sesame oil, ginger, and garlic. I always suggest letting the salmon sit in the marinade for at least 20 minutes. For even more flavor, marinate it for up to an hour. This helps the salmon absorb every delicious bite. When you cook the salmon bites, make sure your skillet is hot. This helps sear the salmon and gives it a nice golden color. Cook each side for about 3-4 minutes. Don't crowd the pan; this allows the salmon to cook evenly. If your salmon pieces are too close, they will steam instead of sear. To thicken your teriyaki sauce, use a cornstarch slurry. Mix cornstarch with water before adding it to the skillet. Pour in any leftover marinade after the salmon cooks. Stir in the cornstarch slurry and let it cook for 1-2 minutes. This will create a nice, glossy sauce that clings to your salmon bites. Keep stirring until you see it thicken. {{image_2}} If you want to switch things up, you can use other fish. Tuna or mahi-mahi work well. Both have a firm texture and absorb flavors nicely. If you prefer a plant-based option, try tofu. Press and cube the tofu before marinating. It soaks up the sauce well and gives a nice bite. You can customize the marinade to suit your taste. Instead of soy sauce, try tamari for a gluten-free option. You can also use coconut aminos for a sweeter flavor. Swap honey for maple syrup if you want a vegan version. For a spicy kick, add a bit of sriracha or red pepper flakes to the mix. These salmon bites pair well with many sides. Serve them with steamed rice or quinoa for a filling meal. You can also offer a fresh salad to balance the richness of the salmon. For sauces, a drizzle of spicy mayo or extra teriyaki sauce enhances the flavor. Don't forget to garnish with sesame seeds and green onions for a beautiful presentation! To store leftover teriyaki salmon bites, place them in an airtight container. Make sure they cool down to room temperature first. Then, seal the lid tightly. This helps keep the salmon fresh. You can store it in the fridge for up to three days. If you know you won’t eat them soon, consider freezing them. To reheat your teriyaki salmon bites, use a skillet for best results. Heat the skillet over medium heat. Add a splash of water or a little oil to help keep them moist. Cook for about 3-4 minutes, turning gently. You can also use the microwave. Place the bites in a microwave-safe dish. Cover with a damp paper towel and heat for 30-second intervals until warmed through. If you want to freeze teriyaki salmon bites, first let them cool completely. Place them in a freezer-safe bag or container. Remove as much air as possible to prevent freezer burn. They can last up to three months in the freezer. When you're ready to eat, thaw them overnight in the fridge. Then, reheat as described above for the best taste. You should marinate the salmon for at least 20 minutes. This time allows the flavors to soak in well. For even better taste, you can marinate it for up to an hour. Just remember to keep it in the fridge while it marinates. The more time the salmon sits in the sauce, the more flavor it gains. Yes, you can use frozen salmon. Just make sure to thaw it completely before cooking. You can do this by placing it in the fridge overnight or running it under cold water. After thawing, check for any moisture and pat it dry. This helps the marinade stick better and gives you a tasty result. Teriyaki salmon bites pair well with many sides. Here are some great options to consider: - Steamed rice - Quinoa - Stir-fried vegetables - A fresh green salad - Noodles These sides add flavor and texture to your meal. Use your favorites to create a balanced and delicious plate. To make great teriyaki salmon bites, fresh ingredients are key. We explored the marinade, cooking steps, and best practices. You now know how to prepare, marinate, and cook salmon bites perfectly. Variations help you enjoy this dish your way. Proper storage keeps the flavors intact. Use the tips from the FAQs to enhance your experience. Enjoy your teriyaki salmon bites and impress your friends and family!

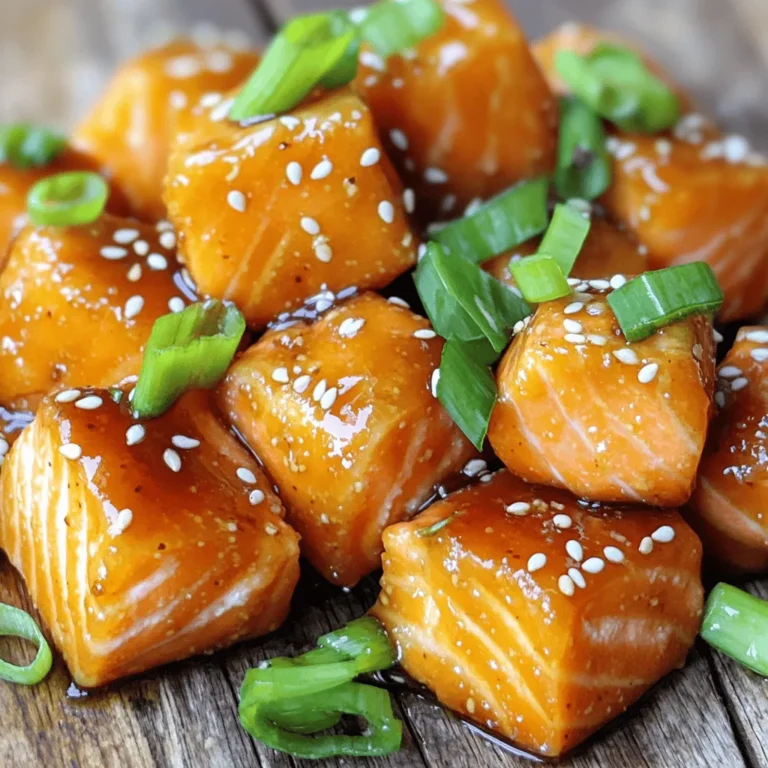
Teriyaki Salmon Bites Flavorful Easy Appetizer Recipe

Here’s what you need to make Chai Apple Crumble Bars. Each ingredient adds to the taste and texture. - 2 cups rolled oats - 1 cup all-purpose flour - 1/2 cup brown sugar - 1/2 cup unsalted butter, melted - 1 teaspoon baking powder - 1 teaspoon ground cinnamon - 1/2 teaspoon ground cardamom - 1/4 teaspoon ground ginger - 1/4 teaspoon allspice - 1 large apple, peeled, cored, and diced - 1/4 cup honey or maple syrup - 1 tablespoon lemon juice - 1/4 cup chopped walnuts (optional) Each item plays a role in making these bars a delight. The rolled oats form a hearty base. The flour helps bind everything together. Brown sugar adds a touch of sweetness. Unsalted butter gives richness. Baking powder makes the bars light. The spices bring warmth and flavor. The apple adds moisture and tartness. Honey or maple syrup sweetens the filling. Lemon juice brightens the taste. Walnuts add crunch, but they are optional. Choosing quality ingredients will make a big difference. Fresh spices and crisp apples will enhance the dish. Enjoy gathering these items before you start cooking! First, I grease a 9x9 inch baking pan. You can also use parchment paper to help remove the bars later. Next, I preheat the oven to 350°F (175°C). This ensures even baking and a nice golden top. In a large bowl, I combine rolled oats, all-purpose flour, and brown sugar. I add melted butter, baking powder, and the ground spices: cinnamon, cardamom, ginger, and allspice. I mix everything until it looks crumbly. This crumbly texture gives the bars their nice base. Now, I set aside about 1 cup of the oat mixture for the topping. I press the rest into the bottom of the greased pan to form the crust. In another bowl, I toss the diced apple with honey or maple syrup and lemon juice. Once mixed, I pour this apple filling over the crust in the pan. Then, I evenly spread the reserved oat mixture over the apple layer. If I want a crunchy touch, I sprinkle chopped walnuts on top. I bake the bars in the preheated oven for 25-30 minutes. I watch for a golden brown top and tender apples. Once done, I let the bars cool in the pan for at least 15 minutes. This cooling time helps them firm up before I slice them into squares or bars. To make your Chai Apple Crumble Bars even more tasty, consider adding more spices. You can try nutmeg or cloves for a warm touch. Fresh ingredients matter too. Use crisp, juicy apples for the best flavor. They add sweetness and texture to every bite. To check if your bars are done, look for a golden brown top. You can also insert a toothpick. If it comes out clean, your bars are ready. To prevent soggy bars, let them cool in the pan. This helps the filling set and keeps the crust firm. These bars shine when served warm. You can add a scoop of vanilla ice cream on top. Whipped cream also pairs well for extra creaminess. Enjoy them with a hot cup of chai or coffee. You’ll love the combination of flavors! {{image_2}} You can swap the apple for many other fruits. Pears, peaches, or berries work great too. Each fruit gives a different taste and texture. For a fun mix, try combining apples with berries. The tartness of berries adds a nice contrast to sweet apples. If you need a gluten-free option, use gluten-free oats and flour. These swaps keep the bars tasty without gluten. For a vegan version, replace butter with coconut oil or a plant-based butter. Use maple syrup instead of honey for a sweet touch. You can adjust the spice levels to suit your taste. If you love spice, add more cinnamon or cardamom. For fall flavors, try adding pumpkin spice. This change makes the bars perfect for the holiday season. You can even mix in nutmeg for a warm twist. To keep your Chai Apple Crumble Bars fresh, store them in the fridge. Place them in an airtight container. This will prevent them from drying out. You can enjoy them for up to five days. After that, the taste and texture may change. You can freeze these bars if you want to save some for later. First, let the bars cool completely. Then, cut them into squares or bars. Wrap each piece in plastic wrap. After that, place them in a freezer-safe bag. They can stay fresh in the freezer for up to three months. When you want to eat them, take out the bars and let them thaw in the fridge overnight. You can also warm them in the oven at a low temperature. This will bring back their delicious taste. Enjoy your tasty treat even after freezing! Yes, you can make Chai Apple Crumble Bars in advance. They taste great after a day or two. Just store them in an airtight container at room temperature. If you want them to last longer, you can refrigerate them. Let them cool completely before storing. Use sweet and tart apples for the best flavor. I recommend Granny Smith or Honeycrisp. They hold their shape well when baked. You can also mix in some sweeter apples for added flavor. The bars are done when the top is golden brown. You can also check if the apples are tender with a fork. If they are soft and warm inside, your bars are ready. Yes, you can use quick oats or even almond flour. Just keep in mind that the texture may change. Quick oats will make it softer, while almond flour will give it a nutty taste. You can use oil instead of butter. Coconut oil or vegetable oil works well. Just use the same amount as the recipe calls for. Oil will change the flavor a bit, but it will still taste great. In this blog post, I detailed how to make delicious Chai Apple Crumble Bars. We covered the key ingredients, from rolled oats to spices. I laid out clear steps for prep, baking, and cooling. Plus, I shared plenty of tips to enhance flavor and texture. You can even explore variations that suit dietary needs or seasonal tastes. Enjoy your baking adventure and savor these tasty bars with family and friends!

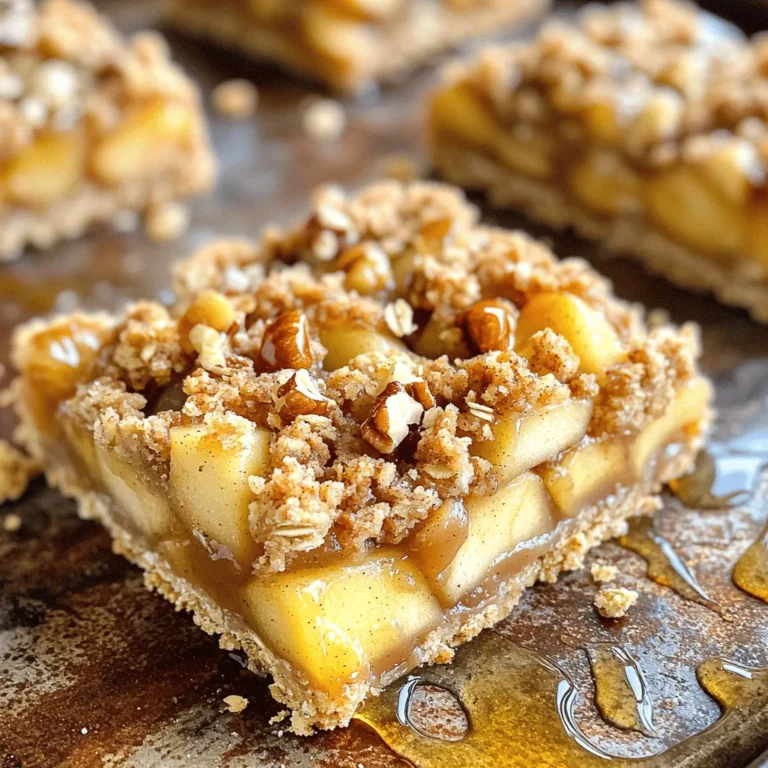
Chai Apple Crumble Bars Simple and Flavorful Delight

- 1 cup frozen strawberries - 1 banana, sliced and frozen - 1 cup almond milk (or any milk of your choice) - 2 tablespoons unsweetened cocoa powder - 1 tablespoon almond butter (or peanut butter) - 1 tablespoon honey or maple syrup (optional) - Toppings: Fresh strawberries, sliced banana, granola, chia seeds, and shredded coconut - If you don’t have frozen strawberries, use fresh ones. Just add ice to keep it cold. - Any milk works here. Try oat milk or coconut milk for a twist. - If you want a nut-free version, skip almond butter. Use sunflower seed butter instead. - For sweetening, agave syrup can replace honey or maple syrup. - Frozen strawberries: These berries are low in calories and packed with vitamin C. - Banana: Bananas give energy. They are full of potassium and good for digestion. - Almond milk: This milk is low in calories and has healthy fats. It’s also dairy-free. - Cocoa powder: It has antioxidants that help with heart health and mood. - Almond butter: This nut butter adds protein and healthy fats. It keeps you full longer. - Honey or maple syrup: These natural sweeteners add flavor and some vitamins. - Toppings: Fresh fruits add fiber, granola gives crunch, chia seeds are rich in omega-3s, and shredded coconut adds healthy fats. Each ingredient plays a role in making this bowl both tasty and nutritious. To start, gather your ingredients. You need: - 1 cup frozen strawberries - 1 frozen, sliced banana - 1 cup almond milk (or any milk you like) - 2 tablespoons unsweetened cocoa powder - 1 tablespoon almond butter (or peanut butter) - 1 tablespoon honey or maple syrup (optional) 1. Place the frozen strawberries, banana, almond milk, cocoa powder, and almond butter in a blender. 2. If you want it sweeter, add the honey or maple syrup. 3. Blend on high speed until everything is smooth and creamy. 4. Stop the blender and scrape the sides if needed to mix well. 5. Pour the smoothie mixture into a bowl. To get a creamy texture, here are some tips: - Use frozen fruit. It helps make the smoothie thicker. - Start blending at a low speed and then increase to high. - If the mixture is too thick, add a little more almond milk. - Stop to scrape down the sides of the blender for even mixing. Now it's time to make your bowl look great! Here are my suggestions: - Arrange fresh strawberry slices and banana slices on top. - Sprinkle granola for a nice crunch. - Add a few chia seeds for extra nutrition. - Finish with a sprinkle of shredded coconut. Grab a spoon and enjoy your tasty Chocolate Strawberry Smoothie Bowl! To get a smooth and creamy texture, start with frozen fruits. Frozen strawberries and bananas work best. They help make the smoothie thick and rich. Use almond milk or your favorite milk for creaminess. Blend on high until it’s fully mixed. Stop to scrape the sides if needed. This ensures every bit is blended well. Adding almond butter gives it a nice creaminess too. Make your smoothie bowl unique! You can swap the fruits based on what you like. Try mangoes or blueberries instead of strawberries. You can also change the nut butter. Use peanut butter for a different taste. Want more sweetness? Add a bit more honey or maple syrup. You can even mix in some spinach for added nutrition without changing the flavor. Toppings make your bowl look great and add crunch. Arrange fresh strawberries and banana slices on top. Use granola for a nice crunch. Sprinkle chia seeds for a health boost. Shredded coconut adds a tropical touch. Place each topping in sections. This makes your bowl colorful and fun to eat. Remember, how you arrange the toppings can make it more appealing! {{image_2}} You can use different types of milk in this recipe. Almond milk is great, but you can try oat milk, coconut milk, or regular cow's milk. Each milk brings its own taste and creaminess. Oat milk adds a nice sweetness. Coconut milk gives a rich, creamy texture. Cow's milk can make it extra smooth and filling. To boost protein, consider adding protein powder. Use whey, casein, or plant-based protein. You can also add Greek yogurt or cottage cheese for a creamy texture. These options help keep you full and support muscle growth. A scoop of nut butter also adds protein and good fats. While strawberries are delicious, feel free to mix in other fruits. Blueberries, raspberries, or even mango can make tasty swaps. Each fruit has its unique flavor and health benefits. For a tropical twist, try adding pineapple or banana for extra sweetness. If you have leftovers of your Chocolate Strawberry Smoothie Bowl, store them right. Use an airtight container. This keeps the bowl fresh. Place it in the fridge. Your smoothie bowl will stay good for one day. If the smoothie thickens, just add a splash of almond milk before eating. You can freeze your smoothie ingredients for later use. Freeze strawberries and bananas in small bags. This way, they are ready for the next bowl. When you want to make a smoothie, just take out what you need. This helps save time and reduces waste. Meal prep makes mornings easier. Prepare your smoothie bowl ingredients ahead of time. Portion your frozen fruits in bags. You can also mix the dry ingredients, like cocoa powder and almond butter, in a jar. This makes blending quick and easy. Grab a bag, blend, and enjoy! Yes, you can make this smoothie bowl vegan. Use almond milk or any plant-based milk. Replace honey with maple syrup. This way, you keep it tasty and vegan-friendly. To make your smoothie bowl thicker, add less almond milk. You can also use more frozen fruit. Try adding avocado for creaminess without changing the taste. Blending on low speed can help keep it thick. Great toppings include fresh strawberry slices, banana, granola, chia seeds, and shredded coconut. You can also try nuts or seeds for crunch. Chocolate chips can add an extra treat. Choose what you love! Yes, you can use fresh strawberries. However, the smoothie may be thinner and less cold. If you want a chilled bowl, freeze your fresh strawberries first. This keeps your smoothie bowl nice and icy. A smoothie bowl is best fresh. If you cover it, it can last in the fridge for about one day. After that, it may lose its flavor and texture. Enjoy it right away for the best taste! This blog post covered key ingredients, step-by-step instructions, helpful tips, and variations for smoothie bowls. Every ingredient adds unique nutrition. You can easily customize your bowl to fit your taste. Proper storage helps maintain freshness. Remember, you can adjust ingredients for special diets like vegan. With a few easy changes, you can create a perfect smoothie bowl every time. Enjoy blending and experimenting with flavors to find your best version!

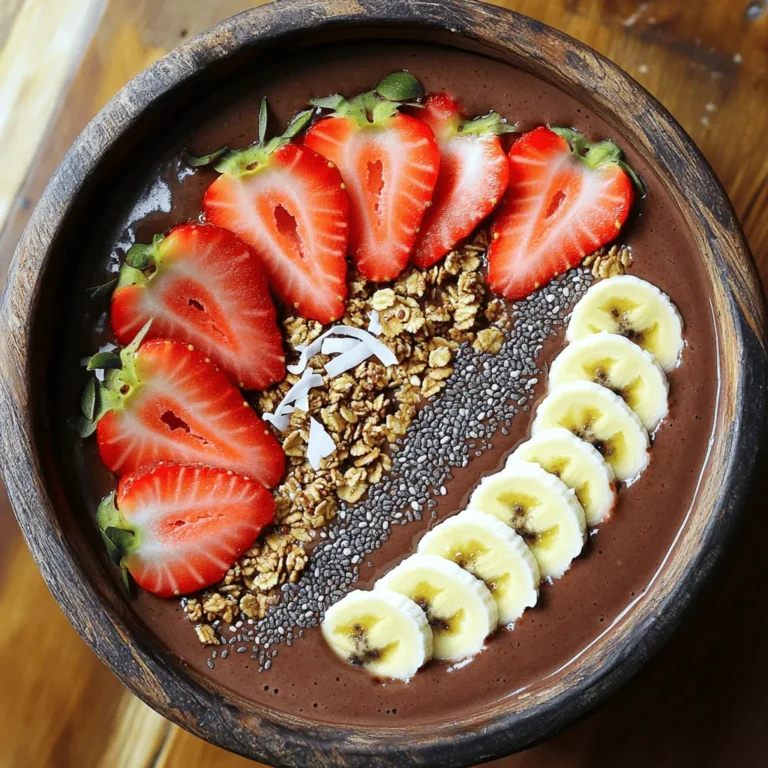
Chocolate Strawberry Smoothie Bowl Delight Recipe

- 2 pounds chicken wings - 1 tablespoon olive oil - 1 teaspoon garlic powder - 1 teaspoon onion powder - 1 teaspoon smoked paprika - 1 teaspoon salt - 1/2 teaspoon black pepper - 1/4 cup grated Parmesan cheese - 2 tablespoons fresh parsley, chopped - 1 tablespoon minced garlic - Zest of 1 lemon - Juice of 1 lemon When making Air Fryer Garlic Parmesan Wings, the ingredients are simple yet powerful. You need chicken wings, of course! Start with around 2 pounds. Ensure they are separated for even cooking. Olive oil helps the spices stick and adds flavor. Garlic powder gives a nice kick. Next, we have the seasoning mix. Onion powder, smoked paprika, salt, and black pepper add depth to the flavor. These spices are not just for taste; they create a lovely aroma too. Then comes the star of the show: the garlic Parmesan sauce. Grated Parmesan cheese, fresh parsley, minced garlic, lemon zest, and lemon juice create a bright and savory finish. This sauce truly elevates the wings. It’s a perfect blend of flavors that makes you want more with every bite. Gather these ingredients before you start cooking. Trust me, having everything ready makes the process smoother and more enjoyable. First, rinse the chicken wings under cold water. This helps remove any residue. Next, pat them dry using paper towels. Dry wings crisp up better in the air fryer. Now, it’s time to season the wings. In a large bowl, mix together the olive oil, garlic powder, onion powder, smoked paprika, salt, and black pepper. Add the wings to the bowl and toss them well. Make sure every wing gets coated with the spice mix. This step adds great flavor to each bite. Before cooking, preheat your air fryer to 400°F (200°C). This helps the wings cook evenly and get that perfect crunch. Once preheated, place the seasoned wings in the air fryer basket. Make sure they sit in a single layer. If needed, cook them in batches to avoid crowding. Cook the wings for 25 to 30 minutes. Halfway through, shake the basket. This ensures the wings cook and crisp up evenly. Keep an eye on them as they cook to get that perfect golden color. While the wings are cooking, let’s make the garlic Parmesan sauce. In a small bowl, mix the minced garlic, lemon zest, lemon juice, and grated Parmesan cheese. Stir until the ingredients blend well. Set this bowl aside for later. Once the wings are golden and crispy, take them out of the air fryer. Immediately toss them in the garlic Parmesan sauce. Make sure every wing gets a nice coating. This sauce adds a rich and tangy flavor that pairs perfectly with the crispy wings. To get the best crispy wings, drying them is key. After rinsing, use paper towels to pat them dry well. Moisture on wings can lead to sogginess. Next, avoid overcrowding the air fryer. Place wings in a single layer for even cooking. If your fryer is small, cook in batches. This way, every wing gets that crispy texture. Want to spice things up? Add some cayenne pepper for heat. You can also try smoked paprika for a deeper flavor. Mix things up with some Italian seasoning or lemon pepper. When serving, dips add fun. Ranch dressing complements the garlic well. You can also use blue cheese or a spicy aioli. They will elevate the taste and make each bite special. For a fresh touch, garnish with chopped parsley. It adds color and flavor. Sprinkle it over the wings just before serving. Serving with lemon wedges is a great idea. The tangy juice brightens the dish. Guests can add juice to taste, enhancing the overall flavor. Arrange wings on a nice platter for a lovely presentation. {{image_2}} You can spice things up with spicy garlic Parmesan wings. Just add your favorite hot sauce to the garlic Parmesan sauce. It gives a nice kick. You can also try fresh herbs like rosemary or thyme. Mixing herbs adds depth and freshness to the dish. If you want a different method, try baking your wings in the oven. Preheat your oven to 425°F (220°C). Spread the wings on a baking sheet and bake for 40-45 minutes. Flipping them halfway helps them crisp up nicely. For a smoky flavor, grilling is a great option. Use medium heat and grill for about 20-25 minutes, turning frequently. Pair your wings with different sides. Fresh veggies, like carrots and celery, add crunch. You can also serve them with fries or a salad for balance. If you have a gathering, create a wing platter. Arrange the wings with sauces on the side. This makes it fun for everyone to grab and enjoy. To keep your wings fresh, refrigerate them. Place the wings in an airtight container. This helps keep them from drying out. You can also use a resealable plastic bag. Make sure to remove as much air as possible. Label the container with the date. This way, you know when to eat them. The best way to reheat wings is in the air fryer. Set it to 350°F (175°C). Heat them for about 5 to 8 minutes. This will make them crispy again. You can also use an oven. Preheat it to 350°F (175°C) and bake for 10 to 15 minutes. For a quick option, use a microwave, but the wings may not be as crispy. You can freeze leftover wings for later. First, let them cool completely. Then, place the wings in a freezer-safe bag. Remove all the air and seal it tightly. Label the bag with the date. To thaw, put the wings in the fridge overnight. You can also reheat them straight from the freezer in the air fryer. Just add a few extra minutes to the cooking time. You will cook wings in an air fryer for about 25-30 minutes. This time gives them a nice crisp. I recommend shaking the basket halfway through. This helps cook the wings evenly. You want them golden brown and crispy all over. Yes, you can use frozen wings in the air fryer. However, you need to adjust the cooking time. I suggest cooking them for about 30-35 minutes. Check them at the 30-minute mark to see if they are cooked through. The extra time helps them get crispy and delicious. Garlic Parmesan wings go well with several tasty dips. Here are some popular choices: - Ranch dressing - Blue cheese dressing - Honey mustard - BBQ sauce These dips add more flavor to the wings. Enjoy trying different ones! In this post, we explored how to make delicious garlic Parmesan chicken wings. We covered the main and seasoning ingredients, step-by-step cooking instructions, and useful tips for getting crispy results. You learned about flavor and cooking variations, plus how to store and reheat your wings. These wings are perfect for gatherings or a fun meal. Enjoy trying new flavors and impressing friends and family!

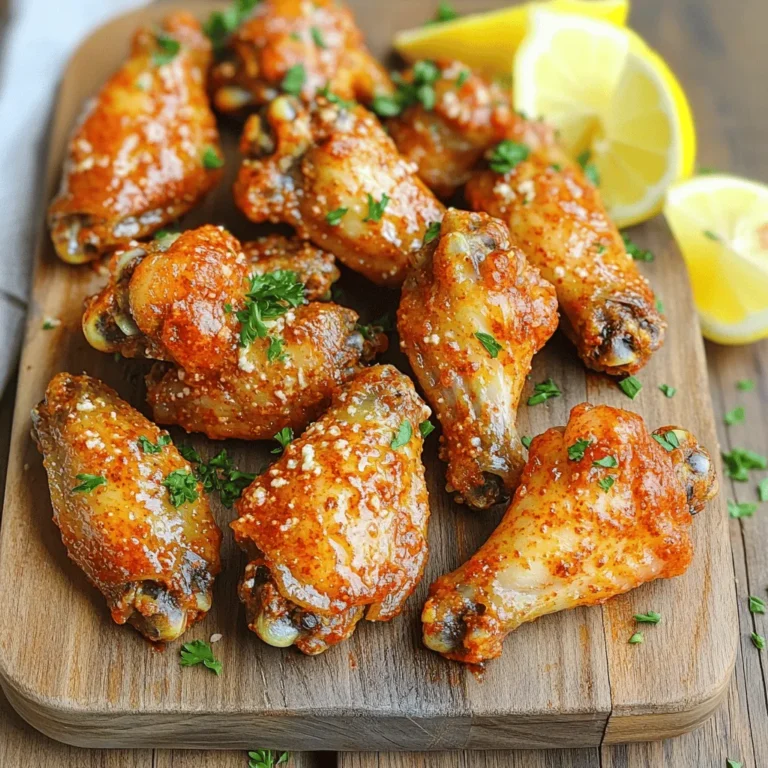
Air Fryer Garlic Parmesan Wings Flavorful and Crispy Dish

- 1 cup rolled oats - 1 scoop vanilla protein powder - 1 teaspoon baking powder - 1 teaspoon cinnamon - 1 medium apple, peeled and grated - 2 eggs - 1/2 cup almond milk - 1 tablespoon honey or maple syrup (optional) - Pinch of salt - Oil or butter for cooking To make these tasty pancakes, I use simple, healthy ingredients. The rolled oats form the base of the batter. They give the pancakes a nice texture and add fiber. I also add vanilla protein powder to boost the protein content. This helps keep me full longer. Baking powder makes the pancakes fluffy. I always add cinnamon for a warm flavor that pairs well with apples. A medium apple, peeled and grated, gives sweetness and moisture. The eggs bind everything together and add more protein. I prefer almond milk for creaminess, but any milk works. You can sweeten the batter with honey or maple syrup if you like it sweeter. A pinch of salt enhances the flavors. Finally, I use oil or butter for cooking, which adds richness. - Protein content per serving: Approximately 12 grams - Calorie count and breakdown: About 180 calories per pancake - Health benefits of protein in breakfast: Protein helps build muscles and keeps you full. These pancakes offer about 12 grams of protein per serving. Each pancake has around 180 calories. Starting the day with protein can help with energy and muscle repair. It also keeps you satisfied until lunch. So, these Apple Cinnamon Protein Pancakes are not just tasty; they’re also a smart choice for breakfast! First, you need to measure the oats. Use one cup of rolled oats. Then, put them in a blender. Blend until they are fine like flour. This gives the pancakes a good texture. Next, grab a medium apple. Peel it and then grate it. You want small pieces that mix well into the batter. The apple adds moisture and sweetness. Now, let’s mix the wet and dry ingredients. Take a bowl and whisk the eggs with half a cup of almond milk. If you want extra sweetness, add honey or maple syrup. In the same bowl, add the ground oats, protein powder, baking powder, cinnamon, and salt. Mix until just combined. Do not over-mix. If you do, the pancakes may become tough. Now carefully fold in the grated apple. This adds great flavor and a nice texture. It’s time to cook! Preheat a non-stick skillet over medium heat. Lightly grease it with oil or butter. Pour a quarter cup of batter for each pancake onto the skillet. Cook for 2-3 minutes. You’ll see bubbles form on top and the edges will firm up. Now, flip the pancakes. Cook for another 2-3 minutes. They should be golden brown and cooked through. Repeat this with the rest of the batter. Grease the skillet as needed. To make great pancakes, you need the right batter. Start with your oats. Blend them until they are a fine flour. This gives the pancakes a nice texture. The mixture should be thick but pourable. If it’s too runny, add a little more oats. If it’s too thick, add some almond milk. Cooking evenly is key for great pancakes. Preheat your skillet on medium heat. Use a non-stick skillet if you can. Lightly grease it with oil or butter. Pour 1/4 cup of batter for each pancake. Watch for bubbles on the surface. This shows they are ready to flip. Cook until both sides are golden brown. Presentation makes your pancakes look extra yummy. Stack them high on a plate. Drizzle with honey or maple syrup for sweetness. Sprinkle extra cinnamon on top for flavor. You can add diced apples for a fresh touch. For a creamy kick, add a dollop of Greek yogurt. It balances the sweetness and adds protein. Feel free to get creative with your toppings! {{image_2}} You can make your apple cinnamon protein pancakes even better with fun flavors. Adding nuts or seeds gives a nice crunch. Try walnuts, pecans, or chia seeds. They add good fats and protein. You can also mix in spices like nutmeg or ginger. These spices boost the flavor and warmth. Just a pinch can make a big difference. If you want to make vegan pancakes, it’s easy! Swap the eggs for flax eggs. Just mix one tablespoon of ground flaxseed with three tablespoons of water. Let it sit for five minutes until it thickens. Use almond milk or any plant milk you like. For gluten-free pancakes, use gluten-free rolled oats. Just check the label to be sure. These swaps keep your pancakes tasty and friendly for all diets. To keep your leftover pancakes fresh, follow these steps: - Refrigeration: Place the pancakes in an airtight container. They stay good for up to three days in the fridge. You can stack them with parchment paper in between to prevent sticking. - Freezing pancakes for later use: If you want to keep them longer, freeze the pancakes. Lay them flat on a baking sheet until firm. Then, transfer them to a freezer bag. They can last for up to three months. Just remember to label the bag with the date! To enjoy your pancakes again, you can use these methods: - Microwave: Place pancakes on a plate and cover them with a damp paper towel. Heat for about 20-30 seconds or until warm. This keeps them soft. - Toaster: For a crispy edge, toast the pancakes. Set your toaster to a low setting and toast until warm. Keep an eye on them to avoid burning. - Skillet: Heat a non-stick skillet over medium heat. Add a little oil or butter. Cook each pancake for about 1-2 minutes on each side until heated through. These methods will help maintain the best texture and flavor of your apple cinnamon protein pancakes. Enjoy! To make vegan apple cinnamon protein pancakes, swap the eggs for flax eggs. Mix 1 tablespoon of ground flaxseed with 2.5 tablespoons of water. Let it sit for 5 minutes until it thickens. For milk, use almond milk or any plant-based milk you like. You can keep the rolled oats, cinnamon, and apple as they are. If you want a sweet touch, use maple syrup instead of honey. Yes, you can use instant oats, but they will change the texture. Instant oats create a softer pancake. They absorb liquid faster, so you may need to reduce the almond milk a bit. Watch the cooking time, as they may cook quicker than rolled oats. Keep an eye on them to avoid burning. To boost protein in your pancakes, add more protein powder. A second scoop can work well. You could also mix in some Greek yogurt or cottage cheese into the batter. These options add creaminess and extra protein. For a nutty flavor, sprinkle in chia seeds or hemp seeds. You can make delicious apple cinnamon protein pancakes using simple ingredients. We covered the key components, like oats, apples, and protein powder. I shared easy steps for preparation, mixing, and cooking. Don't forget the tips for perfect pancakes and serving ideas. You can also explore variations to make them fit your taste. Whether you store leftovers or want to reheat them, the advice is there. Enjoying a healthy breakfast can be easy and fun. Try these pancakes to boost your mornings.

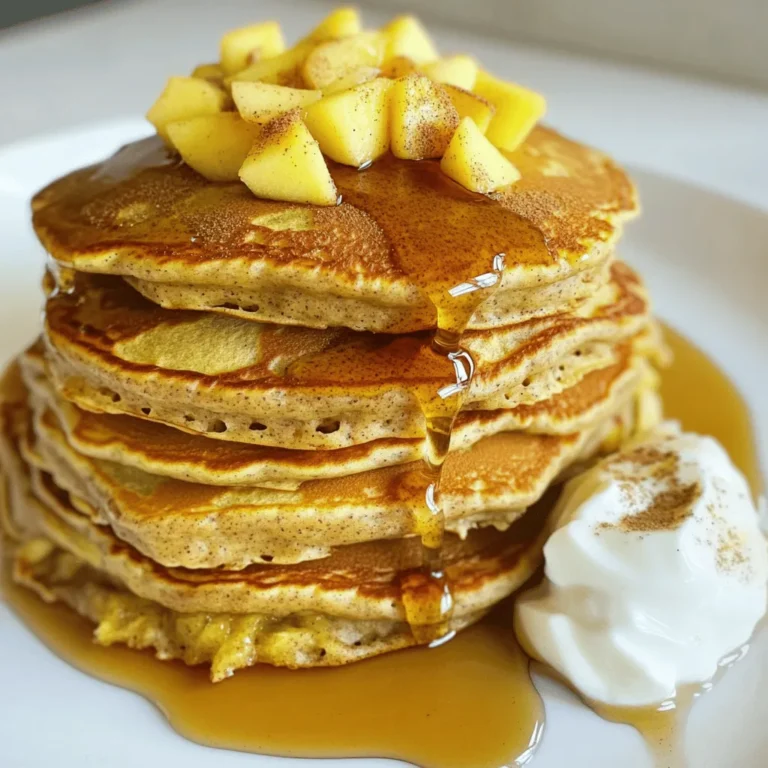
Apple Cinnamon Protein Pancakes Tasty and Easy Recipe

For the Slow Cooker Tuscan Beef Ragu, you will need: - 2 lbs beef chuck roast, cut into large chunks - 1 medium onion, finely chopped - 3 cloves garlic, minced - 1 carrot, diced - 1 celery stalk, diced - 1 can (14 oz) diced tomatoes - 1 cup beef broth - 2 tablespoons tomato paste - 1 tablespoon balsamic vinegar - 1 teaspoon dried basil - 1 teaspoon dried oregano - 1 teaspoon red pepper flakes (adjust to taste) - Salt and pepper to taste - Fresh basil leaves for garnish - Cooked pasta of your choice (for serving) Each ingredient brings its own flavor and texture. The beef chuck roast adds richness. The onion and garlic give depth. The carrot and celery add natural sweetness. If you don't have some ingredients, here are easy swaps: - Beef chuck roast: Use brisket or round roast. - Onion: Shallots work fine. - Garlic: Garlic powder can substitute. - Carrot: Use bell pepper for sweetness. - Celery: Zucchini can add texture. - Diced tomatoes: Crushed tomatoes can be used instead. - Beef broth: Vegetable broth is a good alternative. - Balsamic vinegar: Red wine vinegar can work too. These swaps still provide great flavor and keep the dish tasty. Fresh herbs can elevate your dish. Here are my top picks: - Basil: Adds a sweet and peppery taste. - Oregano: Offers a warm, aromatic flavor. - Thyme: Provides a subtle earthiness. Add these herbs near the end of cooking for the best flavor. Fresh herbs bring brightness to your ragu. Start with 2 lbs of beef chuck roast. Cut it into large chunks. Season the beef with salt and pepper. Next, finely chop 1 medium onion and mince 3 cloves of garlic. Dice 1 carrot and 1 celery stalk. These veggies add great flavor. In a skillet, heat a splash of oil over medium heat. Add the chopped onion, garlic, carrot, and celery. Sauté until soft, about 5-7 minutes. This step wakes up the flavors in your ragu. Once done, transfer the mixture to the slow cooker with the beef. In the slow cooker, add a can of diced tomatoes, including the juice. Pour in 1 cup of beef broth and add 2 tablespoons of tomato paste. Then, add 1 tablespoon of balsamic vinegar. Sprinkle in 1 teaspoon of dried basil, 1 teaspoon of dried oregano, and red pepper flakes. Stir gently to mix everything well. Cover the slow cooker. Cook on low for 8 hours or high for 4 hours. The beef should be tender and easy to shred. This slow cooking lets all the flavors blend together. After cooking, take two forks and shred the beef right in the slow cooker. Mix it into the sauce. Taste the ragu and add more salt and pepper if needed. Serve the ragu over your favorite cooked pasta. Garnish with fresh basil leaves for a pop of color and flavor. Enjoy the rich taste of Tuscan beef ragu! To boost the taste, consider adding more herbs. Fresh herbs like thyme or rosemary can add depth. You can also use red wine for a richer flavor. Just add a half cup before cooking. It adds a lovely warmth to the sauce. Always start with good-quality beef. This makes a big difference in taste. Cut the beef into large chunks, so it cooks evenly. Season each piece well with salt and pepper. After adding the veggies, mix them well before pouring in the liquids. This helps blend the flavors nicely. To get the best texture, cook the ragu on low heat. This allows the beef to become very tender. If you're short on time, high heat works, but low is better. Shred the beef in the slow cooker. This lets it soak up the sauce. If the sauce is too thin, remove the lid for the last hour. This helps it thicken up just right. {{image_2}} You can switch the beef chuck for other meats. Pork shoulder works well. It gives a nice, rich taste. You can also use chicken thighs for a lighter option. Just remember, chicken cooks faster, so check it early. To make a vegetarian or vegan ragu, try using mushrooms. They add a great texture and umami flavor. Replace the beef broth with vegetable broth. You can add lentils for protein. Another option is to use jackfruit, which shreds well and absorbs flavors. While pasta is a classic, there are many great ways to serve this ragu. Try it on polenta for a creamy twist. You can spoon it over mashed potatoes for comfort food. It also pairs nicely with crusty bread for dipping. For a light meal, serve it over zucchini noodles. Once you finish your Slow Cooker Tuscan Beef Ragu, let it cool. Place the ragu in an airtight container. You can store it in the fridge for up to four days. Make sure to label the container with the date. This helps keep track of freshness. If you want to save some for later, freezing works great. Portion the ragu into freezer-safe bags or containers. Remove as much air as possible to avoid freezer burn. You can freeze it for up to three months. When you are ready to eat, just thaw it in the fridge overnight. To reheat, you can use the stove or microwave. For the stove, place the ragu in a pan over low heat. Stir it often until it warms up. If using the microwave, heat in short bursts, stirring in between to ensure even warming. Always check the temperature before serving. It should be hot throughout. Enjoy your flavorful meal again! To check if the beef is cooked, look for tenderness. You can use two forks to shred it. If it pulls apart easily, it's done. The meat should also be a deep brown color. You can taste a small piece to ensure it has a rich flavor. If it’s tough, it needs more time to cook. Let it go longer until it reaches that melt-in-your-mouth quality. Yes, you can make Tuscan Beef Ragu on the stove or in an oven. For stove-top cooking, brown the beef in a pot first. After that, add the vegetables and other ingredients. Simmer on low heat for about 2 to 3 hours. If using an oven, cook it in a covered pot at 325°F for around 3 hours. Both methods will give you a delicious result. Tuscan Beef Ragu pairs perfectly with many dishes. Classic pasta, like tagliatelle or pappardelle, works great. You can also serve it with polenta or creamy mashed potatoes. For a lighter option, try it on a bed of sautéed greens. A side salad with a tangy vinaigrette complements the rich flavors too. Don't forget some crusty bread for dipping! This blog post covered how to make a tasty Tuscan Beef Ragu. We explored the ingredients you need, from fresh herbs to substitutes. I also shared tips to enhance flavor and texture in your slow cooker. You learned about different meat options and vegetarian variations too. Finally, I explained how to store and reheat your ragu. Enjoy experimenting with this recipe. You can customize it to fit your taste. Whether you stick to beef or try something new, your ragu will shine. Happy cooking!

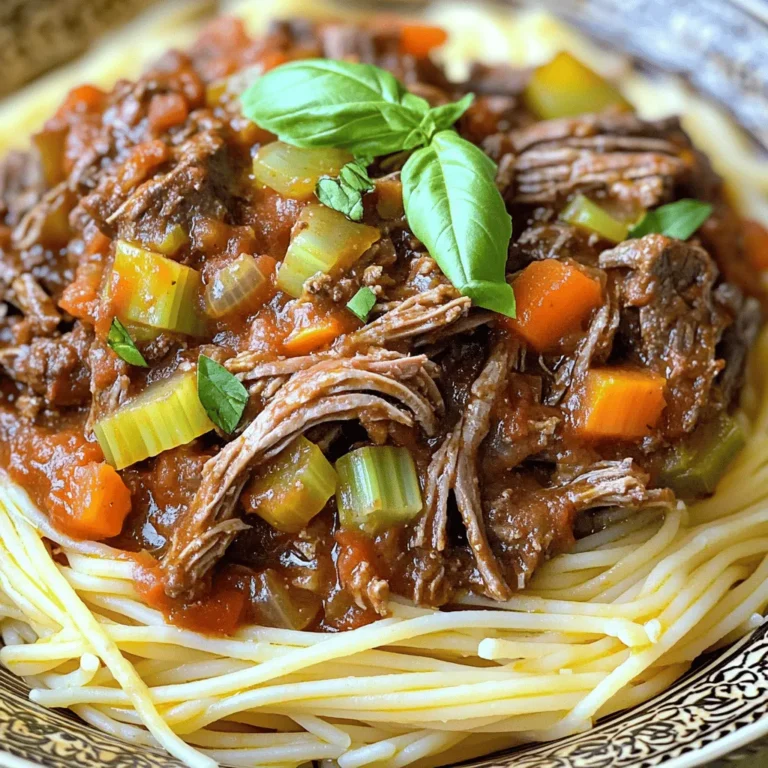
Slow Cooker Tuscan Beef Ragu Flavorful Dinner Delight

PREV 1 … 18 19 20 … 57 NEXT
secrets pice kitchen

explore

DessertsDinnerAppetizersDrinks

Our Policies

  • Cookie Policy
  • Copyright Policy
  • Disclaimer
  • GDPR Policy
  • Terms Of Use
Back to Top
  • About
  • Contact Us
  • Privacy Policy
© 2025 secrets pice kitchen