FREE DINNER EBOOK! Get your copy!
  • Cookie Policy
  • GDPR Policy
  • Disclaimer
  • Terms Of Use
  • Visit my other site: Fun Cookie Recipes
secrets pice kitchen
  • Home
  • Dinner
  • Desserts
  • Drinks
  • Appetizers
  • Contact
  • About
  • Privacy Policy
  • Home
  • Dinner
  • Desserts
  • Drinks
  • Appetizers
  • Contact
  • About
  • Privacy Policy
  • Cookie Policy
  • GDPR Policy
  • Disclaimer
  • Terms Of Use
Visit my other site: Fun Cookie Recipes

HOME / CATEGORIES /

Latest

- 2 lbs beef chuck, cut into 1-inch cubes - 1 large onion, diced - 3 cloves garlic, minced - 3 medium carrots, sliced - 2 medium potatoes, cubed - 1 cup green beans, trimmed and cut into 1-inch pieces - 4 cups beef broth - 2 tablespoons tomato paste - 2 tablespoons olive oil - 1 teaspoon smoked paprika - 1 teaspoon dried thyme - 1 teaspoon ground cumin - Salt and pepper to taste - 1 bay leaf - 1 tablespoon Worcestershire sauce The main ingredients for this beef stew create a rich and hearty meal. The beef chuck provides a tender texture when cooked. The vegetables add color and nutrition. Onions and garlic bring depth to the flavor. The beef broth acts as the base for the stew, while the spices enhance the taste, making every bite delicious. - Additional vegetables like mushrooms or peas - Fresh herbs such as parsley or rosemary - Spices like cayenne pepper or Italian seasoning You can add extra veggies or herbs to make the stew your own. Mushrooms bring an earthy taste. Peas add sweetness. Fresh herbs can brighten the dish. If you like heat, add cayenne pepper. This flexibility allows you to customize your stew based on what you have at home or what you enjoy. {{ingredient_image_1}} - Searing the beef: Start by setting your Instant Pot to the sauté function. Add 2 tablespoons of olive oil and let it heat for one minute. Next, add 2 pounds of beef chuck, cut into 1-inch cubes. Sear the beef until it is browned on all sides. This should take about 5 to 7 minutes. A good sear adds flavor to the stew. - Setting aside: Once the beef is well-browned, remove it from the pot and set it aside. This step helps keep the beef tender. - Sautéing onions: In the same pot, add the diced onion. Cook for 3 to 4 minutes until it softens. The onion adds a sweet flavor to the dish. - Adding garlic: Stir in 3 minced garlic cloves and cook for an additional 30 seconds. This will make your kitchen smell amazing. - Incorporating tomato paste and spices: Add 2 tablespoons of tomato paste, 1 teaspoon of smoked paprika, 1 teaspoon of dried thyme, and 1 teaspoon of ground cumin. These ingredients build a rich flavor base. - Coating ingredients: Stir well to coat the onions and garlic evenly. Cook for one more minute to let the spices bloom. - Adding vegetables and broth: Return the browned beef to the pot. Add 3 sliced carrots, 2 cubed potatoes, and 1 cup of green beans that are trimmed and cut. Then pour in 4 cups of beef broth. - Seasoning the mixture: Add 1 tablespoon of Worcestershire sauce, and toss in a bay leaf. Season with salt and pepper to taste, mixing everything well. - Instant Pot settings: Close the lid of the Instant Pot. Make sure the steam release valve is set to sealing. Set it to high pressure for 35 minutes. - Natural and quick release: After cooking, allow a natural release for 10 minutes. Then switch to a quick release for any remaining pressure. - Adjusting seasonings: Open the lid and taste the stew. Adjust the seasonings if needed. This step ensures each bite is packed with flavor. - Garnishing: Serve the stew hot. Garnish with fresh parsley if desired for a touch of color and freshness. Thickening the stew If your stew is too thin, you can thicken it easily. First, mix one tablespoon of cornstarch with two tablespoons of cold water. Stir this into the hot stew. Cook for a few more minutes to help it thicken. Another method is to mash some of the potatoes in the stew. This adds body and helps thicken it naturally. Avoiding overcooking To avoid overcooking, keep an eye on the time. The Instant Pot cooks food quickly. Set the timer for 35 minutes on high pressure. After cooking, wait for 10 minutes before releasing the pressure. This natural release helps keep the meat tender. If you cook too long, the beef may become dry. Recommended seasoning adjustments Taste your stew before serving. If it needs more flavor, add a pinch of salt or a dash of Worcestershire sauce. You can also add fresh herbs like parsley or thyme at the end. These herbs brighten the dish and add freshness. Marinating beef For extra flavor, marinate the beef before cooking. Use a simple mix of olive oil, garlic, and spices. Let the beef sit for at least an hour, or overnight if possible. This step adds depth to the flavor and makes the beef more tasty. Common troubleshooting tips If the Instant Pot does not reach pressure, check the sealing ring. It must be in place and free of debris. If your stew burns on the bottom, add more liquid next time. Always scrape the bottom well after sautéing. Safety tips for pressure cooking Always ensure the steam release valve is set to sealing before cooking. When the cooking time is up, wait for the natural release. This prevents hot steam from escaping suddenly. Use a long utensil when moving the steam release valve to avoid burns. Pro Tips Choose the Right Cut: Using beef chuck is ideal for stews as it becomes tender during cooking. Avoid lean cuts as they may dry out. Layer Flavors: Searing the beef and sautéing the aromatics first enhances the overall flavor of the stew significantly. Vegetable Variations: Feel free to add other vegetables like peas or parsnips for added flavor and nutrition. Thickening the Stew: If you prefer a thicker stew, mix a tablespoon of cornstarch with cold water and stir it in during the last few minutes of cooking. {{image_2}} You can use different cuts of beef in this stew. Chuck is great, but brisket or round also work well. Each cut offers a unique taste and texture. If you want a vegetarian option, try using mushrooms or lentils. Mushrooms add a rich umami flavor. Lentils give you protein and a nice texture. Both options make the stew hearty and filling. Adding wine or beer can change the flavor. Red wine boosts richness, while beer adds depth. Just a cup enhances the stew’s taste. You can also play with herbs. Fresh rosemary or parsley brightens the dish. Thyme and bay leaves deepen the flavor. Feel free to mix and match your favorites. I love serving beef stew with crusty bread. It soaks up the sauce perfectly. Mashed potatoes are another great side. They add creaminess to each bite. For garnishing, fresh parsley is my go-to. It adds a pop of color and freshness. You could also sprinkle some grated cheese on top for extra flavor. After you enjoy this stew, let it cool first. This step helps keep it fresh. Pack the stew in airtight containers. Glass or plastic containers work well. Make sure to leave some space at the top. This space allows for expansion if you freeze it. To freeze beef stew, let it cool completely. Then, pour it into freezer bags or containers. Remove as much air as you can from bags. This keeps the stew from getting freezer burn. For best taste, eat the frozen stew within three months. When you are ready to eat, thaw it in the fridge overnight. Reheat it in the microwave or on the stove. Stir it well to heat evenly. For best freshness, eat leftover stew within three to four days. Always store it in the fridge, covered. Check for spoilage by looking for off smells or changes in color. If the stew smells sour or looks different, throw it away. This keeps you safe and healthy. The total time for Instant Pot beef stew is about one hour. This includes 15 minutes for prep and 35 minutes for cooking. After cooking, let it rest for 10 minutes before serving. The Instant Pot speeds things up, making this dish quick and easy. You can use frozen beef, but it will change the cooking time. If you use frozen chunks, add about 10 more minutes to the cook time. Ensure the beef is cut into smaller pieces for even cooking. It will still be tasty and tender. If your stew is too salty, don’t worry. You can fix it easily. Add more broth or water to dilute the saltiness. If you want, add diced potatoes or carrots. They soak up some salt while cooking. Taste as you go to find the right balance. Yes, you can double the recipe. Just keep the cooking time the same. Make sure not to fill the pot beyond the max fill line. This way, your stew will cook evenly and taste great. To thicken your stew, try these methods. First, mash some of the potatoes in the stew. This will add creaminess. Another way is to mix a tablespoon of cornstarch with water. Stir this mixture into the stew and let it cook for a few more minutes. In this blog post, we explored how to make a delicious beef stew in an Instant Pot. We covered main ingredients like beef chuck, vegetables, and seasonings. You learned about optional add-ins for extra flavor. The step-by-step guide included tips for prepping, cooking, and storing your stew. Remember, experimenting with flavors and ingredients can make your stew unique. Enjoy the cooking process, and don't forget to savor every bite! This hearty dish is not just a meal but also a chance to create memories.

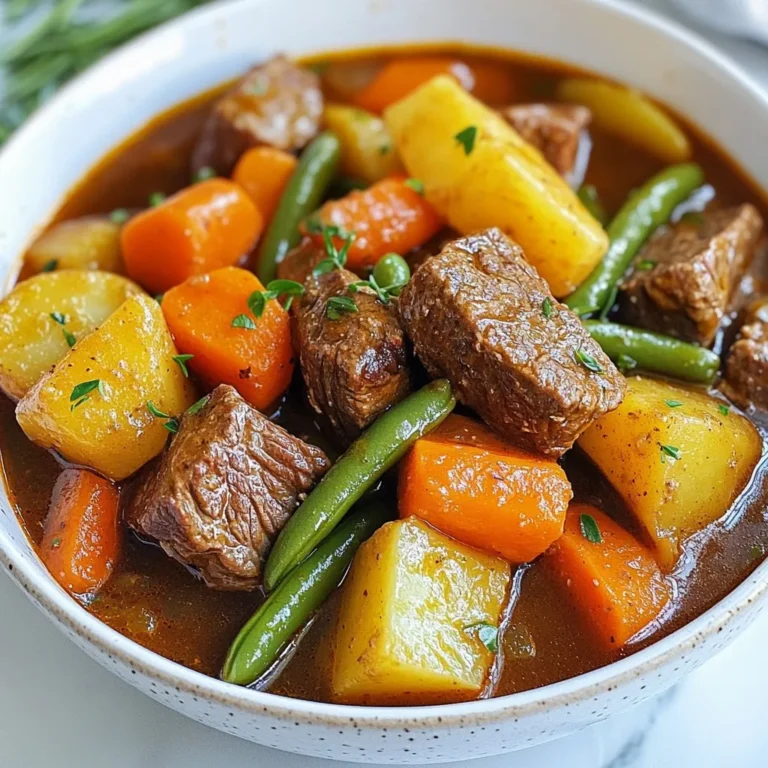
Instant Pot Beef Stew Flavorful and Hearty Meal

- Spinach: Use 4 cups of fresh spinach. Look for bright green leaves. Avoid any wilted or yellowed spinach for best taste. - Strawberries: Choose 2 cups of ripe strawberries. Look for shiny, deep red berries with no white spots. They should smell sweet and feel firm. - Red Onion: Use 1/4 of a red onion, thinly sliced. This onion adds a sharp flavor. It balances well with the sweet strawberries. - Pecans: Use 1/2 cup of pecans, toasted for best flavor. To toast, place them in a dry pan over medium heat. Stir them often until they smell nutty. This should take about 5 minutes. - Feta Cheese: You can add 1/4 cup of crumbled feta cheese if you like. It adds creaminess and saltiness. If you want a vegan option, skip the cheese or use a plant-based substitute. - Balsamic Vinegar: I recommend a good quality balsamic vinegar. The flavor can vary, so taste it first. Look for one that is rich and sweet. - Honey: Use 2 tablespoons of honey for sweetness. If you prefer, maple syrup or agave nectar can be good substitutes. - Olive Oil: Add 1 tablespoon of olive oil to the dressing. Extra virgin olive oil works best for its rich flavor. {{ingredient_image_1}} To make a great dressing, start with a small bowl. Combine 3 tablespoons of balsamic vinegar, 2 tablespoons of honey, and 1 tablespoon of olive oil. Use a whisk to blend these ingredients well. This technique helps mix the flavors evenly. For seasoning, add salt and pepper to taste. A pinch of salt enhances the sweetness of the honey and the tang of the vinegar. Adjust to your liking. Set the dressing aside while you prepare the salad. Next, grab a large mixing bowl. Add 4 cups of washed and torn fresh spinach. Then, pile in 2 cups of hulled and sliced strawberries. Toss in 1/2 cup of toasted pecans for crunch. Add 1/4 thinly sliced red onion for a zesty bite. If you like, sprinkle in 1/4 cup of crumbled feta cheese for creaminess. Mix the ingredients gently with a large spoon. This order helps the flavors meld together nicely. Now it’s time to dress the salad. Drizzle the dressing over the mixture. Using salad tongs or two large spoons, toss the salad gently. Be careful not to bruise the spinach or strawberries. For serving, transfer the salad to a bright serving dish or individual plates. To make it look lovely, garnish with extra sliced strawberries and a sprinkle of feta on top. Serve your salad chilled or at room temperature for the best taste. You can save time by preparing some ingredients in advance. Wash and tear the spinach a day before. Slice the strawberries and store them in the fridge. This keeps them fresh and ready to go. For the pecans, toast them ahead of time and let them cool. Store them in an airtight container. Always store the dressing separately. Mixing it with the salad too early can make it soggy. You can whisk the dressing and keep it in the fridge for a few days. Just give it a good shake before using it. To enhance flavors, try adding fresh herbs like basil or mint. These herbs bring a new twist to your salad. You can also sprinkle in some black pepper or a pinch of cumin for extra depth. Balancing sweetness and acidity is key. If the dressing is too sweet, add a splash more balsamic vinegar. This will brighten the dish and make it more refreshing. Using the right tools makes salad prep easier. A large mixing bowl works best for combining ingredients. Grab a salad spinner to wash and dry the spinach. For leftovers, choose glass containers with tight lids. This keeps the salad fresh. If you have leftover dressing, store it in a small jar. You can easily grab it for your next salad! Pro Tips Use Fresh Ingredients: Always opt for fresh spinach and ripe strawberries for the best flavor and texture in your salad. Toast Your Nuts: Toasting pecans enhances their flavor and adds a delightful crunch to the salad. Let It Rest: Allow the salad to sit for a few minutes after dressing to let the flavors meld together. Experiment with Dressings: Try adding citrus juices or herbs to the dressing for a different flavor profile. {{image_2}} You can change up the salad by adding different fruits. Here are some tasty options: - Blueberries: They add a nice pop of color and flavor. - Raspberries: These berries bring a tartness that works well. - Mandarin oranges: They add sweetness and a juicy bite. You can also swap out the pecans for other nuts. Consider these tasty alternatives: - Almonds: Sliced or slivered, they add a crunchy texture. - Walnuts: They offer a rich flavor that pairs nicely with the salad. You can make your own dressing for this salad. Try mixing these flavors: - Lemon juice: Use it instead of balsamic vinegar for a fresh taste. - Maple syrup: Swap honey for this for a different sweetness. If you prefer store-bought dressings, here are some good choices: - Honey mustard: It adds a tangy sweetness that complements the salad. - Raspberry vinaigrette: This dressing enhances the berry flavor. You can adapt this salad to fit different diets. For vegan options, replace these ingredients: - Honey: Use agave syrup or maple syrup. - Feta cheese: Try tofu or leave it out entirely. If you need gluten-free options, rest easy. All the ingredients are gluten-free. Just check any packaged items, like dressings, for gluten. Enjoy this fresh dish without worry! To store leftover salad, place it in an airtight container. This keeps it fresh and prevents sogginess. Use a container with a tight lid to block out air. Aim to eat the salad within 1-2 days for the best taste. If the salad is dressed, it may wilt faster. Consider storing the dressing separately to keep the greens crisp. Freezing this salad is not recommended. However, you can freeze individual ingredients. For example, you can freeze sliced strawberries. Wash and dry them first, then place them in a single layer on a baking sheet. Once frozen, transfer them to a freezer bag. You can also freeze pecans. Just make sure they are in a sealed bag to avoid freezer burn. When you're ready to use frozen strawberries, thaw them in the fridge overnight. This keeps them from getting mushy. You can also use them in smoothies or desserts. For pecans, you can toast them again in a pan to bring back their crunch. Enjoy your salad fresh for the best flavor! This salad is full of goodness! It offers vitamins A, C, and K. Spinach is great for your eyes and skin. Strawberries are rich in antioxidants and boost your immune system. Pecans add healthy fats and protein. Together, these ingredients make a balanced meal. Eating this salad can help you feel full and satisfied. It’s a delicious way to get your daily nutrients. Yes, you can! To keep it fresh, prep the salad ingredients early. Store the spinach, strawberries, and nuts separately. Mix them together just before serving. This way, the spinach stays crisp. Keep the dressing in a jar in the fridge. Dress the salad right before you eat. This will keep the flavors bright and the textures perfect. To tone down the sweetness, add more balsamic vinegar. Start with a teaspoon at a time. You can also add a pinch of salt to balance the flavors. If you want, try using less honey. Taste as you go to find your perfect mix. Adjust the dressing until it fits your taste. Enjoy your custom salad! This blog post covered how to make a delicious Strawberry Spinach Pecan Salad. We explored fresh produce, nuts, cheese, and dressing components. You learned how to prepare, assemble, and serve the salad for the best flavor. I shared tips for making it ahead and offered helpful variations. Remember, you can always adjust ingredients to suit your taste. Enjoy experimenting with flavors and find what works for you! Your perfect salad awaits.

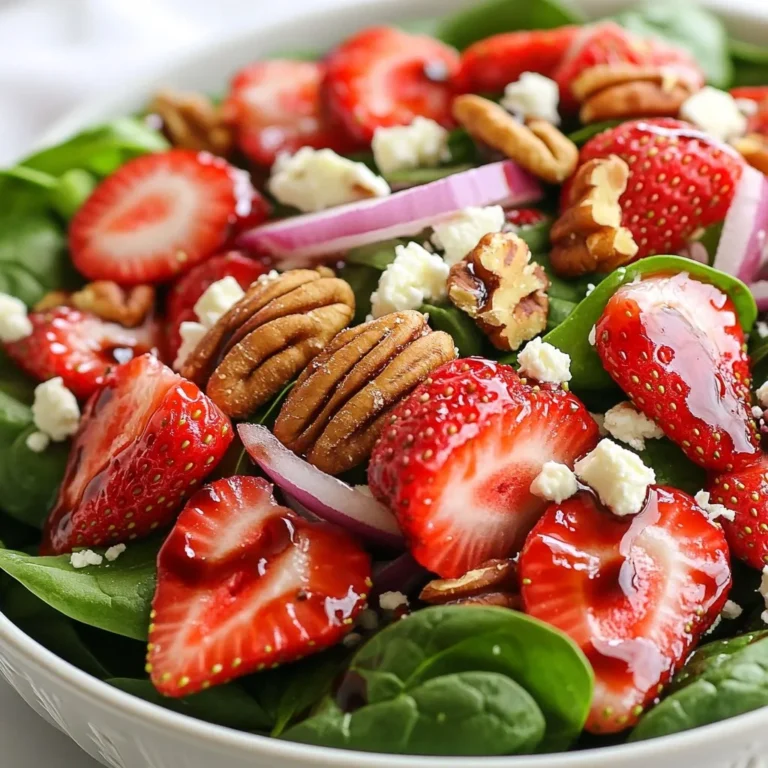
Strawberry Spinach Pecan Salad Fresh and Flavorful Dish

Here are the ingredients you need for Creamy Tuscan Chicken Skillet. They are simple and easy to find. - 4 boneless skinless chicken breasts - 2 tablespoons olive oil - 3 cloves garlic, minced - 1 cup cherry tomatoes, halved - 2 cups fresh spinach - 1 cup heavy cream - 1/2 cup grated Parmesan cheese - 1 teaspoon Italian seasoning - Salt and pepper to taste - Fresh basil leaves for garnish Each ingredient plays a key role in making this dish special. The chicken gives it a hearty base. The garlic adds a nice aroma. Cherry tomatoes bring sweetness and color. Fresh spinach adds a pop of green and nutrition. Heavy cream makes the sauce rich and creamy. Parmesan cheese adds depth and saltiness. Italian seasoning ties all the flavors together. Salt and pepper enhance everything. Finally, fresh basil offers a lovely finish. Gather these ingredients, and you will be ready to create a delightful meal in just 30 minutes! {{ingredient_image_1}} - Seasoning the chicken Start with the chicken breasts. Sprinkle salt and pepper on both sides. This simple step adds flavor. - Cooking the chicken in the skillet Heat two tablespoons of olive oil in a large skillet over medium heat. Place the chicken in the skillet. Cook each side for 6-7 minutes. You want them golden brown and fully cooked. Once done, remove the chicken and set it aside on a plate. - Sautéing garlic and tomatoes In the same skillet, add the minced garlic. Sauté for about 30 seconds. You will smell the garlic aroma. Then, add one cup of halved cherry tomatoes. Cook for 2-3 minutes until they soften. - Adding spinach and cream Next, toss in two cups of fresh spinach. Stir until it wilts, which takes about 2 minutes. After that, pour in one cup of heavy cream. Bring it to a gentle simmer. - Mixing in Parmesan cheese Finally, stir in half a cup of grated Parmesan cheese. Add one teaspoon of Italian seasoning. Mix well until the cheese melts. This creates a rich, creamy sauce. - Returning chicken to the skillet Place the cooked chicken back into the skillet. Spoon the creamy sauce over the chicken. - Final adjustments and heating Let it simmer for 2-3 minutes to heat through. Taste the sauce and adjust seasoning with more salt or pepper if needed. Serve it hot, garnished with fresh basil leaves for extra flavor. To get juicy chicken, always start with fresh breasts. Season them well with salt and pepper. Use olive oil in a hot skillet. Cook each breast for 6-7 minutes on both sides. This creates a nice golden crust while keeping the inside moist. Let the chicken rest for a few minutes before slicing. This step helps keep the juices locked in. Fresh herbs can elevate the sauce's taste. I love using basil or parsley. Chop them finely and stir them in just before serving. This adds color and a fresh kick. For creaminess, adjust the amount of heavy cream. If you prefer a lighter sauce, add less cream. You can also blend in more Parmesan for a thicker feel. This dish pairs perfectly with pasta or rice. The creamy sauce clings to both, making every bite delightful. You can also serve it with a side of garlic bread for extra flavor. For garnish, sprinkle fresh basil leaves on top. It adds a lovely aroma and a pop of green. Enjoy your meal! Pro Tips Use a Meat Thermometer: Ensure chicken is cooked perfectly by checking it reaches an internal temperature of 165°F (75°C). Enhance the Flavor: Marinate the chicken for a few hours in olive oil, lemon juice, and herbs for extra flavor. Opt for Fresh Ingredients: Using fresh spinach and ripe cherry tomatoes will elevate the taste and texture of the dish. Adjust Cream Consistency: If the sauce is too thick, add a splash of chicken broth or pasta water to reach your desired consistency. {{image_2}} You can swap chicken for many other proteins. Try using turkey breasts or pork chops. Each option brings its own taste. For a vegan or vegetarian dish, use tofu or tempeh. They will soak up the sauce and still taste great. To kick up the flavor, add sun-dried tomatoes. They add a nice tangy kick. You could also toss in some olives for a briny twist. Different cheeses work well too! Substitute Parmesan with feta or goat cheese for a unique taste. You can bake this dish in the oven. Just place everything in a baking dish and bake at 375°F for about 25 minutes. A slow cooker works too! Combine the chicken, veggies, and sauce, then cook on low for 4-6 hours. It’s easy and perfect for busy days. To keep your creamy Tuscan chicken fresh, follow these tips: - Refrigeration: Place leftovers in an airtight container. Store in the fridge for up to 3 days. - Freezing: For longer storage, freeze the chicken. Use a freezer-safe container or bag. It can last up to 3 months in the freezer. Reheating your creamy chicken is easy. Here’s how: - Stovetop Method: Place the chicken in a skillet over low heat. Add a splash of cream to keep it moist. Heat for about 5-7 minutes. - Microwave Method: Use a microwave-safe dish. Cover it and heat for 2-3 minutes. Stir halfway through to ensure even heating. Always check that the chicken reaches an internal temperature of 165°F for safety. Enjoy your meal! The chicken is done when it reaches an internal temperature of 165°F. You can use a meat thermometer for accuracy. Cut into the thickest part. The meat should be white, not pink. If it looks golden brown outside and firm, it is likely done. Always check to ensure safety. You can use milk, but the dish will be less creamy. Heavy cream gives a rich texture and flavor. If you use milk, consider adding a bit of flour or cornstarch to thicken it. You may also want to use half-and-half as a middle ground. This gives you some creaminess without needing heavy cream. Leftovers can last for about 3 to 4 days in the fridge. Store them in an airtight container to keep them fresh. Make sure they cool down before sealing. If you want to keep them longer, freezing is a good option. Yes, this recipe can be made in advance. Cook the chicken and sauce, then store them separately. When ready to eat, just reheat the chicken and sauce together. This makes it easy to enjoy a quick meal on busy nights. This blog post covered a creamy chicken dish that is both simple and tasty. We discussed the key ingredients, step-by-step instructions, and helpful tips to enhance flavor. You can explore variations to fit your diet and preferences. Remember to store any leftovers properly to enjoy them later. Overall, this dish offers a quick and satisfying meal for any occasion. With these easy steps, you’ll impress family and friends at the dinner table. Enjoy cooking!

Creamy Tuscan Chicken Skillet Flavorful Weeknight Dish

To make chewy ginger molasses cookies, you need the right ingredients. Each one adds to the cookie's warm flavor and chewy texture. Here’s a list of what you’ll need: - 2 1/4 cups all-purpose flour - 2 teaspoons ground ginger - 1 teaspoon ground cinnamon - 1 teaspoon baking soda - 1/2 teaspoon ground cloves - 1/4 teaspoon salt - 3/4 cup unsalted butter, softened - 1 cup brown sugar, packed - 1/2 cup molasses - 1 large egg - 1 teaspoon vanilla extract - 1/4 cup granulated sugar (for rolling) Each ingredient plays a key role in your cookies. The all-purpose flour gives structure, while the molasses adds sweetness and a rich flavor. Brown sugar helps the cookies stay soft and chewy. The spices, like ginger and cinnamon, bring warmth and depth. Using unsalted butter allows you to control the saltiness. The egg binds everything together and gives the cookies a nice rise. Finally, rolling the dough balls in granulated sugar adds a sweet crunch to the outside. Make sure to gather all these ingredients before you start baking. It makes the process smoother and more fun! {{ingredient_image_1}} 1. Preheating the oven: Start by preheating your oven to 350°F (175°C). This step is key for even baking. Line a baking sheet with parchment paper. This helps the cookies not to stick. 2. Mixing dry ingredients: In a medium bowl, whisk together 2 1/4 cups of all-purpose flour, 2 teaspoons of ground ginger, 1 teaspoon of ground cinnamon, 1 teaspoon of baking soda, 1/2 teaspoon of ground cloves, and 1/4 teaspoon of salt. Make sure it is well combined. Set this mixture aside for later. 3. Creaming butter and sugar: In a large bowl, take 3/4 cup of softened unsalted butter. Add 1 cup of packed brown sugar. Use a hand mixer or stand mixer to beat these together. Mix until the mixture is light and fluffy, which takes about 2-3 minutes. 4. Incorporating wet ingredients: Now, add 1/2 cup of molasses, 1 large egg, and 1 teaspoon of vanilla extract to the butter mix. Blend until everything is fully combined. 5. Forming cookie dough balls: Gradually add the dry mixture to the wet mix. Use low speed to combine until a sticky dough forms. Be careful not to overmix. With a cookie scoop or your hands, form 1-inch dough balls. Roll each one in 1/4 cup of granulated sugar to coat. 6. Baking cookies: Place the sugar-coated dough balls on the prepared baking sheet. Leave about 2 inches between each ball. Bake them in your preheated oven for 8-10 minutes. The edges should be set, but the centers will still be soft. They will firm up as they cool. - Timing for the best texture: Bake for the full time but check them at 8 minutes. If they look puffy and slightly cracked, they are ready. - Recognizing doneness: The cookies should have set edges but soft centers. They will feel slightly firm when cool. You want to catch them before they harden completely. To make chewy ginger molasses cookies, focus on mixing and ingredient balance. Cream the butter and sugar well. This step adds air, making the cookies light. Mix just until wet and dry ingredients combine. Overmixing can lead to tough cookies. The right ingredient ratios are key. Use 2 1/4 cups of flour, 3/4 cup of butter, and 1 cup of brown sugar. The molasses adds moisture, giving cookies that chewy texture. Many people overmix the dough. This makes cookies hard instead of chewy. Mix just until you see no dry flour. Incorrect measuring can ruin your cookies. Use a kitchen scale for best results. If you use cups, spoon flour into the cup, then level it off. Never scoop directly from the bag. This can pack flour and lead to dry cookies. Pro Tips Chill the Dough: For an even chewier texture, refrigerate the cookie dough for at least 30 minutes before baking. This helps the flavors meld and prevents excessive spreading. Use Fresh Spices: Ensure your ground spices are fresh for the best flavor. Spices can lose potency over time, so check the expiration dates. Perfect Baking Time: Keep a close eye on your cookies while baking. The right time is key: remove them when the edges are set but the centers are still soft, as they'll continue cooking on the baking sheet. Storage Tips: Store your cookies in an airtight container at room temperature. For longer freshness, you can freeze the baked cookies and thaw them as needed. {{image_2}} You can make chewy ginger molasses cookies even more fun with add-ins. Here are two great ideas: - Chocolate chips: Mix in 1 cup of semisweet chocolate chips for a sweet twist. The rich chocolate pairs well with the warm spices. - Nuts or dried fruit: Add 1 cup of chopped nuts like walnuts or pecans. You can also use dried fruit like raisins or cranberries for a chewy texture. If you need to make changes for dietary needs, here are some easy swaps: - Gluten-free alternative: Use 2 1/4 cups of a gluten-free flour blend. This keeps the cookies chewy and tasty. - Vegan substitutions: Replace the egg with 1/4 cup of unsweetened applesauce. Use vegan butter or coconut oil in place of unsalted butter. These swaps keep the cookies just as delicious. To keep your chewy ginger molasses cookies fresh, use airtight containers. This helps to keep them soft and chewy. You can store them at room temperature for up to a week. If you live in a humid area, refrigeration can help extend freshness. However, cold storage might make them a bit firmer. You can freeze these cookies for up to three months. To freeze, place the cookies in a single layer on a baking sheet. Once frozen, transfer them to a freezer-safe bag or container. Be sure to label it with the date. For thawing, simply leave them at room temperature for about 30 minutes. Enjoy them as if they were just baked! You want to look for a few signs. First, check the edges. They should look set and slightly firm. The centers may still look soft and a bit puffy. The cookies will harden as they cool. If the edges start to brown, it's time to take them out. Bake for 8-10 minutes for the best chewy texture. Yes, you can use brown sugar for rolling. It adds a deeper flavor and extra moisture. This makes the cookies even chewier. Just remember to pack the brown sugar tightly in the measuring cup. It helps to create that perfect sweetness. To add spice, increase the ground ginger. Start with an extra half teaspoon. You can also add a pinch of cayenne pepper for heat. Another option is to use fresh grated ginger. This will give a bold and fresh flavor. Adjust to your taste for the perfect kick. These cookies go well with warm drinks. Try pairing them with hot tea or coffee. A glass of milk also works perfectly. For a sweet touch, serve with whipped cream or vanilla ice cream. The flavors will blend beautifully, enhancing your treat experience. These ginger molasses cookies are easy to make and perfect for sharing. We reviewed ingredients, baking steps, and tips for the best texture. Avoid common mistakes to achieve chewy cookies everyone will love. Feel free to try add-ins or adapt for different diets. Store them carefully, and enjoy fresh or frozen. Now you can bake with confidence and impress your family and friends. Happy baking!

Chewy Ginger Molasses Cookies Simple and Tasty Treat

- 1 lb chicken tenders - 1 cup grated Parmesan cheese - 1 cup breadcrumbs (preferably panko for extra crunch) - 2 large eggs - 1 teaspoon garlic powder - 1 teaspoon onion powder - 1 teaspoon dried Italian herbs (oregano, basil, thyme) - Salt and pepper to taste - Olive oil spray To make Air Fryer Parmesan Crusted Chicken Tenders, you need a few simple items. Start with fresh chicken tenders. They are tender and cook quickly. You also want grated Parmesan cheese for a nice, cheesy flavor. Panko breadcrumbs give a great crunch, which is essential for a good crust. You will need two large eggs to help the breading stick to the chicken. Flavor comes from garlic powder, onion powder, and dried Italian herbs. Don’t forget to add salt and pepper to taste. Finally, an olive oil spray helps the tenders crisp up in the air fryer. Gather these ingredients, and you are ready to make a tasty meal! {{ingredient_image_1}} Set your air fryer to 400°F (200°C). Preheat it for about 5 minutes. This step helps the chicken cook evenly. You will need three shallow dishes for this. In the first dish, place 1 cup of grated Parmesan cheese. In the second dish, mix 1 cup of breadcrumbs with 1 teaspoon of garlic powder, 1 teaspoon of onion powder, 1 teaspoon of dried Italian herbs, salt, and pepper. In the third dish, whisk 2 large eggs until smooth. Take each chicken tender. First, dip it in the grated Parmesan cheese. Make sure it is coated well. Next, dip it into the egg mixture, letting any extra egg drip off. Finally, coat it in the seasoned breadcrumbs. Press gently to help the crumbs stick. Lay the breaded chicken tenders in a single layer in the air fryer basket. It is important not to overcrowd them. If needed, work in batches for even cooking. Lightly spray the tops of the chicken tenders with olive oil. This helps them become golden and crispy as they cook. Air fry the chicken tenders at 400°F (200°C) for 10-12 minutes. Flip them halfway through cooking. This ensures they brown evenly. The chicken should reach an internal temperature of 165°F (75°C). Once cooked, carefully remove the chicken tenders from the air fryer. Let them rest for a couple of minutes. Serve them on a platter with your favorite dipping sauces, like marinara or ranch. Garnish with fresh parsley for a nice touch. To get that perfect crispy bite, start with the right cooking time. I recommend air frying at 400°F for about 10-12 minutes. If you want extra crunch, use a light spray of olive oil. This helps the breading turn golden brown. Don't skip this step! It makes a big difference. For extra flavor, try marinating your chicken tenders. You can use simple options like buttermilk or a mix of olive oil and lemon juice. Let the chicken soak for at least 30 minutes. This adds moisture and taste. It’s a great way to make your tenders even better. To prevent sogginess, ensure your chicken tenders are not crowded in the air fryer. Leave space around each piece. This allows hot air to circulate. Also, remember to flip the tenders halfway through cooking. This helps them cook evenly and stay crispy. Always check the internal temperature. It should reach 165°F for safety. Pro Tips Use Fresh Ingredients: Always opt for fresh chicken tenders for the best flavor and texture. Seasoning is Key: Don’t skip on seasoning the breadcrumbs; it enhances the overall taste of the chicken. Check for Doneness: Use a meat thermometer to ensure chicken reaches an internal temperature of 165°F (75°C). Let Them Rest: Allow the chicken to rest for a few minutes after cooking for juicier tenders. {{image_2}} You can change up the flavor of your chicken tenders. Try using different herbs. Here are some ideas: - Fresh Basil: Add a sweet, peppery taste. - Thyme: This brings a warm, earthy note. - Rosemary: It adds a strong, pine-like flavor. Mix and match these herbs with your breadcrumbs. It gives your dish a fresh twist. If you like heat, make a spicy version. You can add cayenne pepper or red pepper flakes. Here’s how: - Cayenne Pepper: Start with a pinch. Increase as you like. - Chili Powder: It adds a smoky flavor. Mix these spices into your breadcrumb blend. You can also serve with hot sauce for extra kick. For a gluten-free meal, swap out regular breadcrumbs. Here are some easy substitutes: - Almond Flour: It keeps the crunch and is low-carb. - Rice Flour: This works well, too, and has a light texture. Make sure all your spices and cheese are gluten-free. This way, everyone can enjoy the meal! To keep your chicken tenders fresh, store them in the fridge. Place them in an airtight container. Make sure they cool down first. They will last for up to three days. If you want to keep them longer, freezing is a great option. For the best results, reheat your chicken tenders in the air fryer. Set it to 350°F (175°C). Heat for about 5-7 minutes. This keeps them crispy. You can also use a conventional oven. Just place them on a baking sheet and heat at the same temperature. Avoid using a microwave, as it can make them soggy. To freeze, let the chicken tenders cool completely. Wrap them tightly in plastic wrap or aluminum foil. Place them in a freezer-safe bag. They can be stored for up to three months. When ready to eat, thaw them in the fridge overnight before reheating. Yes, you can use frozen chicken tenders. However, cooking time will change. When using frozen, add about 5 minutes to your cooking time. Make sure to check that the chicken reaches 165°F. This way, you ensure safety and taste. Fresh chicken tends to cook more evenly. But frozen is a great option for quick meals. For fresh chicken tenders, cook them for 10-12 minutes at 400°F. If they are thicker, check for doneness at 12 minutes. Always flip them halfway through. This helps make them crispy all around. For frozen tenders, cook for 15-17 minutes. Adjust based on size and thickness. You can serve these tenders with many sides. Here are a few ideas: - Fresh garden salad - Steamed broccoli or green beans - Crispy French fries or sweet potato fries - Garlic mashed potatoes - Dipping sauces like marinara or ranch These pair well with the crunchy texture of the tenders. Yes, you can bake them! Preheat your oven to 425°F. Place the breaded chicken on a baking sheet lined with parchment paper. Bake for 20-25 minutes. Turn them halfway for even cooking. Check to ensure they reach 165°F. Baking gives a different texture but still tastes great! In this article, we covered how to make delicious Parmesan crusted chicken tenders in an air fryer. You learned about the key ingredients, step-by-step cooking instructions, and tips for perfect crispiness. We also shared variations, storage info, and common questions. Try these methods for a fun and tasty meal. With simple steps and great flavors, you can impress anyone. Enjoy your crispy chicken tenders!

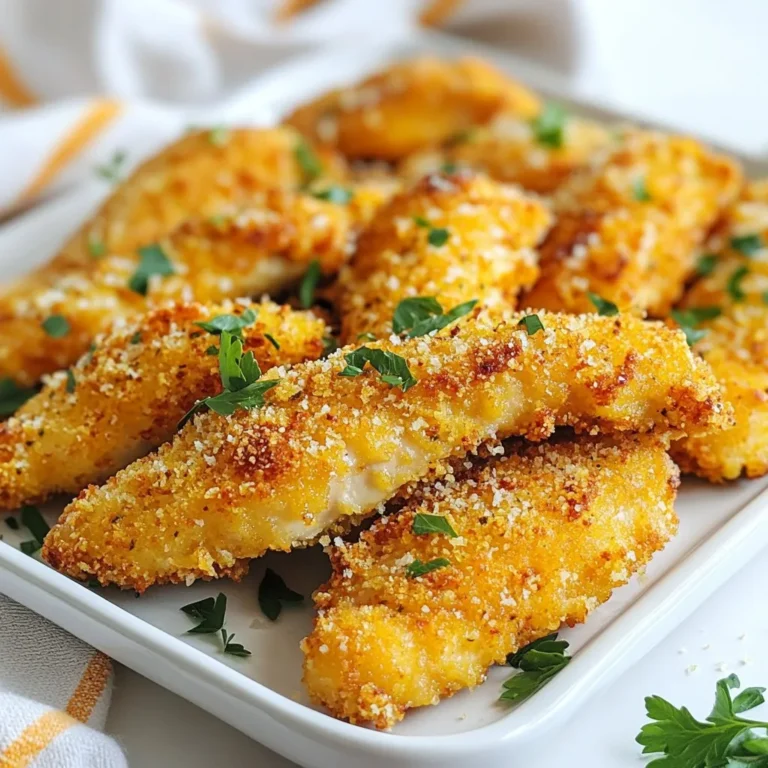
Air Fryer Parmesan Crusted Chicken Tenders Delight

- Cheese Tortellini: You need 12 oz of cheese tortellini. You can use fresh or frozen. - Pesto Sauce: Use 1 cup of pesto. Homemade works great, but store-bought is fine too. - Heavy Cream: One cup of heavy cream adds richness and creaminess. - Cherry Tomatoes: Add 1 cup of halved cherry tomatoes for a burst of flavor and color. - Shredded Mozzarella Cheese: One cup of shredded mozzarella cheese gives a gooey texture. - Grated Parmesan Cheese: Use ½ cup of grated Parmesan cheese for a salty kick. - Garlic: Two cloves of minced garlic bring aroma and depth to the dish. - Olive Oil: One tablespoon of olive oil helps sauté the garlic. - Fresh Basil Leaves: Use fresh basil leaves for a fragrant and bright garnish. {{ingredient_image_1}} - Preheat oven to 375°F (190°C). - Grease a medium-sized baking dish with olive oil. - Boil water in a large pot. - Add 12 oz of cheese tortellini. - Cook according to package instructions. - Drain the tortellini and set aside. - Heat 1 tablespoon of olive oil in a large skillet over medium heat. - Add 2 cloves of minced garlic and sauté for about 1 minute until fragrant. - Pour in 1 cup of heavy cream and 1 cup of pesto sauce. - Stir gently to mix, cooking for 2-3 minutes until heated through. - Add the cooked tortellini and 1 cup of halved cherry tomatoes. - Mix well and season with salt and pepper to taste. - Transfer the tortellini mixture into the greased baking dish. - Top with 1 cup of shredded mozzarella and ½ cup of grated Parmesan cheese. - Bake in the preheated oven for 20-25 minutes, until the cheese is bubbly and golden. - Remove from oven and let cool for a few minutes. - Garnish with fresh basil leaves before serving. Perfecting Tortellini Texture Cook the tortellini until al dente. This keeps them firm during baking. Follow the package instructions for the best results. Fresh tortellini usually takes less time than frozen. Drain them well to avoid a watery bake. Adjusting Sauce Consistency If your sauce is too thick, add a splash of water or broth. Stir it in slowly until it reaches the desired creaminess. For a thicker sauce, simmer it a bit longer. This helps the flavors meld nicely. Garnishing with Basil Fresh basil adds a pop of color and flavor. Tear the leaves and sprinkle them on top just before serving. This makes your dish look restaurant-quality and tastes great too! Serving Suggestions Serve this bake with a side salad for a full meal. Garlic bread pairs well and soaks up the creamy sauce. You can also offer a sprinkle of extra cheese at the table for those who love it. Adding Additional Vegetables Consider adding spinach, zucchini, or bell peppers. Sauté them with the garlic for added flavor. This boosts nutrition and adds color to your dish. Spice Variations If you like heat, try adding red pepper flakes. Mix them into the sauce for a spicy kick. You can also use Italian seasoning for extra flavor without the heat. Pro Tips Use Fresh Pesto: For the best flavor, opt for fresh homemade pesto instead of store-bought. It elevates the dish with vibrant taste and aroma. Don’t Overcook Tortellini: Make sure to cook the tortellini just until al dente. It will continue to cook while baking, ensuring a perfect texture. Add Extra Veggies: Feel free to mix in additional vegetables like spinach or bell peppers for added nutrition and flavor. Let It Rest: After baking, allow the dish to cool for a few minutes before serving. This helps the sauce thicken slightly and makes for easier serving. {{image_2}} Gluten-Free Options You can easily make this dish gluten-free. Use gluten-free tortellini instead of regular ones. Many stores offer good brands. Check the package for cooking times, as they may vary. Dairy-Free Alternatives For a dairy-free version, swap heavy cream with coconut cream. Use dairy-free cheese for the topping. There are great options made from nuts or soy. Alternative Pesto Options If you want a different taste, try sun-dried tomato pesto. It adds a rich flavor. You can also use spinach or arugula instead of basil for a fresh twist. Cheese Substitutes Need a cheese swap? Use nutritional yeast for a savory flavor. It’s great for a dairy-free option. You could also try vegan mozzarella if you need a meltable cheese. Adding Protein (Chicken, Shrimp) Want to boost the protein? Add cooked chicken or shrimp. Just toss them in when mixing the tortellini and sauce. They will add a nice texture and flavor. Spicy Versions (Red Pepper Flakes) If you like heat, add red pepper flakes to the sauce. Start with a pinch and adjust to your taste. This adds a nice kick to the creamy dish. Refrigeration Guidelines After you enjoy your creamy pesto tortellini bake, store leftovers in an airtight container. Keep it in the fridge for up to three days. Make sure to let it cool to room temperature before sealing. Freezing Instructions If you want to save some for later, you can freeze it! Just place the cooled dish in a freezer-safe container. It can last for up to three months in the freezer. When you're ready to eat, thaw it in the fridge overnight. Oven vs. Microwave For the best taste and texture, reheat in the oven. Preheat it to 350°F (175°C) and bake for about 15 minutes. If you use a microwave, heat in short bursts. Stir between each burst to heat evenly. Tips for Retaining Texture To keep the creamy texture, add a splash of cream or milk when reheating. This helps prevent it from drying out. Covering the dish with foil in the oven also helps keep moisture in. How Long it Lasts In the fridge, your creamy pesto tortellini bake will stay good for about three days. In the freezer, it can last up to three months. Signs of Spoilage Before eating, always check for changes. If you see mold or notice an off smell, it’s best to discard it. Trust your senses; they will guide you. Cooking tortellini takes about 2 to 4 minutes for fresh tortellini. For frozen tortellini, it takes around 5 to 7 minutes. Always check the package for exact times. Fresh tortellini cooks faster and has a softer texture. Frozen tortellini is convenient but can be slightly chewier. Yes, you can make Creamy Pesto Tortellini Bake a day ahead. Prepare the dish up to the baking step. Cover it tightly with plastic wrap and store it in the fridge. When ready to bake, remove the wrap and pop it in the oven. You might need to add a few extra minutes to the cooking time. You can create a vegan version easily. Use vegan tortellini or make your own from scratch. Swap heavy cream for coconut cream or cashew cream. Choose a dairy-free pesto and replace mozzarella and Parmesan with vegan cheese or nutritional yeast. This version stays creamy and tasty. This blog post covered how to make a creamy pesto tortellini bake. We explored the main and additional ingredients, along with seasoning and garnishing options. The step-by-step instructions made it easy to follow, from cooking the tortellini to baking the dish. I shared tips to enhance flavor and presentation, and offered variations for dietary needs. In closing, this dish is simple and tasty. With a few tweaks, it can fit any diet. Enjoy cooking and sharing this meal with others!

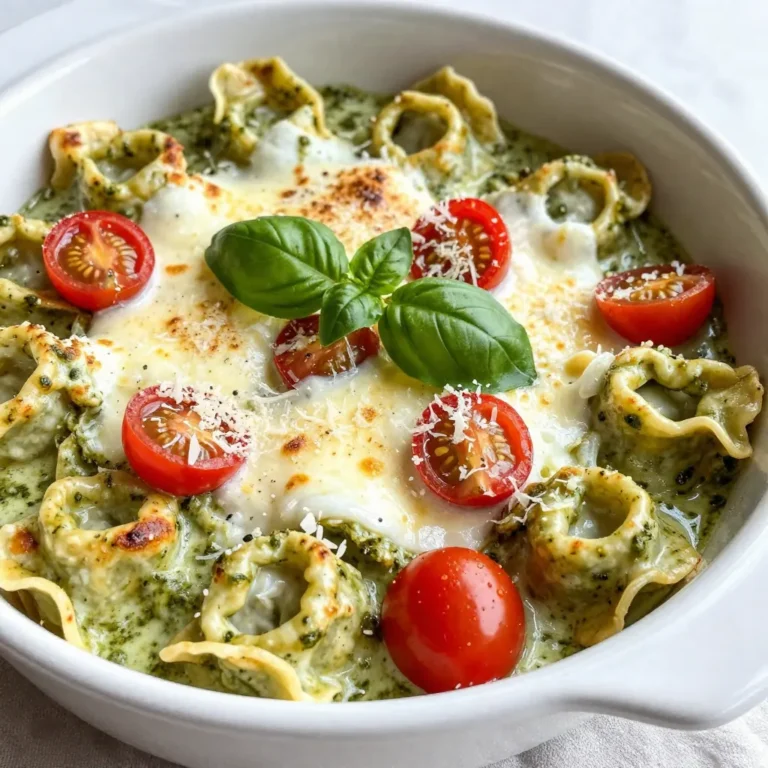
Creamy Pesto Tortellini Bake Flavorful and Easy Dish

To make the perfect peppermint trifle cups, gather these ingredients: - 2 cups peppermint-flavored yogurt - 1 cup crushed chocolate sandwich cookies (like Oreos) - 1 cup whipped cream - 1/2 cup peppermint candy, crushed (plus extra for garnish) - 1 cup cooked vanilla pudding (store-bought or homemade) - Fresh mint leaves for garnish These simple ingredients create a delightful and festive dessert. The peppermint yogurt adds a refreshing flavor. The crushed cookies bring a rich, chocolatey taste. Whipped cream and vanilla pudding make everything light and creamy. Finally, the crushed peppermint candy gives a fun crunch. You can use fresh mint leaves for a nice touch. With these ingredients, you will create a treat everyone will love. {{ingredient_image_1}} Start by taking a large bowl. Add the peppermint-flavored yogurt to the bowl. Next, grab half of the crushed peppermint candy. Mix it gently with the yogurt. This step adds both flavor and festive spirit. In another bowl, fold together the whipped cream and cooked vanilla pudding. You want a fluffy texture here. Use a spatula to mix until it’s smooth. This mixture will give your trifle its creamy layer. Now, let’s build our trifle cups! Start with a scoop of the yogurt mixture. Place it at the bottom of each cup. Then, add a layer of the crushed chocolate sandwich cookies. This adds a nice crunch. Next, add the whipped cream and pudding mixture over the cookies. Repeat the layers: yogurt, cookies, and whipped cream. Keep going until the cups are nearly full. Finish with a dollop of whipped cream on top. Sprinkle the rest of the crushed peppermint candy over the whipped cream for that extra touch. Finally, chill the trifle cups in the fridge for at least 30 minutes. This allows all the flavors to mix. Before you serve, add fresh mint leaves for color and freshness. Enjoy your tasty creation! When you layer your trifle cups, start with your yogurt mixture. Use a spoon to scoop it gently into the cup. Be careful not to mash it down. This way, the layers stay nice and fluffy. Next, sprinkle on the crushed chocolate cookies. Make sure they cover the yogurt well. This adds crunch and flavor. After that, add the whipped cream and pudding mixture. Spread it evenly to create a smooth layer. Repeat this process until your cups are full. Always finish with whipped cream on top. This gives a lovely look! To get the best whipped cream, start with cold cream. Cold cream whips better and faster. Use a whisk or an electric mixer. Whip on medium speed until soft peaks form. This means the cream should hold a shape but still be smooth. Avoid over-whipping, as it can turn grainy. If that happens, you can add a little milk to fix it. Light and airy whipped cream makes your trifle taste great! You can change the flavors to make this dessert your own. Try using different yogurt, like vanilla or chocolate. For a fun twist, add a layer of fruit, like berries or bananas. You can also mix in flavored extracts, like vanilla or almond, into the whipped cream. Want it richer? Use chocolate pudding instead of vanilla. The options are endless! Just remember to keep the peppermint candy for that festive touch. Pro Tips Chill Your Ingredients: For a creamier texture, chill the yogurt, whipped cream, and pudding before assembling the trifle cups. Layering Technique: To create visually appealing layers, use a piping bag for the whipped cream and pudding mixture. Customizable Flavors: Feel free to substitute the peppermint yogurt with any other flavored yogurt for a different twist on the trifle. Serving Suggestions: These trifle cups can be made a day ahead and stored in the fridge; just add the mint leaves right before serving for freshness. {{image_2}} You can change the toppings to fit your taste. Try using fruit, like strawberries or blueberries, instead of peppermint candy. You can also use chocolate chips for a rich twist. Crushed nuts add a nice crunch. Just be sure to balance the sweetness with these toppings. If you need a gluten-free dessert, swap out the chocolate sandwich cookies. Use gluten-free cookies or make your own. You can find many recipes online. The rest of the ingredients, like yogurt and whipped cream, are often gluten-free, but check the labels to be sure. You can change this dessert for any holiday. For fall, add pumpkin spice to the yogurt. In summer, use fresh berries instead of mint. You can also use colored candies to match your party theme. This makes the trifle cups festive for any occasion. To keep your trifle cups fresh, cover them tightly with plastic wrap. This step prevents air from drying them out. You can also use an airtight container for better protection. Store the trifle cups in the refrigerator. This keeps the layers looking nice and fresh. Store peppermint-flavored yogurt in its original container in the fridge. Keep crushed chocolate cookies in a sealed bag to avoid moisture. Store whipped cream in an airtight container. If you made vanilla pudding, refrigerate it right after use. Crushed peppermint candy should stay in a cool, dry place. You can enjoy your trifle cups for up to three days. After that, the layers may start to lose their texture. The whipped cream can become watery, which is not ideal. Always check for any signs of spoilage before eating. Yes, you can make peppermint trifle cups a day ahead. Just keep them in the fridge. This helps the flavors blend well. The layers stay fresh and tasty. Just add the mint leaves right before serving. If you can't find peppermint yogurt, use plain yogurt instead. Add a few drops of peppermint extract for flavor. You can also mix in some crushed peppermint candy. This gives you that festive taste. Making homemade whipped cream is easy. Start with heavy cream. Pour one cup into a bowl. Use a mixer and beat it until soft peaks form. Add sugar and vanilla for sweetness. Keep mixing until you like the texture. Yes, you can use non-dairy yogurt and whipped cream. Look for coconut or almond-based options. They work well in this recipe. Just check the flavor to make sure it fits your taste. This blog post covered a delicious peppermint trifle cup recipe. You learned about the key ingredients and step-by-step instructions. We explored tips for perfect layers and cream. I shared fun ways to customize your treat and alternatives for special diets. Remember to store leftovers properly to keep them fresh. This dessert is easy to make and sure to impress. Enjoy your trifle cups at any gathering or treat yourself!

Peppermint Trifle Cups Festive and Delicious Dessert

To make a tasty Mediterranean quinoa salad, gather these items: - 1 cup quinoa, rinsed - 2 cups water or vegetable broth - 1 cucumber, diced - 1 cup cherry tomatoes, halved - 1 bell pepper (red or yellow), diced - 1/2 red onion, finely chopped - 1/2 cup Kalamata olives, pitted and sliced - 1/2 cup feta cheese, crumbled - 1/4 cup fresh parsley, chopped - 1/4 cup olive oil - 2 tablespoons lemon juice - 1 teaspoon dried oregano - Salt and pepper to taste This salad is not just delicious; it's also good for you. Here’s why: - Quinoa is a great source of protein and fiber. It helps fill you up. - Cucumbers are hydrating and low in calories. They add crunch. - Cherry tomatoes provide vitamins A and C. They offer a sweet burst of flavor. - Bell peppers are rich in antioxidants. They add color and taste. - Kalamata olives offer healthy fats. They give a briny kick. - Feta cheese adds creaminess and calcium. It enhances the flavor profile. - Olive oil is heart-healthy. It helps the salad taste rich and smooth. - Lemon juice brings brightness. It balances the flavors perfectly. If you have dietary needs, here are some simple swaps: - Quinoa can be replaced with brown rice for a gluten-free option. - Feta cheese may be swapped with avocado for a vegan version. - Olives can be left out if you dislike them, adding more veggies instead. - Dressing can use apple cider vinegar instead of lemon juice for a twist. - Herbs like basil or mint can replace parsley for different flavors. These substitutions keep your salad fresh and tasty while fitting your needs. Enjoy making this vibrant dish! {{ingredient_image_1}} To start, take 1 cup of quinoa and rinse it in a strainer. Rinsing removes bitter flavors. Next, pour the rinsed quinoa into a medium saucepan. Add 2 cups of water or vegetable broth to the pot. Bring the mixture to a boil over medium heat. Once it boils, reduce the heat to low. Cover the saucepan and let it simmer for 15 minutes. The quinoa is done when it absorbs all the liquid and looks fluffy. After cooking, remove the pot from heat and let it cool. Fluff the quinoa with a fork before adding it to the salad. This step keeps it light and airy. While the quinoa cools, wash and chop your veggies. Take a cucumber and dice it into small pieces. This adds crunch and freshness. Next, halve 1 cup of cherry tomatoes. Their sweetness brightens the salad. Then, dice a bell pepper, either red or yellow, for color and flavor. Finely chop half a red onion for a bit of bite. Slice half a cup of Kalamata olives for a salty kick. Finally, crumble half a cup of feta cheese for creaminess. These ingredients will mix well and create a vibrant salad. Now, grab a large mixing bowl. Add all the prepared veggies: cucumbers, tomatoes, bell pepper, onion, olives, and feta cheese. Once the quinoa is cool, add it to the bowl too. Next, make the dressing. In a small bowl, whisk together 1/4 cup of olive oil, 2 tablespoons of lemon juice, and 1 teaspoon of dried oregano. Add salt and pepper to taste. Pour this dressing over the quinoa and vegetables. Gently toss everything until well combined. You can serve the salad right away, or let it chill in the fridge for at least 30 minutes. Chilling helps the flavors blend together. Before serving, give it a good toss. Enjoy your fresh and healthy Mediterranean quinoa salad! To fluff quinoa well, let it cool first. After cooking, remove the pot from heat. Let it sit for 5 minutes, covered. This helps steam escape and keeps the grains from clumping. Then, use a fork to gently stir. This separates the grains and makes them light and fluffy. Fluffed quinoa works great in salads! For serving, use a large, colorful bowl. This adds visual appeal to your dish. Top the salad with extra parsley and a lemon slice. This makes it look fresh and inviting. You can serve it chilled or at room temperature. Both ways, the flavors shine. Pairing it with crusty bread or grilled chicken makes it a complete meal. Meal prep can make your week easier. Cook a big batch of quinoa ahead of time. Store it in the fridge for up to five days. You can chop the veggies a day before. Keep them in an airtight container. This way, when you’re ready to eat, just combine everything. Making this salad is quick and simple when you prep ahead. Pro Tips Tip Title: Rinse the Quinoa: Always rinse quinoa thoroughly before cooking to remove its natural coating, called saponin, which can taste bitter. Tip Title: Use Broth for Flavor: Cooking quinoa in vegetable or chicken broth instead of water will enhance its flavor and add depth to your salad. Tip Title: Chill Before Serving: Allowing your salad to chill in the refrigerator for at least 30 minutes helps the flavors meld and improves the overall taste. Tip Title: Customize Your Veggies: Feel free to add or substitute vegetables based on your preference or seasonal availability for a personalized touch. {{image_2}} You can make your Mediterranean quinoa salad more filling by adding proteins. Consider adding grilled chicken or shrimp for a tasty twist. Both options bring extra flavor and texture. For a vegetarian choice, chickpeas or black beans work great. They add protein and make the dish heartier. Simply mix in one cup of your chosen protein after combining the vegetables. This small change turns your salad into a main course. If you want a vegetarian or vegan salad, it’s easy to adapt. For a vegetarian option, keep the feta cheese for creaminess. If you prefer vegan, just leave out the cheese or use a plant-based alternative. You can also add avocado for a creamy texture. It pairs well with the other fresh ingredients. Try adding nuts or seeds for crunch as well. Sunflower seeds or sliced almonds can add a nice touch. Herbs and spices can elevate your salad's flavor even more. Fresh herbs like basil or mint add a bright taste. You can mix them in with the parsley for a delightful twist. For a spicier kick, add a pinch of red pepper flakes. This small addition can bring warmth without overpowering the salad. You can also experiment with different spices like cumin or smoked paprika. Each will change the flavor profile in fun ways. You can store leftover Mediterranean Quinoa Salad in an airtight container. Make sure the salad is cool before sealing it. This helps keep the flavors fresh. If you don't have a container, use plastic wrap. Be sure to cover the bowl tightly. To refresh the salad, add a splash of olive oil or lemon juice. This adds moisture and brightens the flavors. If you want to reheat it, warm it gently on the stove. Heat in a pan for a few minutes. Avoid using the microwave, as it can make the salad soggy. This quinoa salad lasts about 3 to 5 days in the fridge. After that, the veggies may lose their crunch. Always check for any off smells or colors before eating. If you see any signs of spoilage, it is best to toss it out. Enjoy your salad while it’s fresh! You can store Mediterranean Quinoa Salad in the fridge for up to five days. Make sure to keep it in an airtight container. This helps keep the flavors fresh. The salad might get better as it sits, too! Yes, you can make this salad ahead of time! It's great for meal prep. I suggest making it a day before you serve it. This gives the flavors time to mix well. Just remember to toss it again before serving. This salad pairs well with many dishes! You can serve it with grilled chicken or fish. It also works great as a side for wraps or pita. For a light meal, enjoy it with a warm bowl of soup. This salad adds a fresh touch to any plate. In this blog post, we explored the key ingredients, cooking steps, and tips for a delicious Mediterranean Quinoa Salad. Each section offered insights on nutrition, substitutions, and variations to suit your taste. Remember, you can customize your salad easily while considering storage and meal prep tips. This versatile dish is perfect for any occasion. Enjoy making it your own while keeping health in mind. Now, go ahead and create a vibrant salad that fits your needs!

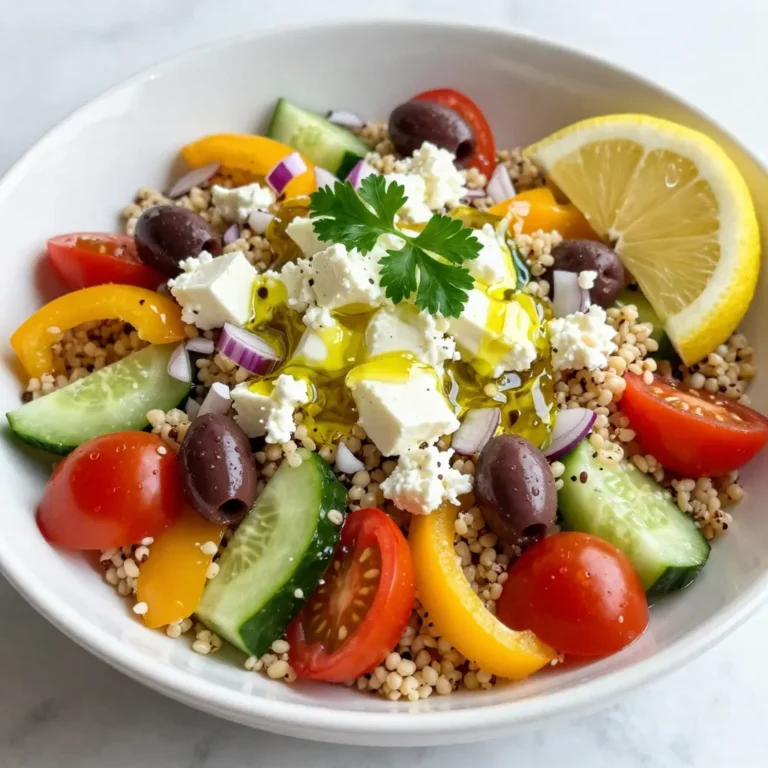
Mediterranean Quinoa Salad Fresh and Healthy Delight

For the perfect extra crispy chicken wraps, you need just a few main ingredients: - 2 large chicken breasts, boneless and skinless - 1 cup buttermilk - 1 cup all-purpose flour - 1 cup panko breadcrumbs - 2 large tortillas (flour or corn) The chicken is the star of the show. It gives the wrap its base. The buttermilk helps tenderize the chicken. This makes it juicy and delicious. Panko breadcrumbs add that extra crunch we all love. The right spices make your wraps pop with flavor. Here’s what you need for seasoning: - 1 teaspoon garlic powder - 1 teaspoon onion powder - 1 teaspoon smoked paprika - 1/2 teaspoon cayenne pepper (adjust to taste) - 1 teaspoon salt - 1/2 teaspoon black pepper Mixing these spices into the flour makes the coating tasty. Garlic and onion powder bring out the savory notes. Smoked paprika adds a hint of smokiness. Cayenne gives a kick, but you can adjust it to your liking. To top off your wraps, consider these tasty additions: - 1 cup shredded lettuce - 1 cup diced tomatoes - 1/2 cup ranch dressing These toppings add freshness and creaminess. The lettuce gives crunch, while the tomatoes add color and flavor. Ranch dressing ties it all together with its creamy texture. Feel free to get creative with other toppings like avocado or cheese! {{ingredient_image_1}} First, you need to marinate the chicken. Take two large chicken breasts and place them in a bowl. Pour in one cup of buttermilk. Let the chicken soak for at least 30 minutes. This helps make the chicken tender and adds flavor. Next, prepare the coating. In a separate bowl, mix one cup of all-purpose flour with one teaspoon each of garlic powder, onion powder, smoked paprika, salt, and half a teaspoon of black pepper. Add cayenne pepper to taste. This mix gives the chicken a nice kick and a lot of flavor. Now, it's time to fry the chicken. Heat about half an inch of cooking oil in a large skillet over medium heat. Take each chicken breast and dredge it in the flour mixture. Dip it back into the buttermilk, then coat with one cup of panko breadcrumbs. Fry the chicken for about five to seven minutes on each side. Look for a golden brown color. Make sure the chicken’s internal temperature reaches 165°F to ensure it's fully cooked. Once the chicken is cooked, let it rest for a few minutes. This helps keep it juicy. Slice the chicken into strips. Take a tortilla and lay it flat. Place the crispy chicken strips on the tortilla. Add one cup of shredded lettuce and one cup of diced tomatoes. Drizzle half a cup of ranch dressing over the top to add creaminess. To wrap it up, fold in the sides of the tortilla and roll from the bottom. Cut the wrap in half for easy handling. Serve with extra ranch dressing or your favorite dipping sauce on the side. Enjoy your extra crispy chicken wraps! To get that extra crispy texture, follow these steps. First, use panko breadcrumbs instead of regular ones. They add more crunch. Make sure to coat the chicken well. Dredge it in the flour mix, dip in buttermilk, and then coat it with panko. This layers the texture. Fry the chicken in hot oil. The oil should be around 350°F (175°C). If the oil is too cool, the chicken will soak up oil and lose crispiness. Marinating is key to great flavor and tenderness. Soak your chicken in buttermilk for at least 30 minutes. If you have time, marinate it for 1 to 2 hours. This helps break down proteins, making the chicken juicy. For a stronger flavor, add spices to the buttermilk, like garlic or hot sauce. This gives your chicken a nice kick. The right oil makes a big difference. Use oils with high smoke points. Good choices include canola oil, vegetable oil, or peanut oil. These oils can handle high heat without burning. Avoid using olive oil for frying, as it can smoke easily. Make sure to use enough oil to submerge the chicken halfway. This helps achieve an even, crispy finish. Pro Tips Marination Time: For best flavor and tenderness, marinate the chicken for at least 1 hour or overnight if possible. Double Dip for Crunch: After coating the chicken in the flour mixture, dipping it back into the buttermilk before rolling it in panko breadcrumbs will create an even crispier texture. Oil Temperature: Use a thermometer to ensure your oil is at the right temperature (around 350°F/175°C) before frying to achieve that perfect golden-brown crust. Resting Chicken: Let the fried chicken rest for a few minutes before slicing to retain its juices and maintain moisture in the wrap. {{image_2}} If you want a healthier wrap, skip the frying. Instead, bake the chicken. Start by preheating your oven to 400°F (200°C). After coating the chicken, place it on a baking sheet lined with parchment paper. Spray the chicken lightly with cooking oil. Bake for about 20-25 minutes. This method keeps the crunch while cutting down on oil. You can use different wraps if you want a twist. Try lettuce leaves for a low-carb option. You can also use whole wheat tortillas for added fiber. If you're feeling adventurous, use pita bread or even flatbreads. Each choice gives a unique taste and texture. To change the flavor, play with the spices! For a spicy kick, add more cayenne pepper or use hot sauce in the buttermilk. If you prefer BBQ, mix BBQ sauce into the ranch dressing. You can even coat the chicken in BBQ sauce before baking or frying. Each option creates a new layer of flavor and keeps things exciting. To store leftover wraps, let them cool first. Wrap each one tightly in plastic wrap. Place the wrapped wraps in an airtight container. They will stay fresh in the fridge for about 2 to 3 days. If you have extra filling, keep it separate to avoid sogginess. When you’re ready to eat, take the wraps out of the fridge. Unwrap them and place them on a plate. You can reheat them in the microwave for about 30 seconds. If you want them crispy again, use an oven. Preheat your oven to 350°F (175°C) and bake for 10 minutes. This will help keep that extra crispy texture. You can freeze these wraps for easy meals later. Wrap each one in plastic wrap, then place them in a freezer bag. They can last up to 2 months in the freezer. When you’re ready to eat, thaw them overnight in the fridge. Reheat as mentioned earlier for the best results. You can use regular milk mixed with vinegar or lemon juice. Add 1 tablespoon of vinegar or lemon juice to 1 cup of milk. Let it sit for 5-10 minutes. This mix will act like buttermilk. You can also use yogurt or sour cream thinned with water. To make these wraps gluten-free, swap the all-purpose flour with a gluten-free flour blend. Use gluten-free panko breadcrumbs too. Ensure your tortillas are gluten-free, made from corn or a gluten-free flour mix. Always check labels to avoid hidden gluten. Yes, you can prep the chicken early. Marinate the chicken in buttermilk and seasonings. Cover and store it in the fridge for up to 24 hours. This keeps the chicken tasty and tender. When you're ready, just coat and fry it. This blog post covers all you need for tasty chicken wraps. You learned about key ingredients and how to fry chicken for extra crispiness. We shared tips for marination and storage, and even variations for health needs. In the end, you can create wraps that suit your taste and schedule. Enjoy experimenting with flavors and toppings to find what you like best. Happy cooking!

Extra Crispy Chicken Wraps Simple and Tasty Recipe

To make this tasty chowder, you need some key ingredients. Here is what you will need: - 2 boneless, skinless chicken breasts - 4 cups chicken broth - 3 cups frozen corn - 2 medium potatoes, diced - 1 onion, chopped - 2 cloves garlic, minced - 1 cup heavy cream (or coconut milk for a dairy-free option) - 1 teaspoon dried thyme - 1 teaspoon smoked paprika - Salt and pepper to taste - 3 green onions, sliced (for garnish) - Fresh parsley, chopped (for garnish) These ingredients come together to create a hearty and tasty meal. The chicken adds protein, while the corn and potatoes give it a nice texture. Want to make your chowder a bit different? You can add some optional ingredients. Here are a few ideas: - Bell peppers for a sweet crunch - Carrots for extra sweetness - Celery for a fresh taste - Bacon bits for a smoky flavor - Chili powder for a spicy kick Feel free to mix and match these options to suit your taste. The chowder is very flexible and allows for creativity. If you have dietary needs, you can still enjoy this chowder. Here are some substitutions you can use: - Use chicken thighs instead of breasts for more flavor. - Swap heavy cream for coconut milk to keep it dairy-free. - Replace potatoes with cauliflower for a low-carb option. - Use vegetable broth instead of chicken broth for a vegetarian version. These substitutions will help you enjoy the chowder without worrying about dietary restrictions. {{ingredient_image_1}} Start with the chicken. Take two boneless, skinless chicken breasts and place them at the bottom of your crockpot. This helps the chicken soak up all the flavors. Next, chop two medium potatoes into small pieces. Dice them well so they cook evenly. Chop one onion and mince two cloves of garlic. These add a nice touch to the chowder. Now, it’s time to layer the ingredients. Pour four cups of chicken broth over the chicken. This broth is the heart of the chowder. Add three cups of frozen corn, the diced potatoes, chopped onion, and minced garlic on top. Sprinkle one teaspoon of dried thyme and one teaspoon of smoked paprika over everything. Don’t forget to add salt and pepper to taste. Give it all a gentle stir. This mix creates a cozy flavor. Cover the crockpot with its lid. You can cook on low for six hours. This makes the chicken very tender. If you want it done faster, cook on high for three hours. Once it’s ready, take out the chicken and shred it with two forks. Then, return the shredded chicken to the pot. Stir in one cup of heavy cream or coconut milk. Let it cook for another 30 minutes. This step makes the chowder rich and creamy. Before serving, taste it and adjust the seasoning if needed. Top each bowl with sliced green onions and fresh parsley for a lovely finish. To make your chowder creamy, use heavy cream. You can also use coconut milk for a dairy-free choice. Stir in the cream at the end to keep it rich. This small step makes a big difference. Let it cook for another 30 minutes to blend the flavors well. Shredding chicken is simple. After cooking, take the chicken out of the crockpot. Use two forks to pull the meat apart. This method keeps the chicken tender and juicy. Make sure to return it to the chowder to soak in all the tasty broth. Serve your chowder hot in a bowl. Top with fresh green onions and parsley for color. You can pair it with crusty bread or cornbread for a full meal. A crisp salad on the side adds freshness. Enjoy it with family or friends for a cozy night in. Pro Tips Use Fresh Ingredients: For the best flavor, opt for fresh vegetables and herbs when available. They can elevate the dish significantly! Adjust the Thickness: If you prefer a thicker chowder, mash some of the potatoes in the pot before adding the cream to create a creamier texture. Make it Spicy: Add a pinch of cayenne pepper or diced jalapeños for a spicy kick that complements the sweetness of the corn. Storage Tips: This chowder stores well in the fridge for up to 3 days. Reheat gently on the stove, adding a splash of broth if it thickens too much. {{image_2}} You can make this chowder dairy-free by using coconut milk. Simply swap the heavy cream for one cup of full-fat coconut milk. This change keeps the chowder rich and creamy. Plus, it adds a subtle sweetness that pairs well with the corn. If you like, you can also use almond milk, but it may not be as creamy. Boost the nutrition in your chowder by adding more veggies. You can include carrots, bell peppers, or even spinach. Just chop them into small pieces and add them to the crockpot with the other ingredients. This way, you not only increase nutrients but also add more colors and textures to your dish. Want to spice things up? Add jalapeños for a kick. Chop one or two jalapeños and toss them in with the other ingredients. You can adjust the amount based on your spice tolerance. This version gives the chowder a whole new level of flavor. To keep your chowder fresh, let it cool first. Place it in an airtight container. Store it in your fridge for up to three days. When ready to eat, check for any signs of spoilage. If it smells good, it’s likely safe to enjoy. This chowder freezes well. Use a freezer-safe container and leave some space for expansion. Pour your cooled chowder into the container and seal tightly. Label it with the date. You can freeze it for up to three months. When you want to eat it again, thaw it in the fridge overnight. To reheat, pour the chowder into a pot over medium heat. Stir regularly to avoid sticking. If it seems thick, add a splash of chicken broth or water. Heat until it is warm throughout. You can also use a microwave. Heat it in short bursts, stirring in between. This keeps the flavor and texture just right. You can store this chowder for up to four days in the fridge. Make sure to put it in an airtight container. This helps keep it fresh and tasty. If you want to save it longer, try freezing it. In the freezer, it lasts up to three months. Just remember to let it cool first before freezing. Yes, you can use fresh corn! Fresh corn adds great flavor and texture. Just cut the kernels off the cob and use about three cups. This will give your chowder a fresh, sweet taste. If you use fresh corn, add it in the last hour of cooking to keep it tender. Absolutely! Adding beans can boost nutrition and make the chowder heartier. You can use black beans or white beans for a nice twist. Rinse the beans well and add them in when you add the corn. This will give your chowder a nice, creamy texture and extra protein. Crockpot Chicken Corn Chowder is a simple and tasty meal. We covered key ingredients, step-by-step cooking, and useful tips. You can customize the recipe to fit your likes, including dairy-free and spicy options. Proper storage can help you enjoy it later, too. Remember to try different variations to find your favorite. With this recipe, you will have a warm bowl of comfort anytime you need it. Enjoy your chowder adventures!

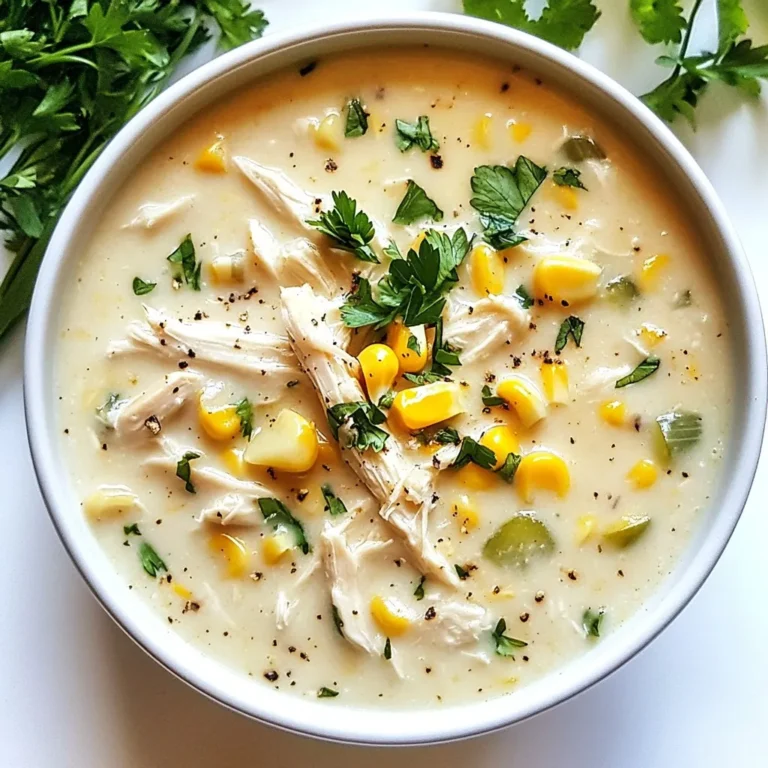
Crockpot Chicken Corn Chowder Tasty Comfort Food

PREV 1 2 3 … 86 NEXT
secrets pice kitchen

explore

DessertsDinnerAppetizersDrinks

Our Policies

  • Cookie Policy
  • Copyright Policy
  • Disclaimer
  • GDPR Policy
  • Terms Of Use
Back to Top
  • About
  • Contact Us
  • Privacy Policy
© 2026 secrets pice kitchen