FREE DINNER EBOOK! Get your copy!
  • Cookie Policy
  • GDPR Policy
  • Disclaimer
  • Terms Of Use
  • Visit my other site: Fun Cookie Recipes
secrets pice kitchen
  • Home
  • Dinner
  • Desserts
  • Drinks
  • Appetizers
  • Contact
  • About
  • Privacy Policy
  • Home
  • Dinner
  • Desserts
  • Drinks
  • Appetizers
  • Contact
  • About
  • Privacy Policy
  • Cookie Policy
  • GDPR Policy
  • Disclaimer
  • Terms Of Use
Visit my other site: Fun Cookie Recipes

HOME / CATEGORIES /

Latest

To make this creamy chicken mushroom orzo, gather these key ingredients: - 1 lb chicken breast, diced - 1 cup uncooked orzo pasta - 2 cups mushrooms, sliced (button or cremini) - 1 small onion, chopped - 3 cloves garlic, minced - 4 cups chicken broth (low sodium) - 1 cup heavy cream - 1 cup spinach leaves - 1 teaspoon dried thyme - 1 teaspoon paprika - Salt and pepper to taste - 2 tablespoons olive oil - Grated Parmesan cheese for serving - Fresh parsley for garnish These ingredients work together to create a rich and tasty dish. The chicken provides protein, while the orzo serves as a comforting base. Mushrooms add a nice earthy flavor. Heavy cream makes the dish creamy, and spinach gives it a fresh touch. You can boost flavor with these optional ingredients: - Lemon zest for brightness - Red pepper flakes for heat - Fresh herbs like thyme or basil for freshness - A splash of white wine for depth Using these extras can make your meal more exciting. A little lemon zest adds zing, while red pepper flakes bring warmth. Fresh herbs can elevate the dish with their aroma. To prepare this dish, you'll need: - A large pot or Dutch oven - A sharp knife for chopping - A cutting board - Measuring cups and spoons - A wooden spoon for stirring Having the right tools makes cooking easier. A large pot helps with even cooking, while a sharp knife ensures clean cuts. Measuring cups help you get the amounts just right. First, heat two tablespoons of olive oil in a large pot over medium heat. Add one pound of diced chicken breast. Season it with salt, pepper, and one teaspoon of paprika. Cook the chicken for about five to seven minutes until it turns golden brown and cooks through. Once done, remove the chicken and set it aside on a plate. In the same pot, toss in one small chopped onion and two cups of sliced mushrooms. Sauté these for about four to five minutes. You want the onions to be clear and the mushrooms tender. Next, add three cloves of minced garlic and one teaspoon of dried thyme. Cook for one more minute until you smell the lovely aroma. Now, add one cup of uncooked orzo pasta to the pot. Stir it well so it mixes with the veggies. Pour in four cups of low-sodium chicken broth and bring it to a boil. Once boiling, reduce the heat to low and cover the pot. Let it simmer for about ten to twelve minutes, stirring occasionally, until the orzo is al dente. When the orzo is ready, stir in one cup of heavy cream and return the cooked chicken to the pot. Cook this for an extra two to three minutes until everything is warm. Finally, fold in one cup of fresh spinach leaves and cook until they wilt, about one to two minutes. Adjust the seasoning if needed, and serve hot! To cook chicken right, start with fresh meat. Cut your chicken into small, even pieces. This helps it cook faster and more evenly. Use a hot pot to sear the chicken. Brown the pieces for about 5-7 minutes. This gives flavor and keeps it juicy. Always check that the chicken reaches 165°F for safety. To get that creamy texture, add heavy cream at the end of cooking. Stir it in after the orzo is done. This keeps the cream from curdling. You can also add cheese for extra richness. Grated Parmesan melts nicely and adds flavor. If you want a lighter touch, use half-and-half instead of cream. Cooking orzo well takes a little attention. Use plenty of chicken broth for flavor. Bring it to a boil, then reduce heat and cover. Stir often so it doesn’t stick. Cook for about 10-12 minutes until it’s al dente. This means it should still have a slight bite. If it absorbs too much liquid, add a splash more broth or water. {{image_2}} If you want to change up the greens, try kale or Swiss chard. Both add a nice flavor. You can also use frozen spinach if fresh is not available. Just add it at the end. This way, it heats through but doesn't get overcooked. You still get that vibrant color and nutrients. Feel free to switch the chicken with turkey or shrimp for a tasty twist. You can even use tofu for a plant-based option. Add other vegetables like bell peppers or zucchini to increase the nutrients. Just chop them small so they cook evenly. This gives you room to be creative while still enjoying the creamy orzo. For a lighter meal, use coconut milk or almond milk instead of heavy cream. This keeps the dish creamy while making it dairy-free. You can also cut the amount of oil. Use just one tablespoon for a lighter touch. Taste the dish often to find the right balance of flavors. To store leftovers of creamy chicken mushroom orzo, let it cool first. Then, place it in an airtight container. You can keep it in the fridge for up to 3 days. Make sure to label the container with the date. This helps you keep track of freshness. When you are ready to eat leftovers, heat them on the stove or in the microwave. For the stove, use a low heat and add a splash of chicken broth or cream. This keeps it creamy and prevents sticking. Stir often until it's warm. If using the microwave, cover with a lid to avoid splatters. Heat in short bursts, stirring in between, until hot. If you want to freeze this dish, wait until it fully cools. Place portions in freezer-safe containers or bags. You can freeze it for up to 3 months. When ready to enjoy, thaw it overnight in the fridge. Reheat it on the stove, adding a bit of liquid to keep it creamy. Yes, you can make this dish ahead of time. Cook it fully, then cool it down. Store it in an airtight container in the fridge for up to three days. When ready to eat, simply reheat it on the stove or in the microwave. Add a splash of broth or cream if it seems dry. If you don’t have orzo, try using other small pasta shapes. You can use ditalini, small shells, or even couscous. The cooking times may differ slightly, so check the package instructions. Quinoa is also a great grain substitute, adding a nice texture and flavor. To spice things up, add red pepper flakes while cooking. You can also use a spicy paprika or hot sauce for more heat. For an extra kick, include diced jalapeños or a bit of cayenne pepper. Adjust the amount to your taste for the perfect heat level. This blog post covered how to make creamy chicken mushroom orzo. We discussed essential and optional ingredients, along with helpful tools. I shared step-by-step instructions, tips for cooking, and tasty variations. Finally, I provided storage information and answered common questions. Make this dish your own. Experiment with flavors and find what you love. Happy cooking!

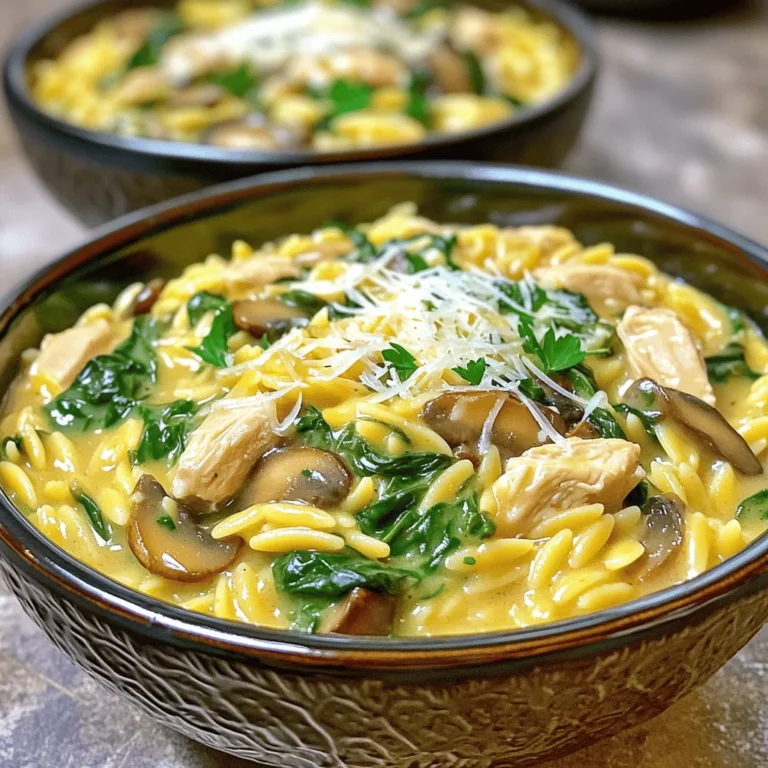
Creamy Chicken Mushroom Orzo One Pot Delight

To make this spiced apple cider punch, gather these simple ingredients: - 4 cups apple cider - 1 cup orange juice - 2 cups sparkling water - 1 tablespoon cinnamon - 1 teaspoon nutmeg - 1 teaspoon allspice - ½ cup brown sugar (adjust to taste) - 1 orange, sliced - 1 apple, sliced - 6-8 whole cloves - Ice cubes - Fresh mint leaves for garnish You can make your punch special with some fun additions: - Add a splash of cranberry juice for a tangy twist. - Try ginger slices for a spicy kick. - Mix in pomegranate seeds for a pop of color. - Use different herbs like rosemary for a unique taste. Quality matters when making this drink. Here’s what to keep in mind: - Use fresh apple cider for the best flavor. - Freshly squeezed orange juice adds a bright note. - Choose sparkling water with no added sugars to keep it light. - Use whole spices for a richer taste; ground spices lose flavor quickly. - Always pick ripe fruits for slicing; they enhance the drink's sweetness. Making Spiced Apple Cider Punch is simple and quick. You’ll need about 25 minutes. Gather all your ingredients before you start. This way, you can move smoothly from one step to the next. You will create a warm, spiced drink that is perfect for any gathering. 1. Start by taking a large pot. Add 4 cups of apple cider, 1 cup of orange juice, 1 tablespoon of cinnamon, 1 teaspoon of nutmeg, and 1 teaspoon of allspice. Mix these well. 2. Now, add ½ cup of brown sugar. This will bring a nice sweetness to the punch. Stir the mix over medium heat until it gets hot, but don’t let it boil. Keep stirring to help the sugar dissolve. 3. After it heats, it's time to add flavor. Toss in 6 to 8 whole cloves and the sliced orange and apple. Leave the pot off the heat and let it steep for about 15 minutes. This step helps the spices and fruit flavors blend well. 4. Once steeped, use a slotted spoon to remove the cloves, orange, and apple slices. This keeps your punch smooth and easy to drink. 5. Right before serving, stir in 2 cups of sparkling water. This adds a refreshing fizz. Then, add ice cubes to chill the punch. 6. Taste it! If you want it sweeter, add a little more brown sugar. Just stir it in until it dissolves. 7. Serve the punch in glasses. You can garnish each glass with fresh mint leaves and more fruit slices for a nice touch. Watch the heat closely. Medium heat is key. If it gets too hot, the mix can boil. Boiling can change the flavors, making it less tasty. Stir often to ensure even heating. When you see steam, you’re at the right temperature. Keep it warm but not boiling for the best flavor. To make the best Spiced Apple Cider Punch, focus on balance. Start with fresh apple cider. The sweetness of the cider should blend well with the tartness of the orange juice. Use just the right amount of spices. Too much cinnamon can overpower the drink. I like to keep it simple. Stick to one tablespoon of cinnamon, one teaspoon of nutmeg, and one teaspoon of allspice for a warm, cozy flavor. Adjust the brown sugar to meet your taste. You want it sweet but not too sweet. When serving this punch, presentation matters. Use clear glasses to show off the vibrant colors. Add ice cubes just before serving. This keeps the drink cold without diluting the flavors too quickly. Garnish each glass with mint leaves and extra fruit slices. It adds a fresh look and aroma. For larger gatherings, serve the punch in a big bowl. Guests can help themselves, making it fun and easy. To make your punch even more festive, consider adding some extra touches. You can add whole cloves and orange slices for a beautiful look. For a fun twist, try adding a splash of cranberry juice. This will give a nice color and flavor. If you want to make it a warm drink, serve it right from the pot. Just keep it on low heat. This way, guests can enjoy it hot, which is perfect for chilly days. {{image_2}} You can switch up the flavors in your Spiced Apple Cider Punch. For a fun twist, add cranberry juice. It brings a tartness that pairs well with the spices. You can also try pear juice for a smooth and sweet flavor. Mixing in some pomegranate juice adds a rich color and taste. Fresh fruits like berries or even pineapple can give the punch a tropical feel. Each juice adds its own flair, so feel free to get creative! This punch works for everyone. For a non-alcoholic version, stick with the original recipe. The warm spices and sweet flavors are perfect for all ages. If you want an adult drink, add some rum or bourbon. Start with a cup of alcohol and adjust to your taste. It adds warmth and depth to the drink. Just remember to serve responsibly and enjoy the cheers! You can change the punch with seasonal spices. In fall, add a dash of ginger for a zesty kick. During winter, try using star anise or cardamom for warmth. In spring, fresh herbs like basil or rosemary can make it bright. You can also swap in seasonal fruits like berries in summer. Each season brings its own flavors, making this punch a year-round delight! I recommend storing leftover spiced apple cider punch in an airtight container. Use a large jar or pitcher with a lid. Make sure to chill it in the fridge. This helps keep it fresh and tasty. Just remember, it’s best to store the punch without the sparkling water. This way, it won’t lose its fizz. If you want to enjoy warm punch later, heat it gently. Pour the leftover punch into a pot. Use low heat to warm it up. Stir occasionally to mix the flavors. Avoid boiling, as this can change the taste. If you want it colder, add ice cubes right before serving. To keep your punch fresh, follow these tips: - Use fresh ingredients like apples and oranges. - Store the punch in the fridge and use it within three days. - When serving, add sparkling water just before pouring. This keeps the fizz. - Always taste before serving, as flavors can change in the fridge. Spiced Apple Cider Punch lasts about 3 to 5 days in the fridge. To keep it fresh, store it in a sealed container. The flavors may change over time, so drink it soon for the best taste. Yes, you can make this punch ahead of time. I suggest making the base without the sparkling water. Store it in the fridge. Just before serving, add the sparkling water and ice. This keeps the fizz fresh and fun. Yes, you can adjust the sweetness easily. To make it sweeter, add more brown sugar. Start with a tablespoon and taste. For less sweetness, reduce the amount of sugar or use less sweet juice. Adjust until it tastes just right for you. This blog covered how to create a delightful Spiced Apple Cider Punch. We went over the key ingredients, cooking steps, and tips for perfect flavor. You now have serving ideas and variations for any occasion. Storing and reheating methods ensure this punch stays fresh. Enjoy crafting your punch with confidence. Experiment with flavors, and make it your own!

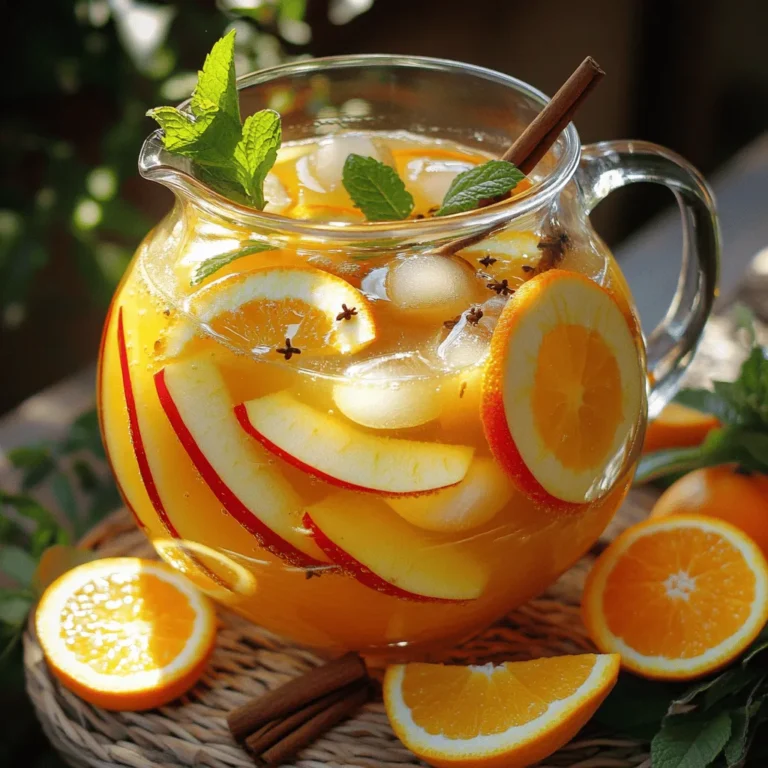
Spiced Apple Cider Punch Festive and Flavorful Drink

- 1 lb (450g) gnocchi - 1 lb (450g) boneless, skinless chicken breasts - 1 cup cream cheese, softened - 1 cup chicken broth - 1 packet ranch seasoning mix - 1 cup shredded cheddar cheese - 1 cup frozen peas and carrots - 2 tablespoons olive oil - Fresh parsley, chopped This dish starts with gnocchi, which gives it a soft and pillowy texture. You can buy gnocchi fresh or frozen, but I love using the store-bought kind for ease. Next, we need chicken. I prefer boneless, skinless chicken breasts for their lean quality. They cook quickly and shred easily. Cream cheese adds richness and creaminess to the sauce. It’s key for that indulgent taste. Chicken broth will bring moisture and depth to the dish. The ranch seasoning mix adds a burst of flavor that makes everything pop. Shredded cheddar cheese melts beautifully into the dish, making it even more delightful. For extra nutrition and flavor, I often toss in frozen peas and carrots. They add color and sweetness. Olive oil helps cook the chicken while keeping it juicy. Finally, fresh parsley makes a lovely garnish. It adds a touch of freshness and bright color to the plate. Gathering these ingredients is simple. You can find most at your local grocery store. This dish is perfect for a cozy family dinner or when you want to impress guests with minimal effort. Get ready to enjoy a rich, creamy, and satisfying meal! {{ingredient_image_1}} To start, I season the chicken breasts with salt and pepper. This simple step brings out the chicken's flavor. Next, I heat olive oil in a large skillet over medium-high heat. I add the seasoned chicken to the skillet and cook for about 7-10 minutes on each side. I watch for a golden color and ensure the chicken is cooked through. Once done, I remove the chicken from the skillet and let it rest. After a few minutes, I shred the chicken using two forks, making sure the pieces are bite-sized. In the same skillet, I reduce the heat to medium. I then add the softened cream cheese, chicken broth, and ranch seasoning mix. Stirring is key here; I mix until the cream cheese melts and the sauce is smooth. Next, I toss in the frozen peas and carrots. I stir well and cook for an additional 3-5 minutes. This heats the vegetables and adds color to the sauce. While making the sauce, I boil a pot of salted water. When the water reaches a rolling boil, I add the gnocchi. I cook them according to the package instructions, which usually takes just a few minutes. Once they float to the top, I know they are done. I then drain the gnocchi and set them aside. Now comes the fun part! I add the shredded chicken and cooked gnocchi to the creamy sauce in the skillet. Stirring gently, I ensure everything is well combined. I let it cook for an additional 2-3 minutes to heat through. Finally, I remove the skillet from the heat and mix in the shredded cheddar cheese. I wait a moment for it to melt into the dish, creating a rich and creamy finish. You can make this dish your own by adjusting the seasoning. Start with the ranch mix, then taste as you go. If you want more flavor, add garlic powder or onion powder. You can also swap out the ranch for a different seasoning mix like Italian or taco seasoning. If you need to substitute ingredients, it’s easy. Use Greek yogurt instead of cream cheese for a lighter option. You can replace chicken with turkey or even tofu for a veggie twist. Frozen veggies work well, but fresh ones add a nice crunch. To ensure your chicken cooks just right, use a meat thermometer. Chicken should reach 165°F (74°C) to be safe. Cook it until golden on the outside. Then, let it rest. This keeps the meat juicy when you shred it. For gnocchi, follow the package instructions closely. Cook them until they float to the top of the water. This means they are done. Don’t overcook them, or they will become mushy. Garnish with fresh parsley for a pop of color. It not only looks good but adds flavor too. If you want, sprinkle some extra cheddar cheese on top right before serving. For serving, a bowl works best. This dish is creamy and rich, so a deep bowl lets everyone enjoy it. You can also pair it with a simple salad or crusty bread to soak up the sauce. Pro Tips Choose Quality Chicken: Select fresh, high-quality chicken breasts for the best flavor and texture in your dish. Perfectly Cooked Gnocchi: Make sure to cook the gnocchi until they float to the top of the boiling water, indicating they are done. Customize Your Veggies: Feel free to add or substitute your favorite vegetables, like spinach or bell peppers, for added nutrition and flavor. Make Ahead: This dish can be made ahead of time. Simply reheat on the stove, adding a splash of chicken broth to maintain creaminess. {{image_2}} You can change the taste of this dish easily. Use different seasoning blends to mix things up. Try garlic powder, Italian herbs, or smoked paprika for a unique twist. If you like heat, add some cayenne pepper or red pepper flakes. These spices give the dish an exciting kick that many enjoy. Feel free to use your favorite vegetables. Broccoli, bell peppers, or spinach can work great in this dish. They add color and nutrients. If you need a gluten-free option, look for gluten-free gnocchi. Many brands offer this choice now, making it easy to enjoy. Pair this dish with side salads or bread. A fresh green salad complements the creamy gnocchi well. You can also serve it as a casserole. Just place the mixture in a baking dish, top with more cheese, and bake until bubbly. This method makes for a cozy meal that everyone will love. To store leftovers of your Classic Crack Chicken Gnocchi, let it cool down. Place the cooled dish in an airtight container. This helps keep it fresh. I recommend using glass or plastic containers with tight lids. You can store it in the fridge for up to three days. If you want to freeze this dish, use freezer-safe containers. Portion it out to make reheating easier later. Make sure to leave some space at the top of the container. This allows for expansion as it freezes. You can freeze it for up to three months. When ready to eat, thaw it in the fridge overnight. For reheating, warm it slowly on the stove over low heat. Stir occasionally to avoid sticking. You can also microwave it, but check it often to make sure it heats evenly. Enjoy your comforting meal again! Crack Chicken is a creamy, flavorful dish that features chicken cooked in a rich sauce. The name comes from its addictive taste. You will find it often made with cream cheese, ranch seasoning, and cheddar cheese. Some people add bacon or green onions for extra flavor. Common variations may include different cheeses or spices. Each cook adds their twist to make it special. Yes, you can prepare Crack Chicken Gnocchi in advance. Cook the chicken and sauce, then store them separately. Keep the gnocchi in a sealed container. When you're ready to eat, combine everything and heat it. For best results, store the dish for no more than three days in the fridge. This keeps the flavors fresh. To make this dish healthier, consider using low-fat cream cheese or Greek yogurt. You can also add more veggies, like spinach or bell peppers. These choices boost nutrition without losing taste. Use smaller portions if you want to control calories. Enjoy this comfort dish while keeping it balanced! This blog post detailed a creamy, rich dish made with gnocchi, chicken, and cream cheese. You learned about the main and optional ingredients, step-by-step cooking instructions, and helpful tips. We also explored variations to enhance flavor, and how to store your leftovers for future meals. In the end, this dish is versatile and satisfying. Experiment with the ingredients to find what you love the most. Happy cooking!

Classic Crack Chicken Gnocchi Flavorful Comfort Dish

- 1 cup cottage cheese - 3 large eggs - 1/2 cup rolled oats - 1/2 teaspoon baking powder - 1 tablespoon maple syrup (optional for sweetness) - 1/2 teaspoon vanilla extract - Pinch of salt Cottage cheese is the star here. It adds protein and creaminess to the pancakes. Eggs help bind the mixture while also adding more protein. Rolled oats give the pancakes a hearty texture. Baking powder makes the pancakes rise and become fluffy. Maple syrup is optional but adds a nice sweetness. The vanilla extract gives a warm flavor, and just a pinch of salt balances everything out. - Protein powder - Cinnamon - Fruits (e.g., blueberries, bananas) You can boost the protein even more by adding protein powder. A dash of cinnamon adds warmth and spice. Fruits like blueberries or sliced bananas bring freshness and natural sweetness to your pancakes. Feel free to mix and match these ingredients to suit your taste. Each add-in offers a unique twist to the basic recipe. To make the batter, start by mixing the ingredients. In a large bowl, combine 1 cup of cottage cheese, 3 large eggs, and 1/2 cup of rolled oats. Add 1/2 teaspoon of baking powder, a pinch of salt, and 1/2 teaspoon of vanilla extract. If you like it sweet, include 1 tablespoon of maple syrup. Next, blend the mixture to your desired texture. You can use a blender or a hand mixer. If you want a smooth batter, blend well. For a chunkier style, blend less. This choice will change how the pancakes feel when you eat them. Now, it’s time to cook. Preheat a non-stick skillet or griddle over medium heat. Lightly grease it with cooking spray or a bit of oil. This step helps prevent sticking. Once your skillet is hot, pour about 1/4 cup of batter for each pancake onto the skillet. Cook for about 2-3 minutes. Look for bubbles forming on the surface. This is a good sign! Then, carefully flip the pancake. Cook for another 2-3 minutes until it turns golden brown. Repeat this with the rest of the batter. Now that your pancakes are ready, think about toppings. I recommend fresh fruits like berries or bananas. You can also add a dollop of yogurt for creaminess. If you want more sweetness, drizzle an extra bit of maple syrup on top. These pancakes also pair well with a side of scrambled eggs or turkey bacon. Enjoy your meal! To make great pancakes, start with the right heat. I recommend medium heat. This helps cook the pancakes evenly. If the heat is too high, they may burn. If it's too low, they may not cook through. Avoid sticking by greasing your pan. Use cooking spray or a small amount of oil. Make sure the skillet is hot before pouring in the batter. This helps create a nice crust. If you notice sticking, your pan may not be hot enough. For the best storage, keep leftover pancakes in an airtight container. They will stay fresh in the fridge for about three days. When ready to eat, simply reheat them. A microwave or skillet works well for this. If you want to save pancakes for later, freezing is a great option. Place the pancakes in a single layer on a baking sheet. Freeze them for about one hour. Then, transfer them to a freezer bag. This way, they won't stick together. When you want some, just heat them straight from the freezer. {{image_2}} You can change the taste of your cottage cheese pancakes easily. For a sweet twist, add chocolate chips. Just fold in about 1/2 cup of mini chocolate chips into the batter. The chips melt slightly as you cook, making each bite delightful. If you want a savory option, try herbs and cheese. Mix in a handful of fresh chopped herbs like chives or parsley. You can also add shredded cheese, such as cheddar or feta. This creates a tasty pancake that pairs well with eggs or avocado. Cottage cheese pancakes can fit many diets. For a gluten-free version, swap rolled oats for almond flour or gluten-free oats. This keeps the texture and taste great. For a vegan option, use plant-based substitutes. Replace eggs with flax eggs. Just mix 1 tablespoon of ground flaxseed with 2.5 tablespoons of water. Let it sit for five minutes until it thickens. Use dairy-free yogurt instead of cottage cheese. This will give you a similar texture and taste while keeping it vegan. Each serving of cottage cheese protein pancakes has about 200 calories. This makes them a great choice for breakfast or a snack. The main ingredients give you a good balance of nutrients. - Calories per serving: 200 - Protein: 20 grams - Carbohydrates: 18 grams - Fat: 7 grams This pancake recipe packs a punch with protein. It has about 20 grams of protein per serving. This high protein content helps keep you full. It also supports muscle health. Cottage cheese brings many health benefits. It is rich in protein and calcium. This protein helps build and repair muscles. Calcium is good for strong bones. Oats also add value to your diet. They are high in fiber, which aids digestion. Fiber helps keep you feeling full longer, too. This can help with weight management. Oats have vitamins and minerals that support heart health. They may lower cholesterol levels and keep your heart strong. These pancakes combine the benefits of both cottage cheese and oats. They make a tasty, healthy meal option. Can I use different types of cheese? Yes, you can use different cheeses. Ricotta or Greek yogurt work well as substitutes. Each cheese will change the taste and texture. Try them to find your favorite! How to make pancakes fluffier? To make pancakes fluffier, separate the egg whites from the yolks. Whip the egg whites until stiff peaks form, then fold them into the batter. This adds air and makes the pancakes rise better. How long do these pancakes last in the fridge? These pancakes last about three to four days in the fridge. Store them in an airtight container. You can reheat them in the microwave or on the skillet for a quick meal. You now know how to make healthy cottage cheese pancakes. We explored the simple ingredients needed and provided step-by-step instructions. I shared tips for cooking perfect pancakes and ideas for storage and variations. These pancakes are not just tasty; they’re packed with protein and nutrients. Feel free to experiment with flavors and toppings. With practice, you’ll impress your friends and family. Enjoy your cooking journey!

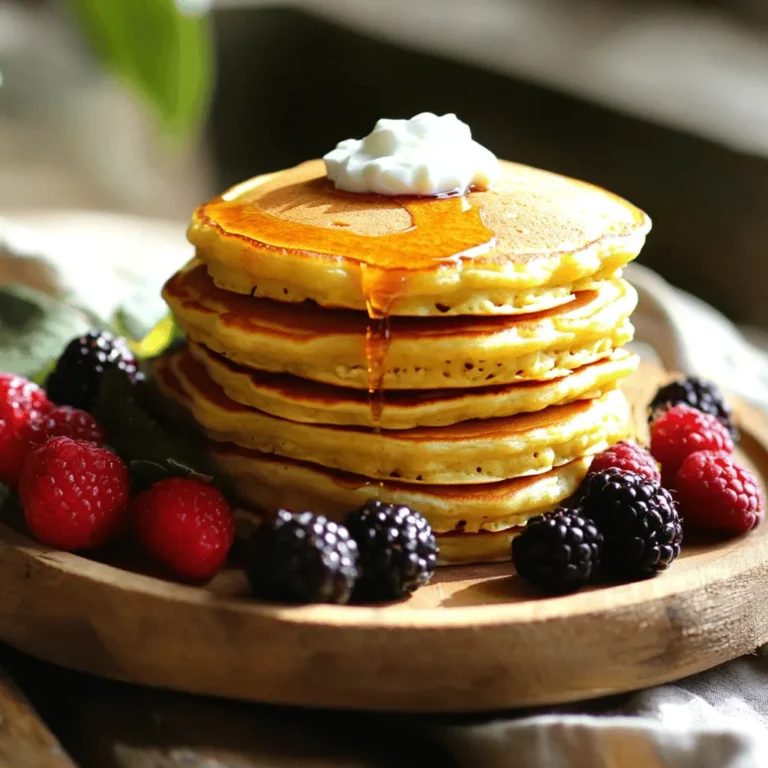
Cottage Cheese Protein Pancakes Simple and Tasty Meal

To make this dish, gather the following items: - 4 salmon fillets - 2 tablespoons olive oil - 4 tablespoons unsalted butter - 4 cloves garlic, minced - 1 cup heavy cream - 1/2 cup chicken broth (or vegetable broth) - 1 teaspoon Dijon mustard - 1 teaspoon lemon juice - Salt and pepper to taste - 1/4 cup freshly chopped parsley - 1 cup cherry tomatoes, halved - 1 teaspoon lemon zest These ingredients mix together to create a lovely meal. Each element adds a unique flavor to your dish. You can adjust the recipe to fit your taste. Here are some options: - Add capers for a briny touch. - Use spinach for extra greens. - Swap in fresh herbs like dill or basil. - Try different vegetables, like zucchini or asparagus. These extras can make your dish more exciting and colorful. If you need alternatives, here are some ideas: - Use coconut cream instead of heavy cream for a dairy-free option. - Swap chicken broth for vegetable broth to make it vegetarian. - Use garlic powder if you don't have fresh garlic. - Replace Dijon mustard with whole grain mustard for more texture. These swaps ensure you keep the dish tasty, even with changes. Start by heating 2 tablespoons of olive oil in a large skillet over medium-high heat. While the oil heats, season 4 salmon fillets with salt and pepper on both sides. When the oil is hot, carefully place the salmon in the skillet, skin-side down. Cook for about 4 to 5 minutes until the skin is crispy. Then, flip the fillets and cook for another 3 to 4 minutes. Once done, remove the salmon from the skillet and set it aside on a plate. In the same skillet, reduce the heat to medium. Add 4 tablespoons of unsalted butter and let it melt. Once melted, add 4 minced garlic cloves and sauté for about 1 minute until the garlic is fragrant. Next, stir in 1 cup of heavy cream, 1/2 cup of chicken broth (or vegetable broth), 1 teaspoon of Dijon mustard, and 1 teaspoon of lemon juice. Allow this mixture to simmer for about 2 to 3 minutes until it thickens slightly. Now, add 1 cup of halved cherry tomatoes and 1 teaspoon of lemon zest into the sauce. Stir gently to combine and let it cook for an additional 2 minutes. Return the cooked salmon fillets to the skillet. Spoon the creamy garlic sauce over each fillet. Let it simmer for another 2 to 3 minutes so the salmon warms up and absorbs the sauce's flavors. Finally, remove the skillet from heat and stir in 1/4 cup of freshly chopped parsley. For a nice presentation, serve the salmon with the creamy garlic sauce drizzled on top. You can also pair it with steamed vegetables or fluffy rice to complete your meal. Enjoy your delicious creation! To make your salmon crispy, start with a hot skillet. Heat the olive oil until it's shimmering. Then, place the salmon skin-side down. This helps the skin turn crispy and golden. Cook it for 4 to 5 minutes without moving it. This allows a nice crust to form. Next, flip the salmon and cook for another 3 to 4 minutes. This will keep the inside moist and soft. You can add fun twists to this dish. Try using fresh herbs like dill or thyme for extra flavor. A pinch of red pepper flakes brings a nice heat. For a zesty kick, add capers or olives to the creamy sauce. If you like a smoky taste, add smoked paprika. You can also swap in veggies. Spinach or asparagus work great with salmon. Presentation is key to a great meal. When serving, drizzle the creamy sauce over each salmon fillet. Sprinkle more fresh parsley on top for color. Place the cherry tomatoes around for a vibrant look. Serve with a side of fresh steamed veggies or fluffy rice. This adds color and makes the plate pop. Remember, we eat with our eyes first! {{image_2}} You can change the cream sauce to fit your taste. Instead of heavy cream, try using half-and-half for a lighter sauce. You can also swap in coconut milk for a dairy-free option. If you want a tangy twist, add some cream cheese or sour cream. For a spicy kick, mix in a dash of red pepper flakes. While I love making this dish in a skillet, you can also bake the salmon. Preheat your oven to 400°F. Place the salmon in a baking dish with the sauce poured on top. Bake for about 15-20 minutes. You can also grill the salmon. Brush the fillets with olive oil and grill for 4-5 minutes per side. The smoky flavor adds a nice touch. Seasonal veggies can brighten up this dish. In spring, add asparagus or peas for a fresh taste. In summer, mix in zucchini or bell peppers. In the fall, try butternut squash or kale. In winter, roasted Brussels sprouts work well. These additions not only enhance flavor but also make the dish colorful and fun. You can store leftover salmon in an airtight container. Make sure to let it cool first. Place it in the fridge if you plan to eat it within two days. If you won’t eat it soon, freeze it. This way, you keep the flavors fresh. To reheat, take the salmon out of the fridge. Warm it in a skillet over low heat. Add a splash of broth or cream to keep it moist. You can also microwave it for about a minute. Just be careful not to overheat, or it can dry out. If you freeze the salmon, wrap each piece tightly in plastic wrap. Then place them in a freezer bag. Label the bag with the date. The salmon can last up to three months in the freezer. When you're ready to eat, thaw it in the fridge overnight before reheating. Yes, you can use frozen salmon. Just be sure to thaw it first. I recommend doing this overnight in the fridge. If you're in a hurry, you can thaw it in cold water for about an hour. After thawing, make sure to pat the salmon dry. This helps achieve a nice sear when cooking. You can serve creamy garlic butter salmon with several tasty sides. Here are some great options: - Steamed vegetables like broccoli or asparagus - Fluffy rice or quinoa - Mashed potatoes for a comforting touch - A fresh garden salad to add crunch Each of these sides pairs well with the rich sauce and salmon flavor. To check if salmon is cooked, look for a few signs. First, the flesh should be opaque and flake easily with a fork. You can also use a meat thermometer. The internal temperature should reach 145°F (63°C). If you see a light pink color in the middle, it may need a little more time. Cook it longer, but be careful not to overcook. Enjoy your perfectly cooked salmon! This blog post covered key ingredients, step-by-step instructions, and helpful tips for making creamy garlic butter salmon. You learned how to prepare salmon, make the sauce, and serve it nicely. We explored ingredient swaps and variations to keep things fresh. Plus, I shared storage tips for leftovers and answered common questions. Remember, cooking should be fun and creative. You can try your own twists and make this dish your own. Enjoy every bite!

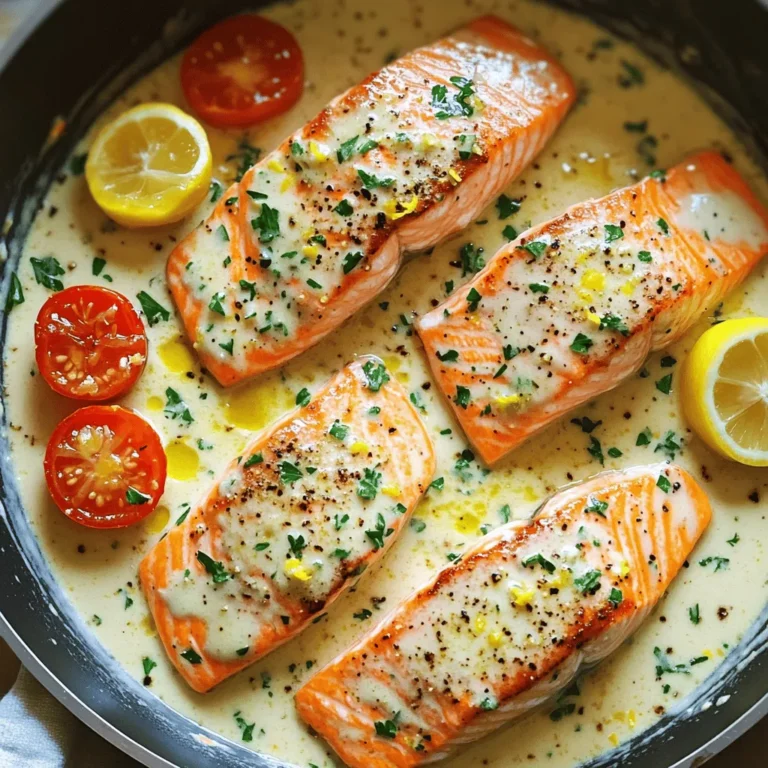
One Pan Creamy Garlic Butter Salmon Dish Delight

- 2 cups all-purpose flour - 1/3 cup brown sugar, packed - 1 tablespoon baking powder - 1/2 teaspoon salt - 1/2 teaspoon ground cinnamon - 1/4 cup unsalted butter, chilled and cubed - 1/2 cup heavy cream - 1 large apple, peeled and diced - 1/2 cup caramel sauce - 1 egg, beaten (for egg wash) You can swap all-purpose flour with whole wheat flour or almond flour. Both will add different flavors and textures. For caramel sauce, you may use homemade or store-bought. Homemade sauce offers a richer taste, but store-bought saves time. When picking your apple, Granny Smith works best. Its tartness balances the sweet caramel. Each scone contains about 250 calories. The breakdown is roughly 10 grams of fat, 35 grams of carbs, and 3 grams of protein. If you need gluten-free options, use gluten-free flour blends. These scones are vegetarian-friendly as well. 1. Preheat your oven to 400°F (200°C). This heat gives scones a nice rise. 2. Line a baking sheet with parchment paper. This helps prevent sticking. 3. In a large bowl, whisk together: - 2 cups all-purpose flour - 1/3 cup brown sugar, packed - 1 tablespoon baking powder - 1/2 teaspoon salt - 1/2 teaspoon ground cinnamon Make sure everything is mixed well. 1. Add the chilled, cubed butter to the flour mixture. Use your fingers or a pastry cutter to blend. You want it to look like coarse crumbs. 2. In another bowl, mix: - 1/2 cup heavy cream - 1 large apple, peeled and diced Gently fold this mix into the dry ingredients. 3. Be careful not to overmix. This keeps your scones light and fluffy. 1. Turn the dough out onto a floured surface. Shape it into a disk about 1 inch thick. 2. Cut the disk into 8 wedges, like slicing a pizza. Place the wedges on the baking sheet. 3. Brush the tops with: - 1 egg, beaten (for egg wash) This gives them a lovely golden color. 4. Bake for 15-18 minutes. Look for a light golden brown color. 5. Once baked, drizzle caramel sauce over the warm scones. Let it soak in for extra flavor. To make great scones, start with cold butter. This keeps the butter solid while mixing. When you cut it into the flour, it creates little pockets. These pockets help make your scones flaky. To achieve that perfect scone texture, blend the butter until it looks like coarse crumbs. Don’t overmix the dough once you add the wet ingredients. Just mix until combined. This helps keep your scones light and airy. Scones are best served warm. Pair them with hot tea or coffee for a delightful treat. You can also add a dollop of whipped cream or a side of apple butter. For presentation, serve your scones on a rustic wooden board. Drizzle extra caramel sauce over the top. Add small apple slices around the scones for an autumn touch. This makes for an attractive display. If your scones turn out too dry or crumbly, try adding a splash more cream. This will help bind the dough better. Make sure you’re not overbaking them, as that can also dry them out. Different ovens may cook unevenly. If you have a hot spot, rotate your baking sheet halfway through. This helps ensure that all scones bake evenly. Adjust the time if you notice they are browning too fast. {{image_2}} You can make your caramel apple scones even more exciting! One way is by adding nuts or dried fruits. Chopped walnuts or pecans bring a nice crunch. Dried cranberries or apricots add a sweet twist. Just mix them in with the apples to blend the flavors. Another fun idea is to experiment with spices beyond cinnamon. Try nutmeg or ginger for a warm kick. Cardamom can add a unique taste too. These spices change the flavor profile and make your scones stand out. Seasonal changes inspire tasty scone twists. For fall, think about adding pumpkin or maple flavors. A bit of pumpkin puree in the dough makes for a rich treat. Maple syrup can replace some sugar for a sweet touch. In summer, use fresh berries for a light and fruity snack. Blueberries or raspberries work well with apples. This gives you a fresh burst of flavor and color in each bite. For those who want healthier scones, there are great swaps. You can use gluten-free flour to make the recipe safe for everyone. Almond flour or coconut flour are tasty options. Just remember, you might need to adjust the liquid. If you want to cut down on sugar, try using less sugar or sugar alternatives. Honey or maple syrup can sweeten your scones while adding flavor. These options keep your scones delicious and a bit lighter. To keep your caramel apple scones fresh, follow these tips: - Short-term storage: Place the scones in an airtight container. They can last up to three days at room temperature. Keep them away from sunlight and heat. - Freezing scones: For longer storage, wrap each scone tightly in plastic wrap. Then, place them in a freezer-safe bag. They can last up to three months in the freezer. Let them cool completely before freezing. To enjoy your scones again, reheating them is key: - Maintain texture: Always aim to keep the scones moist. You can place a damp paper towel over them when reheating. - Oven vs. microwave: The oven is best for reheating. Preheat it to 350°F (175°C). Bake for about 10 minutes. If you use a microwave, heat for 20-30 seconds. Watch closely to prevent drying them out. Knowing how long your scones last is important: - At room temperature: Scones stay fresh for about three days. If they begin to harden, they are past their best. - Signs of spoilage: Look for any mold or off smells. If they feel very hard or dry, it's time to toss them. Enjoying them while fresh is key to their delicious taste! How do I make scones without heavy cream? You can use milk or yogurt instead. Both keep the scone moist and tasty. If you use yogurt, choose plain and whole-fat for best results. Can I make the dough ahead of time? Yes, you can! Wrap the dough in plastic wrap and keep it in the fridge. Use it within a day for the best flavor and texture. What’s the best way to serve scones? Serve them warm with extra caramel sauce. You can also add whipped cream or a scoop of ice cream for a sweet treat. How can I ensure my scones rise properly? Use cold butter and don’t overmix the dough. Make sure your baking powder is fresh too. These steps will help your scones rise nicely. Should I use a food processor for mixing? You can, but I prefer using my hands or a pastry cutter. This way, I can control the texture better. Can I use a different type of apple? Yes, you can use any apple you like! Sweet varieties like Fuji or Honeycrisp work well, too. Just remember, tart apples add a nice balance. Is it possible to make vegan caramel apple scones? Absolutely! Use coconut cream instead of heavy cream. For the caramel, choose a vegan recipe or store-bought option. Enjoy your delicious vegan treat! We covered how to make delicious caramel apple scones. You learned about the key ingredients, useful substitutions, and nutritional facts. I shared tips on achieving the perfect scone texture and serving ideas that impress. You also discovered how to store and reheat leftovers effectively. Feel confident to experiment with flavors and variations. Baking should be fun and creative. Enjoy your scone-making journey, and remember, practice improves your skills!

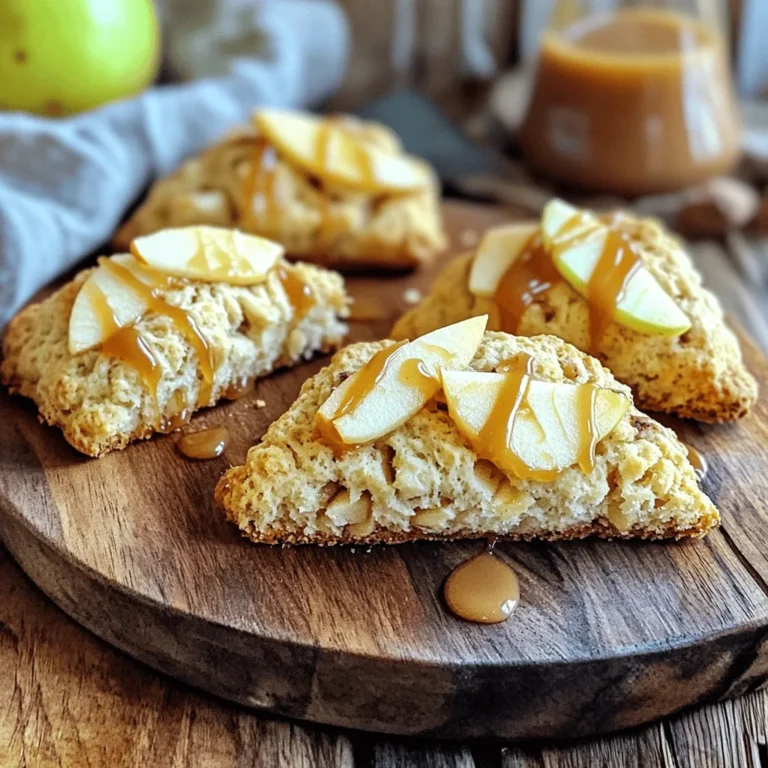
Caramel Apple Scones Irresistible and Easy Recipe

- 1 cup gingersnap cookies, crushed - 1 cup cream cheese, softened - 1 cup pumpkin puree - ½ cup granulated sugar - 1 cup heavy whipping cream - ½ teaspoon vanilla extract - 1 teaspoon ground cinnamon - ¼ teaspoon ground nutmeg - Whipped cream - Whole gingersnap cookies These ingredients make the perfect base for pumpkin cheesecake gingersnap parfaits. Each item plays a key role in creating layers of flavor and texture. The gingersnap cookies provide a sweet and spicy crunch at the bottom. The cream cheese gives a rich and creamy base. Pumpkin puree adds a warm, earthy taste. Granulated sugar sweetens the mix just right. Heavy whipping cream lightens the texture, making it airy. The spices are the stars of the show. Vanilla extract adds depth. Ground cinnamon gives warmth, while ground nutmeg adds a hint of spice. For garnishes, whipped cream on top adds a lovely finish. A whole gingersnap cookie creates a fun touch. These choices enhance the visual appeal and the flavor. Using these ingredients, you can craft a delightful dessert that everyone will enjoy. To start, grab a large mixing bowl. Add 1 cup of softened cream cheese, 1 cup of pumpkin puree, and ½ cup of granulated sugar. Beat these together until smooth and creamy. Next, mix in ½ teaspoon of vanilla extract, 1 teaspoon of ground cinnamon, and ¼ teaspoon of ground nutmeg. This blend creates a rich and flavorful filling. In a separate bowl, pour in 1 cup of heavy whipping cream. Add 2 tablespoons of powdered sugar to sweeten it. Use an electric mixer to whip the cream until soft peaks form. Be careful not to over-whip. Once done, gently fold this whipped cream into your pumpkin mix. This step makes the mixture light and airy. Now, let’s build the parfaits! Start by crushing 1 cup of gingersnap cookies. In serving glasses or jars, add a layer of crushed cookies at the bottom. Then, add a layer of your pumpkin cheesecake mixture on top. Use a spoon to smooth it out. Repeat these layers until you fill the glasses. Finish with a layer of the pumpkin cheesecake on top. For added flair, you can garnish with whipped cream and a whole gingersnap cookie. These parfaits not only taste great but also look stunning. Enjoy the process as you create this layered delight! To get the best texture, start with softened cream cheese. Cold cream cheese can cause lumps. Leave it out for a while before mixing. This way, it blends smoothly with the pumpkin puree. When whipping cream, be sure to chill your bowl and beaters. Cold tools help the cream whip faster. Whip until soft peaks form. This means the cream holds its shape but is still creamy. Gently fold the whipped cream into the pumpkin mix. This keeps it light and airy. You can boost the flavor with extra spices. Try adding ground ginger or cloves for a warm twist. A pinch of allspice can add depth too. Cookie choice matters! Use fresh gingersnap cookies for a crunchy base. Avoid stale cookies as they may not hold layers well. You can also try graham crackers for a different taste. Serving in clear glasses is a must. This way, everyone can see the lovely layers of pumpkin and cookie. It makes each parfait look special. For a sweet touch, drizzle honey over the top. Honey not only adds flavor but also makes it look pretty. Finish with a sprinkle of cinnamon for a nice touch. You can also add whipped cream and a whole gingersnap cookie as a garnish. This adds to the fun and flavor! {{image_2}} For a vegan pumpkin cheesecake parfait, swap out the cream cheese for a plant-based option. You can use cashew cream or tofu blended until smooth. For the whipped cream, coconut cream works great. Look for full-fat coconut milk. Use maple syrup or agave syrup instead of granulated sugar for sweetness. These swaps keep the dish creamy and delicious. If you need gluten-free gingersnap cookies, look for brands that use almond flour or gluten-free oats. You can also make your own with gluten-free flour. Always check labels to avoid cross-contamination. This ensures your parfait stays safe for those with gluten sensitivities. Add a festive touch by mixing in some dried cranberries or chopped pecans. These ingredients add color and texture to your parfaits. You might also want to adjust your spice levels. For a stronger holiday flavor, increase the cinnamon or add ground cloves. These changes make your dessert even more special for the season. To keep your parfaits fresh, store them in the fridge. Use airtight containers or cover the tops of the glasses with plastic wrap. This keeps moisture out and flavors in. You can store the parfaits for up to three days. After that, the gingersnap cookies may become too soft. You can freeze individual parfaits for longer storage. Just cover them tightly with plastic wrap and then foil. This helps prevent freezer burn. They can stay frozen for up to one month. When you're ready to eat, move them to the fridge overnight to thaw. Avoid microwaving, as that can ruin the texture. Before serving, check the parfaits. If they look a bit flat, gently stir the layers. This can refresh their look. Aim to eat the parfaits within three days of thawing for the best taste. If you wait longer, the layers may lose their charm. Enjoying them fresh will always be the best choice! You can easily prepare these parfaits in advance. First, make the pumpkin cheesecake filling and store it in the fridge. You can crush the gingersnap cookies and keep them in a sealed bag. When you are ready to serve, simply layer the cookies and filling in glasses. This way, the cookies stay crisp until serving. Make sure to chill the parfaits for at least one hour before serving. This helps the flavors meld nicely. Yes, you can use fresh pumpkin. First, cook the pumpkin until soft, then mash it well. Make sure to remove any excess water. Fresh pumpkin has a different texture than canned puree. This can affect the creaminess of your filling. If you prefer a richer taste, you may need to adjust the sugar and spices. Experiment to find your favorite flavor balance. To keep gingersnap cookies from getting soggy, layer them just before serving. You can also dip the cookies quickly in a bit of melted butter. This adds flavor and creates a barrier against moisture. Use thicker layers of the pumpkin cheesecake filling to help protect the cookies too. Keep the parfaits in the fridge until you are ready to serve them. This helps maintain the cookie's crunch. You learned how to create tasty pumpkin cheesecake parfaits. The main ingredients mix flavors well, while spices add warmth. I shared steps for the perfect texture and layering. Feel free to explore variations like vegan or gluten-free options. Remember, storage is key to keeping your treats fresh. Whether you serve these for a holiday or a simple treat, your guests will love them. Enjoy the process and savor every bite. Happy indulging!

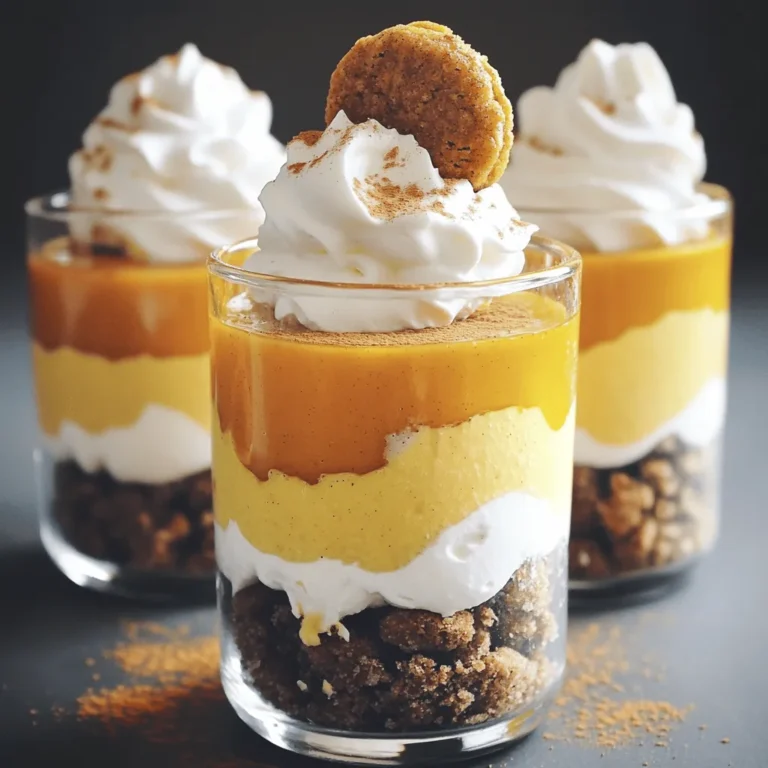
Pumpkin Cheesecake Gingersnap Parfaits Layered Delight

- Ground Chicken: This is the base of our meatballs. It keeps them juicy and tender. - Breadcrumbs: They help bind the meatballs and give them a nice texture. - Fresh Herbs: Green onions and cilantro add a bright flavor that lifts the dish. - Sweet Chili Sauce: This is the star of the show. It brings sweetness and heat. - Soy Sauce: It adds depth and umami to your meatballs. - Garlic & Ginger: These two ingredients bring warmth and zest to the flavors. - Sesame Oil: Just a touch adds a nutty flavor that enhances the dish. - Salt & Pepper: These simple seasonings make all the flavors pop. When you mix these ingredients, you create a symphony of flavor. The sweet chili sauce pairs perfectly with the ground chicken, while the fresh herbs add brightness. Garlic and ginger bring warmth, and soy sauce adds a savory touch. Each bite is a burst of flavor, making these meatballs irresistible! Mixing Meatball Ingredients In a large bowl, combine the ground chicken, breadcrumbs, and chopped green onions. Add cilantro, minced garlic, and grated ginger. Pour in the sweet chili sauce, soy sauce, and sesame oil. Season with salt and pepper. Use your hands or a spoon to mix everything well. You want a uniform mixture that will hold together when shaped. Shaping the Meatballs Next, take a small amount of the mixture and roll it into a ball about one inch wide. This size helps them cook evenly. Aim to make about 20 meatballs. Place them on a plate as you shape them. Keep them close but not touching so they won’t stick together. Preheating the Air Fryer Set your air fryer to 380°F (190°C). Let it preheat for about 5 minutes. This step is key for getting that golden brown finish on your meatballs. Air Frying Instructions Once preheated, arrange the meatballs in a single layer in the air fryer basket. Leave some space between each meatball for air to flow. Cook them for 10-12 minutes. Shake the basket halfway through to ensure even cooking. The meatballs should be golden brown and reach an internal temperature of 165°F (74°C). Drizzling Sweet Chili Sauce After cooking, drizzle more sweet chili sauce over the meatballs for added flavor. You can toss them gently to coat each one. This extra step makes them even more delicious. Presentation Tips Serve the meatballs on a nice plate. Garnish with extra chopped cilantro for color. If you have toothpicks, offer them for easy serving. This makes them perfect for parties or gatherings! Ideal Meatball Size Make each meatball about 1 inch wide. This size cooks evenly and stays juicy. It also helps them fit nicely in the air fryer basket. You should get around 20 meatballs from this recipe. Best Cooking Temperature Preheat your air fryer to 380°F (190°C). This temperature ensures that the meatballs cook through without drying out. The high heat gives them a nice golden brown color, too. Marinating Tips For extra taste, let the meatball mixture rest for 15-30 minutes before cooking. This time allows the flavors to meld together. If you have more time, marinate in the fridge for a few hours. The longer, the better! Adding More Spice If you love heat, add crushed red pepper flakes to the mix. Start with 1/4 teaspoon and adjust to your liking. You can also drizzle extra sweet chili sauce on top before serving for a sweet and spicy kick. Overcrowding the Air Fryer Do not stack the meatballs in the basket. Crowding them leads to uneven cooking. Cook in batches if needed. This way, each meatball gets enough hot air to become crisp. Not Preheating Properly Always preheat your air fryer first. Skipping this step can cause your meatballs to cook unevenly. Set the timer for 5 minutes to ensure it reaches the right temperature. {{image_2}} You can swap ground chicken for other meats. Ground turkey or beef works well too. Use ground turkey for a leaner option. Ground beef gives a richer flavor. If you need a gluten-free option, replace regular breadcrumbs. Use gluten-free breadcrumbs easily found in stores. This keeps the meatballs tasty without gluten. To kick up the heat, add spices like crushed red pepper. This small change gives a nice kick to your meatballs. You can also try different sauces. Teriyaki or BBQ sauce can add a fun twist. Each sauce changes the flavor profile. For low-carb or keto-friendly options, skip the breadcrumbs. You can use ground nuts or almond flour instead. This keeps the meatballs low in carbs. If you're looking for vegan alternatives, use plant-based ground meat. Mix in some finely chopped veggies for extra texture. You’ll still enjoy delicious meatballs without meat. To keep your meatballs fresh, place them in an airtight container. Store them in the fridge. They will last for up to four days. Be sure to let them cool before sealing. This helps prevent moisture buildup. To freeze meatballs, let them cool completely first. Then, spread them on a baking sheet. Place the sheet in the freezer for about an hour. This keeps them from sticking together. After they freeze, transfer the meatballs to a freezer bag. Label the bag with the date. They can last in the freezer for up to three months. To reheat meatballs, place them in the air fryer at 350°F (175°C). Heat them for about 5-7 minutes. This keeps them crispy and warm. For added flavor, drizzle some sweet chili sauce on top. You can serve them with rice or noodles for a filling meal. They also pair well with a fresh salad for a lighter option. Air frying meatballs takes about 10 to 12 minutes. Preheat your air fryer to 380°F (190°C) for five minutes. Then, place your meatballs in a single layer, leaving space between them. Shake the basket halfway through to help them cook evenly. The meatballs should be golden brown with an internal temperature of 165°F (74°C). Yes, you can use frozen chicken. Just make sure to thaw it first. You can thaw chicken in the fridge overnight or use the microwave. Once thawed, follow the same steps in the recipe. The texture may vary slightly, but they will still taste great. You can serve these meatballs with rice, noodles, or a fresh salad. They pair well with steamed veggies or a side of sweet chili sauce for dipping. You can even use toothpicks for easy serving at parties. Enjoy your meal with friends and family! These chicken meatballs are easy and tasty. We covered key ingredients, like ground chicken and fresh herbs. I shared steps to mix, shape, and cook them in an air fryer. You learned how to add flavors and avoid common mistakes. You can also try fun variations and storage tips for later. Try these tips to enjoy your meatballs to the fullest. A little spice or sauce can make a big difference. Enjoy your cooking adventure!

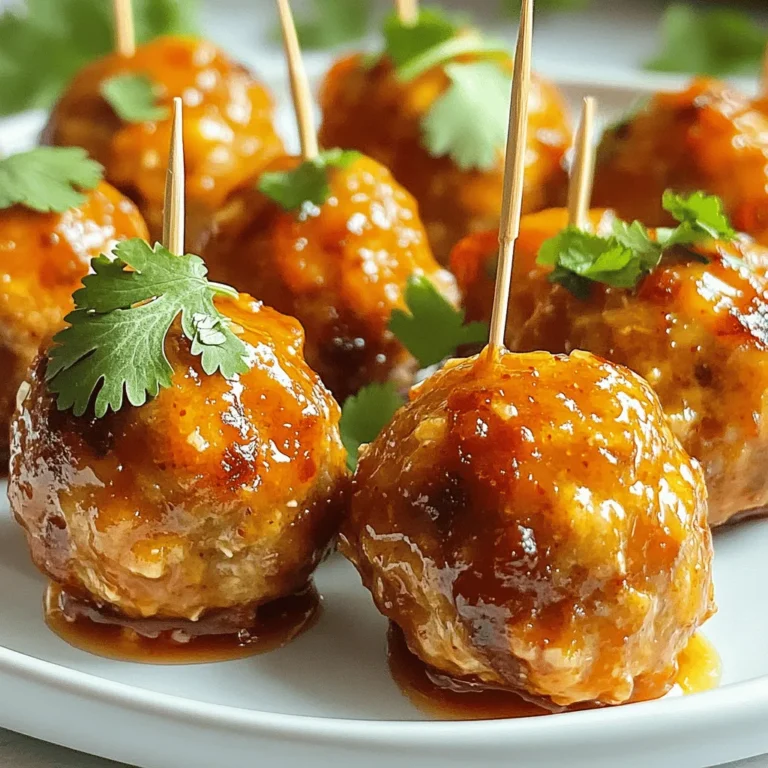
Air Fryer Sweet Chili Chicken Meatballs Flavor Boost

- Apples: You will need 6 large apples. I suggest using a mix of Granny Smith and Fuji. This blend gives a nice balance of tart and sweet flavors. Make sure to peel, core, and chop them into small pieces. - Sweeteners: We use 1 cup of brown sugar and 1 cup of granulated sugar. Brown sugar adds a rich, deep flavor, while granulated sugar helps balance the sweetness. - Spices: The spices are key. You will need: - 1 tablespoon of cinnamon - 1 teaspoon of ground nutmeg - 1 teaspoon of ground ginger - 1/2 teaspoon of allspice - 1/4 teaspoon of cloves - 1/4 teaspoon of salt These spices create a warm and cozy taste that makes the apple butter special. - Additional ingredients: You will also need 1 tablespoon of lemon juice. This helps brighten the flavor. Lastly, add 1/4 cup of water. The water helps the apples cook down nicely in the slow cooker. How to peel, core, and chop apples Start with 6 large apples. I like a mix of Granny Smith and Fuji for great flavor. First, wash the apples well. Use a peeler to remove the skin. After peeling, use a corer to take out the core. Then, chop the apples into small pieces. Aim for chunks about one inch. This size helps them cook evenly. Mixing sugar and spices: Techniques for best results Next, grab a bowl and add 1 cup of brown sugar and 1 cup of granulated sugar. Then, add 1 tablespoon of lemon juice. Now, sprinkle in 1 tablespoon of cinnamon, 1 teaspoon of nutmeg, 1 teaspoon of ginger, 1/2 teaspoon of allspice, 1/4 teaspoon of cloves, and 1/4 teaspoon of salt. Mix well until everything is combined. This step is key for even flavor. Slow cooking settings: Low heat importance Pour the sugar and spice mix over the apples in your slow cooker. Add 1/4 cup of water to help the apples cook. Cover the slow cooker and set it to low heat. Let it cook for 6 to 8 hours. Low heat is important. It breaks down the apples slowly, making them soft and sweet. Importance of stirring occasionally While cooking, remember to stir the mixture occasionally. This ensures all the apples get coated in the spices and sugar. Stirring helps prevent sticking and burning. It also allows the flavors to blend nicely. Pureeing with immersion blender vs. regular blender When the apples are soft and the mixture is thick, it's time to puree. You can use an immersion blender right in the slow cooker. This is quick and easy. If you prefer, you can transfer the mix in batches to a regular blender. Just be careful with hot liquids. Adjusting flavors: When and how to taste After pureeing, taste your apple butter. If you want it sweeter, add more sugar. If you want more spice, add a pinch of cinnamon or nutmeg. Cook for an extra 30 minutes on high if you adjust flavors. This helps deepen the taste. Enjoy the rich aroma as it cooks! For the best apple butter, I love using a mix of Granny Smith and Fuji apples. Granny Smith brings a nice tartness, while Fuji adds sweetness. This combo makes your apple butter rich in flavor. You can also try Honeycrisp or Braeburn apples for a twist. When it comes to storage, keep your apples in a cool, dark place. If you have a lot, store them in the fridge. This helps them stay fresh longer. Avoid washing them until you're ready to use them. Excess moisture can cause them to rot. To give your apple butter a unique twist, you can add spices like cardamom or vanilla. They add warmth and depth. A splash of maple syrup can also enhance sweetness. If you want it sweeter, add more brown sugar or granulated sugar. For thickness, if your apple butter is too runny, let it cook longer with the lid off. This helps reduce excess liquid. Always taste your apple butter before finishing. This way, you can adjust the sweetness or spice levels to your liking. {{image_2}} You can change the spices in this apple butter for new tastes. Try adding cardamom for warmth or vanilla for sweetness. Each spice brings a unique flavor. In the fall, think about using pumpkin spice. This mix usually includes cinnamon, nutmeg, and ginger. It can make your apple butter feel even cozier and festive. You can make this apple butter a bit healthier. Try using honey or maple syrup instead of sugar. Both options add natural sweetness. If you want a low-calorie version, use less sugar overall. You can also add more apples to take the place of some sugar. This keeps the flavor strong while cutting calories. For the best results, store your apple butter in glass jars. Mason jars work great. Make sure they are clean and dry before filling them. If you want to keep it simple, use a plastic container with a tight lid. You can store it in the fridge for a short time or can it for longer use. If you choose refrigeration, just place the jars in the fridge after they cool. For canning, follow safe methods to seal jars properly. Apple butter lasts about two weeks in the fridge. It's best to check for any signs of spoilage before you use it. If you seal your jars correctly, apple butter can last for a year on the shelf. Make sure to store them in a cool, dark place. When you open a jar, put it back in the fridge and use it within two weeks. This way, you enjoy the best taste and quality! Can I use frozen apples for this recipe? Yes, you can use frozen apples. They should be thawed first and then drained. This way, you avoid too much extra liquid in your apple butter. The flavor will still be good, but fresh apples are best. How do I know when the apple butter is done? The apple butter is done when it thickens. The apples should be very soft. You can check by stirring. If it stays in place, it’s ready. A good sign is when it looks like a thick sauce. Is it safe to can apple butter at home? Yes, it is safe to can apple butter at home. Make sure to follow safe canning practices. This includes using clean jars and proper sealing methods. Always check for signs of spoilage before use. Can I make this recipe without a slow cooker? Yes, you can make this recipe on the stove. Cook the apples in a pot over low heat. Stir often to prevent sticking. It will take less time, about 2 to 3 hours. Just keep an eye on it. In this blog post, we explored how to make slow cooker spiced apple butter. We reviewed the key ingredients like apples, sugars, and spices. You learned the step-by-step process, from prepping apples to finalizing the taste. I shared tips on choosing apples and suggestions for flavor enhancements. Lastly, we discussed how to store your apple butter and answered common questions. Now, you have everything needed to create a delicious batch. Enjoy the sweet taste and warm aromas of homemade apple butter.

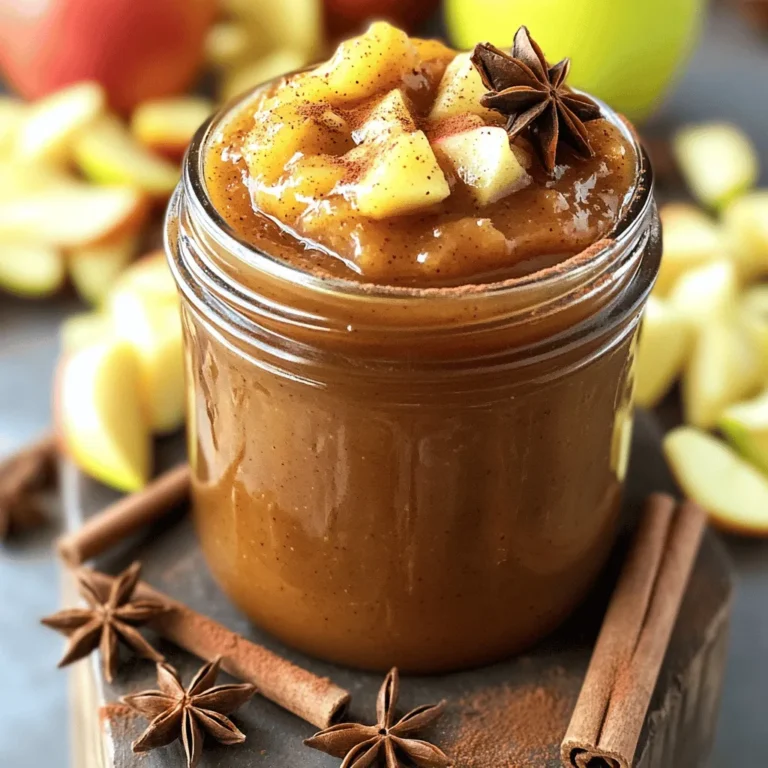
Slow Cooker Spiced Apple Butter Recipe Delight

- 6 bone-in chicken thighs, skin-on - 2 cups baby potatoes, halved - 1 cup green beans, trimmed - 1/4 cup Dijon mustard - 1/4 cup fresh lemon juice - 2 tablespoons olive oil - 3 cloves garlic, minced - 1 teaspoon dried thyme - 1 teaspoon smoked paprika - Salt and pepper, to taste - Lemon slices - Fresh parsley, chopped Gathering these ingredients sets you up for success. The chicken thighs are the star, bringing flavor and juiciness. Baby potatoes add heartiness and a nice texture. Green beans balance the meal with their crunch. For the marinade, I love using Dijon mustard and lemon juice. They give the chicken a zesty kick. The garlic, thyme, and smoked paprika boost the flavor even more. Don't skip the garnishes. Fresh lemon slices and parsley make the dish pop. They add color and brightness to your plate. Enjoy the cooking process with these fresh and simple ingredients! - First, preheat your oven to 425°F (220°C). This helps the chicken cook evenly. Line your sheet pan with parchment paper for easy cleanup. - In a mixing bowl, whisk together these ingredients: - 1/4 cup Dijon mustard - 1/4 cup fresh lemon juice - 2 tablespoons olive oil - 3 cloves garlic, minced - 1 teaspoon dried thyme - 1 teaspoon smoked paprika - Salt and pepper, to taste - Now, take the chicken thighs and put them in a large zip-lock bag or bowl. Pour half of the mustard-lemon mixture over the chicken. Toss well to coat. Let the chicken marinate for at least 30 minutes. You can also marinate it overnight for more flavor. - While the chicken marinates, prepare your vegetables. In another bowl, toss the halved baby potatoes with the leftover mustard-lemon mixture. Add more salt and pepper if you like. - After marinating, arrange the chicken thighs skin-side up on one side of the sheet pan. Place the seasoned baby potatoes next to the chicken. - Bake the chicken and potatoes in the preheated oven for about 20 minutes. This helps them start to cook and brown. - After 20 minutes, add the green beans to the pan. Drizzle them with some olive oil and season with salt and pepper. Return the pan to the oven. Bake for another 15-20 minutes. The chicken should reach an internal temperature of 165°F (74°C), and the vegetables should be tender. - Once done, carefully remove the sheet pan from the oven. Let the dish rest for a few minutes. Garnish with lemon slices and freshly chopped parsley before serving. Enjoy your meal! Marinating your chicken is key for great flavor. A good marination time is at least 30 minutes. This lets the chicken soak up the tasty Dijon and lemon. You can even marinate overnight for a stronger taste. Use a zip-lock bag for easy coating. Make sure to coat each thigh well. Cook your chicken until it reaches 165°F (74°C). This keeps it safe to eat. Use a meat thermometer to check. For the veggies, test them with a fork. They should be tender but not mushy. This gives the dish a nice texture. For presentation, serve directly from the sheet pan. It looks rustic and inviting. You can also transfer everything to a platter for a special touch. Drizzle leftover juices over the chicken and veggies. This adds more flavor and makes it look appealing. {{image_2}} You can switch up the chicken in this recipe. Try using boneless chicken thighs or breasts for a quicker cook time. They will still be juicy and flavorful! If you want to go for a lighter option, substitute the chicken with fish. Salmon or cod works well. For a plant-based choice, tofu is a great alternative. Just make sure to press it well to remove excess moisture. This recipe is flexible with vegetables. You can add bell peppers, zucchini, or carrots for extra color and flavor. Seasonal veggies like asparagus or Brussels sprouts also fit well. Using what’s fresh and in-season makes this dish even better. Don’t hesitate to mix and match your favorites! Want to change the flavors? Add fresh herbs like rosemary or basil to the marinade for a new twist. You can also try different spices, such as cumin or coriander. For a citrus boost, use lime juice instead of lemon. If you fancy a bolder taste, experiment with different mustard types. Whole grain mustard adds texture, while spicy mustard gives a kick. The options are endless! To keep your leftovers fresh, place them in an airtight container. Store them in the fridge. Use containers that fit the amount of food you have. Glass or plastic containers work well. Make sure to cool the food before sealing it. This prevents moisture build-up. Leftovers will stay good for up to three days. You can reheat the chicken and vegetables in a few ways. The oven works great for this. Preheat it to 350°F (175°C). Place the food on a baking sheet and cover it with foil. This keeps the chicken juicy. Heat for about 15 to 20 minutes. If you want to use a microwave, place food in a microwave-safe dish. Heat on medium power. Stir halfway through to avoid cold spots. You can freeze this dish, too! Make sure the chicken and veggies are cool first. Place them in freezer-safe bags or containers. Squeeze out as much air as possible. This helps prevent freezer burn. You can freeze leftovers for up to three months. When you’re ready to eat, thaw the dish in the fridge overnight. After that, reheat it using the oven or microwave. Enjoy your meal just as good as fresh! You should marinate chicken thighs for at least 30 minutes. This gives the flavors time to soak in. For best results, try to marinate them overnight. The longer you marinate, the more flavor your chicken will have. Keep the chicken in the fridge while it marinates. The safe internal temperature for chicken thighs is 165°F (74°C). This ensures that any harmful bacteria are killed. Use a meat thermometer to check the temperature. Insert it into the thickest part of the thigh, avoiding bone. This step is crucial for your safety. Yes, you can prepare parts of this recipe ahead of time. You can marinate the chicken the night before. This saves time on the day you want to cook. You can also wash and cut the veggies in advance. Keep everything in the fridge until you are ready to bake. This dish combines chicken thighs, potatoes, and green beans in a tasty meal. The marinade adds great flavor, and marinating time is key. Baking ensures everything cooks well together. Feel free to mix in other proteins or veggies for variety. Storing leftovers properly keeps them fresh for later. You can also freeze this meal. With these tips, you can enjoy a fun and tasty dinner anytime.

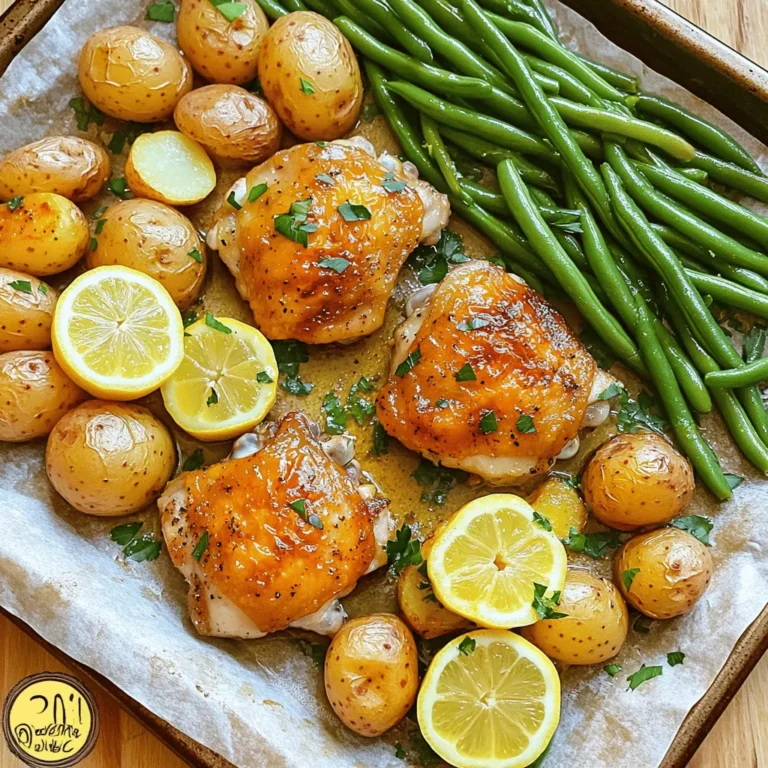
Sheet Pan Lemon Dijon Chicken Thighs Simple Recipe

PREV 1 … 19 20 21 … 57 NEXT
secrets pice kitchen

explore

DessertsDinnerAppetizersDrinks

Our Policies

  • Cookie Policy
  • Copyright Policy
  • Disclaimer
  • GDPR Policy
  • Terms Of Use
Back to Top
  • About
  • Contact Us
  • Privacy Policy
© 2025 secrets pice kitchen