FREE DINNER EBOOK! Get your copy!
  • Cookie Policy
  • GDPR Policy
  • Disclaimer
  • Terms Of Use
  • Visit my other site: Fun Cookie Recipes
secrets pice kitchen
  • Home
  • Dinner
  • Desserts
  • Drinks
  • Appetizers
  • Contact
  • About
  • Privacy Policy
  • Home
  • Dinner
  • Desserts
  • Drinks
  • Appetizers
  • Contact
  • About
  • Privacy Policy
  • Cookie Policy
  • GDPR Policy
  • Disclaimer
  • Terms Of Use
Visit my other site: Fun Cookie Recipes

HOME / CATEGORIES /

Latest

- 1 block (14 oz) firm tofu, drained and pressed - 3 tablespoons cornstarch - 3 tablespoons vegetable oil (for frying) - 1 red bell pepper, sliced - 1 yellow bell pepper, sliced - 2 cups broccoli florets - 4 cloves garlic, minced - 2 tablespoons soy sauce - 1 tablespoon chili paste (adjust to taste) - 1 tablespoon honey or maple syrup - 1 teaspoon sesame oil The main ingredients create a strong base for flavor. Firm tofu gives a great texture. It absorbs the sauce well, making every bite tasty. The vibrant bell peppers add color and crunch. Broccoli brings a nice, fresh taste. Garlic adds depth, while soy sauce and chili paste create a balanced flavor. Honey or maple syrup adds a hint of sweetness. Sesame oil ties everything together with its rich aroma. - Green onions, chopped (for garnish) - Sesame seeds (optional, for garnish) Garnishes like green onions and sesame seeds enhance the dish. They add color and texture. Green onions give a fresh taste. Sesame seeds add a nice crunch. Using these makes your stir fry look even more appealing. Don't skip them if you want to impress! 1. Draining and pressing the tofu: Start with a block of firm tofu. Drain the water from the package. Wrap the tofu in a clean towel. Place a heavy object on top to press out extra water for about 15 minutes. 2. Cutting the tofu into cubes: Once pressed, unwrap the tofu. Cut it into 1-inch cubes. This size helps the tofu cook evenly and absorb flavors. 3. Coating with cornstarch: In a large bowl, toss the tofu cubes with 3 tablespoons of cornstarch. Make sure each piece is fully coated. This helps create a crispy texture when frying. 1. Heating oil in skillet or wok: Heat 2 tablespoons of vegetable oil in a large skillet or wok over medium-high heat. This oil will help fry the tofu and add flavor. 2. Frying tofu until golden brown: Carefully add the tofu cubes to the hot oil. Fry them for about 8-10 minutes, turning occasionally. You want them golden brown on all sides. Remove the tofu and set it aside. 3. Adding vegetables and stir-frying until tender: In the same skillet, add 1 tablespoon of oil. Now, add the sliced red and yellow bell peppers and broccoli florets. Stir-fry for about 5-7 minutes until the veggies are tender-crisp. 1. Adding garlic and sautéing: Toss in 4 cloves of minced garlic with the vegetables. Stir-fry for another 1-2 minutes until you smell the garlic. This adds a nice aroma and flavor to the dish. 2. Mixing sauce ingredients: In a small bowl, combine 2 tablespoons of soy sauce, 1 tablespoon of chili paste, 1 tablespoon of honey or maple syrup, and 1 teaspoon of sesame oil. Mix well. 3. Tossing everything together: Return the golden tofu to the skillet. Pour the sauce over the tofu and veggies. Toss everything gently to coat well. Cook for another 2-3 minutes to heat through. Adjust seasoning if needed. To get crispy tofu, start by pressing it. This step removes water and helps the tofu fry better. You can use a towel and a weight, like a can. After pressing, cut the tofu into 1-inch cubes. Next, coat the cubes in cornstarch. A good coating will help them get golden and crunchy when you fry them. You can adjust the sauce to fit your taste. If you like it sweeter, add more honey or syrup. If you want more heat, add extra chili paste. You can also mix in different veggies. Try carrots, snap peas, or mushrooms for variety. Adding proteins like tempeh or chicken can make this dish heartier. Serve this stir fry over fluffy jasmine rice or quinoa. Both pair well with the flavors. For a beautiful look, use green onions as a garnish. Sprinkle sesame seeds on top for added crunch. A colorful plate not only looks good but also makes your meal more inviting. {{image_2}} You can easily make this dish even more vegan-friendly. Using maple syrup instead of honey adds a nice touch of sweetness. It works well with the spicy flavors. You can also adjust the chili paste. If you like it hot, add more. If you prefer mild, use less. Feel free to mix up your veggies! You can add carrots, snap peas, or zucchini. Using seasonal veggies is also great. In spring, try asparagus. In autumn, add mushrooms. Each veggie will change the taste and texture, keeping your meal exciting. If you want to change the protein, tempeh works well. It has a nutty flavor that pairs nicely with the sauce. You can also use chicken or shrimp. Just remember to adjust your cooking time. Chicken needs about 10 minutes, and shrimp cooks in just a few minutes. This way, you get the best results every time! After enjoying your Chili Garlic Tofu Stir Fry, store any leftovers right away. Place the stir fry in an airtight container. This keeps the meal fresh and tasty. You can refrigerate it for up to three days. Use glass or plastic containers. Glass is great for reheating in the oven or microwave. Make sure to cool the stir fry before sealing it. This helps prevent moisture build-up. To reheat your stir fry, use the microwave or a skillet. If using the microwave, place the stir fry in a bowl. Add a splash of water to keep it moist. Cover with a damp paper towel. Heat for one minute, then stir. You can also use a skillet on low heat. Add a little oil or water to avoid dryness. Stir gently until heated through. This way, you keep the flavors and textures intact. If you want to freeze the stir fry, wait until it cools. Place it in a freezer-safe container. It can last for up to two months in the freezer. To thaw, move it to the fridge overnight. For quick thawing, use the microwave on the defrost setting. After thawing, reheat it using the methods above. This keeps the stir fry delicious and fresh for another meal. Yes, you can make this recipe gluten-free. To do this, swap the soy sauce for tamari. Tamari is made without wheat and has a similar taste. You can also use coconut aminos as a soy sauce substitute. This option is also gluten-free and adds a mild sweetness. To add more heat, increase the amount of chili paste. Start with an extra half tablespoon and taste. You can also add fresh chili peppers, like sliced jalapeños or serranos, during cooking. Another way to spice up the dish is to sprinkle in red pepper flakes before serving. Adjust the heat to suit your taste. This stir fry pairs well with fluffy jasmine rice or fluffy quinoa. Both options soak up the sauce nicely. You can also serve it with steamed rice noodles for a different texture. A simple side salad can add freshness. Consider a cucumber or Asian slaw for a crisp contrast. In this blog post, I covered how to make a tasty Chili Garlic Tofu Stir Fry. We looked at key ingredients like firm tofu, fresh vegetables, and flavorful seasonings. I shared clear steps for preparing, cooking, and combining flavors. You also got tips for crispy tofu and suggestions for custom flavors. Remember, you can tweak this recipe as you like. Whether you want to change the vegetables or add a protein, feel free to experiment. Enjoy your cooking journey!

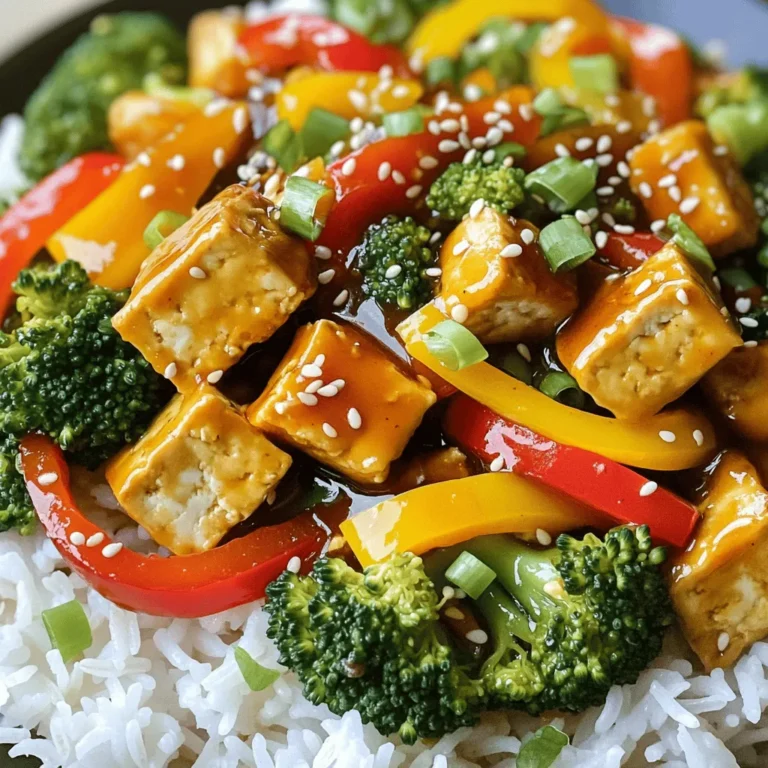
Chili Garlic Tofu Stir Fry Flavorful and Simple Meal

- 2 cans of refrigerated cinnamon rolls (12 rolls each) - 3 medium apples (like Granny Smith or Honeycrisp), peeled and diced - 1 cup caramel sauce (store-bought or homemade) - 1 teaspoon ground cinnamon - ½ cup chopped pecans (optional) - ¼ cup brown sugar - 2 tablespoons butter, melted - 1/4 teaspoon salt - 1/2 cup powdered sugar (for icing) - 1–2 tablespoons milk (for icing) This recipe starts with two cans of refrigerated cinnamon rolls. They save time and are easy to use. Next, I choose three medium apples. Granny Smith brings a tart taste, while Honeycrisp adds sweetness. Both work great. I love to use one cup of caramel sauce. You can buy it or make your own. The sauce adds a rich flavor. You will also need ground cinnamon, which gives warmth to the dish. Optional pecans add crunch and depth. If you choose to include them, chop them up. Brown sugar enhances the sweetness and balances the tart apples. Melted butter adds richness, while salt boosts all the flavors. Finally, for the icing, mix half a cup of powdered sugar with one to two tablespoons of milk. This will create a sweet drizzle to top your bake. Each ingredient plays a role in making this treat so delicious! 1. First, preheat your oven to 350°F (175°C). This helps the bake cook evenly. 2. Next, grease a 9x13-inch baking dish with non-stick spray or butter. This keeps the bake from sticking. 3. Now, prepare the apples. Peel and dice three medium apples. I love using Granny Smith or Honeycrisp for their balance of sweet and tart. 4. In a large bowl, mix the diced apples with one teaspoon of ground cinnamon, ¼ cup of brown sugar, and ½ cup of chopped pecans if you like. Toss well to coat the apples and set this mixture aside. 1. Open the two cans of refrigerated cinnamon rolls. Cut each roll into quarters. This makes them easy to layer. 2. Place the quartered cinnamon rolls evenly in the greased baking dish. Spread them out so they cook well. 3. Spoon one cup of caramel sauce over the cinnamon roll pieces. Make sure to cover them generously. 4. Next, add the apple mixture on top of the cinnamon rolls. Spread it out evenly for a balanced flavor. 5. Drizzle two tablespoons of melted butter over the apple and roll mixture. This adds richness and flavor. 1. Place the baking dish in your preheated oven. Bake for 25-30 minutes. 2. Keep an eye on it. The cinnamon rolls should puff up and turn golden brown. The edges should bubble with caramel. 3. To check for doneness, look for a fluffy texture and a golden color. The bake should be warm and inviting. When choosing apples, look for firm ones that are not bruised. Granny Smith offers a nice tartness. Honeycrisp adds a sweet crunch. You can mix both for great flavor. To avoid soggy cinnamon rolls, make sure you don’t overload with caramel. Pour just enough to coat the rolls. Also, bake until golden brown and fluffy. This keeps the rolls light and tasty. Serve this caramel apple cinnamon roll bake warm from the oven. It looks great in a simple baking dish. Add a sprinkle of pecans on top for a nice crunch. Pair it with vanilla ice cream. The cold ice cream melts slightly on the warm bake. This creates a creamy, delicious mix. You can also add a drizzle of extra caramel on top for a sweet finish. {{image_2}} If you want to change things up, you can switch ingredients. For nuts, pecans are great, but walnuts or almonds work too. They add a nice crunch. You can also skip nuts if you prefer. For toppings, try using chocolate chips or crushed graham crackers. They add a fun twist. If you want to change the fruit, pears or peaches can replace apples. The bake will taste different but still delicious. You can even use a mix of fruits for added flavor. If you need a gluten-free option, use gluten-free cinnamon rolls. These are easy to find at most stores. They work well in this recipe. Just check the packaging for other gluten-filled ingredients. For a vegan version, swap the butter for coconut oil or vegan butter. Use dairy-free milk in the icing too. You can also find vegan caramel sauce. With these swaps, everyone can enjoy this tasty treat! After enjoying your caramel apple cinnamon roll bake, store any leftovers properly. Place them in an airtight container. This keeps them fresh and moist. You can refrigerate the bake for up to three days. If you want to save it for longer, you can freeze it. Wrap the dish tightly in plastic wrap, then foil. It will keep well in the freezer for up to three months. To reheat your leftover bake, first, take it out of the fridge or freezer. If frozen, let it thaw in the fridge overnight. For best results, preheat your oven to 350°F (175°C). Place the bake in an oven-safe dish, cover it with foil, and heat for about 15-20 minutes. This keeps it moist and warms it evenly. If reheating from frozen, it may take a bit longer, around 30-40 minutes. Enjoy it warm for the best taste and texture! How to make caramel sauce at home? Making caramel sauce at home is simple. You need sugar, butter, and cream. Start by heating 1 cup of sugar in a saucepan. Stir it until it melts and turns golden brown. Then, add 6 tablespoons of butter and mix well. Finally, slowly pour in 1/2 cup of heavy cream. Stir until smooth. Let it cool before using. Can I use frozen cinnamon rolls instead? Yes, you can use frozen cinnamon rolls. Just thaw them first. Let them sit at room temperature for about 30 minutes. Once thawed, cut them into quarters and follow the recipe as usual. This will save you time and still taste great! What to do if the bake is too dry? If your bake turns out dry, try adding more caramel sauce. Drizzle it over the top after baking. You can also serve it with a scoop of ice cream. This adds moisture and flavor. How to fix overbaked cinnamon rolls? If the rolls are overbaked, you can soften them. Add a few drops of water to the baking dish. Cover it with foil and warm it in the oven for a few minutes. This should help bring back some moisture. This blog post covered a fun and tasty recipe using simple ingredients. We explored how to make a delicious baked dish with cinnamon rolls and apples, topped with caramel. I shared steps for prep, baking, and serving. You learned tips for perfecting your dish and even some tasty variations. In summary, this recipe is easy and sure to impress. Enjoy making it your own!

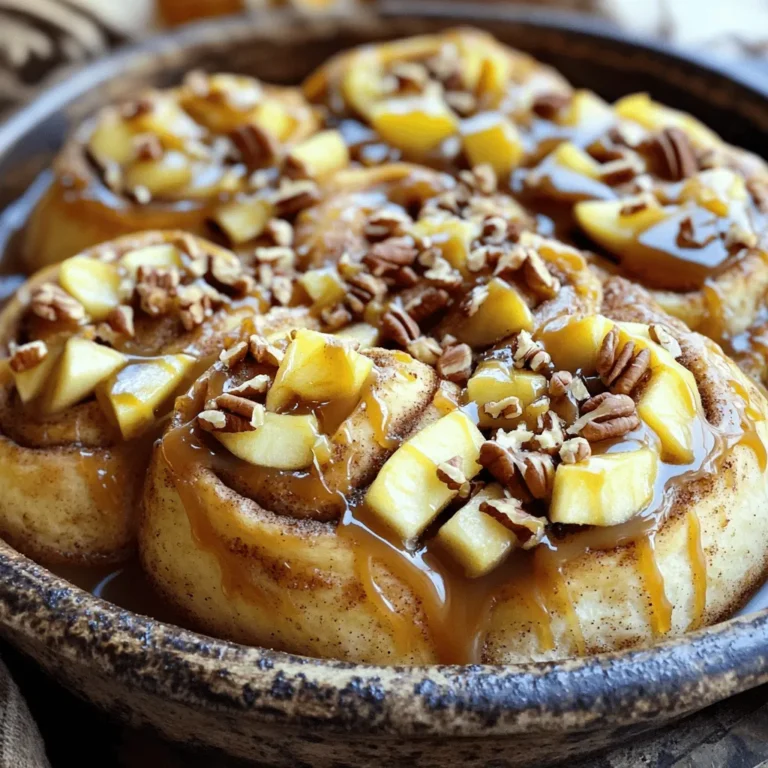
Caramel Apple Cinnamon Roll Bake Simple and Tasty Treat

- 1 cup orzo pasta - 1 cup fresh spinach, chopped - 1/2 cup sun dried tomatoes, julienned - 1/2 cup feta cheese, crumbled - 1/4 cup Kalamata olives, pitted and sliced - 2 cloves garlic, minced - 1 tablespoon olive oil - 1 tablespoon lemon juice - 1/4 teaspoon red pepper flakes (optional) - Salt and pepper to taste - Fresh basil leaves for garnish You can change the dish to fit your taste. Here are a few ideas: - Add grilled chicken for protein. - Use arugula instead of spinach for a peppery taste. - Swap feta for goat cheese for a creamier texture. - Toss in some roasted red peppers for extra color and flavor. - Orzo pasta: It cooks quickly and absorbs flavors well. It's a great base for this dish. - Fresh spinach: This leafy green is rich in vitamins and adds a nice color. - Sun dried tomatoes: They bring a sweet and tangy flavor that brightens the dish. - Feta cheese: Feta adds creaminess and saltiness that balance the flavors. - Kalamata olives: These olives add a briny taste, adding depth to each bite. - Garlic: This ingredient gives a savory aroma and enhances the overall flavor. - Olive oil: It adds richness and helps to marry all the flavors together. - Lemon juice: The acidity from lemon juice brightens the dish. - Red pepper flakes: These optional flakes add a touch of heat for those who like spice. - Salt and pepper: These seasonings elevate all the flavors in the dish. - Fresh basil: This herb adds a fragrant finish and a pop of color on top. Start by gathering your ingredients. You will need orzo pasta, fresh spinach, sun dried tomatoes, feta cheese, Kalamata olives, garlic, olive oil, lemon juice, and seasonings. Chop the spinach and julienne the sun dried tomatoes for easy mixing. This will make your cooking process smooth and quick. First, boil salted water in a large pot. Add the orzo and cook it until it is al dente. This usually takes about 8-10 minutes. Drain the orzo and set it aside. In the same pot, heat olive oil over medium heat. Add minced garlic and sauté it for about 30 seconds. You want it fragrant but not burnt. Then, add the sun dried tomatoes and cook for 1-2 minutes. This step helps release their rich flavor. Next, stir in the chopped spinach. Cook until it wilts, which takes about 2-3 minutes. After that, add the drained orzo back into the pot. Toss everything together well. Stir in crumbled feta, sliced olives, and lemon juice. If you like a bit of heat, add the red pepper flakes. Mix until all ingredients combine nicely. Finally, season the dish with salt and pepper to taste. Remove from heat and garnish with fresh basil leaves. For perfect orzo, always cook it al dente. This keeps the texture firm and prevents mushiness. Use high-quality sun dried tomatoes for a richer flavor. Fresh spinach adds a nice color and nutrients. Don't skip the lemon juice; it brightens the dish. Let the dish sit for a few minutes before serving. This allows the flavors to meld. If you want it creamier, add more feta cheese. Enjoy this colorful, tasty meal any night of the week! To cook orzo just right, start with plenty of salted water. Bring it to a boil before adding the orzo. This helps the pasta cook evenly. Follow the package instructions for timing. Usually, orzo needs about 8-10 minutes. You want it al dente, meaning it should have a slight bite. After cooking, drain the orzo well and set it aside. Avoid rinsing, as this washes away the starch that helps sauces cling. To boost the flavors in your Sun Dried Tomato Spinach Orzo, use fresh ingredients. Fresh garlic adds a robust taste, while sun dried tomatoes bring a sweet and tangy punch. Don’t skip the lemon juice; it brightens the dish and balances the richness of feta cheese. If you enjoy heat, add red pepper flakes. They give a nice kick without overpowering the other flavors. Finally, fresh basil leaves add a lovely aroma and a touch of color. One common mistake is overcooking the orzo. If you cook it too long, it becomes mushy. Make sure to taste it a minute or two before the time is up. Another mistake is not seasoning properly. Always taste and adjust salt and pepper at the end. Lastly, avoid overcrowding the pot when cooking the spinach. If too much goes in at once, it won’t wilt properly. Cook it in batches if needed for the best texture. {{image_2}} To make this dish vegetarian, just skip the feta cheese. You can use plant-based cheese instead. It adds creaminess without dairy. For a vegan option, ensure that the sun dried tomatoes and olives do not contain any animal products. You can also add more veggies like bell peppers or zucchini for extra flavor. If you want a heartier meal, consider adding some protein. Grilled chicken or shrimp works well. Just cook them separately and mix them in at the end. For a vegetarian protein, add chickpeas or white beans. These options boost nutrition and keep you full longer. Seasonal ingredients can brighten up your orzo dish. In spring, try adding fresh asparagus or peas. In summer, roasted cherry tomatoes add sweetness. In fall, replace spinach with kale, which holds up well. In winter, stir in hearty greens like Swiss chard. This keeps your dish fresh and exciting all year round. To keep your Sun Dried Tomato Spinach Orzo fresh, follow these steps. First, let the dish cool down to room temperature. Then, place it in an airtight container. This helps keep moisture in and prevents drying out. You can store it in the fridge for up to five days. Make sure to label your container with the date. This way, you know when to enjoy it. Freezing is a smart option if you have extra orzo. Start by letting it cool completely. Next, portion it into freezer-safe bags or containers. Be sure to remove as much air as possible. This helps prevent freezer burn. You can freeze your orzo for up to three months. When you're ready to eat, just thaw it in the fridge overnight. Reheating your orzo can be simple and tasty. For the best flavor, use a skillet. Add a splash of water or olive oil to the pan. This keeps the orzo moist and prevents sticking. Heat over medium-low heat until warm, stirring often. You can also use the microwave, but add a bit of water. Cover the dish to keep the moisture in. Enjoy your orzo just as delicious as the first time! Yes, you can use whole wheat orzo. Whole wheat orzo adds more fiber and nutrients. It gives a slightly nuttier flavor. Just follow the same cooking time as regular orzo. This dish lasts about three to five days in the fridge. Store it in an airtight container. Make sure it cools down before you seal it. This keeps it fresh and tasty. You can make this dish ahead of time. It tastes great even after a day in the fridge. Just warm it up in a pan or microwave before serving. You might want to add a splash of lemon juice to refresh the flavors. This blog covered how to make a delicious Sun Dried Tomato Spinach Orzo. You learned about key ingredients and their benefits. The step-by-step guide included tips for cooking and flavor. We discussed variations, from vegetarian options to protein add-ins. Also, I shared smart storage methods and answered common questions. Enjoy experimenting with this dish. It’s easy to customize and share. You’ll impress family and friends with your skills. Happy cooking!

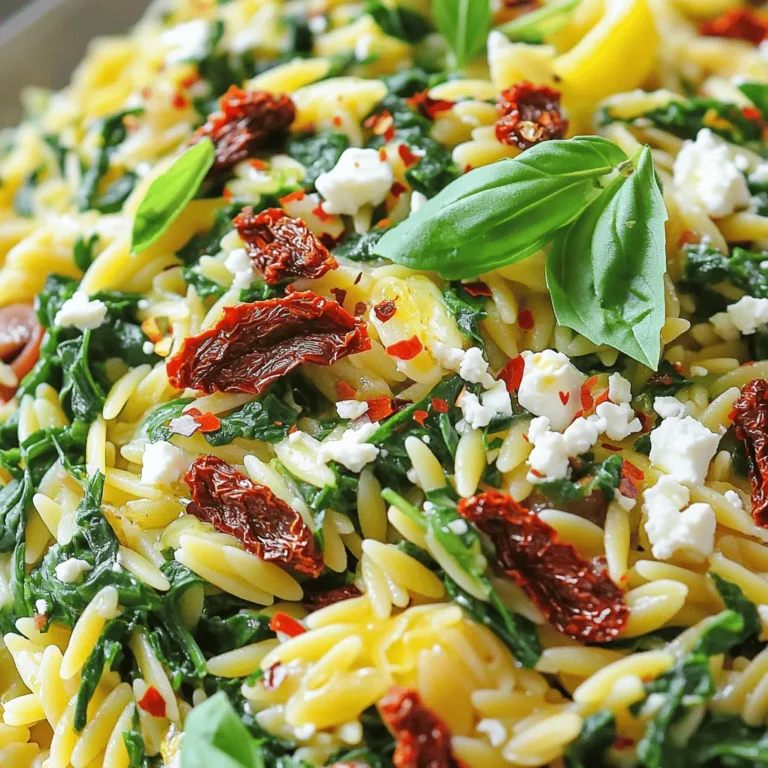
Sun Dried Tomato Spinach Orzo Flavorful Dinner Idea

- 2 lbs boneless, skinless chicken thighs - 1 can (15 oz) white beans, drained and rinsed - 1 can (4 oz) diced green chilies - 1 medium onion, chopped - 3 cloves garlic, minced The base of your chili starts with boneless, skinless chicken thighs. They stay juicy and tender during cooking. White beans add creaminess and a hearty texture. Diced green chilies bring heat and flavor. Onions and garlic give a rich aroma to the dish. - Fresh cilantro - Avocado slices - Crumbled tortilla chips Garnishes make your chili pop! Fresh cilantro adds a bright taste. Avocado slices provide creaminess and help cool the heat. Crumbled tortilla chips add a crunchy texture that contrasts well with the smooth chili. - Different types of beans - Substitutions for chicken - Variations of spices You can mix up the beans. Pinto or black beans work great too! If you want a different protein, consider using turkey or pork. You can also play with spices. Try adding smoked paprika or chili powder for a unique twist. 1. Preparing the ingredients Start by gathering all your ingredients. You need: - 2 lbs boneless, skinless chicken thighs - 1 can (15 oz) white beans, drained and rinsed - 1 can (4 oz) diced green chilies - 1 medium onion, chopped - 3 cloves garlic, minced - 1 medium jalapeño, seeded and chopped - 1 cup corn (fresh, canned, or frozen) - 4 cups chicken broth - 1 tsp cumin - 1 tsp oregano - 1 tsp lime juice - Salt and pepper to taste Make sure to chop the onion and mince the garlic. This helps release their flavors. 2. Layering in the slow cooker Place the chicken thighs at the bottom of the slow cooker. This keeps them juicy. Next, add the chopped onion, minced garlic, and jalapeño over the chicken. Then, pour in the chicken broth. Now add the white beans, diced green chilies, and corn. Sprinkle in the cumin and oregano. Finally, add lime juice, salt, and pepper. Stir gently to combine everything. Ensure the chicken is submerged. 1. Setting the slow cooker (low vs. high) You can cook on low or high. Low heat cooks for a longer time, about 6-8 hours. High heat cooks faster, around 3-4 hours. Both methods work well. 2. Cooking times and what to expect When the chicken is done, it should be tender. You can check by pulling it apart with a fork. The beans and corn will be soft but not mushy. 1. Shredding the chicken Once the chicken is tender, remove it from the slow cooker. Use two forks to shred it into bite-sized pieces. This makes it easier to mix back. 2. Adjusting seasoning and flavors Return the shredded chicken to the pot. Taste the chili and adjust the seasoning. If it needs more zing, add a little more lime juice or salt. Let it sit for a few minutes before serving. This helps all the flavors blend. Serve hot, garnished with fresh cilantro and avocado slices. Top with crumbled tortilla chips for crunch. Enjoy this cozy dish! To make your chili verde pop, adjust the seasonings. Try adding an extra teaspoon of cumin for warmth. A pinch of smoked paprika can give it a nice smoky taste. You might also want to add more lime juice for a zesty kick. Adding extra ingredients can deepen the flavor too. Consider tossing in some fresh corn off the cob. A handful of chopped bell peppers can add sweetness. You can also mix in some diced tomatoes for a juicy twist. If your chicken turns out overcooked, don’t worry. Shredded chicken can still taste great. Mix in a bit of chicken broth to moisten it. This will help bring back some flavor and juiciness. For a chili that is too thick, you can fix that too. Just stir in some extra broth or water. Keep adding until you reach your desired consistency. If it's too thin, let it cook a bit longer with the lid off. Pair your chili verde with cornbread for a sweet touch. A simple side salad can add freshness, too. For a fun crunch, serve it with tortilla chips on the side. When it comes to drinks, I suggest a light beer or a sparkling water. A limeade can also be refreshing. For a warm option, serve it with hot tea. Each of these pairs nicely with the flavors of the chili. {{image_2}} If you want a vegetarian option, use mushrooms or jackfruit instead of chicken. Both options soak up flavors well. You can also try using lentils or chickpeas for protein. They add texture and taste to the dish. For different protein sources, consider turkey or pork. Both work well in chili. They bring unique flavors that change the dish's overall taste. If you want something leaner, opt for chicken breast instead of thighs. To add regional spices, try using smoked paprika or chipotle. These spices give your chili a deep, smoky flavor. You can also experiment with different herbs, like fresh thyme or bay leaves. They add great depth to the dish. Incorporating local ingredients can make your chili unique. If you have access to fresh tomatillos, add them for a bright flavor. You can also use local beans that are in season. This keeps your dish fresh and interesting. For a kid-friendly version, reduce the spice levels. You can omit the jalapeño or use a milder pepper. This way, even the pickiest eaters can enjoy the meal. Make the presentation fun for younger diners. Serve the chili in colorful bowls and let kids add toppings. They can sprinkle cilantro or add avocado slices. Crumbled tortilla chips make a crunchy topping that kids love. You can keep your slow cooker white chicken chili verde in the fridge for up to four days. To store it, let it cool down first. Use an airtight container to keep the flavors fresh. This method helps keep the chicken and beans from getting mushy. If you want to save some chili for later, freezing is a great option. Divide the chili into portions. Use freezer-safe bags or containers. Make sure to remove as much air as possible. This helps prevent freezer burn. When you’re ready to eat, thaw the chili in the fridge overnight. Reheat on the stove or microwave until hot. Stir well to ensure even heating. Leftover chili verde can inspire new meals. Try using it as a filling for tacos or burritos. You can also mix it with rice for a quick meal. Another idea is to serve it over baked potatoes. The creamy texture pairs well with potato skins. Plus, you can top it with cheese or sour cream for extra flavor. Can I use frozen chicken thighs? Yes, you can use frozen chicken thighs. Just remember to add extra cooking time. If cooking on low, aim for 8-10 hours. If cooking on high, go for 4-5 hours. Always ensure the chicken reaches 165°F for safety. What if I don’t have white beans? If you lack white beans, you can use other beans. Great options include black beans or pinto beans. You can even skip the beans if you prefer a meatier chili. Adjust seasonings to balance the flavors. What if I don’t have a slow cooker? No slow cooker? No problem! You can use a regular pot on the stove. Simply simmer on low heat for 1.5 to 2 hours. Stir occasionally and make sure the chicken is tender before shredding. How do I make it spicy? To add heat, use more jalapeños or include chopped serrano peppers. You can also add a dash of cayenne pepper or hot sauce. Taste as you go to find the right level of spice for you. Calories per serving Each serving has about 350 calories. This can vary based on the exact ingredients used. Adding toppings may change the count slightly. Dietary considerations and tips This chili is gluten-free and can be made dairy-free by skipping cheese toppings. For a healthier option, serve with lettuce wraps instead of chips. Always adjust for personal dietary needs. This recipe is packed with flavor and easy to make. You learned about key ingredients like chicken thighs and white beans, plus tasty garnishes. The step-by-step instructions guide you through each part, ensuring success. Helpful tips prevent common problems and serve up great ideas for leftovers. Try variations to please everyone, including kids. This dish is versatile and fun. Enjoy your chili verde, knowing you’re well-prepared to create a delicious meal anytime.

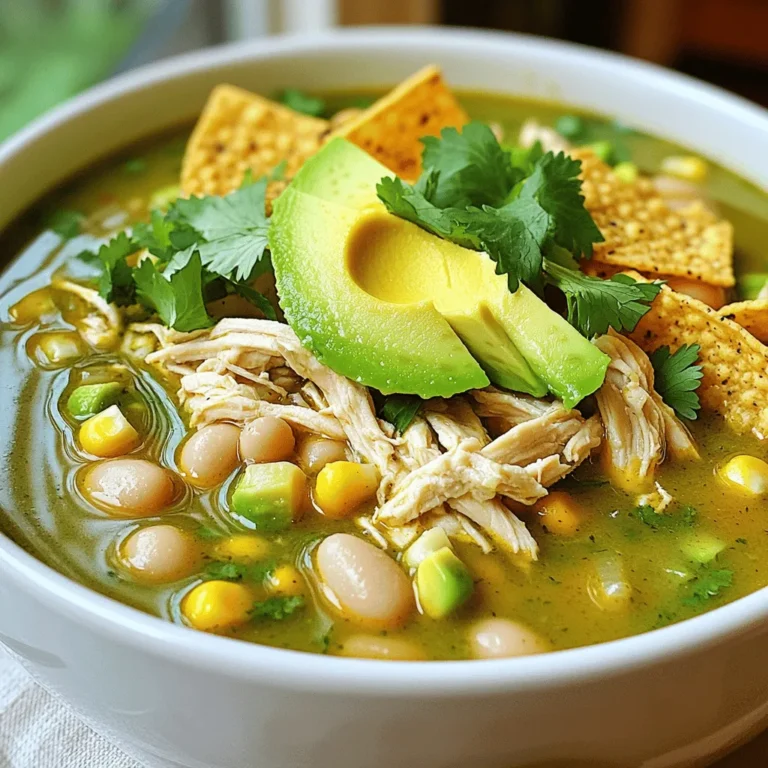
Slow Cooker White Chicken Chili Verde Flavor Boost

- 1 cup rolled oats - 1 cup unsweetened almond milk - 1 scoop vanilla protein powder - 1 medium carrot, grated - 1/4 cup Greek yogurt - 1 tablespoon maple syrup (or honey) - 1/2 teaspoon ground cinnamon - 1/4 teaspoon nutmeg - 1/4 cup raisins - 1/4 cup chopped walnuts (optional) - Pinch of salt I love using these ingredients because they come together to create a tasty treat. The rolled oats serve as a hearty base. Almond milk adds a nice creaminess without dairy. The vanilla protein powder boosts the protein content, making it great for breakfast or a snack. Grated carrot not only gives flavor but also adds moisture. Greek yogurt makes the mixture rich and creamy. Maple syrup or honey adds sweetness, while cinnamon and nutmeg give that warm, comforting taste. Raisins add chewy sweetness, and walnuts give a nice crunch. Don't forget the pinch of salt to enhance all the flavors. - Calories per serving: Approximately 300 calories - Protein content: About 20 grams - Other macro and micronutrients: - Carbs: 40 grams - Fat: 8 grams - Fiber: 6 grams - Calcium: Good source from yogurt and almond milk - Iron: Present in oats and walnuts Knowing the nutritional value helps you make smart choices. Each serving is packed with protein and fiber to keep you full. It’s a balanced meal that supports your energy needs throughout the day. Enjoy this easy recipe that fills you up and tastes great! - Start by mixing the dry ingredients. Combine 1 cup of rolled oats, 1 scoop of vanilla protein powder, 1/2 teaspoon of ground cinnamon, 1/4 teaspoon of nutmeg, and a pinch of salt in a mixing bowl. Stir until they blend well. - Next, incorporate the wet ingredients. Pour in 1 cup of unsweetened almond milk and 1 tablespoon of maple syrup or honey. Mix until everything is fully combined. - Finally, combine with the grated carrot and mix-ins. Add 1 medium grated carrot, 1/4 cup of Greek yogurt, and 1/4 cup of raisins. If you like, toss in 1/4 cup of chopped walnuts. Stir gently to mix all the ingredients. - Now, transfer the oat mixture to a mason jar or an airtight container. Make sure to cover it tightly. - Refrigerate the jar overnight. This allows the oats to absorb the liquid and soften. If you're short on time, let it sit for at least 4 to 6 hours. - When you're ready to serve, stir the oats well. If you want a creamier texture, add a splash more almond milk. - Top the oats with extra grated carrot, a sprinkle of cinnamon, and a drizzle of maple syrup. This adds flavor and makes your dish look amazing! - Dairy-free alternatives: Use coconut yogurt instead of Greek yogurt. This keeps it creamy and dairy-free. You can also try oat milk if almond milk isn't your favorite. - Sweetener options: You can swap maple syrup for agave nectar or even mashed banana for a natural sweet touch. - Consistency adjustments: If you like thicker oats, add a bit more protein powder or reduce the almond milk. For creamier oats, mix in extra yogurt or milk. - Importance of overnight soaking: Soaking oats overnight softens them. This makes them easier to eat and helps blend the flavors well. - Best practices for storing leftovers: Keep your oats in an airtight jar or container. This helps them stay fresh and prevents odors from the fridge. - How long they last in the fridge: Your oats can last up to five days in the fridge. Just give them a stir before eating. {{image_2}} You can change the taste of your oats by adding spices. Ginger and cloves are great choices. They give your oats a warm, cozy flavor. You can also try using different fruits. Chopped apples or crushed pineapple can add a fresh twist. Each fruit brings its own sweetness and texture. Want to pack in more protein? Try adding hemp seeds or nut butter. These ingredients blend well and enhance the flavor. You can also switch up your protein powder. Chocolate or caramel flavors can add a fun twist. Each option offers a unique taste and boosts nutrition. If you need gluten-free oats, look for certified brands. Many oats are naturally gluten-free, but check the label. For a vegan option, you can swap Greek yogurt for plant-based yogurt. Almond yogurt or coconut yogurt works well. These changes help everyone enjoy this tasty treat. Ideal breakfast companions Protein carrot cake overnight oats are great with fresh fruit. Try adding banana slices or berries. You can also enjoy them with a side of scrambled eggs for extra protein. A warm cup of herbal tea or coffee pairs well for a cozy start to your day. Snack or post-workout options These oats make a quick snack too. Grab a jar after your workout for a tasty recovery boost. The protein and carbs help repair your muscles. You can also enjoy them as a mid-afternoon treat to keep your energy up. Creative jar presentations Use clear mason jars to show off the colorful layers. This makes your oats more appealing. You can create layers by adding grated carrot, yogurt, and oats separately. This adds a fun twist to your breakfast or snack. Garnishing ideas Top your oats with extra grated carrot or a sprinkle of nuts. Add a drizzle of maple syrup for sweetness. You can also use coconut flakes or a few chocolate chips for a treat. These small touches make your oats look and taste amazing. Batch preparation You can make a big batch of these overnight oats. This saves time on busy mornings. Just double the recipe and divide it into jars for the week. Each jar stays fresh and ready to enjoy. How to customize servings Feel free to mix in your favorite fruits or nuts. You can swap the walnuts for pecans or leave them out. Adjust the sweetness with more or less maple syrup to match your taste. This recipe is flexible and can suit anyone’s preferences. Protein Carrot Cake Overnight Oats last about 3 to 5 days in the fridge. Store them in an airtight jar or container. The oats may soften over time, but they still taste great. Enjoy them within this time for the best flavor and texture. Yes, you can easily make these oats vegan. Use plant-based yogurt instead of Greek yogurt. Also, swap honey for maple syrup. Both changes keep the creamy texture and sweet taste. You get a delicious vegan treat without losing any flavor. If you don’t have Greek yogurt, try using any plant-based yogurt. Almond, coconut, or soy yogurt work well. You can also use applesauce for creaminess, though it may change the flavor slightly. Each option keeps your dish tasty and smooth. Yes, you can heat up overnight oats if you prefer a warm breakfast. Simply transfer the oats to a microwave-safe bowl. Heat for about 30 to 60 seconds, stirring halfway through. You can add a splash of almond milk to keep them creamy. To boost the protein content in your oats, consider adding more protein powder. You can also mix in nuts, seeds, or nut butter. Chia seeds and hemp seeds are great options. These additions keep the dish tasty while giving you extra protein. This blog post covered the key ingredients and simple steps to make Protein Carrot Cake Overnight Oats. We discussed nutritional benefits, tips for perfect texture, and fun variations. You can customize these oats to fit your taste and needs. Remember, they make a great breakfast or snack. With easy storage tips, you can enjoy them throughout the week. Now, you're ready to create a healthy, tasty treat that fuels your day. Enjoy your cooking journey!

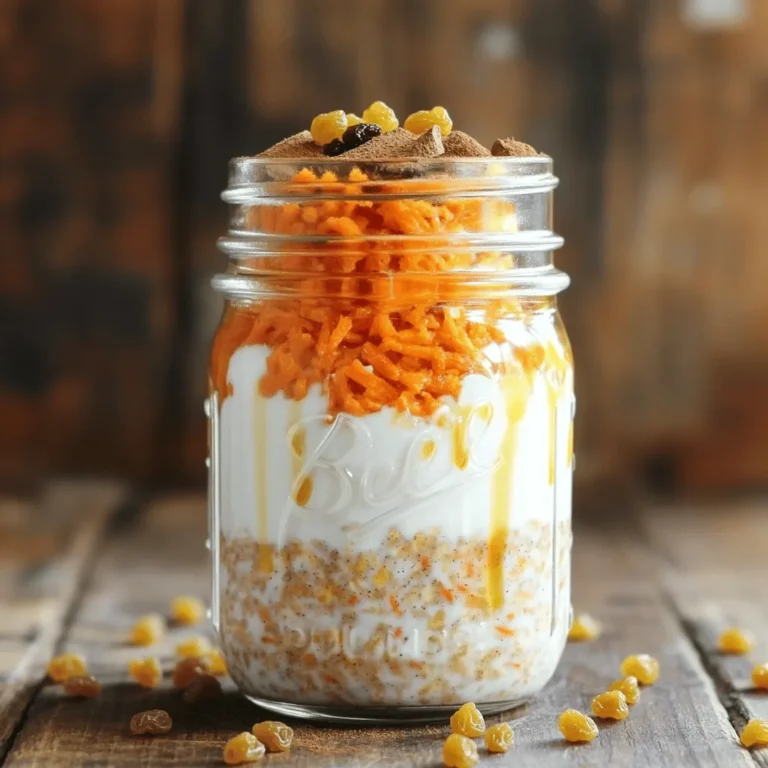
Protein Carrot Cake Overnight Oats Recipe Delight

- 16 oz (450g) fresh button mushrooms, cleaned and stems trimmed - 3 tablespoons olive oil - 4 cloves garlic, minced - 1/2 cup grated Parmesan cheese - 1 teaspoon dried Italian herbs (oregano, basil) - 1/2 teaspoon salt - 1/4 teaspoon black pepper - 2 tablespoons fresh parsley, chopped (for garnish) To make great Air Fryer Garlic Parmesan Mushrooms, you need to measure your ingredients right. Use a kitchen scale for mushrooms. If you don’t have one, a standard cup works too. Make sure your mushrooms are clean. Rinse them under cold water and pat them dry. Trim the stems to about half an inch. This helps them cook evenly. Using fresh garlic gives the best taste. Mince the garlic finely for good flavor. For the Parmesan cheese, use fresh grated cheese. It melts better than the pre-packaged stuff. Gather all your ingredients before starting. This will make the cooking process smoother and fun. First, grab your fresh button mushrooms. Clean them well and trim the stems. This keeps them fresh and tasty. Next, take a large mixing bowl. Pour in 3 tablespoons of olive oil. Add the mushrooms to the bowl. Toss them gently to coat each one in oil. This step helps the mushrooms get crispy in the air fryer. Now, it's time to add some flavor! Mince 4 cloves of garlic and toss them in with the mushrooms. Next, sprinkle in 1/2 cup of grated Parmesan cheese. Add 1 teaspoon of dried Italian herbs, 1/2 teaspoon of salt, and 1/4 teaspoon of black pepper. Stir everything well. Make sure each mushroom is covered in the tasty mix. This step brings out the great flavors of garlic and cheese. Preheat your air fryer to 375°F (190°C). This should take about 5 minutes. While it heats, arrange your mushrooms in the air fryer basket. Lay them out in a single layer. Make sure they don’t overlap. If you have many mushrooms, cook them in batches. Air fry them for 10-12 minutes. Shake the basket halfway through to help them cook evenly. Watch closely as they turn golden brown and crispy. When done, carefully take them out and place them on a serving platter. Garnish with chopped parsley for a fresh touch. To get that perfect crunch on your mushrooms, shake the basket halfway through cooking. This step ensures even heat distribution. When you leave the mushrooms in one spot, they can steam instead of crisp. Cooking in batches is key. If you overcrowd the basket, the mushrooms won’t cook well. They need space for air to flow. For best results, cook in small portions. This way, each mushroom gets the chance to crisp up nicely. One common error is overcrowding the air fryer. When too many mushrooms are in the basket, they won’t fry properly. Always make sure they’re in a single layer. Keep an eye on your cooking time. Overcooking can lead to dry mushrooms. Check them around the 10-minute mark. They should be golden brown and crispy. If you’re unsure, it’s better to cook them less than more. These mushrooms make a great snack or side dish. Pair them with grilled chicken or a fresh salad. They add a burst of flavor to any meal. For dips, try serving them with garlic aioli or a zesty marinara. These sauces complement the garlic and Parmesan well. They make every bite even more enjoyable. {{image_2}} You can swap button mushrooms for other types. Try cremini or shiitake for a rich taste. Portobello mushrooms add a meaty texture. These mushrooms hold flavors well and cook nicely in the air fryer. Each type brings its own unique flavor to the dish. While Parmesan is great, you can experiment with other cheeses. Grated Romano gives a sharper taste. Mozzarella adds creaminess and melts beautifully. For a twist, use feta for a tangy kick. Each cheese changes the flavor profile, making your snack fresh and exciting. Don’t be shy about adding herbs and spices. Fresh thyme or rosemary can enhance the earthiness of mushrooms. A pinch of red pepper flakes adds heat for spice lovers. You can also try smoked paprika for a touch of smokiness. Mix and match to find your perfect flavor blend. To store leftovers, let the mushrooms cool first. Place them in an airtight container. Keep the container in the fridge. They will stay fresh for up to three days. If you want to enjoy these tasty treats later, store them right away. The best way to reheat mushrooms is in the air fryer. Set your air fryer to 350°F (175°C). Place the mushrooms in the basket. Heat for about 5 minutes. This method keeps them crispy and tasty. You can also use a microwave, but they might get soft. If you want to freeze mushrooms, do this before cooking. Clean and coat them with olive oil and seasonings. Spread them on a baking sheet. Freeze them for about one hour until firm. Then, transfer them to a freezer bag. They can last for up to three months. When you're ready to use them, cook from frozen, adding a few extra minutes to the cooking time. For fresh button mushrooms, I recommend air frying them for 10-12 minutes at 375°F (190°C). If you use larger mushrooms, like portobellos, they may need 12-15 minutes. Always shake the basket halfway through for even cooking. Yes, you can use frozen mushrooms! However, they may release more water during cooking. This can make them less crispy. I suggest thawing them first and patting them dry with a towel. Then, coat them with the oil and seasonings as usual. If you want a different flavor, try cheddar or pecorino. For a vegan option, nutritional yeast works well. It adds a cheesy flavor without dairy. You can also use vegan cheese shreds that melt nicely. In this post, we explored how to make delicious air-fried mushrooms. We covered ingredients like fresh mushrooms, olive oil, and Parmesan cheese. You learned tips for perfect preparation, cooking methods, and how to store leftovers. With these steps and tricks, you can create crispy, flavorful mushrooms. Feel free to experiment with different cheeses and seasonings. Enjoy your cooking journey, and don’t hesitate to try new variations!

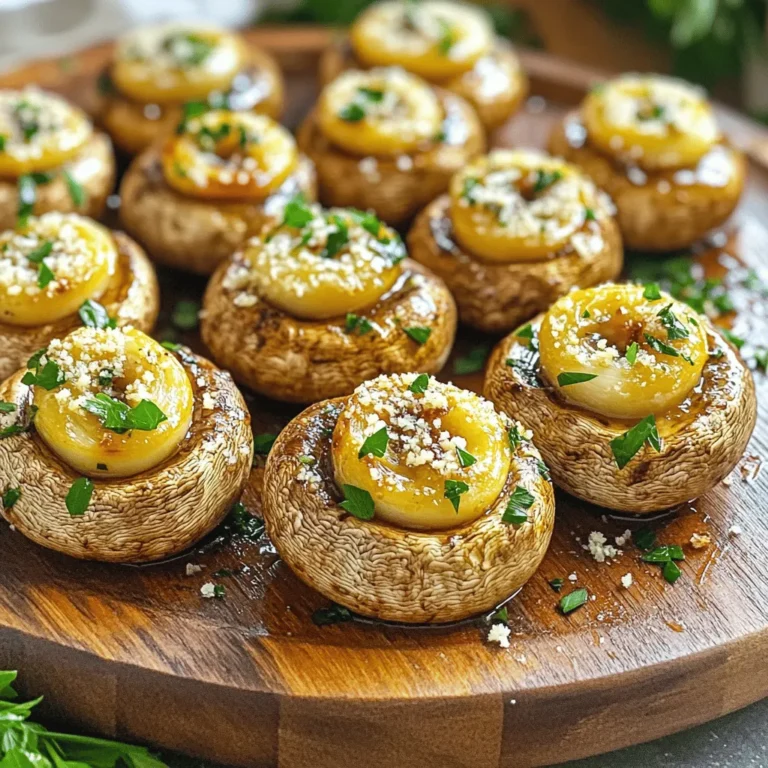
Air Fryer Garlic Parmesan Mushrooms Delicious Snack

To make these tasty bars, you need some key items: - 1 cup creamy peanut butter - 1/2 cup unsalted butter, melted - 1 cup graham cracker crumbs - 1 cup powdered sugar - 1 cup semi-sweet chocolate chips - 1/4 cup heavy cream - 1/2 teaspoon vanilla extract - Pinch of salt These ingredients create a rich, sweet flavor. The peanut butter gives a smooth base. The graham cracker crumbs add a nice crunch, while the chocolate on top makes it a treat. You can switch things up with these options: - Chopped peanuts (for garnish) - Sea salt (for a sweet-salty taste) - Different chocolate types like dark or white chocolate These extras let you play with flavors and textures. Try adding your favorite nuts or a sprinkle of sea salt to make it special. To make this easy treat, gather these tools: - Medium mixing bowl - Small saucepan - 8x8-inch baking dish - Parchment paper - Spatula Having the right tools helps keep the process smooth. It makes mixing and spreading simple, so you can focus on enjoying your sweet creation! Start by taking a medium bowl. Add 1 cup of creamy peanut butter and 1/2 cup of melted unsalted butter. Mix them well until they blend smoothly. You want a nice, creamy texture. This step is key for flavor. Next, add 1 cup of graham cracker crumbs and 1 cup of powdered sugar to the peanut butter mix. Sprinkle in a pinch of salt. Stir everything together until it forms a thick, sticky dough. This crust is what makes the bars special. Now, take a small saucepan and heat 1/4 cup of heavy cream over low heat. Watch closely until it begins to simmer but do not let it boil. Remove it from the heat and add 1 cup of semi-sweet chocolate chips. Stir until the chips melt and the mix becomes smooth. This ganache adds a rich layer. Line an 8x8-inch baking dish with parchment paper. Leave some paper hanging over the edges. This helps with easy removal. Press the peanut butter mixture into the bottom of the dish. Smooth it out with a spatula. Pour the chocolate ganache on top. Spread it evenly. If you want, sprinkle chopped peanuts on top for extra crunch. Refrigerate for at least 2 hours until the chocolate is firm. After chilling, lift the bars out using the parchment. Cut them into squares or rectangles. Enjoy your tasty treat! To get the perfect creamy peanut butter mix, start with smooth peanut butter. I use creamy peanut butter for this recipe. It blends well with melted butter. Make sure both are at room temperature. This helps them mix easily. Combine them in a bowl until they are smooth. Use a sturdy spatula to mix well. If you like, you can add a pinch of salt. This will enhance the flavor. The chocolate ganache is key to these bars. For rich taste, use semi-sweet chocolate chips. Heat heavy cream in a small saucepan. Bring it to a light simmer, but do not boil. Remove the pan from heat and add the chocolate chips. Stir until the chips melt completely. This creates a smooth ganache. Add vanilla extract for extra flavor. Spread the ganache evenly over the peanut butter layer. This makes each bite rich and tasty. For a fun touch, consider garnishing your bars. Chopped peanuts add a nice crunch. Sprinkle them on top of the chocolate layer. You can also drizzle extra melted chocolate for flair. Serve these bars chilled for the best taste. Cut them into squares or rectangles for serving. They make great treats for parties or snacks. Enjoy sharing them with friends and family! {{image_2}} You can make these bars gluten-free easily. Just swap out the graham cracker crumbs for gluten-free crumbs. You can find these at most stores. Check the labels to make sure they are safe. This way, everyone can enjoy them! Want to mix things up? Here are some fun ideas: - Add-ins: Toss in some mini marshmallows or chocolate chunks for extra sweetness. - Substitutes: Use almond butter instead of peanut butter for a nutty twist. - Flavoring: Stir in a bit of cocoa powder for a richer chocolate taste. Each choice adds new flavor and fun to the bars. These bars fit many occasions. For a party, cut them into small squares and serve on a big plate. Add colorful sprinkles for fun. For a picnic, wrap each bar in wax paper for easy sharing. Got a holiday? Top with festive decorations like holiday-themed sprinkles. No matter the event, these bars are a hit! To keep your no bake Reese’s peanut butter bars fresh, store them in an airtight container. Make sure the container seals well to keep out air. Place a piece of parchment paper between layers if stacking them. This will stop them from sticking together. You can also wrap each bar in plastic wrap for extra care. When stored properly in the fridge, the bars last up to one week. If you want them to last longer, you can freeze them. Just remember, the longer they sit, the more their flavor might fade. So, try to enjoy them fresh for the best taste! To freeze the bars, first cut them into squares. Wrap each piece in plastic wrap tightly. Then, place them in a freezer-safe bag or container. Be sure to label the bag with the date. They can stay in the freezer for about three months. When you're ready to eat, take them out and let them thaw in the fridge. Enjoy your tasty treats! Yes, you can use crunchy peanut butter. It adds nice texture. The bars will still hold together well. The flavor remains rich and tasty. Just mix it the same way as creamy. You can tell the bars are set when the chocolate top is firm. Press lightly on the chocolate. If it feels solid, they are ready. Refrigerate for at least 2 hours for best results. You can use crushed cookies, such as Oreos or Digestive biscuits. Another option is ground oats or almond flour. These will change the taste a bit but still make great bars. Yes, you can make these bars vegan. Use vegan butter and dairy-free chocolate chips. Replace heavy cream with coconut cream. These swaps will keep the bars delicious and vegan-friendly. No Bake Reese’s Peanut Butter Bars are easy and fun to make. We covered essential and optional ingredients, step-by-step instructions, and handy tips. You learned how to customize the bars and store them well. Remember, these treats can fit any diet or occasion. Trust your taste buds to guide you! Enjoy the process and be creative with flavors. These bars promise to impress, whether for yourself or friends. Now it’s time to make your own delicious batch!

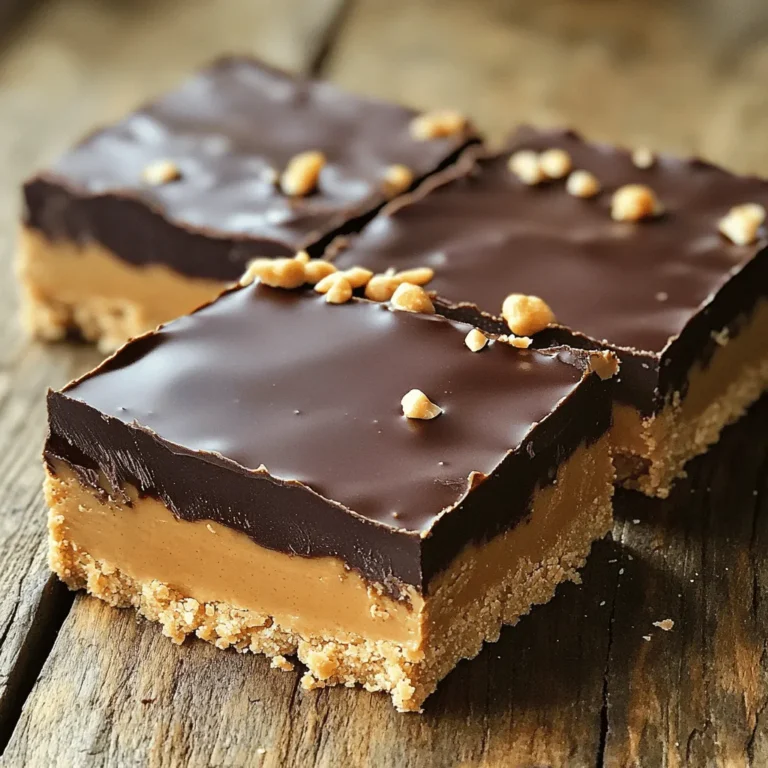
No Bake Reese’s Peanut Butter Bars Easy and Quick Treat

- 1 lb boneless chicken thighs, sliced into thin strips - 1 cup fresh Thai basil leaves - 2-3 Thai bird chilies, sliced The main ingredients give this dish its hearty base. Boneless chicken thighs are juicy and tender. They soak up flavors well. Fresh Thai basil leaves add a sweet, aromatic taste. They make the dish unique. Chili peppers add heat. You can adjust the number based on your spice level. - 2 tablespoons soy sauce - 1 tablespoon oyster sauce - 1 teaspoon sugar The sauces and seasoning bring the dish together. Soy sauce adds saltiness and umami. Oyster sauce gives a rich depth. Sugar balances the flavors and adds a hint of sweetness. Mixing these sauces creates a tasty glaze for the chicken. - 4 cloves garlic, minced - 1 red bell pepper, sliced - 1 cup snap peas Vegetables add color and crunch. Garlic brings a strong aroma and flavor. Red bell pepper adds sweetness and a pop of color. Snap peas provide a crisp texture. They all work together to make the dish bright and fresh. - Slicing the chicken: Start by taking 1 pound of boneless chicken thighs. Use a sharp knife to cut it into thin strips. Thin strips cook evenly and quickly. This helps keep your meal fast and tasty. - Minced garlic and chili prep: Next, take 4 cloves of garlic. Peel and mince them finely. Then, grab 2-3 Thai bird chilies. Slice them thinly, adjusting the amount based on how spicy you want it. More chilies add more heat! - Heating the oil and cooking the garlic: In a large skillet or wok, heat 2 tablespoons of vegetable oil over medium-high heat. Once the oil is hot, add the minced garlic and sliced chilies. Stir-fry for about 30 seconds until fragrant. Be careful not to burn the garlic; it can turn bitter! - Adding and browning the chicken: Now, add your sliced chicken to the skillet. Cook it for about 5-7 minutes. You want the chicken to brown nicely and be cooked all the way through. Stir it often to make sure it cooks evenly. - Incorporating vegetables and sauce mixture: Toss in the sliced red bell pepper and 1 cup of snap peas. Stir constantly for another 2-3 minutes. You want the veggies tender but still crisp. In a small bowl, mix 2 tablespoons of soy sauce, 1 tablespoon of oyster sauce, and 1 teaspoon of sugar. Pour this sauce mixture into the skillet and stir well. - Adding basil and lime juice: Finally, add 1 cup of fresh Thai basil leaves and the juice of 1 lime. Stir gently until the basil wilts. Taste and season with salt and pepper if needed. This mix of flavors will make your dish shine! To make sure your chicken stays tender, use boneless thighs. They cook quicker and stay juicy. Slice them thinly for even cooking. Start with hot oil to seal in moisture. Cook the chicken for about 5-7 minutes until it turns golden brown. To avoid overcooked vegetables, add them later in the cooking process. Stir-fry the bell pepper and snap peas for only 2-3 minutes. This keeps them crisp and colorful. For a great meal, serve your Thai Basil Chicken over jasmine rice or rice noodles. Both soak up the flavors well. You can also pair it with a fresh salad or spring rolls for a balanced meal. Garnish the dish with extra basil leaves and lime wedges. This not only looks good, but the lime adds a zesty touch. If you like some heat, adjust the number of Thai bird chilies. Start with one and add more if you want. You can substitute the chicken with shrimp or tofu for different flavors. For a veggie twist, try adding mushrooms or baby corn. If you don’t have oyster sauce, soy sauce works too. {{image_2}} You can change the meat for different tastes. Chicken is great, but try pork or shrimp. These options give new flavors and textures. For a vegetarian twist, consider tofu or tempeh. Both soak up the sauce well and add protein. Using seasonal veggies can make the dish pop. Try zucchini, broccoli, or carrots. These mix well and add color. Avoid starchy vegetables like potatoes. They don't blend nicely with the stir-fry style. To add crunch, toss in some cashews or peanuts. They will give a lovely texture. You can also use herbs like cilantro or mint. These will change the flavor and make the dish more exciting. To store leftovers, let the dish cool first. Then, place it in a clean container. I suggest using glass or plastic containers with tight lids. This keeps the food fresh and safe. You can store it in the fridge for up to three days. Yes, you can freeze Thai Basil Chicken Stir Fry. Make sure to cool it completely before freezing. Use airtight containers or freezer bags to prevent freezer burn. Label the bags with the date. The stir fry can stay good in the freezer for about three months. For reheating, you have two good options: microwave or stovetop. If you use the microwave, heat it in short bursts. Stir in between to heat evenly. On the stovetop, add a splash of water to the skillet. This helps keep the dish moist and tasty. Both methods work well to maintain the flavor and texture. Enjoy your meal! Thai Basil Chicken Stir Fry can be spicy, but you control the heat. The heat comes from Thai bird chilies. You can use 2-3 chilies for a nice kick. If you want it milder, remove the seeds. You can also use fewer chilies or swap them for sweet bell peppers. Always taste as you go. This way, you can find the heat level that works for you. You can use dried basil, but fresh is best. Fresh Thai basil has a bright, bold flavor. Dried basil lacks the same pop and aroma. If you must use dried, use about one teaspoon for every tablespoon of fresh. Add it earlier in the cooking to let the flavor develop. But remember, nothing beats fresh basil in this dish. Thai Basil Chicken Stir Fry works well with many sides. Here are some great options: - Jasmine rice: The classic choice to soak up the sauce. - Rice noodles: For a fun twist on this dish. - Steamed vegetables: Broccoli or bok choy add color and nutrients. - Cucumber salad: This adds a refreshing crunch. - Spring rolls: A great appetizer to start your meal. These dishes make a perfect spread for a Thai-inspired dinner. You now have a complete guide to making Thai Basil Chicken Stir Fry. We covered the key ingredients, step-by-step cooking instructions, helpful tips, and variations. You can adjust spice levels and use different vegetables to suit your taste. Remember to store leftovers properly and reheat with care. This dish is tasty, simple, and fun to customize. Enjoy mixing flavors and impressing your family or friends with your cooking. Dive in and make your own unique stir fry today!

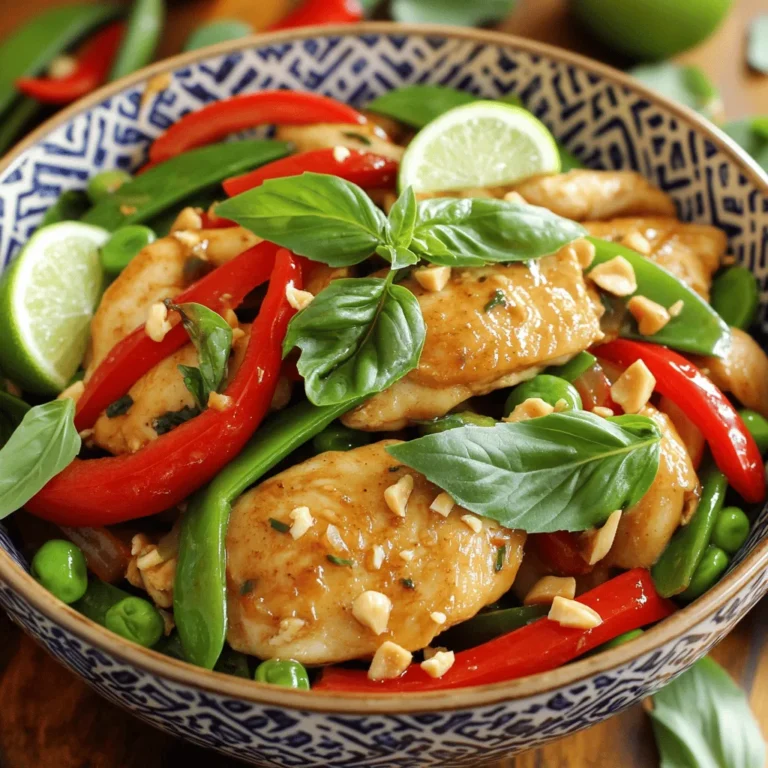
Thai Basil Chicken Stir Fry Flavorful Quick Meal

- 1 ½ cups Oreo cookie crumbs - ½ cup unsalted butter, melted - 16 oz cream cheese, softened - ½ cup granulated sugar - 2 teaspoons vanilla extract - 1 ½ cups heavy whipping cream - 1 cup crushed Oreo cookies (for mixing into the cheesecake) - 2 tablespoons crushed Oreo cookies (for topping) When I make No-Bake Cookies & Cream Cheesecake Bars, I love the simple yet rich flavors. First, I gather my ingredients. The base uses Oreo cookie crumbs, which add that classic chocolate taste. Melting unsalted butter helps bind the crumbs together, creating a solid crust. Next, I focus on the cream cheese. It must be softened for a smooth texture. Granulated sugar sweetens the mix, while vanilla extract gives it a lovely aroma. Heavy whipping cream is key for fluffiness. I whip it until it forms stiff peaks. This step makes the cheesecake light and airy. Then, I add crushed Oreo cookies into the filling. This mix gives a nice crunch and enhances the flavor. Finally, I save some crushed cookies for the topping. They make the bars look appealing and add extra sweetness. Each ingredient plays an important role in the final product. 1. Combine Oreo cookie crumbs and melted butter: In a medium bowl, mix the Oreo cookie crumbs with melted butter. Make sure all the crumbs get coated well. The mix should look like wet sand. 2. Press into the baking dish: Take a 9x9-inch baking dish. Firmly press the crumb mix into the bottom. You want an even layer. 3. Refrigerate to set: Place the dish in the fridge for about 15-20 minutes. This helps the crust hold its shape. 1. Beat cream cheese until smooth: In a large bowl, beat the softened cream cheese using an electric mixer. Mix until it is creamy and smooth. 2. Add sugar and vanilla extract: Gradually mix in the granulated sugar and vanilla extract. Keep mixing until everything is well combined. 3. Whip heavy cream until stiff peaks: In a separate bowl, whip the heavy cream until it forms stiff peaks. This step adds a light, fluffy texture to your filling. 1. Fold whipped cream into cream cheese mixture: Gently fold the whipped cream into the cream cheese mix. Be careful not to deflate the whipped cream. 2. Stir in crushed Oreo cookies: Add the crushed Oreo cookies to the mixture. Stir until they are evenly mixed in. 3. Pour filling over crust: Pour the cheesecake filling over the chilled crust. Spread it out evenly. Tap the dish gently on the counter to let air bubbles escape. To whip cream to stiff peaks, start with cold heavy cream. Use a clean bowl and beaters. Whip the cream on medium speed. Watch closely as it thickens. When peaks form and hold their shape, stop mixing. This adds air and makes your cheesecake light. Room temperature cream cheese is key for a smooth filling. Cold cream cheese can be lumpy. Leave it out for about 30 minutes before mixing. This makes it easier to blend with the sugar and vanilla. Garnishes can make your cheesecake bars look extra special. Consider adding a sprig of mint on top. You can also drizzle chocolate syrup for a fun touch. Fresh berries add color and freshness. For pairing options, serve your bars with coffee or tea. The rich flavors of the cheesecake work well with these drinks. You can also enjoy them with fresh fruit for a nice contrast. One common mistake is over-folding the whipped cream. This can deflate the air you worked hard to create. Gently fold until just combined for a light texture. Another mistake is not chilling the bars long enough. They need at least four hours to set. If you can, chill overnight. This helps the flavors meld and makes slicing easier. {{image_2}} You can change the flavors of your no-bake cheesecake bars easily. - Chocolate version: Use chocolate sandwich cookies instead of Oreos. Mix in cocoa powder for a rich taste. - Mint cookies and cream: Add peppermint extract to the cream cheese mix. Use mint Oreos for extra flavor. If you have special dietary needs, you can still enjoy this treat. - Gluten-free options: Use gluten-free chocolate cookies for the crust. Make sure all ingredients are gluten-free. - Dairy-free alternatives: Replace cream cheese with a dairy-free cream cheese. Use coconut cream instead of heavy cream. Serving can be fun and creative. - Individual cups instead of bars: Layer the crust and filling in small cups. This makes for easy serving and a cute look. - Adding toppings like chocolate drizzle: Drizzle melted chocolate or a berry sauce on top. This adds a nice touch and extra flavor. To keep your cheesecake bars fresh, place them in an airtight container. This will keep them from drying out or absorbing other smells. You can store them in the fridge for up to five days. Make sure to cover them well if you don't have a container. Yes, you can freeze cheesecake bars! They freeze well and taste great later. To freeze them, first, cut the bars into pieces. Wrap each piece in plastic wrap. Then, place them in a freezer-safe bag or container. When you want to eat them, take out a piece and let it thaw in the fridge. This will keep the texture nice. Don't rush the thawing; it may take a few hours. Enjoy your cheesecake bars even after freezing! Yes, you can use other cookies. Graham crackers work well for a classic taste. Chocolate cookies add a richer flavor. Just crush them into fine crumbs and mix with melted butter, just like the Oreos. These cheesecake bars last about 5 days in the fridge. Store them in an airtight container to keep them fresh. If you want them to last longer, consider freezing them. Absolutely! This recipe is great for making ahead. You can make it a day or two before serving. Just allow enough time for chilling, usually at least 4 hours or overnight. If you want a lighter option, use whipped topping. You could also try coconut cream for a dairy-free choice. Just remember, the texture might change a little, but it will still be tasty! This blog post shared a tasty recipe for Oreo cheesecake bars. We discussed the key ingredients and detailed steps to make the crust and filling. Tips helped you avoid common mistakes and suggested ways to enhance your dessert. Variations showed how to customize flavors and presentations. Finally, we covered storage methods to keep your bars fresh. Enjoy creating this delicious treat! You'll impress friends and family with your cheesecake skills.

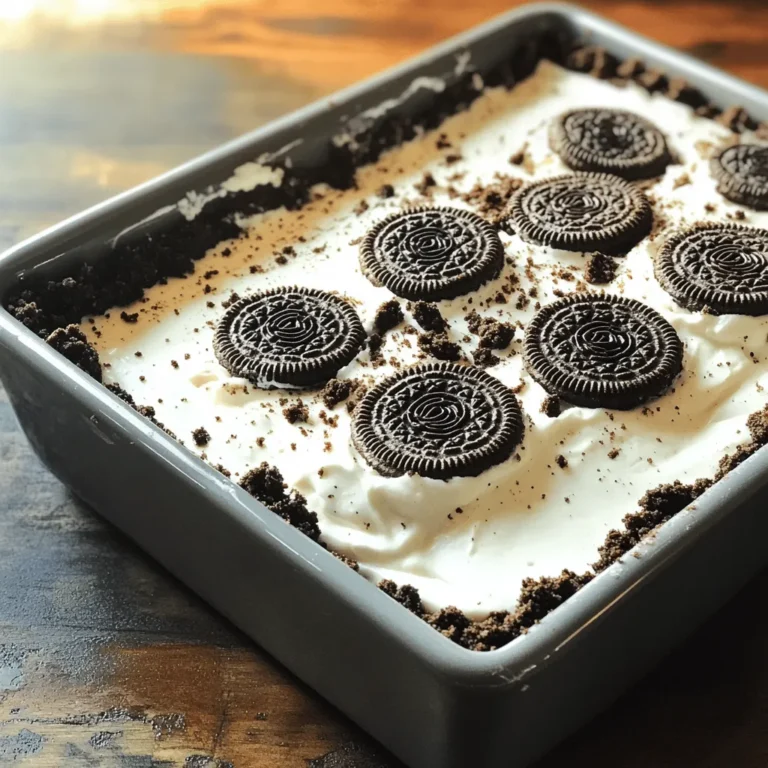
No-Bake Cookies & Cream Cheesecake Bars Delight

- 12 oz penne pasta - 8 oz spicy Italian sausage, casing removed and crumbled - 1 medium onion, diced - 2 garlic cloves, minced - 1 can (14 oz) crushed tomatoes - 2 cups low-sodium chicken broth - 1 teaspoon red pepper flakes (adjust to taste) - 1 teaspoon dried oregano - 1 tablespoon olive oil - Salt and pepper to taste - Fresh basil leaves for garnish - Grated Parmesan cheese for serving (optional) When you prepare your ingredients, use a kitchen scale for accurate amounts. For the onion, make sure to dice it small. This helps it cook evenly. Mince the garlic finely for great flavor in every bite. Measure the crushed tomatoes and chicken broth with liquid measuring cups for precision. If you like heat, keep the red pepper flakes handy as you cook. You can adjust them to your taste. You can swap the penne pasta for any pasta you like. Bowtie or rotini work well too. If you can't find spicy Italian sausage, use mild sausage with added red pepper flakes. For a vegetarian option, try crumbled tofu or lentils instead of sausage. If you want a lighter dish, use vegetable broth instead of chicken broth. Fresh herbs like parsley can replace the basil if you prefer. Start by gathering all your ingredients. This makes cooking easier and more fun. You will need: - 12 oz penne pasta - 8 oz spicy Italian sausage, casing removed and crumbled - 1 medium onion, diced - 2 garlic cloves, minced - 1 can (14 oz) crushed tomatoes - 2 cups low-sodium chicken broth - 1 teaspoon red pepper flakes (adjust to taste) - 1 teaspoon dried oregano - 1 tablespoon olive oil - Salt and pepper to taste - Fresh basil leaves for garnish - Grated Parmesan cheese for serving (optional) Next, chop the onion and mince the garlic. This helps release their flavors better during cooking. In a large pot or Dutch oven, heat the olive oil over medium heat. Add the crumbled spicy Italian sausage. Cook until it turns brown, about 3-5 minutes. Use a spoon to break it up as it cooks. Once the sausage is browned, stir in the diced onion. Cook it until it becomes soft and translucent, which takes about 3 minutes. Then, add the minced garlic. Sauté it for about 30 seconds until it smells great. Now, pour in the crushed tomatoes and chicken broth. Add red pepper flakes, dried oregano, salt, and pepper. Stir everything well to combine. Next, bring this mixture to a boil. Once boiling, add the penne pasta. Make sure to stir it well so the pasta is fully submerged in the liquid. Reduce the heat to low and cover the pot. Let it simmer for about 12-15 minutes. Stir occasionally until the pasta is cooked and most of the liquid is absorbed. When the pasta is done, take the pot off the heat. Taste the dish and adjust the seasoning if needed. Serve it hot. Garnish with fresh basil leaves and sprinkle grated Parmesan cheese on top if you like. This recipe makes 4 servings. Enjoy your meal! To boost flavor, use fresh herbs. Fresh basil adds a nice touch. You can also try thyme or parsley for extra taste. If you want more heat, add extra red pepper flakes. For a smoky flavor, try adding a bit of smoked paprika. Start by cooking the sausage well. This adds depth to the dish. Stir it often to break it apart. Cook until it’s nicely browned. This step builds flavor. When you add the pasta, make sure it's fully submerged in the broth. This helps it absorb the sauce better. Stir occasionally for even cooking. One common mistake is overcooking the pasta. This makes it mushy. Check it a minute before the time is up. Another mistake is not tasting the dish. Always taste the sauce before serving. Adjust the salt and pepper as needed. Lastly, don’t skip the fresh basil. It lifts the dish and adds brightness. {{image_2}} You can easily change the flavor of this dish. Swap the spicy Italian sausage for sweet Italian sausage if you prefer less heat. Ground turkey or chicken also works well. If you want a smokier taste, try adding chorizo. For a deeper flavor, include some diced bell peppers or mushrooms. You can even use different pasta types, like rigatoni or fusilli, to mix things up. To make this dish vegetarian, replace the sausage with plant-based sausage or lentils. Lentils add protein and a hearty texture. You can also use chickpeas for a nutty flavor. For a vegan option, skip the cheese and use nutritional yeast instead. This adds a cheesy flavor without the dairy. You can still enjoy the rich taste of tomatoes and spices. Using seasonal ingredients makes this dish burst with flavor. In spring, add fresh asparagus or peas for a pop of color. During summer, toss in zucchini or cherry tomatoes. Fall is perfect for adding spinach or kale. For winter, consider roasted butternut squash. All these additions bring freshness and nutrition to your one-pot meal. Plus, they make your dish more colorful and appealing! Store your One-Pot Spicy Sausage Tomato Pasta in an airtight container. Let it cool down before sealing it. This helps keep the flavors fresh. You can keep it in the fridge for up to three days. If you want to keep it longer, freezing is a great option. To reheat the pasta, use a pot on low heat. Add a splash of water or broth to keep it moist. Stir gently until it warms up evenly. You can also use a microwave. Place it in a microwave-safe bowl and cover it. Heat in short bursts, stirring in between, to avoid hot spots. For freezing, portion the pasta into freezer-safe bags or containers. Remove as much air as possible to prevent freezer burn. It can last up to three months in the freezer. When ready to eat, thaw it in the fridge overnight. Reheat it on the stove or microwave as mentioned above. Enjoy your tasty meal anytime! To make the pasta spicier, you can add more red pepper flakes. Start with an extra half teaspoon. If you like heat, try using spicy sausage instead of mild. You can also add diced jalapeños or hot sauce. Just remember, taste as you go. You want the heat to enhance the dish, not overpower it. This pasta pairs well with a fresh salad. A simple green salad with vinaigrette works great. You can also serve garlic bread on the side. To elevate your meal, a light white wine complements the flavors. For an extra touch, sprinkle some extra Parmesan cheese on top before serving. Yes, you can make this recipe ahead of time. Cook the pasta and sauce as directed, then cool it down. Store it in the fridge for up to three days. When ready to eat, reheat on the stove over low heat. Add a splash of broth to keep it moist. Enjoy your easy, flavorful meal any day! This blog post covered all key steps for making great pasta. We discussed ingredients, preparation, cooking methods, and tips. I shared ways to avoid common mistakes and enhance flavors. You learned about variations, like vegetarian options and seasonal swaps. Lastly, I provided storage tips to keep your pasta fresh. Remember, cooking is about having fun and being creative. You can make this dish your own with easy changes and unique flavors. Enjoy your pasta adventures!

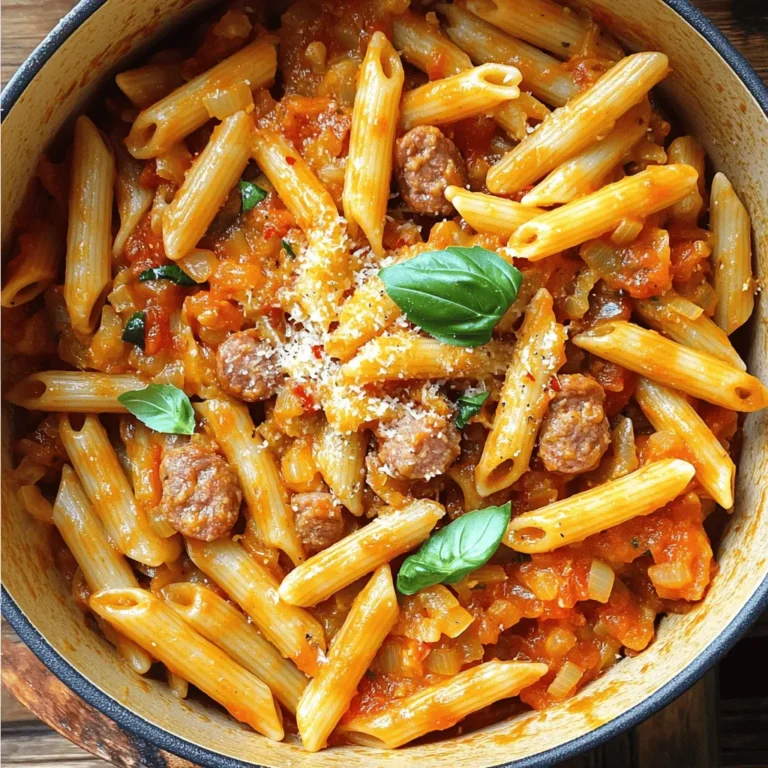
One-Pot Spicy Sausage Tomato Pasta Easy Dinner Recipe

PREV 1 … 21 22 23 … 57 NEXT
secrets pice kitchen

explore

DessertsDinnerAppetizersDrinks

Our Policies

  • Cookie Policy
  • Copyright Policy
  • Disclaimer
  • GDPR Policy
  • Terms Of Use
Back to Top
  • About
  • Contact Us
  • Privacy Policy
© 2025 secrets pice kitchen