FREE DINNER EBOOK! Get your copy!
  • Cookie Policy
  • GDPR Policy
  • Disclaimer
  • Terms Of Use
  • Visit my other site: Fun Cookie Recipes
secrets pice kitchen
  • Home
  • Dinner
  • Desserts
  • Drinks
  • Appetizers
  • Contact
  • About
  • Privacy Policy
  • Home
  • Dinner
  • Desserts
  • Drinks
  • Appetizers
  • Contact
  • About
  • Privacy Policy
  • Cookie Policy
  • GDPR Policy
  • Disclaimer
  • Terms Of Use
Visit my other site: Fun Cookie Recipes

HOME / CATEGORIES /

Latest

To make these salted caramel pretzel brownies, you will need: - 1 cup unsalted butter (2 sticks) - 2 cups granulated sugar - 4 large eggs - 1 teaspoon vanilla extract - 1 cup all-purpose flour - 1 cup unsweetened cocoa powder - 1 teaspoon baking powder - 1/2 teaspoon salt - 1 cup chocolate chips - 1 cup crushed pretzels - 1 cup salted caramel sauce If you have allergies or dietary needs, here are some easy swaps: - Butter: Use coconut oil or vegan butter for dairy-free brownies. - Eggs: Replace with 1/4 cup unsweetened applesauce per egg for a vegan option. - All-purpose flour: Try almond flour for a gluten-free choice. - Chocolate chips: Use dairy-free chocolate chips to avoid milk. - Salted caramel sauce: Make your own with coconut cream for a dairy-free version. Choosing high-quality brands can make a big difference in flavor: - Unsalted butter: I recommend Kerrygold for its rich taste. - Granulated sugar: C&H Sugar is a reliable choice. - Cocoa powder: Look for Ghirardelli for deep chocolate flavor. - Chocolate chips: Guittard or Enjoy Life are great options. - Pretzels: Snyder's of Hanover offers a tasty, crunchy pretzel. - Salted caramel sauce: Stonewall Kitchen makes a delicious, ready-to-use sauce. Start by preheating your oven to 350°F (175°C). While it warms up, grab a 9x13-inch baking pan. Grease it well or line it with parchment paper. The parchment helps with easy removal later. This step is key for a smooth baking process. In a medium saucepan, melt 1 cup of unsalted butter over low heat. Stir it often to keep it from browning. Once melted, take it off the heat. In a large mixing bowl, combine the butter with 2 cups of granulated sugar. Mix until it looks smooth. Now, add 4 large eggs one at a time. Make sure each egg is well mixed in before adding the next. Stir in 1 teaspoon of vanilla extract. In another bowl, sift together 1 cup of all-purpose flour, 1 cup of unsweetened cocoa powder, 1 teaspoon of baking powder, and 1/2 teaspoon of salt. Gradually fold these dry ingredients into the wet mixture. Be gentle! You want to mix just until everything is combined. Overmixing can make your brownies tough. Next, stir in 1 cup of chocolate chips and 1 cup of crushed pretzels. Save a handful of pretzels for later. This adds a nice crunch to the top! Pour half of the brownie batter into your prepared pan. Spread it evenly across the bottom. Drizzle half of the salted caramel sauce on top. Use a knife to swirl it gently into the batter. Now, add the rest of the brownie batter on top. Spread it out evenly again. Drizzle the remaining caramel sauce on top and sprinkle the saved pretzel pieces. Bake your brownies in the preheated oven for 25 to 30 minutes. Check them with a toothpick. It should come out with moist crumbs, not wet batter. Once baked, let them cool in the pan for at least 15 minutes. After that, transfer them to a wire rack to cool completely before cutting them into squares. For an extra touch, sprinkle a little sea salt on top! To get soft, fudgy brownies, start with melted butter. Melt it slowly to avoid browning. Mix it well with sugar until smooth. Add eggs one at a time. This helps the batter blend well. After mixing in the dry ingredients, stop as soon as they come together. Overmixing can lead to tough brownies. Salted caramel adds a nice twist. It brings out the sweetness of the brownies. To balance flavors, add just enough salt. A sprinkle of sea salt on top enhances the taste. The salty pretzels also help balance the sweet caramel. Taste your batter before baking to adjust flavors if needed. Let the brownies cool before cutting. Cooling helps them set. Use a sharp knife for clean cuts. Wipe the knife with a damp cloth after each cut. This keeps edges neat. For a fun touch, top each piece with a tiny bit of extra caramel sauce. This makes each bite special! {{image_2}} You can make these brownies gluten-free! Replace the all-purpose flour with a gluten-free blend. Many stores sell easy-to-use mixes that work well. Just check that your baking powder is also gluten-free. Your brownies will still taste rich and delicious! Feel free to mix things up! Try using chopped nuts like walnuts or pecans. You can also add a layer of peanut butter or cream cheese for a tasty twist. Instead of pretzels, use crushed cookies for a fun crunch. Experiment with different flavors to find your favorite combo! If you're short on time, I have a fast method for you. Use a box brownie mix instead of making batter from scratch. Just add the crushed pretzels and salted caramel sauce as directed. This will save you time while still giving you that delightful sweet and salty taste! To keep your salted caramel pretzel brownies fresh, store them in an airtight container. Place parchment paper between layers to prevent sticking. They will stay good at room temperature for up to four days. If you want them to last longer, refrigerate them. Just remember that chilling might change the texture a bit. Freezing brownies is easy and a great way to save some for later. Cut the brownies into squares before freezing. Wrap each piece in plastic wrap and then place them in a freezer bag. They can last for up to three months in the freezer. When you’re ready to enjoy, simply thaw them in the fridge overnight or at room temperature for a few hours. To warm up your brownies, preheat your oven to 350°F (175°C). Place the brownies on a baking sheet and cover them with foil. Heat for about 10 minutes. This will help them regain their soft texture. You can also use the microwave. Heat a single brownie on medium power for about 15-20 seconds. Enjoy the gooey goodness! To make brownies fudgier, add extra fat. You can use more butter or some oil. Try adding an extra egg too. Another tip is to bake them for less time. Check them early, around 20 minutes. They should look set but soft in the middle. Yes, you can use many types of chocolate chips! Dark chocolate chips add a rich taste. Milk chocolate chips make them sweeter. You can even mix them. Try white chocolate chips for a fun twist. Just keep the amount the same, about one cup. If your brownies are too dry, check your baking time. They may have baked too long. You can also add a little water or milk. Another option is to serve them with ice cream or whipped cream. This adds moisture and makes them taste great! This blog post covered all you need to know for baking brownies. We listed key ingredients, offered allergen swaps, and shared brand suggestions. I outlined step-by-step instructions for perfect preparation. You learned tips for texture, flavor balance, and cutting techniques. We also explored gluten-free options and quick versions for busy days. Finally, you got storage tips to keep brownies fresh. With this knowledge, you can create delicious brownies every time. Enjoy the process and share your tasty treats!

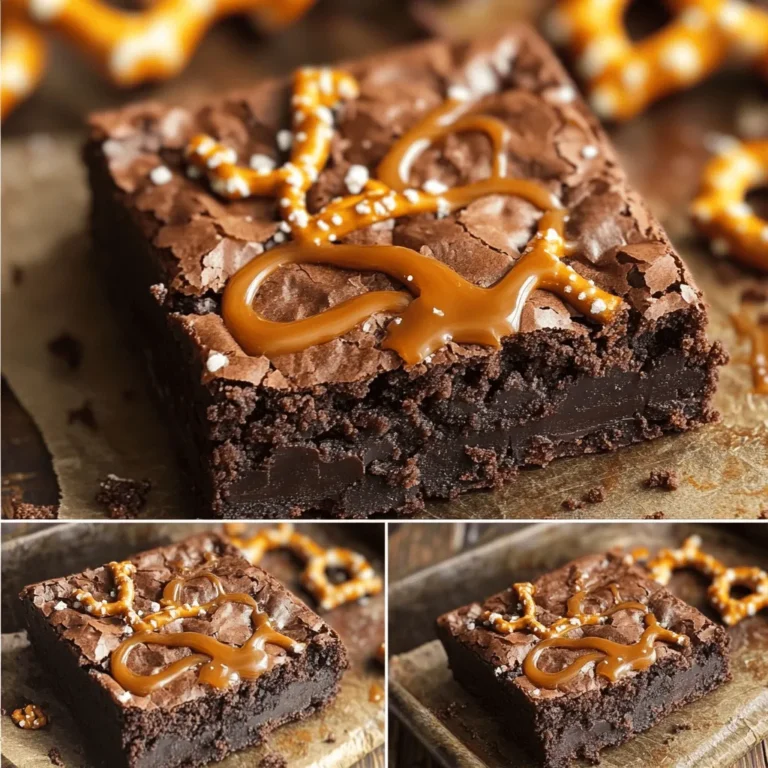
Salted Caramel Pretzel Brownies Rich and Decadent Treat

- 4 cups fresh broccoli florets, chopped - 1 medium onion, diced - 2 cloves garlic, minced - 1 cup carrots, shredded - 1 cup celery, diced Fresh produce makes this soup bright and tasty. The broccoli adds green color and nutrients. Onions and garlic give it a strong base flavor. Carrots add sweetness, while celery brings crunch. Using fresh ingredients ensures your soup is full of flavor. - 4 cups vegetable broth - 1 teaspoon dried thyme - 1/2 teaspoon black pepper - 1/4 teaspoon cayenne pepper (optional) - Salt to taste - 1 tablespoon olive oil Pantry essentials are key for taste. Vegetable broth adds depth. Thyme brings an earthy aroma. Black pepper adds warmth, while cayenne gives a spicy kick. Salt enhances all the flavors. Olive oil helps blend everything smoothly. - 1 cup heavy cream - 2 cups sharp cheddar cheese, shredded Creamy components turn this soup into a delight. Heavy cream makes it rich and smooth. Sharp cheddar cheese adds a tangy flavor that you will love. Together, they create a comforting texture that makes this soup a favorite. - Add chopped vegetables to the slow cooker. - Pour in the vegetable broth and seasonings. First, gather your fresh ingredients. You’ll need 4 cups of broccoli florets, 1 diced onion, 2 minced garlic cloves, 1 cup of shredded carrots, and 1 cup of diced celery. This mix gives your soup great flavor and texture. Next, place the chopped vegetables in the slow cooker. Make sure they are evenly spread out. Now, pour in 4 cups of vegetable broth. This broth will be the soup's base. To add flavor, sprinkle in 1 teaspoon of dried thyme and 1/2 teaspoon of black pepper. If you like a bit of heat, add 1/4 teaspoon of cayenne pepper. Finish by drizzling 1 tablespoon of olive oil over the mix. Stir everything to combine. - Cover and set slow cooker (low for 4-5 hours or high for 2-3 hours). - Check vegetable tenderness before blending. Now it’s time to cook. Cover your slow cooker and set it to low for 4-5 hours or high for 2-3 hours. The longer you cook, the softer the veggies will get. After a few hours, check if the vegetables are tender. They should easily break apart when pressed with a fork. - Puree the soup to desired consistency. - Stir in cream and cheddar; heat through. Once the veggies are soft, use an immersion blender to puree the soup. Blend until you reach your favorite texture. If you like some chunks, don’t blend it too much. After blending, stir in 1 cup of heavy cream. This adds rich creaminess to the soup. Gradually mix in 2 cups of shredded sharp cheddar cheese. Keep stirring until the cheese melts and combines well. Let the soup heat for another 10-15 minutes on low. Stir occasionally to keep it smooth and warm. Now, your slow cooker broccoli cheddar soup is ready to serve! To make your soup taste just right, adjust the seasoning. Start with salt and black pepper. Add small amounts and taste as you go. You want it to be savory, but not too salty. If you like heat, try adding cayenne pepper. Just a little can give your soup a nice kick. Start with a pinch, then add more if you want. This spice can really change the dish. For a rich soup, you can keep some chunks. This adds texture and makes it feel hearty. Blend the soup until smooth, but leave a few bits of broccoli for a nice bite. You can use an immersion blender or a traditional blender. An immersion blender is easy. You can blend right in the slow cooker. A traditional blender works too, but you must transfer the soup in batches. Choose what you prefer! Presentation is key to a stunning dish. Serve your soup in warm bowls. This keeps it hot and inviting. Top with extra shredded cheddar cheese. A sprinkle of fresh cracked black pepper adds flavor and looks nice. For an added touch, add a dollop of sour cream. A few broccoli florets on top make it pretty. These small details make your soup feel special! {{image_2}} You can switch up the cheese in this soup easily. Instead of sharp cheddar, try gouda or Monterey Jack. Each cheese brings its own flavor and creaminess. If you prefer a vegan option, look for plant-based cheeses. Many brands offer great vegan cheddar. Just check the label for meltability. Want to add more to your soup? You can throw in cooked chicken or beans for extra protein. This makes the dish heartier. You can also mix in other veggies like spinach or cauliflower. Adding these gives your soup a nutrition boost and great taste. If you need a gluten-free soup, use gluten-free broth. Most vegetable broths fit this need. For a low-fat version, swap heavy cream with almond milk or low-fat milk. This keeps the soup creamy without all the fat. Adjust the cheese amount to keep the flavor strong. To keep your Slow Cooker Broccoli Cheddar Soup fresh, refrigeration is key. After serving, let it cool down. Place it in an airtight container and store it in the fridge. Enjoy it within 3 to 4 days for the best flavor. If you want to save some for later, freezing is a great option. Pour the cooled soup into freezer-safe containers. Leave some space at the top for expansion. It can last up to 3 months in the freezer. When you're ready to eat, just thaw it overnight in the fridge. When reheating, using the stove is best. Pour the soup into a pot and heat it on low. Stir it often to keep it smooth and creamy. If you choose the microwave, use a microwave-safe bowl. Heat in short bursts, stirring in between. This method helps avoid separation of ingredients. Always check the temperature before serving. The soup should be hot throughout, but not boiling. If it looks a bit thick, add a splash of broth or cream to loosen it. In the fridge, your soup stays good for 3 to 4 days. If you freeze it, the shelf life extends to about 3 months. Just remember, the longer it sits, the more the flavors may change. Always trust your senses—if it smells off or looks strange, it's best to toss it. Cooking in a slow cooker is simple. If you choose low heat, it takes about 4 to 5 hours. On high heat, the soup cooks in 2 to 3 hours. I find low heat gives the best flavor as the veggies blend well over time. Always check if the vegetables are tender before blending. Yes, you can make this soup ahead of time. Just prepare it and let it cool first. Store it in an airtight container in the fridge for up to three days. To reheat, warm it on the stove or in the microwave. This soup tastes great even after a day or two. You can use frozen broccoli if you want. Just keep in mind that frozen veggies cook faster. Reduce the cooking time by about an hour. Also, add them in the last hour of cooking. This way, they stay bright and tasty. In this post, we explored how to make a creamy Slow Cooker Broccoli Cheddar Soup. We discussed vital ingredients such as fresh veggies, seasonings, and creamy elements like heavy cream and cheddar cheese. You learned step-by-step instructions for cooking and blending, plus tips for flavor and texture. Variations allow for personal touches, and storage tips help keep leftovers fresh. Enjoy your homemade soup knowing you can customize it to fit your taste!

Slow Cooker Broccoli Cheddar Soup Easy Comfort Dish

To make crispy Air Fryer Parmesan Potato Wedges, you will need: - 4 medium-sized russet potatoes - 3 tablespoons olive oil - 1/2 cup grated Parmesan cheese - 1 teaspoon garlic powder - 1 teaspoon dried Italian herbs (like oregano, basil, or thyme) - 1/2 teaspoon smoked paprika - Salt and pepper to taste - Fresh parsley, chopped (for garnish) Using good-quality ingredients makes a big difference in taste. Fresh russet potatoes give you the best texture. Look for firm potatoes with no green spots. For the olive oil, choose extra virgin for a richer flavor. High-quality Parmesan cheese will melt and crisp better, adding a nice touch. You can adjust the recipe based on what you have. If you don’t have russet potatoes, try Yukon gold or sweet potatoes. For the cheese, you can swap Parmesan for Cheddar or a mix. If you want a kick, add cayenne pepper to the spices. You can also use fresh herbs instead of dried for a fresher taste. Start with fresh russet potatoes. These potatoes give the best texture. Wash and scrub them well to remove dirt. Cut each potato into wedges, aiming for about eight per potato. This size helps them cook evenly. Place the wedges in a large bowl, ready for seasoning. Now, it’s time to add flavor. Drizzle three tablespoons of olive oil over the wedges. This oil helps the seasonings stick and gives a nice crisp. Next, sprinkle one teaspoon of garlic powder, one teaspoon of dried Italian herbs, and half a teaspoon of smoked paprika. Add salt and pepper to taste. Toss the wedges gently until they are well coated. Every wedge should be covered in oil and spices. Preheat your air fryer to 400°F (200°C). This step is key for golden, crispy wedges. Once heated, place the wedges in the basket in a single layer. If you have too many, cook them in batches. Set the timer for 15-20 minutes. Halfway through, shake the basket. This helps them cook evenly. They are done when they are golden brown outside and soft inside. Enjoy your delicious wedges! To get the best crispy texture, start with dry potatoes. After washing, make sure to pat them dry with a towel. This step helps the oil and seasonings stick better. Cut the potatoes into wedges that are about the same size. This way, they cook evenly. A light coat of oil is key. Too much oil can make them soggy. Aim for just enough to coat each wedge lightly. For crispy potato wedges, cook them for 15 to 20 minutes at 400°F (200°C). The exact time depends on your air fryer model. I suggest checking them around the 15-minute mark. If they look golden brown, they are likely done. If not, give them a few more minutes. Remember to shake the basket halfway through. This helps them crisp up all around. Always preheat your air fryer for about 5 minutes before cooking. This step ensures even cooking. Set your air fryer to 400°F (200°C) for the best results. Avoid overcrowding the basket. If you have a lot of wedges, cook them in batches. This allows hot air to circulate around each wedge, making them crispy and delicious. {{image_2}} You can play with cheese in your potato wedges. Try using sharp cheddar for a bold flavor. A blend of Parmesan and mozzarella gives a gooey texture. If you want something different, look for cheese blends in stores. Just remember to keep the same amount of cheese for best results. If you like heat, add some spice! Mix in cayenne pepper or chili powder with your seasonings. You can also use a dash of hot sauce on the wedges before cooking. This will create a kick that makes each bite exciting. Just adjust the spice to suit your taste. Fresh herbs can take your wedges to the next level. Try adding rosemary, thyme, or even cilantro. Chop them finely and mix them in with the olive oil. For a unique twist, use fresh basil after cooking. It adds a bright flavor that pairs well with the crispy potatoes. To keep your leftover potato wedges fresh, place them in an airtight container. Let them cool to room temperature first. This helps avoid moisture build-up, which can make them soggy. Store the container in the fridge. They will last for about 3 to 5 days. Reheat your potato wedges in the air fryer for the best results. Set it to 350°F (175°C) and cook for 5 to 7 minutes. This will help restore their crispy texture. You can also use an oven if you prefer. Place them on a baking sheet and heat at 375°F (190°C) for about 10 minutes. Avoid the microwave, as it can make them soft. You can freeze potato wedges for later use. First, let them cool completely. Place them in a single layer on a baking sheet and freeze for about 1 hour. Then, transfer them to a freezer bag or container. This method prevents them from sticking together. They will stay good for up to 3 months. When you’re ready to eat, cook them straight from the freezer in your air fryer. Just add a few extra minutes to the cooking time. Yes, you can use different potatoes. Yukon Gold or sweet potatoes work well. Each type gives a unique taste and texture. Yukon Gold will be creamy, while sweet potatoes add sweetness. Just remember to cut them into similar wedge sizes for even cooking. To make the wedges healthier, try these tips: - Use less olive oil, just enough to coat. - Swap regular Parmesan for a lower-fat version. - Add more herbs and spices for flavor without extra calories. - Serve with veggies instead of dip for added nutrients. Many sauces go well with these wedges. Here are my favorites: - Ketchup is a classic choice. - Ranch dressing adds creaminess. - Garlic aioli gives a nice kick. - Spicy mayo adds heat. - A tangy barbecue sauce complements the flavors. Try different sauces to find your favorite! This guide covered the best ingredients and steps for air fryer potato wedges. You learned about ingredient quality, seasoning, and cooking techniques. I shared tips for crispiness and variations to enhance flavor. Finally, we explored storage methods and answered common questions. Enjoy making these tasty wedges at home. Experiment with flavors and share your results. Happy cooking!

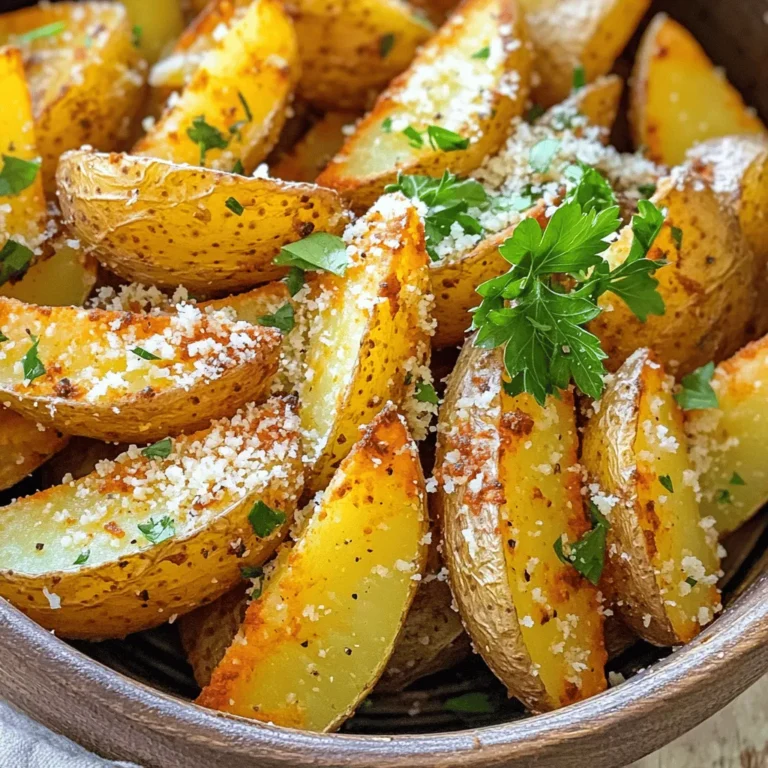
Air Fryer Parmesan Potato Wedges Crispy and Delicious

Here's what you'll need to make your Chocolate Peanut Butter Chia Pudding: - 1/2 cup unsweetened almond milk (or milk of choice) - 1/4 cup chia seeds - 2 tablespoons unsweetened cocoa powder - 2 tablespoons creamy peanut butter - 2 tablespoons maple syrup or honey (adjust to taste) - 1 teaspoon vanilla extract - A pinch of sea salt - Dark chocolate shavings (for garnish) - Crushed nuts (for garnish, optional) Each ingredient plays a key role in this recipe. The almond milk gives a creamy base. Chia seeds add texture and a boost of nutrition. Cocoa powder provides the rich chocolate flavor we love. Peanut butter brings a nutty depth. Maple syrup or honey sweetens the mix, while vanilla extract rounds it out. Sea salt enhances all these flavors. Lastly, the dark chocolate shavings and crushed nuts add a delightful finish. Make sure to gather these ingredients before you start. They are easy to find and you might already have some at home. This recipe is simple yet rewarding, perfect for a sweet treat any time of day! - Combine wet ingredients First, grab a medium-sized mixing bowl. Pour in 1/2 cup of unsweetened almond milk. Add 2 tablespoons of unsweetened cocoa powder. Then, mix in 2 tablespoons of creamy peanut butter. Next, add 2 tablespoons of maple syrup or honey. Don’t forget 1 teaspoon of vanilla extract and a pinch of sea salt. Whisk until everything blends well and looks smooth. - Mix in chia seeds Now, it’s time to add the star ingredient: the chia seeds! Measure out 1/4 cup and sprinkle them into the bowl. Stir vigorously. This step makes sure the chia seeds spread evenly and don’t clump together. You want them mixed in well. - Refrigeration process After mixing, cover the bowl with plastic wrap. You can also use a jar with a lid. Place it in the fridge for at least 4 hours or overnight. This time helps the chia seeds absorb the liquid and turn your mix into a pudding. - Adjusting consistency before serving When you’re ready to serve, check the pudding's texture. If it seems too thick, add a splash of almond milk. Stir it well until you reach the right consistency. This ensures a creamy and smooth dessert. - Presentation ideas For serving, stir the pudding again. Spoon it into your favorite bowls or glasses. For a lovely touch, garnish with dark chocolate shavings. You can add crushed nuts if you like a bit of crunch. It makes for a beautiful presentation! - Portion sizes This recipe makes enough for 2 to 4 servings. You can adjust the portions based on your needs. Each serving is rich and filling, perfect for a sweet treat! To get the best chocolate peanut butter chia pudding, you need even chia seed distribution. When you mix the chia seeds into the wet ingredients, stir really well. This way, the seeds won’t clump together. They need space to soak up the liquid and expand. The recommended setting time for your pudding is at least four hours. For best results, let it sit overnight in the fridge. This allows the chia seeds to do their magic. When you check it later, the pudding should be thick and creamy. If it feels too thick, simply stir in a splash more almond milk. You can take your pudding up a notch by adding spices or extracts. A pinch of cinnamon or a dash of nutmeg can add warmth. You might also try a few drops of almond extract for a new twist. If you want a different sweetness, consider using agave or stevia instead of maple syrup. Each sweetener brings its own flavor, so feel free to experiment. Just adjust the amount based on your taste. {{image_2}} You can switch up the nut butter for fun. Almond or cashew butter works great. Each adds a unique taste. You can also try different kinds of milk. Coconut or soy milk can give a creamier texture. They will change the flavor, too. These variations keep your pudding exciting. Toppings make your pudding even better. Fresh fruits like bananas or strawberries add sweetness. They also give a nice pop of color. You can add granola for a crunchy bite. Coconut flakes are another tasty option. They add a tropical twist to your dessert. Experiment with these toppings to find your favorite mix! After making chocolate peanut butter chia pudding, store it in the fridge. Use an airtight container for best results. This keeps it fresh and tasty. The pudding can last for about 3 to 5 days in the fridge. Check for any changes in smell or texture before eating. If you see any signs of spoilage, it’s best to toss it out. Yes, you can freeze chia pudding! This is a great option for meal prep. Transfer the pudding to a freezer-safe container. Leave some space at the top, as it will expand when frozen. It can last up to 2 months in the freezer. To thaw, place it in the fridge overnight. If it's too thick after thawing, stir in a little almond milk to loosen it. Enjoy your delicious treat later! Chia seeds are tiny powerhouses. They are rich in fiber, which helps digestion. They also contain protein, making them a great snack. Omega-3 fatty acids in chia seeds support heart health. Plus, they have antioxidants that fight free radicals. Eating chia seeds can give you energy and keep you full longer. Yes, this recipe is easy to make vegan. Just use almond milk or another plant-based milk. Maple syrup is already vegan, so you can keep that. The creamy peanut butter adds protein and flavor without animal products. This chocolate peanut butter chia pudding is a great vegan treat. You can serve chocolate peanut butter chia pudding in bowls or glasses. First, stir the pudding well to mix it up. Then, spoon it into your serving dish. For a fun touch, add dark chocolate shavings on top. You can also sprinkle crushed nuts for extra crunch. It looks great and tastes even better! Yes, you can make this pudding ahead of time. In fact, it tastes better when it sits. Just prepare it the night before. Let it chill in the fridge for at least four hours. This lets the chia seeds absorb the liquid and thicken. You can enjoy it the next day as a quick breakfast or snack! This blog post covered a tasty chocolate peanut butter chia pudding recipe. We discussed its ingredients, step-by-step instructions, and some handy tips. You learned how to perfect your pudding and explore fun variations. Don’t forget about the storage info for leftovers and answers to common questions. Now you can create a delicious dessert that fits your diet. Enjoy making this healthy treat again and again!

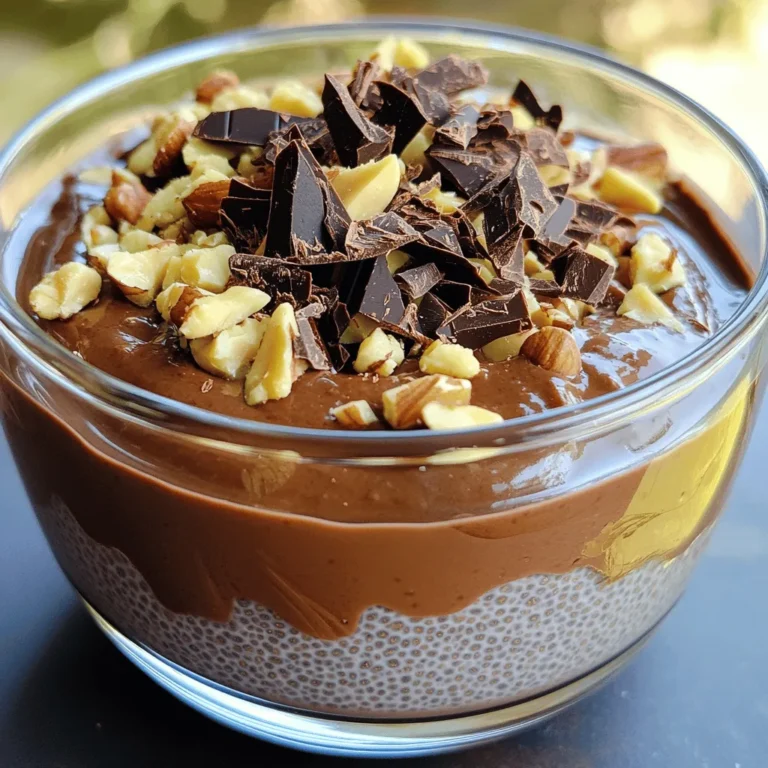
Chocolate Peanut Butter Chia Pudding Delightful Treat

To create sheet-pan blackened salmon tacos, gather these fresh items: - 2 salmon fillets (6-8 oz each) - 1 tablespoon smoked paprika - 1 teaspoon garlic powder - 1 teaspoon onion powder - 1 teaspoon cumin - 1 teaspoon cayenne pepper (adjust for spice level) - Salt and black pepper to taste - 2 tablespoons olive oil - 8 small corn tortillas - 1 cup shredded cabbage (red or green) - 1 avocado, sliced - 1/4 cup fresh cilantro, chopped - 1 lime, cut into wedges - Optional: Crumbled feta cheese or a dollop of sour cream Fresh ingredients make a big difference in taste. Using fresh salmon ensures a flaky, tender texture. Fresh herbs, like cilantro, bring bright flavors. Fresh lime juice adds a zesty kick. The taste of your tacos improves with fresh, colorful veggies. Cabbage adds crunch, while ripe avocados give creaminess. Always choose the best ingredients for great meals. You can customize your tacos based on what you have. If you can’t find salmon, use chicken or shrimp. For spice lovers, add more cayenne pepper. Prefer a milder taste? Skip the cayenne altogether. You can swap corn tortillas for flour ones if you like. Add crumbled feta or sour cream for creaminess. Adding pickled onions or jalapeños can also boost flavor. Feel free to mix and match! Start by preheating your oven to 425°F (220°C). This ensures your salmon cooks evenly. Line a large baking sheet with parchment paper. This makes for easy clean-up and keeps the salmon from sticking. In a small bowl, mix together the smoked paprika, garlic powder, onion powder, cumin, cayenne pepper, salt, and black pepper. This spice rub gives your salmon that bold blackened flavor. Pat the salmon fillets dry with paper towels. This helps the rub stick better. Brush both sides of the salmon with olive oil. Now, sprinkle the spice mix generously over the fillets. Make sure every bit of salmon is covered. Place the seasoned salmon on your prepared baking sheet. Bake in the oven for about 12-15 minutes. You’ll know the salmon is done when it flakes easily with a fork and looks opaque. Once it's cooked, take it out and let it rest for a few minutes. This helps keep the juices inside. After resting, break the salmon into bite-sized pieces using a fork. While the salmon bakes, warm your corn tortillas. Heat them in a dry skillet over medium heat for about 30 seconds on each side. This makes them soft and pliable. Keep the tortillas warm in a clean kitchen towel until you’re ready to serve. Now it’s time to put everything together. Lay down a good amount of shredded cabbage on each tortilla. Then, add the blackened salmon pieces on top. Don’t forget to add sliced avocado and chopped cilantro for extra flavor. Squeeze fresh lime juice over everything. If you like, add crumbled feta cheese or a dollop of sour cream. Serve your tacos right away with extra lime wedges on the side. Enjoy! To make the best blackened seasoning, use fresh spices. Dried spices lose their flavor over time. A mix of smoked paprika, garlic powder, onion powder, cumin, and cayenne pepper works wonders. Adjust the cayenne to match your spice level. This seasoning gives your salmon a bold, smoky taste. When applying the rub, be generous. Make sure every bit of salmon is covered. This creates a flavorful crust that seals in moisture. Warming tortillas is key for soft, tasty tacos. Use a dry skillet over medium heat. Place the tortillas in the skillet for about 30 seconds on each side. This step makes them pliable and enhances their flavor. If you have a tortilla warmer, use it to keep them warm. Wrap them in a clean kitchen towel if you don’t have one. This keeps them hot until you’re ready to fill them. These tacos shine with fresh toppings. Shredded cabbage adds crunch and color. Sliced avocado brings creaminess, while cilantro offers a fresh bite. A squeeze of lime juice brightens the flavors. You can also add feta cheese or a dollop of sour cream for richness. Serve the tacos with extra lime wedges on the side. These small touches elevate your dish and make it even more enjoyable. Consider pairing with a light salad or chips for a complete meal. {{image_2}} You can switch the salmon for other proteins. Chicken works great here. Simply use boneless chicken thighs or breasts. Shrimp is another tasty option. Cook them in the same spice rub for a quick meal. If you prefer white fish, try cod or tilapia. These fish also soak up flavors well. For a vegetarian twist, use grilled veggies. Bell peppers and zucchini add color and taste. You can also try black beans for protein. If you're going vegan, use tofu. Press it to remove extra moisture, then coat it with the spice rub. Bake until golden. These options make your tacos hearty and healthy. Tacos can vary in style. Try lettuce wraps for a low-carb option. This swap gives a fresh crunch. For toppings, think outside the box. Add mango salsa for a sweet bite. Roasted corn adds a nice texture. You can also use pickled red onions for tanginess. Each topping brings new flavors to your meal. After enjoying your Sheet-Pan Blackened Salmon Tacos, you might have some salmon left. To store it, let the salmon cool down first. Then, place it in an airtight container. It will stay fresh in the fridge for up to three days. You can also freeze the salmon. Just wrap it tightly in plastic wrap and then place it in a freezer bag. Frozen salmon can last for about three months. When you’re ready to enjoy the leftover tacos, you can reheat them easily. If you have whole tacos, unwrap them. Heat a skillet over medium heat. Place the tacos in the skillet for about 1-2 minutes on each side. For the salmon, you can microwave it for about 30 seconds. Just be careful not to overcook it. You want it warm, not dry. Meal prep helps save time during busy weeks. You can prepare the salmon ahead of time. Bake it, then let it cool and store it in the fridge. You can also chop your veggies and keep them in separate containers. When you're ready to eat, simply warm the salmon and tortillas. Assemble your tacos quickly for a fresh meal. This method keeps flavors vibrant and saves you from cooking every day. Yes, you can use frozen salmon. Just remember to thaw it first. Place the salmon in the fridge overnight or run it under cold water. After thawing, dry the salmon with paper towels. Then, follow the same steps to season and bake it. If you don't have corn tortillas, you can use flour tortillas. Lettuce wraps also work well for a low-carb option. You can even try pita bread or whole grain tortillas. Each option adds a new taste to your tacos. The spice level in these tacos can vary. The cayenne pepper adds heat. If you want less spice, reduce the amount of cayenne. You can also add toppings like sour cream or avocado to cool it down. Enjoy the flavors at your own heat level! This blog covered essential ingredients and their importance. Fresh ingredients boost flavor and nutrition. I shared step-by-step instructions for making tasty blackened salmon tacos. You learned tips for seasoning and warming tortillas. I also discussed variations for different diets and preferences. Remember, cooking is fun and creative. Don’t hesitate to experiment. Enjoy your meals and share them with friends!

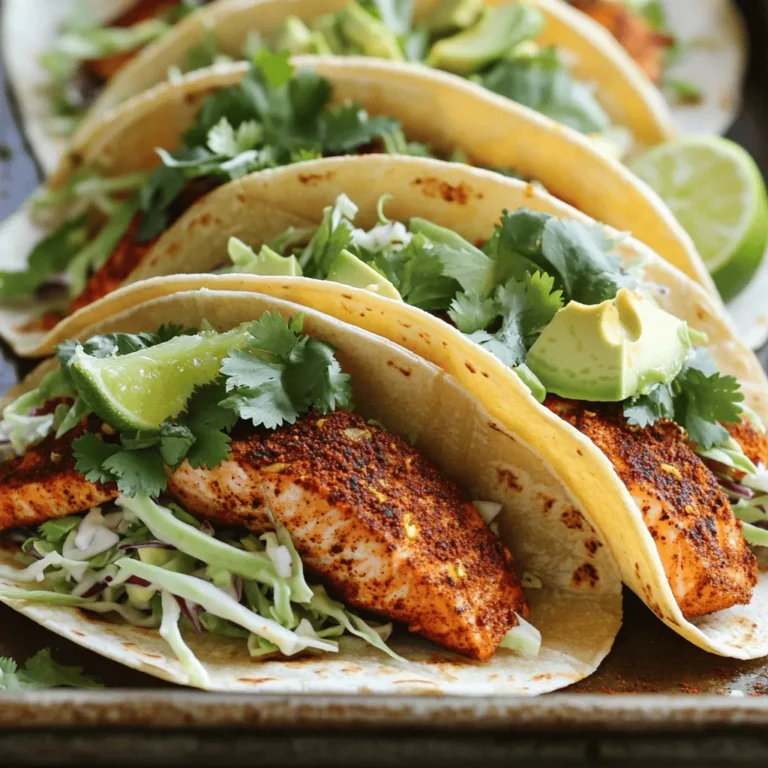
Sheet-Pan Blackened Salmon Tacos Flavorful Dinner Idea

- 1 cup graham cracker crumbs - 1/4 cup unsalted butter, melted - 2 (8 oz) packages cream cheese, softened - 1 cup powdered sugar - 1/2 cup sour cream - 1/4 cup fresh lime juice (about 2-3 limes) - Zest of 2 limes - 1 teaspoon vanilla extract - Whipped cream, for topping - Lime slices, for garnish You can swap graham crackers for crushed cookies or oats. For butter, use coconut oil or margarine. If you want a dairy-free option, try vegan cream cheese. You can use maple syrup instead of powdered sugar for a different sweet taste. Greek yogurt can replace sour cream for a tangy twist. If fresh limes are not available, use bottled lime juice, but fresh juice tastes best. You can skip vanilla extract, but it adds great flavor. For toppings, use any fruit instead of lime slices. Using fresh ingredients is key to a tasty cheesecake. Fresh limes give a bright and bold flavor that bottled juice can’t match. Cream cheese should be fresh for the best texture and taste. Quality ingredients make your dessert shine. They enhance flavors and create a rich, creamy filling. Freshness also improves the look of your dessert. A beautiful, tasty treat is sure to impress your friends and family. To make the crust, gather your graham cracker crumbs and melted butter. In a medium bowl, mix the crumbs and butter. Stir until the crumbs look like wet sand. This step is key to a great base. Next, take your jars and place about 2 tablespoons of the crumb mixture into each one. Press down gently to form a nice crust. This helps keep everything together later. Now, let's move to the filling. In a large mixing bowl, add the softened cream cheese. Beat it with an electric mixer until it is smooth. This makes it easier to mix in other ingredients. Gradually add the powdered sugar while mixing. This will sweeten the filling just right. Then, mix in sour cream, fresh lime juice, lime zest, and vanilla extract. Beat it all together until it is fluffy and smooth. This should take about 2 minutes. After making the filling, it's time to assemble the jars. Spoon or pipe the cheesecake filling over the crust in each jar. Fill them about 3/4 full. This gives you a nice layer of cheesecake. Use a spatula to smooth the tops. Now, place the jars in the refrigerator. Chill them for at least 4 hours or until set. This helps the flavors blend and the filling firm up. Before serving, add a dollop of whipped cream on top and a slice of lime for a fresh touch. Enjoy your delicious no-bake key lime cheesecake jars! To get a smooth and creamy cheesecake, start with soft cream cheese. Let it sit out for about 30 minutes. Beat it well with a mixer until it’s fluffy. Add the powdered sugar slowly to avoid lumps. When you mix in the sour cream and lime juice, do it gently. This helps keep the mix nice and airy. Want to save time? Use a food processor for the graham cracker crust. It makes quick work of crushing the crackers. You can also prep the jars a day ahead. Just chill them overnight. This gives the flavors time to blend and taste even better. For this recipe, I recommend having a few key tools on hand. You need a medium bowl for the crust and a large bowl for the filling. An electric mixer is great for smooth results. Use a spatula to help layer the cheesecake into the jars. Finally, a piping bag makes filling the jars neat and easy. {{image_2}} You can easily change the flavor of your cheesecake jars. For a tropical twist, add shredded coconut to the filling. Just mix in 1/2 cup of unsweetened shredded coconut with the cream cheese. Another idea is to use lemon juice instead of lime juice for a lemon cheesecake. You can also add a touch of coconut extract for more coconut flavor. This keeps it fun and fresh! Garnishing your jars can make a big difference. Instead of lime slices, try using fresh berries. Strawberries or blueberries add a lovely color. You can also sprinkle some toasted coconut on top for crunch. For a chocolate lover, drizzle melted dark chocolate over the whipped cream. These small touches can wow your guests and make the dessert look stunning. These cheesecake jars are great for parties! You can set them on a table for a fun dessert bar. Use different jars to create a colorful display. Consider adding mini spoons for easy serving. You can even pair them with coffee or tea. This adds a nice touch to your gathering and lets everyone enjoy their own little treat. To keep your no-bake key lime cheesecake jars fresh, store them in the fridge. Use an airtight container to prevent any smells from getting in. If you stack the jars, place parchment paper between them to avoid sticking. Keep them away from strong-smelling foods, as cheesecake can absorb odors easily. These cheesecake jars can last for about 5 days in the fridge. After that, the crust might get soggy, and the filling may lose its freshness. Always check for any off smells or changes in texture before serving. If you notice anything odd, it’s best to toss them out. You can freeze these cheesecake jars, but it’s best to do this before adding the whipped cream. Wrap each jar tightly in plastic wrap and then in foil. They can last up to 3 months in the freezer. When you are ready to eat, let them thaw in the fridge overnight. Add whipped cream and lime slices just before serving for the best taste. Yes, you can make these jars a day or two ahead. Just chill them in the fridge. The flavors will deepen and taste even better. Make sure to cover the jars tightly. This keeps them fresh and tasty. If you need a swap for cream cheese, try using Greek yogurt. It gives a nice tang. Another option is mascarpone cheese. It is rich and creamy, just like cream cheese. Both choices work well in this recipe. To keep the crust crunchy, use fresh graham cracker crumbs. Mix them with melted butter well. Press them firmly into the bottom of the jars. Avoid adding the filling too soon. Let the crust chill for a bit before adding the cheesecake layer. This helps keep it firm. This blog post gave you a clear guide on making cheesecake jars. We covered essential ingredients, substitutions, and the importance of freshness. You learned how to prepare the crust, make the filling, and assemble the jars. I shared tips for the right texture and time-saving tricks. We explored flavor variations and garnishing ideas for your parties. Lastly, I provided storage tips to keep your treats fresh. Enjoy making these delicious desserts, and don’t hesitate to experiment with your flavors!

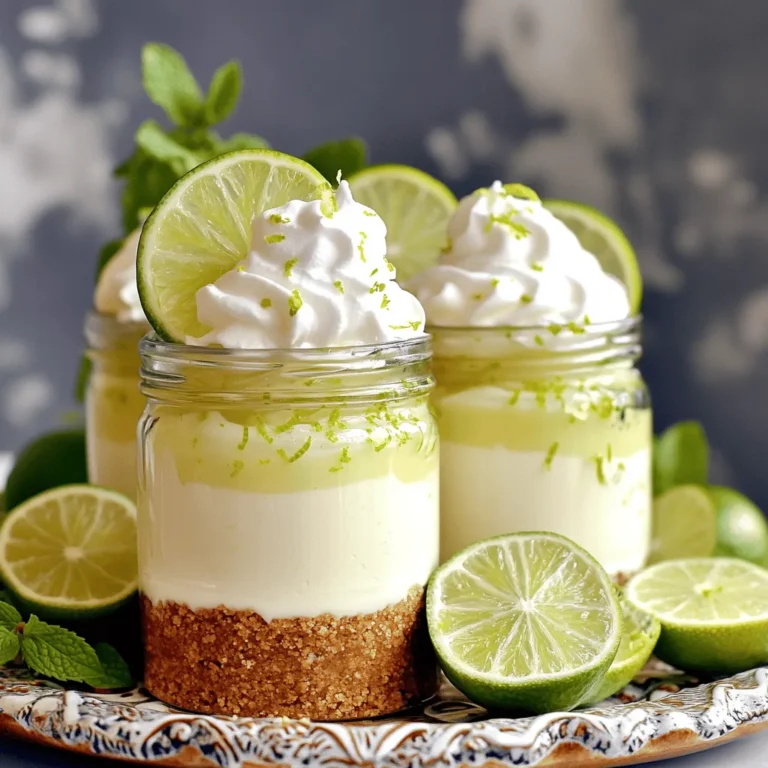
No-Bake Key Lime Cheesecake Jars Easy Dessert Delight

- 1 lb boneless, skinless chicken breasts, diced - 1 cup orzo pasta - 4 cups chicken broth - 1 cup heavy cream - 1 cup grated Parmesan cheese - 4 cloves garlic, minced - 1 medium onion, chopped - 2 tablespoons olive oil - 1 teaspoon Italian seasoning - Salt and pepper to taste - Fresh parsley, chopped (for garnish) Gathering your ingredients is key. Start with fresh chicken breasts, as they give the best flavor. Dicing them helps cook the chicken evenly and quickly. Next, you’ll need orzo pasta. This small pasta cooks fast and absorbs all the delicious flavors. For the broth, I prefer chicken broth for richness. It adds depth to the dish and enhances the flavor. Heavy cream is essential for that creamy texture. Parmesan cheese adds a salty, nutty flavor that makes it irresistible. Garlic and onion are the aromatic base. They bring a wonderful scent and taste, making every bite delightful. Olive oil is necessary for sautéing. It helps cook the chicken and aromatics while adding flavor. Italian seasoning ties everything together with a burst of herbs. Finally, don’t forget salt and pepper. They are crucial to enhance all the flavors. To finish, fresh parsley gives a pop of color and freshness to the dish. Having all these ingredients ready will make cooking this one-pot meal a breeze. First, heat olive oil over medium heat in a large pot. Once the oil is hot, add the diced chicken. Season it with salt, pepper, and Italian seasoning. Cook the chicken for about 5 to 7 minutes. You want it browned and cooked through. After cooking, remove the chicken from the pot and set it aside. Next, in the same pot, add the chopped onion and minced garlic. Sauté these ingredients for 2 to 3 minutes. You want the onions to turn translucent and fragrant. This step builds a great flavor base for your dish. Now, stir in the orzo pasta. Toast the orzo in the pot for about 1 to 2 minutes. This helps it absorb the flavors of the oil and garlic. Then, pour in the chicken broth and stir well. Bring the mixture to a boil, then reduce the heat to a simmer. Cover the pot and let it cook for about 10 to 12 minutes. Stir occasionally until the orzo is al dente. Once the orzo is cooked, it's time to make it creamy. Stir in the heavy cream and grated Parmesan cheese. Mix until the cheese melts and the sauce becomes creamy. Then, return the cooked chicken to the pot. Mix it well with the creamy orzo. Allow everything to heat through for another 2 to 3 minutes. Adjust the seasoning with salt and pepper if needed. - How to achieve the best flavor: Start with fresh ingredients. Use good-quality chicken and fresh garlic. This will make a big difference. Don’t rush the sautéing step. Cook the onions and garlic until they smell great. This brings out their best taste. - Ensuring creamy consistency: For a rich texture, use full-fat heavy cream. It blends well with the cheese. Stir the cream in slowly. This helps it mix better with the orzo and keeps it creamy. Add the Parmesan cheese at the end. This keeps it from clumping and helps it melt perfectly. - Adjusting cooking times for variations: If you use whole wheat orzo, it may take longer to cook. Check the package for the time. For frozen chicken, add a few extra minutes to the cooking time. Make sure it is fully cooked before serving. - Substituting ingredients for dietary needs: You can swap chicken for tofu to make it vegetarian. Use vegetable broth instead of chicken broth for a plant-based option. If you’re lactose intolerant, try a dairy-free cream. There are many great choices now. - Pairing ideas for a complete meal: This dish goes well with a side salad. A fresh green salad adds crunch and color. Garlic bread is another great choice. It’s perfect for soaking up the creamy sauce. - Best garnishes and sides: Top your dish with fresh parsley for a pop of color. You can also sprinkle extra Parmesan on top. This adds a nice touch. Serve it with some steamed veggies on the side for added nutrition. {{image_2}} For a lighter dish, you can use low-fat cream and cheese. This change cuts down on calories but keeps the taste delicious. You can also add vegetables like spinach or broccoli. These veggies boost nutrition and add color. To amp up the flavor, try adding herbs and spices. Fresh basil or thyme can really elevate the taste. You could also mix in different cheeses. A bit of mozzarella or feta can create a unique twist. For a meatless meal, swap the chicken with plant-based proteins like tofu or chickpeas. This option keeps the protein but makes it vegetarian. Use vegetable broth instead of chicken broth. This adds depth without meat, making it a satisfying dish for everyone. To store your leftover One-Pot Garlic Parmesan Chicken Orzo, follow these steps: - Let the dish cool down to room temperature. - Transfer the orzo to an airtight container. - Make sure to seal it tightly to keep out air. Your leftovers will last in the fridge for about 3 to 4 days. Always check for any off smells before eating. If you want to freeze this creamy dish, here’s how: - Allow the orzo to cool completely. - Scoop it into a freezer-safe container, leaving some space for expansion. - Label the container with the date for easy reference. For best taste, use the frozen orzo within 2 to 3 months. To reheat, let it thaw in the fridge overnight. Then, heat it gently on the stove. Add a splash of chicken broth or cream to revive the creaminess. Stir often to heat evenly. Yes, you can use other pasta types. If you want, try small shapes like ditalini or even fusilli. Keep in mind that cooking times can change. Check the pasta for doneness. If you use a different pasta, adjust the broth amount as needed. To ensure chicken is safe to eat, check its internal temperature. Cooked chicken should reach 165°F (75°C). Use a meat thermometer for accuracy. This step keeps your meal safe and tasty. Absolutely! To make this dish gluten-free, substitute orzo with gluten-free pasta. Also, choose gluten-free chicken broth. These swaps keep the dish delicious while meeting your needs. Enjoy the same creamy texture without the gluten! This blog post covers a tasty recipe for creamy chicken orzo. You learned about the main ingredients, cooking steps, and ways to make it even better. The tips will help you perfect the dish while enjoying variations for health or flavor. Remember, storage info ensures your leftovers stay fresh. With easy adjustments, this meal can fit your needs and preferences. Enjoy creating this delicious dish, and happy cooking!

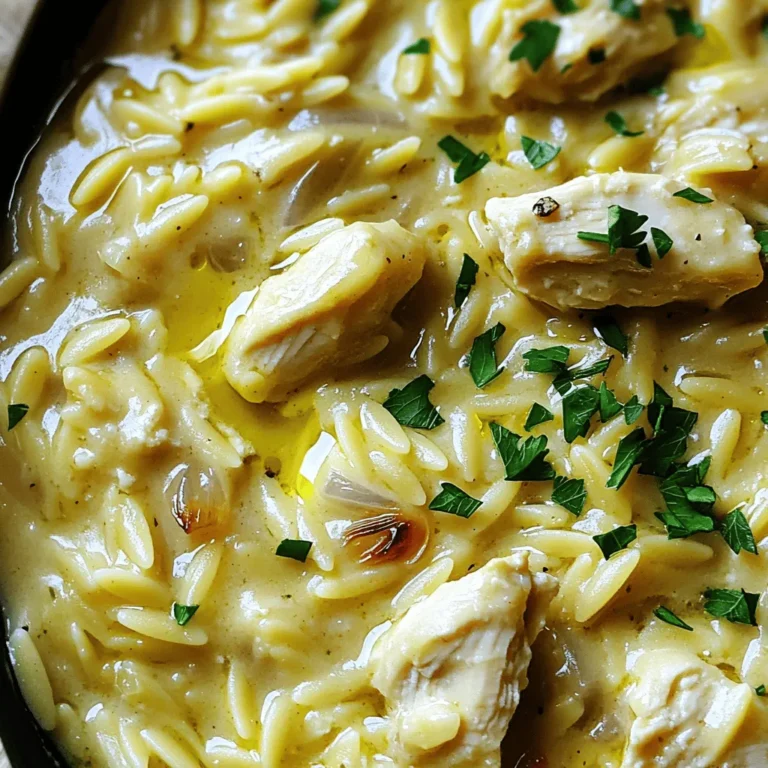
One-Pot Garlic Parmesan Chicken Orzo Recipe to Savor

- 1 lb chicken breast, cut into bite-sized pieces - 1 cup orange juice (freshly squeezed for best flavor) - 2 tablespoons soy sauce The chicken breast is the star of this dish. It cooks quickly and stays tender. I always prefer fresh orange juice. It makes a big difference in flavor. Soy sauce brings a nice saltiness that balances the sweetness. - 1 bell pepper (red or orange), diced - 1 cup broccoli florets - 2 green onions, chopped I love adding colorful veggies. They not only look good but also add nutrition. Bell peppers give a sweet crunch. Broccoli florets add a nice bite. Green onions bring a fresh taste and a pop of color. - 1 tablespoon honey - 1 tablespoon cornstarch - ½ tablespoon grated ginger - 2 cloves garlic, minced Honey adds a touch of sweetness. It helps the sauce stick to the chicken. Cornstarch thickens the sauce nicely. Ginger and garlic bring warmth and depth to the flavor. These ingredients make the sauce rich and tasty. To start, I mix the marinade ingredients in a bowl. I use: - 1 cup orange juice - 2 tablespoons soy sauce - 1 tablespoon honey - 1 tablespoon cornstarch - ½ tablespoon grated ginger - 2 cloves garlic, minced I stir everything until it's well blended. Next, I place the chicken pieces in a zip-top bag. I pour half of the marinade over the chicken and seal the bag. I let it marinate for at least 30 minutes. For more flavor, I suggest marinating for up to 2 hours in the fridge. I heat a large skillet over medium-high heat and add a drizzle of olive oil. When the oil is hot, I add the marinated chicken. I cook the chicken until it turns golden brown and is cooked through. This takes about 5-7 minutes. Once done, I remove the chicken from the skillet and set it aside. I add a bit more olive oil to the same skillet if needed. Then, I toss in the diced bell pepper and broccoli florets. I sauté the vegetables for about 3-4 minutes. I want them just tender, not mushy. After that, I pour in the remaining marinade. I bring it to a simmer and add back the chicken. I stir everything to combine and let the sauce thicken for another 2-3 minutes. Finally, I season with salt and pepper and stir in chopped green onions before removing it from the heat. - Best practices for marinating chicken: Use a zip-top bag to coat the chicken evenly. Marinate for at least 30 minutes. For stronger flavor, marinate up to 2 hours in the fridge. - Cooking time adjustments for different stoves: Medium-high heat works well for most stoves. If your stove runs hot, reduce the heat slightly to avoid burning the chicken. - Ideal rice options to pair: Jasmine rice is perfect for this dish. Its fragrant flavor complements the orange chicken well. You can also try brown rice for added fiber. - Presentation tips for bowls: Use colorful bowls to make your dish pop. Add a wedge of orange and some extra green onions on top for color and freshness. - Alternatives for soy sauce: Use tamari for a gluten-free option. Coconut aminos is another great choice for a sweeter taste. - Using different vegetables: You can swap out broccoli for snap peas or zucchini. Bell peppers can be any color, depending on your preference. {{image_2}} You can add some heat to your orange chicken bowls by using chili sauce. Just a spoonful can really kick up the flavor. Mix it into the marinade for a spicy twist. You may also try adding other citrus flavors, like lime or lemon juice. This will give your dish a fresh and bright taste. If you need gluten-free options, choose tamari instead of soy sauce. It has a similar taste and is safe for those with gluten sensitivities. For a lower-calorie meal, swap out honey for agave syrup. You can also use less oil when cooking the chicken. These small changes can make a big difference in your dish. Preparing your orange chicken bowls in advance can save you time. You can marinate the chicken a day before. This allows the flavors to soak in and makes cooking faster. Store the marinated chicken in the fridge. For storage, use airtight containers for your meals. Keep cooked chicken and vegetables separate from the rice. This helps keep everything fresh. When you’re ready to eat, just reheat it all together for a quick and tasty meal. To keep your Orange Chicken Bowls fresh, store them properly. Place leftovers in an airtight container. This helps lock in flavor. Refrigerate the container right away. Your dish will last up to four days in the fridge. If you want to save it longer, freezing is a great option. Divide your leftovers into smaller portions. This makes it easy to reheat later. Wrap each portion tightly in plastic wrap or foil. Then, place them in a freezer-safe bag or container. Your Orange Chicken Bowls can freeze well for up to three months. When it's time to enjoy your leftovers, there are a few ways to reheat them. The best method is using a skillet. Heat it over medium heat and add a splash of water or broth. This prevents the chicken from drying out. Stir often until everything is warm. Avoid using a microwave if you can. It often makes the chicken soggy. If you must use a microwave, cover the bowl with a damp paper towel. This helps keep moisture in while reheating. Knowing when to discard your leftovers is important. In the fridge, your Orange Chicken Bowls last up to four days. If you freeze them, they can last up to three months. Always check for signs of spoilage before eating. If you see any mold or if it smells off, it's time to throw it away. Trust your senses; they are your best guide for food safety. Yes, you can use frozen chicken. Start by thawing it in the fridge overnight. If you're in a hurry, you can use the microwave's defrost function. Once thawed, cut it into bite-sized pieces. - Make sure to pat the chicken dry before marinating. This helps the marinade stick better. - Cook the chicken a bit longer. Frozen chicken takes more time to cook through, about 8-10 minutes. You have many tasty options for sides. Here are some ideas: - Jasmine rice: This is the perfect base for your orange chicken. - Steamed rice: A simple and classic choice. - Stir-fried vegetables: Broccoli, snap peas, or carrots add color and nutrition. - Salad: A light salad with a citrus vinaigrette can be refreshing. If you like heat, there are easy ways to spice it up: - Chili sauce: Add your favorite chili sauce to the marinade. Sriracha or chili garlic sauce works well. - Red pepper flakes: Stir some into the sauce while cooking. Start with a pinch and add more if needed. - Fresh chilies: Slice fresh jalapeños or Thai chilies and toss them in with the vegetables for extra kick. This blog post covered a tasty orange chicken bowl recipe. We discussed the key ingredients like chicken, orange juice, and soy sauce. I shared cooking steps to get the chicken just right and tips for perfect veggies. You learned about serving ideas, ingredient swaps, and meal prep hints. In conclusion, this dish is easy to make and fun to adjust. Whether you want spice or healthier options, you can tailor it to your taste. Enjoy making this delightful meal!

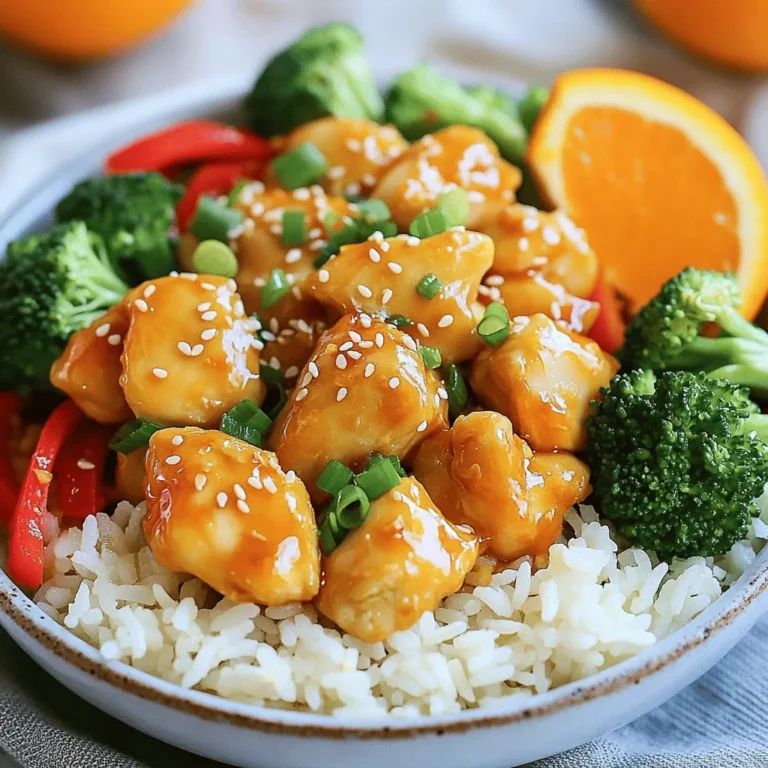
Orange Chicken Bowls Flavorful and Easy Dinner Dish

- 2 large sweet potatoes, peeled and diced - 1 can (15 oz) black beans, rinsed and drained - 1 can (14 oz) diced tomatoes with green chilies Sweet potatoes bring a sweet taste and soft texture. They add nutrients like fiber and vitamins. Black beans offer protein and heartiness, making the stew filling. Diced tomatoes create a rich base and add acidity. Together, these three ingredients make a delightful foundation for the stew. - 1 yellow onion, diced - 3 cloves garlic, minced - 1 red bell pepper, diced - 1 teaspoon ground cumin - 1 teaspoon smoked paprika - ½ teaspoon chili powder - Salt and pepper to taste Onion and garlic are key for flavor. They bring a savory base to the dish. The spices add warmth and depth. Cumin gives a nutty aroma, while smoked paprika adds a hint of smoke. Salt and pepper enhance all the flavors, making every bite enjoyable. - 1 cup vegetable broth - 2 tablespoons olive oil - Fresh cilantro for garnish Vegetable broth adds moisture and richness. It helps the stew cook slowly and evenly. Olive oil adds healthy fats and helps sauté the vegetables. Fresh cilantro brightens the dish, adding color and freshness. With these ingredients, your sweet potato black bean stew will be a hit! Start by heating 2 tablespoons of olive oil in a skillet over medium heat. Add the diced yellow onion and red bell pepper. Sauté these until soft, about 3 to 4 minutes. The colors and smells will fill your kitchen. Next, add 3 minced garlic cloves. Sauté for just 1 more minute. This will bring out the garlic's flavor. Now, grab your slow cooker. Layer in 2 large diced sweet potatoes and 1 can of black beans, rinsed and drained. Then, pour in 1 can of diced tomatoes with green chilies. Add 1 cup of vegetable broth, too. Sprinkle in 1 teaspoon of ground cumin, 1 teaspoon of smoked paprika, and ½ teaspoon of chili powder. Season with salt and pepper to your taste. Mix everything well. This helps the flavors blend. Cover the slow cooker. You can set it on low for 6 to 8 hours or high for 3 to 4 hours. The sweet potatoes should be tender when done. To check for doneness, poke a sweet potato piece with a fork. If it breaks apart easily, your stew is ready. Enjoy the warm, hearty smell as it cooks! To boost the flavor of your stew, try adding some extra spices. A pinch of cayenne pepper can add heat. You can also consider adding ground coriander for a citrusy note. Each spice brings its own twist. Using fresh herbs can elevate your dish. Cilantro adds a bright touch when added at the end. Fresh thyme or oregano can also enhance the stew’s aroma. Just chop them finely and stir them in before serving. To keep sweet potatoes firm, cut them into even pieces. This helps them cook at the same rate. If they are too small, they may turn mushy. If your stew turns out too watery, you can fix it. Let it cook uncovered for a bit to evaporate some liquid. You can also mash a few sweet potato pieces. This thickens the stew naturally and adds creaminess. For the best results, set your slow cooker to low. This allows the flavors to deepen as they cook. Low settings work for 6-8 hours, while high settings need 3-4 hours. Keeping the lid on during cooking is key. It helps maintain a consistent temperature. Avoid opening the lid too often, as this lets heat escape. {{image_2}} You can easily change the beans in this stew. Try kidney beans or pinto beans instead of black beans. Each bean brings a unique taste and texture to the dish. You might also consider adding legumes like lentils for an extra twist. Adding other vegetables can brighten the stew. Carrots add sweetness, while zucchini gives a soft texture. You can even throw in some corn for a pop of color and crunch. Feel free to mix and match any veggies you like! If you want more heat, add fresh peppers. Jalapeños or serranos will spice things up. Just remember to remove the seeds for less heat. You can also use red pepper flakes for a quick kick. If you prefer a milder flavor, skip the chili powder. You can also reduce the amount of smoked paprika. Adding a bit of honey can balance the spice while keeping it delicious. This stew is naturally vegan and gluten-free. All the ingredients are plant-based, making it a great choice for everyone. You can ensure it remains gluten-free by using certified gluten-free broth. For high-protein options, consider adding quinoa or tofu. These will boost the protein content without changing the flavor much. This way, you can enjoy a filling meal that meets your dietary needs. To store your sweet potato black bean stew, use airtight containers. Glass or plastic containers work well. Make sure they are completely cool before sealing. The stew keeps fresh in the fridge for about 4 to 5 days. To freeze the stew, let it cool down first. Then, pour it into freezer-safe bags or containers. Remove as much air as possible to prevent freezer burn. The stew can last in the freezer for up to 3 months. When you're ready to eat it, thaw it overnight in the fridge. Reheat on the stove over low heat or in the microwave until hot. You can create fun dishes with leftovers. Consider making burritos or tacos. Just fill tortillas with the stew and add cheese or avocado. You can also turn it into a dip. Serve it with tortilla chips for a tasty snack. If you have extra stew ingredients, mix them into rice or quinoa for a healthy bowl. You can easily make this stew vegan by swapping out a few ingredients. First, make sure to use vegetable broth instead of any meat broth. The black beans are already vegan. You don’t need to worry about the diced tomatoes either; they are vegan-friendly. If you want to add any toppings like sour cream or cheese, use vegan alternatives. This way, you keep all the great flavors while making it plant-based. Yes, you can use fresh beans! If you choose dry black beans, soak them overnight in water. This helps soften them. After soaking, drain and rinse the beans. Cook them in water until they are tender, which takes about 1 to 2 hours. Once they are cooked, you can add them to the stew. Just keep in mind that the cooking time for the stew may change since you need to add fully cooked beans. This stew pairs well with several side dishes. You might enjoy it with: - Cornbread - Rice or quinoa - A fresh green salad - Tortilla chips for crunch These sides will complement the stew's rich flavors and add different textures to your meal. Enjoy experimenting with your favorites! This stew blends sweet potatoes, black beans, and spices for a tasty meal. You learned how to prepare and cook it in a slow cooker. With tips to enhance flavor and adjust texture, you can make it your own. Explore ways to swap ingredients for variety, and store it safely for later. This dish is versatile and perfect for many diets. Enjoy making new meals, and have fun with the leftovers!

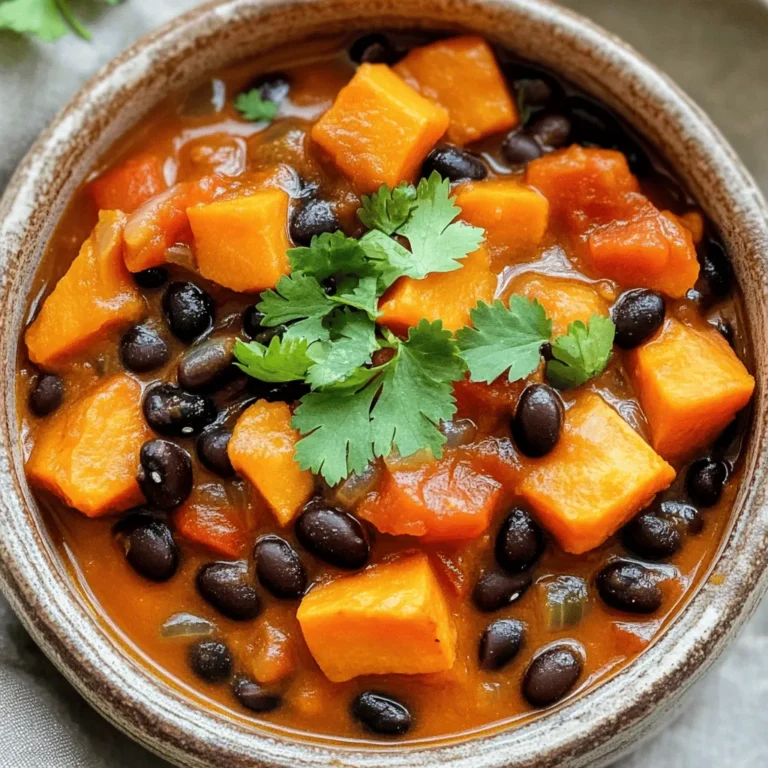
Sweet Potato Black Bean Stew Slow Cooker Delight

- Chicken and Marinade Components - 1 lb (450g) boneless, skinless chicken breast, cut into 1-inch cubes - 1/4 cup pure maple syrup - 2 tablespoons Dijon mustard - 1 tablespoon apple cider vinegar - Seasoning Essentials - 1 teaspoon garlic powder - 1 teaspoon onion powder - Salt and pepper to taste - 1 tablespoon olive oil - Optional Garnishes - Fresh parsley, chopped For this recipe, I start with fresh chicken breast. The chicken is easy to chop into bite-sized pieces. I love using pure maple syrup for its rich taste. Dijon mustard adds a tangy kick that pairs well with the sweet maple. Apple cider vinegar brings brightness to the marinade. Next, I add garlic and onion powder. They give my chicken a depth of flavor. I always season with salt and pepper, as it enhances all the other tastes. A drizzle of olive oil helps the chicken crisp up in the air fryer. Finally, I like to finish with fresh parsley. It adds a pop of color and a fresh taste. This combination makes for a perfect mix of sweet and savory flavors. You can enjoy these bites as a snack or a meal! - Mixing the Ingredients Start by taking a medium bowl. Whisk together 1/4 cup pure maple syrup, 2 tablespoons Dijon mustard, and 1 tablespoon apple cider vinegar. Add 1 teaspoon garlic powder and 1 teaspoon onion powder. Sprinkle in salt and pepper to taste. Mix until everything is well combined. - Marinating the Chicken Cut 1 lb of boneless, skinless chicken breast into 1-inch cubes. Place the chicken into the marinade. Stir well to coat each piece evenly. - Recommended Marination Time Let the chicken marinate for at least 30 minutes. For more flavor, marinate it up to 2 hours in the fridge. - Preheating the Air Fryer Preheat your air fryer to 400°F (200°C). This should take about 5 minutes, ensuring your chicken cooks evenly. - Cooking Instructions Remove the chicken from the marinade and lightly toss it in 1 tablespoon of olive oil. Place the chicken bites in a single layer in the air fryer basket. Do not overcrowd them. Cook for 10-12 minutes. Shake the basket halfway through to ensure even cooking. - Checking for Doneness The chicken is done when it turns golden brown and reaches an internal temperature of 165°F (74°C). Use a meat thermometer to check. - Resting the Chicken Once cooked, remove the chicken bites from the air fryer. Allow them to rest for a few minutes. This helps keep them juicy. - Garnishing Tips Chop some fresh parsley for garnish. Sprinkle it over the chicken bites right before serving. This adds color and a fresh taste. - Serving Suggestions Serve these bites as a snack or with a side salad. They also pair well with rice or mashed potatoes. Enjoy your meal! - Preventing Overcrowding: Place chicken bites in a single layer. If you stack them, they won’t cook evenly. The hot air needs space to circulate. This way, you get a nice crisp on each piece. - Ensuring Even Cooking: Shake the basket halfway through cooking. This helps the chicken bits move around. It ensures all sides get that golden color. - Marination Time Recommendations: Let the chicken sit in the marinade for at least 30 minutes. You can also refrigerate it for up to 2 hours. This gives the flavors time to soak in. The longer you marinate, the better the taste. - Additional Seasoning Ideas: Consider adding spices like paprika or cayenne for heat. Fresh herbs like thyme or rosemary can also boost the flavor. Experiment with what you like best. - Tips for Crispiness: Toss the chicken lightly in olive oil before cooking. This helps create a crispy outer layer. Don't skip this step! - Cooking Temperature Adjustments: Cook at 400°F (200°C) for the best results. If your chicken is thicker, you may need a minute or two longer. Always check the internal temperature to ensure it’s fully cooked at 165°F (74°C). {{image_2}} Using Different Proteins You can switch the chicken for other meats. Try using turkey for a leaner option. Pork works well too, giving a nice twist. If you prefer plant-based meals, use firm tofu or tempeh. Cut them into cubes just like the chicken. Alternative Sweeteners If you want to change the sweetness, use honey instead of maple syrup. Agave nectar is another great choice. Both options will still give a nice glaze and flavor. Spicy Variations Looking for a kick? Add chili powder or cayenne pepper to your marinade. You can also mix in hot sauce to the marinade for even more heat. I enjoy a spicy maple mustard combo. It adds depth and excitement to each bite. Herb Infusions Fresh herbs can elevate your dish. Try adding thyme or rosemary to the marinade. Fresh dill also adds a bright flavor. Chop them finely and mix them in. This will give your chicken a fragrant touch. Appetizer versus Main Dish You can serve these bites as a fun appetizer. Just place them on a platter with toothpicks. They also work well as a main dish. Serve them with rice or a salad for a complete meal. Pairing Suggestions Pair your chicken bites with roasted veggies for a balanced plate. A fresh green salad complements them nicely too. For a dipping sauce, honey mustard or ranch works well. These side options enhance the overall taste. To keep your Maple Mustard Chicken Bites fresh, follow these tips: - Best Practices for Refrigeration: Place the chicken bites in an airtight container. This helps prevent moisture loss. They can stay fresh for up to 3 days in the fridge. You can also add a paper towel inside to absorb excess moisture. - Freezing Guidelines: For longer storage, freeze the chicken bites. Place them in a freezer-safe bag or container. Remove as much air as possible to avoid freezer burn. They will last up to 3 months in the freezer. When ready to enjoy, thaw them in the fridge overnight before reheating. To enjoy your leftovers, reheating is key. - Air Fryer Reheating Tips: The air fryer is great for reheating. Set it to 350°F (175°C). Place the chicken bites in a single layer for even heating. Heat for about 5-7 minutes, shaking halfway through. This keeps them crispy and tasty. - Oven or Microwave Alternatives: You can also use the oven or microwave. For the oven, preheat to 350°F (175°C). Place the chicken on a baking sheet and heat for 10-15 minutes. In the microwave, use a microwave-safe plate. Heat in 30-second intervals until warmed through. Be careful not to overheat, as this can make the chicken dry. Yes, you can make Maple Mustard Chicken Bites ahead of time. You can marinate the chicken and store it in the fridge. It’s best to marinate for at least 30 minutes, but you can do it for up to 2 hours. If you want to prepare them even sooner, you can marinate the chicken the night before. Just remember to cook them fresh when you're ready. Maple Mustard Chicken Bites go well with many sides. You can serve them with: - Roasted vegetables like carrots and broccoli - A fresh green salad with vinaigrette - Rice or quinoa for a filling meal - Sweet potato fries for a fun twist - Dipping sauces like ranch or honey mustard These options will balance the sweet and tangy flavors of the chicken bites. To check if the chicken is fully cooked, use a meat thermometer. Insert it into the thickest part of a chicken bite. The internal temperature should reach 165°F (74°C). If you don’t have a thermometer, you can cut a piece open. The meat should be white and juices should run clear. If it’s pink or red, keep cooking. In this blog post, we explored how to make delicious Maple Mustard Chicken Bites. We covered the key ingredients, step-by-step cooking methods, and tips for getting perfect texture. I shared variations and storage advice too. Remember, marinating the chicken adds great flavor. Use the tips to enhance your dish. Keep experimenting with new ingredients and flavors for exciting meals. Enjoy your cooking journey!

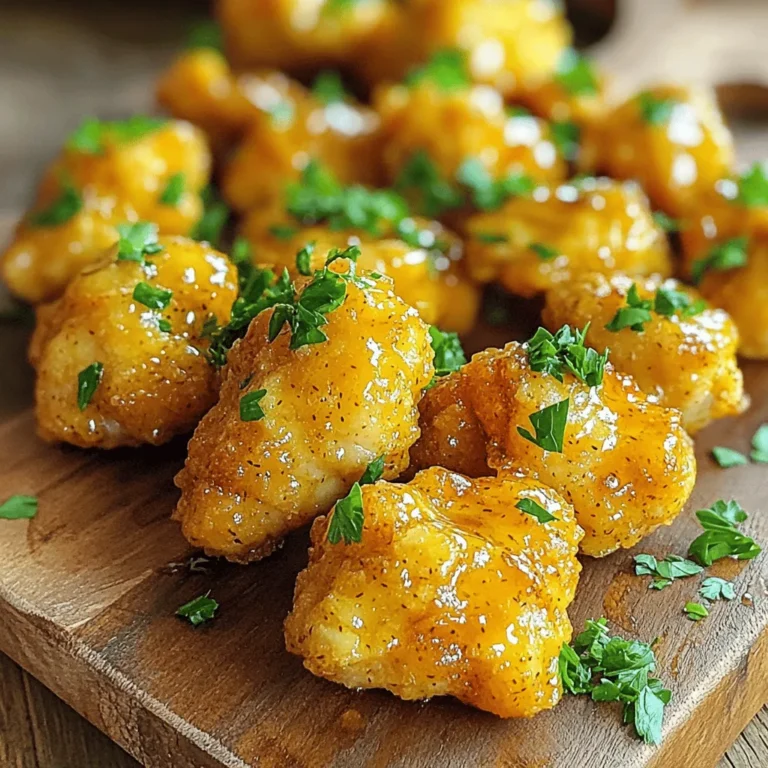
Maple Mustard Chicken Bites Air Fryer Delight

PREV 1 … 22 23 24 … 57 NEXT
secrets pice kitchen

explore

DessertsDinnerAppetizersDrinks

Our Policies

  • Cookie Policy
  • Copyright Policy
  • Disclaimer
  • GDPR Policy
  • Terms Of Use
Back to Top
  • About
  • Contact Us
  • Privacy Policy
© 2025 secrets pice kitchen