FREE DINNER EBOOK! Get your copy!
  • Cookie Policy
  • GDPR Policy
  • Disclaimer
  • Terms Of Use
  • Visit my other site: Fun Cookie Recipes
secrets pice kitchen
  • Home
  • Dinner
  • Desserts
  • Drinks
  • Appetizers
  • Contact
  • About
  • Privacy Policy
  • Home
  • Dinner
  • Desserts
  • Drinks
  • Appetizers
  • Contact
  • About
  • Privacy Policy
  • Cookie Policy
  • GDPR Policy
  • Disclaimer
  • Terms Of Use
Visit my other site: Fun Cookie Recipes

HOME / CATEGORIES /

Latest

To make these tasty maple glazed salmon bowls, gather these simple ingredients: - 4 salmon fillets - 1/4 cup pure maple syrup - 2 tablespoons soy sauce (or tamari for gluten-free) - 2 tablespoons Dijon mustard - 1 teaspoon garlic powder - 1 teaspoon ginger powder - 2 medium sweet potatoes, diced - 2 cups broccoli florets - 1 tablespoon olive oil - Salt and pepper to taste - 1 cup cooked quinoa (for serving) - Fresh cilantro or green onions for garnish You can swap some ingredients if needed. Here are some ideas: - Use honey instead of maple syrup for a different sweet taste. - Choose coconut aminos instead of soy sauce for a milder flavor. - If you don’t have Dijon, yellow mustard works too. - Try other veggies like bell peppers or asparagus in place of broccoli. - Quinoa can be switched with brown rice or farro for a hearty base. When picking salmon, keep these tips in mind: - Look for bright, shiny skin with no dull spots. - The flesh should be firm and spring back when touched. - Fresh salmon has a clean, ocean-like smell. - Avoid any fish with a strong, fishy odor. - If possible, buy wild-caught salmon for better flavor and health benefits. These tips help ensure you get the best fish for your meal. Enjoy your cooking! Start by preheating your oven to 400°F (200°C). This high heat helps cook everything evenly. Next, line a large sheet pan with parchment paper. This will make cleanup easy after you enjoy your meal. In a small bowl, combine the maple syrup, soy sauce, Dijon mustard, garlic powder, and ginger powder. Whisk these ingredients together until smooth. This glaze gives the salmon a sweet and savory flavor that you will love. Place the diced sweet potatoes on one side of the sheet pan. Drizzle them with olive oil, then add salt and pepper. Toss them well to coat. On the other side, arrange the broccoli florets. Add a little olive oil and season them with salt and pepper too. This method keeps the flavors separated until they cook. Now, place the salmon fillets in the center of the sheet pan. Brush each fillet generously with the maple glaze. Don't forget to save some glaze for later! Put the sheet pan in the oven. Bake for about 20-25 minutes. The salmon should flake easily with a fork. The sweet potatoes need to be tender, and the broccoli should be bright green. When you take the pan out, brush the salmon with the reserved glaze for extra flavor. Now you're ready to assemble your bowls! Divide the cooked quinoa among serving bowls. Top each bowl with sweet potatoes, broccoli, and a salmon fillet. Finish by garnishing with fresh cilantro or green onions. Enjoy your delicious meal! To get the best salmon, start with fresh fillets. Look for bright color and firm texture. Cook at 400°F for even heat. Keep an eye on the time; 20-25 minutes should do. It’s ready when it flakes easily with a fork. Boost the taste by using quality maple syrup. Choose pure syrup for a rich flavor. The soy sauce adds umami, while Dijon mustard brings tang. Don’t skip the garlic and ginger powders; they add depth. You can also add a pinch of chili flakes for heat. Make your bowl look great! Start with a base of quinoa. Place the salmon fillet in the center. Arrange the sweet potatoes and broccoli around it. For color, sprinkle fresh cilantro or sliced green onions on top. A beautiful dish makes it taste even better! {{image_2}} You can switch up the veggies in this dish. Try using asparagus or green beans. Cauliflower is another great choice, adding a nice crunch. You can also use bell peppers for a sweet touch. Just remember to adjust the cooking time if you pick different veggies. Salmon is tasty, but you can change the protein. Chicken works really well here. Use chicken thighs for more flavor and juiciness. If you want a plant-based option, try firm tofu. Just cut it into cubes and marinate it in the glaze. Each option will give you a unique taste. While quinoa is great, you can try other grains. Brown rice adds a nutty flavor. Farro or barley are also good choices for texture. For a gluten-free option, use rice or cauliflower rice. Each grain brings its own special taste and will pair nicely with the glaze. To keep your maple glazed salmon bowls fresh, let them cool first. Place the salmon, sweet potatoes, and broccoli in airtight containers. Make sure to separate the quinoa. This helps keep everything fresh. Store them in the fridge for up to three days. If you want to enjoy them later, consider freezing some. When you are ready to eat, you can reheat your leftovers. The best way is to use the oven. Preheat it to 350°F (175°C). Place the salmon and veggies on a baking sheet. Cover them with foil to keep moisture. Heat for about 10-15 minutes until warm. You can also use the microwave if you're in a hurry. Heat each bowl for one to two minutes until hot. If you have extra salmon bowls, freeze them for later. First, cool the bowls completely. Then, wrap each bowl tightly in plastic wrap and foil. This keeps out air and prevents freezer burn. They can last up to three months in the freezer. When ready to eat, thaw them in the fridge overnight before reheating. Yes, you can easily make this recipe gluten-free. Just swap soy sauce for tamari. Tamari works just as well and gives the same flavor. Always check the labels to ensure they are gluten-free. Salmon stays fresh in the fridge for about 3 days. Store it in an airtight container. If you want it to last longer, freeze it. Frozen salmon can last up to 3 months. You can pair these bowls with many sides. Try brown rice, farro, or even mixed greens. For a crunchy twist, add sliced radishes or avocado. Fresh herbs like parsley or dill also add great taste. Yes, you can prepare the glaze ahead of time. Just mix the maple syrup, soy sauce, Dijon mustard, garlic, and ginger. Keep it in a jar in the fridge for up to a week. This makes meal prep easy and quick! Maple glazed salmon bowls are simple and tasty. You learned about the key ingredients, how to make the glaze, and the best baking methods. We also explored tips for cooking salmon just right and ideas for substitutions. Remember to store leftovers properly to keep them fresh. With this guide, you can create a meal that is fun and full of flavor. Dive into your kitchen and enjoy cooking!

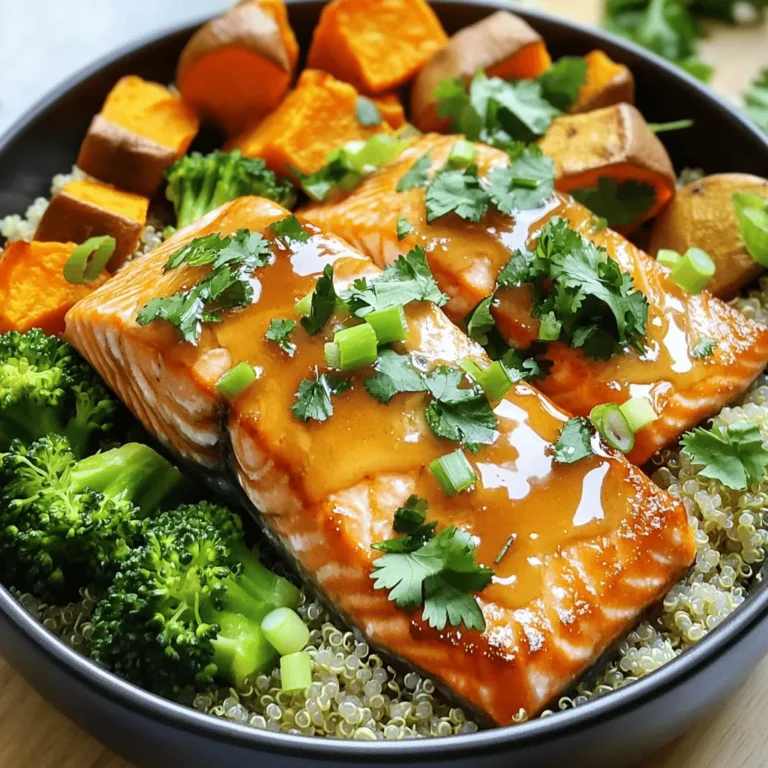
Maple Glazed Salmon Bowls Sheet Pan Delight

- 1 lb flank steak - 1/4 cup fresh cilantro, chopped - 2 limes (one juiced and one cut into wedges) The main ingredients play a big role in the flavor of this dish. Flank steak is tender and juicy when cooked right. Fresh cilantro adds a bright, herby taste. Limes bring a tangy zest that balances the richness of the steak. - 2 tablespoons olive oil - 2 cloves garlic, minced - 1 teaspoon ground cumin - 1 teaspoon chili powder - Salt and pepper to taste These additional ingredients make the marinade special. Olive oil helps the flavors stick to the meat. Garlic gives a nice aroma and taste. Cumin and chili powder add warmth and spice. Salt and pepper enhance every bite. - 1 cup cooked quinoa - 1 cup black beans, rinsed and drained - 1 cup corn (fresh or canned) - 1 avocado, sliced - 1/2 cup cherry tomatoes, halved The bowl components add texture and nutrition. Quinoa serves as a hearty base. Black beans offer protein and fiber. Corn adds sweetness and crunch. Avocado gives creaminess, while cherry tomatoes add freshness. Together, they create a colorful and tasty meal. {{ingredient_image_1}} To marinate the steak, start by making the marinade. In a bowl, mix the juice of one lime, olive oil, minced garlic, chopped cilantro, cumin, chili powder, salt, and pepper. This blend creates a bright and tasty flavor. Now, place the flank steak in a resealable bag or a shallow dish. Pour the marinade over the steak, ensuring it is well coated. Seal the bag or cover the dish. Let it marinate in the fridge for at least 30 minutes. For even more flavor, let it marinate for up to 4 hours. Next, preheat your grill or grill pan to medium-high heat. Once it's hot, take the steak out of the marinade and discard the marinade. Grill the steak for about 4 to 5 minutes on each side. Check for your preferred doneness. For medium-rare, aim for an internal temperature of about 130°F. After cooking, let the steak rest for 5 minutes. This helps keep it juicy. Slice the steak against the grain into thin strips. Now it's time to assemble the bowls! Start with a base of cooked quinoa. This will add a nice, nutty flavor and a good texture. Next, top the quinoa with the sliced steak. Add rinsed black beans and corn. Then, layer on sliced avocado and halved cherry tomatoes for freshness. To finish, garnish your bowls with lime wedges and any optional toppings you like. Feta cheese, radish slices, or extra cilantro can add great flavor and color. Enjoy your vibrant and tasty meal! To get the best flavor, you should marinate the steak. Mix lime juice, olive oil, garlic, cilantro, cumin, and chili powder in a bowl. Place the flank steak in a bag and pour the marinade over it. Seal the bag and let it sit. For a quick boost, marinate for 30 minutes. If you have time, 4 hours will give you even more flavor. Cooking the steak just right is key. Preheat your grill to medium-high heat. Take the steak out of the marinade. You don’t need any extra oil. Grill it for 4-5 minutes on each side for medium doneness. Use a meat thermometer if you like. The steak should reach 130°F for medium-rare. Let it rest for 5 minutes before slicing. This helps keep the juices in. Pair your steak bowl with a light wine, like Sauvignon Blanc. It goes well with the fresh flavors. For sides, try a simple green salad or grilled veggies. When you serve, start with a scoop of quinoa. Layer on the steak, black beans, corn, avocado, and tomatoes. For a pop of color, add lime wedges and sprinkle some feta or radish slices on top. This makes your bowl look vibrant and inviting. Pro Tips Marinate Longer for More Flavor: For the best flavor, marinate the flank steak for up to 4 hours. The longer it marinates, the more the flavors will penetrate the meat. Let the Steak Rest: After grilling, let the steak rest for about 5 minutes. This allows the juices to redistribute, resulting in a juicier and more tender steak. Customize Your Toppings: Feel free to add your favorite toppings like jalapeños, sour cream, or lettuce to enhance the flavor and texture of your steak bowls. Use a Meat Thermometer: To achieve your desired level of doneness, use a meat thermometer. Aim for 130°F for medium-rare, 140°F for medium, and 160°F for well-done. {{image_2}} You can easily change the protein in your Cilantro Lime Steak Bowls. If you prefer chicken, use boneless chicken thighs or breasts. This will give you a lighter flavor. Simply marinate the chicken in the same marinade as the steak. Grill it for about 6-7 minutes on each side. If you want a plant-based option, tofu is a great choice. Use extra-firm tofu for the best texture. Press it to remove excess water, then cut it into cubes. Marinate the tofu just like the steak, then grill until golden. For gluten-free options, stick with quinoa and avoid any sauces that contain gluten. All the main ingredients in this recipe are gluten-free, making it easy to enjoy. If you're looking for vegan adaptations, replace the steak with tofu. Skip the cheese and use avocado for creaminess. You can also add more veggies for extra flavor and nutrients. You can swap out the black beans and corn for other options. Try chickpeas or lentils for a different taste. If quinoa doesn’t suit you, brown rice or farro works well too. These swaps keep your meal fresh and exciting while maintaining balanced nutrition. Store leftovers in an airtight container. Keep them in the fridge for up to three days. This keeps the flavors fresh. Make sure to separate the steak from the other ingredients. This helps maintain their taste and texture. If you have any toppings, store them in small containers. This way, they stay crisp and flavorful. You can freeze components separately for longer storage. First, slice the steak and place it in a freezer bag. Remove as much air as possible before sealing. For quinoa, cool it down, then place it in a freezer-safe container. Black beans and corn can also freeze well. Use freezer bags for these as well. Label each bag with the date. This helps you keep track of how long they are stored. When reheating, aim to keep the flavors and texture intact. For steak, use a skillet over medium heat. Add a splash of water to help it steam. This keeps it moist. For quinoa and beans, microwave them in a covered dish. Add a little water to prevent drying out. Stir halfway through to heat evenly. Enjoy your meal just as fresh as the first time! You can marinate flank steak for at least 30 minutes. For better flavor, try marinating for up to 4 hours. This allows the steak to soak in all the great flavors from the marinade. Always keep it in the fridge while marinating to ensure food safety. Yes, you can make this recipe in advance. You can marinate the steak a day before and cook it fresh when you are ready. You can also prepare the quinoa, beans, and corn ahead of time. Store each component in airtight containers in the fridge. This way, you can assemble your bowls quickly for a tasty meal. If you want to swap quinoa, try brown rice or farro. Both grains work well in bowls and add a nice texture. You can also use couscous for a quicker option. Each grain brings its own flavor, so choose one that you enjoy! This article covered how to make a delicious bowl with flank steak and fresh ingredients. I shared ideas for marinating the steak, cooking it perfectly, and assembling your bowl. You learned tips for alternatives, storage, and even how to serve creatively. Use these steps to create a meal your friends and family will love. Enjoy experimenting with variations and remember, your kitchen is a place for fun and flavors!

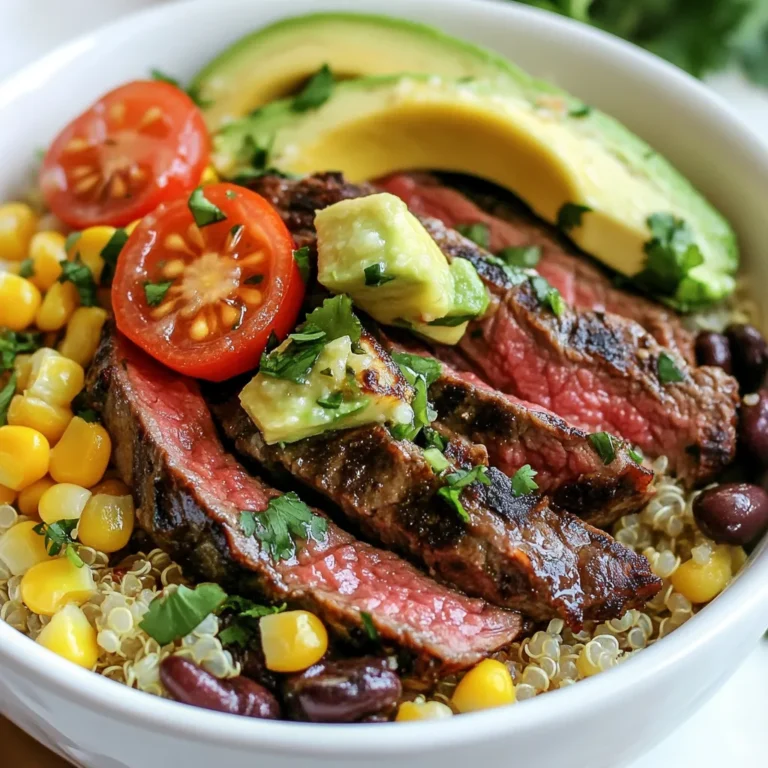
Cilantro Lime Steak Bowls Fresh and Flavorful Meal

- 2 boneless, skinless chicken breasts - 8 oz fettuccine pasta - 2 tablespoons olive oil - 3 garlic cloves, minced - 1 cup heavy cream - 1 cup sun-dried tomatoes, chopped - 1 cup fresh spinach, roughly chopped - 1 teaspoon Italian seasoning - Salt and pepper to taste - 1/2 cup grated Parmesan cheese - Fresh basil leaves for garnish - Red pepper flakes for heat - Other vegetables like bell peppers or mushrooms - Alternatives for heavy cream include half-and-half or coconut milk. When I gather the ingredients for my Ultimate Marry Me Chicken Pasta, I feel excited. Each item plays a key role in making the dish special. The chicken gives a nice protein base. The fettuccine pasta adds a soft texture that hugs the sauce well. Olive oil brings warmth to the chicken as it cooks. Garlic is a must for flavor. It fills the kitchen with a wonderful aroma. Heavy cream makes everything rich and creamy. Sun-dried tomatoes add a sweet, tangy taste. Fresh spinach not only looks nice but also adds a fresh bite. Italian seasoning ties all these flavors together. You can adjust the heat with red pepper flakes. If you want more color, add bell peppers or mushrooms. If you're out of heavy cream, half-and-half or coconut milk will work too. By mixing and matching these ingredients, you can make this dish your own. This dish is not just a meal; it’s a chance to impress. Use fresh basil as a garnish to make it pop. The vibrant green adds a lovely touch to your plate. Remember, the right ingredients make all the difference! {{ingredient_image_1}} - Boil salted water in a large pot. - Add fettuccine pasta and cook until al dente. - Drain the pasta and reserve one cup of pasta water. - Season the chicken breasts with salt, pepper, and Italian seasoning. - Make sure to cover all sides for even flavor. - Heat olive oil in a large skillet over medium heat. - Cook the chicken for 6 to 7 minutes on each side. - Look for a golden brown color and ensure it's cooked through. - Let the chicken rest for five minutes before slicing. - In the same skillet, add minced garlic. - Sauté for about 30 seconds until it smells great. - Pour in the heavy cream and let it simmer. - Add chopped sun-dried tomatoes and spinach, stirring until the spinach wilts. - Toss the cooked fettuccine into the skillet with the sauce. - If the sauce looks too thick, add some reserved pasta water. - Mix well until the pasta is fully coated. - Stir in grated Parmesan cheese until it melts. - Taste and add more salt or pepper if needed. - Plate the pasta and top with sliced chicken. - Garnish with fresh basil leaves for a lovely look. - Use a meat thermometer to check the chicken's doneness. Cook it to 165°F. - For perfectly cooked pasta, boil salted water. Cook until al dente, not mushy. - Serve the pasta in a large bowl for a stunning look. Twirl the fettuccine for elegance. - Garnish with fresh basil leaves and a sprinkle of cheese for an appealing finish. - Boost flavor with fresh herbs like basil or parsley. Add red pepper flakes for heat. - Consider making homemade sauces or marinades. Use garlic, lemon, or balsamic vinegar for depth. Pro Tips Let the Chicken Rest: Allowing the chicken to rest for a few minutes after cooking keeps it juicy and tender. Reserve Pasta Water: Always save a cup of pasta water before draining. It helps adjust the sauce's consistency and adds flavor. Fresh Ingredients Matter: Using fresh spinach and high-quality sun-dried tomatoes elevates the dish's flavors significantly. Adjust Seasoning Gradually: Taste your sauce before serving and adjust the seasoning little by little for the best flavor balance. {{image_2}} You can switch out the fettuccine for other types of pasta. Penne and spaghetti work great. If you need gluten-free, use gluten-free pasta. Each type brings a new taste and feel. Choose what you love most! Chicken is delicious, but feel free to try other proteins. Shrimp adds a nice seafood twist. Scallops offer a sweet flavor. For a plant-based choice, tofu is perfect. Just make sure to cook them right for the best taste. To make this dish lighter, use low-fat cream instead of heavy cream. You can also add more veggies like bell peppers or zucchini. This way, you keep the flavor but cut down on fat. It's a win-win! To keep your Ultimate Marry Me Chicken Pasta fresh, place leftovers in an airtight container. Store them in the fridge for up to three days. Make sure the pasta cools down before sealing it. This helps prevent moisture buildup. Label the container with the date you made it. This way, you know when to eat it. Reheating pasta can be tricky. I recommend using a skillet for the best results. Heat a little olive oil over medium heat. Add the pasta and a splash of cream or broth. Stir often until hot. This method keeps the pasta creamy and prevents it from drying out. You can also microwave it in a bowl with a bit of water. Cover it to trap steam and heat for one minute. Stir, then heat for another minute if needed. If you want to freeze the dish, do it before adding the cheese. Store the pasta and sauce together in freezer-safe bags. Squeeze out the air to avoid freezer burn. You can freeze it for up to three months. When ready to eat, thaw it in the fridge overnight. Then, heat it on the stove, adding fresh cheese. This makes the dish taste fresh and delicious, just like the first time! To make the best Marry Me Chicken Pasta, start with fresh ingredients. Use high-quality chicken and pasta. Season your chicken well with salt, pepper, and Italian seasoning. This adds great flavor. Sear the chicken until golden brown. This gives it a nice crust. Use a meat thermometer to check for doneness. Cook the pasta just right, so it’s al dente. It should have a slight bite. Finally, mix the pasta with a creamy sauce made from heavy cream, garlic, sun-dried tomatoes, and spinach. Stir in the Parmesan for richness. This combo creates a dish that tastes divine. Yes, you can prepare Marry Me Chicken Pasta in advance. Cook the chicken and pasta ahead of time. Store them separately in the fridge. You can also make the sauce ahead. Just reheat everything together before serving. This saves time for busy nights. Aim to eat it within three days for best taste. If you want to save even more time, you can chop the sun-dried tomatoes and spinach in advance. This way, you have everything ready to go. Marry Me Chicken Pasta pairs well with many side dishes. A simple green salad with a light vinaigrette works great. Garlic bread is also a nice touch. You can add roasted vegetables for extra flavor and color. For wine, a crisp white wine like Sauvignon Blanc complements the dish well. The fresh flavors balance the creamy sauce. You can also try a light red wine, like Pinot Noir, if you prefer. Marry Me Chicken Pasta can fit some special diets with a few changes. For a keto option, use zucchini noodles instead of pasta. You can also skip the heavy cream for a dairy-free version. Use coconut milk instead. If you want it vegetarian, replace chicken with firm tofu or grilled veggies. This keeps the dish tasty and satisfying. Always check individual ingredient labels for any hidden allergens. You now have all you need to make Marry Me Chicken Pasta. We covered key ingredients, from chicken and fettuccine to flavorful seasonings. I shared step-by-step instructions for cooking and tips for the best results. You learned variations and how to store leftovers too. This dish is perfect for impressing someone special or as a comforting meal. With a little creativity, you can make it your own. Enjoy crafting this delicious recipe, and savor every bite!

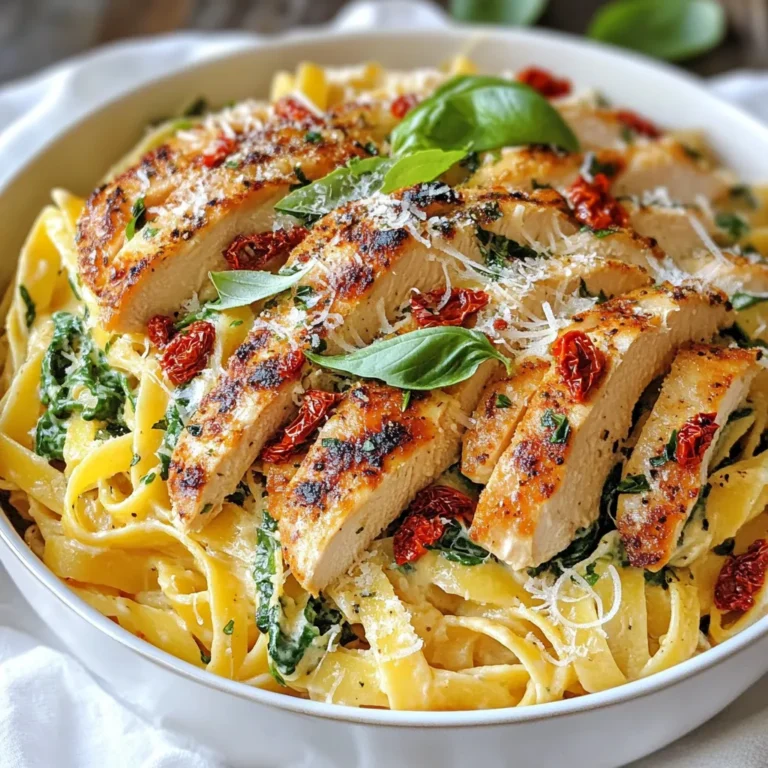
Ultimate Marry Me Chicken Pasta Scrumptious Dinner Dish

To make Cowboy Butter Chicken Linguine, you need fresh and tasty ingredients. Here’s what you will need: - 300g linguine - 2 chicken breasts, diced - 4 tablespoons cowboy butter (1/2 cup unsalted butter mixed with garlic, parsley, and smoked paprika) - 1 cup cherry tomatoes, halved - 1 cup baby spinach - 1 tablespoon olive oil - 1 teaspoon red pepper flakes (adjust for spice level) - Salt and pepper to taste - Fresh parsley, chopped (for garnish) - Grated Parmesan cheese (optional) Gathering these ingredients is key for a great meal. The linguine gives a nice texture, and the chicken adds protein. Cowboy butter is the star here, with its rich flavor from butter, garlic, and smoked paprika. Cherry tomatoes add a sweet burst, while spinach adds good color and nutrients. Don't forget to have salt and pepper on hand. They help bring out all the flavors. Fresh parsley and grated Parmesan can make your plate look beautiful and tasty. Enjoy cooking! {{ingredient_image_1}} Start by bringing a large pot of water to a boil. Add salt to the water. Once boiling, add 300g of linguine. Cook it until al dente, following the package instructions. This usually takes about 8-10 minutes. When done, drain the pasta in a colander. Remember to save 1 cup of that pasta water for later. In a large skillet, heat 1 tablespoon of olive oil over medium heat. While the oil heats, season 2 diced chicken breasts with salt, pepper, and 1 teaspoon of red pepper flakes. Once the skillet is hot, add the chicken. Cook for about 6-8 minutes. Stir occasionally until the chicken turns golden brown and is fully cooked. When done, remove the chicken from the skillet and set it aside. In the same skillet, add 4 tablespoons of cowboy butter. Let it melt slowly. Once melted, toss in 1 cup of halved cherry tomatoes. Sauté the tomatoes for 2-3 minutes. They should start to soften and release their juices. Next, add 1 cup of baby spinach to the skillet. Cook it for about 1 minute. You want the spinach to wilt nicely. After that, return the cooked chicken to the skillet. Mix everything well so the flavors blend. Now, it’s time to add the cooked linguine to the skillet. Toss the pasta with the chicken and veggies. If the dish looks too dry, use that reserved pasta water. Add a little at a time until you reach your desired consistency. Serve the linguine hot on plates. Garnish with freshly chopped parsley. If you like, sprinkle some grated Parmesan cheese on top. Enjoy your Cowboy Butter Chicken Linguine for a tasty and filling meal! To cook perfect linguine, start with a big pot of water. Add a good amount of salt to the water. This step is key to flavor. Bring the water to a boil before adding the pasta. Stir the linguine often while it cooks. Follow the package time for al dente. This means it should be a bit firm to the bite. When done, drain the pasta but save some water for later. For the chicken, cut the breasts into small cubes. This helps them cook evenly. Season them well with salt and pepper. Heat olive oil in a skillet over medium heat. Add the chicken to the hot oil. Sauté until golden brown and fully cooked. This takes about 6-8 minutes. Do not overcrowd the pan; cook in batches if needed. This keeps the chicken juicy and tender. Cowboy butter is what makes this dish special. Mix unsalted butter with garlic, parsley, and smoked paprika. This adds a rich flavor. If you want more heat, add more red pepper flakes. You can also toss in other herbs like basil or oregano. For a fresh twist, try adding lemon zest or juice. These small changes can make a big difference. Serve the Cowboy Butter Chicken Linguine hot. Garnish with chopped fresh parsley for color. You can also sprinkle grated Parmesan cheese on top. This adds extra creaminess. Pair it with a simple green salad or garlic bread. This will make your meal feel complete and satisfying. Enjoy every bite! Pro Tips Perfectly Cooked Pasta: To achieve al dente pasta, remember to taste it a minute or two before the package's cooking time is up. This ensures you're serving perfectly cooked linguine. Enhanced Flavor: For an extra kick, consider adding a pinch of cayenne pepper along with the red pepper flakes to deepen the flavor of the chicken and butter. Fresh Spinach Substitute: If baby spinach isn't available, feel free to substitute with kale or arugula. Both will add a unique flavor and texture to your dish. Leftover Cowboy Butter: If you have leftover cowboy butter, store it in the refrigerator to use on grilled meats or vegetables for an added flavor boost in future meals. {{image_2}} You can make a tasty vegetarian version of Cowboy Butter Chicken Linguine. Swap the chicken for diced mushrooms or zucchini. Both add a nice texture. You can also use tofu to boost protein. Just sauté them in the cowboy butter. This keeps the dish rich and full of flavor. While linguine works great, you can use other types of pasta. Spaghetti, fettuccine, or penne all fit well. Each choice will change the feel of the dish. For a gluten-free option, try chickpea or rice pasta. These options add a unique twist while still tasting good. If you want more protein, consider shrimp or scallops. They cook quickly and pair well with the butter sauce. You can also add cooked sausage for a heartier meal. Just remember to adjust cooking times as needed. To change the spice level, simply adjust the red pepper flakes. You can add more for heat or leave them out for a milder taste. Consider using fresh jalapeños for a different flavor. They add a nice crunch and a fresh kick to your dish. Store your Cowboy Butter Chicken Linguine in an airtight container. Make sure it cools down first. Keep it in the fridge for up to three days. If you want to keep it longer, consider freezing it. To reheat, you can use the microwave or a skillet. If using the microwave, place the pasta in a bowl. Add a splash of water to keep it moist. Heat for one to two minutes. If using a skillet, add a little olive oil. Heat the pasta over medium heat, stirring often until warm. To freeze the dish, let it cool completely. Place the linguine in a freezer-safe container. It will keep well for up to three months. When ready to eat, thaw it overnight in the fridge. Then, reheat as mentioned above. Enjoy easy meals without compromising flavor! Cowboy butter is a rich mix of flavors. It combines unsalted butter, garlic, parsley, and smoked paprika. This blend gives dishes a savory kick. It adds depth to any meal. You can use it for many recipes, not just pasta. Yes, you can use other pasta types. Options like penne, fettuccine, or even spaghetti work well. Just cook them the same way as linguine. Each pasta shape gives a different texture, which can change the dish. To add heat, use more red pepper flakes. You can also mix in chopped jalapeños or a dash of hot sauce. Start with small amounts to avoid overpowering the dish. Adjust the spice level to your taste. Great side dishes include garlic bread, a fresh salad, or steamed veggies. Roasted asparagus or zucchini adds color and flavor. You can also serve it with a light soup for a full meal. Cowboy Butter Chicken Linguine stays fresh for up to three days in the fridge. Store it in an airtight container to keep it tasty. Reheat in the microwave or on the stove before serving. In this post, we explored a delicious Cowboy Butter Chicken Linguine recipe. You learned about key ingredients, step-by-step cooking instructions, and helpful tips to enhance flavors. We also discussed variations to suit different tastes and storage methods for leftovers. Cooking this dish can be fun and rewarding. With these steps, you can create a tasty meal that everyone will enjoy. Try it out and make it your own!

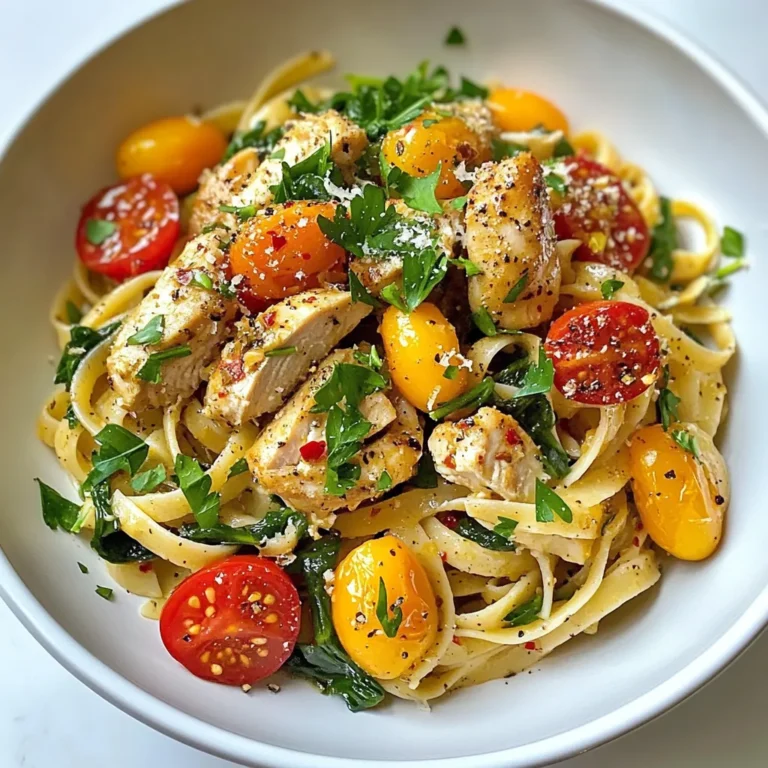
Cowboy Butter Chicken Linguine Savory Dinner Delight

- 2 boneless, skinless chicken breasts - 4 cups frozen corn kernels - 1 medium onion, diced - 2 cloves garlic, minced - 2 medium potatoes, peeled and diced - 4 cups chicken broth - 1 cup heavy cream - 1 teaspoon dried thyme - 1 teaspoon paprika - Salt and pepper to taste - 2 tablespoons olive oil - Fresh parsley for garnish I love starting with fresh, simple ingredients. The chicken gives a nice base, while the corn adds sweetness. Onions and garlic bring great flavor, and potatoes add heartiness. The broth makes everything come together, and cream makes it rich. - Cooked bacon bits - Green onions, sliced - Shredded cheese - Croutons - A squeeze of lime These add-ins can elevate your chowder. Bacon brings a smoky touch. Green onions add a fresh crunch. Cheese melts in and adds depth. Croutons give a fun texture, while lime brightens the dish. - Crusty bread - Side salad - Grilled cheese sandwiches - Roasted vegetables Pairing with crusty bread makes for a cozy meal. A side salad adds freshness and crunch. Grilled cheese sandwiches can be a fun twist. Roasted vegetables bring extra flavors and nutrients. Start by gathering all your ingredients. You will need: - 2 boneless, skinless chicken breasts - 4 cups frozen corn kernels - 1 medium onion, diced - 2 cloves garlic, minced - 2 medium potatoes, peeled and diced - 4 cups chicken broth - 1 cup heavy cream - 1 teaspoon dried thyme - 1 teaspoon paprika - Salt and pepper to taste - 2 tablespoons olive oil - Fresh parsley for garnish Heat the olive oil in a skillet over medium heat. Add the diced onion and minced garlic. Sauté until the onion looks clear, about 5 minutes. This step builds flavor. Next, place the chicken breasts at the bottom of your slow cooker. Add the sautéed onion and garlic on top of the chicken. Now, add the frozen corn and diced potatoes. Pour the chicken broth over everything. Make sure all the ingredients are covered. Sprinkle in the dried thyme, paprika, salt, and pepper. Stir gently to combine. Cover the slow cooker with its lid. Set it to cook on low for 6-7 hours or on high for 3-4 hours. The chicken should be tender and fully cooked. Once the cooking time is up, take out the chicken breasts. Use two forks to shred the chicken into bite-sized pieces. Return the shredded chicken back into the slow cooker. Stir in the heavy cream. Mix well to blend everything. Taste the chowder and adjust the seasoning if needed. Let the chowder cook on low for an extra 30 minutes. This allows the flavors to meld and the chowder to thicken. When ready, serve the chowder in warm bowls. Garnish with freshly chopped parsley and a sprinkle of black pepper. Enjoy your cozy, creamy chicken and corn chowder! To get creamy chowder, use heavy cream. It adds richness. Shredding the chicken adds to the texture. After cooking, use two forks to shred the chicken well. This helps blend the meat into the chowder. If you want a thicker chowder, mash some potatoes before adding the cream. This thickens the base and gives a nice mouthfeel. To save time, prep the night before. Chop the onion and garlic and store them in the fridge. You can also measure your spices ahead of time. When you're ready to cook, just toss everything into the slow cooker. Using frozen corn speeds up cooking, too. No need to thaw; just add it straight from the bag. One common mistake is overcooking the chicken. If you cook it too long, it can dry out. Always check the chicken after the minimum cooking time. Another mistake is not seasoning enough. Taste your chowder before serving. If it's bland, add more salt and pepper. Lastly, remember to stir in the cream at the end. This keeps it smooth and prevents curdling. {{image_2}} You can make this chowder lighter. Swap heavy cream for Greek yogurt or coconut milk. Use skinless chicken thighs instead of breasts for more flavor. Add more veggies like carrots or zucchini for extra nutrients. You can also use low-sodium chicken broth to cut down on salt. Spice up your chowder with fresh herbs like cilantro or basil. Add a splash of lime for a zesty twist. You can also throw in some jalapeños for heat. If you love smokiness, try adding smoked paprika instead of regular paprika. These small changes can bring new life to this dish. To make a vegetarian version, leave out the chicken. Use vegetable broth instead of chicken broth. For protein, add lentils or chickpeas. You can also use cashew cream to keep it creamy and rich. This way, everyone can enjoy a warm bowl of delicious chowder! After enjoying your chowder, let it cool down. Place the cooled chowder in an airtight container. Use a container that fits your leftover amount well. Store it in the fridge for up to three days. To reheat, pour the chowder into a pot. Heat it over medium heat. Stir often to ensure even heating. You can also use the microwave. Heat in a microwave-safe bowl, covered loosely for about 2-3 minutes. Stir halfway through to warm it evenly. To freeze, let the chowder cool completely. Use a freezer-safe container, and leave some space at the top. This allows for expansion as it freezes. It will stay good for up to three months in the freezer. When ready to eat, thaw it in the fridge overnight before reheating. Yes, you can use fresh corn. Just cut the kernels off the cob. You will need about 4 cups of fresh corn. Fresh corn gives a nice crunch and sweet flavor. However, frozen corn saves time and is always ready. If using fresh, add it during the last hour of cooking for the best taste. To make the chowder dairy-free, swap the heavy cream for coconut milk or almond milk. Both options add creaminess without dairy. You can also use a dairy-free cream option found in stores. Just make sure the broth you use is also dairy-free. This way, you keep the chowder tasty and creamy. Chowder pairs well with many sides. Here are some ideas: - Crusty bread or rolls - Green salad with light dressing - Steamed vegetables like broccoli or green beans - Cornbread for a sweet touch These sides complement the creamy chowder and make a full meal. We covered important steps to create a tasty chowder. You learned about key ingredients and helpful tips for prep. I shared ways to get the best texture and time-saving hacks. You can also explore tasty variations and storage methods for leftovers. Remember, cooking is about joy and creativity. Use this guide to make chowder your way. Enjoy each step as you create something special. Your delicious chowder awaits!

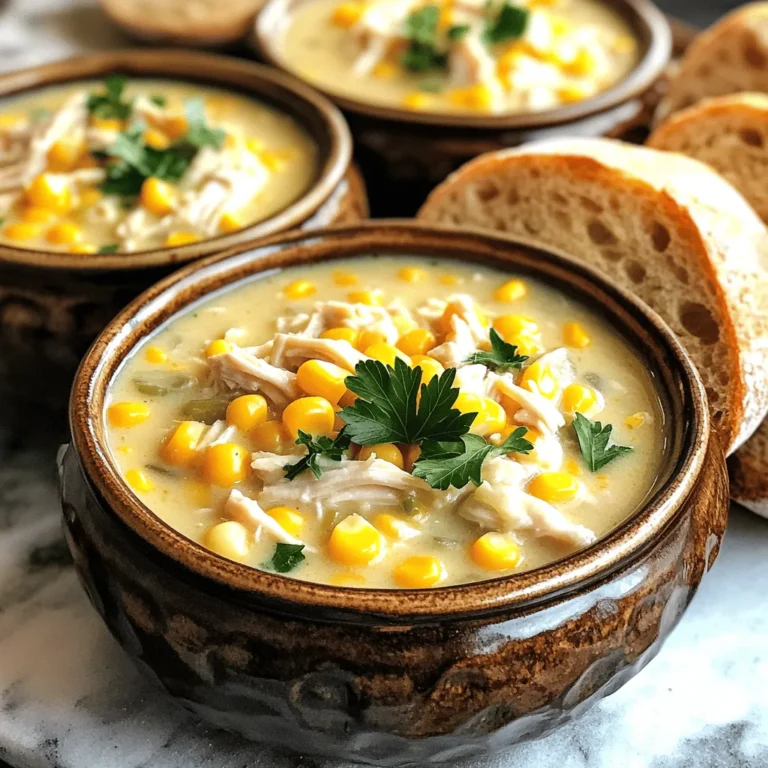
Slow Cooker Creamy Chicken and Corn Chowder Delight

To make a no-bake chocolate pumpkin pie, gather these simple ingredients: - 1 ½ cups graham cracker crumbs - ½ cup unsweetened cocoa powder - ⅓ cup coconut oil, melted - ½ cup maple syrup or honey - 1 cup canned pumpkin puree - 1 cup cream cheese, softened - ½ cup powdered sugar - 1 teaspoon vanilla extract - 1 teaspoon pumpkin spice - Whipped cream for topping (optional) - Dark chocolate shavings for garnish (optional) You can swap some ingredients if you need to. Here are some easy options: - Graham cracker crumbs: Use crushed cookies like Oreos or digestive biscuits. - Coconut oil: You can use unsalted butter if you prefer. - Maple syrup: Honey or agave syrup works well too. - Cream cheese: Try Greek yogurt for a lighter filling. - Pumpkin spice: You can mix cinnamon, nutmeg, and ginger if you don't have pumpkin spice. Garnishes can make your pie look great and add flavor. Consider these: - Whipped cream adds a light touch on top. - Dark chocolate shavings give a nice crunch and rich taste. - A sprinkle of cinnamon or nutmeg can enhance the flavor. This recipe is flexible, so feel free to get creative! First, gather your ingredients for the crust. You need graham cracker crumbs, cocoa powder, melted coconut oil, and maple syrup. In a mixing bowl, combine 1 ½ cups of graham cracker crumbs and ½ cup of unsweetened cocoa powder. Then, add ⅓ cup of melted coconut oil and ½ cup of maple syrup. Mix these until it looks like wet sand. Next, press this mixture into the bottom and sides of a 9-inch pie dish. Use the back of a measuring cup to press it firmly. This step helps create a strong base. Set the crust aside in the fridge so it can firm up while you prepare the filling. Now, let’s make the filling. Take a large mixing bowl and beat 1 cup of softened cream cheese until smooth. This makes the filling creamy and rich. Next, add in 1 cup of canned pumpkin puree, ½ cup of powdered sugar, 1 teaspoon of vanilla extract, and 1 teaspoon of pumpkin spice. Mix everything together until it’s fully blended. The mixture should be thick and creamy. It’s time to add some chocolate! Pour half of the pumpkin filling into the crust and spread it evenly. This layer adds a nice base flavor. Now, melt some dark chocolate until it’s smooth. Mix the melted chocolate into the remaining filling until it’s well combined. Gently pour this chocolate pumpkin mixture on top of the first layer in the crust. Use a spatula to smooth the top. This layering gives the pie a beautiful look and a rich taste. Cover the pie with plastic wrap and place it in the fridge. Chill it for at least 4 hours, or overnight if you can wait. This helps the pie set and makes it easier to slice. When you’re ready to serve, take the pie out of the fridge. You can top it with whipped cream and sprinkle dark chocolate shavings on top for a nice finish. Enjoy the creamy, chocolatey goodness! To make a great crust, use fresh graham cracker crumbs. If they sit too long, they can lose flavor. Mix the crumbs with cocoa powder for a rich taste. When adding melted coconut oil and maple syrup, combine them well. Press the mixture firmly into the dish. This helps the crust hold its shape. Chill the crust in the fridge while making the filling. This step helps it firm up nicely. For a smooth filling, soften the cream cheese first. Beat it well until there are no lumps. Then, add the pumpkin puree slowly. Mix in the powdered sugar, vanilla, and pumpkin spice. Make sure every ingredient blends well. This will give you a creamy texture. If your filling seems too thick, you can add a splash of milk. This helps it blend more easily. To boost flavor, try adding a pinch of sea salt. It can enhance the sweetness. You can also mix in some cinnamon or nutmeg for extra warmth. If you love chocolate, add dark chocolate chips to the filling. They will melt and add richness. For a fun twist, top the pie with crushed nuts or sprinkles. This gives a nice crunch and a pop of color. {{image_2}} You can make this pie gluten-free with simple swaps. Use gluten-free graham cracker crumbs instead of regular ones. Many brands offer tasty gluten-free options. Check the label to ensure they are truly gluten-free. You will still get a great crust with the same flavor. To make this pie dairy-free, swap out the cream cheese. Use a dairy-free cream cheese alternative. There are many options on the market today. You can also use coconut cream for a rich texture and taste. This keeps the pie creamy without any dairy. If you want to change the sweetness, try different sweeteners. You can use agave syrup instead of maple syrup or honey. You can also use stevia or monk fruit sweetener for a low-calorie option. Just adjust the amount based on the sweetener's strength. This way, you can enjoy a pie that fits your diet needs. To store leftovers, place the pie in an airtight container. You can also cover the pie dish with plastic wrap. This helps keep the pie fresh and tasty. Store it in the fridge for up to four days. Always ensure the pie is cool before covering it. You can freeze No-Bake Chocolate Pumpkin Pie too! First, let the pie chill completely. Then, wrap it tightly in plastic wrap. After that, place it in a freezer-safe container. This way, you can enjoy it later! The pie can stay frozen for up to two months. When ready to eat, thaw it in the fridge overnight. The shelf life of this pie varies based on storage. In the fridge, it lasts about four days. If you freeze it, you can keep it for two months. For the best taste, eat the pie within a week if stored in the fridge. Always check for any changes in smell or texture before enjoying it. Yes, you can use fresh pumpkin. Start with a small pumpkin. Cut it in half and remove the seeds. Roast or steam the pumpkin until soft. Then, scoop out the flesh and puree it in a blender or food processor. This gives a fresh taste to your pie. Just make sure to measure out one cup of puree for the recipe. You can keep the pie in the fridge for up to five days. Make sure to cover it well with plastic wrap. This keeps it fresh and prevents it from absorbing other odors in the fridge. If you want to enjoy it later, you can freeze it too. No worries if you lack graham cracker crumbs! You can use crushed cookies or even crushed nuts. Options like vanilla wafers or digestive biscuits work great too. Just mix them with cocoa powder and melted coconut oil for a tasty crust. In this blog post, we explored how to make a no-bake chocolate pumpkin pie. We covered the essential ingredients, including possible substitutions and garnishes. I shared step-by-step instructions for preparing the crust and creamy filling. Tips for a perfect result and variations for different diets were included too. Finally, we looked at storage methods and answered common questions. In summary, making this pie is simple and fun. Try these tips for your next dessert!

No-Bake Chocolate Pumpkin Pie Easy and Delicious Recipe

- 1.5 pounds fingerling potatoes, halved lengthwise - 3 tablespoons olive oil - ¾ cup grated Parmesan cheese Fingerling potatoes are small and tender. Their shape makes them perfect for roasting. I love how they get crispy on the outside and stay soft inside. Olive oil adds rich flavor and helps the potatoes brown nicely. The Parmesan cheese creates a golden crust that takes these potatoes over the top. - 1 teaspoon garlic powder - 1 teaspoon smoked paprika - ½ teaspoon dried thyme - Salt and black pepper to taste Garlic powder gives a strong taste without the hassle of chopping fresh garlic. Smoked paprika adds a warm, smoky flavor that enhances the potatoes. Dried thyme brings earthiness to the mix. Don’t forget salt and black pepper; they bring out the best in every ingredient. - 2 tablespoons fresh parsley, chopped Fresh parsley is a great touch. It adds a pop of color and freshness to the dish. Just sprinkle it on top before serving. It makes your crispy Parmesan roasted fingerling potatoes look even better! - Preheating the oven Start by preheating your oven to 425°F (220°C). This step is key. A hot oven helps the potatoes become crispy. - Coating the potatoes In a large bowl, combine 1.5 pounds of halved fingerling potatoes with 3 tablespoons of olive oil. Add 1 teaspoon of garlic powder, 1 teaspoon of smoked paprika, and ½ teaspoon of dried thyme. Sprinkle in salt and black pepper to taste. Toss everything well until the potatoes are fully coated. This mix makes the flavors pop. - Arranging potatoes on a baking sheet Spread the coated potatoes in a single layer on a baking sheet lined with parchment paper. Make sure the cut sides face down. This ensures they get that perfect crispiness. - Roasting times and flipping guidelines Roast the potatoes in your preheated oven for 25 to 30 minutes. Halfway through, flip them with a spatula. This helps them roast evenly and become golden brown. - Adding Parmesan cheese Once the potatoes are golden and crispy, take them out of the oven. Sprinkle ¾ cup of grated Parmesan cheese evenly over the potatoes. Return them to the oven for 5 to 7 minutes. Watch closely until the cheese melts and gets a bit crispy. - Garnishing with parsley After removing the potatoes from the oven, let them cool for a couple of minutes. Then sprinkle 2 tablespoons of chopped fresh parsley on top for a bright finish. This adds a nice pop of color and flavor. To get crispy potatoes, spread them in a single layer. This helps them roast evenly. When you place them cut-side down, they caramelize beautifully. This method allows the edges to crisp up just right. Adjust the spices based on your taste. If you love garlic, add more garlic powder. Try adding a squeeze of lemon juice for a fresh kick. You can also mix in some grated cheese before roasting for extra flavor. These crispy potatoes pair well with dips like ranch or aioli. You can also serve them with ketchup for a classic touch. For side dishes, consider a fresh salad or grilled veggies. They add color and balance to your meal. {{image_2}} You can make these potatoes even tastier with a few simple tweaks. Adding fresh herbs like rosemary or basil can boost flavor. Just chop them finely and mix them in with the potatoes before roasting. You can also try different cheeses. Grated cheddar or pecorino adds a unique twist. Fingerling potatoes are great, but you can explore other baby potatoes too. Try using baby Yukon gold or red potatoes for a different taste and texture. If you want something sweeter, substitute with sweet potatoes. They will give a lovely color and a hint of sweetness. Want a kick? Use cayenne pepper to spice things up. You can mix it in with the garlic powder for a warm flavor. Another option is to use herb-infused olive oil. It adds depth and pairs well with the Parmesan. Try garlic or chili oil for extra zing. Store leftover crispy Parmesan roasted fingerling potatoes in the fridge. Let them cool completely first. Place them in an airtight container. This helps keep them fresh for up to three days. Make sure to label the container with the date. This way, you’ll know when to eat them. Reheat your potatoes for the best taste. The oven provides a crispier result than the microwave. To reheat in the oven, preheat to 350°F (175°C). Spread the potatoes on a baking sheet. Heat them for about 10-15 minutes. Flip them halfway through to restore crispiness. If using the microwave, place them on a microwave-safe plate. Heat for about one minute. Check and heat for additional 30 seconds if needed. Yes, you can freeze roasted potatoes! However, they may lose some crispiness. Let them cool completely before freezing. Place them in a freezer-safe bag or container. Remove as much air as possible. They can last in the freezer for up to three months. To reheat frozen leftovers, first thaw them in the fridge overnight. Then, follow the oven reheating method for the best result. This will help bring back some of that delicious crunch! To make your roasted potatoes crispy, follow these best practices: - Choose the right potatoes: Fingerling potatoes are perfect for crispiness. - Cut them correctly: Halve them lengthwise for more surface area. - Use enough oil: Coat them well with olive oil for a crunchy texture. - Preheat your oven: Aim for 425°F (220°C) to get that golden crust. - Single layer roasting: Spread the potatoes out on a baking sheet, cut-side down. - Flip halfway: Turn them during cooking for even browning. - Add cheese at the end: Sprinkle Parmesan during the final minutes for a crispy top. These steps ensure your potatoes turn out crunchy and delicious every time. Yes, you can use regular potatoes as substitutes for fingerling potatoes. Here are a few options: - Yukon Gold: This potato has a rich, buttery flavor and smooth texture. - Red potatoes: They hold their shape well and have a nice skin. - New potatoes: These are small and tender, similar to fingerlings. When using substitutes, adjust cooking times as needed. Larger potatoes may require more time to cook through. To store leftover roasted fingerling potatoes properly: - Cool them down: Let the potatoes sit at room temperature for no more than two hours. - Use an airtight container: Transfer the cooled potatoes into a container to keep them fresh. - Refrigerate: Store them in the fridge for up to four days. When reheating, use an oven or a skillet for the best results. This keeps them crispy, unlike a microwave. This blog post covered how to make delicious roasted fingerling potatoes. We explored main ingredients like potatoes, olive oil, and Parmesan cheese. You learned steps for preparation and roasting, plus tips for the crispiest texture. You can even switch up flavors or types of potatoes. Remember, proper storage keeps leftovers fresh. Now, you have the tools to create a tasty side dish that fits any meal. Enjoy experimenting with this versatile recipe!

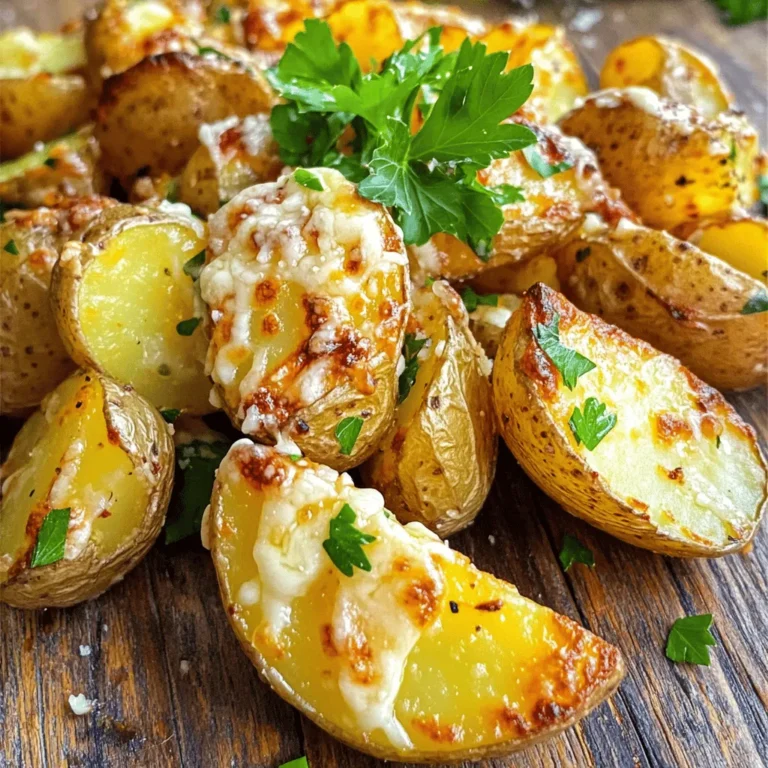
Crispy Parmesan Roasted Fingerling Potatoes Delight

- 1 cup pumpkin puree - 1/2 cup brown sugar - 1/4 cup granulated sugar - 1/2 cup unsalted butter, melted - 1 large egg - 1 teaspoon vanilla extract - 1 cup all-purpose flour - 1 teaspoon baking powder - 1/2 teaspoon baking soda - 1/2 teaspoon salt - 1 teaspoon pumpkin pie spice - 3/4 cup chocolate chips Using fresh pumpkin puree will boost flavor. If you choose canned, pick a brand without additives. For sugar, light brown sugar adds moisture and a rich taste. Always use unsalted butter, as it gives you control over salt. Choose high-quality chocolate chips; they melt better and taste richer. Fresh eggs yield the best texture. Finally, use a good vanilla extract for deeper flavor. You can swap pumpkin puree with sweet potato or butternut squash puree. For a dairy-free option, use coconut oil instead of butter. If you want a different sweetener, maple syrup or honey can work, but adjust the liquid in the recipe. You can also replace all-purpose flour with a gluten-free blend. For vegan blondies, use flax eggs in place of a real egg. Start by preheating your oven to 350°F (175°C). This step ensures even baking. Next, grab an 8x8-inch baking pan. Grease it well to prevent sticking. You can use butter or cooking spray. Make sure to cover all corners of the pan. This will help your blondies come out easily once baked. In a large mixing bowl, combine 1 cup of pumpkin puree, 1/2 cup of brown sugar, and 1/4 cup of granulated sugar. Mix these together until smooth. It should look creamy and well-blended. Now, add in 1/2 cup of melted unsalted butter, 1 large egg, and 1 teaspoon of vanilla extract. Whisk these ingredients together until they blend perfectly. This mixture should be rich and inviting. In another bowl, whisk together 1 cup of all-purpose flour, 1 teaspoon of baking powder, 1/2 teaspoon of baking soda, 1/2 teaspoon of salt, and 1 teaspoon of pumpkin pie spice. This mix adds flavor and helps your blondies rise. Gradually add this dry mix into your wet mixture. Stir gently until just combined. Be careful not to overmix; this keeps your blondies soft and chewy. Now comes the fun part! Take 3/4 cup of chocolate chips and fold them into the batter. Use a spatula to make sure they are evenly mixed. This step adds delightful bursts of chocolate in every bite. The chips should be spread throughout the batter, ensuring each blondie has a sweet surprise. Pour your batter into the prepared baking pan. Use a spatula to spread it evenly. Bake in the preheated oven for 25-30 minutes. To check if they are done, insert a toothpick into the center. If it comes out clean, your blondies are ready! Once baked, remove the pan from the oven. Let it cool for about 10 minutes. Then, transfer to a wire rack to cool completely. Enjoy the wonderful aroma filling your kitchen! To get the best texture in your blondies, start with room-temperature ingredients. This helps them mix better. Use fresh pumpkin puree for a moist and rich flavor. Don’t overmix your batter. A few lumps are okay. This keeps the blondies soft and chewy. Bake them until a toothpick comes out clean. If you bake too long, they can dry out. Avoid using cold butter. Cold butter does not blend well and can make your blondies dense. Another mistake is skipping the cooling time. Letting them cool allows the flavors to settle. Don’t forget to grease your baking pan. This prevents sticking and helps with easy removal. Finally, measure your ingredients carefully. Too much flour can make them crumbly. Serve these blondies warm or at room temperature. For a nice touch, dust them with powdered sugar. A dollop of whipped cream on top adds creaminess. You can also pair them with a scoop of vanilla ice cream. This creates a delightful contrast with the warm blondies. Consider adding a sprinkle of cinnamon for extra flavor. {{image_2}} You can make these blondies extra special by adding nuts. Walnuts or pecans work great. Just chop them up and fold them in with the chocolate chips. This adds a nice crunch and flavor. You could also add dried fruit. Raisins or cranberries can give a sweet twist. Experiment with what you love! Want to make these blondies gluten-free? Simply swap the all-purpose flour for a gluten-free blend. Many brands make great mixes that work well in baking. Just make sure to check the package for the right amount to use. This way, you can enjoy these treats without worry. You can give your blondies a new taste by changing the spices. Try adding cinnamon or nutmeg for warm flavors. You could even use ginger for a fun kick! If you really want to mix it up, add some cocoa powder for a chocolate twist. These small changes can bring new life to your pumpkin chocolate chip blondies! To keep your pumpkin chocolate chip blondies fresh, store them in an airtight container. This helps retain moisture and flavor. You can layer the blondies with parchment paper to prevent sticking. Keep them at room temperature for up to three days. If you want them to last longer, the fridge works too, but it may change the texture a bit. Freezing blondies is simple and effective. First, let them cool completely. Then, cut them into squares. Wrap each piece tightly in plastic wrap. Place the wrapped blondies in a freezer-safe bag or container. They can stay in the freezer for up to three months. When you're ready to enjoy them, just thaw them at room temperature. Pumpkin chocolate chip blondies can last up to five days in the fridge. To reheat, place a square in the microwave for about 10-15 seconds. This warms them up nicely. You can also heat them in an oven set to 350°F for about 5 minutes. Enjoy them warm for a cozy treat! Yes, you can use fresh pumpkin. To do this, cook the pumpkin until soft. Then, mash it well until smooth. Make sure to drain excess water. This helps your blondies stay firm and not too wet. To check if your blondies are done, insert a toothpick into the center. If it comes out clean or with a few crumbs, they are ready. If it has wet batter on it, bake a few more minutes. Keep an eye on them to avoid overbaking. Yes, you can easily make this recipe vegan. Replace the egg with a flax egg. To do this, mix one tablespoon of ground flaxseed with three tablespoons of water. Let it sit for five minutes until it thickens. Use a vegan butter substitute for the unsalted butter. Each blondie has roughly 180 calories. They contain 9 grams of fat, 24 grams of carbs, and 2 grams of protein. The chocolate chips add some sugar, so adjust your intake if needed. They also provide some fiber from the pumpkin, which is a plus. Yes, these blondies are safe to eat if left out overnight. However, store them in a cool, dry place. If your kitchen is warm, it’s better to keep them in the fridge. This helps them stay fresh longer. Enjoy them within a few days for the best taste. We explored the key ingredients and how to make pumpkin chocolate chip blondies. I shared steps for mixing, baking, and cooling. You learned tips for texture and common mistakes. Variations, like gluten-free options and mix-ins, add fun. Lastly, storing and reheating ideas help keep them fresh. With this knowledge, you can bake delicious blondies with confidence. Enjoy your tasty treats!

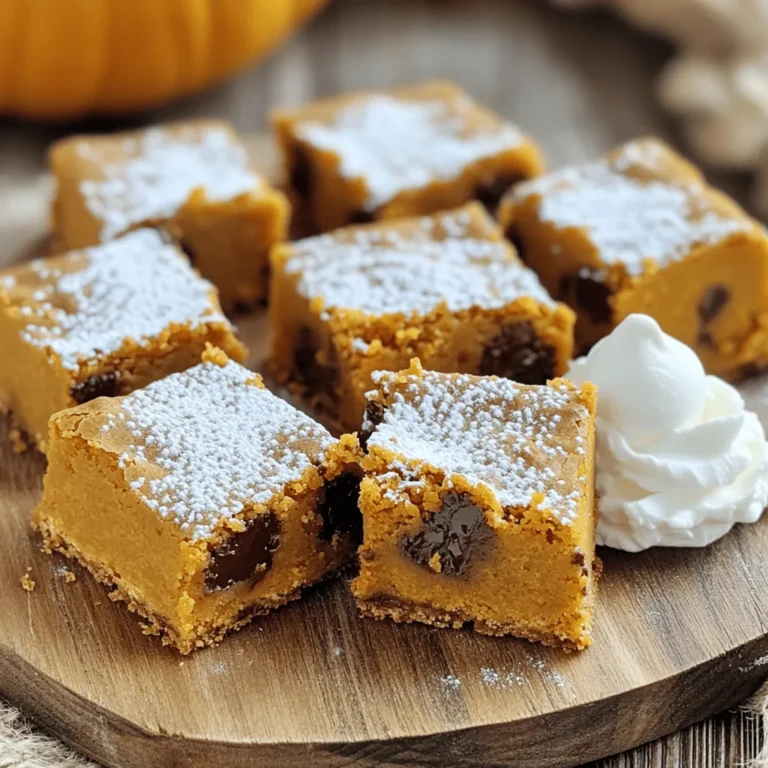
Pumpkin Chocolate Chip Blondies Irresistible Treat

To make One-Pot Creamy Pesto Chicken Orzo, you need simple, fresh ingredients. Here’s what you will need: - 1 tablespoon olive oil - 1 pound boneless, skinless chicken thighs, cut into bite-sized pieces - Salt and pepper to taste - 3 cloves garlic, minced - 1 cup orzo pasta - 4 cups chicken broth - 1 cup heavy cream - 1 cup basil pesto (store-bought or homemade) - 1 cup cherry tomatoes, halved - 1 cup fresh spinach - ½ cup grated Parmesan cheese - Fresh basil leaves for garnish These ingredients come together to create a creamy, savory dish. Each one plays a key role. The chicken provides protein. The orzo gives a nice texture. Pesto adds rich flavor. Fresh spinach and tomatoes add color and nutrients. When choosing your ingredients, consider freshness. Fresh basil and spinach make a big difference. You can use homemade pesto for a personal touch. If you prefer, store-bought works well, too. Now, you’re ready to start cooking! With these ingredients, you can make a meal that impresses everyone. First, heat one tablespoon of olive oil in a large pot over medium heat. Once the oil is hot, season one pound of boneless, skinless chicken thighs with salt and pepper. Add these chicken pieces to the pot. Cook the chicken for about 5 to 7 minutes. Stir occasionally until the chicken is browned and cooked through. After that, remove the chicken and set it aside. In the same pot, add three cloves of minced garlic. Cook the garlic for about 30 seconds until it smells great. Then, stir in one cup of orzo pasta and pour in four cups of chicken broth. Bring this mixture to a boil. After boiling, reduce the heat to a simmer. Cover the pot and cook for 10 to 12 minutes. Stir it now and then until the orzo is tender and has absorbed most of the broth. Once the orzo is cooked, lower the heat. Stir in one cup of heavy cream and one cup of basil pesto. Mix until well combined. Next, add the cooked chicken back into the pot. Toss in one cup of halved cherry tomatoes and one cup of fresh spinach. Stir gently and let it cook for an extra 2 to 3 minutes. This helps the spinach wilt and everything heat up. Finally, add half a cup of grated Parmesan cheese. Stir until the cheese melts and makes the dish creamy. Adjust the seasoning if needed. Remove from heat and let it sit for a few minutes before serving. To cook chicken evenly, cut it into small, bite-sized pieces. This helps it cook fast and brown nicely. Always check the chicken's center to make sure it is no longer pink. For orzo, avoid mushy pasta by stirring it often while it cooks. A gentle stir helps keep the orzo from clumping together. You can try different pesto options to change the taste. If you want a milder flavor, use a spinach or sun-dried tomato pesto. For a kick, look for a spicy pesto. Adjust seasoning to your taste by adding more salt or pepper as you cook. Tasting as you go helps you find the perfect balance. Serve this dish in large, generous bowls. A big bowl makes it feel special. Garnish with fresh basil leaves for a pop of color. You can also sprinkle extra Parmesan cheese on top for a creamy finish. These small touches make your meal look fancy and inviting. {{image_2}} You can easily change the chicken in this recipe. Try using chicken breasts instead of thighs. They will cook the same way. You can also use rotisserie chicken to save time. If you want a vegetarian dish, swap chicken for mushrooms or chickpeas. Both add great flavor and texture. Want to spice things up? Add red pepper flakes or Italian seasoning. Fresh herbs like thyme or oregano can also boost the taste. You can mix in other veggies too. Bell peppers, zucchini, or peas work well. They add color and nutrients to your meal. If you need gluten-free options, use gluten-free orzo. There are many brands available now. For a dairy-free meal, swap heavy cream for coconut milk. Nutritional yeast can replace Parmesan cheese. This keeps the creamy texture without dairy. These simple changes let everyone enjoy your dish. - To store leftovers, let the dish cool down first. - Place the orzo chicken in an airtight container. - It can stay fresh in the fridge for up to 3 days. - When reheating, warm it slowly on the stove. - Add a splash of chicken broth to keep it creamy. - To freeze the dish, let it cool completely. - Transfer it to a freezer-safe container. - Seal it tightly to prevent freezer burn. - It can last for up to 3 months in the freezer. - To thaw, place it in the fridge overnight. - Reheat it on the stove, adding broth to restore creaminess. How can I make it spicier? You can add red pepper flakes for heat. Start with a pinch and adjust to taste. Fresh jalapeños also work well. Just chop them finely and toss them in when cooking the chicken. If you want more flavor, try spicy pesto or a dash of hot sauce. Can I use whole wheat orzo? Yes, whole wheat orzo is a great choice. It adds fiber and nutty flavor. The cooking time may be slightly longer, so check the package instructions. Remember, it will still blend well with the creamy sauce. What can I serve with One-Pot Creamy Pesto Chicken Orzo? This dish is filling on its own, but you can add a side salad for freshness. A simple green salad with vinaigrette pairs nicely. You could also serve garlic bread to soak up the sauce. Enjoy a light dessert after for balance, like sorbet or fruit. This blog post detailed a simple and tasty recipe for One-Pot Creamy Pesto Chicken Orzo. You learned about essential ingredients, like chicken, orzo, and pesto. Following my step-by-step instructions helps ensure a delicious meal. I shared tips for cooking, customizing flavors, and enhancing presentation. You can also swap ingredients and adjust for dietary needs. Finally, I highlighted storage options to keep leftovers fresh. Now, you can enjoy a satisfying dish any time!

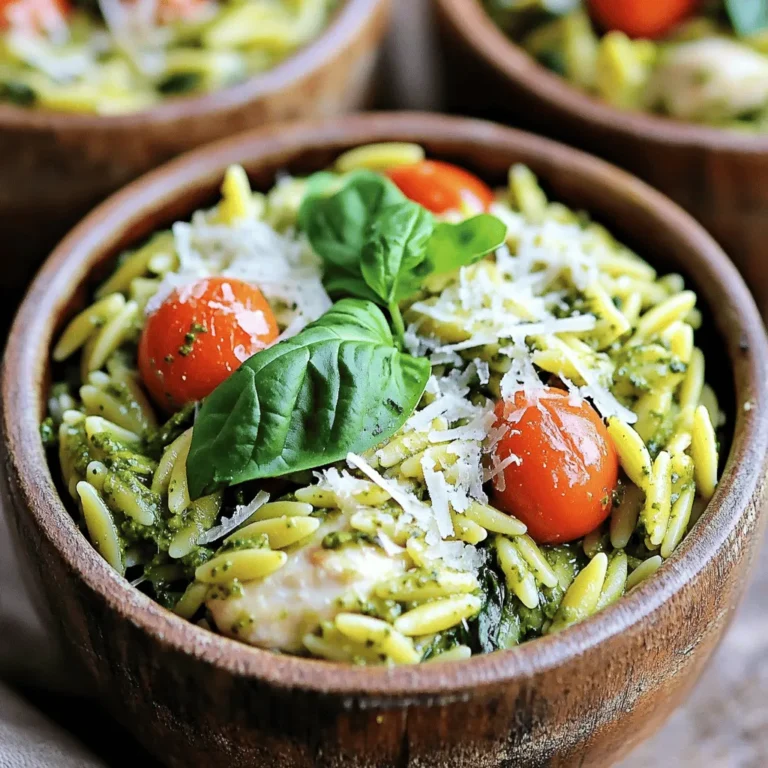
One-Pot Creamy Pesto Chicken Orzo Easy Weeknight Meal

To make Air Fryer Garlic Butter Steak Bites, you need simple, fresh ingredients. Here’s what you will need: - 1 lb sirloin steak, cut into 1-inch cubes - 4 tablespoons unsalted butter, melted - 4 cloves garlic, minced - 1 teaspoon fresh rosemary, chopped - 1 teaspoon fresh thyme, chopped - Salt and pepper to taste - 1 tablespoon olive oil - Fresh parsley, chopped (for garnish) These ingredients work together to create a rich and savory flavor. The sirloin steak is tender and juicy, perfect for this dish. The garlic and butter bring a wonderful aroma and taste. Fresh herbs like rosemary and thyme add depth to the flavor. Using quality ingredients makes a big difference. Fresh herbs can really enhance the taste. Be sure to use unsalted butter for better control over the saltiness. The olive oil helps to keep the steak moist while cooking. When you gather these items, you set yourself up for success. The combination of these flavors will make your steak bites a hit with everyone. First, pat the steak cubes dry with paper towels. This step is key. It helps the seasoning stick better. Then, place the steak in a large bowl. Next, mix the marinade ingredients in a small bowl. Combine melted butter, minced garlic, rosemary, thyme, olive oil, salt, and pepper. This mix adds rich flavor to your steak bites. Now, coat the steak cubes with the marinade. Pour the mixture over the steak, then toss it well. Ensure each piece is covered. Let the steak marinate for at least 15 minutes. This allows the flavors to soak in and enhances the taste. Before cooking, preheat your air fryer to 400°F (200°C) for about 5 minutes. This step ensures even cooking and a nice sear. Place the marinated steak cubes in the air fryer basket. Lay them in a single layer to ensure they cook evenly. Cook for 8 to 10 minutes. Shake the basket halfway through. This helps all sides get crispy and golden. Aim for medium-rare to medium doneness for the best flavor. For steak bites, aim for an internal temperature of 130°F to 135°F for medium-rare. If you prefer medium, go for 140°F to 145°F. Use a meat thermometer to check for the right doneness. Adjust your cooking time based on how you like your steak. For medium-rare, cook for about 8 minutes. For medium, increase the time to 10 minutes. Remember to shake the basket halfway through to cook evenly. To boost flavor, consider adding more herbs. Fresh oregano or basil can work well with your garlic butter. You might also try a pinch of red pepper flakes for a spicy kick. Resting the meat after cooking is key. Let it sit for 5 minutes before serving. This helps the juices spread, making each bite more tender and juicy. Garnish your steak bites with fresh parsley for a pop of color. You can also add a sprinkle of flaky sea salt for extra flavor. For plating, use a clean white dish to help the steak stand out. Arrange the bites in a single layer. Drizzle some of the garlic butter over the top. This not only looks nice but also adds extra flavor. {{image_2}} You can use many cuts for steak bites. Sirloin is great, but ribeye is even better. Ribeye has more fat, which adds juicy flavor. Tenderloin is also a nice choice, offering a buttery texture. Flank steak and skirt steak are good too. They give a nice chew and flavor when cooked right. Just cut them into 1-inch cubes like the sirloin. Want to change the flavor? You can add spices like paprika or cayenne for heat. Italian herbs, like oregano or basil, can give a fresh taste. You can also try different marinades. Soy sauce or Worcestershire sauce can add depth. Specialty butters are a fun twist. Try garlic herb butter or even blue cheese butter for a rich kick. The right sides make your steak bites shine. Serve them with crispy fries or roasted veggies. A fresh salad with tangy dressing pairs well too. For a cozy meal, mashed potatoes or mac and cheese are great choices. Don’t forget a dipping sauce! A creamy ranch or spicy aioli can make each bite even better. To make sure your steak bites stay fresh, store them in a good container. Use an airtight container. This helps keep moisture in and air out. You can also use plastic wrap or foil for short-term storage. Place the leftover steak bites in the fridge if you plan to eat them soon. If you want to keep them longer, freeze them. Just make sure to use freezer-safe bags or containers. When you are ready to eat your leftovers, reheating them the right way is key. I recommend using the air fryer again. Set it to 350°F (175°C). Cook for about 5 minutes, shaking the basket halfway. This method helps keep the steak bites juicy and crispy. You can also reheat them on the stovetop. Just warm them in a pan over low heat for a few minutes. In the fridge, your steak bites last about 3 to 4 days. If you freeze them, they can last up to 3 months. Just remember to label your containers with the date. This way, you know when to use them. Enjoying these steak bites later can be just as tasty as the first time! I suggest marinating the steak bites for at least 15 minutes. This time allows the flavors to seep into the meat. If you have more time, marinating for up to an hour can deepen the taste even more. The garlic, herbs, and butter work together to create a bold and rich flavor. Just make sure to keep the steak covered while it sits. Yes, you can use frozen steak! Just remember to thaw it first. You can place the steak in the fridge overnight to defrost. If you're short on time, you can use the microwave. Once thawed, pat it dry and follow the marination process. Cooking time may need slight adjustments. Ensure the steak bites reach a safe temperature for eating. Several sauces complement steak bites perfectly. Here are a few popular options: - Classic barbecue sauce - Creamy ranch dressing - Spicy Sriracha mayo - Chimichurri sauce for a fresh kick - Garlic aioli for extra garlic flavor Feel free to try different sauces to find your favorite! This post shared a simple guide to making tasty steak bites. You learned about the key ingredients, easy steps to prepare, and air fry to get perfect results. I also included tips on flavor, presentation, and storage. Remember, marinating and choosing the right cut can boost your meal. Enjoy these bites with your favorite sides or dipping sauces for a great treat. Now, you’re ready to impress with your steak bites!

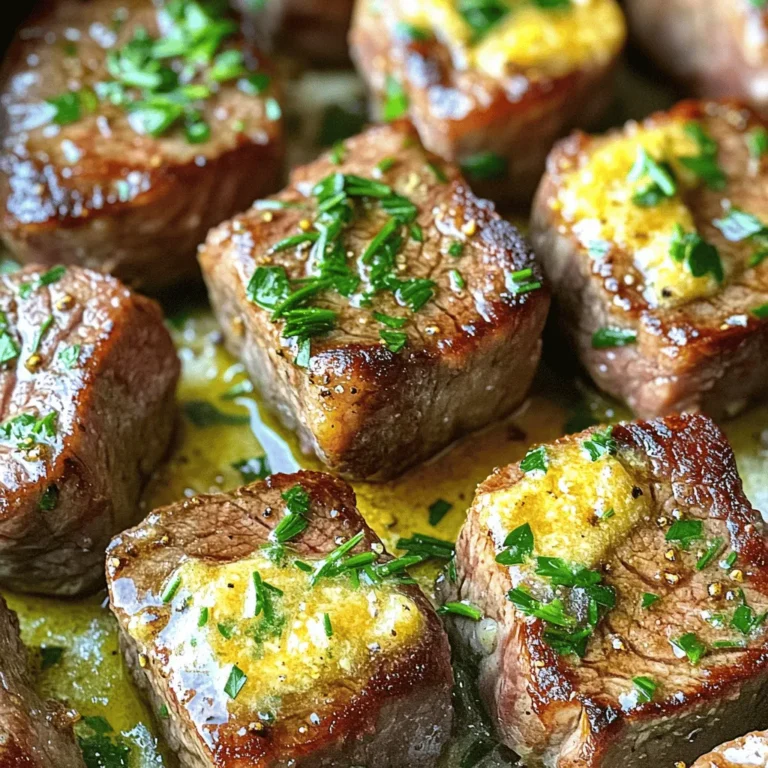
Air Fryer Garlic Butter Steak Bites Savory Flavor Boost

PREV 1 … 26 27 28 … 57 NEXT
secrets pice kitchen

explore

DessertsDinnerAppetizersDrinks

Our Policies

  • Cookie Policy
  • Copyright Policy
  • Disclaimer
  • GDPR Policy
  • Terms Of Use
Back to Top
  • About
  • Contact Us
  • Privacy Policy
© 2025 secrets pice kitchen