FREE DINNER EBOOK! Get your copy!
  • Cookie Policy
  • GDPR Policy
  • Disclaimer
  • Terms Of Use
  • Visit my other site: Fun Cookie Recipes
secrets pice kitchen
  • Home
  • Dinner
  • Desserts
  • Drinks
  • Appetizers
  • Contact
  • About
  • Privacy Policy
  • Home
  • Dinner
  • Desserts
  • Drinks
  • Appetizers
  • Contact
  • About
  • Privacy Policy
  • Cookie Policy
  • GDPR Policy
  • Disclaimer
  • Terms Of Use
Visit my other site: Fun Cookie Recipes

HOME / CATEGORIES /

Latest

To make Bakery-Style Cinnamon Sugar Donut Muffins, you'll need simple yet key ingredients. Here’s the full list: - 1 ½ cups all-purpose flour - 1 teaspoon baking powder - ½ teaspoon baking soda - ½ teaspoon salt - 1 teaspoon ground cinnamon (plus extra for coating) - ½ cup granulated sugar (plus extra for coating) - ½ cup unsalted butter, melted - 2 large eggs - 1 teaspoon vanilla extract - ½ cup buttermilk - Optional: ½ cup mini chocolate chips or chopped nuts Each ingredient plays an important role. The flour gives structure, while baking powder and baking soda help the muffins rise. The cinnamon adds warmth and flavor. The sugar and melted butter create a sweet, rich base. Eggs add moisture and help bind everything together. Vanilla and buttermilk enhance the overall taste and texture. Optional add-ins like chocolate chips or nuts can bring fun twists. They add texture and a burst of flavor to each bite. You can mix and match as you like. Always use fresh ingredients for the best results. This helps create soft, fluffy muffins that taste like they came from a bakery. First, preheat your oven to 350°F (175°C). This step is key for even baking. Next, prepare your muffin pan. You can grease it or use muffin liners for easy removal. Both methods work well. In a mixing bowl, whisk together 1 ½ cups of all-purpose flour, 1 teaspoon of baking powder, ½ teaspoon of baking soda, ½ teaspoon of salt, and 1 teaspoon of ground cinnamon. Whisk until everything is well mixed. This mix forms the base of your muffins. In another bowl, cream together ½ cup of granulated sugar and ½ cup of melted unsalted butter until smooth. This mix adds richness. Next, add in 2 large eggs one at a time. Stir well after each addition. Then, mix in 1 teaspoon of vanilla extract and ½ cup of buttermilk until everything is combined. Now, gently fold the dry ingredients into the wet mixture. Do this until just combined. Be careful not to overmix, as this can make your muffins tough. If you want, fold in ½ cup of mini chocolate chips or chopped nuts for extra flavor and texture. Spoon the batter into the prepared muffin tin, filling each cavity about ¾ full. Bake the muffins for 15-18 minutes. To check for doneness, insert a toothpick into the center of a muffin. It should come out clean when they are done. While the muffins bake, prepare the cinnamon sugar coating. In a small bowl, mix ¼ cup of granulated sugar with 1 tablespoon of ground cinnamon. Once the muffins are out of the oven, let them cool in the pan for about 5 minutes. While they are still warm, roll each muffin in the cinnamon sugar mixture to coat fully. Let them cool completely on a wire rack before serving. To make the best donut muffins, avoid overmixing the batter. When you mix too much, the muffins can become tough. Instead, stir gently until the dry ingredients just blend with the wet ones. This keeps the muffins light and fluffy. For a moist muffin, use room-temperature ingredients. Cold eggs or buttermilk can lead to uneven mixing. Also, adding melted butter gives a rich flavor and texture. Don't forget to fill your muffin cups about three-quarters full for the perfect rise. You can spice things up by using different spices. Try nutmeg or cardamom for a unique twist. You can even add a touch of ginger for warmth. These spices can change the whole taste of your muffins. For a fun coating, skip the cinnamon sugar and use powdered sugar or chocolate glaze instead. This gives your muffins a delightful, sweet finish. You can mix in mini chocolate chips or chopped nuts to add extra crunch and flavor. These muffins are great for breakfast or as a snack. Pair them with coffee or tea for a cozy treat. You can also serve them with fresh fruit or yogurt to balance the sweetness. To keep your muffins fresh, store them in an airtight container. They can stay tasty for up to three days at room temperature. If you want to keep them longer, consider freezing them. Just thaw them on the counter when you're ready to enjoy. {{image_2}} If you want to make these muffins gluten-free, use a gluten-free all-purpose flour mix. Look for blends that include xanthan gum. This helps mimic the texture of regular flour. You can also try oat flour or almond flour. Each will give a unique taste. Just be sure to adjust the baking time as needed. To make these muffins vegan, replace the eggs with flax eggs. Mix one tablespoon of ground flaxseed with three tablespoons of water. Let it sit for five minutes to thicken. For dairy alternatives, use almond milk or oat milk instead of buttermilk. You can also use coconut oil instead of butter for a rich flavor. Get creative with your muffins! You can add fillings like fruit preserves or chocolate chips. Try adding a swirl of peanut butter for a fun twist. For toppings, consider crushed nuts or a drizzle of icing. Cinnamon sugar is classic, but a maple glaze can also elevate these muffins. To keep your muffins fresh, store them in an airtight container. Use a plastic or glass container. Place a paper towel at the bottom to absorb moisture. This helps avoid sogginess. Keep the container in a cool spot, like a pantry. Avoid direct sunlight to maintain flavor and texture. When reheating, use your oven for the best results. Preheat your oven to 350°F (175°C). Wrap each muffin in foil to keep them moist. Heat for about 5-10 minutes. You can also microwave them for 15-20 seconds. This method is quick but may dry them out a bit. Enjoy your muffins warm for the best taste! To freeze muffins, first let them cool completely. Wrap each muffin in plastic wrap tightly. Then place them in a freezer bag. Remove as much air as you can. Label the bag with the date. To thaw, place a muffin in the fridge overnight or microwave it for 30 seconds. This way, you can enjoy your delicious treats later! Yes, you can use regular milk. To make it similar to buttermilk, add 1 tablespoon of vinegar or lemon juice to one cup of milk. Let it sit for five minutes. This will give you a good substitute for buttermilk. If you don't have a muffin tin, you can use a baking dish. Pour the batter into a greased square or round pan. You can also use silicone molds or even paper cups. Just adjust the baking time, since the muffins may take longer to bake. To check if your muffins are done, insert a toothpick into the center. If it comes out clean or with a few crumbs, they are done. You can also look for a golden-brown color on top. The muffins should spring back when lightly touched. Yes, adding fruit is a great idea! You can mix in blueberries, chopped apples, or mashed bananas. Just be careful not to add too much fruit, as it can make the batter too wet. About ½ cup of fruit works well in this recipe. You now have all the steps to make delicious muffins. We covered the key ingredients, preparation, baking, and storage tips. Remember, great muffins need good mixing and care. You can tweak the recipe too, with flavors and ingredients you love. Whether you want gluten-free or vegan options, there’s a way to meet your needs. Enjoy these tasty treats at breakfast or as snacks. Now, gather your ingredients and start baking your perfect muffins!

Bakery-Style Cinnamon Sugar Donut Muffins Delight

- 2 lbs boneless, skinless chicken thighs - 1 cup BBQ sauce (your favorite brand) - 1 onion, sliced - 4 cloves garlic, minced - 1 tablespoon apple cider vinegar - 1 teaspoon smoked paprika - 1 teaspoon onion powder - ½ teaspoon black pepper - 12 slider buns - Coleslaw (for topping) - Fresh parsley, chopped (for garnish) For this recipe, I love using boneless, skinless chicken thighs. They stay juicy and tender. The BBQ sauce is key to the flavor. Use your go-to brand for best results. I also recommend slicing the onion thinly to help it cook well. Minced garlic adds a nice kick to the sauce. Apple cider vinegar gives a tangy touch. Smoked paprika and onion powder bring depth to the dish. Black pepper adds just the right amount of heat. You will need slider buns to serve the chicken. Coleslaw on top adds crunch and freshness. A sprinkle of parsley makes your sliders look great. - Calories per serving: Approximately 300 - Macronutrients breakdown: - Carbohydrates: 34g - Proteins: 22g - Fats: 10g The sliders are filling and packed with flavor. Each serving has a good balance of carbs, proteins, and fats. This makes them a satisfying meal. Enjoy your delicious slow cooker BBQ chicken sliders! Start by layering the onions in the slow cooker. Place the sliced onion at the bottom. This will add flavor to the chicken as it cooks. Next, mix the BBQ sauce ingredients. In a bowl, combine minced garlic, BBQ sauce, apple cider vinegar, smoked paprika, onion powder, and black pepper. Stir until everything is well mixed and ready to coat the chicken. Now, add the chicken thighs to the slow cooker. Pour the BBQ sauce mixture over the chicken. Make sure the chicken is well coated. Cover the slow cooker and set it on low. Cook for 6 to 8 hours. The chicken should become tender and easy to shred. After cooking, take the chicken thighs out. Shred the chicken using two forks. This helps the chicken soak up all the flavors. Return the shredded chicken to the slow cooker. Stir it to mix with the remaining BBQ sauce. To assemble the sliders, lightly toast the slider buns. Place a generous amount of BBQ chicken on the bottom half of each bun. Top with a spoonful of coleslaw for fresh crunch. Finally, cover with the top half of the bun. For a pop of color, garnish with chopped parsley. Enjoy your delicious sliders! To keep the chicken juicy, choose boneless, skinless thighs. They cook well and stay moist. Use a good BBQ sauce. Your favorite brand will work, but consider trying a smoky or spicy one for added flavor. Mix in fun spices. Besides smoked paprika, try cayenne for heat or brown sugar for sweetness. These small changes can make a big impact. For a great presentation, serve sliders on a big platter. Add extra BBQ sauce on the side for dipping. This makes it fun and tasty! Pair your sliders with sides like coleslaw, corn on the cob, or potato salad. These sides add color and balance to the meal. You can also serve chips for a crunchy texture. {{image_2}} You can switch up the flavor of your sliders easily. Try using spicy BBQ sauce for a kick. You can also add spices like cayenne or chili powder. This adds heat and depth. If you want to change the meat, try pulled pork instead of chicken. Turkey is another great option. It’s leaner and still very tasty. Each choice gives your sliders a different twist. If you need gluten-free options, choose gluten-free slider buns. They taste great and hold the filling well. You can also use lettuce leaves instead of buns. This makes a fresh and light version. For vegetarian alternatives, try jackfruit or mushrooms. Both can soak up the BBQ flavors well. These options make the dish friendly for everyone. Enjoy making your sliders fit your needs! To store leftover BBQ chicken sliders, let them cool down first. Place the chicken in an airtight container. You can keep it in the fridge for up to four days. For best results, separate the chicken from the slider buns. This keeps the buns from getting soggy. If you want to freeze the sliders, wrap each slider tightly in plastic wrap. Then, place the wrapped sliders in a freezer bag. Remove as much air as possible. You can keep them in the freezer for up to three months. When you are ready to eat, thaw them in the fridge overnight. To reheat leftover sliders, you have a few options. You can use the microwave for quick heating. Place the slider on a plate and cover it with a damp paper towel. Heat for 30 seconds, check, then heat more if needed. For a crispier bun, use the oven. Preheat the oven to 350°F (175°C). Wrap the sliders in foil and bake for about 10-15 minutes. This method keeps the flavor and texture. Can I use chicken breasts instead of thighs? Yes, you can use chicken breasts. They will work well. However, thighs stay juicier. The flavor may change slightly. How long can I store the BBQ chicken sliders? You can store them in the fridge for up to four days. Make sure to keep them in an airtight container. This keeps them fresh and tasty. What should I serve with my BBQ chicken sliders? Try serving them with coleslaw, baked beans, or potato chips. You can also add pickles for crunch. These sides complement the sliders nicely. Can I cook this recipe on high heat instead of low? Yes, you can cook on high heat. Cook for about 3 to 4 hours. Check the chicken for tenderness. It should shred easily. Can I make the BBQ chicken mixture ahead of time? Absolutely! You can mix the BBQ sauce and chicken a day before. Just store it in the fridge. When ready, put it in the slow cooker to cook. In this blog post, I shared a simple BBQ chicken slider recipe. You learned about the ingredients, cooking steps, and serving tips. The recipe offers room for variations, so you can customize it to your tastes. Try these sliders for your next gathering. They are easy to make and delicious. Remember to store leftovers properly to enjoy later. With these tips, you’ll impress family and friends with your cooking skills. Enjoy crafting these tasty treats!

Slow Cooker BBQ Chicken Sliders Savory and Easy Meal

To make honey garlic butter green beans, you need a few simple items. Here’s the list of ingredients: - 1 pound fresh green beans, trimmed - 3 tablespoons unsalted butter - 2 tablespoons honey - 4 cloves garlic, minced - Salt and pepper to taste - 1 tablespoon lemon juice - 1 tablespoon sesame seeds (optional) - Fresh parsley for garnish Each ingredient plays a key role in creating the dish's flavor. Fresh green beans give a crisp bite, while unsalted butter adds richness. Honey brings sweetness, and garlic provides depth. Salt and pepper enhance all the flavors. A splash of lemon juice brightens the dish, making it lively. Sesame seeds offer a delightful crunch, but they are optional. Fresh parsley adds a pop of color and freshness at the end. Using quality ingredients makes a big difference. Choose bright green beans, as they taste better. Use real honey for the best flavor. This simple list allows anyone to create a dish that is both tasty and beautiful. 1. Start by boiling a large pot of salted water. 2. Add 1 pound of trimmed green beans to the pot. 3. Blanch the green beans for about 3-4 minutes. They should look bright green and be tender-crisp. 4. Drain the beans in a colander. 5. Transfer them to a bowl filled with ice water. This stops the cooking. 6. Leave the beans in the ice water for about 2 minutes, then drain and set aside. 1. In a large skillet, melt 3 tablespoons of unsalted butter over medium heat. 2. Once the butter is melted, add 4 cloves of minced garlic. 3. Sauté the garlic for 1-2 minutes. You want it fragrant, not browned. 4. Stir in 2 tablespoons of honey. 5. Let the mixture bubble gently for about one minute. 1. Add the blanched green beans to the skillet. 2. Toss them in the honey garlic butter mixture. 3. Cook for 3-4 minutes, stirring often for even coating. 4. Season with salt and pepper to taste. 5. Drizzle 1 tablespoon of lemon juice over the beans. 6. Toss well to mix all the flavors. 7. If you want, sprinkle 1 tablespoon of sesame seeds on top. 8. Remove from heat and garnish with fresh parsley before serving. To get the best green beans, timing is key. Blanch your beans for just 3-4 minutes. This keeps them bright green and slightly crisp. If you cook them too long, they can become mushy. After blanching, quickly move the beans to an ice water bath. This stops the cooking and locks in that vibrant color. Leave them in the ice water for about 2 minutes. Then, drain them well before using. You can add even more flavor with spices and herbs. Consider sprinkling in some red pepper flakes for a little heat. Chopped fresh thyme or basil can also add a nice touch. If you want more sweetness, adjust the honey to your taste. Try adding an extra teaspoon, but taste as you go. Finding the right balance is fun and easy. Make your dish look as good as it tastes. Garnishing with fresh parsley adds color and freshness. You can also sprinkle sesame seeds on top for a nice crunch. For a splash of color, try adding sliced cherry tomatoes or lemon wedges on the side. A simple, beautiful plate makes your meal feel special and inviting. {{image_2}} You can change the honey in this recipe. Maple syrup or agave nectar works well. Both options add sweetness without losing flavor. You can also try different beans. Snap peas or asparagus can be great swaps. Each vegetable will give a unique taste to the dish. If you're up for a twist, try oven-roasting these beans. Toss them with honey garlic butter and spread on a baking sheet. Bake at 425°F for about 15-20 minutes. This method gives a nice crispy texture. You can also grill honey garlic green beans. Just toss them in a grill basket and cook for 5-7 minutes. The smoky flavor adds a nice touch. Honey garlic butter green beans pair well with meats like chicken or steak. They also go great with grains like rice or quinoa. For special occasions, serve them as part of a holiday spread. Their bright color and rich flavor will impress your guests. To keep your honey garlic butter green beans fresh, store them in an airtight container. This method helps keep the flavors locked in. Make sure to let them cool to room temperature before sealing. In the fridge, these beans will last for about 3 to 4 days. After this time, they may lose their bright color and taste. When you're ready to eat leftovers, I suggest reheating them on the stove. This method helps maintain flavor and texture. You can add a splash of water or a bit more butter to keep them moist. Heat over low to medium heat, stirring gently until warm. You can also microwave them, but be careful not to overheat. If you want to freeze your green beans, make sure they are completely cool. Place them in a freezer-safe bag, removing as much air as possible. They can last up to 3 months in the freezer. When you are ready to use them, thaw in the fridge overnight. You can then sauté them straight from frozen or add them to soups and stews. Blanching green beans is simple. Follow these steps for great results: - Bring a large pot of salted water to a boil. - Add the trimmed green beans to the boiling water. - Cook them for 3-4 minutes until they are bright green and tender-crisp. - Drain the beans in a colander. - Transfer them to a bowl of ice water for 2 minutes. - This stops the cooking and keeps the beans crisp. Yes, you can! Here are some easy swaps: - Replace unsalted butter with vegan butter or olive oil. - Use agave syrup or maple syrup instead of honey. These changes keep the flavor and make it vegan-friendly. This dish is not spicy. It has a sweet and savory taste. If you want some heat, add red pepper flakes or a dash of hot sauce. Start with a little, and adjust to your liking. These green beans pair well with many dishes. Here are some ideas: - Serve them with grilled chicken or fish for protein. - Pair them with rice or quinoa as a base. - Add a fresh salad for a light and healthy meal. These sides enhance the flavors and create a balanced plate. In this post, we explored making honey garlic butter green beans. We covered ingredients, cooking steps, tips for perfect texture, and ways to serve. You can also customize this dish with your favorite flavors or cooking methods. As you prepare this simple yet tasty recipe, remember to enjoy the process. Whether for a weeknight dinner or a special occasion, these green beans will impress. Happy cooking!

Honey Garlic Butter Green Beans Flavorful and Simple Dish

For this recipe, I use two types of chocolate. The first is semi-sweet chocolate chips, which give a deep, rich taste. The second is milk chocolate chips, adding a creamy touch. Mixing these two chocolates creates a balanced flavor. You can also try dark chocolate for a bolder taste. I use 1 cup of crushed pretzels for a nice crunch. You can crush them in a bag with a rolling pin or use a food processor. Make sure you don’t turn them into powder; small pieces work best. This gives a great texture to the bark. The saltiness of the pretzels pairs well with the sweet chocolate. You can use 1/2 cup of caramel sauce for this recipe. You have two options: homemade or store-bought. If you want to make it from scratch, simply melt sugar until it turns brown, then add butter and cream. Store-bought caramel is easy and quick. Both options add a delicious, gooey layer to the bark. First, gather all your ingredients. You need semi-sweet chocolate chips, milk chocolate chips, crushed pretzels, caramel sauce, and sea salt. Line a baking sheet with parchment paper. This will keep the bark from sticking. Make sure the paper is smooth and flat. A clean workspace helps you stay organized and focused. Next, take a microwave-safe bowl. Add the semi-sweet and milk chocolate chips. Heat them in the microwave. Do this in 30-second intervals. Stir after each interval until smooth. This should take about 1 to 2 minutes. Be careful not to overheat the chocolate. You want it melted, not burned. Now, pour the melted chocolate onto the parchment-lined baking sheet. Use a spatula to spread it out. Make it as thick as you like. Drizzle the caramel sauce over the chocolate in a zig-zag pattern. Take a toothpick or skewer to swirl the caramel gently. This creates a beautiful marbled look. Sprinkle the crushed pretzels over the top. Press them down lightly so they stick. Finally, add a light sprinkle of sea salt to enhance the flavor. Place the baking sheet in the fridge for at least 1 hour. This allows the chocolate to set properly. Once it’s firm, break the bark into pieces. Store them in an airtight container. Enjoy your delicious treat! To get the right layer thickness, spread the chocolate evenly. Use a spatula to smooth it out. Aim for about 1/4 inch thick. This thickness gives a nice balance of chocolate and crunch. If it's too thin, the bark may break easily. If it's too thick, it can be hard to bite. Sea salt brings out the sweet flavors. After adding your pretzels, sprinkle a pinch of sea salt on top. This small touch makes a big difference. The salt cuts through the sweetness and adds a nice contrast. I love using flaky sea salt for extra crunch. When you drizzle the caramel, do it in a zig-zag pattern. This creates a fun look. Use a toothpick to swirl the caramel into the chocolate. Don't overdo it; you want to see both colors. This adds flair and makes your bark look gourmet. {{image_2}} You can create fun twists on caramel pretzel chocolate bark. Try adding nuts for crunch, like almonds or pecans. Dried fruits also add a nice touch. Consider using mini marshmallows for a sweet, chewy bite. You could even add a sprinkle of toffee bits for extra sweetness. Each of these options brings a new flavor and texture. Mixing flavors can make your bark more exciting. Try using dark chocolate instead of semi-sweet. This change gives a richer taste. If you love fruit, add orange zest or crushed berries. These flavors pair well with caramel. You might enjoy a hint of espresso powder in the chocolate for a coffee kick. Experiment with mint extract for a fresh twist. How you present your bark can impress guests. Instead of breaking it into pieces, cut it into neat squares. You can even use cookie cutters for fun shapes. Place the bark in small treat bags for gifts. Serve it on a colorful platter, and add a dip of extra caramel sauce. These little touches make your treat stand out. To keep your Caramel Pretzel Chocolate Bark fresh, store it in an airtight container. Make sure the container is clean and dry. Place a piece of parchment paper between layers if you stack the bark. This will help prevent sticking. Keep the container in a cool, dry place. Avoid areas near heat or direct sunlight. When stored properly, your bark can last up to two weeks. After that, the flavors may fade. If you notice any changes in texture or smell, it’s best to toss it. Make sure to check often, especially if you have a sweet tooth! If you want to save some for later, freezing is a great option. Wrap the bark tightly in plastic wrap. Then place it in a freezer-safe bag or container. This will help keep it fresh for up to three months. To enjoy, thaw the bark in the fridge overnight. This helps maintain its texture and flavor. Yes, you can swap the chocolate types. Dark chocolate offers a rich flavor. White chocolate gives a sweet contrast. You can mix and match to find your favorite. Just remember, the taste changes with each type. The melting process stays the same, so no worries there. If you don’t have pretzels, try using crispy rice cereal. You can also use potato chips for a salty crunch. Crushed crackers work well too. Each option brings a unique twist to the bark. Just make sure to use something with a good crunch. To make simple caramel sauce, start with sugar. In a pot, heat one cup of sugar over medium heat. Stir until it melts and turns golden. Then, slowly add half a cup of heavy cream. Stir until smooth. Let it cool before using. This sauce pairs perfectly with your bark. This blog post covered the fun process of making caramel pretzel chocolate bark. We explored different chocolate types, pretzel prep, and caramel sauces. You learned step-by-step instructions, from melting chocolate to layering. The tips helped you achieve perfect thickness and added flavor. We also shared fun variations and storage tips to keep your bark fresh. Enjoy making this tasty treat and share it with friends. Your kitchen can create delicious bites that impress!

Caramel Pretzel Chocolate Bark Irresistible Treat

To make Caramel Apple Cheesecake Cookies, gather these items: - 1 cup unsalted butter, softened - 1 cup brown sugar, packed - 1/2 cup granulated sugar - 2 large eggs - 1 teaspoon vanilla extract - 3 cups all-purpose flour - 1 teaspoon baking soda - 1/2 teaspoon salt - 1 teaspoon ground cinnamon - 1 cup diced apples (peeled) - 1/2 cup cream cheese, softened - 1/4 cup caramel sauce (plus extra for drizzling) - 1/2 cup chopped walnuts or pecans (optional) You can add a twist to these cookies by trying these optional ingredients: - 1/2 cup chocolate chips for a sweet touch - 1/2 cup dried cranberries for tartness - A pinch of nutmeg for extra warmth If you need substitutes, here are some options: - Use coconut oil instead of butter for a dairy-free choice. - Swap brown sugar for coconut sugar for a healthier option. - Replace granulated sugar with honey or maple syrup for a natural sweetener. - Use gluten-free flour in place of all-purpose flour for a gluten-free version. These choices make your baking more flexible and fun! Start by gathering all your ingredients. You will need: - 1 cup unsalted butter, softened - 1 cup brown sugar, packed - 1/2 cup granulated sugar - 2 large eggs - 1 teaspoon vanilla extract - 3 cups all-purpose flour - 1 teaspoon baking soda - 1/2 teaspoon salt - 1 teaspoon ground cinnamon - 1 cup diced apples (peeled) - 1/2 cup cream cheese, softened - 1/4 cup caramel sauce (plus extra for drizzling) - 1/2 cup chopped walnuts or pecans (optional) Preheat your oven to 350°F (175°C). Line a baking sheet with parchment paper. This will help the cookies not stick. 1. Cream Butter and Sugars: In a large bowl, mix the softened butter, brown sugar, and granulated sugar. Beat it until it is light and fluffy. This will take about 2-3 minutes. 2. Add Eggs and Vanilla: Add the eggs one by one, mixing well after each. Then stir in the vanilla extract. Make sure everything is well combined. 3. Mix Dry Ingredients: In another bowl, whisk together the flour, baking soda, salt, and ground cinnamon. Gradually add this to the wet mixture. Mix until just combined. Don’t overmix. 4. Incorporate Apples and Nuts: Gently fold in the diced apples and nuts if you choose to use them. This adds great flavor and texture to your cookies. 5. Prepare Cream Cheese Mixture: In a small bowl, mix the softened cream cheese with the caramel sauce until it becomes smooth and creamy. This will be the tasty filling. 6. Form Cookies: Scoop out tablespoon-sized portions of dough onto your prepared baking sheet. Space them about 2 inches apart. Make a small indent in the center of each cookie and fill it with a teaspoon of the cream cheese mixture. 7. Bake: Place the baking sheet in the oven. Bake for 10-12 minutes. The edges should look lightly golden. The centers might seem soft but will firm up as they cool. 8. Cool and Drizzle: Let the cookies cool on the baking sheet for 5 minutes. Then, transfer them to a wire rack to cool completely. Once cooled, drizzle extra caramel sauce over each cookie for a sweet finish. Now, you are ready to enjoy your caramel apple cheesecake cookies! To keep your cookies soft, use room-temperature butter. This helps mix well with sugar. Cream the butter and sugars for a full five minutes. This adds air, making them fluffy. When adding flour, mix until just combined. Over-mixing can make them tough. Use parchment paper on your baking sheet. This stops cookies from sticking and makes cleanup easy. You can also lightly grease the parchment with cooking spray. If you find your dough is sticky, chill it for 30 minutes. This makes it easier to scoop and shapes the cookies better. You can prepare the dough in advance. Form the cookies and place them on a tray. Freeze them for about an hour until firm. Then, transfer to a zip-top bag. Label the bag with the date. You can bake them straight from the freezer. Just add a couple of extra minutes to the baking time. {{image_2}} You can mix things up with your Caramel Apple Cheesecake Cookies. Try adding pumpkin for a fall twist. Simply replace some apples with 1 cup of pumpkin puree. This gives a warm, spiced flavor. If you prefer chocolate, add 1/2 cup of chocolate chips instead of nuts. This adds a rich depth to your cookies. If you have nut allergies, skip the walnuts or pecans. You can still enjoy the cookies without nuts. For a gluten-free option, use 3 cups of gluten-free flour instead of all-purpose flour. This keeps the cookies soft and tasty, while being safe for those with gluten sensitivities. Serve your cookies with a scoop of vanilla ice cream on top. The warm cookies and cold ice cream make a delightful contrast. You can also stack cookies and drizzle extra caramel sauce over them for a stunning plate. For a fun twist, add a sprinkle of sea salt to enhance the caramel flavor. To keep your caramel apple cheesecake cookies fresh, place them in an airtight container. Layer parchment paper between the cookies to prevent sticking. This method helps maintain their soft texture. You can also store them in a zip-top bag. Just make sure to remove as much air as possible before sealing. If you want to enjoy these cookies warm, reheating is easy. Preheat your oven to 300°F (150°C). Place the cookies on a baking sheet and cover them with foil. Heat for about 5-7 minutes. This keeps them soft and gooey. You can also use a microwave. Heat each cookie for about 10-15 seconds, but watch closely to avoid overheating. These cookies can last for about a week when stored properly. If you want to keep them longer, consider freezing them. Wrap each cookie tightly in plastic wrap, then place them in a freezer-safe bag. They can last for up to three months in the freezer. When you’re ready to enjoy, just thaw them at room temperature. Caramel Apple Cheesecake Cookies are soft, sweet treats. They mix apple pieces and creamy cheesecake with a caramel twist. Each cookie has a soft center and a golden edge. The flavors remind you of a cozy fall day. You get the crunch of apples and the smoothness of cream cheese. These cookies are perfect for sharing or enjoying alone. Yes, you can make these cookies without nuts. Just skip the walnuts or pecans in the recipe. The cookies will still taste great. They will remain soft and chewy without nuts. This option is great for those with nut allergies. You can also add more apples for extra flavor. To keep the cookies from spreading, chill the dough for 30 minutes before baking. This helps them hold their shape. Make sure to measure your flour correctly. Too little flour can cause spreading. Also, do not overmix the dough once you add the flour. Finally, use a baking sheet lined with parchment paper. This will help the cookies keep their form. This article covered how to make delicious cookies from start to finish. We discussed key ingredients, easy steps for baking, and helpful tips for soft cookies. You learned about fun variations and storage info to keep your treats fresh. Baking cookies can be fun and rewarding. Use these ideas to explore your own flavors and techniques. Enjoy the process and share your tasty creations with friends and family. Happy baking!

Caramel Apple Cheesecake Cookies Delicious Treat Recipe

To make Minute Garlic Butter Zucchini Noodles, you need a few simple ingredients. Here’s what you will need: - 4 medium zucchinis - 4 tablespoons unsalted butter - 4 cloves garlic, minced - 1 teaspoon red pepper flakes (adjust to taste) - Salt and pepper to taste - 1 tablespoon fresh parsley, chopped (for garnish) - Grated Parmesan cheese (optional, for serving) Each ingredient plays a key role. Zucchini gives the dish its main base. The unsalted butter adds richness and flavor. Fresh garlic brings a nice aroma and taste. Red pepper flakes add a little heat, but you can adjust that to your liking. Salt and pepper enhance all the flavors. Fresh parsley adds a pop of color and freshness. Finally, Parmesan cheese, while optional, adds a creamy finish. Using fresh ingredients makes all the difference. Fresh garlic is more fragrant than the jarred stuff. Look for firm, shiny zucchinis with no blemishes. When you use these quality ingredients, your dish will shine. Using a Spiralizer To make zucchini noodles, grab your spiralizer. First, wash the zucchinis. Then, cut off both ends. Insert one zucchini into the spiralizer. Twist to create long, curly noodles. Repeat with all zucchinis. Set these fun noodles aside. Using a Vegetable Peeler If you don’t have a spiralizer, use a vegetable peeler. Wash and trim the zucchinis first. Peel strips lengthwise to form thin noodles. Keep peeling until you reach the seeds. Set these aside too. Both methods work well for this dish. Melting the Butter Next, grab a large skillet and place it on medium heat. Add 4 tablespoons of unsalted butter to the skillet. Let the butter melt slowly. Swirl the pan gently to help it melt evenly. Sautéing the Garlic Once the butter melts, add 4 minced garlic cloves. Sprinkle in 1 teaspoon of red pepper flakes for some heat. Stir the garlic for about 1-2 minutes. Watch closely to avoid burning it. The garlic should smell amazing and not brown. Tossing in the Garlic Butter Quickly add the zucchini noodles to the skillet. Toss them in the garlic butter mix. This step makes sure they soak up all the flavors. Cooking Time for Perfect Texture Cook the noodles for just 2-3 minutes. Stir them often to keep them from sticking. You want them tender but still a bit crunchy. This texture makes the dish great! Season with salt and pepper to taste. Adjusting Level of Spice To change the spice level, use red pepper flakes. Start with one teaspoon. Add more if you like heat. Just keep in mind, a little goes a long way. Taste as you go. This way, you can find your perfect balance. Adding Herbs for Freshness Fresh herbs brighten the dish. I love using parsley here. It gives a nice pop of color and flavor. You can also try basil or cilantro. Just chop them fine and sprinkle them on top before serving. Tips for Avoiding Soggy Noodles To keep noodles crispy, cook them quickly. Stir them in the skillet for only 2-3 minutes. If you cook too long, they get soggy. You can also salt the noodles before cooking. This helps draw out extra moisture. Ideal Cooking Temperature Medium heat works best for this dish. It melts the butter without burning it. It also cooks the garlic just right. Too high, and you risk burnt garlic. Too low, and the noodles won’t cook fast enough. Benefits of Fresh Garlic Fresh garlic makes a huge difference. It adds a strong, aromatic flavor. Use whole cloves and mince them yourself. Store-bought garlic can lack the same punch. Plus, fresh garlic is healthier and adds nutrients. Choosing the Right Zucchini Look for firm zucchinis with smooth skin. Avoid ones with blemishes or soft spots. Smaller zucchinis are often sweeter. If you find them, grab a few. They work great in this dish. {{image_2}} You can make gluten-free meals by using other veggies. Try using carrots or sweet potatoes. These can spiralize well too. They add a nice crunch and color. Feel free to mix and match your favorite vegetables. This keeps your meals fresh and fun. If you want a vegan dish, swap the butter for olive oil. Use about the same amount. Olive oil brings a rich taste and healthy fats. You can also add some lemon juice for a zesty twist. This change keeps the dish light and tasty. Want to make this meal heartier? Add grilled chicken or shrimp. Cook them separately and toss them in at the end. This adds protein and makes it more filling. You can season the protein like you do the noodles. This makes sure every bite is packed with flavor. After cooking your Minute Garlic Butter Zucchini Noodles, let them cool first. Use an airtight container for storage. Glass or plastic containers work well. Make sure to seal them tightly. This keeps moisture in and prevents drying out. Store the noodles in the fridge for up to three days. When you are ready to eat, reheat the noodles carefully. Use a skillet over low heat. Add a tiny bit of butter or oil to help. Stir gently to keep the noodles from getting mushy. Heat them for about 2-3 minutes until warm. This helps keep their nice texture. Freezing zucchini noodles is not ideal. They can become watery when thawed. If you want to freeze, do it before cooking. Place raw, spiralized zucchini in a freezer bag. Squeeze out air and seal it. Use within two months for best taste. When ready to cook, thaw them in the fridge overnight before sautéing. You can easily make zucchini noodles with a vegetable peeler. First, wash the zucchini. Then, hold it firmly and peel long strips. Keep turning the zucchini as you peel. This method gives you flat, ribbon-like noodles. You can also use a box grater. Just grate the zucchini on the large holes. This will create thin, noodle-like strands. Both methods work well for this dish. Yes, you can prep some parts ahead. You can spiralize or peel the zucchini in advance. Just store them in a sealed bag in the fridge. However, I recommend cooking the noodles right before serving. Zucchini noodles can become soggy if stored for long. The garlic butter sauce is quick to make, so it's best to prepare it fresh. Zucchini noodles are low in calories and high in nutrients. They are rich in vitamins A and C. They also provide fiber, which is great for digestion. Since they are low in carbs, they are a good choice for those watching their carb intake. Zucchini noodles can help you feel full while keeping meals light. Plus, they are a fun way to add more veggies to your diet. In this blog post, we explored how to make healthy zucchini noodles. We covered the key ingredients, from zucchini to fresh garlic, and walked through step-by-step instructions to prepare and cook them perfectly. Tips on enhancing flavor and ensuring the right texture helped refine your dish. We also discussed fun variations, storage options, and answered common FAQs. Zucchini noodles are tasty, simple, and a great way to eat more veggies. Enjoy creating your own delicious meals, and let your cooking journey inspire others!

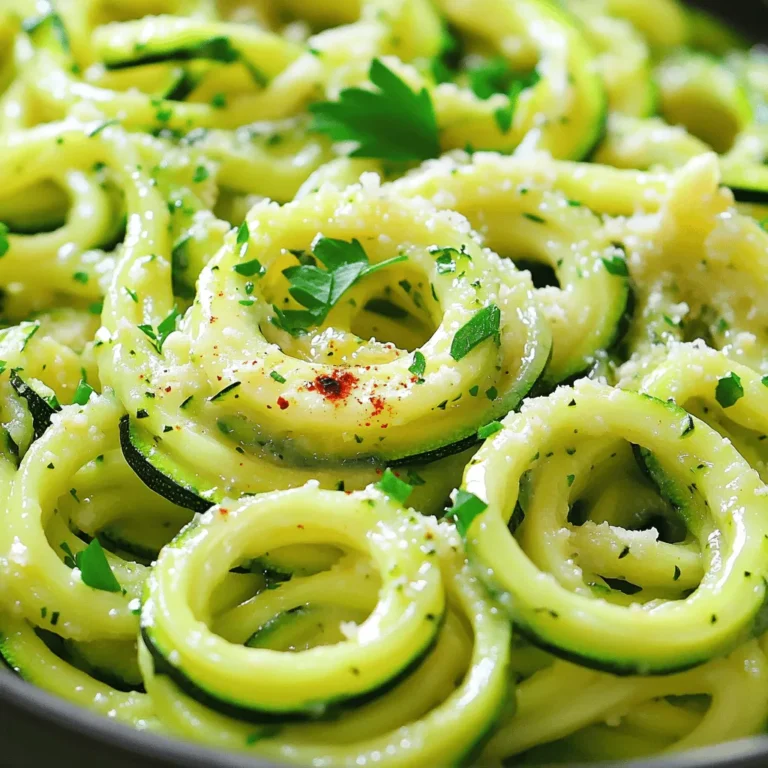
Minute Garlic Butter Zucchini Noodles Fresh Dish

- 2 cups white chocolate chips - 1 cup sweetened condensed milk - 1/2 cup dried cranberries, chopped - 1/2 cup walnuts or pecans, chopped - 1 teaspoon vanilla extract - 1/4 teaspoon sea salt You can swap white chocolate chips with milk chocolate chips for a sweeter taste. If you need a nut-free option, skip the walnuts or pecans. Try using sunflower seeds or pumpkin seeds instead. For a vegan version, use dairy-free chocolate and coconut milk in place of sweetened condensed milk. To make this fudge, you will need: - An 8x8-inch baking dish - Parchment paper for easy removal - A medium saucepan for melting - A spatula for spreading - A sharp knife for cutting These tools help you prepare the fudge quickly and easily. Enjoy your time making this tasty treat! First, grab an 8x8-inch baking dish. Line it with parchment paper. Leave some paper hanging over the sides. This makes it easy to lift the fudge out later. Make sure it covers the bottom and sides well. The parchment keeps the fudge from sticking. It also makes cleanup a breeze. Next, we need to melt our chocolate. Place 2 cups of white chocolate chips and 1 cup of sweetened condensed milk in a medium saucepan. Set the heat to low. Stir this mix continuously until the chocolate melts. You want it to be smooth and creamy. This step is key for a great fudge texture. Take the saucepan off the heat. Then, stir in 1 teaspoon of vanilla extract and 1/4 teaspoon of sea salt. This adds wonderful flavor. Now it’s time for the fun part—adding mix-ins! Take 1/2 cup of chopped dried cranberries and 1/2 cup of chopped walnuts or pecans. Gently fold them into the melted chocolate mixture. Make sure they spread evenly throughout. This step adds texture and bursts of flavor in each bite. The cranberries bring a nice tartness that pairs well with the sweet chocolate. Pour the fudge mixture into your prepared baking dish. Use a spatula to spread it evenly. Smooth out the top for a nice finish. Now, place the dish in the fridge. Let it chill for at least 2 hours. This step is crucial for the fudge to set properly. Once it's firm, use the parchment paper to lift it out. Cut it into squares or rectangles. Enjoy your delicious no-bake fudge! To get the right texture for your fudge, follow these steps. First, heat the white chocolate and sweetened condensed milk slowly. Stir it well until it melts completely. If you rush this step, the fudge may turn out grainy. Once melted, add the sea salt and vanilla. This adds flavor and helps the fudge set better. After mixing in the cranberries and nuts, pour the mixture into your dish quickly. Spread it evenly. Refrigerate it for at least two hours. This helps it firm up nicely. When serving your fudge, presentation matters. Cut the fudge into neat squares or rectangles. Place them on a pretty platter. For extra flair, sprinkle some chopped cranberries on top. You can also use small paper liners for each piece. This adds a fun touch and makes it easy for guests to grab one. Pair the fudge with a cup of tea or coffee for a lovely treat. Watch out for a few common errors. First, do not overheat the chocolate mixture. This can cause it to seize up. Second, make sure to fold in the cranberries and nuts gently. If you mix too hard, the fudge can become tough. Lastly, do not skip the chilling time. If it’s not set, your fudge will be too soft to cut. Following these tips will help you create the best no-bake fudge every time. {{image_2}} You can change the nuts in this fudge for fun. Instead of walnuts or pecans, try almonds or hazelnuts. Each nut adds its own flavor and crunch. Chopping them finely makes the fudge even smoother. You can also mix nuts for a richer taste. Just make sure to use about half a cup. Want to spice up your fudge? You can add more flavors. Try using orange zest for a fruity twist. A dash of almond extract gives a nice nutty taste. For a touch of spice, sprinkle in some cinnamon or nutmeg. These flavors blend well with the white chocolate and cranberries. Experiment and find your favorite combo! To make this fudge dairy-free, swap out a few key ingredients. Use dairy-free white chocolate chips instead of regular ones. You can also try coconut milk instead of sweetened condensed milk. This will give the fudge a nice coconut flavor. Just be sure to check that your chocolate is dairy-free. Enjoy this treat without the dairy! Store your no-bake cranberry white chocolate fudge in an airtight container. You can place parchment paper between layers to keep it from sticking. Make sure to seal it well to keep it fresh. This fudge stays soft and tasty when stored properly. You can freeze this fudge if you want to save some for later. Cut the fudge into squares before freezing. Wrap each piece in plastic wrap and place them in a freezer-safe bag. This way, you can easily grab a piece whenever you want a sweet treat. Your fudge will last in the fridge for about two weeks. If you freeze it, it can last up to three months. Just remember to let it thaw in the fridge before enjoying it again. This way, it keeps its great taste and texture. Yes, you can. Dark chocolate or milk chocolate work well. Each type gives a different taste. Just remember, adjust the sweetness if needed. Dark chocolate may make it less sweet, while milk chocolate adds more. Experiment with what you like best! To make it more festive, add colorful sprinkles on top. You can also mix in some mini marshmallows. For a holiday touch, use seasonal spices like cinnamon or nutmeg. Serve it in cute wrappers or boxes for gifts. These little changes can make a big difference! If you have a nut allergy, simply skip the nuts. You can replace them with more dried fruit. Try adding chopped apricots or raisins instead. This adds flavor and keeps the texture nice. Just make sure to keep everything safe and tasty. Yes, you can make it vegan! Use vegan white chocolate chips and coconut milk instead of sweetened condensed milk. This way, you keep the creamy texture without dairy. It still tastes great and fits a vegan diet! You can store the fudge for up to two weeks in the fridge. Keep it in an airtight container to keep it fresh. If you want to keep it longer, you can freeze it for up to three months. Just make sure to wrap it well! In this post, we explored the key ingredients for making fudge. We discussed ingredient swaps and tools to use. I laid out step-by-step instructions and tips for perfecting your fudge. We also looked at tasty variations and storage options. Fudge is fun to make and share. Don’t be afraid to experiment with flavors. With practice, you’ll create amazing treats. Enjoy your fudge making journey!

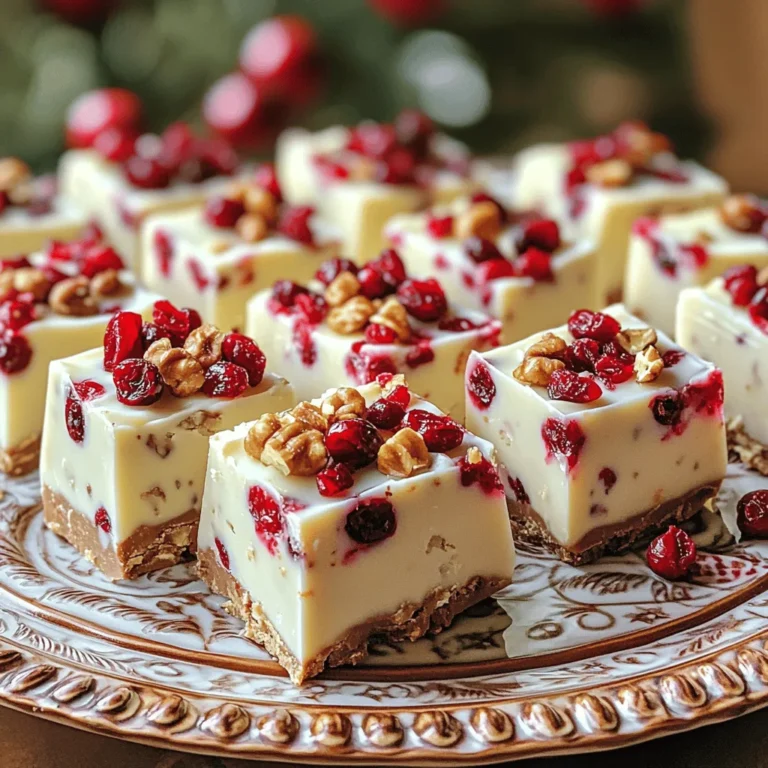
No-Bake Cranberry White Chocolate Fudge Delight

To make this dish, you need some key ingredients. Here’s what you will need: - 1 bag (16 oz) store-bought gnocchi - 1 cup sun-dried tomatoes, packed in oil, drained and chopped - 2 cloves garlic, minced - 1 cup fresh spinach, roughly chopped - ½ cup heavy cream - ¼ cup grated parmesan cheese - 2 tablespoons olive oil - 1 teaspoon dried basil - Salt and pepper to taste - Fresh basil leaves for garnish These ingredients work together to create a tasty blend of flavors. The sun-dried tomatoes add a rich, tangy taste. The heavy cream gives the sauce a nice, creamy texture. You can customize your gnocchi with some optional add-ins. Consider these for extra flavor: - Red pepper flakes for a spicy kick - Mushrooms for earthiness - Cooked chicken or shrimp for protein These add-ins let you create a dish that fits your taste. Feel free to experiment and make it your own! If you have dietary needs, don't worry! Here are some substitutes: - For gluten-free, use gluten-free gnocchi. - For dairy-free, swap heavy cream with coconut cream and omit cheese. - For a vegan option, use nutritional yeast instead of parmesan. These swaps keep your dish delicious while meeting your dietary goals. You can enjoy this meal no matter your preferences! First, grab a large pot. Fill it with water and add a pinch of salt. Bring the water to a full boil. Once boiling, add the bag of gnocchi. Watch as they sink to the bottom. After about 2-3 minutes, the gnocchi will float to the top. That means they are done! Drain them in a colander and set them aside for later. Next, take a large skillet and heat some olive oil over medium heat. Once the oil is hot, add minced garlic. Sauté the garlic for about 30 seconds. It will smell great! Now, add the roughly chopped spinach to the skillet. Stir it in and cook until it wilts. This should take just a few minutes. Now it's time to bring it all together. Add the chopped sun-dried tomatoes to your skillet. Sprinkle in the dried basil too. Stir everything to mix well. Let it sauté for another 2-3 minutes. Next, lower the heat and pour in the heavy cream. Stir well to combine. Let the mixture simmer for 2-3 minutes until it thickens slightly. After your sauce thickens, it’s time to add the cooked gnocchi. Gently stir in the fresh spinach as well. Mix everything until the spinach wilts and the gnocchi heats up. Now, sprinkle in the grated parmesan cheese. Stir until it melts and makes the sauce creamy. Taste it and add salt and pepper if needed. Finally, plate your dish and garnish it with fresh basil leaves for a pop of color and flavor. Enjoy your meal! To cook gnocchi perfectly, start with a big pot of salted water. Bring it to a rolling boil. Add the gnocchi and watch them closely. They will sink first and then float up. This takes about 2-3 minutes. Once they float, they are done. Drain them right away to avoid mushiness. When sautéing, always use medium heat. This helps to cook the garlic without burning it. Add garlic to the hot olive oil and stir for about 30 seconds. Once it smells great, add sun-dried tomatoes and dried basil. Stir them together for 2-3 minutes. This enhances the flavors and makes the dish pop. To make the dish creamy, use heavy cream. Pour it in after sautéing the garlic and tomatoes. Let it simmer on low heat for a few minutes. This thickens the sauce beautifully. Adding grated parmesan cheese at the end also adds creaminess. Stir it in until it melts. This will give your gnocchi a rich, smooth texture. {{image_2}} You can easily add protein to your sun-dried tomato gnocchi. Chicken and shrimp work well. For chicken, dice it into small pieces. Cook it in the skillet before adding garlic. Cook it until golden brown. Then, add the garlic and follow the recipe. For shrimp, add them after the garlic. Cook until they turn pink. This adds flavor and makes the dish heartier. To keep it vegetarian, consider adding mushrooms or zucchini. Sauté sliced mushrooms with garlic for a savory twist. Zucchini can be diced and cooked with the sun-dried tomatoes. Both options bring extra texture and flavor. Also, try adding artichokes or olives for a Mediterranean touch. These ingredients make the dish more vibrant and delicious. Making this dish vegan is simple. Replace heavy cream with coconut milk or cashew cream. Both options provide a creamy texture. Use nutritional yeast instead of parmesan for a cheesy flavor. You can also add more veggies like bell peppers or kale. This keeps the meal hearty while making it plant-based. Enjoy your custom vegan sun-dried tomato gnocchi! To keep your gnocchi fresh, place it in an airtight container. Make sure it cools down first. Store it in the fridge for up to three days. This way, you can enjoy the flavors later. When you reheat gnocchi, avoid the microwave if possible. Instead, use a skillet. Add a bit of olive oil or cream to keep it moist. Heat it over low heat. Stir gently until warmed through. This keeps the texture nice and creamy. If you want to freeze gnocchi, first let it cool completely. Then, spread it out on a baking sheet. Freeze it for about an hour. Once frozen, transfer the gnocchi to a freezer bag. It can last up to three months. To cook, boil it straight from the freezer. Just add a couple of extra minutes to the cooking time. The best type of gnocchi to use is store-bought gnocchi. It is quick and easy. Look for brands made with potatoes. They have a soft texture and a nice flavor. Fresh gnocchi is also great but take more time to prepare. You can use fresh tomatoes, but they change the dish. Fresh tomatoes have more water. This can make the sauce too thin. If you want to use them, add less cream. Cook the sauce longer to thicken it up. Sun-dried tomato gnocchi lasts about three days in the fridge. Store it in an airtight container. To keep it fresh, let it cool before sealing. If it smells off or looks weird, throw it out. You can serve sun-dried tomato gnocchi with a simple side salad. A fresh green salad pairs well. Garlic bread is also a great choice. You can even add grilled chicken or shrimp for protein. This blog post covered how to make sun-dried tomato gnocchi from scratch. We explored key ingredients, detailed step-by-step instructions, and shared useful tips. You learned variations to customize the dish, including protein options and ways to accommodate diets. Finally, we looked at storage methods to keep leftovers fresh. Making this dish is simple and fun! Enjoy experimenting to find your perfect version. Happy cooking!

Savory Sun-Dried Tomato Gnocchi Easy Dinner Recipe

To make Brown Sugar Pumpkin Donuts, gather these key ingredients: - 1 cup pumpkin puree (canned or fresh) - 1 cup all-purpose flour - 1/2 cup brown sugar, packed - 1/4 cup granulated sugar - 1/2 teaspoon baking soda - 1 teaspoon baking powder - 1/2 teaspoon ground cinnamon - 1/4 teaspoon ground nutmeg - 1/4 teaspoon ground ginger - 1/4 teaspoon salt - 1/4 cup milk (or dairy-free alternative) - 1 large egg - 1/4 cup vegetable oil - 1 teaspoon vanilla extract These ingredients blend to create moist and flavorful donuts. The pumpkin puree adds rich taste and texture. Brown sugar gives a deep sweetness that pairs well with the spices. You can enhance your donuts with these fun toppings and mix-ins: - Powdered sugar for a quick glaze - Cinnamon and granulated sugar for rolling - Chopped nuts for crunch - Chocolate chips for extra sweetness - A splash of maple syrup for more flavor These options let you customize your donuts. Experiment with toppings to find your favorite. Don’t be afraid to mix and match! First, preheat your oven to 350°F (175°C). Grease your donut pan with non-stick spray. This helps the donuts release easily. In a large bowl, mix the wet ingredients. Combine pumpkin puree, brown sugar, granulated sugar, milk, egg, vegetable oil, and vanilla extract. Whisk until smooth. In another bowl, sift the dry ingredients. Mix flour, baking soda, baking powder, cinnamon, nutmeg, ginger, and salt. Gradually add the dry mix to the wet mix. Stir gently until just combined. Remember, small lumps are fine; do not overmix. Now, fill each donut cavity. Use a piping bag or a zip-top bag with a corner cut off. Fill each cavity about 3/4 full with batter. This ensures they rise nicely. Bake in the preheated oven for 10-12 minutes. Check doneness with a toothpick; it should come out clean. To fill the donut pan, I recommend using a piping bag. If you don’t have one, a zip-top bag works too. Just snip one corner off the bag. This method keeps the filling neat. Make sure to only fill each cavity about 3/4 full. This prevents overflow while baking. If you want a little fun, you can add chocolate chips or nuts into the batter. Just mix them in gently after combining the wet and dry ingredients. After baking, let the donuts cool in the pan for about 5 minutes. This lets them firm up a bit. Then, transfer them to a wire rack to cool completely. This helps avoid sogginess. For serving, you can keep them simple or add a glaze. To glaze, whisk together powdered sugar and a splash of milk until smooth. Drizzle it over the cooled donuts. You can also roll them in a mix of cinnamon and granulated sugar while still warm. This adds a sweet touch. Enjoy your delicious brown sugar pumpkin donuts! To make sure your donuts bake evenly, follow these tips: - Preheat your oven to 350°F (175°C). - Grease your donut pan with non-stick spray to prevent sticking. - Fill each cavity about 3/4 full to allow room for rising. - Check for doneness by inserting a toothpick; it should come out clean. For the ideal donut texture, consider these ideas: - Use pumpkin puree for moisture, which keeps donuts soft. - Do not overmix your batter; some small lumps are fine. - Sift your dry ingredients to add air, giving a lighter texture. - Add a pinch of salt to enhance the sweet flavors. To add some extra flavor to your donuts, try these tips: - Make a simple glaze by mixing powdered sugar with a splash of milk. - Drizzle the glaze over cooled donuts for a sweet finish. - Roll warm donuts in cinnamon and sugar for a classic touch. - Use chopped nuts or sprinkles for added crunch and color. {{image_2}} You can change the spices in these donuts for new flavors. Try adding cardamom or allspice for a warm twist. You might even mix in chocolate chips or chopped nuts for extra texture. Dried fruit like cranberries or raisins can also add sweetness and chewiness. Experiment with these ideas to make your perfect donut. You can easily make these donuts gluten-free by using a gluten-free flour blend. Just make sure to check the blend includes xanthan gum for the best texture. For a dairy-free option, swap regular milk with almond or oat milk. This way, everyone can enjoy these tasty treats without worry. For a holiday twist, add a splash of peppermint extract for Christmas. You can also top the donuts with a cream cheese frosting for a special touch. During Thanksgiving, sprinkle some crushed pecans or walnuts on top for a crunchy bite. These ideas keep your fall treats fresh and exciting throughout the season. To keep your donuts fresh, place them in an airtight container. This keeps moisture in and air out. You can also layer parchment paper between donuts to prevent sticking. Store them at room temperature for up to two days. If you want to keep them longer, consider freezing. To freeze these donuts, first let them cool completely. Wrap each donut in plastic wrap. Then, place them in a freezer-safe bag. Make sure to press out all the air before sealing. These donuts can stay fresh in the freezer for up to three months. When you're ready to eat, move them to the fridge overnight to thaw. For the best taste, reheat your donuts in the oven. Preheat the oven to 350°F (175°C). Place the donuts on a baking sheet and heat for about 5-7 minutes. This helps restore their soft texture. If you prefer, you can also use the microwave. Heat each donut for about 10-15 seconds. Enjoy them warm! To check if your donuts are done, use a toothpick. Insert it into the center of a donut. If it comes out clean, they are ready. You can also gently press the top of a donut. It should spring back without leaving a dent. Keep an eye on the time too. Bake for about 10-12 minutes at 350°F. If you see a golden color, that's a good sign! Yes, you can use fresh pumpkin. Just make sure to cook and puree it first. Fresh pumpkin has a different moisture level than canned. This means you may need to adjust the milk a bit. Start with less milk, then add more if the batter is too thick. Fresh pumpkin can give a richer flavor, which is great for these donuts! If you need a substitute for brown sugar, try using white sugar with molasses. Mix one cup of white sugar with one tablespoon of molasses. This will mimic the flavor and moisture of brown sugar. You can also use coconut sugar, which has a similar taste. Just remember, the donuts may be a bit lighter in color. Brown Sugar Pumpkin Donuts are easy to make and delicious. We covered all the key ingredients, from essential staples to tasty optional toppings. I shared simple, step-by-step instructions to guide you from preparation to serving. You learned tips for perfect texture and flavor, as well as fun variations to try. Don’t forget how to store extras and reheat them for the best taste. Now you have all you need to bake these tasty treats. Enjoy each bite, and share them with friends for a great fall treat!

Brown Sugar Pumpkin Donuts Wholesome Fall Treat

To make Apple Butter Monkey Bread, you will need: - 2 cans (16 oz each) refrigerated biscuit dough - 1 cup apple butter - 1/2 cup brown sugar - 1 teaspoon ground cinnamon - 1/4 teaspoon nutmeg - 1/2 cup chopped pecans (optional) - 1/4 cup melted butter - 1/4 cup powdered sugar (for drizzle) - 1 tablespoon milk (for drizzle) You can make this recipe even more fun with these options: - Chopped walnuts instead of pecans - A pinch of salt for added flavor - A splash of vanilla extract for depth If you don't have some ingredients, here are good swaps: - Use homemade biscuit dough if you prefer. - Swap apple butter with pumpkin butter for a twist. - Use light brown sugar instead of dark for a milder taste. Feel free to mix and match based on what you have at home. This recipe is flexible and simple! To start, preheat your oven to 350°F (175°C). Greasing the bundt pan is key. Use cooking spray or butter to coat the inside. This helps the monkey bread come out easily later. In a mixing bowl, combine 1/2 cup of brown sugar, 1 teaspoon of ground cinnamon, and 1/4 teaspoon of nutmeg. This mix gives the dough a sweet and spicy flavor. Set it aside until you are ready to use it. Open the cans of refrigerated biscuit dough. Cut each biscuit into quarters. Roll each piece into a small ball. Dip these balls in 1/4 cup of melted butter. Then, roll them in the sugar mixture until fully coated. Layer half of the coated dough balls in the bottom of the prepared bundt pan. Pour half of the apple butter over this layer. If you like nuts, sprinkle half of the chopped pecans on top. Repeat this step with the remaining dough balls, apple butter, and pecans. Bake in the preheated oven for 30-35 minutes. Look for a golden brown color to know it's done. Once baked, remove it from the oven. Let it cool for 10 minutes before inverting it onto a serving plate. For a sweet finish, mix 1/4 cup of powdered sugar with 1 tablespoon of milk. Drizzle this icing over the warm monkey bread. Enjoy every bite! For great layers in your monkey bread, start by cutting the biscuits evenly. Use kitchen scissors or a sharp knife to slice each biscuit into four pieces. This helps them mix well with the apple butter. When you roll the pieces into balls, keep them uniform in size. Smaller balls make for better layering. Make sure to coat each ball fully in the melted butter and sugar mix. This step adds flavor and helps stick layers together. Layer half the balls first, then add half the apple butter and pecans. Repeat this for the second layer. The more even your layers, the better your monkey bread will look! If you have leftovers, store them in an airtight container. This keeps the bread fresh and prevents it from drying out. You can leave it at room temperature for one day. For longer storage, place it in the fridge. Just remember to cover it well. When you are ready to eat it again, warm it in the oven. This brings back the soft texture. You can also drizzle some fresh icing on top for extra sweetness. One common mistake is not greasing the bundt pan well. This can make it tough to remove the monkey bread later. Another mistake is overbaking. Keep an eye on it in the oven. It should be golden brown but not too dark. Also, don’t skip the melting butter step. This is key for flavor and texture. Lastly, avoid using cold apple butter straight from the fridge. Let it warm up a bit first for better spreading. Following these tips will help you make a perfect apple butter monkey bread! {{image_2}} You can make your monkey bread even better by adding nuts or fruits. Chopped walnuts or almonds give a nice crunch. You can also add apples or raisins for extra flavor. Just mix these in with the biscuit balls or layer them in between. This adds great taste and texture to your dish. Apple butter is great, but don’t stop there! Try different flavors like pumpkin butter or pear butter. These changes will give your monkey bread a new twist. Each flavor brings its own unique taste. Experiment and see which one you like the most. Your friends and family will love the surprises! If you want a vegetarian option, this recipe is already meat-free. To make it gluten-free, use gluten-free biscuit dough. Many brands offer tasty options that work well. Make sure to check the labels. This way, everyone can enjoy your delicious creation, no matter their diet. To keep your apple butter monkey bread fresh, store it in an airtight container. This helps prevent it from drying out. Place the cooled monkey bread in the container. You can also wrap it tightly in plastic wrap or aluminum foil. Make sure to eat it within three days for the best taste. You can freeze monkey bread if you want to save some for later. First, let it cool completely. Then, wrap it tightly in plastic wrap. After that, place it in a freezer bag or container. It can last in the freezer for up to three months. When you’re ready, thaw it overnight in the fridge. Reheating your monkey bread is easy. Preheat the oven to 350°F (175°C). Place the monkey bread in an oven-safe dish. Cover it with foil to keep it moist. Heat for about 10-15 minutes. You can also use the microwave for a quick reheat. Just warm it for about 30 seconds, but be careful not to dry it out. Enjoy it warm for the best flavor! Yes, you can use homemade apple butter. It adds a personal touch to the dish. Homemade apple butter often has a richer flavor. This will make your monkey bread taste even better. Just make sure it has a smooth texture. Chunky apple butter may not blend well with the dough. I recommend using refrigerated biscuit dough. The flaky texture works perfectly for monkey bread. You can choose buttermilk or classic biscuits. Both options will create a soft, tasty bread. Avoid dough that is too dense. It may not rise or bake well. You can prepare the monkey bread the night before. Assemble it in the bundt pan. Cover it tightly with plastic wrap and store it in the fridge. When you’re ready to bake, just remove it from the fridge. Let it sit for about 30 minutes before baking. This way, it will rise better in the oven. We covered the key parts of making monkey bread. You learned about ingredients, step-by-step instructions, and tips for great results. I shared variations to make it your own and how to store any leftovers. Remember, the right ingredients and careful prep give the best taste. Avoid common mistakes, and your monkey bread will be a hit. Enjoy making this fun treat!

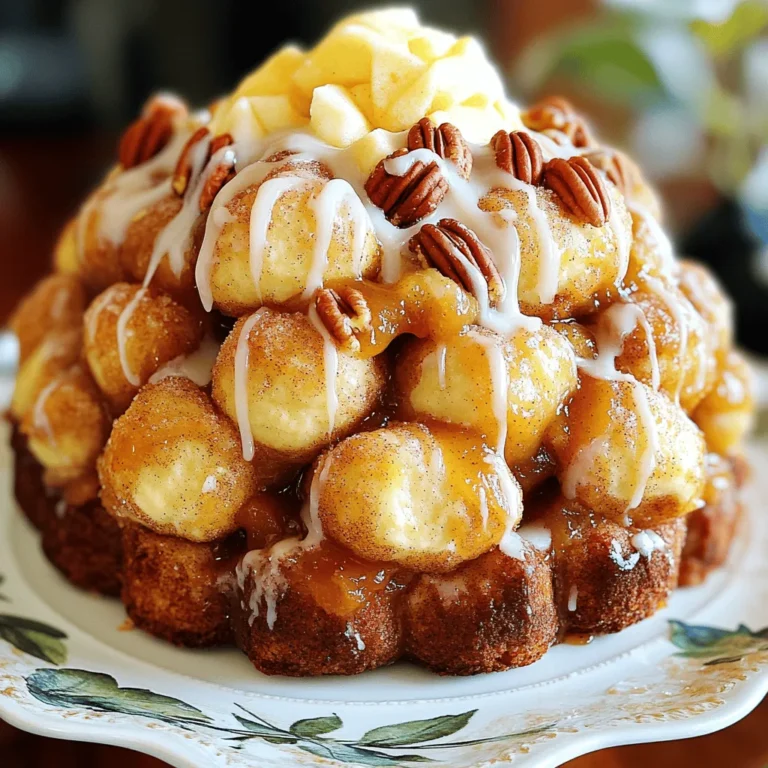
Apple Butter Monkey Bread Delightful and Easy Recipe

PREV 1 … 27 28 29 … 57 NEXT
secrets pice kitchen

explore

DessertsDinnerAppetizersDrinks

Our Policies

  • Cookie Policy
  • Copyright Policy
  • Disclaimer
  • GDPR Policy
  • Terms Of Use
Back to Top
  • About
  • Contact Us
  • Privacy Policy
© 2025 secrets pice kitchen