FREE DINNER EBOOK! Get your copy!
  • Cookie Policy
  • GDPR Policy
  • Disclaimer
  • Terms Of Use
  • Visit my other site: Fun Cookie Recipes
secrets pice kitchen
  • Home
  • Dinner
  • Desserts
  • Drinks
  • Appetizers
  • Contact
  • About
  • Privacy Policy
  • Home
  • Dinner
  • Desserts
  • Drinks
  • Appetizers
  • Contact
  • About
  • Privacy Policy
  • Cookie Policy
  • GDPR Policy
  • Disclaimer
  • Terms Of Use
Visit my other site: Fun Cookie Recipes

HOME / CATEGORIES /

Latest

Here’s what you need to make Garlic Parmesan Hasselback Potatoes. Gather these simple items: - 4 medium russet potatoes - 1/2 cup unsalted butter, melted - 4 cloves garlic, minced - 1/2 cup grated Parmesan cheese - 1 tablespoon fresh rosemary, finely chopped - 1 tablespoon fresh thyme leaves - Salt and pepper to taste - Fresh parsley, for garnish Each ingredient plays a key role. The russet potatoes give a nice, fluffy inside. Unsalted butter adds richness, while garlic brings a strong flavor. Parmesan cheese gives a delicious, cheesy crust. Fresh herbs like rosemary and thyme enhance the taste. Salt and pepper balance the flavors. Finally, parsley adds a bright touch for garnish. Make sure to use fresh ingredients for the best results. Fresh herbs have more flavor than dried ones. This will make your potatoes taste even better! - Preheat the oven to 425°F (220°C). - Clean and dry the potatoes. Scrub them under cold water. Make sure all dirt is gone. - To make the perfect Hasselback cuts, place a potato on a board. - Cut vertical slices about 1/4 inch apart. - Be careful not to cut all the way through. Leave 1/2 inch at the bottom. - You can use chopsticks on either side of the potato. This helps prevent cutting too deep. - In a bowl, mix together melted butter, minced garlic, rosemary, thyme, salt, and pepper. - Brush this garlic butter mixture on the potatoes. Be generous! - Make sure the butter seeps into each cut. Reserve some butter for later. - Place the sliced potatoes on a baking tray lined with parchment paper. - Bake in your preheated oven for 45-50 minutes. - Halfway through, baste the potatoes with the remaining garlic butter. - The outside should be crispy, and the inside should be tender. For crispy outsides and tender insides, use a high oven temperature. I recommend 425°F (220°C). This heat helps the outside get nice and crunchy. Bake for 45 to 50 minutes, basting halfway through. This keeps the potatoes moist and adds flavor. A great baking tray is one lined with parchment paper. It helps with cleanup and prevents sticking. You can add more herbs and spices to boost taste. Fresh chives or dill work well with the garlic and Parmesan. For more heat, consider adding red pepper flakes. If you love garlic, feel free to increase the amount. Just remember, too much can overpower the dish. Start with the 4 cloves and adjust to your liking. Garnishing adds visual appeal. Fresh parsley gives a bright color contrast. You can also drizzle any leftover garlic butter over the potatoes. Arrange them on a wooden cutting board or rustic platter. This makes for a charming presentation. Serve with sour cream or a fresh salad for a complete meal. {{image_2}} You can switch up the cheese for different flavors. Try using cheddar for a sharp bite. Gouda adds a creamy touch, while feta gives a nice tang. For a plant-based option, look for vegan cheeses. Many brands offer great taste without dairy. Nutritional yeast is another choice; it adds a cheesy flavor and is dairy-free. Adding extra ingredients can elevate your potatoes. Crispy bacon bits bring a savory crunch. A dollop of sour cream on top adds rich creaminess. If you like heat, sprinkle chili flakes on the potatoes before baking. This will give them a spicy kick that many enjoy. If you need a gluten-free option, you’re in luck! This recipe is naturally gluten-free. For those watching fat, consider using less butter. You can replace half with vegetable broth to cut calories. Just be sure to adjust seasonings to keep the flavor strong. To keep your Garlic Parmesan Hasselback Potatoes fresh, store them in an airtight container. You can also wrap them in foil or plastic wrap. They last about 3 to 5 days in the fridge. Check for any signs of spoilage before eating. To reheat, the oven is best. Preheat your oven to 350°F (175°C). Place the potatoes on a baking sheet. Cover them with foil to keep them from drying out. Bake for about 15 to 20 minutes. If you want to use a microwave, place a potato on a microwave-safe plate. Heat on high for 1 to 2 minutes. Check and add more time if needed. Enjoy the crispy texture and rich flavor just like when they were fresh! Yes, you can prepare the potatoes ahead of time. Slice and season them, then cover and store in the fridge. When ready to bake, let them sit at room temperature for about 30 minutes. This helps them cook evenly. These potatoes pair well with many dishes. Here are some great options: - Grilled chicken or steak - A fresh salad - Sour cream or Greek yogurt for dipping - Steamed vegetables like broccoli or green beans To prevent cutting through, use chopsticks on each side of the potato. Place the potato on a cutting board and make vertical cuts. Leave about 1/2 inch at the bottom. This trick ensures you get those perfect Hasselback slices. Yes, you can use other types of potatoes. Some good options include: - Yukon gold potatoes for a creamy texture - Red potatoes for a colorful dish - Sweet potatoes for a sweeter flavor Just remember to adjust the cooking time as needed. The nutritional values may vary, but here is a general idea for one serving: - Calories: 350 - Total Fat: 20g - Saturated Fat: 10g - Cholesterol: 30mg - Sodium: 400mg - Carbohydrates: 40g - Fiber: 4g - Protein: 6g This recipe offers a tasty side dish packed with flavor. Garlic Parmesan Hasselback potatoes are a flavorful dish that’s easy to make. You learned about the ingredients, preparation methods, and baking tips. You also explored variations and storage advice. These potatoes can be a tasty side for many meals. Try different herbs or cheeses to find your favorite. Enjoy sharing this dish with friends and family. The possibilities are endless, so have fun experimenting in the kitchen!

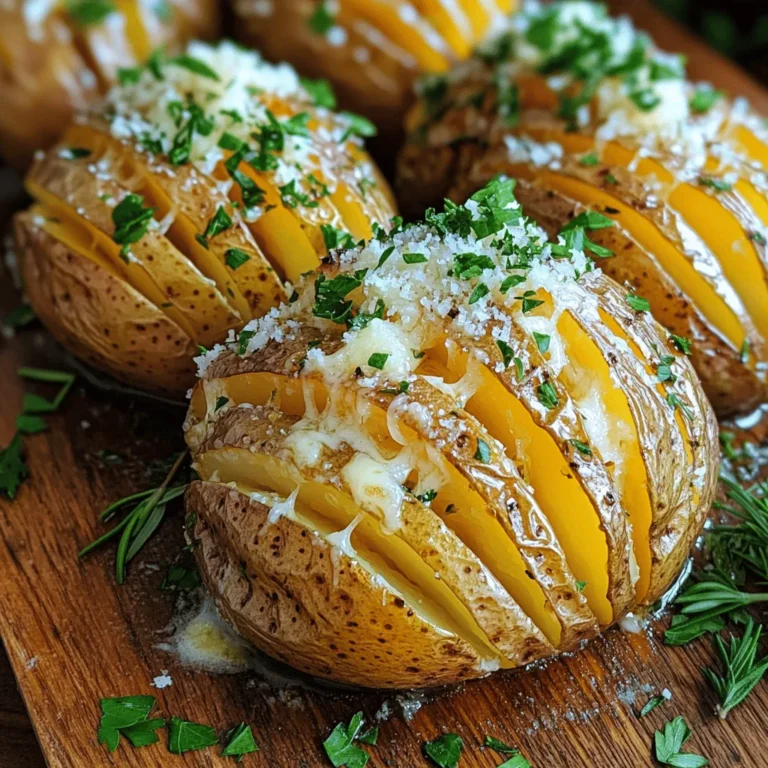
Garlic Parmesan Hasselback Potatoes Savory Delight

To make a tasty Thai Peanut Noodle Salad, you need: - 8 oz rice noodles - 1 cup shredded carrots - 1 red bell pepper, thinly sliced - 1 cucumber, julienned - 1 cup red cabbage, thinly sliced - ½ cup fresh cilantro, chopped - ¼ cup green onions, sliced - ½ cup roasted peanuts, chopped For the peanut sauce, gather: - ¼ cup natural peanut butter - 3 tablespoons soy sauce - 2 tablespoons lime juice - 1 tablespoon honey (or maple syrup for vegan) - 1 tablespoon sesame oil - 1 teaspoon grated ginger - 1 garlic clove, minced - 1-2 tablespoons water (to thin) If you want to switch things up, here are some great swaps: - Use almond butter or sunflower seed butter for peanut butter. - Try bell peppers, carrots, or zucchini for fresh veggies. - For gluten-free needs, use rice noodles and tamari instead of soy sauce. - Maple syrup can replace honey for a vegan option. Choosing fresh ingredients makes a big difference in taste. Here’s how to pick the best: - Rice Noodles: Look for firm noodles without cracks. - Vegetables: Choose bright, vibrant colors and avoid any wilting. - Peanuts: Use dry-roasted peanuts for the best flavor and crunch. - Herbs: Fresh cilantro should smell strong and look bright green. Select ingredients with care to boost your salad's flavor and freshness. To cook the rice noodles, first, bring a pot of water to a boil. Add the noodles and cook according to the package instructions, usually around 4 to 6 minutes. You want them soft but not mushy. Once cooked, drain the noodles in a colander. Rinse them under cold water to stop the cooking. This keeps the noodles from sticking. After rinsing, let them sit in the colander to drain well. Set the noodles aside for later. Next, let's make the peanut sauce. In a small bowl, add the natural peanut butter, soy sauce, lime juice, honey, sesame oil, grated ginger, and minced garlic. Whisk them together until smooth. If the sauce is too thick, add one or two tablespoons of water to thin it out. You want a creamy and pourable sauce, not runny. Taste it to adjust any flavors if needed—balance is key! Now it's time to assemble the salad. In a large mixing bowl, combine the cooked rice noodles, shredded carrots, sliced red bell pepper, julienned cucumber, thinly sliced red cabbage, chopped cilantro, and sliced green onions. Pour the peanut sauce over the noodle mixture. Toss everything gently until well coated. This ensures every bite is full of flavor. Let the salad sit for about 10 minutes. This helps the flavors blend well. Just before serving, sprinkle the chopped roasted peanuts on top for a crunchy finish. To add more depth to your Thai Peanut Noodle Salad, use fresh herbs. Basil, mint, and cilantro bring bright notes. You can also try adding a pinch of red pepper flakes for heat. Mixing in sesame seeds gives a nutty crunch. Fresh lime zest adds a citrus punch too. Experiment with these herbs and spices to find your favorite mix! Serve your salad in a large bowl for a family-style meal. For individual plates, layer the ingredients neatly. Top with extra chopped peanuts and a sprig of cilantro. A lime wedge on the side adds color and flavor. Use a vibrant plate to make the colors pop. Eye-catching presentation makes the meal more enjoyable. You can prep this salad a day in advance. Cook the noodles and chop the veggies early. Keep the peanut sauce separate until you are ready to serve. This way, the salad stays crisp and fresh. Just before serving, toss everything together. This saves time and allows the flavors to blend nicely! {{image_2}} You can easily change this salad to fit your diet. For a vegan version, swap honey for maple syrup. Use gluten-free soy sauce if you need a gluten-free option. If you are allergic to nuts, try sunflower seed butter instead of peanut butter. This way, you can still enjoy the creamy texture and flavor. You can add more veggies and proteins to this salad. Try adding bell peppers, snap peas, or edamame for extra crunch and color. Tofu or grilled chicken can boost the protein. You might also sprinkle in some avocado for creaminess. Feel free to mix and match based on what you love! Want to make this salad even more exciting? Add some spice with sliced jalapeños or crushed red pepper flakes. For a sweeter taste, add more honey or some pineapple chunks. If you enjoy tangy flavors, try adding a splash of rice vinegar or more lime juice. These twists make the dish fun and fresh every time! To keep your Thai Peanut Noodle Salad fresh, store it in an airtight container. Place it in the fridge right after serving. This helps stop bacteria from growing. If you want to freeze it, do not add the peanuts yet. They lose their crunch when frozen. You can store the salad for up to three days in the fridge. For freezing, use a freezer-safe container and eat it within a month. The salad lasts about three days in the fridge. After that, the veggies may become soggy. To keep it fresh longer, make the peanut sauce and salad ingredients separately. Combine them just before you eat. This keeps the flavors bright and the texture nice. You can enjoy this salad cold, which is refreshing. If you prefer warm noodles, you can reheat them. Place the noodles in a pot over low heat. Add a splash of water to help steam them. Stir until they are warm. Mix them back with the salad after reheating. Enjoy it your way! Yes, you can make this salad ahead of time. Prep the salad and store it in the fridge. Keep the peanut sauce separate until you're ready to eat. This helps the salad stay fresh. When you're ready, mix the salad and sauce together. Let it sit for about 10 minutes. This helps the flavors blend better. If you have nut allergies, try sunflower seeds or pumpkin seeds. They add a nice crunch without the nuts. You can also skip the nuts altogether. Just top your salad with crispy rice or extra veggies to keep it exciting. Yes! To add spice, include sliced jalapeños or a dash of red pepper flakes. You can also mix in sriracha sauce with the peanut sauce. Start with a little and taste as you go. This way, you can control how hot it gets. This blog post outlined how to make a Thai Peanut Noodle Salad. We covered key ingredients, cooking steps, and tips for fresh ingredients. You learned how to enhance flavors and presented the dish beautifully. In conclusion, this salad is versatile and easy to make. You can adjust it for different diets and tastes. Enjoy making it, sharing with friends, or prepping meals ahead. It’s a dish that shines in flavor and presentation.

Thai Peanut Noodle Salad Delightful and Fresh Recipe

- 4 large red bell peppers - 1 medium onion, chopped - 3 cloves garlic, minced - 2 cups vegetable broth - 1 cup coconut milk (or heavy cream) - 2 tablespoons olive oil - 1 teaspoon smoked paprika - Salt and pepper to taste - Fresh basil or parsley for garnish Gather these simple ingredients before you start. The red bell peppers are the star of this soup. They give it a sweet and rich flavor. You will also need onion and garlic. They add depth and a nice aroma. The vegetable broth serves as the base. It makes the soup warm and comforting. Coconut milk or heavy cream adds creaminess. I love using coconut milk for a hint of sweetness. Smoked paprika brings a smoky flavor. This spice enhances the roasted taste of the peppers. Don’t forget salt and pepper for seasoning. Fresh basil or parsley will make your soup pop. They add color and a fresh taste. With these ingredients ready, you are all set to make a delicious creamy roasted red pepper soup! First, set your oven to 450°F (232°C). This high heat helps to char the peppers. Next, cut the red bell peppers in half. Remove the seeds and stems. Place them cut-side down on a baking sheet. Drizzle 1 tablespoon of olive oil over the peppers. This adds flavor and helps them roast evenly. Roast the peppers in the oven for about 20 to 25 minutes. You know they are done when the skin is charred and blistered. After roasting, take them out and let them cool for 10 minutes. This makes peeling easier. Gently remove the skins with your hands. In a large pot, heat the last tablespoon of olive oil over medium heat. Add the chopped onion and sauté for about 5 minutes. You want them to be soft and translucent. Then, stir in the minced garlic and cook for 1 to 2 minutes. The garlic should smell fragrant. Now, add the roasted red peppers, vegetable broth, and smoked paprika. Season with salt and pepper. Bring this mixture to a simmer and let it cook for 10 minutes. Now it's time to blend the soup. If you have an immersion blender, use it to puree the soup until smooth. If you prefer a traditional blender, carefully transfer the mixture in batches. Always use caution with hot liquids. Blend until you reach your desired smoothness. Once blended, stir in 1 cup of coconut milk or heavy cream. This adds a creamy texture. Heat the soup over low until it’s warmed through. Taste and adjust the seasoning as needed. You can add more salt or pepper to fit your taste. Serve hot, and feel free to garnish with fresh basil or parsley for a pop of color. When you pick red bell peppers, look for firm ones. They should feel heavy for their size. Their skin should be bright and shiny. Avoid any with soft spots or wrinkles. Fresh peppers add great flavor to the soup. To boost flavor, add spices like smoked paprika or black pepper. A pinch of cayenne can add heat if you like it spicy. Fresh herbs like basil or parsley brighten up the taste. For a creamier texture, blend the soup well. Adding coconut milk gives it a rich, smooth finish. This soup pairs well with crusty bread or a green salad. Serve it with a slice of baguette for dipping. For garnishes, try fresh basil or a drizzle of olive oil. A sprinkle of croutons or roasted seeds adds crunch, too. {{image_2}} You can make this soup vegan by swapping the coconut milk for a different option. Here are some great choices: - Cashew cream: Blend soaked cashews with water until smooth. - Almond milk: Use unsweetened almond milk for a lighter texture. - Soy milk: A simple swap that keeps the flavor rich. Each option keeps the soup creamy and delicious while making it plant-based. If you want to add protein, beans or lentils work well in this soup. Here’s how: - Chickpeas: Drain and rinse canned chickpeas. Add them when you blend the soup. - Lentils: Cooked lentils can be stirred in before blending for a hearty touch. - White beans: Cannellini or navy beans boost protein and creaminess. These additions make the soup more filling and nutritious. You can easily change the spice level to fit your taste. To make the soup spicier: - Red pepper flakes: Add a pinch when cooking the onions. - Cayenne pepper: A small amount can add heat without overpowering the flavor. To make it milder: - Reduce smoked paprika: Use less or leave it out. - Add more coconut milk: This will tone down any heat. Adjust to your liking for the perfect bowl of soup! Store your leftover creamy roasted red pepper soup in an airtight container. Make sure it cools first. Place it in the fridge. It stays fresh for about 3 to 5 days. Label the container with the date. This helps keep track of freshness. To freeze this soup, let it cool completely. Pour it into freezer-safe containers. Leave some space at the top for expansion. Seal the containers tightly. Your soup can freeze for up to 3 months. When ready to eat, move it to the fridge overnight to thaw. Reheat this soup gently. Use a saucepan over low heat. Stir often to avoid sticking. If using the microwave, heat in short bursts. Check every minute and stir well. This keeps the texture smooth and creamy. Yes, you can use canned roasted red peppers. They save time and effort. Here are some pros and cons to think about: - Pros: - Already cooked and peeled. - Convenient for quick meals. - Places like grocery stores carry them. - Cons: - Flavor may not be as fresh. - High in sodium; check labels. - Texture differs from fresh peppers. You can adjust the soup’s thickness easily. Here’s how: - To make it thinner: - Add more vegetable broth. - Stir in a bit of water. - To make it thicker: - Blend in more roasted peppers. - Stir in a bit of cream or coconut milk. These methods help you reach your desired consistency. Yes, you can make this soup ahead of time. Here are tips for meal prep: - Cook the soup and let it cool. - Store it in an airtight container. - Keep it in the fridge for up to four days. - You can also freeze it for up to three months. When ready to eat, just reheat it on the stove. Pairing sides can enhance your soup. Here are some tasty options: - Crusty bread for dipping. - A fresh salad with greens. - Grilled cheese sandwiches for comfort. - Roasted veggies for a balanced meal. These sides complement the soup well and add more flavor to your meal. This blog post shared a simple recipe for creamy roasted red pepper soup. We covered key ingredients, step-by-step instructions, and helpful tips for flavor and texture. You learned how to choose the best peppers and enhance your soup’s taste. Don’t forget about the tasty variations and storage tips. Enjoy making this comforting soup. It’s a great way to add flavor and warmth to your meals. Happy cooking!

Creamy Roasted Red Pepper Soup Flavorful and Easy Recipe

To make a Blueberry Cream Cheese Danish, gather the following items: - 1 sheet puff pastry (thawed) - 8 oz cream cheese, softened - 1/3 cup granulated sugar - 1 tsp vanilla extract - 1 egg yolk - 1 cup fresh blueberries (or frozen, thawed) - 1 tbsp cornstarch - 1 egg, beaten (for egg wash) - Powdered sugar (for garnish) - Lemon zest (optional, for garnish) Each ingredient plays a key role. The puff pastry gives a flaky base. Cream cheese provides a rich, creamy filling. Sugar adds sweetness, while vanilla brings a lovely aroma. The egg yolk helps bind the filling. Blueberries burst with flavor and color. Cornstarch thickens the filling, ensuring it doesn’t run. The beaten egg wash gives a nice golden color. Finally, powdered sugar and lemon zest add a beautiful touch. With these ingredients, you’ll create a delightful treat that everyone will love! Start by preheating your oven to 400°F (200°C). This step is key for crisp pastries. While the oven heats up, grab a baking sheet and line it with parchment paper. This helps prevent sticking and makes cleanup easier. On a lightly floured surface, roll out the thawed puff pastry. Aim for a rectangle about 12x16 inches. Once you have that, cut it into six equal squares or rectangles. These will hold the delicious filling. In a medium bowl, combine 8 ounces of softened cream cheese, 1/3 cup of granulated sugar, 1 teaspoon of vanilla extract, and 1 egg yolk. Beat these ingredients together until the mixture is smooth and creamy. This will be the rich base of your filling. In a separate bowl, take 1 cup of fresh blueberries. If you use frozen berries, make sure they are thawed. Toss the blueberries gently with 1 tablespoon of cornstarch. This helps thicken the blueberry filling and prevents it from getting too runny. Now it's time to put it all together. Place a tablespoon of the cream cheese mixture in the center of each pastry square. Top this with a tablespoon of the blueberry mixture. You can fold the corners of the pastry over the filling to create a square shape. If you prefer, leave them open-faced for a different look. Pinch the edges to seal them well. Brush the tops of the pastries with a beaten egg. This gives them a lovely golden crust when baked. Place your pastries in the preheated oven and bake for 15-20 minutes. Look for a puffed and golden brown finish. Once baked, let them cool slightly. Finally, dust with powdered sugar and add some lemon zest for a bright flavor boost. Enjoy your delightful Blueberry Cream Cheese Danish! To get a flaky puff pastry, keep it cold. Warm dough loses its shape. Use chilled ingredients. Roll the pastry on a lightly floured surface. Roll it out gently. Don't overwork the dough. This keeps the layers light and airy. Always fold the dough in thirds. This creates layers that puff up when baked. If the dough gets warm, chill it for a bit before baking. For the cream cheese filling, start with softened cream cheese. This makes it easy to mix. Blend it with sugar, vanilla, and egg yolk until smooth. Taste the mixture. If you want it sweeter, add more sugar. For extra flavor, you can add lemon zest. This brightens the filling and pairs well with blueberries. Don’t forget to fold in the blueberries gently. This keeps them whole and juicy. To store leftovers, let the Danishes cool first. Place them in an airtight container. They can stay fresh for about two days at room temperature. If you want to keep them longer, refrigerate them. Just remember, the pastry may lose some crispness. To reheat, pop them in the oven for a few minutes. This will help restore some flakiness. Enjoy your treats even after the first day! {{image_2}} You can swap blueberries for many fruits. Raspberries give a nice tartness. Strawberries add sweetness and color. Peaches or cherries work well too. Just slice them small. Mix them with sugar and cornstarch like you do for blueberries. This keeps the filling thick and juicy. For a gluten-free option, look for gluten-free puff pastry in stores. You can also make your own with gluten-free flour. It may not puff as much, but it will still taste good. Just follow the same steps in the recipe. Your friends won’t know it’s gluten-free! Spices can take your Danish to the next level. Try adding cinnamon or nutmeg to the cream cheese mix. A hint of almond extract pairs nicely with the fruit. You can also add lemon zest for brightness. These little touches can make your treat unique and exciting. To keep your Blueberry Cream Cheese Danishes fresh, let them cool first. Place them in an airtight container. You can store them at room temperature for one day. For longer storage, put them in the fridge. They stay good in the fridge for up to three days. If you want to keep them longer, freeze them. Wrap each Danish in plastic wrap and then in foil before freezing. This helps prevent freezer burn. When you're ready to enjoy your Danishes, preheat your oven to 350°F (175°C). Place the Danishes on a baking sheet. Heat them in the oven for about 10 to 15 minutes. This warms them up and keeps the pastry flaky. You can also use the microwave. Heat them for about 20 to 30 seconds, but the pastry might not be as crisp. Blueberry Cream Cheese Danishes can last for a few days. If kept in the fridge, they are best eaten within three days. In the freezer, they can last for up to two months. Just remember to check for any signs of freezer burn if you freeze them. Always use your best judgment with food. If they smell or look off, it’s best to toss them. The best way to defrost puff pastry is in the fridge. Place the frozen pastry in the fridge for about 6 hours or overnight. This keeps the dough cold and easy to work with. If you’re in a hurry, you can leave it out at room temperature for about 30 minutes. Just avoid using heat, as it can change the texture. Yes, you can use frozen blueberries. Just make sure to thaw them first. Pat them dry with a paper towel to remove excess moisture. This helps keep the filling from getting too watery. You’ll know the Danish are done when they turn golden brown. The pastry should puff up and look flaky. Check them around the 15-minute mark. If they look golden, they’re ready! You can prepare the filling and assemble the Danish ahead of time. Store them in the fridge for up to 24 hours. Just bake them when you’re ready to enjoy. This makes for an easy breakfast or snack! If you need a substitute for cream cheese, try mascarpone or ricotta cheese. Both have a similar texture. You can also use Greek yogurt for a lighter option. Just remember that the flavor will be a bit different. This blog post shared how to make a delicious Blueberry Cream Cheese Danish. We explored the ingredients and provided simple steps for preparation and baking. You learned tips for achieving flaky pastry and perfect filling. Plus, we discussed storage and variations for creativity. Enjoy making this treat at home! It’s easy and fun. Share it with friends and family for a tasty surprise.

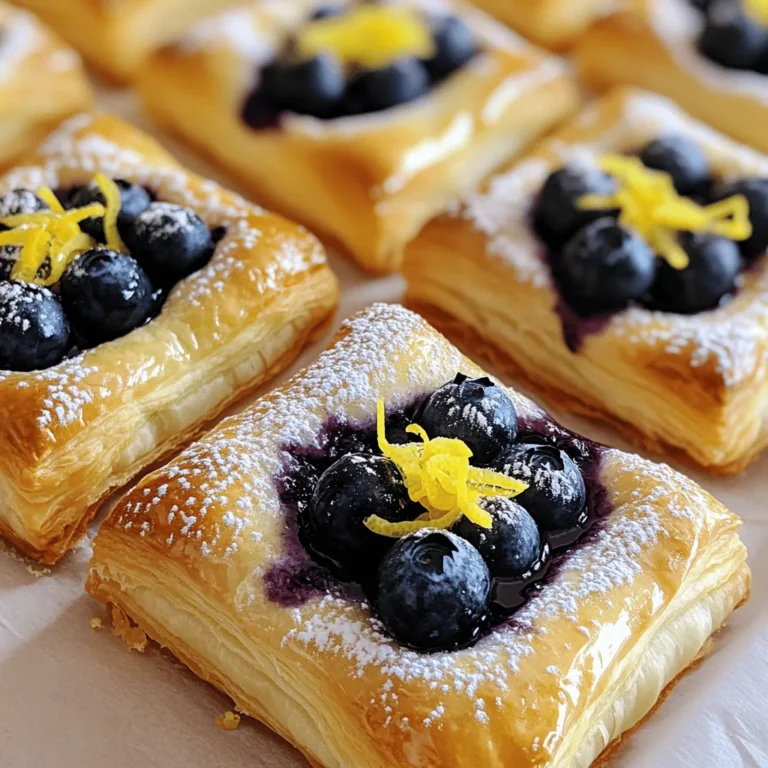
Blueberry Cream Cheese Danish Delightful Treat Recipe

- 1 package (13.8 oz) refrigerated pizza dough - 4 tablespoons unsalted butter, melted - 4 cloves garlic, minced - 1 teaspoon dried parsley - 1 teaspoon Italian seasoning - ½ teaspoon salt - ¼ teaspoon black pepper To make these garlic knots, you need a few simple ingredients. The pizza dough serves as the base. You can use refrigerated dough from the store for ease. The garlic and seasonings bring the flavor. Don’t skip the garlic; it’s the star here! - Grated Parmesan cheese If you want to add a cheesy touch, sprinkle some grated Parmesan cheese on top. It enhances the flavor and adds a nice finishing touch. This step is optional but highly recommended. For accurate results, use these measurements: - Pizza Dough: 13.8 oz (1 package) - Butter: 4 tablespoons, melted - Garlic: 4 cloves, minced - Dried Parsley: 1 teaspoon - Italian Seasoning: 1 teaspoon - Salt: ½ teaspoon - Black Pepper: ¼ teaspoon Measuring correctly is key. It ensures your knots turn out just right. Use a kitchen scale for the dough if you want precision. For the butter, melt it before measuring for the best results. 1. First, preheat your air fryer to 350°F (175°C). This step helps the knots cook evenly. 2. Next, take your refrigerated pizza dough. On a lightly floured surface, roll it out into a rectangle about 1/2 inch thick. Make sure it is smooth and even. 1. Cut the dough into strips that are about 1-inch wide and 4 inches long. Use a sharp knife for clean edges. 2. Now, take each strip and tie it into a knot. Tuck the ends underneath to make a neat shape. Place the knots on a parchment-lined plate to keep them from sticking. 1. In a small bowl, mix melted butter, minced garlic, parsley, Italian seasoning, salt, and pepper. This garlic butter adds great flavor to the knots. 2. Brush each garlic knot with the garlic butter mixture. Make sure they get a good coating. You can save some of this mix for later. 3. Place the garlic knots in your air fryer basket. Keep them in a single layer, leaving space between each knot for air to flow. 4. Air fry the knots for about 7-10 minutes. They should turn golden brown and be cooked through. 5. When they are done, take them out and brush them again with the reserved garlic butter. If you like, sprinkle some grated Parmesan cheese on top before serving. To get evenly cooked garlic knots, follow these tips: - Preheat your air fryer: Always set the air fryer to 350°F before cooking. This helps the knots cook evenly. - Don’t overcrowd: Place knots in a single layer. Leave space between each knot for air to flow. If you use a different air fryer model, adjust cooking time. Some air fryers may cook faster or slower. Check your knots around the 7-minute mark for golden color. Want to boost the taste of your garlic knots? Here are some ideas: - Add more herbs: Consider using fresh basil or oregano. These herbs bring vibrant flavor. - Try different butter types: Use garlic-infused butter for a stronger garlic taste. You can also use herb butter for added depth. Making your garlic knots look great is easy. Here are some serving ideas: - Serve warm: Place the knots in a bread basket. Serve them right after cooking for the best taste. - Garnish beautifully: Sprinkle fresh parsley on top for color. Serve with a small bowl of marinara sauce for dipping. This adds a fun touch! {{image_2}} You can easily change the taste of your garlic knots. Adding cheese or fresh herbs gives them a new spin. For cheese, sprinkle grated Parmesan on top before serving. It melts perfectly and adds a salty kick. You can also mix in herbs like rosemary or thyme into the garlic butter for extra flavor. This makes each bite a burst of taste. If you want to save time, use frozen dough. Just thaw it according to package directions. It works great and saves prep time. You can also make homemade dough if you’re feeling adventurous. A simple mix of flour, water, yeast, and salt can create a nice base for your knots. Homemade dough adds a personal touch and flavor. For those with gluten issues, you can make gluten-free garlic knots. Use gluten-free pizza dough, which is easy to find in most stores. The taste may differ slightly, but they still turn out delicious. Just follow the same steps to form and cook them. You won’t miss the gluten in these tasty treats! To keep your garlic knots fresh, place them in an airtight container. Make sure the knots are cool before sealing. This helps prevent sogginess. Store them in the fridge for up to three days. If you want to keep them longer, freezing is a great option. To reheat your garlic knots while keeping them crispy, use the air fryer. Set it to 350°F (175°C). Place the knots in the basket for about 3-5 minutes. This method revives their crunch and flavor. Avoid using the microwave, as it can make them soft and chewy. For long-term storage, freeze the garlic knots after they cool. Wrap each knot in plastic wrap and place them in a freezer bag. This keeps them safe from freezer burn. They can last up to three months in the freezer. When ready to eat, simply reheat in the air fryer as mentioned before. To check if your garlic knots are done, look for a golden brown color. The knots should feel firm to touch, not doughy. You can also insert a toothpick into the center. If it comes out clean, your knots are ready! Yes, you can prepare garlic knots in advance. To do this, follow the steps up to brushing them with garlic butter. Then, store the unbaked knots in the fridge for up to 24 hours. When ready, brush them with butter and air fry as directed. This saves time and makes for a quick snack! Air fryer garlic knots pair well with marinara sauce for dipping. You can also serve them with ranch dressing or garlic aioli. For a fresh touch, add a side of mixed greens or a simple salad. These pairings enhance the flavors and create a fun snack experience! In this post, we covered how to make delicious air fryer garlic knots. We discussed required and optional ingredients, specifically dough, garlic, seasonings, and cheese. The guide detailed preparation steps and knot formation, along with specific cooking instructions. I shared tips for perfect knots and added flavor ideas. We explored variations, storage options, and answered common questions. Making garlic knots at home is easy and fun. Enjoy your tasty treats, and feel free to get creative!

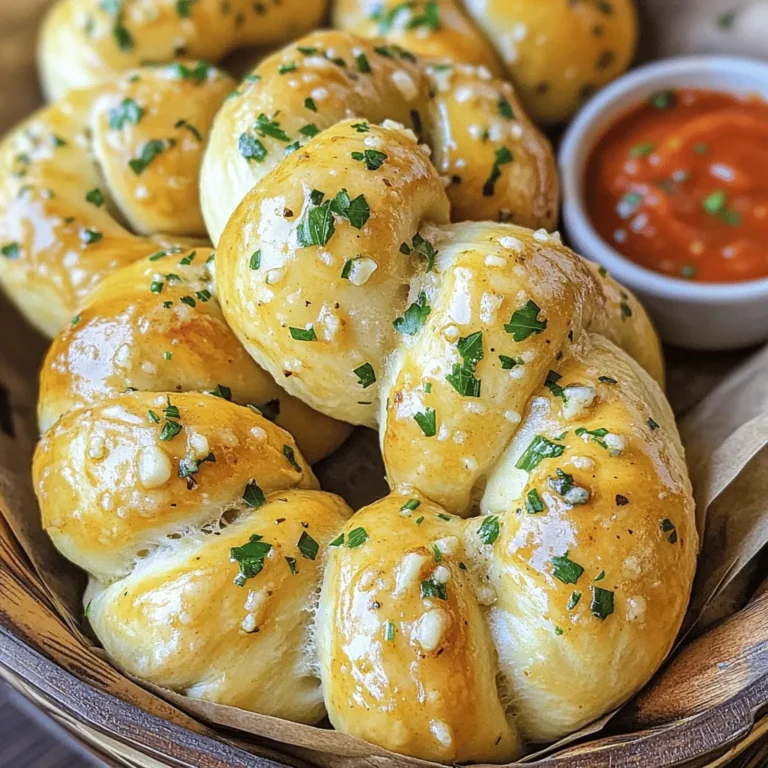
Air Fryer Garlic Knots Crispy and Flavorful Snack

To make maple roasted sweet potatoes, you need: - 4 medium sweet potatoes, peeled and cubed - 1/4 cup pure maple syrup - 3 tablespoons olive oil - 1 teaspoon ground cinnamon - 1/2 teaspoon ground nutmeg - Salt and pepper to taste - 1/2 cup pecans, roughly chopped - Fresh thyme leaves for garnish (optional) When choosing sweet potatoes, look for firm ones. They should have smooth skin. Avoid any with soft spots or blemishes. Organic sweet potatoes may taste better. They are often sweeter and creamier. Try to buy local when possible. This helps support farmers and local economies. For the best flavor, choose pure maple syrup. Look for brands like Grade A or Grade B. Some good options include: - Maple Grove Farms - Crown Maple - Coombs Family Farms These brands offer rich flavor that enhances your sweet potatoes. Avoid imitation syrups as they lack real maple taste. {{ingredient_image_1}} Start by peeling four medium sweet potatoes. Cut them into even cubes. Aim for about one-inch pieces for even cooking. The uniform size helps them roast well. Place the cubed sweet potatoes in a large bowl. This is where the magic begins. Next, add the following ingredients to the bowl: - 1/4 cup pure maple syrup - 3 tablespoons olive oil - 1 teaspoon ground cinnamon - 1/2 teaspoon ground nutmeg - Salt and pepper to taste Mix everything together well. Make sure each piece of sweet potato gets coated. The maple syrup adds sweetness. The spices bring warmth and depth. This coating is what makes them so tasty. Preheat your oven to 425°F (220°C). Line a baking sheet with parchment paper. Spread the coated sweet potatoes on the sheet in a single layer. This step is key. It lets them roast evenly. Roast the sweet potatoes for 25-30 minutes. Stir them halfway through to ensure even cooking. You want them tender and caramelized. In the last five minutes, sprinkle 1/2 cup of roughly chopped pecans over the potatoes. This toasts them and adds crunch. Once done, let them cool for a few minutes. Serve them warm, and enjoy! When choosing sweet potatoes, look for firm ones. They should have smooth skin. Avoid any that feel soft or have dark spots. The color can vary from orange to purple. I prefer the orange ones for their sweetness. You can boost flavor by adding spices. Try a pinch of cayenne pepper for heat. Or mix in some ginger for warmth. A dash of allspice also works well. These additions can make your dish stand out. For great caramelization, space the sweet potatoes well on the baking sheet. If they are too close, they will steam, not roast. Stir them halfway through cooking to ensure even browning. The edges should turn golden and crispy. This adds a delightful texture to your dish. Pro Tips Choose the Right Sweet Potatoes: Look for firm, unblemished sweet potatoes for the best flavor and texture. Adjust Sweetness to Taste: Feel free to modify the amount of maple syrup based on your sweetness preference. Even Roasting: Ensure the sweet potatoes are spread out on the baking sheet to achieve even caramelization. Experiment with Nuts: Try substituting pecans with walnuts or almonds for a different flavor profile. {{image_2}} If you want to change the flavor, try other sweeteners. Honey works well and adds a nice touch. You can also use agave syrup for a lighter sweetness. Coconut sugar is another option. It has a rich, caramel-like taste that pairs nicely with sweet potatoes. Just remember, adjust the amount to match your taste. Pecans add a great crunch, but other nuts can work too. Walnuts bring a strong flavor that mixes well with maple. Almonds can add a nice, nutty taste as well. If you prefer seeds, try pumpkin or sunflower seeds. They give a different texture and flavor, and they’re healthy too. Sweet potatoes are great on their own, but you can mix in other veggies. Carrots add a nice sweetness and color. Red onions lend a bit of sharpness and balance the dish. You can even add Brussels sprouts for a unique twist. Just cut them into small pieces so they cook evenly. After you enjoy your maple roasted sweet potatoes, let them cool down. Store them in an airtight container. This keeps them fresh. Place the container in the fridge. They will last for about 3 to 5 days. When you store them, avoid stacking. This prevents them from getting mushy. If you have extra pecans, store them separately. This keeps them crunchy. To reheat, the oven works best. Preheat your oven to 350°F (175°C). Spread the sweet potatoes on a baking sheet. Heat them for about 10-15 minutes. This helps keep their taste and texture. You can also use a microwave. But, use a microwave-safe dish. Heat in short bursts of 30 seconds. Check often to avoid overcooking. If they seem dry, add a little olive oil. You can freeze these sweet potatoes too. First, let them cool completely. Then, spread them on a baking sheet. This prevents them from sticking together. Freeze for about 1-2 hours. Once frozen, transfer them to a freezer bag. Remove as much air as you can. They will keep for up to 3 months. When ready to eat, thaw in the fridge overnight. Reheat as mentioned before. Yes, you can use other types of potatoes. Regular white or red potatoes work well. However, they will taste different. Sweet potatoes have a unique flavor. They are sweeter and creamier. If you use other potatoes, adjust the cooking time. They may roast faster or slower. You know sweet potatoes are done when they are tender. Use a fork to test them. If the fork slides in easily, they are ready. Look for caramelized edges, too. This means they are golden and tasty. The total roasting time is about 25 to 30 minutes. Yes, this recipe is great for meal prep. You can make it ahead of time. Store the sweet potatoes in an airtight container. They stay good for up to five days in the fridge. Reheat them in the oven or microwave. They will still taste delicious! This post covered everything you need to make delicious maple roasted sweet potatoes. We looked at the best ingredients, like high-quality sweet potatoes and top maple syrup brands. You learned how to prep, mix, and roast your sweet potatoes perfectly. We shared tips to enhance flavor and variations to try. Plus, you now know how to store and reheat leftovers. Use this guide to make your meals tastier and more fun. Enjoy your cooking!

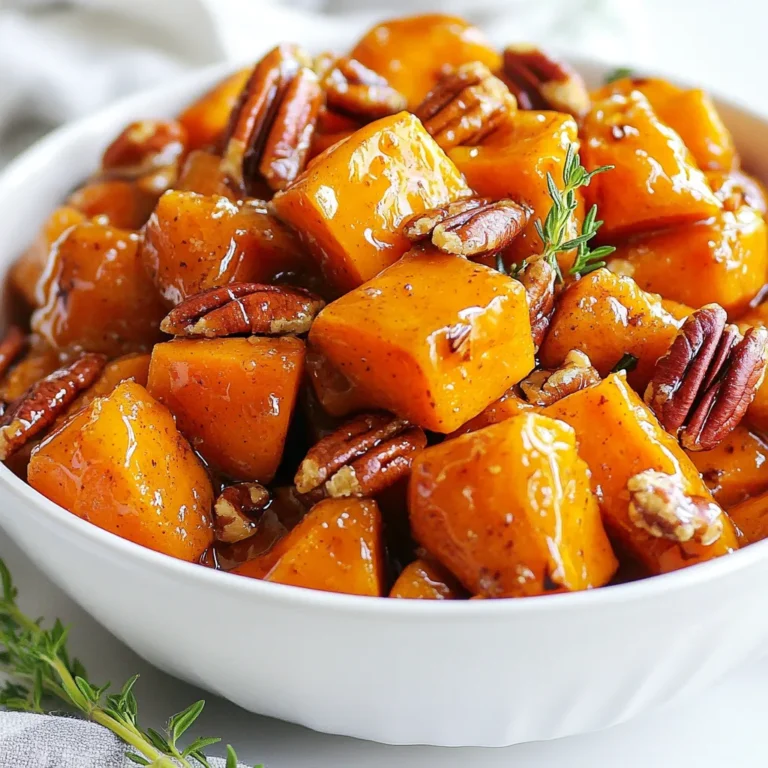
Maple Roasted Sweet Potatoes Tasty and Simple Side

Let’s gather everything you need for veggie packed egg muffins. This recipe is simple and quick, perfect for busy mornings or meal prep. Here’s what you’ll need: - 6 large eggs - 1/2 cup milk or non-dairy alternative - 1 cup chopped spinach - 1/2 cup diced bell pepper - 1/2 cup halved cherry tomatoes - 1/4 cup finely chopped red onion - 1/2 cup shredded cheese (cheddar or feta) - Seasoning: garlic powder, dried oregano, salt, and pepper - Olive oil spray for greasing Now, let’s talk about why these ingredients are great. Eggs are the star here, providing protein and flavor. Milk adds creaminess, making the muffins fluffy. Spinach gives a healthy green boost, while bell peppers and tomatoes add color and taste. Cheese makes everything better. Choose cheddar for a sharp bite or feta for a tangy twist. The seasonings tie it all together. Garlic powder and oregano add depth to every bite. Don’t forget the olive oil spray! It keeps the muffins from sticking to the pan. With these tasty ingredients, you’re set for a nutritious meal that’s easy to make. Enjoy the process, and get ready for something delicious! First, set your oven to 350°F (175°C). This is the perfect heat for baking. While the oven warms up, grab a muffin tin. Spray it with olive oil to stop the muffins from sticking. Make sure to cover each cup well. In a large bowl, crack 6 large eggs. Then, add 1/2 cup of milk. Whisk these together until you see bubbles. Next, toss in 1 cup of chopped spinach, 1/2 cup of diced bell pepper, 1/2 cup of halved cherry tomatoes, and 1/4 cup of finely chopped red onion. Stir it all well so the veggies mix with the eggs. For flavor, add 1 teaspoon of garlic powder, 1 teaspoon of dried oregano, and salt and pepper to taste. Mix until everything looks even. Pour the egg and veggie mixture into the muffin tin. Fill each cup about 3/4 full. Now, sprinkle 1/2 cup of shredded cheese on top of each muffin. Place the muffin tin in the oven and bake for 18 to 20 minutes. You want them to look golden on top and be set in the middle. When done, take them out and let them cool for a few minutes. Use a knife to help pop them out of the tin. Enjoy your veggie packed egg muffins! To get fluffy and tasty egg muffins, whisk the eggs well. The milk helps make them light. If you want a creamier texture, use heavy cream instead of milk. Don’t overbake them. Check for a light golden color on top. This means they are ready to come out. You can swap out the cheese for your favorite type. Try mozzarella or goat cheese for a different taste. For veggies, use whatever you like. Zucchini, mushrooms, or kale can work great too. Just chop them small so they cook evenly. These egg muffins are perfect for meal prep. Make a big batch on the weekend. Store them in the fridge for quick breakfasts. They can last up to five days. You can also freeze them for up to three months. Just reheat in the microwave for a fast meal. {{image_2}} You can mix and match veggies in these muffins. Try zucchini, mushrooms, or broccoli. Carrots add a nice crunch too. Get creative! Just remember to chop the veggies small. This helps them cook evenly and blend well with the eggs. You can also use frozen veggies. Just thaw and squeeze out excess moisture before adding them to the mix. Want to make these muffins heartier? Add cooked bacon or sausage! Chop the cooked meat into small pieces. Stir it into the egg mixture before you pour it into the muffin tin. This adds flavor and protein. Turkey bacon or chicken sausage are great alternatives, too. You can even use leftover rotisserie chicken. Just shred it and mix it in! If you want a dairy-free or vegan version, it's easy! Use a non-dairy milk like almond or oat. For the eggs, try a flax egg or chickpea flour mixed with water. The texture will change a bit, but the taste stays great. You can also skip the cheese or use a dairy-free cheese. Nutritional yeast gives a cheesy flavor, too. This way, everyone can enjoy these tasty muffins! You can store leftover veggie packed egg muffins in the fridge. Place them in an airtight container. They will stay fresh for up to 5 days. Make sure they cool down before sealing. This helps prevent moisture buildup. You can also use plastic wrap if you don’t have a container. To freeze your muffins, let them cool completely first. Then, wrap each muffin tightly in plastic wrap. Place the wrapped muffins in a freezer bag or an airtight container. They can last for up to 3 months in the freezer. Just remember to label the bag with the date. This way, you won’t forget when you made them! To reheat, you can use the microwave or oven. For the microwave, place a muffin on a plate and heat for about 30 seconds. If you prefer the oven, preheat it to 350°F (175°C). Then, place the muffins on a baking sheet for 10-15 minutes. This helps keep them warm and tasty. Enjoy them warm for the best flavor! Yes, you can make these muffins in advance. I often prepare them on Sundays. This way, I have healthy meals ready for the week. Just store them in the fridge after baking. They are easy to grab for breakfast or snacks. The best veggies for egg muffins include: - Spinach - Bell peppers - Tomatoes - Red onion Other great choices are zucchini, mushrooms, and broccoli. You can mix and match based on your taste. Fresh or frozen veggies both work well. Egg muffins last about 4 to 5 days in the fridge. Make sure to store them in an airtight container. This keeps them fresh and tasty. If you want them to last longer, consider freezing them. Yes, you can use egg whites instead of whole eggs. This cuts down on fat and calories. Just use about 1/4 cup of egg whites for each whole egg. This change still gives a nice texture and flavor. This blog post detailed how to make veggie-packed egg muffins. We covered ingredients, step-by-step directions, and helpful tips. You can customize them with your favorite veggies and cheeses. Storing and reheating them is easy too. Egg muffins are a great choice for meal prep. They offer healthy protein and can fit your taste. I hope you enjoy making these simple and tasty treats!

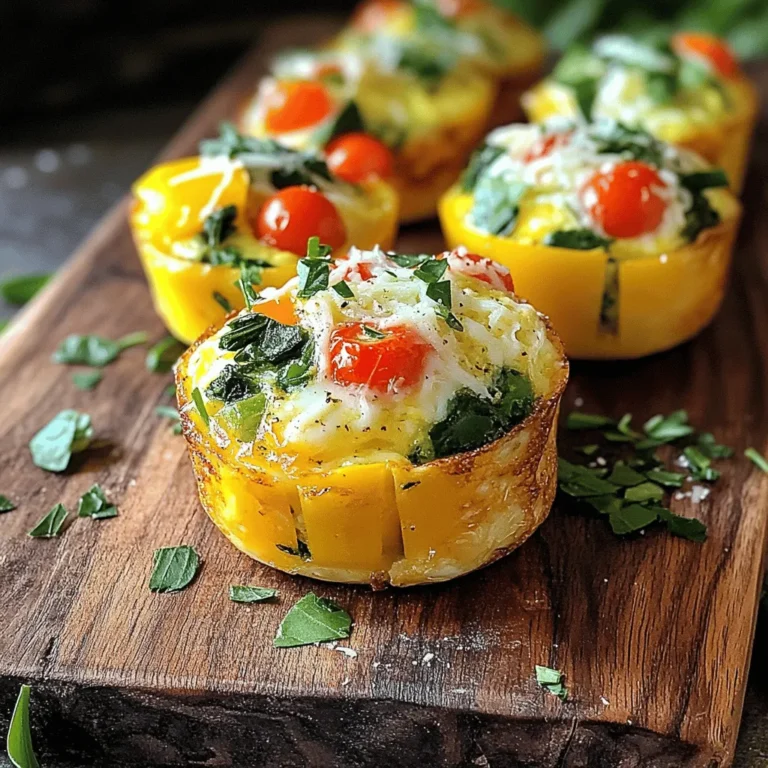
Veggie Packed Egg Muffins Easy and Nutritious Meal

- 2 large apples, peeled and diced - 1 cup rolled oats - 1 cup all-purpose flour - 1/2 cup brown sugar - 1/2 cup unsalted butter, melted - 1/2 teaspoon cinnamon - 1/4 teaspoon nutmeg - 1/4 teaspoon salt - 1/3 cup granulated sugar - 1 tablespoon lemon juice - 1 tablespoon cornstarch Gather these ingredients for your Apple Cinnamon Crumble Bars. Choose firm, tart apples like Granny Smith for great flavor. The oats and flour create a nice base and topping. Brown sugar adds warmth, while butter makes everything rich. A mix of spices like cinnamon and nutmeg gives this dish its cozy feel. - 8x8 inch baking dish - Parchment paper - Mixing bowls - Measuring cups and spoons - Oven You’ll need a few tools to make this recipe. An 8x8 inch baking dish works well for even baking. Parchment paper helps with easy removal. Use mixing bowls to combine your ingredients. Measuring cups and spoons ensure you get the right amounts. Finally, an oven will bake your bars to perfect, golden goodness. With these ingredients and tools ready, you're on your way to making delicious Apple Cinnamon Crumble Bars. Enjoy the process and the tasty results! - Preheat the oven to 350°F (175°C). - Line an 8x8 inch baking dish with parchment paper. First, you want to set your oven to 350°F. This helps the bars bake evenly. Next, take your baking dish and line it with parchment paper. Leave some overhang so you can lift the bars out easily later. - Combine diced apples with lemon juice and spices. - Let the mixture marinate for 10 minutes. In a mixing bowl, toss the diced apples with lemon juice, granulated sugar, cinnamon, nutmeg, and cornstarch. This mix will add flavor to the apples. Let it sit for about 10 minutes. This helps the apples soak up the spices. - Mix together the dry ingredients and melted butter. - Press half of the mixture into the baking dish. In another bowl, mix the rolled oats, all-purpose flour, brown sugar, melted butter, cinnamon, and salt. You want this to look crumbly. Press half of this mixture into the bottom of the baking dish. This will form a solid base for your bars. - Spread the marinated apples evenly over the base. - Sprinkle the remaining crumble topping over the apples. After you press the base, spread the marinated apples evenly over it. Then, take the remaining crumble mixture and sprinkle it on top of the apples. Make sure to cover all the apples so they stay nice and juicy. - Bake for 25-30 minutes. - Cool in the pan for 15 minutes before cutting. Now, place the baking dish in the oven. Bake for about 25 to 30 minutes. You want the top to be golden brown, and the apples should feel soft. Once done, let it cool in the pan for about 15 minutes. This makes cutting the bars easier. To get a great crumble, start with cold butter. Cold butter makes the crumble flaky. It helps create that nice, crunchy topping. When mixing the crumble, make sure not to overmix. You want a crumbly texture, not a paste. Mix just until you see some dry bits. This way, the bars stay light and airy. Adding vanilla extract to the apple filling really boosts the flavor. It gives the apples a warm, sweet note. You might also want to add nuts or raisins. They add a nice crunch and extra flavor. Walnuts or pecans work great. Raisins bring a chewy contrast to the soft apples. When serving, dust the bars with powdered sugar. It looks pretty and adds a touch of sweetness. Another great idea is to top them with vanilla ice cream or whipped cream. The cold cream contrasts nicely with the warm bars. This makes for a delightful treat that everyone will love! {{image_2}} You can make this recipe a bit better for you. Start by swapping out butter for coconut oil. It adds a nice hint of flavor and is a healthier fat. Next, use whole wheat flour instead of all-purpose flour. This change boosts fiber and gives your bars more nutrition. Want to mix it up? Try adding caramel to your apple filling for a richer taste. It gives each bite a sweet surprise! You can also experiment with different fruits. Pears or berries work great. Each fruit brings its own unique flavor. If you need a gluten-free treat, there are easy swaps. Use a gluten-free flour blend in place of regular flour. Just make sure the blend you pick works well for baking. Also, check that your oats are certified gluten-free. This ensures they are safe to eat. To keep your Apple Cinnamon Crumble Bars fresh, place them in an airtight container. This method helps keep the bars moist and tasty. You can store them in the fridge for up to a week. Make sure to check for any signs of spoilage before digging in! If you want to save some for later, freeze the uncut bars. Wrap them tightly in plastic wrap to prevent freezer burn. When you're ready to enjoy, simply thaw the bars at room temperature. This way, you can have a delicious treat whenever you like! For the best texture, reheat the bars in the oven. Set it to 350°F (175°C) and warm them for about 10 minutes. If you’re in a hurry, you can use the microwave for a quick reheating. Just be aware that the texture may become softer. Enjoy your warm, tasty treat! Apple Cinnamon Crumble Bars stay fresh in the fridge for about one week. Store them in an airtight container to keep them moist. If you want to keep them longer, freeze them. The bars can last up to three months in the freezer. Wrap each bar in plastic wrap, then place them in a freezer bag. When you're ready to eat, let them thaw in the fridge overnight. Yes, you can substitute apples with other fruits. Pears work well and give a nice flavor. You can also try peaches or berries for a twist. Each fruit will change the taste, but all will make tasty bars. Keep in mind; the texture may vary slightly depending on the fruit you choose. Look for a golden-brown top. The apples should be tender, and the crumble should look set. You can gently press down on the top. If it feels firm and not wet, it’s ready. Baking takes about 25-30 minutes. Keep an eye on them during the last few minutes to avoid overbaking. Yes, you can make these bars vegan. Substitute unsalted butter with coconut oil or vegan butter. Use maple syrup or coconut sugar instead of brown sugar for sweetness. Ensure that the oats and flour are vegan-friendly. This way, you can enjoy a delicious treat without using animal products! You learned how to make delicious Apple Cinnamon Crumble Bars. We covered all the key ingredients, tools, and steps to enjoy a sweet treat. Remember to consider flavor options and storage tips. You can customize these bars to fit your taste or dietary needs. Try adding nuts or substituting fruits for variety. With these tips, you can create a tasty dessert that everyone loves. Enjoy your baking journey and share these treats with friends and family!

Apple Cinnamon Crumble Bars Tasty and Simple Delight

- 1 lb ground chicken or turkey - 1/2 cup breadcrumbs - 1/4 cup fresh cilantro, chopped - 1 tablespoon fish sauce These main ingredients create the base of our meatballs. I prefer ground chicken for a lighter taste, but ground turkey works too. Breadcrumbs help bind the meatballs and keep them moist. Fresh cilantro adds a bright flavor. Fish sauce gives a savory kick that ties everything together. - 2 teaspoons grated ginger - 2 cloves garlic, minced - 1 tablespoon red curry paste Adding ginger and garlic amps up the flavor. Grated ginger gives warmth, while minced garlic brings depth. Red curry paste adds heat and spice. It’s a key ingredient in this dish. A little goes a long way in creating that authentic Thai taste. - 1 can (13.5 oz) coconut milk - 1 cup chicken broth - 1 red bell pepper, sliced - 1 cup sugar snap peas - 2 tablespoons lime juice Coconut milk forms the creamy base of the sauce. It blends well with chicken broth for a rich flavor. Red bell pepper adds sweetness and color, while sugar snap peas add crunch. A splash of lime juice brightens everything up. This mix creates a tasty sauce that pairs perfectly with the meatballs. - In a large bowl, combine: - 1 lb ground chicken or turkey - 1/2 cup breadcrumbs - 1/4 cup fresh cilantro, chopped - 1 tablespoon fish sauce - 2 teaspoons grated ginger - 2 cloves garlic, minced - Salt and pepper to taste Mix these ingredients until they blend well. This mixture will give your meatballs great flavor. - Now, form the mixture into meatballs about 1 inch in size. Place them on a baking sheet. This helps keep them from sticking together. - In a large skillet or wok, pour in: - 1 can (13.5 oz) coconut milk - 1 cup chicken broth Set the heat to medium. Stir in 1 tablespoon of red curry paste until it mixes well with the liquids. This will create a rich sauce. - Once the sauce simmers, gently add the meatballs to the skillet. Cover and cook them for about 10-12 minutes. Turn the meatballs occasionally. This helps them cook evenly and stay juicy. - After the meatballs are cooked, add: - 1 red bell pepper, sliced - 1 cup sugar snap peas Cook for an additional 3-5 minutes. This makes the vegetables tender but still crisp. - Stir in 2 tablespoons of lime juice. Taste and adjust with salt and pepper if needed. This adds a bright, fresh flavor to your dish. Now, serve the meatballs and curry sauce over cooked jasmine rice. Enjoy the delightful mix of flavors! To ensure your meatballs hold together, use the right mix of ground meat and breadcrumbs. Ground chicken or turkey works best. The breadcrumbs help bind the meat. Without them, your meatballs might fall apart. Cook the meatballs for about 10-12 minutes in the sauce. They should be firm and no longer pink inside. Turn them gently while cooking for even heat. You can check doneness with a meat thermometer. Aim for 165°F. Balancing spices is key. Start with red curry paste for heat. Add fish sauce for depth. Taste as you go. If the flavors seem off, adjust them. Add a bit more lime juice for brightness or sugar for sweetness. Want it spicier? Add more red curry paste or a pinch of chili flakes. For less heat, use less paste. You can also remove seeds from bell peppers. This helps tone down the spice. For the best pairing, serve these meatballs over jasmine rice. Its soft texture soaks up the sauce well. You can also use brown rice for a healthier option. Garnish with fresh cilantro for a pop of color. A squeeze of lime adds freshness. You can even add chopped peanuts for crunch. Enjoy your meal! {{image_2}} If you want to switch up the meat, try using ground pork or beef. These options bring their own flavors. For a lighter touch, you can choose ground turkey. It still works well and keeps the dish tasty. For those who prefer plant-based meals, you have great options too. Use lentils or chickpeas as a base for meatballs. You can also use store-bought vegan meat substitutes. These choices keep the dish hearty and satisfying. Want to change the flavor? You can add different curry pastes. Green or yellow curry paste will give a new twist. Each paste brings its own spice and depth. You can also try adding a dash of curry powder for extra warmth. Explore unique vegetables too. Try adding zucchini, carrots, or eggplant. These veggies soak up the sauce well and add color. You can even throw in some spinach for extra greens. It will make the dish even more colorful and healthy. You can embrace Thai-inspired twists by adding fresh herbs like basil or mint. These herbs boost the aroma and flavor. You might also consider adding a touch of tamarind for a bit of tang. If you want to get creative, think of fusion ideas. You could serve the meatballs with tortillas for a taco night. Another idea is to pair them with pasta, creating a Thai-Italian fusion. This makes the dish fun and unexpected! To keep your Thai Coconut Curry Meatballs fresh, store them in a sealed container. This helps keep out air and moisture. The meatballs will taste best if you eat them within three days. If you want to save them longer, freezing is a great option. In the fridge, the meatballs last about three days. After that, they may lose flavor and texture. Always check for any off smells or changes in color before eating. This ensures your dish remains safe and enjoyable. To freeze meatballs and sauce, let them cool first. Then, place them in freezer bags or containers. Make sure to remove as much air as possible. This helps prevent freezer burn. You can freeze both meatballs and sauce together or separately. When ready to enjoy frozen meatballs, thaw them overnight in the fridge. Reheat them in a skillet over medium heat. Add a splash of chicken broth or coconut milk to keep them moist. Heat until warmed through, about 10 minutes. For busy weeknights, make meatballs ahead of time. You can prepare them on the weekend and store them in the fridge. Portion them into meals for easy cooking during the week. Divide meatballs into single servings. This way, you can grab one from the fridge whenever you need a quick meal. Pair them with rice or veggies for a balanced dish. Yes, you can use other meats. Ground beef or pork works well too. For a lighter option, try ground turkey. If you prefer a meatless dish, plant-based meat substitutes are great. Just ensure they have enough flavor to match the spices in the recipe. Check the meatballs for an internal temperature of 165°F. You can also cut one open to check if it’s no longer pink inside. If the juices run clear, they are ready. Cooking time is about 10-12 minutes in the sauce. Keep an eye on them to avoid overcooking. Serve these meatballs over jasmine rice for a classic pairing. You can also try rice noodles for a fun twist. Fresh veggies like broccoli or a simple green salad brighten up the meal. A side of naan or crusty bread soaks up the tasty sauce too. You now have all the steps to make tasty Thai Coconut Curry Meatballs. We started with key ingredients, from ground chicken to fresh spices. Next, I shared instructions to create flavorful meatballs. Then, I gave tips for perfecting your dish and unique variations. Try these recipes for quick meals or special occasions. The flavors will impress everyone at your table. Enjoy the cooking process and have fun creating your own version!

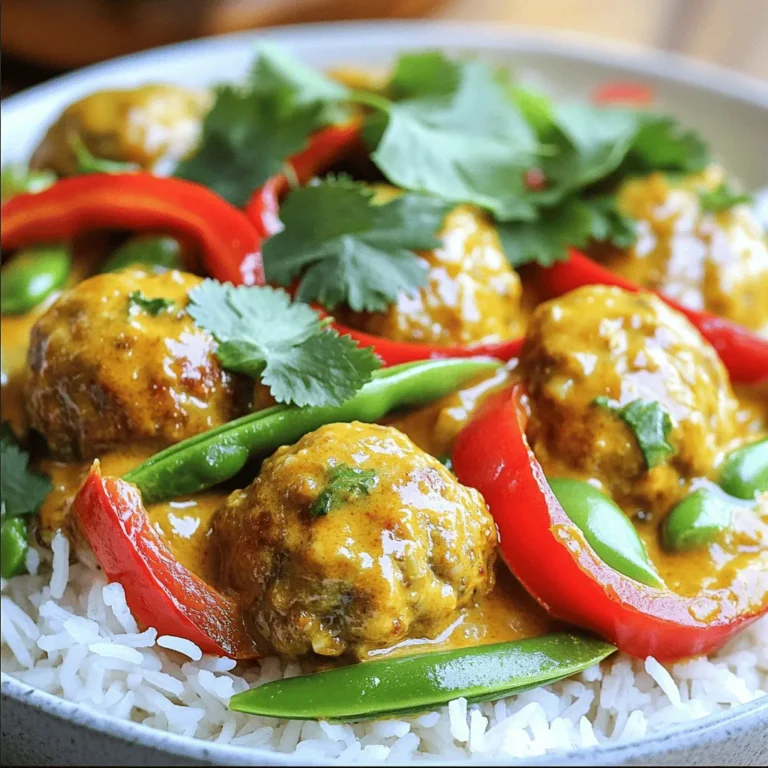
Thai Coconut Curry Meatballs Delightful and Simple Dish

- 1 cup couscous - 1 1/2 cups vegetable broth - 1 cup cherry tomatoes, halved - 1 cucumber, diced - 1/2 red onion, finely chopped - 1/2 cup Kalamata olives, sliced - 1/2 cup feta cheese, crumbled - 1/4 cup fresh parsley, chopped Couscous is the star of this salad. It is small, fluffy, and easy to cook. I use vegetable broth to give it a nice flavor. The fresh vegetables add color and crunch. Cherry tomatoes are sweet, while cucumbers are crisp. Red onions bring a bit of bite. Kalamata olives add a salty touch, and feta cheese gives a creamy finish. Fresh parsley brightens the dish with its green color. - 1/4 cup olive oil - 2 tablespoons lemon juice - 1 teaspoon dried oregano - Salt and pepper to taste The dressing is simple but full of flavor. I mix olive oil and lemon juice to create a bright taste. Dried oregano adds an earthy note. I always season it with salt and pepper to balance the flavors. - Saucepan - Mixing bowl - Whisk - Fork You will need a saucepan to cook the couscous. A mixing bowl is great for combining the salad. A whisk helps blend the dressing well. Lastly, a fork is perfect for fluffing the couscous. These tools make the process smooth and easy. - Boiling Vegetable Broth Start by pouring 1 and 1/2 cups of vegetable broth into a saucepan. Heat it on medium until it boils. Watch it closely so it doesn't boil over. - Adding Couscous Once the broth is boiling, remove the pot from the heat. Add 1 cup of couscous to the broth and stir it gently. Cover the pot with a lid and let it sit for about 5 minutes. This helps the couscous soak up all the flavor. - Cooling the Couscous After 5 minutes, use a fork to fluff the couscous. This step makes it light and airy. Set it aside to cool down while you prepare the salad. - Chopping Fresh Ingredients Take the time to chop your fresh vegetables. Dice 1 cucumber, halve 1 cup of cherry tomatoes, and finely chop 1/2 a red onion. Slice 1/2 cup of Kalamata olives. These add color and flavor. - Combining Ingredients in a Bowl In a large mixing bowl, combine the cooled couscous, chopped tomatoes, cucumber, onion, olives, and 1/2 cup of crumbled feta cheese. Add 1/4 cup of chopped fresh parsley for that fresh taste. - Preparing the Dressing In a small bowl, whisk together 1/4 cup of olive oil, 2 tablespoons of lemon juice, and 1 teaspoon of dried oregano. Season with salt and pepper to taste. This dressing pulls all the flavors together. - Mixing Salad and Dressing Pour the dressing over the couscous mixture. Gently toss everything together. Make sure each ingredient gets coated well in the dressing. - Adjusting Seasoning Taste the salad and adjust the seasoning if needed. You can add more salt, pepper, or lemon juice for extra flavor. - Chilling Time for Flavor Cover the salad and chill it in the refrigerator for at least 30 minutes. This helps the flavors blend and creates a refreshing dish perfect for any occasion. - Fluffing Techniques: After cooking, use a fork to fluff the couscous. This helps separate the grains and keeps it light. Fluffing is key for a great texture. - Letting Couscous Cool: Let your couscous cool for a bit before mixing it with other ingredients. Cooling helps it absorb flavors better. It also prevents the salad from becoming soggy. - Choosing Fresh Vegetables: Pick seasonal veggies for the best taste. Fresh cherry tomatoes and cucumbers make your salad crisp and bright. Adjust what you use based on what’s available. - Adding Seasonal Herbs: Fresh herbs like basil or mint can elevate your dish. They add color and flavor. Use what you find at the market or in your garden for the best result. - Presentation Tips: Serve the salad in a large bowl for a family-style meal. You can also plate it individually for a nice touch. A colorful bowl makes your salad pop. - Garnishing Ideas: Add whole olives and a sprig of parsley on top. This not only makes the dish look appealing but also adds a fresh flavor. Garnishes can really enhance the eating experience. {{image_2}} Gluten-Free Options If you need a gluten-free dish, try using quinoa instead of couscous. Quinoa cooks similarly and adds a nice texture. Just rinse it well before cooking. You can also use gluten-free couscous made from corn or rice. Vegan Adaptations To make this salad vegan, skip the feta cheese. You can use avocado for creaminess. Also, try adding nutritional yeast for a cheesy flavor without dairy. This keeps the dish light and flavorful. Protein Choices You can add cooked chicken for a heartier meal. If you prefer plant-based protein, chickpeas work great. They add a nice bite and are full of fiber. You can also use tuna or shrimp for a seafood twist. Different Cheeses If feta isn't your favorite, try goat cheese or even mozzarella. Each cheese gives a different taste. Goat cheese is tangy, while mozzarella is mild and creamy. Choose what you love best! Spice Suggestions To spice things up, add a pinch of red pepper flakes for heat. You could also sprinkle in some cumin for a warm flavor. Fresh herbs like mint or basil can brighten the dish, too. Alternative Dressings While olive oil and lemon juice are classic, you can experiment. Try a balsamic vinaigrette for a sweeter taste. A tahini dressing can add a nutty flavor that pairs well with the salad's ingredients. - Refrigeration Tips: Store the salad in an airtight container. Keep it in the fridge. It stays fresh for up to three days. Make sure to cool it down before placing it inside. This helps maintain texture and flavor. - Freezing Recommendations: Freezing is not ideal for this salad. The vegetables and feta may become mushy. If you must freeze, store only the couscous. Thaw it in the fridge before serving. - Timeline for Freshness: Enjoy the salad within three days for the best taste. After that, the flavors fade and ingredients lose their crunch. - Signs of Spoilage: Look for wilting vegetables or off smells. If it looks slimy or has a sour scent, it's best to discard it. - Best Practices for Serving Again: If you want to serve it cold, just take it out of the fridge. You can also gently reheat the couscous in the microwave. Add a splash of broth or water to keep it moist. - Recommended Storage Containers: Use glass or plastic containers with tight lids. These help keep the salad fresh and flavorful. Yes, you can! If you want a different texture, try larger couscous like pearl couscous. It has a chewy bite that adds fun to the salad. Quinoa is another great option. It is gluten-free and has a nutty flavor. Just remember to adjust the cooking time if you switch to quinoa. Cook it in water or broth for about 15 minutes until soft. You can store the salad for about 3 days in the fridge. Keep it in an airtight container for best results. The flavors will keep getting better as it sits. Just make sure to check for freshness before you eat it. If it smells off or looks strange, it’s best to toss it. To make your salad more filling, add protein! Here are some tasty ideas: - Grilled chicken for a hearty boost. - Canned chickpeas for a vegetarian option. - Shrimp for a seafood twist. - Hard-boiled eggs for extra richness. - Roasted nuts for crunch and healthy fats. Each option adds flavor and makes the dish more satisfying. Mediterranean Couscous Salad brings fresh flavors and healthy choices to your table. You learned how to cook couscous, mix in fresh vegetables, and create a tasty dressing. Tips for perfect texture and seasonal ingredients help you adapt this dish. Whether you choose gluten-free or vegan options, there’s a way to make it work. Store leftovers safely and enjoy later. This salad is easy to vary, making it a go-to recipe. Embrace the joy of cooking and enjoy every bite!

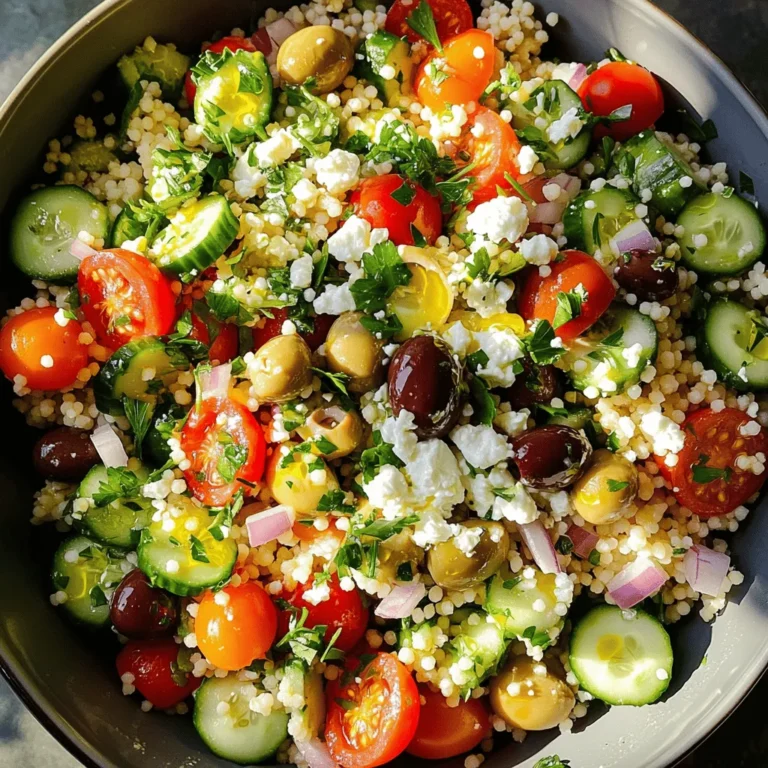
Mediterranean Couscous Salad Fresh and Tasty Recipe

PREV 1 … 32 33 34 … 56 NEXT
secrets pice kitchen

explore

DessertsDinnerAppetizersDrinks

Our Policies

  • Cookie Policy
  • Copyright Policy
  • Disclaimer
  • GDPR Policy
  • Terms Of Use
Back to Top
  • About
  • Contact Us
  • Privacy Policy
© 2025 secrets pice kitchen