FREE DINNER EBOOK! Get your copy!
  • Cookie Policy
  • GDPR Policy
  • Disclaimer
  • Terms Of Use
  • Visit my other site: Fun Cookie Recipes
secrets pice kitchen
  • Home
  • Dinner
  • Desserts
  • Drinks
  • Appetizers
  • Contact
  • About
  • Privacy Policy
  • Home
  • Dinner
  • Desserts
  • Drinks
  • Appetizers
  • Contact
  • About
  • Privacy Policy
  • Cookie Policy
  • GDPR Policy
  • Disclaimer
  • Terms Of Use
Visit my other site: Fun Cookie Recipes

HOME / CATEGORIES /

Latest

- Fresh asparagus - Baby carrots - 3 tablespoons olive oil - 1 teaspoon garlic powder - 1 teaspoon dried thyme - 1 teaspoon lemon zest - Salt and pepper to taste - ¼ cup grated Parmesan cheese (optional) - Fresh parsley for garnish - Baking sheet - Parchment paper - Mixing bowl Gather these ingredients before you start. Fresh asparagus and baby carrots add color and taste. Olive oil helps the veggies roast well. Seasonings like garlic powder and thyme give great flavor. Lemon zest adds a nice, bright touch. If you want a cheesy bite, Parmesan is a fun option. For cooking, use a baking sheet lined with parchment paper. A mixing bowl helps mix ingredients easily. With all this ready, you can make a tasty side dish that impresses! {{ingredient_image_1}} First, you need to trim the asparagus. Hold each stalk and snap off the tough ends. This way, you keep only the tender parts. Next, take your baby carrots and peel them. Peeling helps remove any dirt and gives a nice look. Once done, set both the asparagus and carrots aside. In a large mixing bowl, add the trimmed asparagus and peeled carrots. Pour in three tablespoons of olive oil. Then, sprinkle in one teaspoon of garlic powder, one teaspoon of dried thyme, and one teaspoon of lemon zest. Finally, add salt and pepper to taste. Toss everything together until the veggies are well coated. This step ensures every bite is tasty. Preheat your oven to 400°F (200°C). Spread the seasoned asparagus and carrots evenly on a baking sheet lined with parchment paper. Roast them in the oven for 25-30 minutes. You want the carrots to be tender and the asparagus slightly crispy. Halfway through roasting, use a spatula to flip the veggies. This helps them cook evenly. If you choose to add Parmesan cheese, sprinkle it over the veggies during the last 5 minutes of roasting. This will melt and give a nice golden touch. Enjoy your perfectly cooked veggies! To get the best roasted asparagus and carrots, coat them evenly. This step helps all the veggies cook the same. When you drizzle olive oil and add spices, mix well. Use your hands or a spoon to ensure every piece shines with oil and flavor. Each oven cooks a bit differently. Keep an eye on your veggies. If your oven runs hot, they may cook faster. If it's cooler, give them extra time. Stir halfway through cooking for even roasting. Want to jazz up your veggies? Try adding other spices like paprika or cumin. A pinch of chili powder can add a nice kick. You can also add fresh herbs like rosemary or basil for a fresh taste. If you love cheese, Parmesan is a great choice. Sprinkle it on during the last few minutes of roasting. This helps it melt just right and get a lovely brown color. The cheese adds a rich and creamy taste that pairs well with the sweet carrots and fresh asparagus. Pro Tips Choosing Fresh Vegetables: Always select vibrant, firm asparagus and baby carrots. Fresh produce enhances the flavor and texture of your dish. Perfect Roasting Temperature: Roasting at 400°F (200°C) ensures that the vegetables cook evenly while achieving a nice caramelization. Seasoning Tips: Feel free to experiment with different herbs and spices, such as rosemary or paprika, to add your personal touch to the dish. Serving Suggestions: Pair the roasted vegetables with grilled chicken or fish for a balanced meal, or serve them over a bed of quinoa for a vegetarian option. {{image_2}} You can mix other veggies with asparagus and carrots. Try adding bell peppers for sweetness. They roast well and add color. Zucchini is another great choice. It cooks quickly and has a mild taste. You can also use broccoli. Just chop it into small florets. This adds crunch and nutrients. Cauliflower, when roasted, gets a lovely nutty flavor. You can even throw in some red onions. They caramelize nicely and add depth. Use any combo that sounds good to you. The key is to keep the cooking time similar. Changing herbs and spices can give new life to your dish. Instead of thyme, try rosemary or oregano. They bring different flavors that can surprise your taste buds. For a spicy kick, add crushed red pepper flakes. You can also use fresh herbs. They bring brightness and zest. Just chop them finely and sprinkle them on before serving. Switching oils can change the taste, too. Instead of olive oil, try avocado oil. It has a high smoke point and a buttery flavor. Grapeseed oil is another option. It has a light taste and works well with many dishes. You can even use flavored oils, like garlic or chili oil, for added zest. Experiment with your favorites to find the mix you love! To keep your roasted asparagus and carrots fresh, follow these steps: - Cool down: Let the veggies cool to room temperature. - Use airtight containers: Glass or plastic containers work well. - Separate layers: Place parchment paper between layers if stacking. - Label and date: Write the date on each container. These steps help maintain taste and texture. Proper storage can keep your veggies fresh for up to four days in the fridge. To reheat without losing texture, follow these tips: - Use the oven: Preheat it to 350°F (175°C). Spread veggies on a baking sheet. - Cover with foil: This helps keep moisture in while reheating. - Heat for 10-15 minutes: Check to see if they are hot all the way through. For an extra flavor boost, drizzle a little olive oil or fresh lemon juice before serving. This will refresh the taste and make your veggies delicious again. Roasting asparagus and carrots takes about 25 to 30 minutes. The key is to check for tenderness. The carrots should be soft, while the asparagus should be slightly crispy. I like to stir them halfway through to ensure even cooking. Yes, you can prep this dish ahead of time. You can wash and trim the veggies and toss them with the oil and seasonings. Store them in the fridge until you are ready to roast. To reheat, warm them in the oven at 350°F (175°C) for about 10 minutes. This will help keep their taste and texture. Roasted asparagus and carrots pair well with many main dishes. Try serving them with grilled chicken or fish. They also complement pasta dishes nicely. For a vegetarian option, serve with quinoa or a hearty grain salad. You can also enjoy them with a fresh green salad for a balanced meal. Roasting asparagus and baby carrots offers a simple way to enjoy fresh veggies. Gather essential ingredients like olive oil and your favorite seasonings. You learned how to prepare, season, and roast them perfectly. Remember tips for even cooking and flavor boosts. Variations let you mix other veggies or change up tastes. Store leftovers with care and reheat for the best texture. Try this method for a delicious, healthy side dish you'll love!

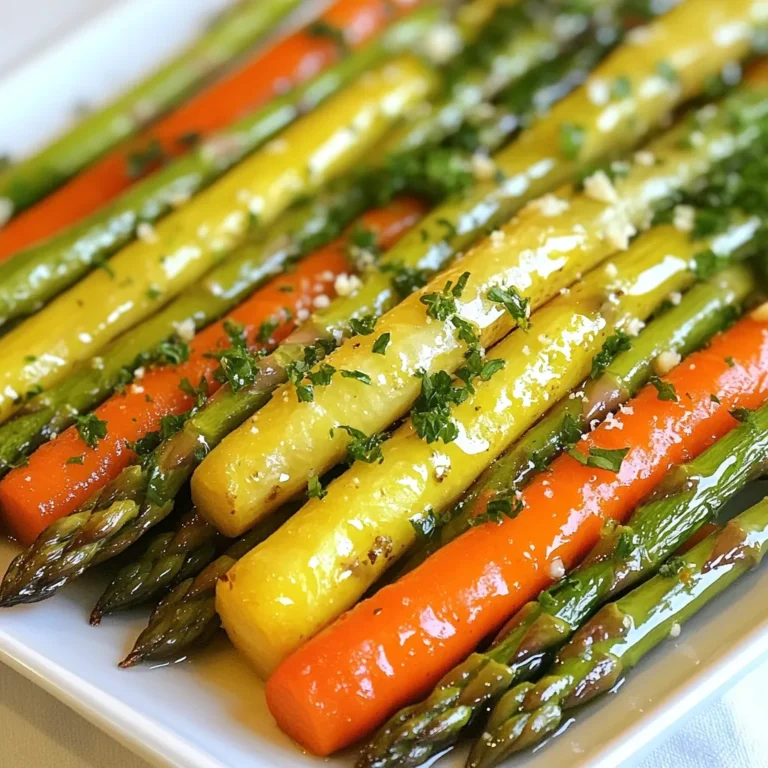
Roasted Asparagus and Carrots Perfectly Cooked Veggies

- 4 bell peppers (any color), diced - 1 lb ground turkey or beef - 1 cup quinoa or brown rice, cooked - 1 can (15 oz) black beans, rinsed and drained - 1 cup corn kernels (fresh, frozen, or canned) - 1 can (14.5 oz) diced tomatoes, with juice - 1 tablespoon olive oil - 1 teaspoon cumin - 1 teaspoon chili powder - 1 teaspoon garlic powder - Salt and pepper to taste - ½ cup shredded cheese (cheddar or Mexican blend) - Fresh cilantro or parsley for garnish (optional) Creating Unstuffed Pepper Bowls is simple with these main ingredients. You start with bell peppers. They add color and crunch. Then, you need ground turkey or beef for protein. It gives the dish a hearty flavor. Next, choose between quinoa or brown rice. Both add a nice texture and fiber. For extra flavor, include black beans, corn, and diced tomatoes. Black beans boost protein and fiber. Corn adds sweetness and color. Diced tomatoes bring moisture and tang. Together, they create a delicious mix. Don't forget the seasoning! Olive oil helps everything cook evenly. Cumin, chili powder, and garlic powder bring warmth and depth. Use salt and pepper to make the flavors pop. Lastly, sprinkle shredded cheese on top. It melts beautifully and adds creaminess. Fresh herbs like cilantro or parsley make it look pretty and fresh. These elements combine to create a dish that is not only tasty but also colorful and fun to eat! {{ingredient_image_1}} First, heat 1 tablespoon of olive oil in a large skillet over medium heat. Then, add 1 pound of ground turkey or beef. Break the meat up as it cooks. Season it with salt, pepper, cumin, chili powder, and garlic powder. Cook until the meat is browned, about 5 to 7 minutes. Next, stir in 4 diced bell peppers. Cook these for another 3 to 5 minutes. You want them to soften but still hold their shape. Now, it’s time to add more flavor. Incorporate 1 can of black beans, 1 cup of corn, and 1 can of diced tomatoes with juice. Stir everything together. Let this mixture simmer for about 5 minutes. This will help the flavors blend. After that, mix in 1 cup of cooked quinoa or brown rice. Stir until all ingredients are well combined. Taste your dish and adjust the seasoning if needed. Remove the skillet from heat. Sprinkle ½ cup of shredded cheese on top. Cover the skillet for a couple of minutes. This allows the cheese to melt nicely. Serve your unstuffed pepper bowls hot in bowls. If you want, you can garnish with fresh cilantro or parsley for an extra burst of flavor. Enjoy! To make your Unstuffed Pepper Bowls just right, adjust the spices. Start with salt and pepper. Taste as you go. If you like it spicy, add more chili powder. For a smoky flavor, try smoked paprika. If you want warmth, a pinch of cayenne can work wonders. You can cook this dish in many ways. The stovetop is quick and easy. Just sauté the meat and veggies in a skillet. If you prefer the oven, roast the peppers first, then mix in the filling. For a hands-off approach, use an Instant Pot. Cook everything in one pot and save time. A slow cooker is also great for a set-it-and-forget-it meal. Want a lighter dish? Use lean ground turkey instead of beef. You can also swap the meat for mushrooms or lentils for a vegetarian option. Instead of quinoa or rice, try riced cauliflower for fewer carbs. These swaps keep the dish tasty while making it healthier. Pro Tips Use Leftover Rice or Quinoa: This recipe is a great way to use up any leftover rice or quinoa you have in the fridge, making it even quicker to prepare. Customize Your Veggies: Feel free to add other vegetables such as zucchini, mushrooms, or spinach for extra nutrition and flavor. Make It Spicy: If you enjoy some heat, add diced jalapeños or a splash of hot sauce to the mixture for a spicy kick. Meal Prep Friendly: These unstuffed pepper bowls can be made ahead of time and stored in the fridge for easy lunches or dinners throughout the week. {{image_2}} You can change the protein in this dish easily. Try using chicken or tofu instead of ground turkey or beef. Each option brings a unique taste. For grains, consider using cauliflower rice. It adds a veggie twist and cuts down carbs. You can also use farro or barley for a nutty flavor. Adding different vegetables can boost flavor. Zucchini and mushrooms work well in this recipe. They add moisture and taste. You can also try spinach or kale for extra greens. Sauces can change the whole dish too. Salsa adds a fresh kick, while taco sauce gives it a bold flavor. Mix and match to find your favorite! For gluten-free options, make sure your grains and sauces are labeled gluten-free. Quinoa is a great choice since it’s naturally gluten-free. If you want a vegan meal, swap the meat for lentils or more beans. Use dairy-free cheese or skip the cheese altogether. You still get a hearty and tasty bowl! To keep your Unstuffed Pepper Bowls fresh, cool them down first. Store leftovers in the fridge within two hours. Use airtight containers to prevent air exposure. This helps maintain flavor and texture. - Use glass or plastic containers with tight lids. - Label containers with the date for easy tracking. When reheating, you can choose between the oven and microwave. The oven gives a nice texture, while the microwave is quick. - For the oven, preheat to 350°F (175°C). Transfer to a baking dish and cover. Heat for about 20 minutes. - For the microwave, use a microwave-safe bowl. Heat in short intervals, stirring in between, until warm. Both methods work, but the oven helps keep the cheese melty and the peppers tender. If you want easy meals, prep ahead of time. You can cook the filling in advance and store it in the fridge. This makes meals quick during busy days. - Portion into containers for grab-and-go lunches. - For longer storage, freeze the cooked filling in freezer bags. Remove as much air as possible to avoid freezer burn. This way, you always have a tasty meal ready! Yes, you can use many kinds of meat in these bowls. Ground chicken or pork works well. You can also try using shredded beef or turkey. Each choice adds a unique taste to the dish. If you want something different, consider using sausage for a spicy kick. Just make sure to cook it fully before adding other ingredients. To make Unstuffed Pepper Bowls vegetarian, swap the meat for more black beans or lentils. You can also use mushrooms for a meaty texture. For a vegan option, skip the cheese and use plant-based cheese or avocado slices. Use vegetable broth instead of water when cooking the grains for extra flavor. These changes keep the dish hearty and delicious. These bowls pair well with many sides. A fresh green salad adds crunch and color. You can also serve tortilla chips for a fun texture. For a filling meal, add a side of guacamole or salsa. If you want something warm, try serving it with cornbread. Each side complements the flavors in the bowl. Yes, you can prep Unstuffed Pepper Bowls in advance. Cook the meat and veggies a day before and store them in the fridge. Just heat everything up when you are ready to eat. You can also freeze the mixture for later use. If you freeze, let it thaw in the fridge overnight before reheating. This makes meal time easy and quick! Unstuffed pepper bowls offer a simple, tasty meal. We explored main ingredients like bell peppers, proteins, and grains. I shared tips on customizing flavors and cooking methods. You can use leftovers easily with proper storage. Remember, you can adapt this dish to fit your taste and dietary needs. Try new ingredients and enjoy experimenting! This recipe is flexible, fun, and perfect for any day. Enjoy your cooking journey!

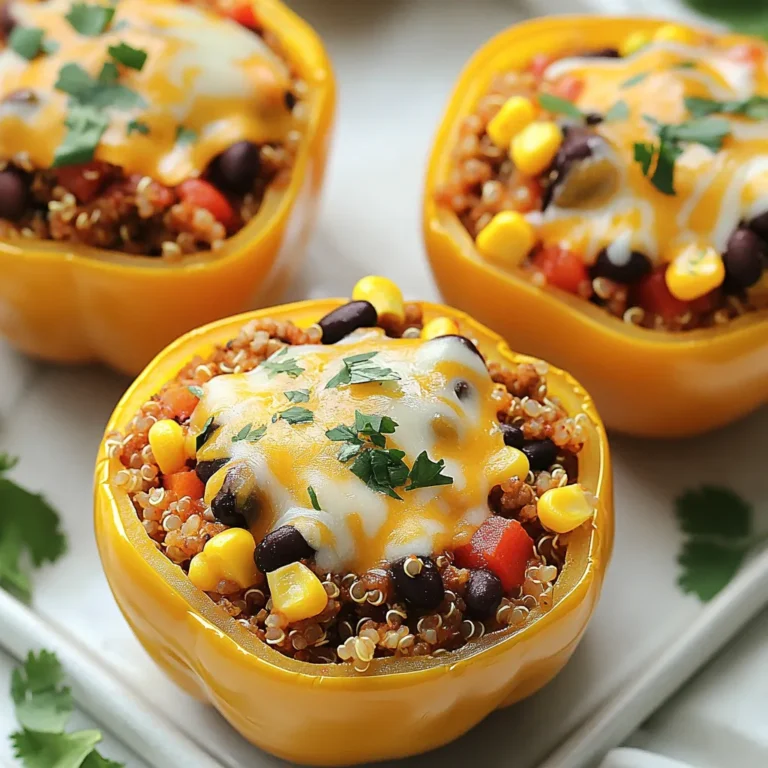
Unstuffed Pepper Bowls Flavorful and Easy Recipe

- 1 pound flank steak - 4 cups broccoli florets - 3 tablespoons coconut aminos (or soy sauce) - 2 tablespoons sesame oil - 1 tablespoon minced ginger - 3 cloves minced garlic - 1 tablespoon rice vinegar - 1 teaspoon erythritol or keto-friendly sweetener - Salt and pepper to taste - Sesame seeds and green onions for garnish Gathering the right ingredients is key to making Minute Keto Beef and Broccoli a hit. You want to use flank steak because it is tender and cooks quickly. Thinly slice the steak against the grain to keep it juicy. For the greens, fresh broccoli florets are best. They add color and crunch to the dish. The sauce is what makes this meal shine. Coconut aminos or soy sauce gives it a nice umami flavor. Sesame oil adds a rich, nutty taste. Ginger and garlic bring warmth and depth to the dish. The rice vinegar adds a hint of tang. Erythritol helps balance the flavors without adding carbs. Make sure to have salt and pepper ready. These seasonings enhance the taste. Don’t forget the garnishes! Sesame seeds and green onions not only look great but also add a fresh finish to the dish. {{ingredient_image_1}} - Blanching the broccoli Bring a pot of water to a boil. Add the broccoli florets and cook for about 2 minutes. This keeps them bright green and tender. Drain the broccoli and set it aside. - Making the marinade In a mixing bowl, combine coconut aminos, sesame oil, minced ginger, minced garlic, rice vinegar, and erythritol. Whisk these ingredients well to mix them into a smooth marinade. This blend adds great flavor to your beef. - Cooking the beef Heat a large skillet or wok over medium-high heat. Add half of the marinade to the pan. Then, add the thinly sliced flank steak. Stir the beef frequently for about 3-4 minutes. Cook until the beef is just browned. Remove the beef from the skillet and set it aside. - Stir-frying broccoli In the same skillet, add the pre-blanched broccoli. Stir-fry it for 2-3 minutes. This heats the broccoli through and gives it a nice texture. - Combining beef and broccoli Return the cooked beef to the skillet. Pour the remaining marinade over everything. Toss all the ingredients together gently for about a minute. Make sure everything is well-coated with the sauce. - Seasoning and serving Season your dish with salt and pepper to taste. Serve hot and garnish with sesame seeds and chopped green onions for extra flavor and color. Enjoy your meal! For a tasty beef dish, slice your flank steak thinly. Cutting against the grain helps keep it tender. Aim for slices about 1/4 inch thick. This makes a big difference in the final dish. Cook the beef for about 3 to 4 minutes. This quick cook time keeps it juicy. You want it just browned, not overcooked. If you cook it too long, it can get tough. To make your beef and broccoli even better, think about adding spices. Try a pinch of red pepper flakes for some heat. You could also add a little black pepper or garlic powder for extra flavor. If you want to switch from coconut aminos, soy sauce is a great option. It gives a rich, savory taste. Also, tamari sauce works well if you need a gluten-free choice. Don’t be afraid to play around with flavors to suit your taste! Pro Tips Use a Hot Pan: Ensure your skillet or wok is hot before adding the beef. This helps to sear the meat quickly and lock in the juices for a tender result. Prep Ahead: Slice your flank steak and prepare the marinade in advance. This saves time and allows the flavors to meld beautifully. Blanching Broccoli: Blanching the broccoli not only enhances its color but also ensures it retains its crunchiness when stir-fried. Garnish for Flavor: Don't skip the sesame seeds and green onions. They add a delightful crunch and fresh flavor that elevates the dish. {{image_2}} You can easily switch out broccoli in this dish. Try using snap peas, bok choy, or bell peppers. Each option gives a new twist to the meal. If you prefer a different cut of beef, use sirloin or ribeye. These cuts add unique flavors and textures. Want some heat? Add chili flakes to the marinade for a spicy kick. You can also experiment with different marinades. Try teriyaki sauce or a spicy garlic sauce for more flavor. These small changes can make the dish exciting every time you cook it. To keep your Minute Keto Beef and Broccoli fresh, follow these tips: - Refrigeration: Place leftovers in an airtight container. Store in the fridge for up to 3 days. - Freezing: You can freeze this dish. Use a freezer-safe container and store for up to 2 months. Make sure to cool it before freezing to prevent ice crystals. When reheating, you want to keep the flavors and texture intact. Here’s how: - Best Methods: Use a skillet over medium heat. Add a splash of water to help steam it. Stir frequently to warm evenly. - Avoiding Overcooking: Heat just until warmed through. This keeps the beef tender and the broccoli crisp. Don’t let it sit too long on the heat. This dish takes about 20 minutes in total. You spend 10 minutes prepping. For cooking, it takes another 10 minutes. Here’s a quick breakdown: - Prep time: 10 minutes - Cook time: 10 minutes Yes, you can make this dish ahead of time. Cook the beef and broccoli first. Store it in the fridge for up to three days. Reheat it in a pan or microwave before serving. This makes it great for busy days. This recipe is perfect for meal prep. You can easily double the ingredients. Store it in individual containers. This way, you have meals ready for the week. Just reheat and enjoy! This recipe combines flank steak and broccoli for a tasty meal. We covered how to prepare the ingredients and cook everything step by step. Remember to use fresh spices for the best flavor. Plus, feel free to change up the vegetables or sauces for variety. With proper storage, leftovers can stay fresh. Enjoy this dish on a busy weeknight or for special gatherings. Try it out and make it your own! It brings healthy eating to your table without too much fuss.

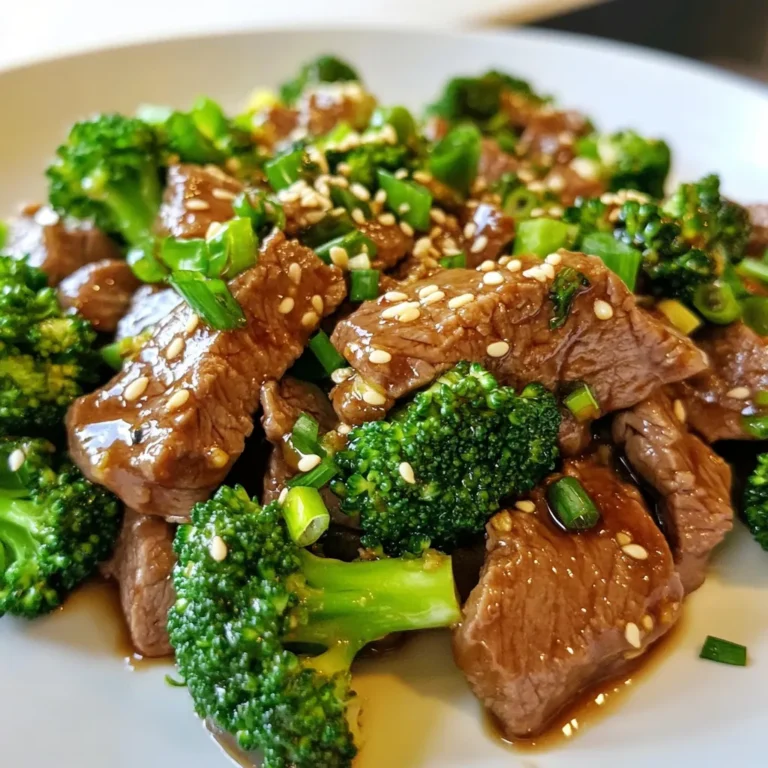
Minute Keto Beef and Broccoli Quick and Easy Recipe

- 2 cans refrigerated crescent roll dough - 1 pound Italian sausage, cooked and crumbled - 1 cup sliced pepperoni - 1 cup mozzarella cheese, shredded - 1/2 cup diced bell peppers (red and green) - 1/2 cup diced onion - 1 cup marinara sauce - 1 teaspoon Italian seasoning - 1/2 teaspoon garlic powder - Salt and pepper to taste - Fresh basil leaves for garnish (optional) To start, you need two cans of crescent roll dough. This dough gives a flaky base and top. You can swap it with puff pastry if you want a different texture. The main meat is Italian sausage. You can use turkey sausage or even plant-based sausage for a lighter dish. Next, add one cup of sliced pepperoni. If you prefer, you can replace pepperoni with salami or even prosciutto. For cheese, use one cup of shredded mozzarella. You can mix in provolone or cheddar for extra flavor. You also need a half cup of diced bell peppers. Any color works, but I love using both red and green for a pop of color and taste. Add half a cup of diced onion. Yellow or white onions work best. For the sauce, one cup of marinara sauce brings moisture and taste. You can use store-bought or homemade. Spices are crucial. Use one teaspoon of Italian seasoning and half a teaspoon of garlic powder. Adjust salt and pepper to your liking. Finally, fresh basil leaves are optional for garnish. They add a nice touch and freshness to the dish. {{ingredient_image_1}} First, cook the Italian sausage. Heat a skillet over medium heat. Add the sausage and break it apart with a spoon. Cook until it turns brown and crumbly. This takes about 5 to 7 minutes. Drain any extra grease. This keeps the dish from being too oily. Next, you need to prep the crescent roll dough. Open one can of the dough. Carefully unroll it and press it into a greased 9x13-inch baking dish. Make sure to cover the bottom and the sides slightly. This will form a nice base for your filling. Now, combine the filling ingredients in a large bowl. Add the cooked sausage, sliced pepperoni, and shredded mozzarella cheese. Then, toss in diced bell peppers and onion. Pour in the marinara sauce, and sprinkle in the Italian seasoning and garlic powder. Season with salt and pepper. Mix everything well. This will create a tasty filling that packs in all the flavors. To layer and seal the dough, spoon the meat and cheese mixture evenly over the crescent roll base. Make sure it spreads out nicely. Now, unroll the second can of crescent roll dough. Place it over the filling. Pinch the edges to seal them closed. This helps keep all the goodness inside while baking. Set your oven to 375°F (190°C). Bake the dish for about 25 to 30 minutes. Watch for the top to turn golden brown and the filling to bubble. This shows that it's ready. Once done, take it out and let it cool for a few minutes. This makes slicing easier. Enjoy your Italian Crescent Sandwich Bake! To make your Italian Crescent Sandwich Bake pop, try these spices: - 1 teaspoon Italian seasoning - 1/2 teaspoon garlic powder - Salt and pepper to taste These spices add depth and warmth. You can also add fresh herbs like basil or oregano for a fresh taste. Balancing flavors is key. Taste your filling mix before baking. If it feels too rich, add a pinch of salt. If it is too salty, add a splash of marinara sauce. Browning the sausage well is crucial. This step adds flavor. Cook it in a hot skillet until it is well-browned. Break it into small pieces as it cooks. This ensures even cooking and great texture. To prevent sogginess in the bottom layer, press the crescent dough firmly into the dish. Make sure it covers the bottom and sides evenly. Use a fork to poke small holes in the dough. This allows steam to escape while baking. You want a nice, crisp base. Pro Tips Use Fresh Ingredients: Opt for fresh bell peppers and basil to enhance the flavor of your sandwich bake. Customize Your Fillings: Feel free to add other ingredients like mushrooms or olives to suit your taste preferences. Don’t Skip the Marinara: A good quality marinara sauce will elevate the dish, adding richness and moisture to the filling. Let It Rest: Allow the baked sandwich to cool for a few minutes before slicing; this helps the filling set and makes for easier serving. {{image_2}} You can easily change some ingredients for this dish. - Vegetarian alternatives: Use mushrooms instead of Italian sausage. Add in extra veggies, like spinach, zucchini, or artichokes. You can also use plant-based sausage for a meat-like flavor. - Gluten-free options: Swap the crescent roll dough for gluten-free dough. You can find this at most grocery stores. Just check the package for the right cooking time. Experimenting with flavors makes this dish fun. - Adding different cheeses: Try using provolone or cheddar for a new taste. A mix of cheeses adds creaminess and flavor. - Experimenting with other meats: You can add ham or salami for a twist. Even cooked chicken works well. Mix and match to find your favorite combo! When your Italian Crescent Sandwich Bake is done, let it cool first. This helps keep it fresh. Place the leftovers in an airtight container. Glass or plastic containers work well. Make sure to store it in the fridge. It will last for about three to four days. If you want to keep it longer, consider freezing it. Just use freezer-safe containers. To reheat your leftovers, you have a few options. The best way is to use the oven. Preheat it to 350°F (175°C). Place the sandwich bake in an oven-safe dish. Cover it with foil to keep it moist. Heat for about 15 to 20 minutes. You can also use a microwave. Place a slice on a microwave-safe plate. Heat it for 30 to 60 seconds, depending on your microwave. However, the oven keeps the texture better. Reheating this way prevents it from getting soggy. Enjoy your tasty leftovers! Can I prepare this dish ahead of time? Yes, you can prepare this dish ahead of time. Make the filling and assemble it in the baking dish. Cover it and store it in the fridge for up to a day. When you're ready to bake, pop it in the oven. This saves time and is great for meal prep. How do I know when the sandwich bake is done? The sandwich bake is done when the top is golden brown. You can also check if the filling bubbles. If both these signs are there, your dish is ready. Let it cool slightly before slicing to ensure easier servings. Can I freeze the Italian Crescent Sandwich Bake? Yes, you can freeze it. After baking, let it cool completely. Then, wrap it tightly in plastic wrap or foil. Store it in a freezer-safe container. It will stay good for up to three months. When ready to eat, thaw and bake until heated through. What can I serve with this dish? You can serve this dish with a simple salad. A side of garlic bread pairs well too. For a light option, try some fresh veggies with dip. These sides add freshness and balance the rich flavors of the sandwich bake. You now have a complete guide to creating a delicious Italian Crescent Sandwich Bake. We covered every step, from gathering ingredients to serving options. Ingredient swaps and cooking tips ensure your dish suits any taste. Proper storage and reheating will keep leftovers tasty. Remember, cooking is fun—experiment and make it your own. Enjoy each bite, and don't be afraid to share your results! Happy cooking!

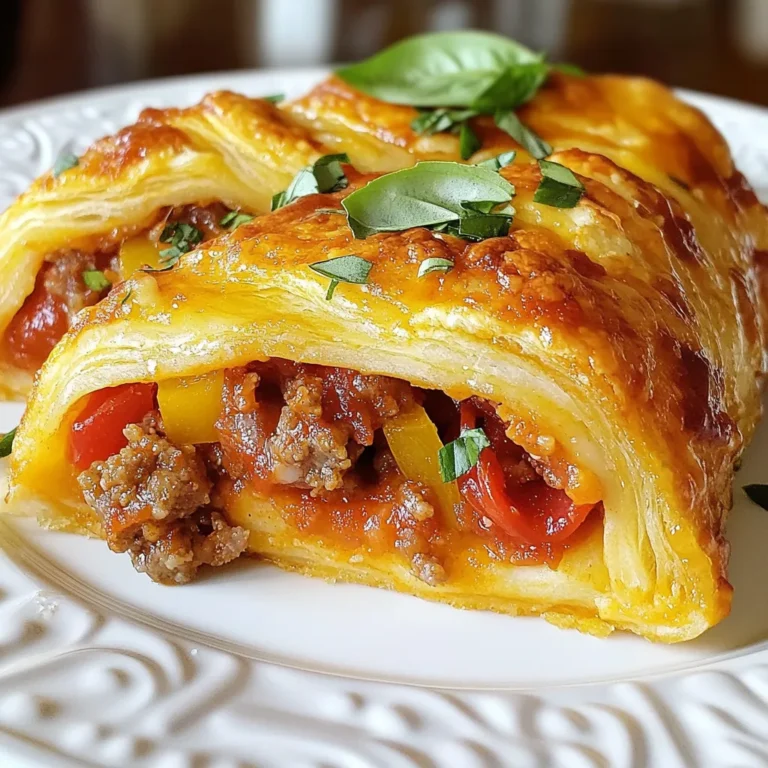
Italian Crescent Sandwich Bake Tasty and Simple Recipe

- 2 cups cooked shredded chicken - 1 package (8 oz) cream cheese, softened - 1 cup Frank's RedHot sauce or favorite hot sauce - 1 cup ranch dressing - 1 cup shredded cheddar cheese - 1/2 cup crumbled blue cheese (optional) - 1 tablespoon garlic powder - 1 tablespoon onion powder - 1/4 cup green onions, chopped (for garnish) For Frank’s Buffalo Chicken Dip, you need simple and tasty ingredients. The first star is the cooked shredded chicken. It gives the dip its hearty flavor. Next is cream cheese. It makes the dip creamy and smooth. Frank's RedHot sauce is the key to that spicy kick. You can use any hot sauce you like, but Frank's is a classic. Ranch dressing adds a nice, tangy taste that balances the heat. Shredded cheddar cheese melts beautifully and adds richness. If you like blue cheese, you can sprinkle some on top for a strong flavor. Garlic powder and onion powder boost the taste further. Finally, don’t forget the green onions. They add a fresh crunch on top. This mix of ingredients creates a dip that is perfect for parties and gatherings. Every bite is packed with flavor! {{ingredient_image_1}} Start by preheating your oven to 350°F (175°C). This step is key for getting that perfect melt. In a large mixing bowl, combine the softened cream cheese, Frank's RedHot sauce, and ranch dressing. Mix these ingredients until they blend smoothly. You want a creamy base that is well incorporated. Next, stir in 2 cups of cooked shredded chicken. This is where the dip gets its heartiness. Add in the garlic powder, onion powder, and half of the shredded cheddar cheese. Mix everything well. The spices add flavor, making each bite exciting. Now it’s time to transfer the mixture to a baking dish. Spread it evenly for even cooking. Sprinkle the remaining cheddar cheese and crumbled blue cheese on top if you like. Bake your dip in the preheated oven for 20-25 minutes. Look for bubbly edges and slightly golden cheese. This is when the magic happens! Once done, let it cool a bit before serving. Enjoy it warm with your favorite dippers. To get the best cheese consistency, use brick cream cheese. It mixes better than whipped cream cheese. Make sure the cream cheese is at room temperature. This helps it blend smoothly with the other ingredients. For a creamier texture, add more ranch dressing. You can also mix in Greek yogurt for a tangy twist. If you want it extra creamy, try mixing in more cheese. For dipping, tortilla chips are my favorite. They add a nice crunch. You can also use celery sticks for a fresh, crisp taste. Crackers work well too, especially buttery ones. Serve the dip warm for the best flavor. It stays good for a while in the oven. Just keep an eye on it to make sure it doesn’t get too hot. Pro Tips Use Fresh Ingredients: Freshly cooked chicken and high-quality cheeses will elevate the flavor of your dip. Adjust Spice Level: Feel free to mix in additional hot sauce or use a milder sauce to customize the heat to your preference. Make It Ahead: Prepare the dip a day in advance and keep it in the fridge. Bake it just before serving for a fresh taste. Experiment with Dippers: Try using different dippers like pita chips, carrot sticks, or even bread for a unique twist. {{image_2}} You can make Frank’s Buffalo Chicken Dip even better by mixing in different cheeses. Adding mozzarella gives it a melty texture. Pepper jack can add a fun kick. You can also play with the spice level. If you want it hotter, add more Frank's RedHot sauce. If you prefer it milder, use less. This makes the dip just right for your taste. You can swap ranch dressing for blue cheese dressing to change the flavor. This adds a tangy twist. If you want a lighter dip, try using Greek yogurt instead of cream cheese. Greek yogurt gives a nice creamy texture while cutting down on fat. These swaps let you create a dip that fits your needs. After your gathering, store any leftover Frank’s Buffalo Chicken Dip in an airtight container. Let the dip cool to room temperature first. Once cooled, seal it tightly and place it in the fridge. It will stay fresh for about three to four days. When you want to enjoy it again, just reheat it in the oven or microwave until warm. If you want to keep it longer, freezing is a great option. To freeze, first let the dip cool completely. Then, place the dip in a freezer-safe container. Make sure to leave some room at the top, as the dip will expand when frozen. You can freeze it for up to three months. To reheat, thaw it overnight in the fridge. Then, warm it in the oven at 350°F (175°C) until it's hot and bubbly. Enjoy your dip even after the party! Can I make this dip ahead of time? Yes, you can make this dip ahead of time. Prepare the dip and place it in a baking dish. Cover it and store it in the fridge for up to 24 hours. When ready to serve, just bake it until hot and bubbly. How spicy is Frank's RedHot sauce compared to other hot sauces? Frank's RedHot sauce has a medium heat level. It is milder than many other hot sauces. If you want more heat, try adding more sauce or use a spicier brand. What can I serve with Frank’s Buffalo Chicken Dip? This dip pairs well with many snacks. You can serve it with tortilla chips, celery sticks, or crackers. Veggie sticks work great, too! Make sure to have plenty for dipping. This blog post highlights the tasty Frank’s Buffalo Chicken Dip recipe. You learned about the key ingredients, step-by-step instructions, and handy tips to make it perfect. I shared variations to fit your taste and ways to store leftovers. Now, you can enjoy a flavorful dip for parties or game days. Keep experimenting with different ingredients to find your favorite combo. With this guide, impress friends and family with your easy and delicious dip. Enjoy making and sharing it!

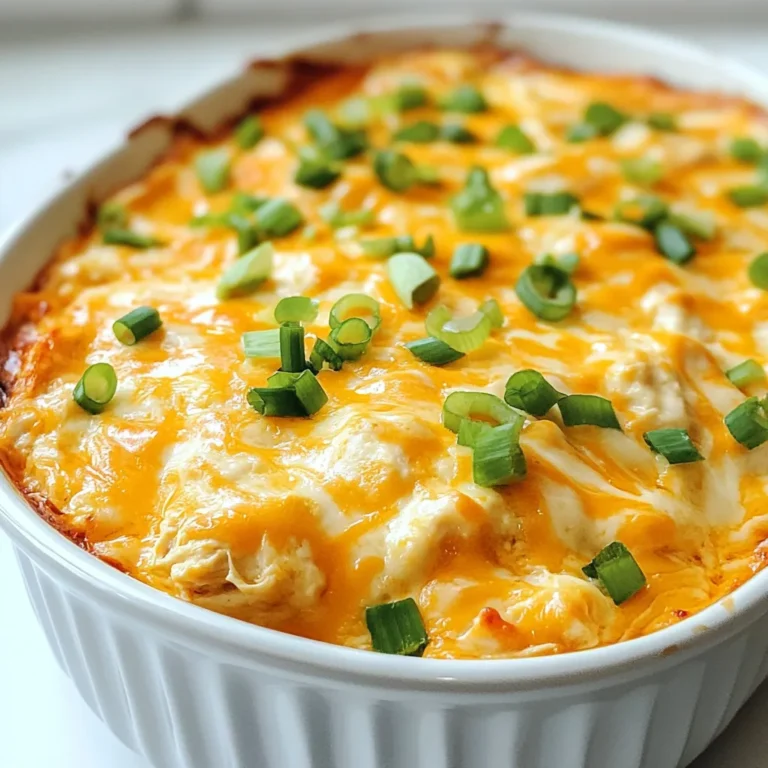
Frank’s Buffalo Chicken Dip Perfect for Any Gathering

To make Creamy Cajun Chicken Pasta, gather these simple ingredients: - 8 oz (225g) fettuccine pasta - 1 lb (450g) chicken breast, cut into bite-sized pieces - 1 tablespoon Cajun seasoning - 2 tablespoons olive oil - 1 bell pepper (red or yellow), sliced - 1 small onion, finely chopped - 3 cloves garlic, minced - 1 cup heavy cream - 1 cup chicken broth - 1 cup cherry tomatoes, halved - ½ cup grated Parmesan cheese - Salt and pepper to taste - Fresh parsley, chopped (for garnish) You can swap some ingredients if needed. Here are a few options: - Use penne or spaghetti instead of fettuccine. - Swap chicken for shrimp or tofu for a different protein. - Use coconut cream instead of heavy cream for a dairy-free option. - If you don't have Cajun seasoning, mix paprika, garlic powder, and cayenne pepper. - Any sweet bell pepper works, so try green or orange if you prefer. Choosing fresh ingredients makes a big difference. Follow these tips: - Pick firm, brightly colored bell peppers. They should feel heavy for their size. - Choose chicken that is pink and moist, not gray or dry. - Look for fragrant garlic that is firm and not sprouting. - For cherry tomatoes, select ones that are shiny and without blemishes. - When buying herbs like parsley, look for vibrant green leaves and no wilting. These small steps ensure your Creamy Cajun Chicken Pasta is full of flavor and freshness! {{ingredient_image_1}} First, fill a large pot with water and add a good amount of salt. Bring the water to a boil. Once boiling, add the fettuccine pasta. Cook it according to the package instructions until it's al dente. This usually takes about 8-10 minutes. When it's done, drain the pasta and set it aside. Now your fettuccine is ready to join the party! In a bowl, grab your chicken breast pieces and sprinkle on the Cajun seasoning. Toss them well so every piece gets coated. Next, heat 2 tablespoons of olive oil in a large skillet over medium-high heat. Once hot, add your seasoned chicken pieces. Cook them for about 5-7 minutes until they turn golden brown and are cooked through. When done, take the chicken out of the pan and set it aside. In the same skillet, toss in the chopped onion and sliced bell pepper. Sauté these for 3-4 minutes until they soften and become fragrant. Then, add the minced garlic and cook for one more minute. Now, it’s time to make the sauce! Pour in the chicken broth and bring it to a gentle simmer for 2-3 minutes. Next, add the heavy cream, stirring well to mix. Once combined, return the cooked chicken to the skillet along with the halved cherry tomatoes. Let everything simmer together for an additional 3-4 minutes. Finally, add the cooked fettuccine to the skillet and toss everything together. Your creamy Cajun chicken pasta is coming together beautifully! If you want to save time, use pre-cooked chicken. This can cut your cooking time down by about 10 minutes. You can also use smaller pasta shapes, like penne, since they cook faster. Always check the pasta package for cooking times. Ensure your pasta is al dente to keep it firm and tasty. To boost flavor, try adding smoked paprika or cayenne pepper. This adds a nice kick to your dish. Fresh herbs, like thyme, can elevate the taste. You can also add a splash of lemon juice for brightness. If you love cheese, add extra Parmesan on top before serving. This creamy Cajun chicken pasta pairs well with garlic bread or a crisp salad. You can add a sprinkle of red pepper flakes for an extra kick. Serve it family-style in a large bowl. Don't forget to garnish with fresh parsley for color and flavor. Enjoy your meal with a glass of white wine for a perfect match. Pro Tips Season Your Pasta Water: Always add a generous amount of salt to your boiling water before adding the pasta. This enhances the flavor of the fettuccine from the inside out. Let the Chicken Rest: After cooking the chicken, allow it to rest for a few minutes before slicing. This helps retain its juices and keeps it moist. Customize the Heat: If you prefer a spicier dish, feel free to add a pinch of cayenne pepper or increase the amount of Cajun seasoning to suit your taste. Garnish for Freshness: Adding fresh parsley not only enhances the presentation but also adds a burst of freshness that complements the creamy sauce. {{image_2}} You can easily turn this dish into a tasty vegetarian meal. Just swap the chicken for hearty veggies. Good choices are mushrooms, zucchini, or eggplant. Sauté them in olive oil until tender. Toss in the Cajun seasoning for that bold flavor. You can follow the same steps as the original recipe. Add more cherry tomatoes for extra sweetness. This variation keeps the creamy texture and the flavor punch. If you love heat, try adding more spice to the chicken. A pinch of cayenne pepper or red pepper flakes can kick up the heat. You can also use spicy sausage instead of chicken for a different taste. Cook the sausage first, then add the veggies and follow the rest of the steps. This adds a new layer of flavor and makes the dish even more exciting. You don't have to stick with fettuccine. You can use any pasta you like. Penne, rotini, or even whole wheat pasta works great. Just keep an eye on the cooking time as it may vary. Gluten-free pasta is another option if you need it. No matter what pasta you choose, the creamy sauce pairs well with all types. It will still be creamy and delicious! To keep your Creamy Cajun Chicken Pasta fresh, let it cool first. After cooling, place it in an airtight container. Store it in the fridge for up to three days. Make sure to label the container with the date. This way, you know when to eat it! If you want to save it for later, freezing is a great option. After cooling, portion the pasta into freezer-safe bags. Try to remove as much air as possible. Seal the bags tightly and label them with the date. You can freeze it for up to three months. When ready to eat, just thaw it overnight in the fridge. Reheating your pasta is easy! You can use a microwave or stovetop. For the microwave, place the pasta in a bowl and cover it with a damp paper towel. Heat in short bursts, stirring in between. For stovetop, add a splash of chicken broth in a pan. Heat on low and stir until warm. Enjoy your pasta just like it was fresh! Yes, you can make this dish ahead of time. Cook the pasta and chicken as directed. Then, store them in an airtight container in the fridge. When ready to eat, reheat them in a pan. Add a splash of chicken broth to keep it creamy. You can use half-and-half or milk mixed with cornstarch. This will keep the creaminess. Coconut milk is another option for a dairy-free choice. Just remember, it may change the flavor slightly. To make it less spicy, use less Cajun seasoning. You can also skip the seasoning altogether. Adding more heavy cream or cheese will help balance the heat. Serve with a side of bread to cool it down, too. This blog post covered everything you need for a tasty Cajun pasta dish. You learned about ingredient choices, cooking steps, and helpful tips. We explored variations to fit any taste, from vegetarian to spicy options. Lastly, I shared storage tips to keep leftovers fresh. In making your own Cajun pasta, trust your taste buds. Try new ingredients and methods. Enjoy the cooking process and make this dish your own!

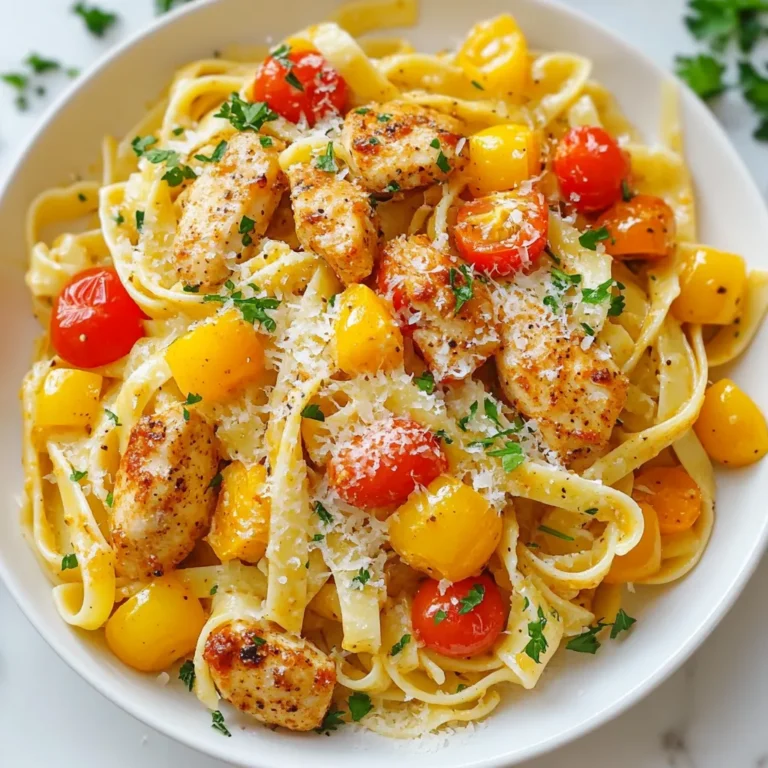
Creamy Cajun Chicken Pasta Delight in Minutes

- 12 oz pasta (spaghetti or fettuccine) - 1 cup crumbled feta cheese - 2 large lemons (zest and juice) - 3 cloves garlic, minced - 1/4 cup olive oil - 1/2 tsp red pepper flakes - 1 cup cherry tomatoes, halved - 1/4 cup fresh basil, chopped - Salt and pepper to taste - Optional: Grated Parmesan for serving - Additional herbs (oregano, thyme) - Capers for a briny taste To make my Lemon Feta Pasta, I gather a few simple ingredients. The star is the pasta, which can be spaghetti or fettuccine. For creaminess and flavor, I use crumbled feta cheese. Two large lemons give a bright taste through both their zest and juice. Next, I add garlic, which adds warmth and depth. Olive oil helps bind everything together. Red pepper flakes add a bit of heat, but you can adjust this to your liking. Cherry tomatoes add a fresh, sweet note, while basil brings in herbal freshness. I also recommend using salt and pepper to taste. If you want an extra flavor boost, try adding some grated Parmesan on top. For more depth, you might include herbs like oregano or thyme. You can also add capers for a briny touch. These ingredients work together to create a tangy and flavorful dish you’ll love. {{ingredient_image_1}} To cook the pasta, start with a large pot of salted water. Bring it to a rolling boil. Add your pasta, either spaghetti or fettuccine. Cook according to the package instructions until it is al dente. This means it should be firm but not hard. Once done, save one cup of pasta water. Drain the pasta and set it aside. In the same pot, add the olive oil and heat it over medium heat. Next, add minced garlic and red pepper flakes. Sauté these for about one to two minutes. You want the garlic to be fragrant but not browned. This step adds a nice kick to your dish. Now, reduce the heat to low. Add the cooked pasta back into the pot. Next, mix in crumbled feta, lemon zest, and lemon juice. Toss everything well to combine. If the pasta seems too dry, gradually add the reserved pasta water. Do this until the pasta reaches your desired creaminess. Fold in the halved cherry tomatoes and chopped basil. Mix until everything is evenly combined. Lastly, taste your dish and season with salt and pepper. Remember, feta is salty, so adjust as needed. When serving, you can plate the pasta in a large bowl or on individual plates. For a beautiful touch, garnish with extra basil leaves and a lemon wedge. You can also drizzle a bit of olive oil on top. Enjoy your Lemon Feta Pasta Delight! To balance flavors with lemon and feta, use fresh ingredients. The zest adds brightness. It gives a punch of flavor without being too sour. Feta brings saltiness; this helps create a nice contrast. Start with less lemon juice, then add more as needed. This way, you can adjust the tang to your taste. Use red pepper flakes to customize spice levels. If you like heat, add more flakes. If you prefer mild, use just a pinch. Remember, you can always add more, but you can't take it out! Reserving pasta water is key. It helps to adjust the sauce’s creaminess. When you add it back to the pasta, it creates a silky texture. Start with a little and mix until you get the right feel. To cook pasta efficiently, use a large pot. Fill it with plenty of salted water. This keeps the pasta from sticking. Stir the pasta often while it cooks. This will ensure even cooking and prevent clumping. For serving, a large bowl works best. It shows off the pasta beautifully. You can also use individual plates for a fancier touch. Garnish with fresh basil and a lemon wedge. This adds color and a nice aroma. A drizzle of olive oil before serving gives it a rich look. Enjoy your vibrant Lemon Feta Pasta! Pro Tips Fresh Herbs Make a Difference: Always use fresh basil for this dish; it adds a vibrant flavor that dried herbs simply can't match. Perfect Pasta Cooking: Make sure to cook the pasta al dente. It will continue to cook slightly after draining, ensuring it maintains a perfect texture. Balance the Flavors: Keep in mind that feta cheese is salty, so taste your dish before adding extra salt. You may not need it! Customize Your Veggies: Feel free to add other vegetables like spinach or zucchini for added nutrition and flavor. Just sauté them briefly before adding to the pasta. {{image_2}} You can easily boost the protein in your Lemon Feta Pasta. Adding grilled chicken or shrimp gives it a nice touch. Simply grill your protein of choice, chop it up, and mix it in. This adds flavor and makes the dish heartier. If you want a vegetarian option, chickpeas work great too. They have a mild taste and a nice texture. Just drain and rinse a can of chickpeas, then toss them in with the pasta. For those looking for vegan options, you can swap feta cheese with vegan cheese. There are many brands available that melt well and mimic the taste of feta. This keeps the dish creamy and tangy without dairy. You can also switch pasta types. Zucchini noodles make a fresh and low-carb alternative. Use a spiralizer to create noodles and then mix them with the other ingredients. Using seasonal vegetables can enhance your dish. In spring, try adding fresh spinach or asparagus. They bring color and nutrients. Just sauté them briefly before mixing with the pasta. In summer, consider adding fresh tomatoes or bell peppers. Their sweetness pairs nicely with lemon and feta. For winter, roasted vegetables like squash or Brussels sprouts add warmth. Adapt your dish to suit the season for the best flavors. To keep your Lemon Feta Pasta fresh, store it in an airtight container. This helps lock in flavors and moisture. Place it in the fridge within two hours of cooking. The pasta will stay good for up to three days. When you reheat, use a skillet or microwave. If reheating in a skillet, add a splash of water or olive oil. This keeps the pasta from drying out. Stir gently to warm it through without losing texture. You can freeze Lemon Feta Pasta for later enjoyment. First, let it cool completely. Then, pack it into a freezer-safe container. Make sure to leave some space for expansion. The pasta can last up to three months in the freezer. When you're ready to eat, thaw it in the fridge overnight. For reheating, use a skillet over low heat. Add a little water or olive oil to help it heat evenly. This way, you’ll enjoy a tasty meal even after freezing! What can I use instead of feta cheese? You can use goat cheese or ricotta for a different taste. They offer creaminess and flavor without feta's saltiness. Can I make this recipe gluten-free? Yes, just swap regular pasta for gluten-free pasta. It tastes just as good and keeps the dish light. How long will the pasta keep in the fridge? Lemon feta pasta will last for about three to four days in the fridge. Store it in an airtight container to keep it fresh. Can I use a different type of pasta? Absolutely! You can use penne, rigatoni, or any pasta you like. Just cook it according to package instructions. What is the best way to zest a lemon? Use a microplane or a fine grater. This method gives you tiny zest pieces that add great lemon flavor to your pasta. How can I make the dish lower in calories? You can cut down on olive oil and feta. Use half the amount of cheese or add more veggies for bulk. What alternatives can I use for cherry tomatoes? Try using sun-dried tomatoes or diced bell peppers. Both add nice flavor and color to your dish. This blog gave you a clear recipe for making lemon feta pasta. From gathering ingredients to serving, every step is simple. You learned tips to enhance flavor and customize your dish. Remember, you can adapt it with proteins or seasonal veggies. Storing leftovers is easy, too. Enjoy creating your unique version of this dish! Your cooking can bring smiles and deliciousness to every meal.

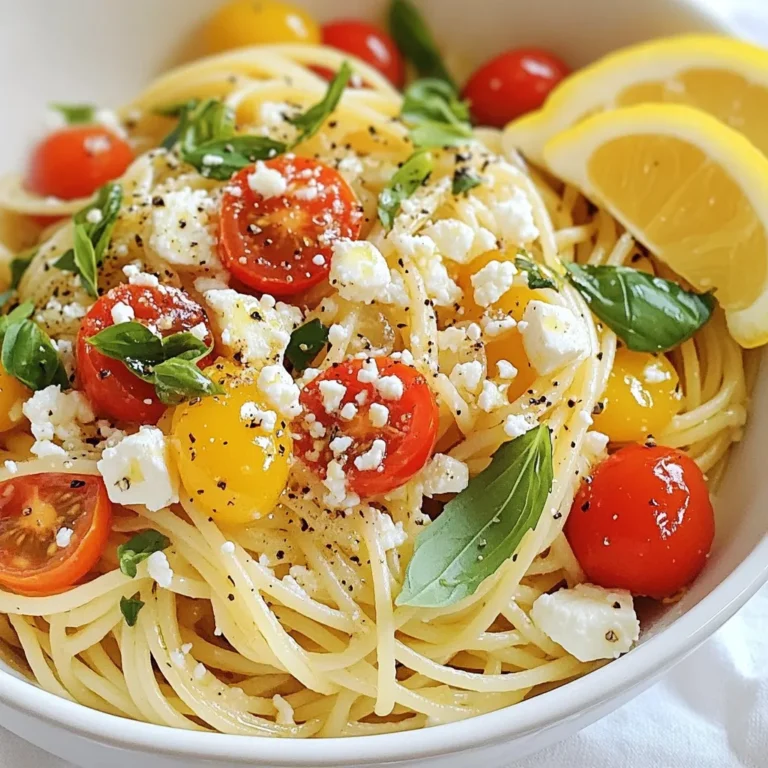
Lemon Feta Pasta Tangy and Flavorful Delight

- 1 lb ground beef - 2 cups broccoli florets - 1 medium onion, finely chopped - 3 cloves garlic, minced - 1 tablespoon ginger, grated - 3 tablespoons soy sauce - 2 tablespoons oyster sauce - 1 tablespoon hoisin sauce - 1 teaspoon sesame oil - 1 tablespoon olive oil - Salt and pepper to taste - Cooked jasmine rice - Toasted sesame seeds - Chopped green onions This savory dish starts with ground beef and bright, fresh broccoli. The onion, garlic, and ginger add a depth of flavor. Ground beef is rich in protein, making it a great choice for a filling meal. Broccoli brings vitamins and a nice crunch. The sauces give the dish a savory kick. Soy sauce adds umami, while oyster sauce provides sweetness. Hoisin sauce adds a hint of spice and depth. Sesame oil gives a nutty flavor that ties everything together. Serve this dish over warm jasmine rice. The rice soaks up the tasty sauce. Top it off with toasted sesame seeds and chopped green onions for a beautiful finish. These garnishes add an extra layer of flavor and texture. {{ingredient_image_1}} Start by heating olive oil in a large skillet over medium-high heat. Add the finely chopped onion. Sauté it for about 3 to 4 minutes until it turns translucent. This step builds a strong base for your dish. Next, add the minced garlic and grated ginger. Cook for one more minute until it smells amazing. This mix of onion, garlic, and ginger creates a fragrant foundation that enhances the flavors of the beef and broccoli. Now, increase the heat to high and add the ground beef to the skillet. Cook the beef for about 4 to 5 minutes. Break it apart with a spatula as it cooks. You want it to brown evenly. If there’s extra fat, drain it off. Once the beef is browned, add the broccoli florets to the skillet. Stir everything together and cook for about 3 to 4 minutes. The broccoli should be bright green and tender-crisp. This texture is key; it adds both flavor and crunch. In a separate bowl, mix the soy sauce, oyster sauce, hoisin sauce, and sesame oil. Pour this mixture over the beef and broccoli in the skillet. Add salt and pepper to taste, then stir everything well. This sauce ties the dish together with savory goodness. To thicken the sauce, drizzle the cornstarch mixture over the stir-fry and mix thoroughly. Cook for an additional 2 minutes. This will give your dish a nice, glossy finish. Now, serve your savory beef and broccoli over cooked jasmine rice. Finish with toasted sesame seeds and chopped green onions for a pop of flavor and color. To make this dish truly shine, adjust the seasoning to your taste. Start with the sauces. I recommend using: - 3 tablespoons soy sauce - 2 tablespoons oyster sauce - 1 tablespoon hoisin sauce These ratios give a great balance of sweet and salty. You can add more or less based on your preference. Taste as you go. Cooking ground beef evenly is key. Use a large skillet and break the beef into small pieces as it cooks. This way, it browns nicely without clumping. For the broccoli, aim for tender-crisp. Cook it for about 3-4 minutes until it is bright green. It should still have a slight crunch. This keeps the flavor fresh and vibrant. Prep is crucial for a quicker meal. Chop your onion, garlic, and ginger ahead of time. You can store them in the fridge for easy access. Using pre-cooked rice can save you time. Just heat it while you cook the beef and broccoli. This way, your meal is ready in no time. Enjoy your cooking! Pro Tips Fresh Ingredients: Always use fresh broccoli and high-quality ground beef for the best flavor and texture in your dish. Cooking Time: Keep an eye on the broccoli while cooking; overcooking can lead to a mushy texture. Aim for bright green and tender-crisp. Custom Sauces: Feel free to adjust the sauce based on your taste preferences. Add more soy sauce for saltiness or hoisin for sweetness. Presentation: For a beautiful presentation, garnish your dish with toasted sesame seeds and chopped green onions just before serving. {{image_2}} You can switch out ground beef for other proteins. Ground turkey is a great choice. It has a light flavor that takes on any sauce well. Ground chicken works too. It’s lean and cooks quickly. For a plant-based option, try using tofu. Just press it to remove water, then crumble it before cooking. Each option brings its own flair. Want to boost the nutrition? Add more veggies to your dish! Carrots add a nice crunch. Bell peppers give sweetness and color. Snap peas offer a fresh taste. You can even throw in mushrooms for earthiness. The more, the merrier! Mix and match based on what you like. You can spice things up! To make your dish spicy, add red pepper flakes or sriracha. If you like sweet flavors, try adding a dash of honey or brown sugar. You can also mix in curry powder for an Indian twist. Experiment with flavors to find your favorite! Store any leftovers in an airtight container. This keeps the dish fresh. It is best to refrigerate within two hours. The dish will stay good for about three days. Make sure to let it cool before sealing. This helps avoid condensation inside the container. To freeze the dish, let it cool completely. Use a freezer-safe container or a heavy-duty freezer bag. This helps prevent freezer burn. Label with the date, so you know when to use it. Ground beef and broccoli can be frozen for up to three months. For best results, thaw it in the fridge overnight before reheating. Reheat the dish on the stove for even heating. Use a non-stick skillet on medium heat. Add a splash of water or broth to keep it moist. Stir often to avoid sticking. You can also microwave it, but stir halfway through. This keeps the texture nice and helps heat evenly. Enjoy your savory dinner delight! If you want to avoid soy sauce, try coconut aminos. It has a sweet flavor and works well. Another option is tamari, which is gluten-free. For a quick fix, mix beef broth with a bit of vinegar. This will give you a salty taste without soy. If you need a low-sodium choice, look for low-sodium soy sauce. Each option will change the flavor slightly, so try them to see what you like best. Yes, you can use fresh broccoli! Fresh broccoli has a brighter taste and a nice crunch. Just be sure to cut it into small florets for even cooking. You will need to adjust your cooking time. Fresh broccoli takes about 3-4 minutes to cook until bright green and tender-crisp. Keep an eye on it, so it doesn’t get too soft. This way, you’ll keep that great texture. To make this dish gluten-free, switch the soy sauce for gluten-free options like tamari or coconut aminos. Check the oyster sauce, as some brands add gluten. Choose a gluten-free oyster sauce or skip it altogether. You can also use a mix of beef broth and cornstarch to thicken the sauce. These swaps keep the flavors while making the dish safe for those who avoid gluten. This blog post covered a tasty dish made with ground beef and broccoli. You learned about the main ingredients, sauces, and how to add flavor. We discussed step-by-step cooking instructions and shared tips to save time. You can also explore variations with different proteins and vegetables. In the end, this dish is easy to make and full of flavor. Feel free to adapt it to your taste. Enjoy cooking and experimenting with this recipe!

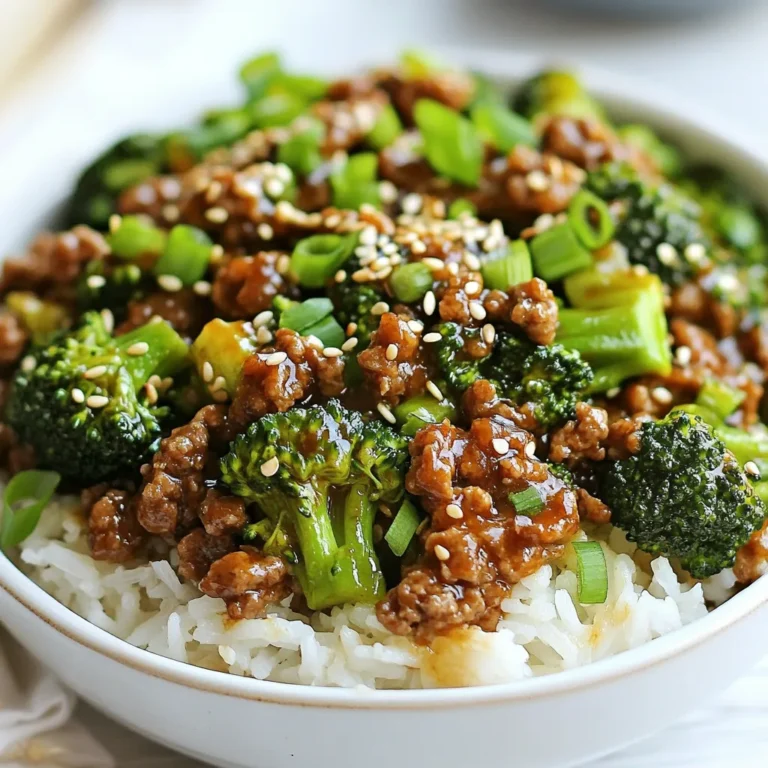
Ground Beef and Broccoli Savory Dinner Delight

- 4 everything bagels, sliced thinly - 2 tablespoons olive oil - 1 teaspoon garlic powder - 1 teaspoon onion powder - 1 teaspoon sesame seeds - 1 teaspoon poppy seeds - 1 teaspoon flaky sea salt - 1 teaspoon dried dill (optional) - You can add dried herbs like oregano or thyme. - A pinch of paprika gives a nice smoky taste. - Try adding some crushed red pepper for a spicy kick. - Swap olive oil for avocado oil or melted butter. - Use bagels with different flavors, like onion or poppy seed. - If you don’t have garlic powder, use fresh garlic. These ingredients will help you make the most tasty bagel chips. Feel free to mix and match to fit your taste! {{ingredient_image_1}} To start, grab four everything bagels. Slice them thinly, about 1/8 inch thick. Thin slices help the chips get nice and crunchy. Next, take a large mixing bowl. Add 2 tablespoons of olive oil, 1 teaspoon of garlic powder, and 1 teaspoon of onion powder. Also, include 1 teaspoon of sesame seeds and 1 teaspoon of poppy seeds. Then, toss in 1 teaspoon of flaky sea salt and 1 teaspoon of dried dill if you want extra flavor. Mix everything well to create a tasty oil blend. Add the bagel slices to the bowl. Gently toss them until every slice gets a good coat of the oil mix. This step is key for flavor and crispiness. Now, preheat your air fryer. Set it to 350°F (180°C) and let it warm up for 3-5 minutes. Once it's hot, arrange the bagel slices in a single layer in the air fryer basket. Depending on your air fryer size, you might need to do this in batches. Air fry the bagel slices for 5-7 minutes. Flip them halfway through for even cooking. Keep an eye on them, as they can burn fast. You want them golden brown and crispy. To check if the chips are done, look for a golden color. They should feel hard and crisp when you touch them. If they seem soft, air fry them a bit longer. Once cooked, take them out and let them cool on a wire rack. This helps keep them crunchy. Repeat this process with any leftover bagel slices. Enjoy your homemade everything bagel chips! To make your bagel chips super crispy, slice them very thin. Aim for about 1/8 inch thickness. This helps them fry evenly. If you slice them too thick, they may end up chewy instead of crunchy. Preheat your air fryer to 350°F (180°C) for a few minutes before cooking. This step gives your chips a nice, even cook. Use a mixing bowl to combine the olive oil and spices. This allows you to coat the bagel slices evenly. Toss the slices gently in the oil blend. Make sure every piece gets some oil, garlic powder, and onion powder. You want full flavor in every bite. If you skip this step, your chips may taste bland. If your bagel chips burn quickly, check the air fryer temperature. It may be too hot. Keep an eye on them while they cook. Flipping the chips halfway through helps them cook evenly. If they come out soggy, they might need a bit more time in the air fryer. Always let them cool on a wire rack to keep that crunch. Pro Tips Slice Evenly: Make sure to slice the bagels evenly at about 1/8 inch thickness. This ensures they cook uniformly and achieve the perfect crispiness. Keep an Eye on Them: Bagel chips can burn quickly in the air fryer. Always check them around the halfway point and adjust cooking time as needed for your specific air fryer model. Experiment with Flavors: Feel free to customize the seasoning mix! Add your favorite spices or herbs to create different flavor profiles according to your taste preferences. Store Properly: Once cooled, store any leftover bagel chips in an airtight container to maintain their crispiness. They can last for several days if stored correctly. {{image_2}} You can change the bagel flavor to suit your taste. Try using onion bagels or sesame bagels. These options will add a unique twist to your chips. You can even experiment with cheese bagels for a rich taste. Just make sure to slice them thinly, and follow the same steps. This way, you’ll still get that perfect crunch. The seasoning blends can make your bagel chips special. You can use ranch seasoning for a zesty kick. Cajun seasoning adds a bit of spice, while a blend of Italian herbs gives a fresh flavor. Just mix your chosen spices into the olive oil before coating the bagels. This small change can lead to big taste differences. Bagel chips pair well with many dips and spreads. Cream cheese is a classic choice. You can also try hummus or guacamole for a fun twist. A spinach dip will make for a tasty party snack. Just remember to serve your chips in a nice bowl to impress your guests. You can even create a dip bar with a few options for everyone to enjoy. To store leftover bagel chips, let them cool completely first. Place them in an airtight container. This keeps them crispy. You can also use a resealable plastic bag. Make sure to squeeze out any air before sealing. When you want to enjoy your leftover bagel chips, heat your air fryer to 350°F (180°C). Place the chips in a single layer in the basket. Heat for about 2-3 minutes. This will restore their crunch. Keep an eye on them to avoid burning. To maintain freshness, store your bagel chips in a cool, dry place. Avoid humidity, as it can make them soggy. If you can, eat them within a week for the best taste. For longer storage, you can freeze them. Just remember to let them thaw before reheating. Yes, you can make bagel chips in a conventional oven. Preheat your oven to 350°F (180°C). Arrange the thin bagel slices on a baking sheet in a single layer. Brush them with the oil and spice mix. Bake for about 10-15 minutes. Flip them halfway through to ensure they crisp evenly. Keep an eye on them to avoid burning. Bagel chips can last for about a week if stored correctly. Place them in an airtight container at room temperature. If you want them to last longer, you can freeze them. Just make sure they are fully cooled before freezing. To enjoy, simply thaw and re-crisp them in the air fryer. Absolutely! Stale bagels work great for making chips. In fact, they can turn out even crispier than fresh ones. Just slice them thin and follow the same steps. The oil and spices will add flavor and help them become crunchy. It's a perfect way to reduce food waste too! In this post, we explored how to make delicious bagel chips. We covered essential ingredients, step-by-step instructions, and tips for perfect crispiness. I shared ways to add flavors and serve them with dips. Remember, using fresh bagels or even stale ones can enhance your snacks. Enjoy creating your own bagel chips at home and experiment with different flavors. Happy cooking!

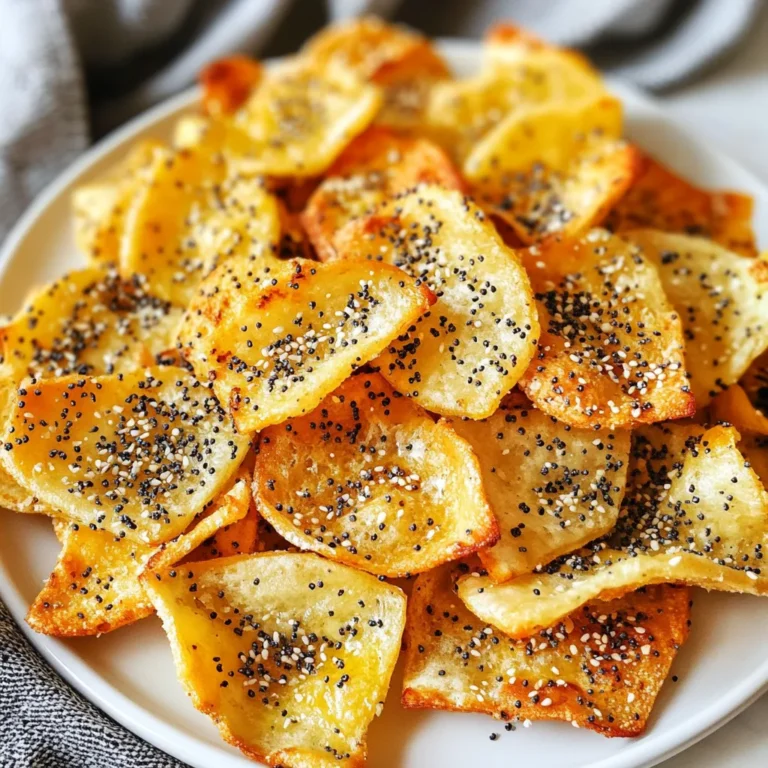
Air Fryer Everything Bagel Chips Crunchy Snack Treat

To make the perfect Cranberry Brie Thyme Phyllo Cups, gather these key ingredients: - 12 sheets of phyllo dough - 1 cup brie cheese, cut into small cubes - 1 cup cranberry sauce (homemade or store-bought) - 1 tablespoon fresh thyme leaves - 4 tablespoons unsalted butter, melted - 1 tablespoon honey - Salt and pepper to taste - Optional: crushed walnuts for garnish These ingredients come together to create a blend of sweet and savory flavors. The phyllo dough gives each cup a light, crispy texture. The brie cheese melts beautifully, adding richness to the dish. Cranberry sauce brings a burst of tartness, while thyme adds a fresh herbal note. Using unsalted butter helps control the salt level in the recipe, letting the other flavors shine. Honey adds a touch of sweetness, enhancing the overall taste. Finally, a sprinkle of salt and pepper finishes each cup perfectly. Feel free to explore optional toppings like crushed walnuts for an extra crunch. This combination makes these phyllo cups a delightful appetizer for any gathering. {{ingredient_image_1}} 1. Preheating the oven: Start by preheating your oven to 375°F (190°C). This step helps the phyllo cups get nice and crispy. 2. Preparing the muffin tin: Grab your muffin tin and brush the cups with melted butter. This will keep the phyllo from sticking. 3. Layering the phyllo dough: Take two sheets of phyllo dough and lay them flat. Brush melted butter on each sheet. Then, cut the stacked dough into four squares. 4. Forming the cups: Press each square into the muffin tin, letting the edges fold over. You should repeat this until you use all the dough. 1. Adding brie cheese: Place a small cube of brie cheese at the bottom of each phyllo cup. The brie will melt and add creaminess. 2. Topping with cranberry sauce: On top of the brie, spoon a bit of cranberry sauce. This adds sweetness and a pop of color. 3. Adding thyme and honey: Sprinkle fresh thyme leaves on top. Drizzle a little honey to enhance the flavor. 1. Oven baking time: Bake the cups in your preheated oven for about 15-20 minutes. This allows the phyllo to become golden brown and crispy. 2. Checking for doneness: Keep an eye on the cups. They should be golden and smell amazing when done. Remove them from the oven and let them cool slightly. If you wish, add some crushed walnuts on top for crunch. Enjoy your tasty treat! - How to handle phyllo dough Phyllo dough is thin and delicate. Work quickly to avoid tearing it. Always keep the unused sheets covered with a damp cloth. This helps keep them moist. Use a sharp knife or pizza cutter to cut the dough. Layer two sheets at a time for strength. Brush each layer with melted butter to get a nice golden color. - Keeping phyllo from drying out To prevent drying, cover the phyllo with a damp cloth. If it starts to dry, you might find it hard to work with. You can also use plastic wrap to keep it moist. When you layer the dough, always brush with butter. This not only adds flavor but helps seal the layers together. - Suggestions for additional spices You can add a pinch of nutmeg or cinnamon for warmth. A sprinkle of cayenne pepper gives it a nice kick. Fresh herbs like rosemary or parsley can really boost the taste. Experiment with your favorite spices to make each bite special. - Pairing with other toppings Try adding sliced apples or pears for a sweet crunch. A dollop of fig jam can add a rich layer of flavor. You can also use different nuts, like pecans or almonds, for added texture. These toppings can transform your phyllo cups into something truly unique. Pro Tips Use Thawed Phyllo Dough: Make sure your phyllo dough is completely thawed before use to avoid tearing and ensure crispiness. Experiment with Cheese: While brie is delicious, feel free to try other soft cheeses like camembert or goat cheese for different flavor profiles. Homemade Cranberry Sauce: For a fresher taste, consider making your own cranberry sauce with fresh cranberries, sugar, and a splash of orange juice. Serve Warm: These cups are best enjoyed warm right out of the oven, so serve them immediately for maximum flavor and texture. {{image_2}} You can swap brie for other cheeses. Creamy cheeses work well in this dish. For a sharper taste, try goat cheese or aged cheddar. If you prefer something milder, use mozzarella or ricotta. Each cheese brings a unique flavor, making it fun to experiment. You can mix up the flavors too. Instead of cranberry sauce, consider using raspberry or fig jam. These options add sweetness and a bit of tang. Fresh herbs also change the taste. Try basil or rosemary for a different twist. Mixing fruit and herbs allows you to create your signature phyllo cup. You can make this dish gluten-free by using gluten-free phyllo dough. Many brands offer great alternatives that taste just as good. For vegan options, swap brie with a plant-based cheese. Use agave syrup or maple syrup instead of honey. These choices keep the recipe tasty while meeting dietary needs. To keep your Cranberry Brie Thyme Phyllo Cups fresh, store them properly. If you have leftovers, place them in an airtight container. Refrigerate them for up to three days. This helps maintain their taste and texture. If you want to store them longer, freezing is an option. Wrap each cup in plastic wrap. Then, place them in a freezer bag. You can freeze them for up to three months. Just remember to label the bag with the date. To enjoy your phyllo cups again, reheating is key. The best method is to use an oven. Preheat it to 350°F (175°C). Place the cups on a baking sheet. Heat them for about 10 minutes or until warm. This keeps the phyllo crispy. If you’re in a hurry, a microwave works too. But be careful, as it may make the phyllo soft. For the best taste, stick with the oven. Enjoy your tasty appetizer again! Your phyllo cups are done when they turn a golden brown color. This usually takes about 15 to 20 minutes in the oven. Keep an eye on them to prevent burning. The edges should be crispy, and the cheese should be slightly melted. Yes, you can prepare the phyllo cups ahead of time. Assemble them but do not bake them yet. Cover them tightly with plastic wrap and store them in the fridge for up to 24 hours. When you're ready, bake them as directed. To make these cups gluten-free, use gluten-free phyllo dough. For a vegan option, swap brie with a vegan cheese alternative. You can also replace honey with maple syrup for a plant-based sweetener. Always check labels for other ingredients to ensure they meet your dietary needs. Yes, store-bought cranberry sauce works perfectly in this recipe. It saves time and still tastes great. Just choose a sauce that you enjoy, as it will add flavor to your phyllo cups. If you want, you can also make your own for a fresher taste. Making Cranberry Brie Thyme Phyllo Cups is simple and fun. We covered all the steps: from gathering ingredients like phyllo dough and brie to baking them to perfection. You learned tips to handle phyllo, flavor ideas, and even how to store and reheat your cups. Embrace your creativity with this dish. Whether you try different cheeses or tweaks for diets, these cups are sure to impress. Enjoy making these delicious treats!

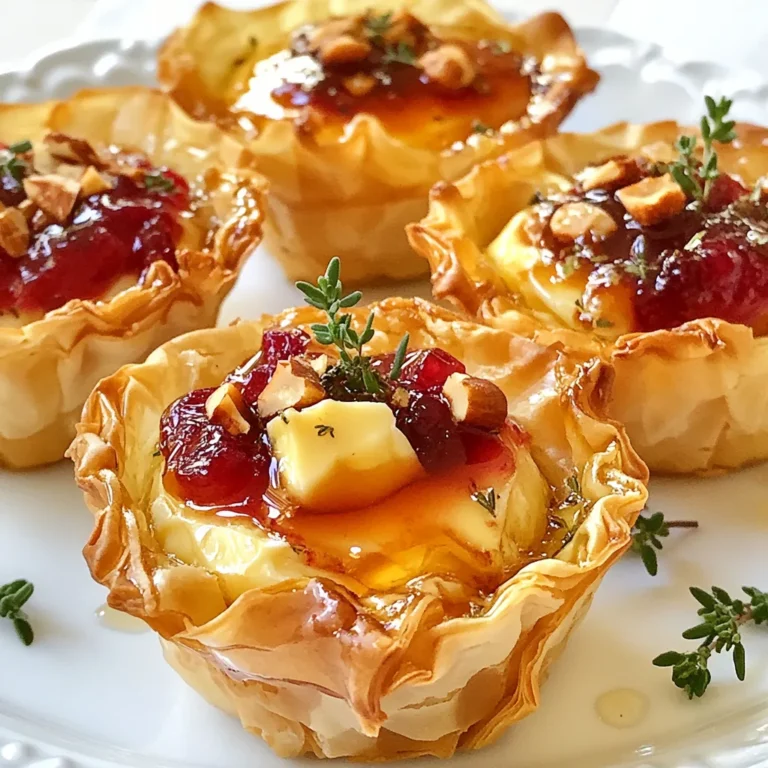
Cranberry Brie Thyme Phyllo Cups Tasty Appetizer

PREV 1 … 41 42 43 … 56 NEXT
secrets pice kitchen

explore

DessertsDinnerAppetizersDrinks

Our Policies

  • Cookie Policy
  • Copyright Policy
  • Disclaimer
  • GDPR Policy
  • Terms Of Use
Back to Top
  • About
  • Contact Us
  • Privacy Policy
© 2025 secrets pice kitchen