FREE DINNER EBOOK! Get your copy!
  • Cookie Policy
  • GDPR Policy
  • Disclaimer
  • Terms Of Use
  • Visit my other site: Fun Cookie Recipes
secrets pice kitchen
  • Home
  • Dinner
  • Desserts
  • Drinks
  • Appetizers
  • Contact
  • About
  • Privacy Policy
  • Home
  • Dinner
  • Desserts
  • Drinks
  • Appetizers
  • Contact
  • About
  • Privacy Policy
  • Cookie Policy
  • GDPR Policy
  • Disclaimer
  • Terms Of Use
Visit my other site: Fun Cookie Recipes

HOME / CATEGORIES /

Latest

- 1 pound ground beef - 1 medium onion, chopped - 2 cloves garlic, minced - 1 cup cauliflower rice (fresh or frozen) - 1 cup cream cheese, softened - 1 cup shredded cheddar cheese - 1 cup bell peppers, diced (any color) - 1 cup spinach, chopped - 1 teaspoon Italian seasoning - Salt and pepper to taste - 2 tablespoons olive oil - Fresh parsley, for garnish (optional) This casserole has a mix of tasty and healthy ingredients. The ground beef gives it a hearty base. I like to use onion and garlic for a strong flavor. Cauliflower rice adds texture while keeping it low in carbs. Cream cheese makes it creamy and rich. Shredded cheddar gives it a nice cheesy top. Bell peppers and spinach add color and nutrients. Italian seasoning brings all the flavors together. Salt and pepper enhance the taste. Olive oil helps cook the veggies and beef. Lastly, fresh parsley adds a pop of color when serving. Gather these ingredients for a delicious dish that is both savory and satisfying. {{ingredient_image_1}} 1. Start by preheating your oven to 350°F (175°C). This step is key to cooking your casserole evenly. 2. In a large skillet, heat 2 tablespoons of olive oil over medium heat. Add 1 chopped onion and 2 minced garlic cloves. Sauté them until fragrant and the onion turns translucent, which takes about 3 to 5 minutes. 3. Next, add 1 pound of ground beef to the skillet. Break it apart with a wooden spoon and cook until it is browned and fully cooked, around 5 to 7 minutes. If there's excess fat, drain it. 1. Now, add 1 cup of diced bell peppers and 1 cup of chopped spinach to the skillet. Mix in 1 cup of cauliflower rice as well. Cook this mixture for an additional 3 to 4 minutes until the veggies become tender. 1. Reduce the heat to low. Then, mix in 1 cup of softened cream cheese until everything is creamy and well combined. Add 1 teaspoon of Italian seasoning, salt, and pepper to taste. Stir until evenly coated. 2. Transfer this beef and veggie mixture into a greased 9x13 inch casserole dish. Spread it out evenly. 3. Finally, sprinkle 1 cup of shredded cheddar cheese over the top. Bake in your preheated oven for 25 to 30 minutes, until the cheese is melted and bubbly. This step-by-step guide makes the process easy and fun. Enjoy creating your Keto Ground Beef Casserole! - To ensure even cooking of the beef, break it apart well with a wooden spoon. This helps it brown nicely. Stir it often as it cooks to prevent sticking. - Perfectly sautéing vegetables starts with a hot pan. Add olive oil and let it heat before adding chopped onion and minced garlic. Sauté until fragrant and the onion turns translucent, about 3-5 minutes. Once done, add the bell peppers and spinach. Cook until they soften. - If you want to switch up the flavor, try substituting fresh herbs for Italian seasoning. Basil or oregano can add a fresh taste. - Adding spices like paprika or cayenne can give your casserole extra zing. Start with a small amount and adjust to your taste. - Garnishing with parsley adds a nice pop of color. Just sprinkle some on top before serving. - For serving, dish it up with a side salad or some low-carb bread. This balances the meal and adds freshness. Pro Tips Use High-Quality Ground Beef: Opt for grass-fed or organic ground beef for a richer flavor and better nutritional profile. Customize Your Veggies: Feel free to swap in your favorite low-carb vegetables like zucchini or broccoli for added variety and nutrition. Make It Ahead: Prepare the casserole in advance and store it in the fridge for up to 2 days. Just bake it when you're ready to serve. Cheese Variations: Experiment with different cheeses like mozzarella or pepper jack for a unique twist on the dish. {{image_2}} You can easily switch the ground beef for turkey or chicken. Both options are lean and still fit the keto plan. If you want to add more veggies, try zucchini or broccoli instead of cauliflower rice. These low-carb choices keep the dish fresh and flavorful. While cheddar cheese is a favorite, you can mix in mozzarella or pepper jack for a different taste. If you want a dairy-free option, use vegan cheese made from nuts. It melts well and adds a nice creaminess. For a quick meal, turn this casserole into a skillet dish. Just cook everything in a large skillet instead of baking. You can also layer your ingredients in the casserole. Start with meat, then add veggies, and finish with cheese. It creates a lovely look and texture! After you enjoy this tasty casserole, store any leftovers in the fridge. Place it in an airtight container. Make sure the casserole cools down first. This keeps flavors fresh and safe. It can stay in the fridge for about three to four days. If you want to keep it longer, consider freezing it. To freeze, wrap the casserole tightly in plastic wrap and then foil. This prevents freezer burn and keeps it tasty. When you're ready to eat leftovers, reheating is easy. The best way is to use the oven. Preheat it to 350°F (175°C). Place the casserole in a baking dish, cover it with foil, and heat for about 20 minutes. This method keeps the texture nice. If you’re short on time, you can use a microwave. Heat in short intervals, stirring in between. This helps it warm evenly without drying out. In the fridge, the casserole lasts about three to four days. If you freeze it, it can last up to three months. Always check for signs of spoilage. If you see any mold or it smells off, it’s best to throw it away. A fresh, tasty dish is always better than a questionable one. Enjoy your meal prep and make the most of your Keto Ground Beef Casserole! Is this Keto Ground Beef Casserole suitable for meal prep? Yes, this casserole is great for meal prep. You can make it ahead and store it in the fridge. Just reheat portions as needed. Can I use frozen cauliflower rice? Absolutely! Frozen cauliflower rice works well. Just add it directly to the skillet without thawing. It saves time and adds convenience. How do I know when the casserole is done? The casserole is done when the cheese is melted and bubbly. You can also check if the meat is hot and cooked through. Carbohydrate count per serving Each serving has about 5 grams of net carbs. This keeps it low-carb and keto-friendly. Macronutrient breakdown - Protein: 25 grams - Fat: 32 grams - Carbohydrates: 5 grams This balance supports keto diets well. Adjusting the recipe for larger servings To serve more people, just double the ingredients. Use a bigger casserole dish as needed to hold everything. Can I make this casserole in advance? Yes, you can prepare it a day ahead. Just bake it when you are ready to serve. This makes dinner easy on busy nights. This article detailed a delicious Keto Ground Beef Casserole recipe. You learned about key ingredients and why they matter. We outlined easy steps to prepare the dish, plus helpful tips for cooking and presentation. You also saw variations for personal tastes and storage advice for leftovers. The possibilities are endless with this casserole. Enjoy experimenting with flavors and ingredients. Make it your own, and share it with family and friends. Happy cooking!

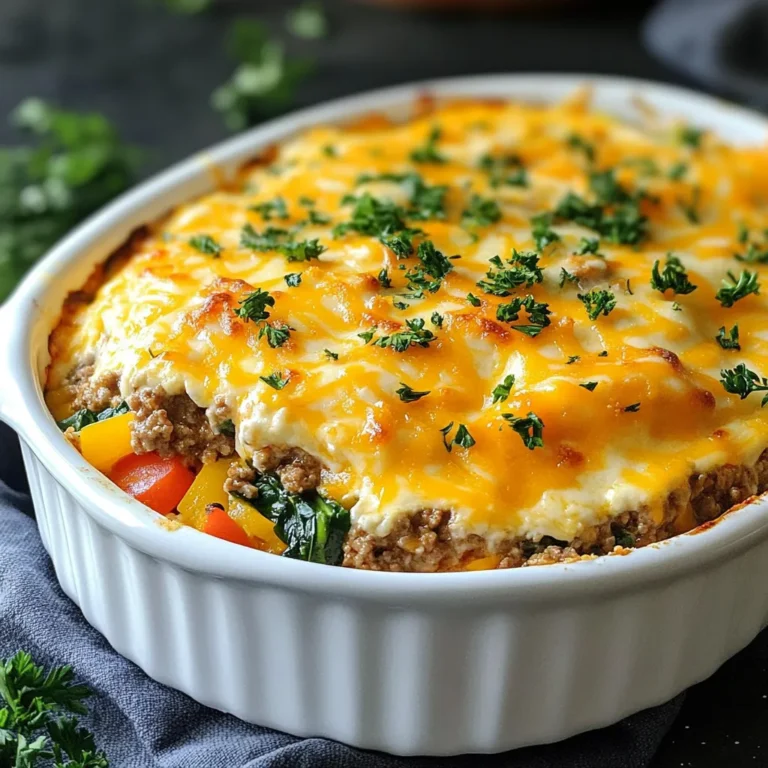
Keto Ground Beef Casserole Savory and Satisfying Dish

- 2 cups cooked chicken, shredded - 1 cup bell peppers (mix of red and green), sliced - 1 cup corn (fresh or frozen) - 1 cup black beans, rinsed and drained - 1 ½ cups shredded cheddar cheese - 1 teaspoon chili powder - 1 teaspoon cumin - ½ teaspoon garlic powder - ½ teaspoon onion powder - 4 large flour tortillas - 2 tablespoons olive oil - Sour cream and salsa for serving In this recipe, I use simple yet tasty ingredients. Shredded chicken brings protein. Bell peppers add color and crunch. Corn and black beans provide sweetness and texture. The cheddar cheese melts perfectly and ties it all together. The spices do more than add flavor. They excite the taste buds! Chili powder and cumin give warmth. Garlic and onion powder bring depth. This blend of spices makes the quesadilla pop! I choose large flour tortillas for their softness and flexibility. They hold the filling well and crisp up nicely. Olive oil helps achieve that golden brown crust. Finally, sour cream and salsa are perfect for dipping. They add creaminess and tang to every bite. {{ingredient_image_1}} To start, we need to combine the main ingredients. In a large bowl, add: - 2 cups cooked chicken, shredded - 1 cup bell peppers, sliced (mix of red and green) - 1 cup corn (fresh or frozen) - 1 cup black beans, rinsed and drained Next, we mix in the spices. For flavor, add: - 1 teaspoon chili powder - 1 teaspoon cumin - ½ teaspoon garlic powder - ½ teaspoon onion powder Stir everything well. You want the chicken and veggies coated in the spices. This will give your quesadillas a great taste. Now, it’s time to heat the skillet. Pour 1 tablespoon of olive oil into a large skillet over medium heat. Place one tortilla in the skillet. On half of the tortilla, layer: - ½ cup shredded cheddar cheese Then, spoon a generous amount of the chicken mixture over the cheese. Finally, sprinkle another ½ cup of cheese on top. Fold the tortilla in half. Cook for about 3-4 minutes. You want the bottom to turn golden brown and the cheese to start melting. Carefully flip the quesadilla using a spatula. Add the remaining tablespoon of olive oil around the edges of the skillet. Cook for another 3-4 minutes until the other side is golden brown and crispy. Once cooked, remove the quesadilla from the skillet. Slice it into wedges and keep warm. Repeat this process with the remaining tortillas and filling. Serve the quesadillas warm. I like to add sour cream and salsa on the side for dipping. This adds a nice touch to your meal. Enjoy! To make the best quesadilla, focus on even cooking. Start with a medium heat to avoid burning. Using a cast-iron skillet works well, as it holds heat evenly. Check the color of the tortilla; it should be golden brown. This means it is cooked just right. For cheese melting tips, use freshly shredded cheese. Pre-shredded cheese often contains anti-caking agents. These can affect how well the cheese melts. Add cheese to both sides of the filling. This makes the quesadilla extra gooey and delicious. If you want to switch proteins, try using cooked turkey or pork. For a vegetarian option, consider black beans or chickpeas. Both add protein and flavor. Seasonal veggies can elevate your quesadilla. In spring, use fresh asparagus or zucchini. In summer, add ripe tomatoes or corn. Autumn is great for sweet potatoes, while winter calls for hearty greens. For serving styles, consider cutting your quesadilla into wedges. This makes it easier to share. You can stack the wedges on a plate for a colorful look. Garnishing adds visual appeal. Try adding fresh cilantro or a sprinkle of lime juice. A dollop of sour cream and a side of salsa make it fun to dip. These small touches make your meal look gourmet. Pro Tips Use Fresh Ingredients: For the best flavor, use fresh bell peppers and corn when available. Fresh ingredients enhance the overall taste of your quesadillas. Don’t Overfill: Be careful not to overfill your quesadilla. A little filling goes a long way, and it helps to avoid messy spills when cooking and flipping. Customize Your Cheese: While cheddar is great, feel free to mix different cheeses like Monterey Jack or pepper jack for added flavor and creaminess. Keep Them Warm: After cooking each quesadilla, place them on a plate covered with a kitchen towel or in a warm oven to keep them warm while you finish the rest. {{image_2}} You can easily swap chicken for veggies in your quesadilla. Try using a mix of sautéed mushrooms, zucchini, and spinach. These add great flavor and texture. You can add different types of cheese too. Mozzarella or pepper jack work well here. They melt nicely and enhance the taste. If you like heat, consider making spicy chicken quesadillas. Adding jalapeños brings a nice kick to the filling. You can also use spicy cheese, like pepper jack, for more heat. A splash of hot sauce can amp up the flavor too. Just a little will make your taste buds dance! Breakfast quesadillas are a fun twist on the classic. Start by adding scrambled eggs and your favorite breakfast meats, like bacon or sausage. You can mix in breakfast-style spices too, like paprika or a pinch of cayenne. Add some diced bell peppers for color and flavor. They make a tasty start to your day! To store your leftover quesadillas, first let them cool to room temperature. This step helps prevent sogginess. Next, place them in an airtight container. Glass or plastic containers work well. You can also wrap them tightly in plastic wrap or foil. Label the container with the date. This way, you know when to eat them. When it comes to reheating, you have two main options: the oven or the microwave. For the oven, preheat it to 350°F (175°C). Place the quesadillas on a baking sheet. Heat them for about 10-15 minutes. This keeps them crispy. If you use the microwave, place a quesadilla on a plate. Heat it for 1-2 minutes. You may lose some crispiness, so add a paper towel to keep it moist. To freeze quesadillas, make sure they cool completely first. Then, wrap each one in plastic wrap. Place the wrapped quesadillas in a freezer-safe bag. Be sure to remove as much air as possible. For thawing, take them out of the freezer and leave them in the fridge overnight. You can also use the microwave for a quick thaw. Just remember to reheat them afterward to get that crispy texture back. Yes, you can make quesadillas ahead of time. Prepare the filling and store it in the fridge. Use a sealed container to keep it fresh. You can also cook the quesadillas, then store them in the fridge for later. To do this, let them cool before wrapping them in foil or plastic wrap. They will stay good for up to three days. For quesadillas, I recommend using shredded cheddar cheese. It melts well and adds a nice flavor. You can also try Monterey Jack or a mix of both. These cheeses create a creamy texture. If you want something different, consider using pepper jack for a spicy kick. To make quesadillas gluten-free, switch to gluten-free tortillas. Many brands offer options made from rice or corn. You can also use lettuce wraps for a lighter version. Just be sure to check the labels for gluten-free certification. Fill them with your favorite ingredients to keep them tasty and satisfying. This blog post detailed how to make delicious quesadillas from scratch. You learned about key ingredients like shredded chicken, bell peppers, and spices. I shared step-by-step instructions on preparing, cooking, and serving these tasty meals. I also gave you tips for perfecting your quesadillas and various options like vegetarian and breakfast styles. Storing and reheating leftovers was covered too. Now, with these tools and ideas, you can enjoy making quesadillas your way. Happy cooking!

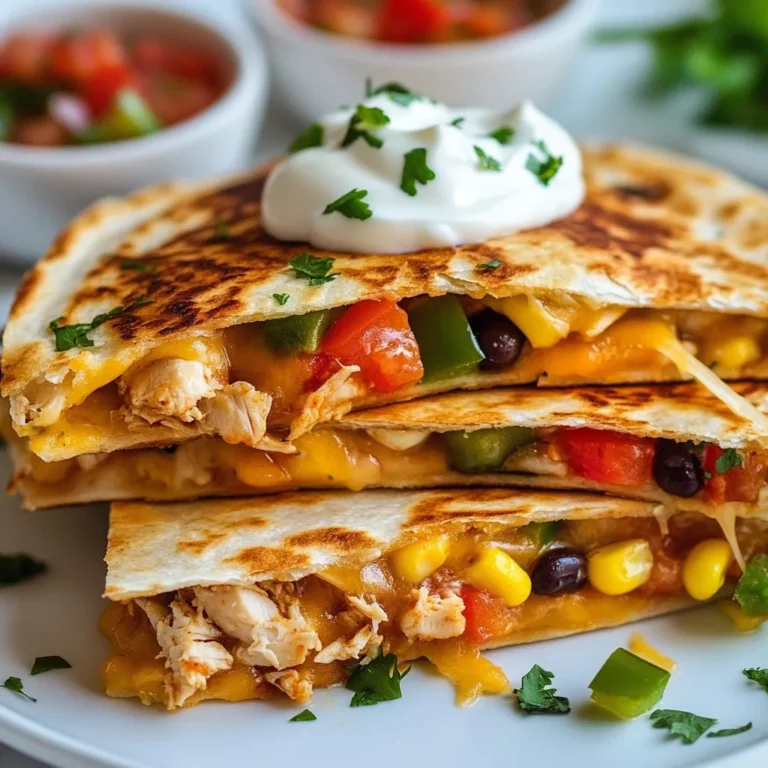
Chicken Quesadillas Simple and Flavorful Recipe

- 2 boneless, skinless chicken breasts, cubed - 2 medium zucchinis, sliced into half-moons - 1 red bell pepper, diced - 1 teaspoon garlic powder - 1 teaspoon onion powder - 1 teaspoon paprika - Salt and pepper to taste - 2 tablespoons olive oil - 1 tablespoon balsamic vinegar - 1/4 cup chicken broth (low-sodium) - Fresh parsley, chopped (for garnish) You will need two boneless and skinless chicken breasts. These should be cut into cubes. Grab two medium zucchinis; slicing them into half-moons gives a nice shape. A single red bell pepper diced adds color and taste. For flavor, you will use garlic powder, onion powder, and paprika. These spices bring a warm taste. You can season with salt and pepper as you like. For cooking, two tablespoons of olive oil are best. This oil helps the chicken cook well. A tablespoon of balsamic vinegar adds a sweet and tangy kick. The low-sodium chicken broth will keep it moist without too much salt. Finally, fresh parsley will brighten your dish when you garnish it. I recommend using olive oil for this recipe. It has a rich taste and holds up well at medium heat. You can also choose avocado oil. It has a light flavor and is good for high heat. Both oils help cook the chicken perfectly. {{ingredient_image_1}} Start by cutting the chicken breasts into small cubes. This helps them cook evenly. Sprinkle garlic powder, onion powder, paprika, salt, and pepper over the chicken. Mix everything well. This step adds great flavor to the chicken. Heat two tablespoons of olive oil in a large skillet over medium heat. Once the oil is hot, add the seasoned chicken. Cook for about 5 to 7 minutes. Stir often until the chicken turns golden brown and is fully cooked. This step is key to having juicy chicken. After the chicken is cooked, it’s time to add the veggies. Toss in the sliced zucchinis and diced red bell pepper. Stir gently to mix them with the chicken. Pour in one tablespoon of balsamic vinegar and 1/4 cup of low-sodium chicken broth. Mix well again. Let everything simmer for another 5 to 7 minutes. This makes the zucchinis tender but still bright and crunchy. Enjoy the mix of flavors and colors in your skillet! To make sure your chicken turns out great, start with fresh meat. I prefer boneless, skinless chicken breasts for this dish. Cut them into equal cubes. This helps them cook evenly. Season the chicken well with garlic powder, onion powder, paprika, salt, and pepper. When you add the chicken to the hot oil, hear that sizzle! This sound means you’re on the right track. Cook the chicken until it’s golden brown and fully cooked, about 5-7 minutes. Zucchini cooks fast, so don’t overdo it. Slice the zucchinis into half-moons. This shape allows for quick cooking while keeping some bite. Add them to the skillet after the chicken is cooked. Stir gently to mix them with the chicken. Pour in the balsamic vinegar and chicken broth to boost flavor. Let everything simmer for 5-7 minutes. You want the zucchini tender but still bright green. If you have leftovers, store them in an airtight container. This keeps the chicken and zucchini fresh. Let the dish cool before sealing it up. You can keep it in the fridge for up to three days. When you're ready to eat, reheat gently on the stove or in the microwave. This helps maintain the dish's flavor and texture. Pro Tips Keep Chicken Juicy: Marinate the chicken in olive oil and seasonings for at least 30 minutes before cooking to enhance flavor and moisture. Perfectly Cooked Zucchini: Add the zucchini to the skillet only after the chicken is cooked to avoid overcooking and losing its vibrant color. Custom Flavor Boost: Experiment with fresh herbs like thyme or basil to elevate the dish's flavor profile. Serving Suggestions: This skillet dish pairs well with quinoa or brown rice for a complete meal that is hearty and nutritious. {{image_2}} You can make this dish even better by adding more veggies. Try carrots, onions, or mushrooms. These add color and taste. Just chop them into small pieces. Add them to the skillet when you include the zucchini. This way, they cook evenly. You can also use leafy greens like spinach or kale. They will wilt nicely in the skillet and bring extra nutrition. If you want a different protein, swap the chicken for shrimp or tofu. Shrimp cooks fast. Just add it to the skillet after the veggies. Tofu needs a bit more time to brown. Make sure to press the tofu first to remove extra water. This helps it soak up the flavors better. You can also try turkey or beef, but adjust the cooking time accordingly. Changing the seasonings can create new flavors. Instead of garlic powder, try fresh garlic for a stronger taste. You can use Italian herbs like oregano and basil for a fresh twist. A pinch of red pepper flakes will add some nice heat. For a smoky flavor, try smoked paprika instead of regular paprika. Experimenting with spices is fun and can lead to tasty surprises! Store your Chicken Zucchini Skillet in an airtight container. Let it cool for about 30 minutes before sealing. This helps keep the dish fresh. You can store it in the fridge for up to 3 days. If you want to keep it longer, consider freezing it. When you are ready to eat, reheat the dish on the stove. Use low heat to avoid drying it out. You can also use a microwave. Heat it in short bursts, stirring in between. This ensures even warming and keeps the flavors intact. To freeze, place the cooled dish in a freezer-safe container. Make sure it is sealed tightly. You can freeze it for up to 3 months. When you are ready to eat, thaw overnight in the fridge. Then, reheat on the stove or microwave. Enjoy the flavors just like when it was fresh! Cooking chicken in a skillet takes about 10 to 15 minutes. First, heat the oil. Then, add the chicken. Cook it for 5 to 7 minutes until it turns golden brown. Always check that it reaches 165°F for safety. Yes, you can use frozen chicken. However, it takes longer to cook. I suggest thawing the chicken first for even cooking. If you must cook it from frozen, increase the cooking time by about 10 minutes. Always ensure it is fully cooked before serving. Many vegetables work well with chicken zucchini skillet. Bell peppers add sweetness and color. Mushrooms bring a rich flavor. You can also add spinach for a nutrient boost. Carrots add crunch, while broccoli gives a nice texture. Feel free to mix and match! In this post, we explored the key ingredients and step-by-step instructions for a chicken zucchini skillet. I shared tips for cooking the chicken just right, how to prepare zucchini, and ways to store your meal. We also discussed variations to keep your dish exciting. Take these insights to create a tasty, nutritious dish you'll love. Remember, each cooking session is a chance to learn and enjoy. Happy cooking!

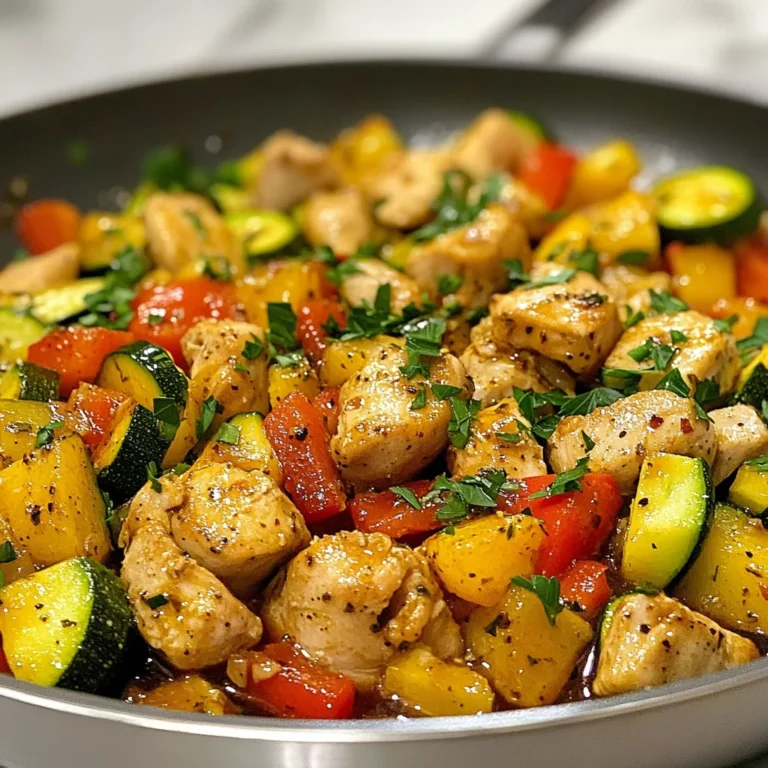
Chicken Zucchini Skillet Flavorful and Easy Recipe

- 4 boneless, skinless chicken thighs - 3 tablespoons honey - 2 tablespoons olive oil - 1 teaspoon ground cumin - 1 teaspoon ground coriander - 1 teaspoon ground cinnamon - ½ teaspoon allspice - 1 teaspoon paprika - 2 garlic cloves, minced - Juice of 1 lemon - Salt and pepper, to taste - Fresh parsley, chopped (for garnish) The chicken thighs bring great flavor and tenderness. They soak up the marinade well. Honey adds a nice sweetness. It balances the spices perfectly. Olive oil helps to keep the chicken moist. Spices like cumin and coriander add warmth. Cinnamon and allspice give it a cozy taste. Garlic adds a punch of flavor. Lemon juice brightens the dish. Fresh parsley adds color and freshness at the end. If you can’t find chicken thighs, use chicken breasts. They will still taste great but may be less juicy. For honey, maple syrup works well too. If you're out of coriander, try using dried oregano. You can skip the allspice if you don’t have it. Instead, add a bit more cinnamon or nutmeg. If you want a spicier kick, use cayenne pepper instead of paprika. {{ingredient_image_1}} To start, gather all your marinade ingredients. In a large mixing bowl, combine: - 3 tablespoons honey - 2 tablespoons olive oil - 1 teaspoon ground cumin - 1 teaspoon ground coriander - 1 teaspoon ground cinnamon - ½ teaspoon allspice - 1 teaspoon paprika - 2 minced garlic cloves - Juice of 1 lemon - Salt and pepper to taste Mix these well. You want a smooth mixture that smells great. The honey gives a sweet touch, while the spices add warmth. Next, add your chicken thighs to the marinade. Make sure each piece is well coated. Cover the bowl tightly with plastic wrap. Let the chicken marinate in the fridge for at least 1 hour. If you have time, letting it sit overnight will give even better flavor. Now, preheat your oven to 400°F (200°C). While it heats, prepare your baking dish. Line it with parchment paper for easy cleanup. Place the marinated chicken thighs in the dish. Don’t forget to save some marinade for later! Bake the chicken for 25-30 minutes. Use a meat thermometer to check the internal temperature. It should reach 165°F (75°C). Halfway through, brush the chicken with the reserved marinade for added flavor. After baking, let the chicken rest for about 5 minutes. This keeps it juicy. Finally, garnish with chopped fresh parsley. Enjoy this tasty dish! Marinating chicken is key to flavor. I suggest you marinate your chicken for at least 1 hour. For the best taste, let it sit overnight. This allows the spices to soak in well. The longer the chicken sits, the more it will taste like the spices. To keep your chicken juicy, do not overcook it. Aim for an internal temperature of 165°F. Use a meat thermometer for the best results. Brush the chicken with leftover marinade halfway through cooking. This adds more moisture and flavor. Serve your Syrian Spiced Honey Chicken on a large platter. Drizzle any remaining juices over the top. Pair it with fluffy couscous or a fresh green salad. You can also include warm pita bread for a complete meal. Fresh parsley on top adds color and a fresh taste. Pro Tips Marinate Longer for Deeper Flavor: For the best flavor, let the chicken marinate overnight. This allows the spices to penetrate the meat, resulting in a more flavorful dish. Use Fresh Ingredients: Fresh garlic and lemon juice will enhance the flavor of the marinade. Opt for fresh herbs when garnishing for a vibrant touch. Check Internal Temperature: Ensure the chicken reaches an internal temperature of 165°F (75°C) for safe consumption. Use a meat thermometer for accuracy. Rest Before Slicing: Let the chicken rest for 5 minutes after baking. This helps retain juices, ensuring each bite is tender and moist. {{image_2}} You can swap chicken thighs for other meats. Try using chicken breasts if you prefer leaner meat. Turkey thighs also work well, giving a unique flavor. For a plant-based option, consider using tofu or tempeh. Just marinate and bake them the same way. These alternatives will soak up the spices and honey, creating a delicious meal. Want more heat? Add cayenne pepper or red pepper flakes. Start with a pinch and taste as you go. For milder flavor, reduce the paprika or skip the spicy elements. You can also add a touch of honey for a sweet contrast to the heat. Adjusting spice levels lets you create a dish perfect for your taste buds. You can add veggies to your dish for extra flavor and nutrition. Bell peppers, zucchini, or red onions roast well with chicken. Chop them into bite-sized pieces and mix them with the marinade. Place them in the baking dish alongside the chicken. They will soak up the flavors and become tender, making your meal more vibrant and tasty. After you bake the Syrian spiced honey chicken, let it cool down. Place the chicken in a shallow dish for faster cooling. Cover the dish tightly with plastic wrap or aluminum foil. Store it in the fridge if you plan to eat it within three days. If you want to keep it longer, freezing is a great option. To reheat the chicken, preheat your oven to 350°F (175°C). Place the chicken in an oven-safe dish. Add a splash of water or broth to keep it moist. Cover the dish with foil to prevent it from drying out. Heat for about 15-20 minutes or until warmed through. You can also use a microwave. Just heat in short bursts, checking often to avoid overcooking. If you freeze the chicken, wrap it tightly in plastic wrap first. Then, place it in a freezer-safe bag. It can last for up to three months in the freezer. When you're ready to eat, move the chicken to the fridge for a night to thaw. You can also use the microwave for quick thawing, but this may change the texture. Always ensure the chicken reaches 165°F (75°C) when reheating. The spices in Syrian Spiced Honey Chicken create a warm and rich flavor. You use ground cumin, ground coriander, ground cinnamon, allspice, and paprika. Each spice adds a unique taste. Cumin gives a nutty flavor, while coriander adds brightness. Cinnamon offers warmth, and allspice brings a hint of sweetness. Paprika adds color and a mild peppery taste. Together, these spices make the chicken savory and aromatic. Yes, you can use chicken breasts instead of thighs. Chicken breasts are leaner and cook faster. However, thighs are juicier and more flavorful. If you choose breasts, reduce the cooking time. Check for doneness to avoid dry chicken. The key is to keep the marinade and spices the same. This keeps the dish tasty and satisfying. To check if the chicken is fully cooked, use a meat thermometer. The internal temperature should reach 165°F (75°C). You can also cut into the thickest part of the chicken. The juices should run clear, not pink. If you don’t have a thermometer, ensure the chicken is firm to the touch. Proper cooking ensures a safe and delicious meal. This post covered all you need for Syrian Spiced Honey Chicken. We explored key ingredients and shared fact-based insights. You learned step-by-step how to prepare and bake the chicken perfectly. I also gave tips for juicy results and easy serving ideas. You can switch proteins or spice levels to fit your taste. Finally, I provided storage and reheating tips. Follow this guide for a tasty meal that is sure to impress. Enjoy your cooking adventure!

Syrian Spiced Honey Chicken Savory and Flavorful Dish

- 2 large chicken breasts, cooked and shredded - 1 cup cooked black beans, drained and rinsed - 1 cup corn kernels (fresh or frozen) - 1 teaspoon cumin - 1 teaspoon paprika - 1 teaspoon garlic powder - Salt and pepper to taste - 1 cup shredded cheese (cheddar or a Mexican blend) - 8 small soft tortillas - 2 tablespoons olive oil - Fresh cilantro, chopped (for garnish) To create rolled chicken tacos, you need a mix of flavors and textures. The chicken gives a nice base. Shredded chicken is easy to work with and absorbs spices well. Black beans add protein and a creamy texture. Corn brings sweetness and crunch. The spices—cumin, paprika, and garlic powder—enhance the flavor. Don't forget salt and pepper; they are key to making your dish pop. - Cheese varieties (cheddar or Mexican blend) - Tortilla options (flour or corn) - Garnishes and dips (sour cream, salsa) You can choose your favorite cheese for extra richness. Cheddar melts nicely, while a Mexican blend adds a kick. For tortillas, you can use flour or corn, depending on what you like. Lastly, garnishes like chopped cilantro brighten the dish. Pairing with sour cream and salsa adds extra flavor and creaminess. These options let you customize your tacos to your taste. {{ingredient_image_1}} To start, take two cooked chicken breasts. You can use rotisserie chicken for ease. Shred the chicken using two forks. Aim for small, bite-sized pieces. This makes it easy to mix and roll. Get eight small soft tortillas. You can use flour or corn, based on your taste. Warm them in a pan for about 30 seconds on each side. This makes them more flexible for rolling. In a large bowl, add the shredded chicken. Then, mix in one cup of cooked black beans and one cup of corn. Next, sprinkle in one teaspoon each of cumin, paprika, and garlic powder. Add salt and pepper to taste. Stir well so all ingredients blend nicely. Lay a tortilla flat on your surface. Spoon a generous amount of the chicken mixture down the center. Sprinkle some shredded cheese on top. Now, roll the tortilla tightly around the filling. Make sure the seam is on the bottom. Repeat this with the rest of the tortillas. Heat two tablespoons of olive oil in a large skillet over medium heat. Once the oil is hot, carefully add the rolled tacos seam-side down. Cook for 3 to 4 minutes until they are golden brown. Flip them carefully to cook the other side for another 3 to 4 minutes. This step gives you that nice crispy texture. After frying, place the tacos on paper towels to soak up extra oil. Achieving the Right Crispiness To get your rolled chicken tacos crispy, use enough oil in the skillet. I prefer olive oil for flavor. Heat the oil to medium heat; too hot will burn the tacos. Cook them seam-side down first. This helps seal them. After a few minutes, flip them gently. You want a nice golden brown color on both sides. Place the cooked tacos on paper towels to soak up oil. Flavor Enhancements Mixing in spices is key to flavor. I use cumin, paprika, and garlic powder. You can also add jalapeños for heat. Fresh herbs, like cilantro, brighten up the dish. Mix these into your chicken filling for a flavor boost. Don’t forget to add cheese, too; it melts beautifully inside. Serve with sour cream or salsa for extra taste. Overfilling the Tacos It’s easy to want to stuff your tacos full. However, overfilling can make them hard to roll. Aim for about a half cup of filling for each taco. This amount keeps them tight and crispy. Cooking Temperature Pay attention to the cooking temperature. Too high can burn the outside while leaving the inside cold. Medium heat works best. This allows the cheese to melt and the tortilla to crisp up nicely. Always keep an eye on them to ensure they cook evenly. Pro Tips Use Leftover Chicken: This recipe is perfect for using up any leftover roasted or rotisserie chicken, saving you time and enhancing the flavor. Customize Your Fillings: Feel free to add other ingredients like diced bell peppers, jalapeños, or even some cream cheese for extra creaminess and flavor. Keep Tacos Warm: If you're making a large batch, keep the cooked tacos warm in a low oven (around 200°F) until ready to serve. Experiment with Cheese: Try different types of cheese like pepper jack for a spicy kick or mozzarella for a milder flavor. {{image_2}} You can swap chicken for beef or go meatless. Ground beef works great in these tacos. Just cook it with the same spices, and you’re set. For a vegetarian twist, use beans or lentils. They add protein and lots of flavor. Want some heat? Add spicy chicken! Use jalapeños or hot sauce in the filling. This makes each bite exciting. You can also mix in spicy sausage for a kick. Adjust the spice level to fit your taste. You can choose to bake or fry your tacos. Baking gives you a lighter option. Place rolled tacos on a baking sheet and brush them with oil. Bake at 400°F for about 20 minutes until golden. Frying, however, makes them extra crispy. Use a skillet and heat oil over medium. Fry each taco for 3-4 minutes on each side. This gives them a nice golden color and delicious crunch. Setting up a taco bar is a fun option too. Lay out all your ingredients. Let everyone build their own tacos! Offer toppings like sour cream, salsa, and fresh cilantro. This makes the meal interactive and enjoyable for all. To keep your rolled chicken tacos fresh, store them in the fridge. Use an airtight container. They stay good for about three to four days. Make sure they cool down before sealing. This helps avoid sogginess. If you want to save them for later, freezing works too. Wrap each taco in plastic wrap. Then place them in a freezer-safe bag. They can last up to three months. Label the bag with the date for easy tracking. Reheating your tacos can be easy. You can use the microwave or the oven. In the microwave, place a taco on a plate. Heat for about 30 seconds. Check if it’s warm enough. If not, heat for another 15 seconds. Using the oven gives a nice crisp. Preheat it to 375°F. Place the tacos on a baking sheet. Heat for about 10-15 minutes. This keeps them crunchy and tasty. Enjoy your leftovers just as much as the first time! Can I use pre-cooked chicken? Yes, you can use pre-cooked chicken. It saves time and makes the recipe easy. Just shred it and mix it with the other ingredients. Using pre-cooked chicken still gives you great flavor. Make sure it’s seasoned well. If it's bland, add some extra spices to boost the taste. How can I make them spicier? To make rolled chicken tacos spicier, add diced jalapeños to the filling. You can also use spicy salsa or hot sauce when serving. Another idea is to use pepper jack cheese instead of regular cheese. This adds heat and flavor in every bite. What to serve with rolled chicken tacos? You can serve rolled chicken tacos with a simple salad or rice. A fresh side helps balance the meal. I love adding guacamole or pico de gallo for extra flavor. These fresh sides make the dish more vibrant. Best sauces and sides to accompany tacos. Sour cream is a classic dip that cools down the heat. Also, try serving them with salsa or a spicy chipotle sauce. Don’t forget to add some fresh cilantro on top. It gives a nice color and flavor. You can also offer tortilla chips on the side for extra crunch. You now have a clear guide to making rolled chicken tacos. We covered the main ingredients, cooking steps, and tips to get them just right. Don’t forget about variations and how to store leftovers properly. I hope these insights inspire you to create and enjoy these tasty treats. Tacos can be simple or exciting based on your choices. Dive in and experiment with flavors. Happy cooking!

Rolled Chicken Tacos Crispy and Flavorful Dish

To make delicious Rosemary Garlic Focaccia Muffins, you need these main ingredients: - 2 cups all-purpose flour - 1 cup warm water (110°F) - 1 packet (2 1/4 teaspoons) active dry yeast - 1 teaspoon sugar - 1/4 cup olive oil (plus more for drizzling) - 2 cloves garlic, minced - 2 tablespoons fresh rosemary, chopped (or 1 tablespoon dried) - 1 teaspoon sea salt (plus more for topping) - Freshly cracked black pepper to taste These ingredients work together to create a soft muffin with a flavorful crust. If you want to boost the flavor of your muffins, consider adding: - Grated Parmesan cheese for a salty kick - Chopped olives for a briny taste - Sun-dried tomatoes for a sweet and tangy flavor - A pinch of red pepper flakes for some heat These additions can take your muffins to the next level. You will need a few tools to make these muffins: - A large mixing bowl for combining ingredients - A small bowl for proofing the yeast - A muffin tin to shape the muffins - A kitchen towel to cover the dough while it rises - An oven to bake the muffins Having these tools ready will make your cooking process smoother. {{ingredient_image_1}} First, warm up one cup of water. The water should feel warm, like a comfy bath, around 110°F. In a small bowl, mix this warm water with one teaspoon of sugar. Then, add the packet of active dry yeast. Let this sit for 5 to 10 minutes. You want to see bubbles forming on the surface. This means the yeast is alive and ready to work its magic. In a large bowl, add two cups of all-purpose flour, one teaspoon of sea salt, two minced garlic cloves, and two tablespoons of chopped rosemary. Stir these dry ingredients well. Next, make a well in the center. Pour in the frothy yeast mixture and 1/4 cup of olive oil. Mix everything until a sticky dough forms. Then, sprinkle a bit of flour on your counter. Knead the dough for about five minutes until it feels smooth and soft. After kneading, place the dough in a greased bowl. Cover it with a clean kitchen towel. Let it rise in a warm spot for about one hour. It should double in size. Preheat your oven to 375°F. Once the dough is ready, punch it down gently. Divide it into 12 equal portions. Roll each piece into a ball and place them in a greased muffin tin. Use your fingers to create dimples on top of each muffin. Drizzle olive oil on them and sprinkle with sea salt and black pepper. Allow the muffins to rise for another 20 minutes before baking. Bake them for 20 to 25 minutes until they turn golden brown. Let them cool in the tin for a few minutes, then transfer them to a wire rack. Enjoy the aroma as they cool! To get soft and fluffy muffins, start with warm water. It should feel like a cozy bath, around 110°F. Mix the yeast and sugar in this warm water. Wait until it gets frothy, which usually takes about 5 to 10 minutes. This step is key because it wakes up the yeast. When mixing dry ingredients, use all-purpose flour and sea salt. Knead the dough for about 5 minutes on a floured surface. You want it smooth and slightly sticky. Let it rise in a warm spot until it doubles in size. This gives the muffins their light texture. If you have extra muffins, cool them down first. Place them in an airtight container. They will stay fresh for about 2 to 3 days at room temperature. For longer storage, wrap each muffin in plastic wrap. Then, place them in a freezer bag. They can last for up to 3 months in the freezer. When you want to enjoy one, just thaw it at room temperature or warm it in the oven. To boost flavor, try adding more herbs. Thyme or oregano can mix well with rosemary. You can also fold in sun-dried tomatoes or olives for a savory twist. For a cheesy delight, add shredded parmesan or mozzarella inside each muffin. This makes them even more tasty. Drizzling extra olive oil before baking gives a nice, golden crust. You can also sprinkle coarse sea salt on top for a crunchy finish. Pro Tips Use Fresh Ingredients: Always opt for fresh rosemary and garlic for the best flavor. Dried herbs can work in a pinch, but fresh ingredients will elevate your focaccia muffins significantly. Temperature Matters: Ensure your water is warm but not hot to activate the yeast properly. Water that is too hot can kill the yeast, resulting in dense muffins. Don’t Rush the Rise: Allow the dough to rise until it has doubled in size for the best texture. A warm, draft-free environment will help the dough rise effectively. Experiment with Toppings: Feel free to get creative with toppings! Try adding coarse sea salt, different herbs, or even a sprinkle of cheese before baking for added flavor. {{image_2}} You can change the flavor of your focaccia muffins by using different herbs. Try thyme, oregano, or basil. Each herb gives a unique taste. For a fresh twist, mix herbs like parsley with rosemary. This way, you get a new flavor each time. Imagine biting into a warm muffin and finding melted cheese inside! To make cheese-filled focaccia muffins, add a small piece of cheese in the center. Mozzarella or feta works well. Simply take a portion of dough, flatten it, and place the cheese inside. Then, seal it up before baking. The result is a savory surprise in every bite! You can still enjoy rosemary garlic muffins if you need a gluten-free option. Use gluten-free all-purpose flour instead of regular flour. Make sure the flour has xanthan gum to help with texture. Follow the same steps in the recipe. Your muffins will still be fluffy and full of flavor. Enjoy the taste without the gluten! To store unbaked dough, keep it in a greased bowl. Cover the bowl tightly with plastic wrap. This helps keep moisture in. Place it in the fridge if you plan to use it later. The dough can last up to 24 hours in the fridge. When ready to bake, let it sit at room temperature for 30 minutes. This allows the dough to rise again before shaping. To keep your baked muffins fresh, let them cool completely. Once cool, place them in an airtight container. This helps prevent them from drying out. You can also wrap each muffin in plastic wrap for extra protection. Store them at room temperature for up to three days. If you want them to last longer, consider refrigeration. Freezing muffins is a great way to save them for later. First, let the muffins cool completely. Then, wrap each muffin tightly in plastic wrap. After that, place them in a freezer bag. Remove as much air as possible from the bag. Muffins can be frozen for up to three months. When ready to eat, thaw them overnight in the fridge. You can also warm them in the oven for a few minutes before serving. Yes, you can use instant yeast. Instant yeast works well and does not need to be proofed. You can mix it directly with the dry ingredients. Use the same amount as active dry yeast. Keep in mind that your dough may rise a bit faster. These muffins pair well with many dishes. Here are a few ideas to try: - Herb-infused olive oil for dipping - A fresh salad with a light dressing - Soups, like tomato or minestrone - Cheese platters with soft cheeses - Roasted vegetables for a hearty side To check if your muffins are done, tap the tops lightly. They should sound hollow. You can also insert a toothpick into the center. If it comes out clean, your muffins are ready. The tops should be golden brown and slightly firm to the touch. Enjoy that warm, savory aroma! In this post, we covered key ingredients and tools for making muffins. I guided you through each step, from prepping the yeast to baking. You learned tips for perfect texture and how to store leftovers. Plus, we explored fun variations, including gluten-free options. Remember, making muffins can be simple and fun! Keep experimenting and enjoy the process.

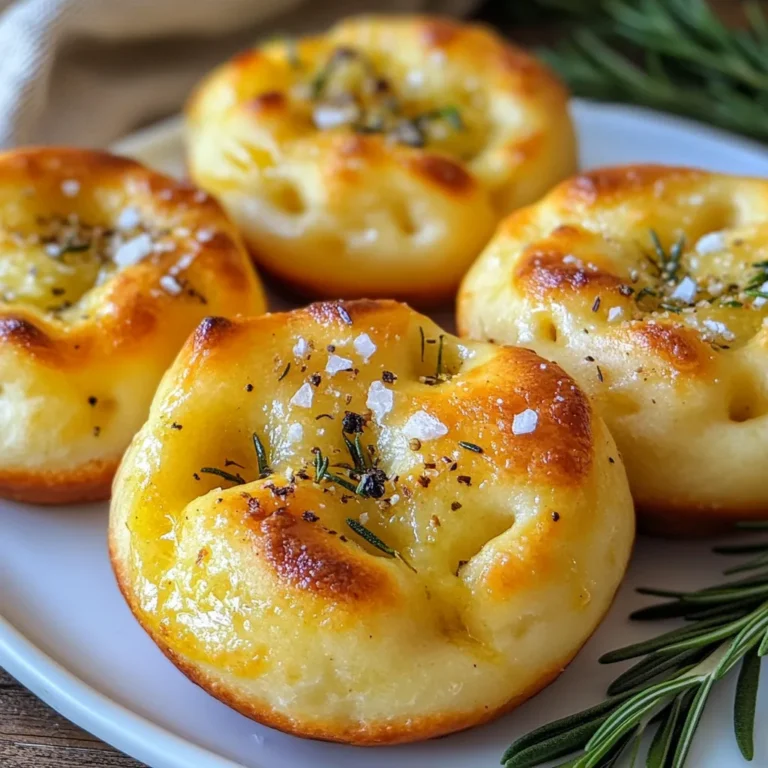
Rosemary Garlic Focaccia Muffins Flavorful Treat

To make Crunchy Baked Mac and Cheese, gather these simple items: - 2 cups elbow macaroni - 4 cups sharp cheddar cheese, shredded - 1 cup Gruyère cheese, shredded - 1/2 cup parmesan cheese, grated - 3 cups milk - 1/4 cup unsalted butter - 1/4 cup all-purpose flour - 1 teaspoon garlic powder - 1 teaspoon mustard powder - 1/2 teaspoon smoked paprika - Salt and pepper to taste - 1 cup panko breadcrumbs - 2 tablespoons fresh parsley, chopped (for garnish) For this dish, cheese is key. I love using sharp cheddar for its bold taste. Gruyère adds a nice creaminess. You can mix it up with these options: - Mozzarella for a stretchier texture - Fontina for a nutty flavor - Gouda for a smoky hint If you want to switch things up, try these alternatives: - Whole wheat elbow macaroni for a healthier option - Almond milk or oat milk for a dairy-free choice - Olive oil instead of butter for a lighter dish - Vegan cheese for a plant-based version These swaps can help you create a dish that fits your taste and needs! {{ingredient_image_1}} Start by bringing a large pot of salted water to a boil. Add 2 cups of elbow macaroni to the water. Cook the pasta for 6 to 8 minutes until it is al dente. You want it firm but not hard. Drain the macaroni in a colander and set it aside. This step is key to avoid mushy pasta later. In the same pot, melt 1/4 cup of unsalted butter over medium heat. Once it melts, whisk in 1/4 cup of all-purpose flour. Cook this mix for about 2 minutes. It should bubble and thicken a bit. Now, slowly add 3 cups of milk while whisking. This helps keep the sauce smooth. Cook until the sauce thickens, which takes about 5 to 7 minutes. Stir in 1 teaspoon of garlic powder, 1 teaspoon of mustard powder, and 1/2 teaspoon of smoked paprika. Add salt and pepper to taste. Then, gradually mix in 4 cups of shredded sharp cheddar cheese and 1 cup of shredded Gruyère cheese. Stir until everything is melted and smooth. Now, fold the cooked macaroni into the cheese sauce. Make sure each piece of pasta gets coated well. Pour this mix into a greased 9x13 inch baking dish. In a separate bowl, combine 1 cup of panko breadcrumbs with 1/2 cup of grated parmesan cheese and a drizzle of olive oil. Mix until the breadcrumbs are coated. Spread this topping evenly over the mac and cheese. Bake in the oven at 350°F for 25 to 30 minutes. You want the top to be golden and crunchy. After baking, let it cool slightly. Garnish with 2 tablespoons of chopped fresh parsley before serving. Enjoy your crunchy baked mac and cheese! To get that great crunch, use panko breadcrumbs. They are lighter and crispier than regular breadcrumbs. Mix them with grated parmesan and a bit of olive oil. This adds flavor and helps the topping brown nicely. Spread this mixture evenly over the mac and cheese. Bake until golden. Keep an eye on it. You want it crispy, not burnt. Bake your mac and cheese at 350°F (175°C). This temperature cooks the dish evenly. Bake it for 25 to 30 minutes. Check it at 25 minutes. Look for a golden top. If it’s not golden, give it a few more minutes. Let it cool for a few minutes before serving. This makes it easier to scoop. Serve your crunchy baked mac and cheese with a fresh salad. A simple green salad balances the cheesy dish. You can also pair it with grilled vegetables or garlic bread. For a protein boost, add chicken or bacon. This adds flavor and makes the meal heartier. Don’t forget to sprinkle some fresh parsley on top for color! Pro Tips Use High-Quality Cheese: For the best flavor and creaminess, opt for high-quality sharp cheddar and Gruyère cheese. Don't Overcook the Pasta: Cook the macaroni just until al dente, as it will continue to cook in the oven. Customize Your Toppings: Feel free to add other toppings like crispy bacon, herbs, or different types of cheese for added flavor. Let It Rest: Allow the baked mac and cheese to cool for a few minutes before serving to help it set and make serving easier. {{image_2}} You can add chicken or bacon for extra flavor. Cook chicken first, then add it to the mac and cheese before baking. For bacon, cook until crispy, chop it, and mix it in. Both options give you a hearty dish that satisfies. If you're vegetarian, skip the meat but keep the flavor. You can add veggies like broccoli, spinach, or bell peppers. Just steam them lightly before mixing in. This will add color and nutrition to your mac and cheese. Want some heat? You can add jalapeños or crushed red pepper flakes. Mix them in with the cheese sauce for warmth. If you like it really spicy, use pepper jack cheese instead of cheddar. This adds a nice kick to each bite. To keep your crunchy baked mac and cheese fresh, let it cool first. Place it in an airtight container. Store it in the fridge for up to three days. Make sure to cover it well to keep moisture out. If you want to freeze leftovers, first cool them completely. Use a freezer-safe container or a heavy-duty freezer bag. This will help keep it fresh for up to three months. When ready to eat, thaw it overnight in the fridge. For the best taste, reheat your mac and cheese in the oven. Preheat the oven to 350°F (175°C). Cover the dish with foil to keep it moist. Bake for about 20 minutes. If you want it crunchy again, remove the foil for the last 5 minutes. You can also use the microwave, but it may not stay crunchy. Yes, you can make this dish ahead of time. Cook the macaroni and cheese as usual. Then, store it uncovered in the fridge before baking. When you are ready, add the panko topping. Bake it straight from the fridge. You may need to add a few extra minutes to the baking time. If you don't have panko, use regular breadcrumbs instead. You can also crush crackers or chips for a crunchy topping. For a gluten-free option, try ground almonds or gluten-free breadcrumbs. To get a creamy dish, skip the panko topping. After mixing the cheese sauce with the macaroni, serve it right away. You can also add more milk or cream to the cheese sauce. This will help keep it smooth and creamy. This article covered key ingredients and steps for the perfect mac and cheese. You learned about cheese options, alternative ingredients, and ways to add protein or spice. Tips included how to achieve a crunchy topping and the best cooking times. Finally, you found storage and reheating advice. Now, you’re ready to impress with your own mac and cheese. Enjoy the process and have fun creating!

Crunchy Baked Mac and Cheese Tasty and Simple Dish

To make a tasty zucchini hamburger casserole, gather these items: - 2 medium zucchinis, sliced - 1 lb ground beef or turkey - 1 small onion, diced - 2 cloves garlic, minced - 1 cup cherry tomatoes, halved - 1 cup shredded mozzarella cheese - 1 cup ricotta cheese - 1 teaspoon Italian seasoning - 1 teaspoon salt - ½ teaspoon black pepper - 1 tablespoon olive oil - Fresh basil leaves for garnish You can swap some ingredients for different flavors. Use ground chicken or even tofu instead of beef or turkey. For cheese, try cottage cheese if you want less fat. You can also use spinach or bell peppers instead of zucchini for a twist. If you lack fresh herbs, dried ones work fine too. Fresh ingredients create the best flavors in this dish. Use fresh zucchinis and tomatoes for a crisp bite. However, if you are short on time, canned tomatoes can be a quick option. Just make sure to drain them well to avoid extra moisture in the dish. {{ingredient_image_1}} Start by preheating your oven to 375°F (190°C). Heat olive oil in a large skillet over medium heat. Then, add the diced onion. Sauté it for about 3-4 minutes until it turns soft. Next, add minced garlic and ground beef or turkey. Cook until the meat is brown, breaking it up as it cooks, which takes about 6-8 minutes. If there's excess fat, drain it. Mix in the Italian seasoning, salt, and black pepper. Finally, take the skillet off the heat and set it aside. Grab a 9x13 inch casserole dish and layer half of the sliced zucchinis on the bottom. Then, spread half of the cooked meat mixture over this zucchini layer. Top it with half of the halved cherry tomatoes. Next, spoon dollops of ricotta cheese on top. Sprinkle half of the shredded mozzarella cheese over everything. Repeat these layers with the remaining zucchinis, meat mixture, tomatoes, ricotta, and finish with the rest of the mozzarella cheese on top. Cover your casserole dish with aluminum foil and bake it in the preheated oven for 25 minutes. After that, remove the foil and bake for an extra 15 minutes. Look for the cheese to be bubbly and lightly golden. Once baked, let the casserole sit for 5-10 minutes before serving. This resting time helps flavors meld together. Finally, garnish with fresh basil leaves for a nice finish. Enjoy your tasty dish! When picking zucchini, look for firm, shiny ones. They should feel heavy for their size. Avoid any with soft spots or blemishes. Small to medium zucchinis taste better and have fewer seeds. Fresh zucchinis make your casserole taste great. You can prepare this casserole a day in advance. Just follow the steps, then cover and chill it. When ready to cook, bake it straight from the fridge. This saves time on busy nights. To reheat leftovers, use the oven. Heat at 350°F (175°C) until warm. One mistake is overcooking the zucchini. This can make them mushy. Layer the zucchini and meat properly for even cooking. Don’t skip the resting time after baking. This helps the casserole set, making serving easier. Finally, use fresh herbs for the best flavor. Pro Tips Use Fresh Zucchini: Opt for firm, fresh zucchinis for the best flavor and texture in your casserole. Brown the Meat Well: Ensure the ground beef or turkey is well-browned to enhance the overall flavor of the dish. Layering Technique: For even cooking, make sure to layer the ingredients evenly and avoid overcrowding the casserole. Let it Rest: Allow the casserole to rest for 5-10 minutes after baking to help it set and make serving easier. {{image_2}} You can make a tasty vegetarian version of this dish. Swap the ground beef for plant-based meat. You can use lentils or mushrooms for a hearty bite. Add more veggies like bell peppers or spinach for extra flavor and nutrition. The ricotta cheese remains a great choice for creaminess. It keeps the dish rich and satisfying. For a low-carb meal, replace ground beef with ground turkey. Use a mix of zucchini and cauliflower rice instead of regular rice. This change cuts carbs while keeping the dish filling. You can also skip the pasta if you want a lighter meal. Using more cheese will add flavor and keep it delicious. Want to kick up the taste? Add spices like red pepper flakes or smoked paprika. They bring warmth and depth to the dish. Fresh herbs like parsley or oregano can also brighten it up. If you love garlic, add more minced garlic for an extra punch. You can combine different cheeses, like adding feta for a tangy twist. These simple tweaks make your casserole even more exciting. To keep your zucchini hamburger casserole fresh, let it cool first. Once cool, cover it tightly with plastic wrap or foil. You can also use an airtight container. Store it in the fridge for up to three days. Make sure to label your container with the date. This way, you know when it’s time to eat it! If you want to save some for later, you can freeze it! Cut the casserole into portions for easy serving. Wrap each piece in plastic wrap, then place them in a freezer bag. Squeeze out as much air as possible to prevent freezer burn. You can freeze it for up to three months. Don't forget to label the bags! When you are ready to eat your casserole, there are a few ways to reheat it. The oven is best for even heating. Preheat it to 350°F (175°C). Place the casserole in an oven-safe dish, cover it with foil, and heat for about 20-25 minutes. If you're in a hurry, the microwave works too. Just heat it in a microwave-safe dish for 2-3 minutes, stirring halfway. Enjoy your meal! Yes, you can use different meats in this dish. Ground turkey works well as a leaner option. You can also try ground chicken for a lighter taste. If you want a richer flavor, ground pork is a great choice. Just make sure to cook any meat thoroughly, like you would with beef. To make zucchini hamburger casserole gluten-free, use gluten-free breadcrumbs. You can also skip the breadcrumbs altogether if you want fewer carbs. Always check labels on sauces or seasonings to ensure they are gluten-free. This way, you can enjoy the dish without worry. This casserole goes great with a simple salad. A fresh green salad with a light vinaigrette complements the rich flavors. You can also serve it with garlic bread for a hearty meal. For a lighter option, try steamed broccoli or green beans. These sides add balance to your plate. This blog post covered all you need to make a great zucchini hamburger casserole. You learned about the ingredients, steps, and tips to achieve the best results. Remember, you can swap ingredients and adjust flavors to suit your taste. It’s easy to prepare ahead and store leftovers. Don’t hesitate to explore variations, too. The right sides can make this dish even better. Enjoy making this comforting meal, and have fun in the kitchen!

Zucchini Hamburger Casserole Flavorful and Easy Recipe

For the Parmesan Spinach Mushroom Pasta Skillet, gather these ingredients: - 8 ounces of fusilli pasta - 2 tablespoons olive oil - 1 medium onion, finely chopped - 3 cloves garlic, minced - 8 ounces mushrooms, sliced - 5 ounces fresh baby spinach - 1 cup vegetable broth - 1 cup heavy cream - 1 cup grated Parmesan cheese - 1 teaspoon Italian seasoning - Salt and pepper to taste - Fresh parsley, chopped These ingredients create a creamy and rich dish filled with flavor. Using fresh ingredients makes a huge difference. Fresh spinach tastes vibrant. It wilts nicely in the skillet. Fresh mushrooms add depth. They cook down to a rich, earthy flavor. Dried herbs can work, but fresh is best for this recipe. If you use dried Italian seasoning, use less. Dried herbs are stronger than fresh ones. Quality matters in cooking. For pasta, I like Barilla or De Cecco. They offer great flavors and textures. For olive oil, try California Olive Ranch or Colavita. Their oils have a nice taste and good quality. When it comes to cheese, look for imported Parmigiano-Reggiano. It has a rich flavor that makes the dish shine. For vegetable broth, Swanson or Pacific Foods are both reliable choices. {{ingredient_image_1}} First, you need to cook the pasta. Bring a large pot of salted water to a boil. Add 8 ounces of fusilli pasta. Follow the package directions to cook it until it's al dente. This should take about 8-10 minutes. Once done, drain the pasta and set it aside. The pasta should be firm, not mushy. Next, let's sauté the aromatics. Heat 2 tablespoons of olive oil in a large skillet over medium heat. Add 1 medium onion that you finely chopped. Cook for 3-4 minutes until the onion is soft and clear. Then, add 3 cloves of minced garlic. Cook for one more minute until it smells great. This step adds deep flavor to your dish. Now it’s time to add the mushrooms. Toss in 8 ounces of sliced mushrooms, either cremini or button. Cook them for about 5-7 minutes. They should turn golden brown and release their moisture. Once they're ready, add 5 ounces of fresh baby spinach. Stir it in until it wilts, which takes about 2 minutes. This adds color and nutrients. After the spinach wilts, make the sauce. Pour in 1 cup of vegetable broth and 1 cup of heavy cream. Stir well and bring this mixture to a gentle simmer. Then, add 1 cup of grated Parmesan cheese and 1 teaspoon of Italian seasoning. Let it simmer for 2-3 minutes until the sauce thickens a bit. Season with salt and pepper to taste. Finally, add the cooked pasta to the skillet. Toss everything gently until the pasta is fully coated in the creamy sauce. Serve hot and garnish with some fresh chopped parsley on top. Enjoy your meal! To ensure your pasta turns out just right, cook it until it's al dente. This means it should be firm but not hard. Follow the package instructions for best results. Always add salt to the boiling water. It enhances flavor and helps the pasta absorb taste. After draining, toss the pasta with a little olive oil to prevent sticking. When sautéing, heat your olive oil over medium heat. If the oil is too hot, it can burn your garlic and onion. Start with the onion, stirring for 3 to 4 minutes. Wait until it becomes translucent. Then, add the minced garlic. Cook it for just one minute to keep its flavor strong. Finally, add the mushrooms and sauté until golden brown. This step adds depth to your dish. For extra flavor, try adding a pinch of red pepper flakes. It gives a nice kick. You can also experiment with fresh herbs like basil or thyme. They can brighten the dish. Don’t forget to season with salt and pepper at the end. Garnish with chopped parsley for a fresh touch before serving. This adds color and enhances the dish's appeal. Pro Tips Perfect Pasta: To achieve al dente pasta, make sure to follow the package instructions and taste the pasta a minute or two before the recommended cooking time. Fresh Ingredients: For the best flavor, use fresh baby spinach and high-quality Parmesan cheese. Fresh ingredients significantly enhance the overall taste of the dish. Customize Your Veggies: Feel free to add other vegetables like bell peppers, zucchini, or asparagus for added color and nutrition. Just sauté them along with the mushrooms. Leftover Love: This pasta dish tastes even better the next day! Store leftovers in an airtight container in the refrigerator for up to 3 days. {{image_2}} You can swap out the fusilli pasta for gluten-free pasta. This keeps the meal tasty for those with gluten issues. Other pastas like penne or rotini work too. If you want a lighter option, try zucchini noodles. They add a fresh crunch and pair well with the sauce. Use vegetable broth instead of chicken broth to keep it vegetarian. You can also replace heavy cream with coconut milk for a dairy-free option. Feel free to play with the veggies in this dish. You can add bell peppers for sweetness. Broccoli or asparagus can bring a nice crunch. Carrots add color and a bit of sweetness too. If you like spice, throw in some red pepper flakes or diced jalapeños. The more veggies, the more nutrients and flavor. To make this dish vegan, you can replace Parmesan cheese with a plant-based cheese. Nutritional yeast can give you that cheesy flavor without dairy. Use almond milk or cashew cream instead of heavy cream for the sauce. Make sure to use vegetable broth and add more spices for extra flavor. This way, you can enjoy a creamy, rich meal without any animal products. Store your Parmesan Spinach Mushroom Pasta Skillet in an airtight container. Let it cool down first. This helps keep the flavors fresh. Place the container in your fridge. It can stay good for up to three days. To reheat, scoop out the amount you want. Place it in a skillet over low heat. Add a splash of water or broth to keep it creamy. Stir gently until it’s hot. You can also use a microwave. Heat in short bursts, stirring in between. This keeps the pasta from drying out. If you want to freeze this dish, it’s best to do it before reheating. Let it cool completely. Then, use a freezer-safe container. It can last up to two months in the freezer. When you’re ready, thaw it in the fridge overnight. Reheat it using the methods above. The texture might change a bit, but it will still taste great! Yes, you can use any pasta you like. Penne or spaghetti works well too. Just adjust the cooking time as needed. Make sure to check the package for al dente cooking times. Different shapes add unique textures to your dish. To make this dish dairy-free, swap heavy cream for coconut cream or almond milk. Use a dairy-free cheese instead of Parmesan. Nutritional yeast can add a cheesy flavor without dairy. Adjust seasonings to enhance the taste. This pasta dish pairs well with a simple salad. A side of garlic bread is also a great choice. You can serve it with grilled chicken or shrimp for more protein. For a light meal, add roasted vegetables on the side. This dish lasts about three to four days in the fridge. Store it in an airtight container to keep it fresh. When you're ready to eat, reheat it gently on the stove or in the microwave. Add a splash of water or broth to help it stay creamy. This post covered key aspects of making a tasty pasta dish. We explored ingredients, cooking steps, tips, and variations. You can easily adapt this recipe to suit your needs. Remember to focus on quality ingredients for the best taste. Experiment with different flavors and textures to make it your own. Store it correctly to enjoy leftovers later. With these steps, you’re ready to create a delicious meal that you and others will love. Enjoy cooking!

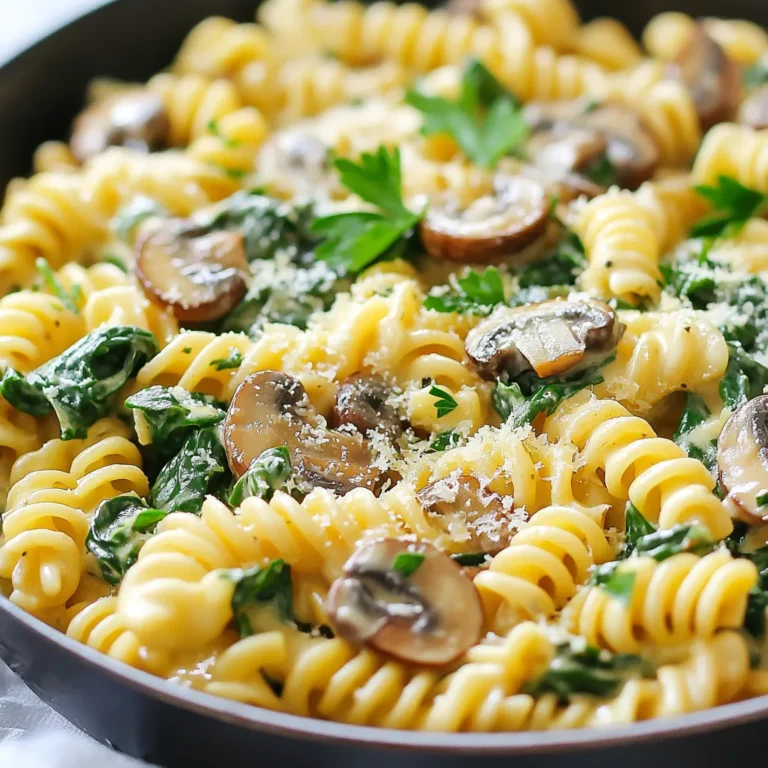
Parmesan Spinach Mushroom Pasta Skillet Delight

- 1 lb ground beef - 2 tablespoons hot honey - 1 tablespoon soy sauce - 1 bell pepper, diced - 1 cup broccoli florets - 2 green onions, sliced - 1 teaspoon garlic powder - 1 teaspoon onion powder - 1 tablespoon sesame oil - 2 cups cooked rice (white, brown, or cauliflower) - Salt and pepper to taste - Sesame seeds for garnish To create this Ground Beef Hot Honey Bowl, you need simple ingredients. Ground beef is the star here. It gives the dish its hearty base. Hot honey adds a sweet and spicy kick. The soy sauce brings umami flavor that ties everything together. For the veggies, feel free to pick your favorite colors. Bell peppers add crunch and bright color. Broccoli florets provide nutrients and balance. Green onions offer freshness and a mild onion taste. Don’t forget the extra ingredients! Garlic powder and onion powder boost flavor without adding bulk. Sesame oil gives a lovely nutty taste. Rice serves as a perfect base, soaking up all the delicious sauce. Finally, sesame seeds add a fun crunch as a garnish. This combination makes a quick and tasty meal you will love! {{ingredient_image_1}} To start, pour 1 tablespoon of sesame oil into a large skillet. Heat it on medium-high. Add 1 pound of ground beef to the hot oil. Use a spatula to break the beef apart. Cook it for about 5 to 7 minutes. You want it browned and fully cooked. After that, drain any extra fat from the skillet. Then, return it to the heat. Stir in 1 teaspoon of garlic powder and 1 teaspoon of onion powder. Add 1 tablespoon of soy sauce and 2 tablespoons of hot honey. Mix everything well and let it simmer for 2 to 3 minutes. This helps the sauce thicken. Taste it and add salt and pepper as needed. Now, let’s prepare the veggies. Take 1 cup of broccoli florets and 1 diced bell pepper. Steam them in a pot for about 3 to 5 minutes. They should become tender but still bright and fresh. This steaming method keeps their color and nutrients. It’s time to build your bowl! Start with a layer of 2 cups of cooked rice. You can use white, brown, or even cauliflower rice. Spread it evenly in the bowl. Next, add the hot honey ground beef on top. Finally, pile the steamed broccoli and bell peppers over the beef. For a finishing touch, sprinkle sliced green onions and sesame seeds on top. This adds flavor and a nice crunch. Enjoy your meal! - To keep the beef juicy, don’t overcook it. Aim for 5-7 minutes until browned. - For perfect vegetables, steam bell peppers and broccoli for 3-5 minutes. They should be tender but still bright. - Use vibrant bowls to make your dish pop. Arrange the rice, beef, and veggies in sections. - Drizzle extra hot honey on top right before serving. This adds flavor and a nice shine. - Pair your bowl with a light salad or some crispy spring rolls. - For drinks, try iced tea or sparkling water with lemon. These will complement the meal well. Pro Tips Choose the Right Beef: For a leaner option, use ground turkey or chicken instead of beef. These alternatives will still allow the flavors of hot honey and spices to shine through. Customize Your Heat: Adjust the amount of hot honey or sriracha to suit your spice tolerance. For a milder dish, reduce the hot honey and add a touch more soy sauce. Prep Ahead: Chop the vegetables and cook the rice in advance to make assembly quick and easy. This is especially helpful for busy weeknights! Extra Flavor Boost: Consider adding a splash of lime juice or a sprinkle of fresh cilantro just before serving for an extra layer of flavor and brightness. {{image_2}} You can swap ground beef for other proteins. Ground turkey or chicken works well. Both are leaner and still tasty. For a plant-based option, try tofu or lentils. Tofu absorbs flavors well. Lentils add a nice texture and protein. You can change the flavor profile easily. Try different sauces like teriyaki or hoisin. You can also add spices like cumin or paprika for depth. Adjust the sweetness by adding more hot honey or reducing it. For spice, add chili flakes or hot sauce. If you want a low-carb option, skip the rice. Cauliflower rice is a great choice. It has a similar texture and absorbs flavors. Zucchini noodles are another fun substitute. They add freshness and keep the dish light. To keep your Ground Beef Hot Honey Bowl fresh, use airtight containers. Glass or plastic containers with tight lids work best. Store in the fridge for up to three days. Make sure it cools down before sealing the container. To reheat, use the microwave or a skillet. If using a microwave, heat in short bursts. Stir between each burst to avoid hot spots. For the skillet, add a bit of water or oil to keep it moist. This helps keep the beef and veggies tender and tasty. Avoid high heat, as that can dry them out. Enjoy your meal again just as much! Hot honey is a sweet and spicy blend of honey and chili peppers. It adds a kick to dishes. You can use it in various recipes. Drizzle it on meats, veggies, or even pizza. It pairs well with cheese, too. This makes it a versatile ingredient in the kitchen. Yes, you can prepare this dish ahead of time. Cook the beef and veggies, then store them in airtight containers. Keep the rice separate to avoid sogginess. You can store the meal in the fridge for up to three days. Reheat it in the microwave or on the stove. This makes meal prep easy and quick. To make the dish milder, use less hot honey. You can mix honey with a bit of sriracha for a softer taste. If you want more heat, add extra hot honey or chili flakes. Taste as you go to find the right balance. Adjusting the spice level lets you customize the meal to your liking. This blog post explored creating a delicious rice bowl with simple ingredients. You learned about the key components, cooking steps, and variations to suit your taste. I highlighted tips for perfect cooking times and presentation ideas to impress. Remember, you can mix proteins and adjust flavors to make it your own. Whether you enjoy leftovers or meal prep, these ideas work for everyone. Dive in and enjoy making this tasty dish!

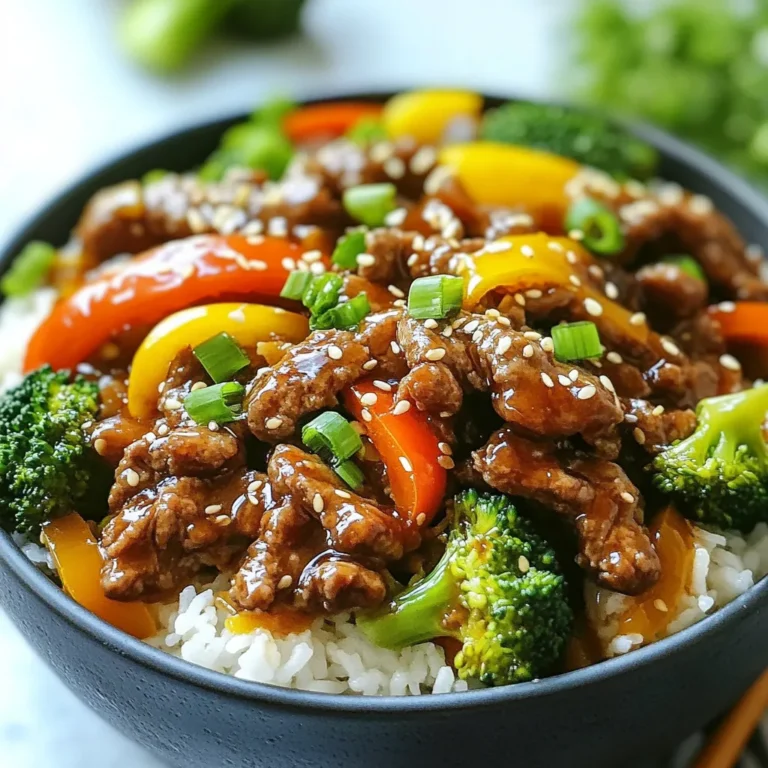
Ground Beef Hot Honey Bowl Quick and Tasty Meal

PREV 1 … 44 45 46 … 56 NEXT
secrets pice kitchen

explore

DessertsDinnerAppetizersDrinks

Our Policies

  • Cookie Policy
  • Copyright Policy
  • Disclaimer
  • GDPR Policy
  • Terms Of Use
Back to Top
  • About
  • Contact Us
  • Privacy Policy
© 2025 secrets pice kitchen