FREE DINNER EBOOK! Get your copy!
  • Cookie Policy
  • GDPR Policy
  • Disclaimer
  • Terms Of Use
  • Visit my other site: Fun Cookie Recipes
secrets pice kitchen
  • Home
  • Dinner
  • Desserts
  • Drinks
  • Appetizers
  • Contact
  • About
  • Privacy Policy
  • Home
  • Dinner
  • Desserts
  • Drinks
  • Appetizers
  • Contact
  • About
  • Privacy Policy
  • Cookie Policy
  • GDPR Policy
  • Disclaimer
  • Terms Of Use
Visit my other site: Fun Cookie Recipes

HOME / CATEGORIES /

Latest

To make this bright and tasty cilantro lime quinoa salad, you will need: - 1 cup quinoa, rinsed and drained - 2 cups vegetable broth or water - 1 cup cherry tomatoes, halved - 1 cucumber, diced - 1 red bell pepper, diced - 1 can (15 oz) black beans, rinsed and drained - 1 avocado, diced - 1/2 cup fresh cilantro, chopped - 1/4 cup red onion, finely chopped - Juice of 2 limes - 3 tablespoons olive oil - 1 teaspoon cumin - Salt and pepper to taste If you can’t find some ingredients, don’t worry! Here are some easy swaps: - Instead of quinoa, you can use bulgur or farro. - Swap black beans for chickpeas or kidney beans. - Use lime juice from a bottle if fresh limes are not available. - For a creamier taste, you can replace avocado with Greek yogurt. - If you don’t have fresh cilantro, parsley makes a good alternative. This salad is not only tasty but also good for you! Each serving has: - Calories: 300 - Protein: 10g - Carbohydrates: 45g - Fat: 12g - Fiber: 12g - Sugars: 2g With these ingredients, you're set for a fresh and healthy meal! Each bite offers a mix of flavors and good nutrition. {{ingredient_image_1}} To start, bring 2 cups of vegetable broth or water to a boil in a medium saucepan. This adds taste and nutrients. Once it boils, add 1 cup of rinsed quinoa. Reduce heat to low and cover the pot. Let it simmer for about 15 minutes. The quinoa will absorb all the liquid and become fluffy. After 15 minutes, take it off the heat. Let it cool for about 10 minutes. Fluff it gently with a fork to separate the grains. While the quinoa cools, grab a large mixing bowl. In this bowl, add the cooled quinoa. Then, toss in 1 cup of halved cherry tomatoes, 1 diced cucumber, and 1 diced red bell pepper. Next, add 1 can of black beans that you’ve rinsed and drained. Don’t forget to include 1 diced avocado, 1/2 cup of chopped fresh cilantro, and 1/4 cup of finely chopped red onion. Mix gently to combine all the fresh, vibrant ingredients. Now, let’s make the dressing. In a small bowl, squeeze the juice of 2 limes. Add 3 tablespoons of olive oil, 1 teaspoon of cumin, and a pinch of salt and pepper. Whisk it all together until it blends well. This dressing will add a zesty kick to your salad. Drizzle the dressing over the quinoa mixture and toss gently. Make sure every ingredient is coated. Taste the salad and adjust the seasoning. You can add more lime juice, salt, or pepper if you wish. To cook fluffy quinoa, start by rinsing one cup of quinoa in water. This step removes any bitter taste. Next, bring two cups of vegetable broth or water to a boil in a medium saucepan. Once boiling, add the rinsed quinoa. Reduce the heat to low, cover, and let it simmer for about 15 minutes. After the time is up, remove the pot from the heat. Let it sit for 10 minutes to steam. Finally, fluff the quinoa with a fork. This method gives you perfectly cooked quinoa every time. To boost the flavor of your quinoa salad, use fresh ingredients. Always opt for ripe cherry tomatoes and a bright cucumber. Add fresh lime juice and good olive oil for a zesty kick. A teaspoon of cumin brings warmth and depth to the dish. Don’t forget to season with salt and pepper to taste. Mixing in fresh herbs like cilantro adds a vibrant touch. Adjust the lime juice as needed to suit your taste. This makes every bite more enjoyable. For a stunning presentation, use a large bowl to serve your salad. Layer the ingredients for a colorful look. Garnish the top with extra cilantro and lime wedges. This not only looks good but also adds more flavor. You can also serve individual portions for a nice touch at a gathering. A sprinkle of additional cumin on top gives a hint of spice. These small details make your salad appealing and fun to eat. Pro Tips Rinse the Quinoa: Rinsing quinoa before cooking removes its natural coating, called saponin, which can taste bitter. This step ensures a more pleasant flavor in your salad. Choose Fresh Ingredients: For the best flavor and nutrition, opt for fresh vegetables and herbs. Look for vibrant colors and firm textures when selecting your produce. Customize the Dressing: Feel free to adjust the lime juice and olive oil to suit your taste. Adding a pinch of sugar or a dash of hot sauce can create a unique flavor profile. Make it Ahead: This salad keeps well in the refrigerator, making it a great option for meal prep. Just add the avocado right before serving to prevent browning. {{image_2}} You can easily boost the protein in your cilantro lime quinoa salad. Try adding grilled chicken, shrimp, or tofu. Each of these choices adds unique taste and texture. For a simple boost, mix in some nuts or seeds. Pumpkin seeds or slivered almonds work great. They add crunch and nutrition. This salad is already vegan and gluten-free, but you can make it even more so. If you want a different flavor, swap the black beans for chickpeas. They give a nice twist and keep it hearty. Also, check your vegetable broth. Ensure it is gluten-free if you need that option. Using seasonal vegetables makes this salad fresh and exciting. In spring, add asparagus or snap peas for crunch. Summer is perfect for ripe peaches or corn. In fall, roasted sweet potatoes add warmth. Winter calls for hearty veggies like brussels sprouts. These changes keep your salad vibrant and satisfying. To keep your cilantro lime quinoa salad fresh, store it in an airtight container. Make sure the salad is cool before sealing it. This way, you limit moisture and keep flavors intact. Place the container in the fridge. It stays fresh for about 3 to 5 days. If you notice any changes in smell or color, it's best to toss it. You can freeze cilantro lime quinoa salad, but avoid freezing the fresh avocado and tomatoes. These ingredients don't thaw well. To freeze, portion the salad into freezer-safe bags or containers. Remove as much air as possible before sealing. It can last up to 2 months in the freezer. When ready to eat, thaw it in the fridge overnight. Cilantro lime quinoa salad is best enjoyed fresh. However, if you store it properly, it can last a few days. For serving, make sure to give it a good stir before you dig in. Add fresh lime juice or a drizzle of olive oil for extra flavor. You can pair it with grilled chicken or fish for a complete meal. Yes, you can make this salad ahead of time. It tastes great after the flavors mix. I suggest making it a few hours before serving. You can also store it overnight in the fridge. Just keep the dressing separate until you are ready to eat. This way, the salad stays fresh and crunchy. Cilantro Lime Quinoa Salad pairs well with many dishes. You can serve it with grilled chicken or fish for a complete meal. It also goes great with tacos or wraps. If you want a lighter meal, serve it with a side of fresh fruit. This salad is versatile and fits many types of meals. Leftovers of this salad last about three to four days in the fridge. Make sure to keep it in an airtight container. If the salad looks or smells off, it’s best to throw it away. Enjoy the fresh flavors while they last. This blog post covered the essential ingredients and methods for making a tasty quinoa salad. You learned how to cook fluffy quinoa, mix fresh ingredients, and prepare a delicious dressing. I shared tips for flavor and serving, plus variations to customize your salad. Finally, we talked about storage and answered common questions. Remember, this salad is easy to personalize and perfect for any meal. Enjoy your cooking and get creative with your ingredients!

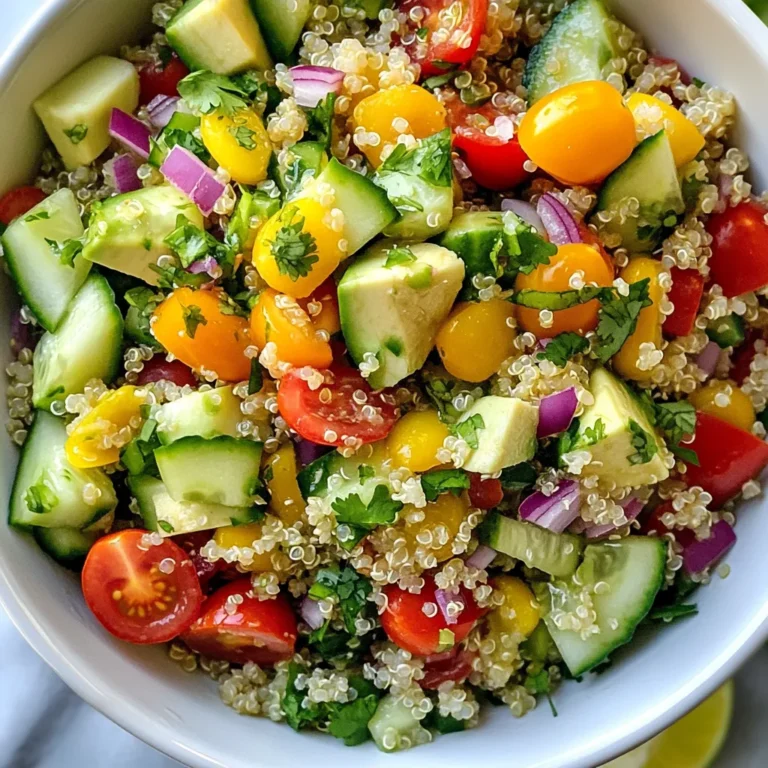
Cilantro Lime Quinoa Salad Fresh and Flavorful Dish

- Beef Chuck Roast: Use 2 lbs of beef chuck roast. Cut it into chunks for easy cooking. This meat is tender and flavorful. - Dried Guajillo and Pasilla Chilies: You will need 4 dried guajillo chilies and 2 dried pasilla chilies. Remove the seeds before use. These chilies bring rich flavor and color. - Essential Spices and Seasonings: Gather 1 teaspoon each of cumin powder, dried oregano, black pepper, and salt. You’ll also need 2 bay leaves. These spices create a warm and savory base for your dish. - Fresh Cilantro: Chop fresh cilantro to add a bright touch. It complements the rich flavors. - Diced Onion: Use diced onion for a crunchy texture and a bit of bite. It enhances the overall taste. - Lime Wedges: Serve lime wedges on the side. A squeeze of lime adds a zesty kick that pairs well with the tacos. {{ingredient_image_1}} - Toasting the Chilies: First, heat a skillet over medium heat. Add the guajillo and pasilla chilies to the pan. Toast them for about 2-3 minutes. Watch for a fragrant smell. This step brings out their rich flavor. - Soaking the Chilies: After toasting, remove the chilies from heat. Place them in a bowl and cover with hot water. Let them soak for about 15 minutes. This softens the chilies, making them easy to blend. - Blending Ingredients: In a blender, add the soaked chilies, minced garlic, and chopped onion. Sprinkle in cumin, oregano, black pepper, and one cup of beef broth. Blend until smooth. If the sauce is too thick, add more broth until it reaches a pourable consistency. - Achieving Sauce Consistency: The sauce should be thick but pourable. You want it to cling to the beef without being too runny. This balance makes your tacos extra tasty. - Combining Ingredients in the Pot: In a large pot, add your beef chunks. Pour the blended chili sauce over the beef. Add the rest of the beef broth and bay leaves. Stir to mix everything well. - Simmering for Tenderness: Bring the pot to a boil. Then reduce the heat to a simmer. Cover the pot and cook for about 2.5 to 3 hours. The beef should become very tender. You’ll know it’s done when it shreds easily with a fork. - Shredding the Cooked Beef: Once the beef is cooked, take it out of the pot. Use two forks to shred the beef into bite-sized pieces. Discard any large pieces of fat. Return the shredded beef to the pot with the broth. - Preparing the Tortillas: In a separate skillet, heat a little oil over medium heat. Quickly dip each tortilla in the birria broth. This adds flavor. Then, place the dipped tortilla in the hot skillet. - Crisping the Tortillas in Oil: Add a generous amount of shredded beef to one half of the tortilla. Fold the tortilla over. Cook for about 2-3 minutes on each side until golden brown and crispy. - Filling and Serving the Tacos: Once cooked, place the tacos on a platter. Garnish with chopped cilantro and diced onion. Serve with lime wedges for squeezing over the top. Enjoy every delicious bite! Benefits of Beef Chuck Roast Beef chuck roast works great for birria. It has rich flavor and tenderness. The fat helps keep the meat juicy. Plus, it shreds easily after cooking. This makes it perfect for tacos. Alternative Cuts for Birria If you can't find chuck roast, try brisket or short ribs. Both cuts add great taste. They also give a nice texture to the dish. Optional Add-ins for the Sauce You can spice up the sauce with extra ingredients. Consider adding a pinch of cinnamon or cloves. These spices add depth to the flavor. You could also toss in some fresh herbs like thyme or bay leaves. Cooking with Different Broths Using different broths can change the taste. Beef broth is standard, but chicken broth works too. Vegetable broth is an option for veggie versions. Each broth adds its unique touch to your birria. Tips for Crispy Tortillas To make crispy tortillas, heat a skillet first. Use a little oil to fry them. Dip each tortilla in the birria broth quickly. This adds flavor and makes them crispier. How to Avoid Soggy Tacos Soggy tacos are a bummer. To prevent this, fill them just before serving. Avoid over-soaking the tortillas. Serve them fresh and hot for the best texture. Pro Tips Toast the Chilies: To enhance the flavor of the chilies, make sure to toast them lightly in a skillet before soaking. This will bring out their natural oils and deepen the flavor of your sauce. Use Quality Beef: For the best texture and flavor, choose a well-marbled beef chuck roast. The fat will render during cooking, keeping the meat tender and juicy. Adjust Spice Level: If you prefer a milder taco, you can reduce the number of chilies or remove the seeds before toasting. Alternatively, add a pinch of cayenne or chili powder for extra heat. Make Ahead: These tacos taste even better the next day! Consider making the birria a day in advance and letting the flavors meld overnight in the refrigerator. {{image_2}} Ingredients for Quesabirria - 2 lbs beef chuck roast, cut into chunks - 4 dried guajillo chilies, seeds removed - 2 dried pasilla chilies, seeds removed - 2 cloves garlic, minced - 1 medium onion, chopped - 2 cups beef broth - 1 teaspoon cumin powder - 1 teaspoon dried oregano - 1 teaspoon black pepper - 1 teaspoon salt (adjust to taste) - 2 bay leaves - 12 corn tortillas - Fresh cilantro, chopped (for garnish) - Diced onion (for garnish) - Lime wedges (for serving) - 1 cup shredded cheese (like Oaxaca or mozzarella) Cooking Instructions for Quesabirria 1. Start by making the birria as described before. 2. After you shred the beef, set it aside. 3. Heat a skillet and add a tortilla. 4. Add a layer of cheese, then beef on one half. 5. Fold the tortilla in half and cook until crispy. 6. Serve hot with dipping broth. Substitute Options - Use jackfruit, mushrooms, or lentils for a hearty base. - Replace beef broth with vegetable broth for vegan options. Flavorful Vegetable Alternatives - Add roasted sweet potatoes for sweetness. - Toss in grilled zucchini or bell peppers for crunch. Accompanying Sides and Dips - Serve with rice and beans for a full meal. - Pair with avocado salsa for a fresh touch. Creative Topping Ideas - Top with pickled red onions for tang. - Add a dollop of guacamole for creaminess. - Use radishes for a peppery crunch. These variations allow you to enjoy birria tacos in new and exciting ways! Refrigeration Tips You can keep leftover birria tacos in the fridge. Place them in an airtight container. They stay fresh for about 3 days. Make sure to separate the tacos from the broth. This keeps the tortillas from getting soggy. Freezing for Long-Term Storage For longer storage, freeze the tacos. Wrap them tightly in plastic wrap. Then place them in a freezer bag. They can last up to 3 months in the freezer. When ready to eat, let them thaw overnight in the fridge. Best Methods to Reheat Tacos To reheat, use a skillet. Heat a little oil over medium heat. Place the tacos in the skillet and cook for 2-3 minutes on each side. This warms them up nicely and keeps them crispy. Keeping the Tacos Crispy Avoid using the microwave. It makes the tortillas soft. Instead, use the oven if you have many tacos. Preheat the oven to 350°F (175°C). Place the tacos on a baking sheet and heat for about 10 minutes. This method keeps them crispy and tasty. Birria tacos come from Mexico. They are soft tacos filled with tender, spicy beef. The meat is slow-cooked in a rich chili broth. You get a wonderful, savory flavor in every bite. Traditionally, people serve them with the broth, called consomé, for dipping. This adds extra taste and warmth. You can find them in many taco shops, especially in Jalisco, Mexico. Yes, you can prepare Birria tacos in advance. Cook the beef and store it in the fridge. This way, the flavors meld together. You can also prepare the chili sauce ahead of time. Store it in an airtight container. For best results, eat the tacos within three days. Reheat the beef on the stove or in the microwave. Many sides go well with Birria tacos. Some popular Mexican sides include: - Spanish rice - Refried beans - Grilled corn For drinks, you can try: - Horchata - Agua fresca - A cold beer These sides enhance the meal and bring a festive vibe. Birria tacos can be spicy, but you control the heat. The dried chilies, like guajillo and pasilla, give the dish its kick. You can adjust the spice level by using fewer chilies. If you prefer milder flavors, remove the seeds from the chilies. This step helps reduce heat while keeping the taste. For those who love spice, try adding fresh jalapeños or hot sauce. Birria tacos are a tasty blend of flavors and textures. We covered key ingredients like beef chuck roast and dried chilies. You learned step-by-step how to make them, from toasting chilies to serving crispy tacos. Don’t forget to try variations like quesabirria or vegan options. These tips will help you store and reheat well. You can enjoy birria tacos with many tasty sides. With practice, you'll create perfect tacos everyone will love. Enjoy your cooking journey!

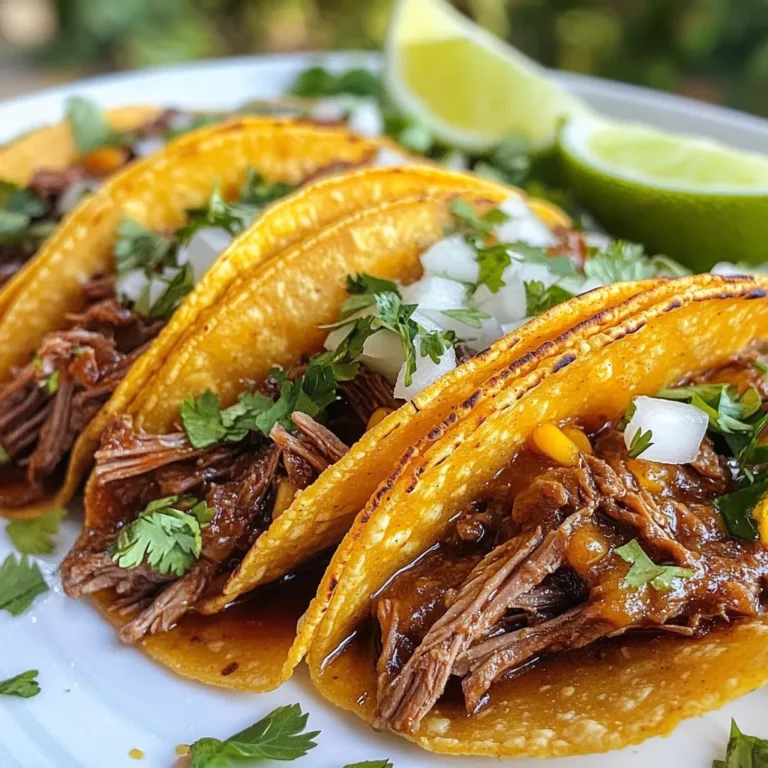
Birria Tacos Flavorful Recipe for Everyone

- 4 salmon fillets, skinless - 2 cups fresh spinach, chopped - 1 cup feta cheese, crumbled - 1/2 cup cream cheese, softened The main ingredients are key to making this dish special. Salmon fillets provide a rich base, while fresh spinach adds a pop of color and nutrition. Feta cheese gives a tangy flavor, and cream cheese adds creaminess to the filling. - 1 tablespoon olive oil - 2 cloves garlic, minced - 1 teaspoon lemon zest - 1/2 teaspoon dried oregano Seasoning is vital for taste. Olive oil helps cook the garlic, which adds a wonderful aroma. Lemon zest brightens the dish and balances the richness of the cheese. Dried oregano adds a hint of earthiness. - 1/2 teaspoon red pepper flakes - Salt and pepper to taste Optional ingredients can enhance your dish. Red pepper flakes give a little heat, while salt and pepper are essential for seasoning. Adjust these to suit your taste. With these ingredients, you are set for a delightful cooking experience! {{ingredient_image_1}} First, preheat your oven to 375°F (190°C). This temperature ensures even cooking. While the oven warms, prepare your salmon fillets. Take four skinless fillets and cut a pocket in each one. Be careful not to cut all the way through. This pocket holds the tasty filling. Next, grab a skillet and heat one tablespoon of olive oil over medium heat. Add two cloves of minced garlic and sauté them until they smell great, about one minute. Then, add two cups of chopped fresh spinach. Cook the spinach for 2-3 minutes until it wilts down. This adds flavor and nutrition to the filling. Now, it’s time to make the filling. In a bowl, mix the cooked spinach with one cup of crumbled feta cheese, half a cup of softened cream cheese, one teaspoon of lemon zest, half a teaspoon of dried oregano, and a pinch of salt and pepper. If you like a little heat, add half a teaspoon of red pepper flakes. Stuff each salmon fillet with this spinach and feta mixture. Make sure to fill them generously. Place the stuffed fillets on a baking sheet lined with parchment paper. Sprinkle a bit more salt and pepper on top. Bake in the preheated oven for 20-25 minutes. The salmon is done when it flakes easily with a fork. Enjoy your delicious stuffed salmon! To avoid dry salmon, I recommend baking it just right. Cook it until it flakes easily with a fork. This usually takes about 20-25 minutes at 375°F (190°C). You can also cover the salmon with foil for the first half of cooking. This keeps moisture in and helps it cook evenly. To ensure even cooking, use fillets of the same thickness. If some pieces are thicker, they will take longer to cook. Let the salmon rest for a few minutes after baking. This helps the juices redistribute and keeps it tender. You can add alternative herbs and spices for a twist. Try dill, basil, or thyme to change the taste. Each herb brings its own flavor to the dish. If you want a kick, add more red pepper flakes to the filling. For a tangy sauce, consider serving a lemon dill sauce or a yogurt sauce. This adds a fresh zing and enhances the flavors of the salmon and filling. Drizzle it on top just before serving for a bright finish. For serving suggestions, place the stuffed salmon on a bed of fluffy quinoa or alongside colorful roasted veggies. This not only looks great but adds nutrition too. For plate garnishing tips, sprinkle fresh dill or parsley on top of the salmon. You can also add lemon wedges on the side for an extra pop of color and flavor. This makes the dish not only tasty but visually appealing as well. Pro Tips Choose Fresh Ingredients: Always opt for fresh spinach and high-quality feta cheese to enhance the flavor of your stuffed salmon. Don't Overstuff: Be careful not to overstuff the salmon fillets, as this can cause them to burst while baking. A generous but manageable amount will ensure even cooking. Perfect Baking Time: Keep an eye on the salmon while it bakes; it should be opaque and easily flake with a fork. Avoid overcooking to maintain its moisture. Herb Variations: Feel free to experiment with different herbs such as basil or thyme for a unique twist on the flavor profile of the stuffed salmon. {{image_2}} You can switch up the protein in this dish. Instead of salmon, try using other fish types. Cod or trout work well with the same stuffing. Both have a mild flavor and cook nicely. You can also go for a stuffed chicken option. Use chicken breasts and follow the same stuffing steps. Just ensure you cook the chicken to a safe internal temperature. If you prefer a vegetarian dish, eggplant makes a great substitute for salmon. Cut the eggplant into thick slices and roast them first. Then stuff them with the spinach and feta mix. This gives you a hearty meal without meat. You can also explore other filling ideas. Consider using mushrooms or zucchini as the base. They both absorb flavors well and create a tasty dish. You can change the flavor profile to suit your taste. For a Mediterranean twist, add sun-dried tomatoes or olives to the filling. These ingredients enhance the dish's depth and richness. You can also create creamy sauce variations to drizzle on top. A lemon-butter sauce or a yogurt-based sauce can brighten up the dish. Experimenting with flavors can take this meal to new heights. To keep your stuffed salmon fresh, store it properly. Place any leftovers in an airtight container. They will last in the fridge for up to three days. Make sure the salmon is completely cool before sealing. If you want to save it for longer, freezing is a great option. Wrap the stuffed salmon tightly in plastic wrap. Then, place it in a freezer-safe bag. This way, it can last for up to three months. Just remember to label the bag with the date. When you’re ready to enjoy your leftovers, reheating is key. The best way to reheat stuffed salmon is in the oven. Preheat the oven to 350°F (175°C). Place the salmon on a baking sheet. Cover it with foil to keep it moist. Heat for about 15 minutes or until warmed through. You can also use the microwave, but be careful. Microwaving can dry out the salmon. If you choose this method, use a microwave-safe dish. Add a splash of water and cover it. Heat in short bursts, checking often. This helps you avoid losing the great texture of the dish. You can tell when salmon is cooked by looking for color and texture. Cooked salmon turns from pink to a light opaque color. It should also flake easily with a fork. The best way to check is to use a meat thermometer. The internal temperature should reach 145°F (63°C). This ensures it's safe to eat and tastes great. Yes, you can make the filling ahead of time! Just prepare the spinach, feta, and cream cheese mixture. Store it in an airtight container in the fridge for up to two days. When you're ready to cook, stuff the salmon and bake it. This saves time on busy nights and keeps the flavors fresh. Stuffed salmon tastes great with many sides. Here are some ideas: - Fluffy quinoa - Roasted vegetables - Garlic mashed potatoes - A fresh green salad - Lemon wedges for extra zing These sides balance the rich flavors of the salmon and make your meal colorful and fun! You can create a delicious stuffed salmon with simple ingredients and steps. We discussed key ingredients like salmon, spinach, and feta. I laid out easy cooking methods and shared tips for avoiding dry salmon. You learned about variations and how to store leftovers well. With these insights, you can make a meal that will impress anyone. Enjoy the process and have fun with the flavors. Happy cooking!

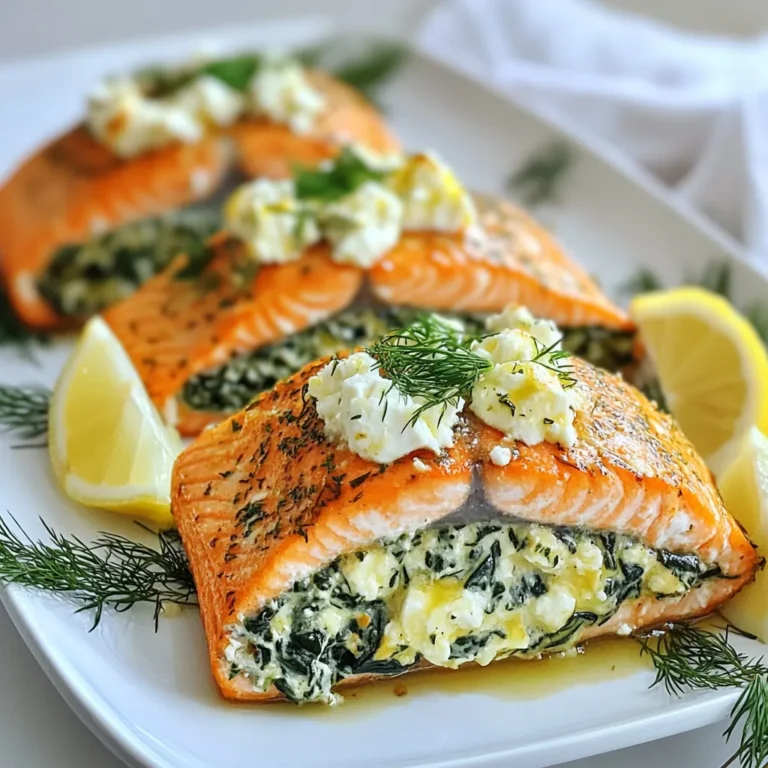
Stuffed Salmon with Spinach and Feta Delight

- 4 chicken thighs (bone-in, skin-on) - 2 oranges (juice and zest) - 1 tablespoon soy sauce - 2 tablespoons honey - 4 garlic cloves, minced - 1 teaspoon fresh ginger, grated - 1 tablespoon olive oil - Salt and pepper to taste - Fresh rosemary sprigs for garnish - Large mixing bowl - Whisk - Roasting pan - Meat thermometer (optional) Gathering the right ingredients and tools makes cooking fun and easy. I love using chicken thighs for this dish. Their juicy meat stays tender during roasting. The skin adds flavor and crispness. Fresh oranges are key. The juice and zest bring bright, tangy notes. The marinade is simple yet powerful. You need soy sauce for saltiness, honey for sweetness, and garlic for depth. Ginger adds a warm, spicy kick. Olive oil keeps everything moist. Don't skip salt and pepper; they enhance all flavors. For tools, a large mixing bowl helps combine all ingredients easily. A whisk ensures you blend the marinade well. A roasting pan is perfect for cooking the chicken evenly. If you have a meat thermometer, it can help check if the chicken is done. With these ingredients and tools, you're ready to create a delicious meal! {{ingredient_image_1}} To start, gather your ingredients. You will need orange juice, orange zest, soy sauce, honey, minced garlic, grated ginger, olive oil, salt, and pepper. In a large mixing bowl, combine the orange juice and zest with the other marinade ingredients. Use a whisk to mix everything well. This helps the flavors blend nicely. Next, take your chicken thighs and add them to the bowl with the marinade. Make sure they are well coated. For the best flavor, marinate them for at least 30 minutes. If you have time, marinating overnight in the fridge works even better. This adds more depth to the dish. Now it’s time to roast. Preheat your oven to 400°F (200°C). In a roasting pan, arrange the chicken thighs skin-side up. Pour the leftover marinade over the chicken. This will keep it juicy while it cooks. Roast for about 35-40 minutes. To enhance the flavor, baste the chicken with the marinade halfway through cooking. This step makes a big difference in taste. To get that delicious crispy skin, always use bone-in, skin-on thighs. This cut holds moisture well and cooks evenly. During roasting, place the chicken skin-side up in the pan. Roasting at a high temperature helps the skin get golden and crispy. Basting the chicken halfway through adds flavor and keeps the skin nice. For the best flavor, marinate your chicken overnight. This lets the flavors soak in deeply. You can also add herbs like thyme or spices like paprika to the marinade. This will give the chicken more depth and make it even better. Serve the roasted orange chicken on a big platter. Drizzle pan juices over the top for a nice touch. Pair it with steamed rice and sautéed green beans. This pairing gives a colorful and complete meal. For plating, arrange the green beans beside the chicken and sprinkle rosemary for a fresh look. Pro Tips Marinate Longer for Depth: For the best flavor, marinate the chicken thighs overnight. This allows the flavors to penetrate deeply into the meat. Use Fresh Ingredients: Fresh garlic and ginger can significantly enhance the flavor of your marinade compared to dried or powdered versions. Monitor Cooking Time: Cooking times can vary based on oven efficiency and chicken size. Always check that the internal temperature reaches 165°F (75°C). Baste for Extra Crispiness: Basting the chicken with the marinade halfway through roasting helps to achieve a crispy and flavorful skin. {{image_2}} You can switch up the flavor by using other citrus fruits. Lemon or lime can add a bright twist to your roasted orange chicken. If you use lemon, it brings a nice tartness. Lime adds a fresh zest that can uplift the dish. Just replace the orange juice and zest with an equal amount of your chosen citrus. This small change can create a whole new taste experience. Want to spice things up? Adding heat can elevate the dish. Red pepper flakes are a great choice. You can sprinkle them into the marinade. Start with a pinch and adjust to your taste. If you like more heat, add more flakes. This will give the chicken a kick and balance the sweetness of the orange. If you need a gluten-free option, tamari or coconut aminos work well. Both can replace soy sauce without losing flavor. Use the same amount as the soy sauce in the recipe. This simple swap makes the dish safe for those avoiding gluten. Enjoy the same great taste while keeping it friendly for all diets. To keep your roasted orange chicken fresh, store it in the fridge. Place the chicken in an airtight container. This helps prevent it from drying out. Enjoy your leftovers within three to four days for the best taste. If you want to save it longer, freezing is a great option. Wrap each piece of chicken tightly in plastic wrap. Then, place them in a freezer bag. Be sure to remove as much air as possible. Frozen chicken can last up to three months. Just label the bag with the date. To reheat your chicken, the oven works best. Preheat it to 350°F (175°C). Place the chicken on a baking sheet. Cover it with foil to keep it moist. Heat for about 15 to 20 minutes or until warm. If you're short on time, you can use the microwave. Place the chicken on a microwave-safe plate. Cover it with a damp paper towel to keep it from drying out. Heat on medium power for about 2 to 3 minutes. Check if it's warm enough. If not, continue heating in 30-second increments. Enjoy your flavorful chicken just like the first time! Marinate the chicken for at least 30 minutes. This time helps the flavors soak in. For best results, marinate overnight in the fridge. The extra time makes the chicken taste amazing. Yes, you can use chicken breasts. However, they cook faster than thighs. Chicken breasts take about 25 to 30 minutes to cook. Thighs need around 35 to 40 minutes. Thighs stay juicier and have more flavor, while breasts can dry out if overcooked. You can serve roasted orange chicken with several great sides. Here are some popular options: - Steamed rice - Sautéed green beans - Roasted vegetables - Garlic mashed potatoes - A fresh salad These sides make a colorful and tasty meal. They pair well with the sweet and tangy chicken. We covered how to make roasted orange chicken, starting with key ingredients like chicken thighs and oranges. I shared tips for marinating and roasting the chicken to achieve crispy skin and rich flavor. You can also explore variations with different citrus or spicy elements. For leftovers, I included storage and reheating tips to keep your meal fresh. With these simple steps, you can create a delicious dish that impresses. Enjoy your cooking!

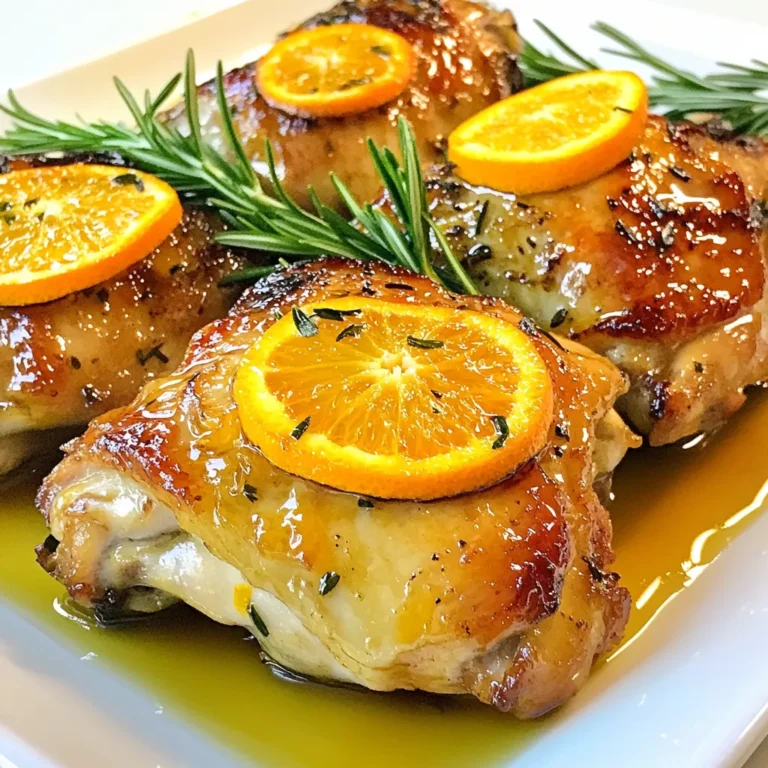
Roasted Orange Chicken Flavorful and Easy Delight

- 8 large eggs - 1 cup egg whites - 1 cup spinach, chopped - 1 red bell pepper, diced - 1/2 cup onion, diced - 1/2 cup low-fat cottage cheese - 1 tsp garlic powder - 1/2 tsp black pepper - 1/2 tsp salt These main ingredients pack a big protein punch. Eggs and egg whites are rich in protein and healthy fats. Spinach adds vitamins A and C, while bell peppers bring in fiber and antioxidants. Onions add flavor and can help with heart health. Low-fat cottage cheese boosts protein without too many calories. - 1/2 cup feta cheese, crumbled - Fresh herbs (like parsley or chives) for garnish Adding feta cheese gives your breakfast a tangy twist. Fresh herbs brighten up the dish and add color. These optional ingredients can make your meal more exciting and flavorful without much effort. - Eggs: High in protein and contain essential amino acids. - Egg Whites: Provide pure protein without fat. - Spinach: Packed with iron and vitamins for energy. - Red Bell Pepper: High in vitamin C, great for your immune system. - Onion: Contains antioxidants and supports heart health. - Low-Fat Cottage Cheese: A great source of protein and calcium. - Garlic Powder: May boost your immune system and add flavor. - Black Pepper: Aids digestion and adds spice to your meal. - Salt: Enhances flavor, but use in moderation. Each ingredient works together to create a meal that fuels your day. You get protein, vitamins, and minerals in every bite. This high protein breakfast will keep you satisfied and ready to take on your morning. {{ingredient_image_1}} To start, make your kitchen ready. First, gather all your tools and ingredients. You will need a large mixing bowl, a whisk, a 9x13 inch baking dish, and a spatula. Preheat your oven to 350°F (175°C). Grease the baking dish or use parchment paper. This step helps with easy cleanup later. In your large bowl, whisk together 8 large eggs and 1 cup of egg whites. Make sure they mix well. Next, add 1 cup of chopped spinach, 1 diced red bell pepper, and 1/2 cup of diced onion. This mix adds color and nutrients. Then stir in 1/2 cup of low-fat cottage cheese. Add 1 tsp of garlic powder, 1/2 tsp of black pepper, and 1/2 tsp of salt. Mix all ingredients until they are even. If you like, fold in 1/2 cup of crumbled feta cheese. This adds great flavor. Pour the egg mixture into the greased baking dish. Spread it evenly across the dish. Bake in your preheated oven for 25-30 minutes. The eggs should be set and the top lightly golden. Once done, take it out and let it cool for a few minutes. Cut it into squares or rectangles for easy serving. Store these in airtight containers in the fridge. They reheat well in the microwave, making breakfast quick and easy. Before serving, add fresh herbs like parsley or chives for a nice touch. To get a fluffy texture, use fresh eggs. Fresh eggs make a big difference. Whisk them well, so they mix fully. When you add cottage cheese, it gives a creamy feel. If you want more fluff, use more egg whites. They help the dish stay light and airy. If you are lactose intolerant, skip the feta and cottage cheese. Try using a dairy-free cheese instead. For a lower-calorie option, swap eggs for egg whites only. You can also replace spinach with kale or another leafy green. If you need a gluten-free option, this recipe is already gluten-free. To save time, prepare the ingredients the night before. Chop your veggies and store them in the fridge. You can also whisk the eggs ahead of time. This way, you can bake the mixture right away in the morning. Using a larger baking dish helps cook more at once. Just cut and store your portions for the week. Pro Tips Use Fresh Ingredients: Fresh spinach and bell peppers will enhance the flavor and nutritional value of your breakfast dish. Customize Your Veggies: Feel free to swap or add other vegetables like zucchini or mushrooms for a different taste and texture. Make It Ahead: This meal prep can be made on the weekend and stored in the fridge for a quick breakfast option throughout the week. Reheat with Care: When reheating, do it in short intervals to prevent the eggs from becoming rubbery; add a splash of water to keep them moist. {{image_2}} You can make your breakfast even better by adding more protein. Try these add-ins: - Turkey bacon: Adds a smoky flavor and packs in protein. - Cooked chicken: Shredded chicken can make your meal filling. - Black beans: They are rich in protein and fiber. - Quinoa: This grain adds protein and a nice texture. - Nuts or seeds: They provide healthy fats and crunch. Each of these options boosts protein while adding new tastes and textures. Feel free to mix and match them. If you prefer a vegan option, there are great substitutes for eggs. Use these: - Tofu: Silken tofu works well in scrambles or bakes. - Chickpea flour: Mix with water to create a batter. - Flaxseed meal: Soak it in water for a gel-like texture. - Aquafaba: The liquid from canned chickpeas can mimic egg whites. These options let you enjoy a protein-rich breakfast without eggs. Experiment to find your favorite. Creating fun flavors for your egg muffins is easy. Here are some tasty combos: - Spinach and feta: A classic choice that never disappoints. - Mushroom and Swiss cheese: Earthy and rich flavors blend well. - Tomato and basil: Fresh and vibrant, great for summer. - Zucchini and cheddar: Perfect for a savory kick. Mix and match these flavors to keep your breakfast exciting. You can create something new each week! After cooking your high protein breakfast, let it cool. This step helps keep moisture out. Use airtight containers for storage. This keeps your meal fresh. Label each container with the date. This way, you know when to use it. Store your containers in the fridge. Keep them on a middle shelf for best results. Your high protein breakfast will stay fresh for about five days in the fridge. If you store it properly, it can last longer. Always check for any signs of spoilage before eating. If it smells or looks off, it’s best to toss it. When reheating, use the microwave for the best results. Heat in short bursts, about 30 seconds at a time. This helps keep the eggs from overcooking. Stir the mixture gently between heats. This ensures even warming. You can also reheat in the oven at 350°F for about 10 minutes. Add a sprinkle of fresh herbs before serving for extra flavor. A high-protein breakfast gives you energy to start your day. It helps keep you full longer. This can reduce cravings for snacks later. Protein boosts your metabolism, helping you burn more calories. It also supports muscle growth and repair. Eating protein in the morning can improve focus and concentration. This is great for busy days ahead. Yes, you can freeze high-protein breakfast meals. Just ensure they cool first before freezing. Use airtight containers to avoid freezer burn. Label each container with the date. Most high-protein meals last about three months in the freezer. When ready to eat, simply thaw overnight in the fridge. Then, reheat in the microwave for a quick meal. You can try many high-protein breakfast options. Here are a few ideas: - Overnight oats with Greek yogurt and nuts. - Quinoa breakfast bowls with fruits and seeds. - Smoothies packed with protein powder and spinach. - Chia seed pudding made with almond milk and topped with berries. These options are easy to make and store well for busy mornings. A high protein breakfast can set your day up for success. This post covered the key ingredients and steps for making tasty egg muffins. We discussed how to enhance flavors and boost nutrition, too. With the right tips, meal prep can save you time. Remember, variations like vegan options and different add-ins keep things fresh. Lastly, following best storage practices helps preserve your meals. A well-planned breakfast can make all the difference in your mornings. Try these ideas and enjoy the benefits of a protein-rich start!

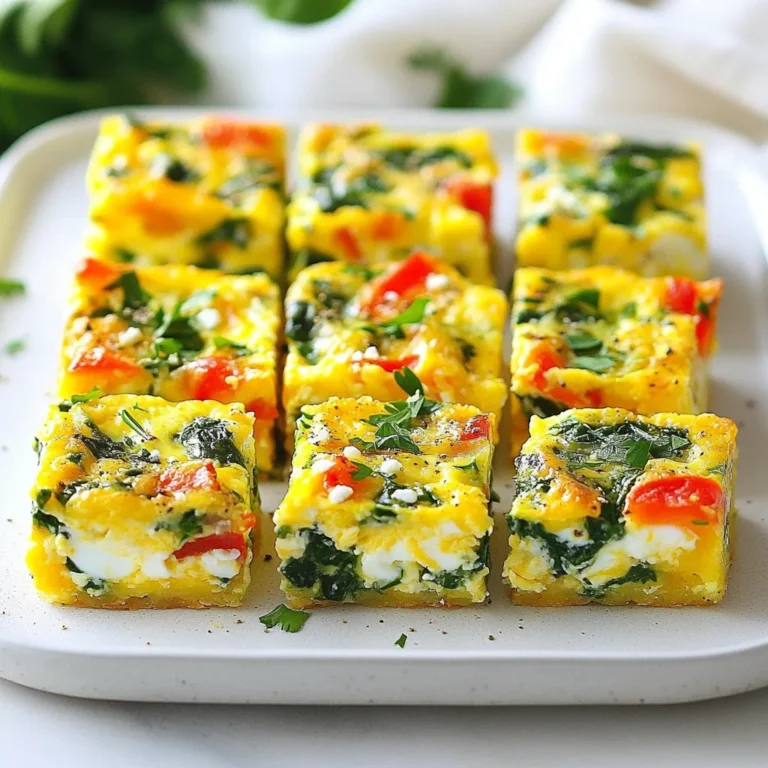
High Protein Breakfast Meal Prep for Energizing Mornings

- Chicken and Rice Components - 2 boneless, skinless chicken breasts - 1 cup basmati rice - 2 cups chicken broth - Seasoning and Aromatics - 1 tablespoon olive oil - 1 small onion, finely chopped - 3 garlic cloves, minced - 1 teaspoon dried oregano - 1 teaspoon dried thyme - 1 teaspoon paprika - Salt and pepper to taste - Garnishes and Optional Add-ins - 1 cup cherry tomatoes, halved - 1 cup fresh spinach - Fresh parsley, chopped (for garnish) Gathering all these ingredients makes the cooking process smooth. The chicken and rice pair well, and the herbs add great flavor. The cherry tomatoes and spinach provide nice color and freshness. Don't forget the parsley! It adds a lovely touch at the end. {{ingredient_image_1}} Seasoning Tips Start by seasoning the chicken breasts. Use salt, pepper, paprika, oregano, and thyme. Rub the spices all over the chicken. This step makes sure every bite is full of flavor. Searing the Chicken Next, heat olive oil in a large skillet over medium heat. Once hot, add the seasoned chicken. Sear each side for about 5-7 minutes. Look for a nice golden brown color. This adds depth to the dish. Setting the Chicken Aside Once the chicken is cooked, remove it from the skillet. Place it on a plate and set it aside. We will return to it later. Sautéing Onion and Garlic In the same skillet, add chopped onion and minced garlic. Sauté them for about 2-3 minutes. You want the onion to become soft and translucent. This step builds a strong flavor base. Adding Basmati Rice Now, stir in the basmati rice. Cook it for 1-2 minutes. Make sure to coat the rice with the oil and the flavors from the onion and garlic. This gives the rice a lovely taste. Cooking the Rice with Chicken Broth Pour the chicken broth into the skillet. Bring it to a boil. Once boiling, reduce the heat to low. Cover the skillet and let it simmer for 15 minutes. The rice will soak up the broth and flavors. Placing Chicken on Rice After 15 minutes, take the seared chicken and place it on top of the rice. Cover the skillet again. Cook for an additional 10 minutes. This allows the chicken to finish cooking and blend its flavor into the rice. Final Mixing with Vegetables Once done, stir in the halved cherry tomatoes and fresh spinach. Cook until the spinach wilts. This gives a fresh touch to the dish. It adds color and nutrients too! Achieving Perfectly Cooked Chicken To cook chicken just right, start with even thickness. Pound the chicken breasts to ensure they cook evenly. Season them well with salt, pepper, paprika, oregano, and thyme. Sear the chicken for 5-7 minutes on each side until golden brown. This creates a nice crust and locks in juices. Always check the internal temperature; it should reach 165°F. Let the chicken rest for a few minutes before slicing. This keeps it juicy. Ensuring Fluffy Basmati Rice For fluffy basmati rice, rinse the rice under cold water. This removes excess starch and prevents stickiness. After rinsing, toast the rice in the skillet for 1-2 minutes. This adds flavor and helps keep the grains separate. Use a 2:1 ratio of chicken broth to rice. When boiling, stir the rice once, then cover and reduce the heat. Let it simmer without lifting the lid. This helps the rice cook evenly and absorb all the flavors. Presentation Ideas For a rustic look, serve the skillet directly on the table. This invites sharing and conversation. If you prefer individual plates, scoop the chicken and rice into shallow bowls. Top each bowl with cherry tomatoes and a sprinkle of fresh parsley. This adds color and brightness to the dish. Pairing with Side Dishes Herb Chicken Basmati Skillet pairs well with a simple green salad. A light vinaigrette complements the flavors. You can also serve it with steamed vegetables like broccoli or green beans. These sides add nutrition and color to your meal. For a heartier option, try crusty bread to soak up the delicious broth. Pro Tips Rest the Chicken: Allow the chicken to rest after cooking. This helps the juices redistribute, making the chicken more tender and flavorful. Use Fresh Herbs: For a burst of flavor, substitute dried herbs with fresh ones when possible. Add them towards the end of cooking for maximum aroma. Check Rice Doneness: Check the rice for doneness a few minutes before the timer goes off. If it's not quite ready, you can add a splash more broth and cover it again. Customize Vegetables: Feel free to add your favorite vegetables to the skillet. Bell peppers, zucchini, or peas can enhance both flavor and nutrition. {{image_2}} Alternative Proteins If you want a twist, try using shrimp or tofu. Both cook quickly and soak up flavors well. For a heartier option, use diced beef or pork. Just adjust the cooking time for each protein. Different Vegetables Feel free to swap in your favorite veggies. Bell peppers add a crunch, while zucchini gives a fresh taste. You can also use frozen peas or broccoli for a quick fix. Just remember to add them in the last few minutes of cooking. Additional Herbs and Spices To boost flavor, consider adding fresh herbs like basil or cilantro. A dash of cumin or coriander can give a warm, earthy taste. You can even try lemon zest for a bright note. Each option can change the dish's profile. Adding Heat If you enjoy spice, add red pepper flakes or diced jalapeños. You can also use spicy paprika for a warm kick. Just be careful not to overwhelm the other flavors. Start with a little, taste, and add more if needed. - Store leftovers in an airtight container. - Keep the chicken and rice together for best flavor. For best taste, eat the leftovers within three days. When you reheat, add a splash of chicken broth. This keeps the rice moist. You can reheat in the microwave or on the stove. If using the stove, warm it over low heat. Stir often to heat evenly. - Let the dish cool completely before freezing. - Use a freezer-safe container to avoid freezer burn. You can freeze the Herb Chicken Basmati Skillet for up to three months. When ready to eat, move it to the fridge to thaw overnight. For quick thawing, place the container in a bowl of cold water. This method helps you enjoy your meal sooner! You can serve this dish with a simple green salad. A fresh cucumber salad works well too. Garlic bread is a great option to soak up any extra sauce. If you want more veggies, steamed broccoli or roasted carrots are nice sides. Yes, you can prepare this dish ahead of time. Cook the chicken and rice as directed. Let it cool, then store in the fridge. You can reheat it when you're ready to eat. The flavors will blend nicely if you make it a day before. To make it gluten-free, use gluten-free chicken broth. For a dairy-free option, this recipe is already dairy-free. If you prefer a vegetarian version, swap the chicken for chickpeas or tofu. Adjust cooking times accordingly. You can use brown rice, but adjust the cooking time. Brown rice takes longer to cook. Use 2.5 cups of broth and simmer for about 35-40 minutes. This will help it cook through and stay tender. In this article, I covered how to make a delicious chicken and rice dish. We discussed the ingredients, cooking steps, tips, variations, and storage methods. You learned how to achieve juicy chicken and fluffy rice. Remember, this meal is versatile and easy to adapt. Try different proteins or spices to match your taste. With these simple steps, you can create a comforting dish that everyone will enjoy. Get cooking and savor the flavors!

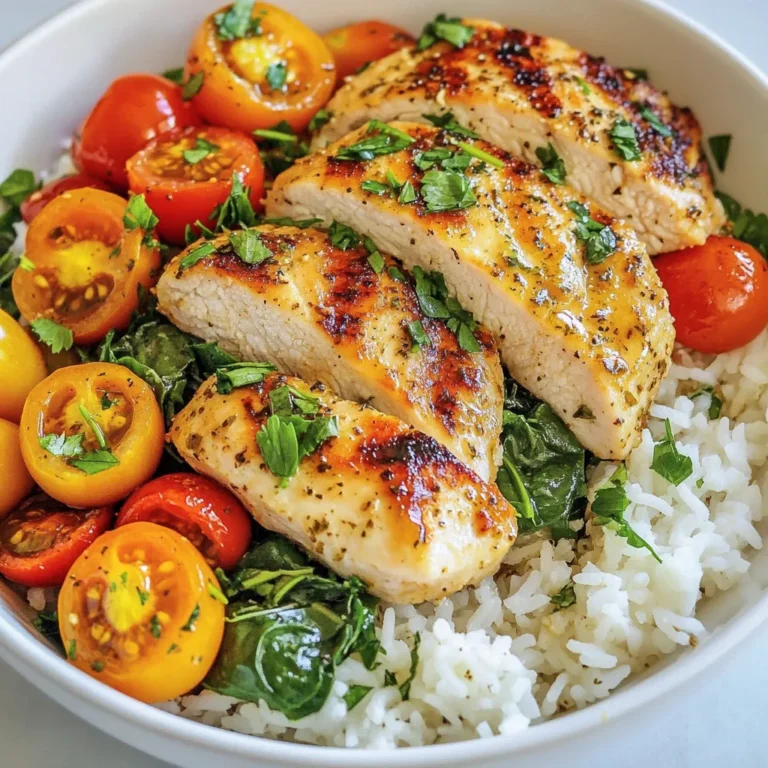
Herb Chicken Basmati Skillet Flavorful One-Pan Meal

- 4 boneless, skinless chicken breasts - 1/3 cup honey - 1/4 cup soy sauce (low sodium recommended) - 4 cloves garlic, minced - 1 tablespoon freshly grated ginger - 1 tablespoon olive oil - 1 tablespoon cornstarch - 2 tablespoons water - Salt and pepper to taste - Chopped green onions for garnish - Sesame seeds for garnish Using high-quality ingredients makes a big difference. I suggest low sodium soy sauce. It adds flavor without too much salt. Fresh garlic and ginger give a bright taste. Always choose honey that is pure and raw for the best flavor. The chicken should be fresh and free from any added hormones or antibiotics. This choice impacts the overall taste and health of your meal. You can add fun twists to this dish. Consider adding chili flakes for heat or lime juice for a tangy kick. You could also toss in some sliced bell peppers or broccoli for a veggie boost. If you love a richer taste, try adding a splash of sesame oil. This will give your sauce a deeper flavor. {{ingredient_image_1}} To start, you need to make the marinade. In a medium bowl, whisk together the honey, soy sauce, minced garlic, and grated ginger. This mix adds flavor. You can add salt and pepper to taste. Next, take your chicken breasts and place them in a Ziploc bag or a shallow dish. Pour the marinade over the chicken. Seal the bag or cover the dish tightly. Let it marinate in the fridge for at least 30 minutes. For even more flavor, you can let it sit for up to 2 hours. Once your chicken has marinated, it's time to cook. Heat olive oil in a large skillet over medium-high heat. Take the chicken out of the marinade, shaking off the extra liquid. Make sure to keep the marinade for later. Add the chicken breasts to the skillet. Cook for about 5-6 minutes on each side. You want them to get golden brown and reach an internal temperature of 165°F. When they are done, remove them from the skillet and set them aside. Now, let’s make the sauce. In the same skillet, pour in the reserved marinade. Bring it to a simmer over medium heat. In a small bowl, mix cornstarch and water to make a slurry. When the marinade is bubbling, stir in the cornstarch mixture slowly. Keep cooking for about 2-3 minutes. This will thicken your sauce. Once it reaches the right thickness, you are ready to coat the chicken! Marinating chicken helps it soak up flavors. I like to use a mix of honey, soy sauce, garlic, and ginger. This gives the chicken a sweet and savory taste. Make sure to marinate it for at least 30 minutes. If you can, try to marinate it for up to 2 hours. This extra time lets the flavors really set in. Use a Ziploc bag or a shallow dish to keep it easy. Always remember to season with salt and pepper. To keep the chicken juicy, use medium-high heat when cooking. After marinating, shake off extra marinade before cooking. This helps the chicken brown nicely. Cook each side for about 5-6 minutes. Check that the internal temperature hits 165°F. This ensures it's safe to eat and still juicy. Once done, let the chicken rest for a minute before serving. This keeps the juices inside. To thicken the sauce, use cornstarch mixed with water. This makes a slurry. After the marinade simmers, slowly stir in the slurry. Let it cook for 2-3 minutes until it thickens. Stir often to avoid lumps. If you want a thicker sauce, add more cornstarch. Be careful not to make it too thick; you want it to coat the chicken well. Pro Tips Marinate Longer for More Flavor: For the best flavor, marinate the chicken for at least 2 hours or even overnight. This will allow the flavors to penetrate deeper into the meat. Use Fresh Ingredients: Always opt for fresh garlic and ginger for the marinade. Fresh ingredients will enhance the overall taste and aroma of the dish. Check Doneness with a Thermometer: To ensure your chicken is perfectly cooked, use a meat thermometer. The internal temperature should reach 165°F (75°C) for safe consumption. Serve with a Side: Pair the honey garlic chicken with steamed vegetables or fluffy rice to complement the flavors and create a balanced meal. {{image_2}} You can cook honey garlic chicken in different ways. Grilling gives the chicken a nice smoky flavor. It adds a great char while keeping it juicy. Just preheat your grill and cook the chicken for 6-7 minutes on each side. Baking is another option. Preheat your oven to 375°F (190°C) and bake for 25-30 minutes. Use a meat thermometer to check for doneness. Both methods work well with this recipe. Want to spice things up? You can add chili flakes to the marinade for heat. This brings a nice kick to the sweet and savory mix. Try adding a splash of rice vinegar for a tangy twist. You can also mix in some sesame oil for a nutty flavor. Experiment with fresh herbs like cilantro or basil for a fresh touch. Each twist can create a new favorite dish. Pair your honey garlic chicken with tasty sides. Steamed broccoli or green beans add a colorful touch. Serve it over fluffy rice to soak up the sauce. Quinoa is a great option for a healthy side. Adding a salad with a light dressing can balance the meal. Don’t forget to garnish with chopped green onions and sesame seeds for that perfect finish. After enjoying your honey garlic chicken, let the leftovers cool. Place them in an airtight container. This keeps the chicken fresh. Store the container in the fridge for up to three days. Make sure to keep the sauce with the chicken. It adds flavor and moisture. To reheat, take the chicken out of the fridge. You can use a skillet or microwave. If using a skillet, heat it on medium. Add a splash of water or broth for moisture. Cook for about 5 minutes, flipping until hot. If using a microwave, cover the chicken with a damp paper towel. Heat it for 1-2 minutes, checking every 30 seconds. This keeps the chicken juicy. To freeze honey garlic chicken, place it in a freezer-safe bag or container. Remove as much air as possible before sealing. Label the bag with the date. It can last up to three months in the freezer. When ready to eat, thaw it in the fridge overnight. Then, reheat as mentioned above. This makes for a quick and tasty meal anytime. You should marinate the chicken for at least 30 minutes. This time allows the flavors to soak in. For a richer taste, marinate for up to 2 hours. Just keep it in the fridge. If time is tight, even 15 minutes can help. However, more time gives better flavor. If you want a honey substitute, you can use maple syrup. It has a similar sweetness and works well. Agave nectar is another good option. Both choices will keep the dish tasty. You can also use brown sugar mixed with a little water. This will mimic the honey's sweetness. To check if the chicken is cooked, use a meat thermometer. The internal temperature should reach 165°F or 75°C. If you don’t have a thermometer, cut into the thickest part. The meat should be white with no pink inside. Juices should run clear. Always make sure to check for safety! This blog post covered how to make a delicious honey garlic chicken. We explored quality ingredients, and I shared step-by-step instructions for marinating and cooking the chicken. I also offered tips for juiciness and sauce thickness. You learned options for cooking methods and variations to keep the dish exciting. Lastly, I provided storage tips and answered common questions. Remember, with these insights, your honey garlic chicken can shine. Enjoy your cooking journey with these ideas!

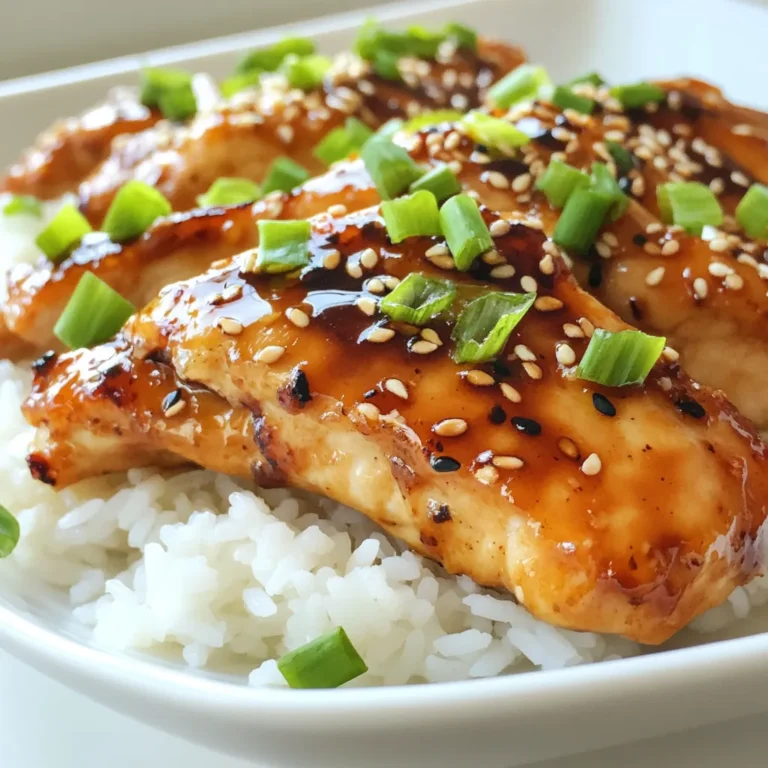
Honey Garlic Chicken Breasts Quick and Simple Recipe

- 1 cup graham cracker crumbs - 1/4 cup unsalted butter, melted - 1 cup cream cheese, softened - 1/2 cup powdered sugar - 1 teaspoon vanilla extract - 1/2 cup fresh strawberries, finely chopped - 1/2 cup whipped cream - 1 cup chocolate chips (milk or dark) - Sea salt for sprinkling These ingredients create a tasty treat. Each one plays a key role. The graham cracker crumbs give a nice crunch. The cream cheese makes the bites creamy and rich. Fresh strawberries add a burst of flavor. - 1/4 cup chopped nuts (like almonds or walnuts) - 1 teaspoon lemon juice - Zest of 1 lemon You can add chopped nuts for more crunch. A hint of lemon juice brightens the flavor. Lemon zest adds a nice touch, too. - Use almond flour instead of graham cracker crumbs for a gluten-free option. - Swap the cream cheese with mascarpone cheese for a lighter taste. - Replace chocolate chips with white chocolate for a sweeter bite. These swaps let you customize the bites. Feel free to get creative! {{ingredient_image_1}} First, I get a medium bowl. I add 1 cup of graham cracker crumbs. Then, I pour in 1/4 cup of melted unsalted butter. I mix it until the crumbs look coated. Next, I line a baking sheet with parchment paper. Using a tablespoon, I scoop out the mixture. I press it down to form small rounds, about 1 inch wide. After that, I place the rounds in the freezer for 15-20 minutes to set. Now, I grab a mixing bowl and add 1 cup of softened cream cheese. I use an electric mixer to beat it until smooth. I slowly add in 1/2 cup of powdered sugar and 1 teaspoon of vanilla extract. I mix it until creamy and well blended. Then, I take 1/2 cup of fresh strawberries and chop them finely. I gently fold the chopped strawberries and 1/2 cup of whipped cream into the cream cheese mixture. This makes a light and fluffy filling. I take the crust rounds out of the freezer. I place a small dollop of the cheesecake filling on each round. I flatten it slightly to form a bite-sized shape. Afterward, I return the bites to the freezer for another 30 minutes to firm up. While they chill, I melt 1 cup of chocolate chips in a microwave-safe bowl. I do this in 20-second intervals, stirring in between until the chocolate is smooth. Once the bites are ready, I dip each one into the melted chocolate, making sure they are coated well. I place them back on the parchment-lined baking sheet. For a gourmet touch, I immediately sprinkle a pinch of sea salt on top of each bite. Finally, I freeze the bites for another 15-20 minutes so the chocolate can set properly. To make your bites just right, follow these steps: - Chill the crust: After mixing the graham cracker crumbs and butter, press them firmly. This helps them hold shape. - Use a spoon: Scoop the crust mixture with a tablespoon. This keeps them uniform in size. - Mix well: Beat the cream cheese until smooth. This makes the filling creamy and rich. - Fold gently: When adding strawberries and whipped cream, fold them in carefully. This keeps the filling light. - Freeze properly: Let each layer chill until set. This helps the bites hold their shape when coated in chocolate. Here are some pitfalls to watch for: - Skipping the chilling steps: If you rush, the bites may not firm up. - Not measuring ingredients: Accurate measurements ensure the right taste and texture. - Overmixing the filling: This can make it too dense. Mix until just combined. - Not using parchment paper: This helps with easy removal once the bites set. - Skipping the sea salt: This tiny touch enhances the flavor. Don't forget it! For a stunning presentation, try these tips: - Use a decorative platter: Arrange the bites neatly. This makes them look inviting. - Garnish with strawberries: Place whole strawberries and mint leaves around the bites. This adds color. - Serve chilled: Keep them in the fridge until serving. This keeps them fresh and tasty. - Pair with drinks: Offer them with a glass of cold milk or iced tea. It makes for a delightful treat. - Include a dipping station: Place extra melted chocolate or fruit sauces on the side for fun! Pro Tips Choose the Right Strawberries: Opt for ripe, fresh strawberries for the best flavor and sweetness. Look for berries that are vibrant in color and have a natural shine. Whip the Cream Properly: Ensure your whipped cream is at soft peaks before folding it into the cheesecake mixture. This helps maintain the light and airy texture of the filling. Perfect Chocolate Coating: When melting chocolate, be careful not to overheat it. Stir frequently and use short intervals in the microwave to prevent it from seizing up. Store for Freshness: Keep the Strawberry Cheesecake Crunch Bites in an airtight container in the freezer. They can be enjoyed for up to a month without losing flavor or texture. {{image_2}} You can swap strawberries for other fruits. Ripe bananas, fresh blueberries, or tart raspberries work great here. Each fruit adds its unique flavor. Bananas give a creamy texture, while blueberries add a burst of sweetness. Raspberries bring a nice tang. Feel free to mix and match for fun bites! Chocolate choice makes a big difference. You can use milk chocolate for sweetness or dark chocolate for a rich taste. White chocolate also works if you like it sweeter. Try adding a sprinkle of cocoa powder or crushed nuts for extra crunch. The chocolate layer can make each bite more exciting. If you want to skip baking, you can still enjoy these bites. Just follow the same steps without baking the crust. The fridge will help set them instead. Chill the bites longer to ensure they firm up nicely. This no-bake version is perfect for hot days when you want a cool treat! To keep your Strawberry Cheesecake Crunch Bites fresh, store them in an airtight container. Place a sheet of parchment paper between layers. This helps avoid sticking. Keep the bites in the fridge for up to five days. Enjoy them cold for a refreshing treat! If you want to save some bites for later, freezing is a great option. First, let the bites set completely in the freezer. Then, place them in a single layer on a baking sheet. Once frozen, move them to a freezer-safe bag. They can last up to three months in the freezer. Make sure to label the bag with the date. These bites taste best when served cold or at room temperature. If you want them warm, microwave them for just a few seconds. Be careful not to overheat them! For serving, arrange the bites on a beautiful platter. Add whole strawberries or mint leaves for a nice touch. This makes your dessert look even more inviting! Yes, you can make these bites ahead of time. I often prepare them the night before. Once they are finished, store them in the fridge. This gives the flavors time to blend. Plus, it saves you time on the day you want to serve them. If you do not have graham crackers, try vanilla wafers or digestive biscuits. Both options work well for the crust. You can also use crushed cookies for a fun twist. Just make sure they are sweet enough to balance the filling. These bites last about three days in the fridge. After that, the texture may change. If you want them to last longer, consider freezing them. They can stay fresh for about a month when frozen. Just remember to let them thaw in the fridge before serving. You now have a clear guide to making delicious crunch bites. We covered key ingredients, step-by-step instructions, and helpful tips. Don't forget the variations to fit your taste. Store any leftovers to enjoy later, and check the FAQs for common questions. These small bites are easy to love and share. Dive in and create your own versions, making dessert fun and tasty!

Strawberry Cheesecake Crunch Bites Easy Delight Recipe

PREV 1 … 55 56
secrets pice kitchen

explore

DessertsDinnerAppetizersDrinks

Our Policies

  • Cookie Policy
  • Copyright Policy
  • Disclaimer
  • GDPR Policy
  • Terms Of Use
Back to Top
  • About
  • Contact Us
  • Privacy Policy
© 2025 secrets pice kitchen