FREE DINNER EBOOK! Get your copy!
  • Cookie Policy
  • GDPR Policy
  • Disclaimer
  • Terms Of Use
  • Visit my other site: Fun Cookie Recipes
secrets pice kitchen
  • Home
  • Dinner
  • Desserts
  • Drinks
  • Appetizers
  • Contact
  • About
  • Privacy Policy
  • Home
  • Dinner
  • Desserts
  • Drinks
  • Appetizers
  • Contact
  • About
  • Privacy Policy
  • Cookie Policy
  • GDPR Policy
  • Disclaimer
  • Terms Of Use
Visit my other site: Fun Cookie Recipes

HOME / CATEGORIES /

Latest

To make a tasty Jalapeno Popper Soup, gather these fresh ingredients: - 4 fresh jalapeños, diced (remove seeds for less heat) - 1 medium onion, chopped - 3 cloves garlic, minced - 1 cup corn kernels (fresh or frozen) These ingredients bring a bright and zesty flavor to the soup. The jalapeños add a nice kick, while the corn gives a sweet touch. Onion and garlic make a great base, adding depth to each spoonful. You will also need a few pantry staples to complete the soup: - 1 tablespoon olive oil - 4 cups chicken or vegetable broth - 1 cup cream cheese, softened - 1 cup sharp cheddar cheese, shredded - 1 teaspoon ground cumin - 1 teaspoon smoked paprika - Salt and pepper to taste This combination of items creates a creamy texture. The broth adds warmth, while the spices enhance the flavor profile. Cream cheese and cheddar make the soup rich and satisfying. Adding garnishes can really elevate your soup experience. Use these toppings: - ½ cup green onions, chopped - ¼ cup crispy tortilla strips Green onions add a fresh crunch, and tortilla strips provide a delightful texture. Together, they make every bite exciting and flavorful. Don’t skip the garnishes; they make your soup look and taste amazing! {{ingredient_image_1}} Start by heating the olive oil in a large pot over medium heat. Add the chopped onion and cook until it looks soft and clear, about 5 minutes. This brings out the onion's sweet flavor. Next, stir in the minced garlic and diced jalapeños. Sauté them for 2 more minutes. The aroma will fill your kitchen and make your mouth water. Now it's time to add the star of our dish: the cream cheese. Place the softened cream cheese into the pot and stir it in. Let it melt a bit, making the soup rich and creamy. Gradually pour in the chicken or vegetable broth. Keep stirring until the cream cheese blends in well and the mix is smooth. This step is key for a silky texture. Next, add the corn, ground cumin, smoked paprika, salt, and pepper. Stir everything together and bring the soup to a gentle simmer. Allow it to cook for 10 to 15 minutes. This lets all the flavors mix nicely. Right before you serve, stir in the shredded sharp cheddar cheese until it melts into the soup. Taste it and adjust the seasoning if needed. Ladle the soup into bowls and top each one with chopped green onions and crispy tortilla strips. These toppings add a nice crunch and fresh flavor. To change the heat in your Jalapeno Popper Soup, start with the jalapeños. Remove the seeds and veins for less spice. If you like heat, keep them in. You can also swap fresh jalapeños for milder peppers, like poblano or Anaheim. Another option is to add a pinch of cayenne pepper for extra kick if needed. For that rich, creamy goodness, use softened cream cheese. This helps it blend smoothly. Stir it in when the pot is warm. Gradually add the broth while mixing. This avoids clumps. Let the soup simmer gently after adding the cheese. This allows all flavors to meld, creating a wonderful creamy texture. When it comes to cheese, pick sharp cheddar for a bold flavor. It melts well and adds creaminess. You can mix in some cream cheese for extra richness. If you want to try something new, use pepper jack cheese for a spicy twist. Always grate your cheese fresh for the best melt and taste. Pro Tips Adjust the Heat: If you prefer a milder soup, be sure to remove all the seeds and membranes from the jalapeños, as these contain most of the heat. Use Fresh Ingredients: Fresh corn and jalapeños will elevate the flavor profile of the soup, making it taste more vibrant and delicious. Make it Ahead: This soup can be made ahead of time and stored in the refrigerator for up to 3 days. Reheat gently before serving. Customize Your Toppings: Feel free to get creative with your toppings! Avocado, sour cream, or fresh cilantro can add extra layers of flavor and texture. {{image_2}} You can easily make this soup vegetarian. Start by using vegetable broth instead of chicken broth. For a creamy base, keep the cream cheese. You can also add extra veggies. Consider using bell peppers, zucchini, or even spinach. These will add more flavor and nutrition. If you want to add protein, chicken or bacon are great choices. For chicken, use cooked, shredded pieces. Stir them in just before serving. If you prefer bacon, cook it until crispy, then crumble it on top. Both options boost flavor and make the soup heartier. Feel free to play with other ingredients. You can add black beans for extra protein and fiber. If you like it spicy, add more diced jalapeños or even some hot sauce. For a smoky flavor, consider adding chipotle peppers. Corn adds sweetness and texture, so don't skip it! Each addition makes the soup unique and delicious. You will want to store leftover soup in an airtight container. Let the soup cool first. Then, seal it tightly. This keeps moisture and flavor inside. You can keep it in the fridge for up to three days. For best taste, eat it sooner. When you reheat Jalapeno Popper Soup, do it slowly. Heat it on the stove over medium heat. Stir often to avoid sticking. If the soup seems thick, add a splash of broth or water. This keeps it creamy and smooth. You can also use a microwave. Heat in short bursts and stir in between. This helps keep the flavor intact. If you want to freeze the soup, use freezer-safe containers. Make sure to leave some space at the top. The soup will expand as it freezes. It can last for up to three months in the freezer. When ready to eat, thaw it overnight in the fridge. Then, reheat it on the stove for the best taste. Yes, you can make Jalapeno Popper Soup ahead of time. This soup tastes even better the next day. To do this, cook the soup, let it cool, and store it in the fridge. It will last for about 3 to 4 days. When you are ready to eat, heat it on the stove. Stir occasionally until hot. If the soup thickens, add a bit of broth or water. You can serve Jalapeno Popper Soup with a few tasty sides. A simple green salad pairs well. You can also enjoy it with crusty bread or tortilla chips. For a fun twist, try grilled cheese sandwiches. They add a nice crunch and complement the soup's creaminess. To make this soup spicier, add more jalapeños. You can keep the seeds for extra heat. Another option is to add a dash of hot sauce. If you like smoky flavors, try adding chipotle powder. Remember, start with a little and taste as you go. You can always add more spice, but it’s hard to take it away! In this article, we explored the tasty world of Jalapeno Popper Soup. We looked at the fresh ingredients, pantry staples, and garnishes to boost flavor. You learned step-by-step how to make the soup, from the base to the finishing touches. I shared tips to adjust the spice, ensure creaminess, and choose cheese. Keep in mind the variations you can try and how to best store the soup. Whether you’re making it ahead or pairing it with sides, this dish is sure to please. Enjoy creating your perfect Jalapeno Popper Soup!

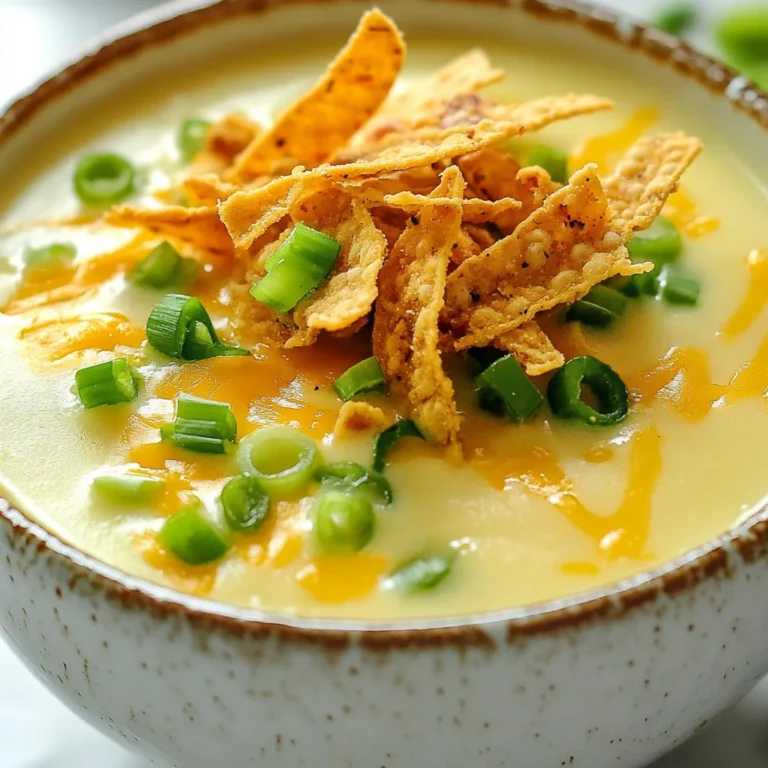
Jalapeno Popper Soup Flavorful Comfort in a Bowl

These are the key items you need for the donut holes: - 1 cup all-purpose flour - 1/2 cup canned pumpkin puree - 1/4 cup granulated sugar - 1 teaspoon baking powder - 1/2 teaspoon baking soda - 1/2 teaspoon ground cinnamon - 1/4 teaspoon ground nutmeg - 1/4 teaspoon salt - 1/4 cup milk - 1 large egg - 2 tablespoons melted unsalted butter - 1/2 cup granulated sugar (for coating) - 2 teaspoons ground cinnamon (for coating) Each ingredient plays an important role. The flour gives structure, while pumpkin adds moisture and flavor. Baking powder and baking soda help the donut holes rise. The spices make them warm and cozy. You can swap some ingredients if needed. - Use whole wheat flour for a healthier option. - Applesauce can replace the egg for a vegan version. - Almond milk or oat milk works well instead of regular milk. - You can use maple syrup instead of granulated sugar for a unique flavor. These swaps keep the flavor and texture while meeting your needs. Add unique touches with these fun ingredients: - Mini chocolate chips for a sweet twist. - Chopped nuts for added crunch. - Dried cranberries for a fruity surprise. These optional add-ins can make your donut holes even more exciting. Mix and match to find your favorite combo! First, you need to preheat your oven to 350°F (175°C). This helps the donut holes bake evenly. Next, lightly grease a mini muffin pan or a donut hole baking pan. Greasing prevents the donut holes from sticking. In a large bowl, whisk together the dry ingredients. Use 1 cup of all-purpose flour, 1/4 cup of granulated sugar, 1 teaspoon of baking powder, 1/2 teaspoon of baking soda, 1/2 teaspoon of ground cinnamon, 1/4 teaspoon of ground nutmeg, and 1/4 teaspoon of salt. Mix until everything blends well. This step gives your donut holes a great base. In another bowl, mix the wet ingredients. Add 1/2 cup of canned pumpkin puree, 1/4 cup of milk, 1 large egg, and 2 tablespoons of melted unsalted butter. Stir until the mixture is smooth and creamy. Combining these ingredients creates a tasty pumpkin flavor. Now, pour the wet ingredients into the dry ingredients. Gently fold the mixtures together until just combined. A few lumps are okay. Overmixing can make the donut holes tough. So, be careful and mix lightly. Using a small scoop or spoon, fill each cavity of your prepared pan about 3/4 full with batter. Bake them in the oven for 10-12 minutes. Check if they spring back when touched and use a toothpick to test if they are done. If the toothpick comes out clean, they are ready. While the donut holes bake, mix the cinnamon sugar coating. In a shallow dish, combine 1/2 cup of granulated sugar and 2 teaspoons of ground cinnamon. This mix adds the sweet and spicy touch to your donut holes. Once the donut holes are done, take them out of the oven. Let them cool in the pan for about 5 minutes. Carefully remove them from the pan and roll each one in the cinnamon sugar mixture. Make sure they are still warm for the sugar to stick well. After coating, place them on a wire rack to cool completely. Enjoy these warm, sweet bites! When making cinnamon sugar pumpkin donut holes, avoid overmixing the batter. Overmixing can make your donut holes tough. Another common mistake is filling the pan too full. Fill each cavity about three-quarters full to allow room for rising. Also, don’t skip cooling before coating. If you coat them too hot, the sugar won’t stick well. To get a light and fluffy texture, use room temperature ingredients. Mix the dry and wet ingredients gently. A few lumps are just fine; they help keep the donut holes soft. Baking time is also key. Keep an eye on them and check with a toothpick to ensure they’re done. They should spring back when touched. Serve these donut holes warm for the best taste. Arrange them in a decorative bowl or tiered stand for a fun look. Add a sprinkle of cinnamon sugar on top to make them extra special. These donut holes pair well with coffee or tea for a cozy treat. {{image_2}} You can make glazed pumpkin donut holes for a sweet twist. To do this, mix powdered sugar with milk and vanilla. Dip each warm donut hole into the glaze, then let them dry on a rack. This gives you a shiny and sweet outer layer that pairs well with the pumpkin flavor. If you love chocolate, add mini chocolate chips to your batter. Just fold in about half a cup of chips after mixing your wet and dry ingredients. The chocolate will melt slightly during baking, creating a gooey surprise inside each donut hole. This adds a rich taste that balances the pumpkin’s sweetness. Want to spice things up? Try adding nutmeg or allspice to your mix. A dash of allspice gives a warm, complex flavor. If you want a richer taste, add more nutmeg. Just a quarter teaspoon can make a big difference. These spices enhance the autumn vibe and make your donut holes extra special. To keep your cinnamon sugar pumpkin donut holes fresh, store them in an airtight container. This will help lock in moisture and keep them soft. Place a paper towel at the bottom of the container to absorb extra moisture. You can store them at room temperature for up to three days. If you want them to last longer, refrigeration is an option, but they may lose some of their fluffy texture. Freezing is a great way to extend the life of your donut holes. Let them cool completely, then place them in a single layer on a baking sheet. Freeze for about an hour to firm them up. Once frozen, transfer them to a freezer-safe bag or container. Make sure to remove as much air as possible. They can last up to three months in the freezer. Just remember to label the bag with the date! When you're ready to enjoy your frozen donut holes, preheat your oven to 350°F (175°C). Place the donut holes on a baking sheet and heat for about 5-10 minutes, or until warmed through. You can also use a microwave for quick reheating, but be careful not to overdo it. Heat them for 10-15 seconds at a time, checking to avoid making them tough. For a fresh touch, roll them in cinnamon sugar again after reheating! Yes, you can use fresh pumpkin. First, cook and puree the pumpkin. Use about half a cup of this fresh puree. Make sure it is smooth and not too watery. This will keep your donut holes moist. Fresh pumpkin adds a bright flavor, perfect for these treats. To make these donut holes healthier, consider these swaps: - Use whole wheat flour instead of all-purpose flour. - Replace granulated sugar with a natural sweetener like honey or maple syrup. - Add applesauce in place of some butter to cut fat. - Use low-fat milk or a non-dairy option. These changes will help you enjoy a lighter version without losing taste. Serving these donut holes is fun and easy. You can: - Arrange them on a decorative plate for a festive look. - Serve with a side of cream cheese frosting for dipping. - Garnish with extra cinnamon sugar for a sweet touch. - Pair with coffee or hot cocoa for a cozy treat. These ideas make them perfect for gatherings or a cozy night in. These donut holes stay fresh for about two days at room temperature. Keep them in an airtight container to maintain softness. You can also freeze them for up to three months. Just thaw them at room temperature before enjoying. This makes them a great make-ahead snack! You now know how to make delicious cinnamon sugar pumpkin donut holes. We covered ingredients, step-by-step steps, and tips to help you succeed. You learned about options for variations and how to store leftovers. My final thought? These treats are easy to make and fun to share. Don't hesitate to try different flavors or share with friends. Enjoy your baking journey and tasty results!

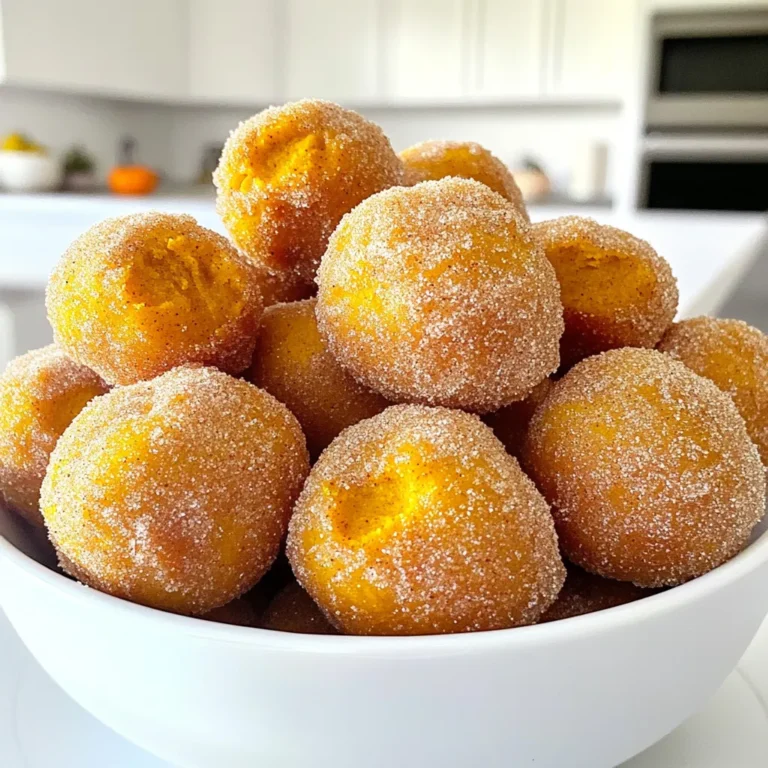
Cinnamon Sugar Pumpkin Donut Holes Easy and Delicious

To make this tasty Pumpkin Cheesecake Caramel Swirl, you will need: - 1 ½ cups graham cracker crumbs - ½ cup unsalted butter, melted - 2 tablespoons sugar - 16 oz cream cheese, softened - 1 cup canned pumpkin puree - 1 cup sugar - 3 large eggs - 1 teaspoon vanilla extract - 1 teaspoon ground cinnamon - ½ teaspoon ground nutmeg - ½ teaspoon ground ginger - 1 cup caramel sauce (store-bought or homemade) Let’s talk about some special ingredients. The cream cheese is key. It gives the cheesecake its rich and creamy texture. Use high-quality cream cheese for the best results. The pumpkin puree adds flavor and moisture. Canned pumpkin is easy and consistent. For spices, the cinnamon, nutmeg, and ginger bring warmth and depth. They make the dessert taste like fall. You might not have all the ingredients. No problem! Here are some easy swaps: - Instead of graham cracker crumbs, use crushed cookies or nuts for the crust. - If you prefer a dairy-free option, try vegan cream cheese. - Maple syrup can replace some sugar for a different flavor. - If you don’t have caramel sauce, chocolate sauce is a fun alternative. Feel free to mix and match. Cooking is all about creativity! To start, preheat your oven to 325°F (160°C). This step is key for a perfect bake. Next, take a medium bowl and mix together: - 1 ½ cups graham cracker crumbs - ½ cup unsalted butter, melted - 2 tablespoons sugar Stir until everything blends well. You want a crumbly texture that sticks together. Now, press this mixture firmly into the bottom of a 9-inch springform pan. Make sure it's even. Bake the crust for 10 minutes, then remove it from the oven. Let it cool while you make the filling. In a large mixing bowl, beat 16 oz of softened cream cheese on medium speed. Mix until it’s smooth and creamy. Then, add 1 cup of canned pumpkin puree. Blend this well until combined. Gradually add 1 cup of sugar, mixing well after each addition. Next, add 3 large eggs, one at a time. Mix on low speed. After all the eggs are in, add: - 1 teaspoon vanilla extract - 1 teaspoon ground cinnamon - ½ teaspoon ground nutmeg - ½ teaspoon ground ginger Blend until everything is smooth. Now it's time to pour the cheesecake mixture over your cooled crust. Drizzle about half of the 1 cup of caramel sauce on top. Use a knife or skewer to swirl the caramel into the batter gently. Bake in your preheated oven for about 60 minutes. The center should be set but still slightly jiggly. After baking, turn off the oven but leave the cheesecake inside for one more hour. This helps it cool gradually. Once an hour passes, take the cheesecake out and let it cool completely at room temperature. After it cools, refrigerate it for at least 4 hours or overnight. Before serving, drizzle the remaining caramel sauce on top. You can also add whipped cream and a sprinkle of cinnamon for extra flair. To get the swirl just right, drizzle your caramel sauce in a zigzag pattern over the cheesecake batter. Use a knife or skewer to gently swirl it in. Start from the center and move outward. Be careful not to overdo it. You want visible swirls, not mixed batter. A smooth and creamy texture is key. Beat the cream cheese until creamy with no lumps. Add the pumpkin puree next, mixing until smooth. When you add eggs, mix on low speed to keep air bubbles out. This helps the cheesecake stay firm and creamy. For a lovely presentation, slice the cheesecake neatly. Drizzle extra caramel sauce over each slice. A dollop of whipped cream adds a nice touch. You can also sprinkle cinnamon on top for extra flavor. Serve with a cup of coffee or tea for a perfect treat. {{image_2}} You can make this dessert healthier with a few swaps. Use Greek yogurt instead of cream cheese. It adds creaminess and cuts fat. For the crust, try oats or almond flour instead of graham crackers. You can also replace sugar with honey or maple syrup. Consider using a sugar-free caramel sauce for less sugar. Want to boost the flavor? Add a pinch of sea salt to the caramel sauce. It brings out the sweetness. You can also mix in chocolate chips for a tasty twist. For extra spice, add a bit of cardamom or allspice. You can even switch pumpkin for sweet potato for a different taste. Serving this dessert can be fun! Slice it into squares for a casual look. Use mini glasses for individual servings that are perfect for parties. Top each one with whipped cream and a drizzle of caramel. You can even layer it with crushed cookies for added crunch. After making your Pumpkin Cheesecake Caramel Swirl, let it cool completely. Cover the cheesecake tightly with plastic wrap or aluminum foil. This keeps it fresh and prevents it from absorbing odors. Store it in the fridge for the best taste and texture. I suggest placing it on a plate to avoid any spills. If you want to save some for later, freezing works well! Slice the cheesecake into pieces. Wrap each piece in plastic wrap, then place them in a freezer-safe bag. This helps keep the flavor locked in. You can freeze it for up to three months. When you’re ready to enjoy it, let it thaw in the fridge overnight. This cheesecake will last about five days in the fridge. To keep it fresh, only cut what you plan to eat. Cover any exposed parts to prevent drying out. If you see any signs of spoilage, such as off smells or changes in texture, it’s best to discard it. Enjoy your creamy dessert delight while it’s still fresh! Yes, you can use fresh pumpkin. Just cook and mash it well. Make sure to remove all the water. Fresh pumpkin has a nice flavor. It can add a richer taste to your cheesecake. The cheesecake is done when the center is set but slightly jiggly. It will firm up as it cools. You can also check with a toothpick. If it comes out clean, your cheesecake is ready. Serve your cheesecake with whipped cream for extra creaminess. You can also add more caramel sauce on top. Fresh pecans or walnuts make a nice crunch, too. A sprinkle of cinnamon enhances the flavor. Enjoy with a cup of coffee or tea! In this guide, we explored everything about making a perfect pumpkin cheesecake with caramel swirl. We covered the key ingredients, step-by-step instructions, and how to get that perfect texture. We also shared tips to make your cheesecake shine and different ways to serve it. Lastly, we discussed how to store your creation properly. Remember, practice makes perfect, and your skills will grow. Enjoy your cheesecake adventure and impress everyone with your delicious results!

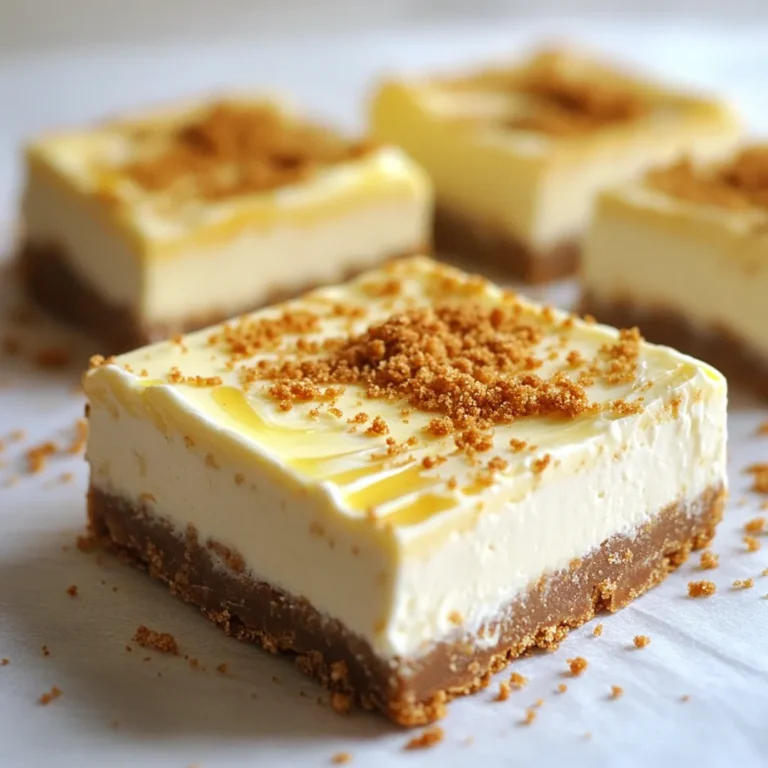
Pumpkin Cheesecake Caramel Swirl Creamy Dessert Delight

To make the Biscoff cheesecake bars, you need a few simple ingredients. Here’s what you’ll need: - 1 cup Biscoff cookies, crushed - 1/4 cup unsalted butter, melted - 8 oz cream cheese, softened - 1/2 cup powdered sugar - 1 cup heavy whipping cream - 1/2 cup Biscoff spread - 1 teaspoon vanilla extract - A pinch of salt - Biscoff cookie crumbles for garnish These ingredients come together to create a rich and creamy dessert. The Biscoff cookies give a nice crunch, while the cream cheese and heavy cream provide a smooth texture. The Biscoff spread adds that unique flavor that makes this dessert special. Make sure your cream cheese is softened. This step helps it mix well with the sugar and Biscoff spread. You can also adjust the amount of powdered sugar based on how sweet you like your dessert. The Biscoff cookie crumbles on top are not just for looks; they add extra flavor and crunch. This dessert is easy, fun, and sure to impress anyone who tries it. Plus, it’s a no-bake recipe, so you can enjoy your time in the kitchen without the heat of the oven! To start, combine 1 cup of crushed Biscoff cookies with 1/4 cup of melted unsalted butter in a medium bowl. Mix well until all the crumbs look wet. This is key for a firm base. Next, press the mixture into the bottom of a 9x9-inch baking pan. Use a spatula or the back of a measuring cup to pack it down tightly. This helps the crust hold together. After that, place the pan in the refrigerator for about 15 minutes to set. In a large mixing bowl, beat 8 oz of softened cream cheese and 1/2 cup of powdered sugar together. Mix until it's smooth and creamy. This step is crucial for a rich filling. Then, add 1/2 cup of Biscoff spread and 1 teaspoon of vanilla extract. Mix again until everything is fully combined. The filling should be thick and luscious. In a separate bowl, whip 1 cup of heavy whipping cream with a pinch of salt. Use an electric mixer for this. Aim for stiff peaks, which usually takes 3-5 minutes. Stiff peaks mean the cream holds its shape well. This fluffy cream adds lightness to the cheesecake. Carefully fold the whipped cream into the cream cheese mixture. Make sure there are no streaks left. This gentle folding keeps the mixture airy. Now, pour the cheesecake filling over your chilled crust. Spread it evenly with a spatula. Smooth the top to make it nice. Finally, cover the pan with plastic wrap. Chill in the refrigerator for at least 4 hours, or overnight if you can wait. This time allows the bars to set properly. To get the best texture in your Biscoff cheesecake bars, chilling is key. Chilling firms up the filling and makes it easier to slice. I suggest chilling the bars for at least four hours. For the best result, chill them overnight. This allows the flavors to blend well. The filling should be smooth and creamy. It’s important to beat the cream cheese and sugar until there are no lumps. When you fold in the whipped cream, do it gently. This keeps the mixture light and airy. If you mix too hard, the filling can become dense. You can play with this recipe by adding chocolate or caramel. Drizzle some melted chocolate on top before chilling. It adds a nice touch and extra flavor. You can also swirl in some caramel into the filling. This will create a marbled effect that looks great. Another fun twist is to use different cookie bases. While Biscoff cookies are a classic choice, you can use graham crackers or Oreos. Each type of cookie gives a unique flavor and texture. Experiment to find your favorite! When it’s time to serve, slice the bars into small squares. A sharp knife works best for clean cuts. For a special touch, garnish each piece with Biscoff cookie crumbles. This adds a nice crunch and looks appealing. Pairing drinks with these cheesecake bars can elevate your dessert experience. A glass of cold milk is always a good choice. For adults, consider a sweet dessert wine. Both options complement the rich flavors of the cheesecake well. {{image_2}} To keep your Biscoff cheesecake bars fresh, store them in the refrigerator. Place leftover bars in an airtight container. This helps prevent them from drying out. You can keep them in the fridge for up to five days. If you want to store them longer, consider freezing. For freezing, wrap each bar in plastic wrap. Then, put them in a freezer-safe bag or container. This way, they won’t get freezer burn. You can freeze the bars for up to three months. Just remember to thaw them in the fridge before serving. In the refrigerator, these cheesecake bars last about five days. Make sure to check for any signs of spoilage. If you see mold or an off smell, it’s best to toss them. When it comes to frozen bars, they stay good for about three months. After that, they may lose texture and flavor. Always trust your senses. If something seems off, don’t take a chance. Yes, you can! Some great options include: - Graham crackers - Oreos - Digestive biscuits - Shortbread cookies Each cookie adds its own unique flavor. Just crush them the same way as Biscoff cookies. Adjust the butter amount if needed for different cookie types. Yes, this recipe can be made gluten-free. Use gluten-free cookies for the crust. Check the labels on your Biscoff spread and other ingredients to ensure they are gluten-free. This way, everyone can enjoy the bars! The bars need at least 4 hours to chill. For the best texture, chill them overnight. This allows the filling to firm up nicely. Patience is key for a perfect cheesecake bar! Each Biscoff cheesecake bar holds about 240 calories. This number may vary based on your exact ingredients and portion sizes. With 16 bars in total, you can enjoy a sweet treat while keeping track of your intake. The key ingredients in these bars pack a punch. - Biscoff cookies: These give a sweet, spiced flavor and are a source of carbs. - Cream cheese: This adds creaminess and protein to the mix. - Heavy whipping cream: This ingredient enhances richness and provides healthy fats. However, keep in mind that these bars have a high sugar content from the powdered sugar and Biscoff spread. They are not dairy-free or low-sugar. A recommended serving size is one bar. Cutting them into 16 squares helps with portion control. Enjoying one bar allows you to savor the flavors without overindulging. This blog post provided a simple method to make delicious Biscoff cheesecake bars. We covered key ingredients, clear steps, and handy tips. Remember, chilling time is crucial for the best texture. Feel free to experiment with flavors or cookie bases to make this dessert your own. With a few easy adjustments, you can also cater to gluten-free diets. Enjoy every bite while sharing with friends, and don’t forget to store leftovers properly! I hope these tips help you create a delightful treat that impresses everyone.

Biscoff Cheesecake Bars No Bake Easy Dessert Recipe

To make apple fritter bread, you will need: - 2 cups all-purpose flour - 1 tablespoon baking powder - 1/2 teaspoon salt - 1/2 teaspoon cinnamon - 1/4 teaspoon nutmeg - 1/2 cup granulated sugar - 1/4 cup brown sugar, packed - 1/2 cup unsweetened applesauce - 2 large eggs - 1/3 cup vegetable oil - 1 teaspoon vanilla extract - 2 cups apples, peeled, cored, and diced (about 2 medium apples) - 1/2 cup powdered sugar (for glaze) - 1-2 tablespoons milk (for glaze) You can swap some ingredients if needed. Use whole wheat flour for a healthier option. If you want a gluten-free version, try a gluten-free flour blend. You can replace applesauce with mashed bananas for a different flavor. Instead of eggs, use flax eggs or applesauce for a vegan option. For a lighter glaze, use yogurt instead of milk in the powdered sugar mix. Using fresh ingredients makes a big difference in taste. Fresh apples add crunch and flavor. They also keep the bread moist. Quality spices like cinnamon and nutmeg enhance the aroma. Good flour ensures a nice texture. When you use fresh items, it shows in the final product. It tastes better, and you can feel proud of your work. Always pick the best ingredients for the best results. 1. Preheat your oven to 350°F (175°C). This heat will bake the bread perfectly. 2. Grease a 9x5-inch loaf pan. I like to use butter or cooking spray for easy release. 3. In a large bowl, mix 2 cups of all-purpose flour, 1 tablespoon of baking powder, 1/2 teaspoon of salt, 1/2 teaspoon of cinnamon, and 1/4 teaspoon of nutmeg. 4. Add 1/2 cup of granulated sugar and 1/4 cup of brown sugar to the bowl. Stir until everything blends well. 5. In another bowl, whisk together 1/2 cup of applesauce, 2 large eggs, 1/3 cup of vegetable oil, and 1 teaspoon of vanilla extract. Aim for a smooth mix. 6. Pour the wet mix into the dry mix. Stir it gently until combined. Avoid overmixing to keep the bread light. 7. Fold in 2 cups of diced apples, ensuring they distribute evenly throughout the batter. 1. Spoon the batter into the greased loaf pan. Smooth the top with a spatula for even baking. 2. Place the pan in your preheated oven. Bake for 50-60 minutes. 3. Check if it’s done by inserting a toothpick into the center. It should come out clean. 4. Once baked, take the pan out and let it cool for 10 minutes. This helps with easy removal. 5. Move the bread to a wire rack to cool completely. - Use fresh apples for the best flavor and texture. They should be firm and crisp. - Don’t overmix the batter. This keeps the bread tender and fluffy. - Let the bread cool fully before adding the glaze. This helps the glaze set nicely. - For a moist bread, check your oven's temperature. Too hot can dry it out. - Store leftovers in a sealed bag or container to keep them fresh. Avoid overmixing the batter. Mix just until combined. Overmixing makes the bread dense. Also, watch the baking time. Every oven is different. A toothpick should come out clean when it's done. Don’t skip greasing the pan. This helps the bread release easily. Add more spices for extra flavor. Try using cardamom or ginger. They pair well with apples. You can also mix in chopped nuts like walnuts or pecans. These add crunch and richness. A touch of lemon zest brightens the flavor. It adds a fresh twist to the sweet apples. Slice the bread into thick pieces for serving. Arrange it on a rustic wooden board. This looks great for guests. Garnish with thin apple slices and a sprinkle of cinnamon. Drizzle the glaze over the top right before serving. Serve warm or at room temperature for the best taste. {{image_2}} If you want to make this apple fritter bread nut-free, simply skip any nuts in the recipe. You can also use dairy-free milk for the glaze. Almond or soy milk works well. The bread will still taste great and stay moist. You can add spices to change the flavor of the bread. Try adding chopped walnuts or pecans for a crunch. A handful of raisins can also bring a fun twist. For a warm taste, increase the cinnamon or add ginger. These small changes can make your bread unique. You can switch things up with seasonal ingredients. In fall, add pumpkin puree instead of applesauce. This gives the bread a cozy vibe. In winter, toss in dried cranberries for a zesty touch. Each season brings new flavors to explore in your apple fritter bread. To keep your apple fritter bread fresh, store it in an airtight container. This will help prevent it from drying out. You can leave it at room temperature for up to three days. For longer storage, place it in the fridge. If you want to enjoy it later, freezing is a great option. To freeze apple fritter bread, wait until it cools completely. Wrap it tightly in plastic wrap or aluminum foil. Then, place it in a freezer-safe bag. Be sure to remove as much air as possible. This will help it stay fresh for up to three months. When you are ready to eat it, simply thaw it in the fridge overnight. To reheat your apple fritter bread, you have a few options. The microwave works well for quick warming. Heat a slice for 15-20 seconds. If you prefer a crispier texture, use the oven. Preheat it to 350°F (175°C) and warm the bread for about 10 minutes. Either way, enjoy the warm, tasty flavor! Store apple fritter bread in an airtight container. This keeps it fresh. You can also wrap it tightly in plastic wrap. It stays good at room temperature for about three days. If you want it to last longer, place it in the fridge. This will keep it fresh for up to a week. Yes, you can make this bread ahead of time. It tastes great even after a day. Just let it cool completely. Then, store it as mentioned above. You can also bake it a day before an event. This way, you can focus on other tasks on the big day. For this recipe, use apples that are sweet and tart. Good choices include Granny Smith or Honeycrisp. These apples add great flavor and texture. They hold up well when baked, ensuring your bread is moist and tasty. Avoid soft apples, as they can turn mushy in the bread. This blog post covered key ingredients, simple instructions, and helpful tips for making apple fritter bread. I shared ingredient substitutions for anyone with allergies, and emphasized the need for fresh ingredients for the best taste. We discussed common mistakes to avoid and served ideas to enhance flavor. You now have the tools to bake this delicious bread. Enjoy the process and share your tasty results with others!

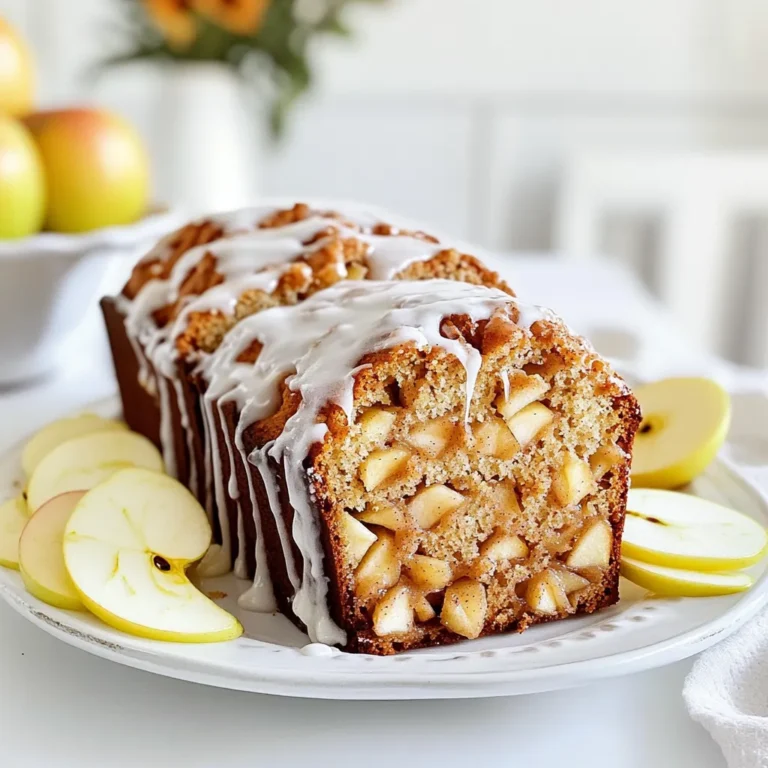
Apple Fritter Bread Bakery Style Easy Homemade Delight

To make this creamy chicken and wild rice soup, gather these simple items: - 1 tablespoon olive oil - 1 medium onion, diced - 2 carrots, diced - 2 celery stalks, diced - 2 garlic cloves, minced - 1 pound chicken breast, cubed - 1 cup wild rice, rinsed - 6 cups chicken broth - 1 cup heavy cream - 1 teaspoon dried thyme - 1 teaspoon dried rosemary - Salt and pepper to taste - 2 cups fresh spinach, chopped - Fresh parsley, for garnish You can swap some ingredients for different flavors or dietary needs. If you want a leaner option, use turkey instead of chicken. For a lighter soup, try half-and-half instead of heavy cream. If you don’t have wild rice, brown rice works too, but it cooks faster. You can also add other veggies like mushrooms or peas for extra nutrition. Choosing fresh ingredients makes a big difference. Look for firm chicken with no strange smell. Your vegetables should be bright and crisp. When selecting spinach, choose leaves that are deep green and free of spots. For herbs, fresh is best. If you can, pick them up from a local market. Fresh herbs really enhance the taste of your soup. First, gather all your ingredients. You need olive oil, onion, carrots, celery, garlic, chicken, wild rice, chicken broth, heavy cream, thyme, rosemary, salt, pepper, spinach, and parsley. This soup is simple, and having everything ready makes cooking easy. 1. Heat the oil: In a large pot, heat one tablespoon of olive oil over medium heat. 2. Sauté the veggies: Add diced onion, carrots, and celery. Stir and cook for about five minutes. The veggies should be soft. 3. Add garlic: Next, add two minced garlic cloves. Cook for one more minute. This will make your kitchen smell great! 4. Cook the chicken: Add one pound of cubed chicken to the pot. Cook while stirring until the chicken turns brown. This takes about five to seven minutes. 5. Combine ingredients: Pour in six cups of chicken broth. Add one cup of rinsed wild rice, one teaspoon of dried thyme, one teaspoon of dried rosemary, salt, and pepper. 6. Simmer: Bring everything to a boil. Then, reduce the heat and cover the pot. Let it simmer for about 45 minutes. The rice should be tender and the chicken fully cooked. 7. Finish the soup: Once the rice is cooked, stir in one cup of heavy cream and two cups of chopped spinach. Heat through for five to ten minutes. Check if you need more seasoning. 8. Serve: Serve the soup hot, and garnish with fresh parsley. Keep the heat at medium when you start. This helps cook the veggies without burning them. When simmering, lower the heat to maintain a gentle bubble. This allows the rice to cook evenly. If the soup is too thick, add a bit more broth. If you want it thicker, let it simmer longer without the lid. One mistake is not cooking the chicken enough. Make sure it turns golden brown. Another error is overcooking the rice. Keep an eye on the cooking time for perfect texture. Don’t skip the fresh herbs; they add great flavor. Lastly, avoid adding the cream too early. It’s best to mix it in at the end. Using fresh ingredients makes a big difference. Select bright, crisp veggies for the best taste. Fresh herbs, like thyme and rosemary, enhance the soup's depth. For a richer flavor, let the soup simmer longer. It helps the chicken and rice absorb all the tasty broth. Taste and adjust the seasoning before serving. A pinch more salt can elevate the dish. If you want a creamier soup, add a bit more heavy cream. You can also mix in a slurry of cornstarch and water. This will naturally thicken the broth. Another option is to puree a portion of the soup and mix it back in. This gives a nice, thick texture without losing any flavor. {{image_2}} You can add mushrooms for a rich flavor. Use 1 to 2 cups of sliced mushrooms. After you sauté the onions, carrots, and celery, add the mushrooms. Cook them until they soften. This addition can make your soup even heartier and more delicious. For a lighter soup, swap heavy cream for half-and-half or milk. You can also use skinless chicken breast. This keeps the dish tasty while lowering fat. Reduce the olive oil to 1 teaspoon. Add more veggies like zucchini or bell peppers for extra nutrition. If you want a meatless version, replace chicken with chickpeas or lentils. Use vegetable broth instead of chicken broth. You can still keep the wild rice for texture. Add extra greens like kale or Swiss chard to boost the health factor. You’ll have a filling soup that everyone can enjoy! To keep your creamy chicken and wild rice soup fresh, store it in an airtight container. Make sure it cools down before sealing it up. This prevents moisture build-up, which can spoil the soup. The soup stays good in the fridge for about three to four days. Ensure you label the container with the date you made it. When you’re ready to enjoy the soup again, reheating is simple. Pour the soup into a pot and heat it on medium. Stir it often to keep it from sticking. If it seems too thick, add a splash of chicken broth or water. Heat until it's warm throughout. For the best taste, avoid using a microwave if you can. You can freeze this soup for longer storage. Use a freezer-safe container or a heavy-duty freezer bag. Leave a little space at the top for the soup to expand. It stays fresh in the freezer for up to three months. When you're ready to eat it, thaw it overnight in the fridge. Then, reheat it on the stove as mentioned above. Enjoy your delicious soup anytime! Yes, you can use brown rice. However, brown rice takes longer to cook. You will need to adjust the cooking time. Brown rice can change the soup's texture. Wild rice gives a unique taste and feel that many enjoy. If you prefer brown rice, try cooking it separately. Then, mix it in just before serving. Making this soup ahead is easy. You can cook the soup up to step 5. Let it cool down, then store it in a container. Keep it in the fridge for up to three days. When you want to eat it, heat it on the stove. Stir in the spinach and cream near the end. This keeps the spinach fresh and bright. This soup pairs well with crusty bread. A simple green salad also works great. You can even serve it with some crackers for a nice crunch. For a fun twist, offer some cheese or herb butter to spread on the bread. Enjoy your meal with a nice drink, like iced tea or lemonade! This blog post provides a clear guide on making Creamy Chicken and Wild Rice Soup. We covered the key ingredients, detailed cooking steps, and helpful tips to avoid mistakes. I also shared delicious variations and best practices for storage. In summary, use fresh ingredients for the best taste. Try the variations for excitement. With these tips, you can enjoy a warm, tasty bowl any day. Happy cooking!

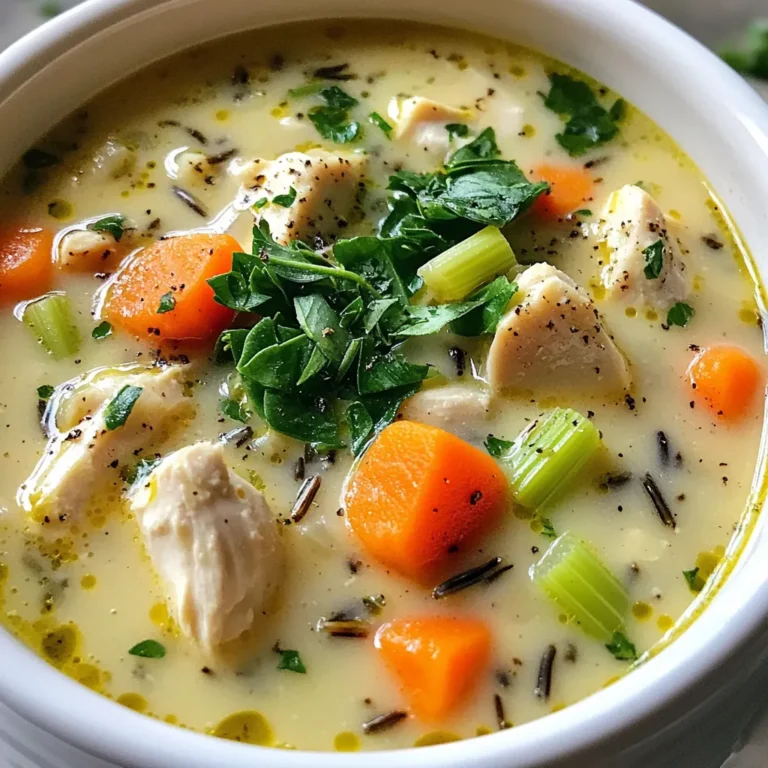
Creamy Chicken and Wild Rice Soup One Pot Delight

To make Air Fryer Eggplant Parmesan, you will need the following ingredients: - 2 medium eggplants, sliced into 1/2-inch rounds - 1 cup all-purpose flour - 2 large eggs, beaten - 1 cup breadcrumbs (panko for extra crunch) - 1 cup grated Parmesan cheese - 2 cups marinara sauce - 1 teaspoon Italian seasoning - 1 teaspoon garlic powder - 1 teaspoon onion powder - 1/2 teaspoon salt - 1/4 teaspoon black pepper - 1 cup shredded mozzarella cheese - Fresh basil leaves for garnish These ingredients come together to create a tasty and crispy dish. The eggplants provide a nice texture, while the cheese and sauce add rich flavor. You can find all these items at your local grocery store. Selecting good eggplants is key. Look for firm ones with shiny skin. They should feel heavy for their size. Fresh basil adds a lovely touch at the end. Preheating the Air Fryer First, turn on your air fryer. Set it to 375°F (190°C) and let it run for about 5 minutes. This step makes sure your eggplant cooks evenly and gets nice and crispy. Setting Up the Breading Station You need three shallow dishes for breading. In one dish, add 1 cup of flour. In the second, beat 2 large eggs. In the third dish, mix 1 cup of breadcrumbs, 1 cup of grated Parmesan cheese, 1 teaspoon of Italian seasoning, 1 teaspoon of garlic powder, 1 teaspoon of onion powder, 1/2 teaspoon of salt, and 1/4 teaspoon of black pepper. This mix gives your eggplant great flavor. Dipping Process Take a slice of eggplant and dip it first into the flour. Make sure it’s fully coated. Next, dip it into the beaten eggs. Lastly, coat it well in the breadcrumb mix. Repeat this for all eggplant slices. Air Frying the Eggplant Place the coated slices in a single layer in the air fryer basket. Depending on your air fryer’s size, you might need to do this in batches. Lightly spray the eggplant with cooking spray. This helps them crisp up. Cook for 10-12 minutes, flipping halfway through, until they are golden and crispy. Layering with Marinara and Cheese While the eggplant cooks, heat 2 cups of marinara sauce in a saucepan over medium heat. Once all your eggplant is cooked, grab a baking dish. Spread a layer of marinara sauce on the bottom. Add a layer of crispy eggplant. Then sprinkle a layer of shredded mozzarella cheese. Repeat these layers until you use all your ingredients. Finish with sauce and mozzarella on top. Final Cooking Steps in Air Fryer Now, place the assembled dish back into the air fryer at 375°F (190°C) for another 5-7 minutes. Cook until the cheese is melted and bubbly. After that, take it out and let it sit for a few minutes before serving. Don’t forget to garnish with fresh basil leaves for that perfect finish! To get that perfect crunch, use panko breadcrumbs. They make the eggplant extra crispy. After breading, spray the eggplant lightly with cooking spray. This helps it crisp up in the air fryer. Make sure not to crowd the basket. Give each slice space to cook evenly. To avoid soggy eggplant, salt the slices first. Lay them on a towel and sprinkle salt on both sides. Let them sit for about 30 minutes. This draws out moisture. After 30 minutes, pat them dry with a paper towel. This step is key for crispy results. Cooking times can vary by air fryer brand. Most models cook eggplant at 375°F for 10-12 minutes. Check for golden color. If your air fryer is smaller, cook in batches. Always flip the slices halfway through for even cooking. Feel free to tweak the seasoning mix. You can add more garlic powder or Italian seasoning. Taste the marinara sauce too. If you want it spicier, add some red pepper flakes. Adjust seasonings until it’s just right for you. Cooking should be fun and personal! {{image_2}} You can easily adjust this recipe to suit your needs. If you want a vegan option, simply replace the cheese and eggs. Use a plant-based egg substitute like flaxseed meal mixed with water. For cheese, try cashew cheese or nutritional yeast. Both options keep the dish tasty and satisfying. If you need a gluten-free version, swap out the all-purpose flour and breadcrumbs for gluten-free alternatives. Almond flour works well for breading, and gluten-free breadcrumbs can give you that crunch you crave. Just ensure all other ingredients are gluten-free. To enhance your Air Fryer Eggplant Parmesan, think about different sauces. Marinara is classic, but a pesto or a spicy arrabbiata can add a nice twist. You could even drizzle some balsamic glaze on top for a sweet touch. For a full meal, consider pairing this dish with a fresh salad or garlic bread. A simple green salad with homemade vinaigrette complements the richness of the eggplant. Garlic bread adds a crunchy, buttery side that everyone loves. These sides round out your dining experience and make it more satisfying. To store leftovers, let the dish cool first. Place the eggplant parmesan in an airtight container. It will stay fresh in the fridge for about 3 to 4 days. Make sure to separate layers with parchment paper to keep it from getting soggy. If you have extra marinara sauce, store it in a separate container. This keeps everything nice and fresh. The best way to reheat eggplant parmesan is in the air fryer. Set it to 350°F (175°C). Air fry for about 5 to 7 minutes. This method keeps the eggplant crispy. You can also use an oven. Preheat it to 350°F (175°C) and bake for about 10 to 15 minutes. Cover it with foil to avoid burning the cheese. Avoid using a microwave, as it will make the dish soggy. Enjoy your crispy, flavorful leftovers! Cooking eggplant in an air fryer takes about 10 to 12 minutes. Preheat your air fryer to 375°F (190°C) first. Once preheated, arrange your breaded eggplant slices in a single layer. Flip them halfway through to ensure even cooking. You want them golden and crispy. Yes, you can prepare the eggplant ahead of time. Bread the eggplant slices and store them in the fridge for up to 24 hours. When you're ready to cook, just air fry them as instructed. You can also assemble the dish and keep it in the fridge. Just remember to heat it well before serving. Air fryer eggplant parmesan pairs well with many dishes. You can serve it with a side salad for freshness. Garlic bread or a crusty Italian loaf also complements it nicely. If you want some greens, sautéed spinach or steamed broccoli works great too. The eggplant is done when it turns golden brown and crispy. You can check by looking at the color and texture. If you want to be sure, use a fork to pierce a slice. It should be tender inside but still hold its shape. In this blog post, we explored the key ingredients for air fryer eggplant Parmesan, from eggplants to tasty toppings. I shared a step-by-step guide for preparation, cooking, and assembly. You discovered tips for perfecting the dish and learned about variations, storage, and reheating. Air frying is a fun way to enjoy this meal with less oil. Experiment with flavors and make it your own. Enjoy a delicious and crispy dish that impresses every time!

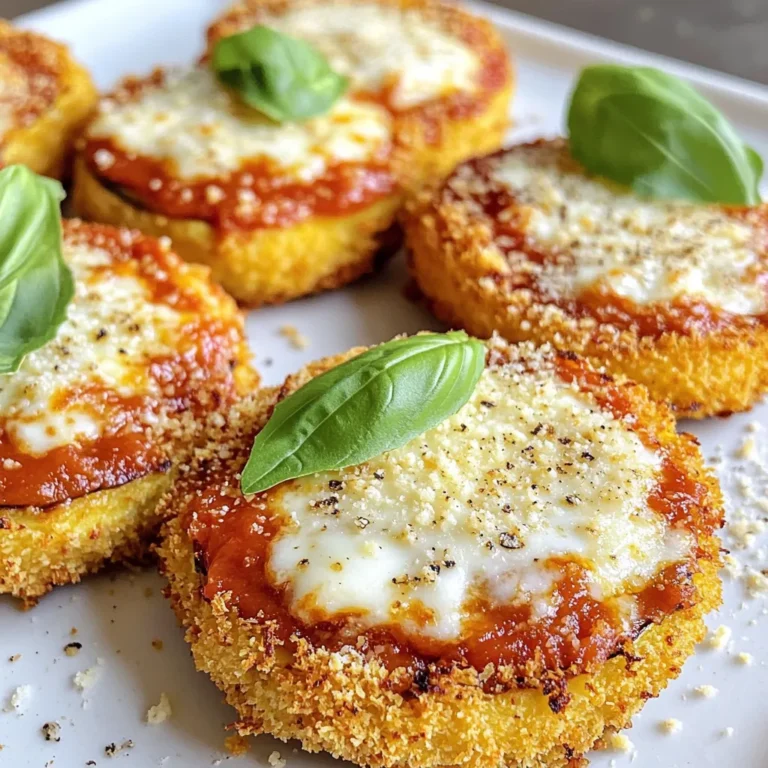
Air Fryer Eggplant Parmesan Crispy and Flavorful Dish

- 2 racks of baby back ribs (about 3-4 pounds) - 1 tablespoon olive oil - 1 cup low-sugar BBQ sauce (homemade or store-bought) - 1/4 cup apple cider vinegar For the BBQ ribs, baby back ribs are my first choice. They are tender and flavorful. I use olive oil to help the spices stick to the meat. The BBQ sauce gives a rich taste, and apple cider vinegar adds a nice tang. - 1 teaspoon smoked paprika - 1 teaspoon garlic powder - 1 teaspoon onion powder - 1 teaspoon chili powder - 1/2 teaspoon cayenne pepper (adjust to taste) - Salt and pepper to taste The right spices make all the difference. Smoked paprika gives depth. Garlic and onion powders add savory notes. Chili powder brings some warmth, and cayenne pepper can spice things up more. Don’t forget salt and pepper to enhance all these flavors. - Fresh cilantro - Fresh parsley For a pop of color, I like to use fresh cilantro or parsley. They add freshness and look great when you serve the ribs. Just sprinkle some on top before serving for that perfect finish. - Removing the silver skin: Start by flipping the ribs over. Look for the thin, shiny layer on the back. Use a sharp knife to lift one end of the silver skin. Grab it with a paper towel for grip and pull it off. This step helps make the ribs tender and juicy. - Seasoning the ribs: In a small bowl, mix olive oil, smoked paprika, garlic powder, onion powder, chili powder, cayenne pepper, salt, and pepper. Rub this flavorful mix all over the ribs. Make sure to coat both sides well. This seasoning adds depth to the meat. - Combining sauce ingredients: In a separate bowl, combine the low-sugar BBQ sauce, apple cider vinegar, brown sugar, and mustard. This blend gives sweet and tangy notes to the ribs. - Whisking for consistency: Take a whisk and mix the sauce until it is smooth. You want a nice, even texture. This ensures each bite of rib is full of flavor. - Placing ribs in the slow cooker: Carefully place the seasoned ribs in the slow cooker. Arrange them in a single layer if possible. This helps with even cooking. - Pouring sauce over ribs: Pour the BBQ sauce mixture over the ribs. Make sure they are fully covered. This will keep them moist and flavorful during cooking. - Setting cooking time and temperature: Cover the slow cooker with its lid. Set it to low for 6-8 hours or high for 3-4 hours. The ribs should become tender and pull apart with ease when they are done. - Transferring ribs to a baking sheet: If you want a nice finish, carefully move the ribs to a baking sheet once they are done. Be gentle, as they will be very tender. - Broiling for caramelization: Preheat your oven's broiler. Brush the ribs with extra BBQ sauce. Broil them for 3-5 minutes until the glaze is bubbly and slightly charred. Keep a close watch to avoid burning. This step adds a delicious crust. - Letting ribs rest: After broiling, let the ribs rest for a few minutes. This helps the juices settle. - Slicing and presenting: Use a sharp knife to slice between the bones. Arrange the ribs on a wooden board or large platter. Garnish with freshly chopped cilantro or parsley. This not only looks great but adds a hint of freshness. Enjoy your BBQ ribs with cornbread or coleslaw for the full experience! To make ribs tender, you need to adjust cooking times. If you have more time, cook on low for 6-8 hours. This gives the meat a chance to break down and become soft. If you’re in a hurry, use high heat for 3-4 hours. Marinating is also important. It adds flavor and helps tenderize the meat. I recommend marinating overnight if you can. The longer the ribs sit in the mix, the better they taste. Adjust seasoning to your taste. The spices in the recipe create a great base. If you love heat, add more cayenne pepper. If you prefer it mild, skip it altogether. Always taste as you go. Decide between homemade or store-bought BBQ sauce. Homemade sauces let you control the sweetness and spice. Store-bought sauces save time. Both can work well, so pick what fits your schedule. When broiling, watch the ribs closely. They can go from perfect to burnt in seconds. Start by setting your broiler to high. Place the ribs on a baking sheet, brush with extra sauce, and keep an eye on them. Broil for just 3-5 minutes. Look for a bubbly, slightly charred glaze. If you see smoke, pull them out right away. This step adds a nice finish without drying out the meat. {{image_2}} When it comes to ribs, two popular choices are spare ribs and baby back ribs. Spare ribs come from the belly of the pig. They are larger and have more fat, which makes them juicy. Baby back ribs are smaller and leaner, coming from the back. They are tender and cook faster. You can also use other cuts, like St. Louis-style ribs. Each type gives a different taste and texture, so choose based on your preference. The sauce is key to great BBQ ribs. You can go with sweet or spicy BBQ sauce. Sweet sauces often use brown sugar or honey, giving a nice caramel flavor. Spicy sauces can pack a punch with chili powder or cayenne. If you want to make your own sauce, mix ketchup, vinegar, and spices for a simple blend. You can adjust the flavors to fit your taste. If you want to switch things up, try using an Instant Pot or oven for your ribs. The Instant Pot cooks ribs quickly, usually in about 30 minutes. This method keeps the meat tender and juicy. Baking ribs in the oven is another great option. You can cook them at a low temperature for a few hours. This method allows the flavors to deepen as they cook. Each method gives a unique taste, so feel free to experiment! To store leftover ribs, let them cool first. Wrap the ribs tightly in plastic wrap or foil. Place them in an airtight container. You can also use a resealable bag. This helps keep them fresh. You can freeze cooked ribs for later use. Wrap them well in plastic wrap and then in foil. This prevents freezer burn. For best taste, eat them within three months. To thaw, place the ribs in the refrigerator overnight. Reheat them in the oven at 350°F for about 20 minutes. Refrigerated ribs last about three to four days. If they smell bad or look off, do not eat them. Signs of spoilage include a slimy texture or discoloration. Always check before serving. For low cooking, set your slow cooker for 6 to 8 hours. For high cooking, aim for 3 to 4 hours. Cooking time can change based on the size of your ribs and your slow cooker model. If the ribs are larger, they may need more time. Always check if the meat pulls apart easily to know if they’re done. Yes, you can use frozen ribs! However, it’s best to thaw them first for even cooking. If cooking from frozen, increase the cooking time by one to two hours. Always ensure the internal temperature reaches at least 145°F for safety. Great sides for BBQ ribs include coleslaw, cornbread, or baked beans. These dishes balance the rich flavors of the ribs. For drinks, consider sweet tea, lemonade, or a light beer. They all pair well with the smoky taste of BBQ. While not required, glazing can enhance flavor and texture. Broiling the ribs gives them a nice caramelized finish. If you skip broiling, you can still enjoy tasty ribs straight from the slow cooker. Just make sure to coat them well in BBQ sauce before serving. You’ve learned how to make BBQ ribs that impress. Start with baby back ribs and fresh spices. Slow cooking makes them tender, while optional broiling adds a nice glaze. Feel free to vary sauces or cooking methods for your taste. Proper storage keeps leftovers fresh. Enjoy your BBQ journey, and share your success with others! These ribs will surely become a favorite at any gathering.

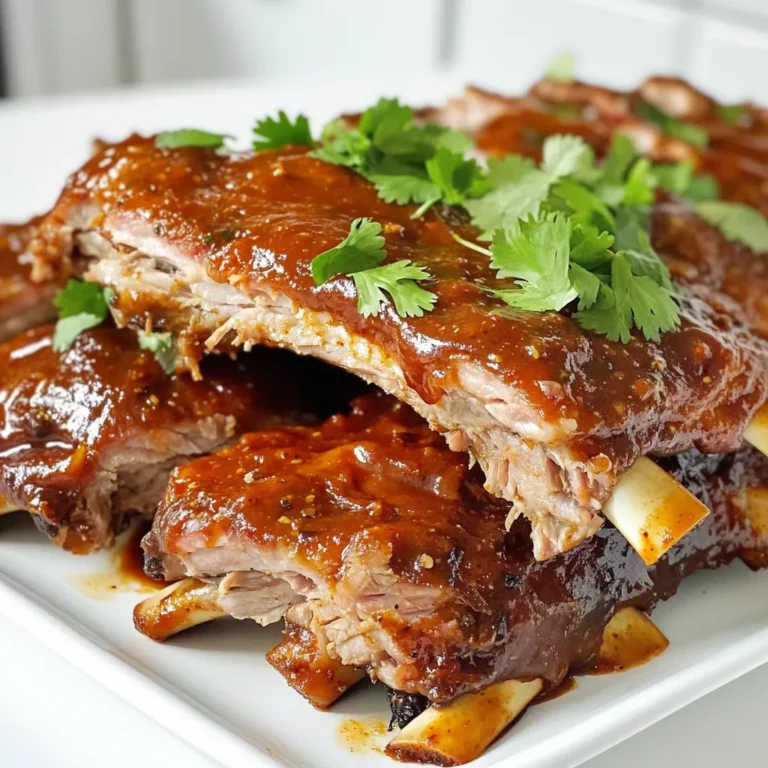
BBQ Ribs Slow Cooker Tender and Flavorful Dish

- 1 lb beef flank steak, thinly sliced against the grain - 1/4 cup cornstarch - 2 tablespoons vegetable oil The beef flank steak is key. It gives the dish its rich flavor. Slicing against the grain keeps it tender. Cornstarch helps the beef get a nice crust. It also thickens the sauce later. Vegetable oil is perfect for cooking. It has a high smoke point and allows for great browning. - 1/2 cup soy sauce - 1/3 cup brown sugar - 1 tablespoon hoisin sauce Soy sauce adds saltiness and depth. It’s a must for Mongolian beef. Brown sugar balances the salt with sweetness. It helps create a lovely glaze. Hoisin sauce adds a hint of sweetness and a rich flavor. It’s sweet and a bit tangy, which works well. - 4 cloves garlic, minced - 1 inch piece ginger, grated - 4 green onions, chopped (white and green parts separated) Garlic brings a strong aroma and flavor. Ginger adds warmth and a slight spice. Green onions give freshness and a pop of color. Use the white parts for cooking and the green for garnishing. This mix of aromatics boosts the dish's flavor. It makes your kitchen smell amazing! - To start, take your beef flank steak and slice it thinly against the grain. This makes it tender. - In a medium bowl, toss the sliced beef with 1/4 cup of cornstarch until it is evenly coated. The cornstarch gives the beef a nice crisp. - Let the beef sit for 10 minutes. This allows the cornstarch to stick to the meat well. - Heat 2 tablespoons of vegetable oil in a large skillet or wok over medium-high heat. - Once the oil is hot, add the coated beef. Sauté it for about 4-5 minutes. - You want the beef to brown nicely and cook through. Once done, remove the beef from the skillet and set it aside. - In the same skillet, add the white parts of 4 chopped green onions, 4 minced garlic cloves, and 1 inch of grated ginger. - Stir-fry these for about 1-2 minutes until they smell great. - In a small bowl, whisk together 1/2 cup of soy sauce, 1/3 cup of brown sugar, 1 tablespoon of hoisin sauce, 1 teaspoon of sesame oil, and 1/4 teaspoon of crushed red pepper flakes if you want some heat. - Pour this sauce mixture into the skillet and bring it to a simmer. - Return the cooked beef to the skillet. Toss it in the sauce until it is well-coated. - Cook for an additional 1-2 minutes to heat everything through. - Finally, remove the skillet from heat and stir in the green parts of the chopped green onions. Flank steak is the star of this dish. It has a great texture and flavor. Other cuts can work, but flank steak gives the best results. When slicing, always cut against the grain. This helps make the beef tender and easier to chew. You can make this dish even better with spices. Try adding a dash of black pepper or garlic powder. If you want it sweeter, add more brown sugar. To balance flavors, adjust the soy sauce for saltiness. Taste as you go to find your perfect mix. Using a wok can change your cooking game. It heats evenly and allows for quick stir-frying. If you don’t have one, a skillet works fine. Just keep the heat high to sear the beef well. Make sure to control the temperature. Too low, and the beef won’t brown. Too high, and it may burn. Find that sweet spot for the best results. {{image_2}} You can easily make this dish vegetarian. Use plant-based proteins like tofu or seitan. Both options soak up flavor well. For a great texture, press the tofu to remove excess water. This helps it get crispy when cooked. For the sauce, swap soy sauce with tamari for a gluten-free option. You can use maple syrup instead of brown sugar. If you want a richer taste, add a bit of peanut butter to the sauce. It gives a nice twist! Want more heat? Add red pepper flakes to the sauce. Start with 1/4 teaspoon and adjust as needed. You can also use chili garlic sauce or sriracha. Both add bold flavor and spice. For a smoky touch, try adding chipotle sauce. It brings a unique taste that pairs well with the beef. Always taste as you go to find your perfect heat level! Serve your Mongolian beef over fluffy rice or noodles. Both options soak up the sauce nicely. For a lighter choice, use steamed vegetables or cauliflower rice. You can also add a garnish of sesame seeds and green onions. This adds color and crunch. Try serving it with a side of stir-fried veggies for a complete meal. Enjoy experimenting with different bases! To keep your leftovers fresh, store them in an airtight container. Place the Mongolian beef in the fridge right after it cools. This helps prevent spoilage. The beef can last for up to three days in the fridge. When you want to reheat, use a skillet over medium heat. This method warms the beef evenly. Stir it gently to avoid overcooking. You can also use a microwave. Heat in short bursts, stirring in between, until warm. If you want to save Mongolian beef for later, freezing is the best option. Place cooled beef in a freezer-safe bag or container. Make sure to remove as much air as possible. This helps keep the flavor and texture. To thaw, move the beef from the freezer to the fridge. Leave it there overnight. If you're in a hurry, you can use the microwave. Use the defrost setting and heat in short bursts. After thawing, reheat using the same methods as before. Mongolian beef stays good in the fridge for about three days. In the freezer, it can last up to three months. Always check for any off smells or changes in texture before consuming. Proper storage helps maintain its delicious taste and texture. Yes, you can. If flank steak is not available, try using sirloin or ribeye. These cuts are tender and flavorful. Slice them thinly for the best texture. You can also use skirt steak, which has a nice beefy taste. Just remember to cut against the grain for tenderness. This recipe is not gluten-free, as it uses soy sauce. You can substitute regular soy sauce with tamari or coconut aminos. Both options work well and add great flavor. Make sure to check labels for other ingredients that may contain gluten. To add heat, include more crushed red pepper flakes. You can also use sriracha or chili paste in the sauce. Start with a small amount and taste as you go. Adjust until you reach your desired spice level. Fresh sliced chili peppers can also add warmth and color. Mongolian beef goes great with steamed rice or fried rice. Noodles are another tasty option. You can also serve it with stir-fried vegetables, like broccoli or bell peppers. A simple cucumber salad adds a nice crunch and freshness. This guide covers all you need for perfect Mongolian beef. You learned about main ingredients, cooking steps, and tips for flavor. We discussed veggie options too. Remember, tweaking spices can make it your own. Store leftovers properly to prevent waste. With these insights, you'll impress everyone at the table. Enjoy your cooking journey and savor every bite!

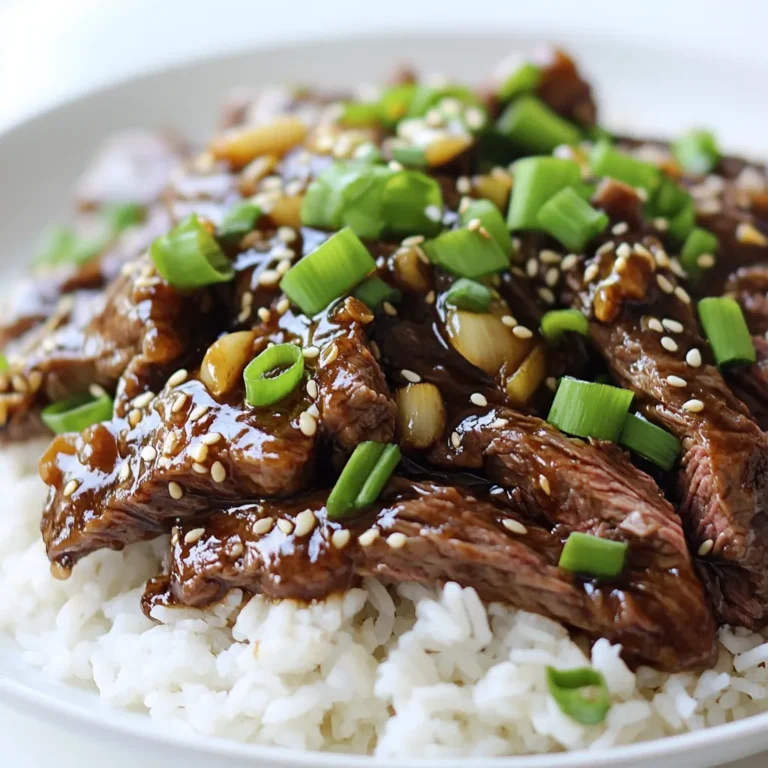
Better Than Takeout Mongolian Beef Quick and Tasty Meal

- 2 cans (28 oz each) crushed tomatoes - 1 medium onion, chopped - 3 cloves garlic, minced - 2 cups vegetable broth - 1 cup heavy cream or coconut cream - 1 teaspoon dried basil - 1 teaspoon sugar - Salt and pepper to taste - 2 tablespoons olive oil - Fresh basil leaves for garnish For this soup, the main ingredients play a big role in the flavor. Start with two cans of crushed tomatoes. They give the base a rich taste. Next, use one medium onion, finely chopped. This adds sweetness and depth. Three cloves of minced garlic bring a punch of flavor. Vegetable broth is key here. You need two cups to help blend all the tastes. The cream is what makes this soup creamy. You can use either heavy cream or coconut cream for a dairy-free option. Dried basil adds a nice herbal note. One teaspoon is enough. A little sugar helps balance the acidity from the tomatoes. Make sure to add salt and pepper to taste for extra flavor. Finally, drizzle two tablespoons of olive oil on top. This adds richness and helps the soup blend well. Don’t forget fresh basil leaves for garnish! They make the soup look pretty and add a fresh taste. - Combining in the Slow Cooker: Start by adding two cans of crushed tomatoes to your slow cooker. Next, chop one medium onion and mince three cloves of garlic. Add both to the tomatoes. Pour in two cups of vegetable broth. Sprinkle in one teaspoon of dried basil and one teaspoon of sugar. Now, stir everything well to mix the flavors. - Adding Olive Oil and Seasoning: Drizzle two tablespoons of olive oil over the mixture. Season with salt and pepper to your taste. This step enhances the taste and makes the soup rich. - Cooking Time and Setting Options: Cover your slow cooker. You can cook on low for six to eight hours or on high for three to four hours. Cooking slowly helps the flavors blend perfectly. - Ensuring Flavor Development: Check the soup after the cooking time. The longer you cook it, the better the flavors develop. This slow cooking method gives you a deep, rich taste. - Using an Immersion Blender: Once your soup is cooked, use an immersion blender to puree it until smooth. If you don’t have one, transfer the soup to a regular blender in batches. Be careful with hot liquids! - Adjusting Creaminess and Seasoning: After blending, return the soup to the slow cooker. Stir in one cup of heavy cream or coconut cream. Let it cook on low for an additional 30 minutes to warm through. Taste and adjust the seasoning with more salt and pepper if needed. This step ensures every bite is delicious. To get that smooth, creamy soup, blending is key. After cooking, use an immersion blender. This tool lets you blend right in the slow cooker. If you don’t have one, you can use a regular blender. Just be careful and blend in small batches. If you want a dairy-free soup, try coconut cream. It adds creaminess and a hint of sweetness. Almond milk is another option, but it may be thinner. Adjust the amount to get your desired texture. For a lovely presentation, serve the soup in warm bowls. Add fresh basil leaves on top for color and flavor. You can drizzle extra cream over the soup for a nice touch. A sprinkle of black pepper also enhances the look. Pair this soup with crusty bread or a fresh salad. A grilled cheese sandwich goes perfectly too. This combo brings warmth and comfort to any meal. {{image_2}} You can change up this creamy tomato basil soup to fit your taste. Adding more vegetables is one simple way to do this. Try adding chopped carrots or diced celery. Both add flavor and texture. You can also boost the nutrition by adding protein. Chickpeas work well in this soup. They add a nice creamy texture and protein. If you want meat, shredded chicken is a great choice. It adds heartiness to the soup. Want to make your soup even tastier? Experiment with spices. Adding a pinch of red pepper flakes gives it a nice kick. If you like herbs, try adding oregano. This spice adds depth to the flavor. The broth you use can also change the taste. You can swap vegetable broth for chicken or beef broth. Each type gives a different flavor profile. Chicken broth adds a savory taste, while beef broth makes it richer. To keep your creamy tomato basil soup fresh, follow these tips: - Refrigeration: Let the soup cool to room temperature. Then, transfer it to an airtight container. This helps prevent any bacteria growth. Store it in the fridge. - Duration for Freshness: Your soup will stay fresh for about 3 to 4 days. After that, the flavor and texture can change. Freezing your soup is a great way to save it for later. Here’s how to do it right: - Tips for Freezing Soup: Use a freezer-safe container. Leave some space at the top, as soup expands when frozen. You can also freeze it in smaller portions. This makes it easy to thaw just what you need. - Reheating Methods After Freezing: To reheat, thaw the soup overnight in the fridge. You can also use the microwave or stovetop. If the soup is too thick after thawing, add a splash of vegetable broth or water. Stir well and heat until warm. Yes, you can use fresh tomatoes! To do this, you need about 4-6 medium tomatoes. First, peel and chop them. You can blanch them in boiling water for easier peeling. Then, crush them with your hands or a fork. Add them to the slow cooker just like you would the canned tomatoes. Fresh tomatoes will give your soup a brighter taste. To add heat, try these tips: - Add red pepper flakes while cooking. Start with a teaspoon and adjust to taste. - Mix in some diced jalapeños or serranos. - Use spicy vegetable broth instead of regular broth. These ideas will make your soup warm and exciting without overwhelming the flavors. Absolutely! To make this soup vegan: - Replace heavy cream with coconut cream or cashew cream. - Use vegetable broth to keep it plant-based. - You can also add nutritional yeast for a cheesy flavor. These swaps let you enjoy the same creamy texture while keeping it vegan-friendly. This blog post covered how to make a rich tomato basil soup. We explored essential ingredients, step-by-step cooking, and tips for perfection. You learned about customization options, storage methods, and answers to common questions. Making this soup can be fun and rewarding. With your creativity, you can turn it into a meal that suits you. Enjoy every bite of your homemade soup!

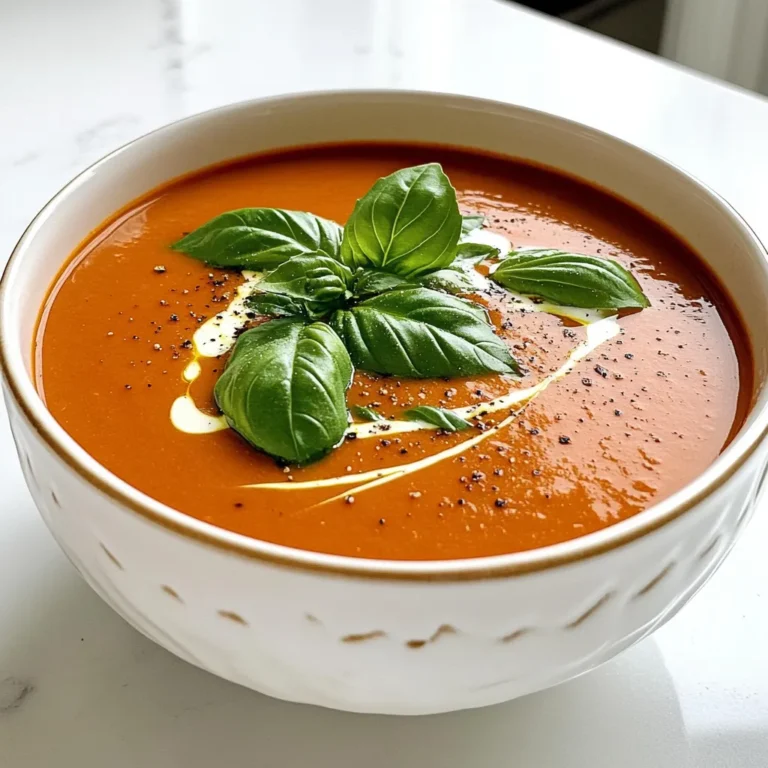
Slow Cooker Creamy Tomato Basil Soup Delight

PREV 1 … 6 7 8 … 56 NEXT
secrets pice kitchen

explore

DessertsDinnerAppetizersDrinks

Our Policies

  • Cookie Policy
  • Copyright Policy
  • Disclaimer
  • GDPR Policy
  • Terms Of Use
Back to Top
  • About
  • Contact Us
  • Privacy Policy
© 2025 secrets pice kitchen