FREE DINNER EBOOK! Get your copy!
  • Cookie Policy
  • GDPR Policy
  • Disclaimer
  • Terms Of Use
  • Visit my other site: Fun Cookie Recipes
secrets pice kitchen
  • Home
  • Dinner
  • Desserts
  • Drinks
  • Appetizers
  • Contact
  • About
  • Privacy Policy
  • Home
  • Dinner
  • Desserts
  • Drinks
  • Appetizers
  • Contact
  • About
  • Privacy Policy
  • Cookie Policy
  • GDPR Policy
  • Disclaimer
  • Terms Of Use
Visit my other site: Fun Cookie Recipes

HOME / CATEGORIES /

Latest

- 1 lb ground chicken - 1/2 cup breadcrumbs - 1/4 cup grated Parmesan cheese - 1/4 cup buffalo sauce - 1 egg, beaten - 2 green onions, finely chopped - 1 tsp garlic powder - 1/2 tsp onion powder - 1/2 tsp salt - 1/4 tsp black pepper - Extra buffalo sauce for drizzling - Blue cheese or ranch dressing for serving To make Air Fryer Buffalo Chicken Meatballs, you need fresh ingredients. Start with ground chicken for a tender bite. Add breadcrumbs to hold the meatballs together. Parmesan cheese gives a nice flavor and creaminess. Use buffalo sauce for that spicy kick. The beaten egg binds everything. Green onions add a fresh crunch, and garlic powder enhances the taste. Don't forget onion powder, salt, and black pepper for seasoning. Lastly, have extra buffalo sauce on hand for drizzling. Serve these meatballs with blue cheese or ranch dressing for a creamy dip. This combo makes each bite packed with flavor! To start, gather all your ingredients. You will need: - 1 lb ground chicken - 1/2 cup breadcrumbs - 1/4 cup grated Parmesan cheese - 1/4 cup buffalo sauce - 1 egg, beaten - 2 green onions, finely chopped - 1 tsp garlic powder - 1/2 tsp onion powder - 1/2 tsp salt - 1/4 tsp black pepper - Extra buffalo sauce for drizzling - Blue cheese or ranch dressing for serving Next, combine the ground chicken, breadcrumbs, and all the other ingredients in a large mixing bowl. Use your hands or a spatula to mix everything well. Make sure to blend the flavors together. This step is key for tasty meatballs. Now it’s time to prep your air fryer. Preheat it to 400°F (200°C). This helps your meatballs cook evenly. A hot basket gives you a nice, golden-brown color. When the air fryer is ready, scoop out small portions of the mixture. Roll them into 1-inch meatballs. Aim for about 20 meatballs. Once you have them shaped, arrange them in a single layer in the air fryer basket. Make sure they do not touch. This allows hot air to flow around them for even cooking. Cook the meatballs in the air fryer for 10-12 minutes. Keep an eye on them. You want a nice golden color and a cooked-through texture. To check for doneness, cut one meatball in half. The center should be fully cooked and no longer pink. If it looks good, carefully remove them from the fryer and drizzle extra buffalo sauce over them. Serve hot with blue cheese or ranch dressing on the side. Enjoy your meal! To make great meatballs, start by rolling them gently in your hands. This keeps them light and fluffy. Aim for about one inch in size. This size cooks evenly and stays moist. To ensure moisture, do not overmix the meat. Mix just until everything is combined. The egg and buffalo sauce add flavor and keep the meatballs tender. Cleaning your air fryer is key for great results. After each use, wipe down the basket and the inside. This prevents residue build-up. Check the manual for specific cleaning tips. Different air fryers cook at different speeds. If yours runs hot, reduce the cooking time by a minute or two. Always check for doneness early to avoid overcooking. Want to spice up your meatballs? Try adding smoked paprika or cayenne pepper for extra heat. You can also mix in some chopped celery for crunch. Drizzling more buffalo sauce before and after cooking adds layers of flavor. Serve with blue cheese or ranch dressing for a tasty dip. This balances the heat and adds creaminess. {{image_2}} You can easily switch up the ground chicken for other meats. Try ground turkey or lean beef for a different taste. These options keep the meatballs juicy and flavorful. If you want a plant-based version, use ground tofu or lentils. Both options add protein and are great for vegetarians. Want to spice things up? Add more buffalo sauce or some cayenne pepper. This gives your meatballs a bold kick. If you prefer milder flavors, reduce the buffalo sauce. You can also try different dipping sauces. Blue cheese is classic, but you can use honey mustard or a zesty garlic aioli. You can serve these meatballs in many ways. For a fun twist, make sliders using small buns. They are perfect for parties. You can also toss the meatballs on a fresh salad. This adds crunch and makes a great meal. Adjust the size of the meatballs for appetizers or a main dish. Smaller meatballs are great for snacking, while larger ones can fill you up. To store cooked meatballs, place them in an airtight container. This helps keep them fresh and tasty. You can refrigerate them for up to four days. Make sure to let them cool before sealing the container. If you want to keep them longer, consider freezing them. To freeze your meatballs, follow these steps: 1. Cool the meatballs: Let them reach room temperature. 2. Arrange on a tray: Place meatballs in a single layer on a baking tray. 3. Pre-freeze: Put the tray in the freezer for about an hour. This helps the meatballs keep their shape. 4. Transfer to a bag: Once frozen, place the meatballs in a freezer bag. Remove as much air as possible to prevent freezer burn. 5. Label and date: Write the date on the bag. You can freeze them for up to three months. When you are ready to use them, take out the desired amount. To thaw meatballs, place them in the fridge overnight. This method keeps them safe and maintains their texture. If you need them quickly, use the microwave. Heat them on low power, checking often to avoid cooking them further. For the best reheating results, try these methods: - Oven: Preheat to 350°F (175°C). Place meatballs on a baking sheet and heat for 10-15 minutes. - Air fryer: Heat at 350°F (175°C) for about 5-7 minutes. This keeps them crispy. - Microwave: Place meatballs on a microwave-safe plate. Heat for 30-second intervals until warm. These methods help keep the meatballs juicy and flavorful. Enjoy them with extra buffalo sauce or your favorite dipping sauce! You can tell when the meatballs are done by checking their color and temperature. They should be golden-brown on the outside. The best way to check doneness is to use a meat thermometer. You want the internal temperature to reach 165°F (74°C). This ensures they are cooked through and safe to eat. If you do not have a thermometer, cut one open. The inside should be white, not pink. Yes, you can make these meatballs ahead of time. To prep, mix all the ingredients as directed. Form the meatballs and place them on a tray. Cover them and store in the fridge for up to 24 hours. You can also freeze them. Just freeze them in a single layer first, then transfer to a bag. They will last for up to three months. When ready, cook them straight from the freezer. Just add a few extra minutes to the cook time. These meatballs are great on their own, but sides can make the meal even better. You can serve them with celery sticks and carrot sticks for crunch. A fresh salad balances the heat well too. Consider coleslaw for a creamy side. If you want something heartier, serve them on a bun to make sliders. Don’t forget blue cheese or ranch dressing for dipping! In this article, we covered how to make delicious Buffalo chicken meatballs. We discussed the essential ingredients, step-by-step instructions for preparing and cooking them, along with helpful tips for perfecting your dish. We also explored variations, storage methods, and answered common questions. Now you can enjoy tasty meatballs with a kick, impressing family and friends. Use these tips to make your cooking fun and easy. You're ready to enjoy a great meal!

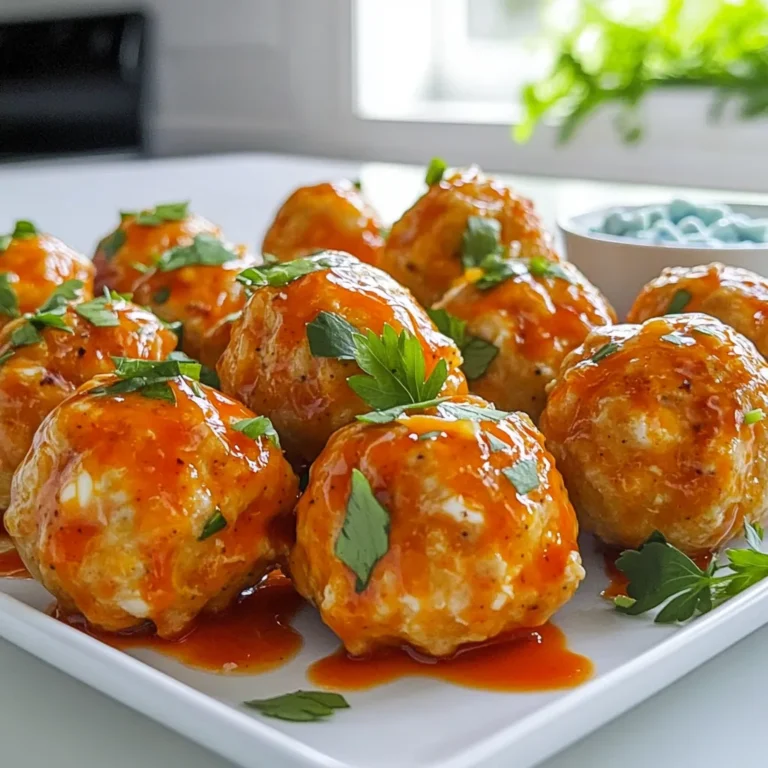
Air Fryer Buffalo Chicken Meatballs Simply Delicious

To make Caramel Mocha Icebox Cake Bars, you will need: - 1 ½ cups graham cracker crumbs - ½ cup unsweetened cocoa powder - ½ cup granulated sugar - ½ cup unsalted butter, melted - 1 cup heavy cream - 1 cup sweetened condensed milk - 1 cup brewed coffee, cooled - 1 teaspoon vanilla extract - ½ cup caramel sauce (plus extra for drizzling) - 1 teaspoon instant coffee granules For an extra touch, consider these garnishes: - Whipped cream for topping - Chocolate shavings for garnish If you need to swap ingredients, here are some ideas: - Use chocolate cookies instead of graham crackers for a richer taste. - Swap the heavy cream with coconut cream for a dairy-free option. - Replace sweetened condensed milk with a homemade version using milk and sugar. - Use decaf coffee if you want to cut back on caffeine. These simple swaps can help you tailor the recipe to your taste while keeping the spirit of the dish intact. Enjoy making these delicious bars! To start, gather your mixing bowl. Add 1 ½ cups of graham cracker crumbs, ½ cup of unsweetened cocoa powder, and ½ cup of granulated sugar. Then, pour in ½ cup of melted unsalted butter. Mix it well until the crumbs are fully coated. This step gives the bars a rich flavor. Next, take the crumb mixture and press it into the bottom of a lined 9x9 inch baking pan. Make sure to create an even layer. Use the back of a measuring cup to pack it down firmly. This will form a solid base for the bars. Now, let’s make the filling. In a large bowl, whisk together 1 cup of heavy cream, 1 cup of sweetened condensed milk, and 1 cup of cooled brewed coffee. Add 1 teaspoon of vanilla extract, ½ cup of caramel sauce, and 1 teaspoon of instant coffee granules. Mix until the mixture is smooth and creamy. This filling is where the magic happens! Pour half of the coffee mixture over the crust in the baking pan. Smooth it out evenly with a spatula. Then, add another layer of the graham cracker mixture on top. Spread it gently, being careful not to disturb the filling below. Follow this with the rest of the coffee mixture, smoothing the top. Cover the pan with plastic wrap. Place it in the refrigerator for at least 4 hours, but overnight is best. This chilling helps the bars set up nicely and makes them easier to slice. Once the bars are set, take them out of the pan using the parchment paper. Slice them into squares or rectangles with a sharp knife. Drizzle extra caramel sauce on top for a delicious touch. You can also add whipped cream and chocolate shavings if you like. Enjoy your sweet treat! To get the best texture in your Caramel Mocha Icebox Cake Bars, focus on the crust. Make sure to pack the graham cracker mixture tightly. Use the back of a measuring cup to press it down firmly. This helps create a solid base that holds well. When mixing the filling, whisk until smooth. The heavy cream should be well combined with the other ingredients. This ensures a creamy and rich filling. One common mistake is not letting the bars chill long enough. They need at least 4 hours in the fridge, but overnight is best. This extra time helps the layers set properly. Another mistake is using warm coffee. Make sure your brewed coffee is cooled before mixing it into the filling. Warm coffee can cause the mixture to lose its nice, thick texture. To boost the flavor, consider adding a pinch of sea salt to the caramel sauce. This little touch can enhance the sweet and rich flavors. You can also experiment with flavored coffee. Try using hazelnut or vanilla coffee for a fun twist. For added texture, mix in some crushed nuts or chocolate chips into the filling. These small changes can take your dessert to the next level. {{image_2}} You can easily add new flavors to your Caramel Mocha Icebox Cake Bars. Try using flavored coffee instead of regular coffee for a nice twist. Hazelnut or vanilla coffee can add depth. You may also mix in a bit of cinnamon or nutmeg for warmth. If you want a fruity touch, consider adding a layer of raspberry or cherry preserves. This gives the bars a sweet and tart contrast. For those who need gluten-free options, use gluten-free graham crackers. They work just as well as regular ones. You can also make your own crust with ground almonds or oats. This keeps the bars crunchy and tasty. Check that your cocoa powder and condensed milk are gluten-free too. These changes let everyone enjoy the dessert without worry. Making vegan Caramel Mocha Icebox Cake Bars is simple. Swap the heavy cream for coconut cream or a plant-based whipping cream. Use sweetened almond or oat milk instead of condensed milk. For the butter, choose coconut oil or a dairy-free spread. Make sure the caramel sauce is vegan too. These swaps keep the creamy texture while being animal-free. Enjoy a delicious treat that fits many diets! Store the Caramel Mocha Icebox Cake Bars in the fridge. Use an airtight container to keep them fresh. If you don’t have one, cover the dish tightly with plastic wrap. This helps prevent them from absorbing odors. They will stay tasty for up to four days. You can freeze these bars too. Cut them into squares first. Then, wrap each piece in plastic wrap. Place the wrapped bars in a freezer-safe bag. They can last for up to three months in the freezer. When you’re ready to enjoy them, thaw in the fridge overnight. These bars taste best when chilled. They are rich and creamy, perfect for a treat. Serve them cold straight from the fridge. For a fun twist, drizzle extra caramel sauce on top. You can also add whipped cream and chocolate shavings for a fancy look. Enjoy every bite! You can use digestive biscuits or vanilla wafers instead of graham crackers. Both options work well and add nice flavor. If you want a gluten-free choice, try almond flour or gluten-free cookies. Crush them and use like graham crackers. Yes, you can make these bars a day or two ahead of time. Just store them in the fridge until you are ready to serve. The flavors will blend better, and they will taste even more delicious. To keep the bars firm, chill them for at least 4 hours, or overnight is best. Make sure the filling is well combined and not too warm when you pour it over the crust. If they still feel soft, try adding a bit more cocoa powder to the crust. These bars go great with coffee or espresso. The coffee flavor in the bars complements the drink. You can also enjoy them with a glass of cold milk or a creamy vanilla latte. They are perfect for any sweet treat moment! This blog post covers everything you need to make Caramel Mocha Icebox Cake Bars. We discussed the key ingredients, including options for garnishes and substitutions. Step-by-step instructions guided you through each part, from the crust to serving. I also shared tips to avoid common mistakes and variations for gluten-free or vegan diets. Proper storage keeps these treats fresh and tasty. With these insights, you can create amazing bars that everyone will love. Enjoy your baking adventure!

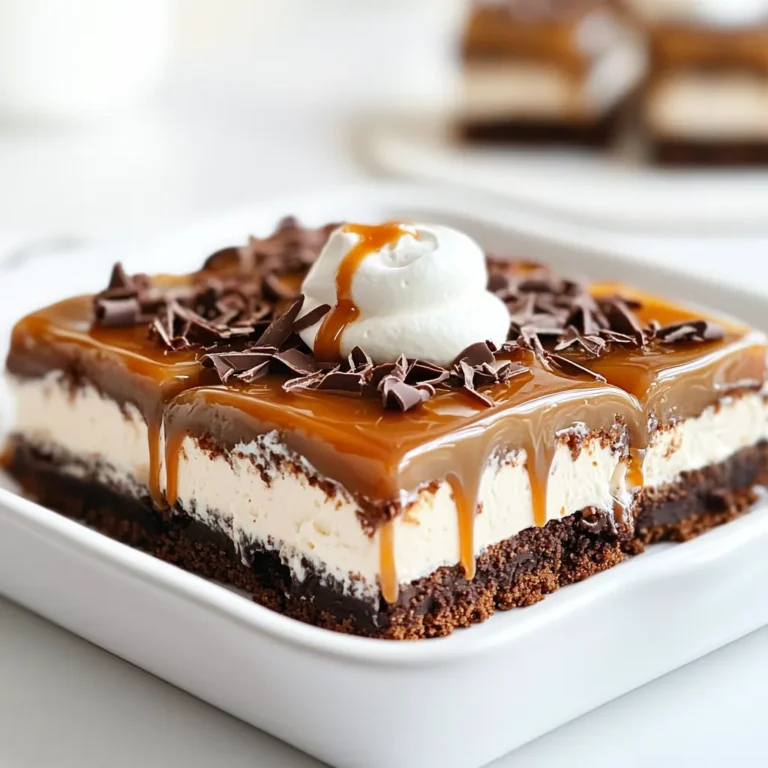
Caramel Mocha Icebox Cake Bars Easy and Delicious Treat

- 2 cups Greek yogurt (plain or vanilla) - 1 cup mixed berries (strawberries, blueberries, raspberries) - 1/2 cup granola (preferably low-sugar) - 1 tablespoon honey or maple syrup (optional, for sweetness) - 1 tablespoon chia seeds - 1/2 teaspoon vanilla extract - A pinch of cinnamon (optional) These ingredients make a tasty and healthy parfait. The Greek yogurt gives a creamy base. The berries add natural sweetness and color. The granola gives a nice crunch to the mix. You can customize each layer to your taste! - Swap Greek yogurt for dairy-free yogurt if needed. - Use any berries you like, such as blackberries or cherries. - Try nuts instead of granola for crunch. - Replace honey with agave syrup for a vegan option. These swaps keep the parfait delicious while catering to your needs. Feel free to mix and match! - Greek yogurt: Packed with protein, it helps build muscle. - Berries: High in vitamins and antioxidants, they boost health. - Chia seeds: Full of fiber, they help keep you full longer. - Granola: Provides energy with healthy carbs, especially if low-sugar. Each ingredient in your parfait serves a purpose. Together, they create a meal that is both satisfying and good for you. Enjoy the benefits while you indulge in a tasty treat! To make these parfaits, gather all your ingredients first. You will need Greek yogurt, mixed berries, granola, and chia seeds. If you want extra sweetness, grab honey or maple syrup. You can prepare this in just 10 minutes. Now, let’s layer the parfait. In a medium bowl, mix the Greek yogurt, vanilla extract, honey, chia seeds, and cinnamon. Stir it until smooth. 1. First Layer: Spoon about 1/3 of the yogurt mixture into a glass or parfait dish. 2. Second Layer: Add a layer of mixed berries—strawberries, blueberries, and raspberries work well. 3. Third Layer: Sprinkle about 1/4 cup of granola over the berries. 4. Repeat: Add another layer of yogurt, more mixed berries, and finish with granola on top. If you want, garnish with whole berries and a drizzle of honey or syrup for extra flair. You can serve these parfaits right away. They are great for breakfast or a snack. If you need to prepare them ahead, cover with plastic wrap. They will stay fresh in the fridge for up to 2 hours. Enjoy your tasty, high-protein treat! To get the best texture in your parfait, use thick Greek yogurt. This yogurt has a creamy feel. Mix it well with vanilla extract, chia seeds, and honey. This creates a smooth base. The chia seeds add a fun crunch. If you prefer a sweeter taste, add honey or maple syrup. Just remember, the yogurt should be the star! You can prepare these parfaits ahead of time. Layer the yogurt, berries, and granola in a glass. Cover it tightly with plastic wrap. Keep it in the fridge for up to two hours. This makes a quick breakfast or snack. Just don’t add the granola until you’re ready to eat. This keeps it crispy! When serving, use clear glasses to show off the layers. Start with a layer of yogurt, then add berries and granola. Repeat until you reach the top. Finish with a few whole berries on top. A light drizzle of honey adds a nice touch. This makes your parfait look great and taste amazing! {{image_2}} If you want to switch up your protein, try using cottage cheese. It adds creaminess and packs in protein. You can also use plant-based yogurt if you want a dairy-free option. Soy yogurt is a great choice. It has a similar texture and protein content. Mixing berries can change the flavor and fun. You can use strawberries, blueberries, and raspberries for a classic taste. But don’t stop there! Try blackberries or even chopped peaches. Each fruit adds its own flavor. You can also mix frozen berries for a chill. They will thaw in the yogurt, making a refreshing treat. Toppings can add crunch and flavor. Add nuts like almonds or walnuts for healthy fats. Seeds like pumpkin or sunflower seeds also work well. For a sweet touch, drizzle some honey or maple syrup on top. You could even add a sprinkle of cocoa powder for a chocolate twist. Get creative! Each topping can change the parfait in exciting ways. To store your yogurt parfaits, use an airtight container. If you have leftovers, place them in the fridge. Cover them tightly to keep them fresh. Avoid mixing in the granola until you’re ready to eat. This keeps the granola crunchy. Yogurt parfaits last about two days in the fridge. After that, the berries may get mushy. The yogurt can stay fresh longer, but the taste may change. Always check for any strange smells or color changes before eating. You can freeze yogurt parfaits, but the texture may change. If you freeze them, do it without the granola. When ready to eat, let them thaw in the fridge overnight. This keeps the yogurt and berries tasty, but the granola will need to be added fresh for crunch. Yes, you can use non-dairy yogurt. Look for options like almond, coconut, or soy yogurt. These types can offer a creamy texture and good flavor. Just choose a brand that has no added sugar for the best taste. To lower the sugar, skip the honey or maple syrup. Instead, focus on the natural sweetness of the berries. You can also use plain Greek yogurt, which has less sugar than flavored kinds. The best granola is low in sugar and high in fiber. Look for granola with whole grains and nuts. It should have simple ingredients without too many added sugars. This keeps your parfait healthy and tasty. Yes, you can prepare parfaits in advance. Layer them in a glass and cover with plastic wrap. They can stay in the fridge for up to 2 hours. However, for the best crunch, add granola just before serving. Yogurt parfaits are simple and healthy. We covered ingredients, step-by-step instructions, and helpful tips. You learned about variations, storage, and common questions. The right ingredients and methods make a great parfait. With the right swaps and tricks, you can customize this dish for your taste. Enjoy experimenting and sharing your parfaits!

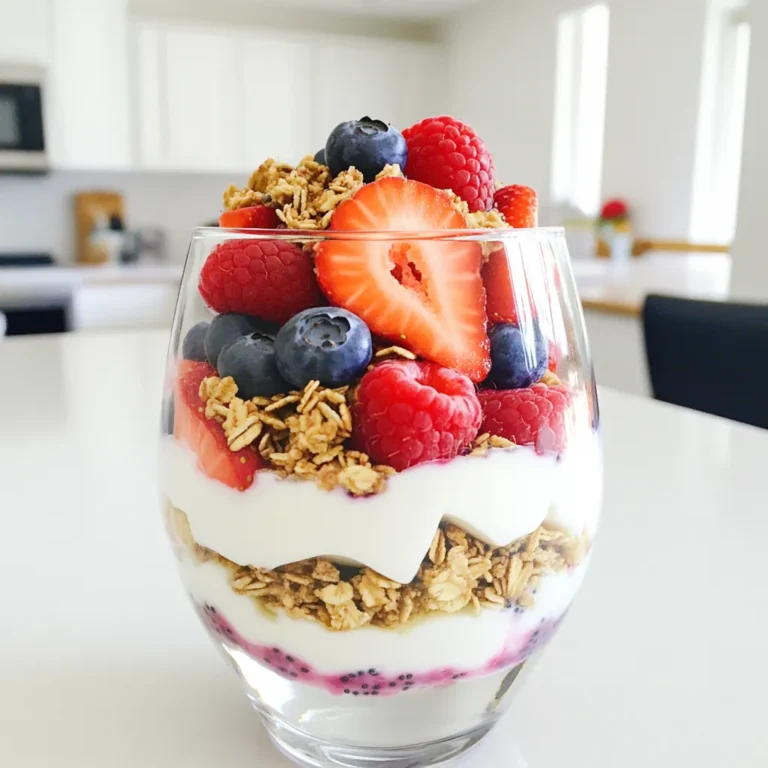
High-Protein Berry Yogurt Parfaits Easy and Delicious

- 1 cup graham cracker crumbs - 4 tablespoons unsalted butter, melted - 1 cup cream cheese, softened - 1 cup powdered sugar - 1 cup pumpkin puree - 1 teaspoon vanilla extract - 2 teaspoons pumpkin pie spice - 1 cup whipped cream (plus extra for topping) - 1 tablespoon brewed coffee, cooled - Chocolate shavings or cocoa powder for garnish Gathering the right ingredients is key to making this tasty no-bake dessert. Each item plays a big role in the flavor and texture. First, you will need graham cracker crumbs and melted butter for the crust. This mixture holds the cheesecake together. Next, cream cheese is a must. Softened cream cheese gives a rich and smooth filling. Powdered sugar adds sweetness, while pumpkin puree offers that warm pumpkin flavor. Vanilla extract and pumpkin pie spice enhance the taste, making it feel festive. Whipped cream brings lightness to the filling and makes it extra creamy. Brewed coffee adds a nice latte kick. Finally, chocolate shavings or cocoa powder will garnish the cups and make them look pretty. With these ingredients ready, you can create your delightful no-bake pumpkin spice latte cheesecake cups! To start, you need a firm crust. In a bowl, mix the graham cracker crumbs with the melted butter. Aim for a texture that feels like wet sand. Next, divide this mixture evenly into your serving cups. Press down firmly to create a solid layer. Now, it’s time to make the filling. Take your softened cream cheese and beat it in a mixing bowl until it’s smooth. Gradually add in the powdered sugar. Make sure to mix well so everything combines evenly. For that pumpkin spice kick, stir in the pumpkin puree, vanilla extract, and pumpkin pie spice. Mix until no lumps remain. You want a smooth and creamy mixture that smells delicious. Now comes the fun part: folding in the whipped cream. Gently combine the whipped cream into your pumpkin cheesecake mix. Be careful not to deflate the whipped cream. Finally, add in your cooled brewed coffee for that extra latte flavor. It’s time to bring it all together. Spoon or pipe the pumpkin cheesecake filling on top of your graham cracker crust. Use a spatula to smooth the tops of each cup, making them look nice and neat. Place your filled cups in the fridge. Chill them for at least four hours. This helps the flavors meld and the cheesecake firm up nicely. Enjoy the anticipation as you wait for this tasty treat! To get a smooth filling, start by beating the cream cheese. Use a hand mixer or stand mixer. Beat until it feels soft and creamy. This step makes the base light. Then add the powdered sugar slowly. Mix until it blends well. Ensure there are no lumps. When folding in whipped cream, do it gently. Use a spatula to lift and fold. This keeps the air in the whipped cream. You want a light and fluffy texture. Avoid stirring too hard, as this can deflate it. Feel free to play with spices. Try adding a pinch of nutmeg or cinnamon for warmth. You can also mix in a bit of ginger for a kick. Each spice adds its unique flavor twist. For garnishes, chocolate shavings are great, but you can also use nuts. Crushed pecans or walnuts give a nice crunch. Dusting with cocoa powder offers a rich finish. You can also drizzle caramel on top for sweetness. If you want to adjust sweetness, start with less powdered sugar. Taste as you mix and add more if needed. This way, you can control how sweet it gets. For sugar substitutes, try using stevia or monk fruit sweetener. These options work well without adding extra calories. Just remember to check the package for conversion rates. They can be more potent than regular sugar. {{image_2}} To enhance the pumpkin spice latte flavor, consider these options: - Use espresso for a stronger taste. - Add chocolate or caramel swirls for a rich twist. These flavor boosters give your cheesecake cups a fun twist. Espresso adds depth and pairs well with pumpkin. Chocolate or caramel brings sweetness and can create beautiful layers. Try these ideas to make your dessert stand out. For those with dietary needs, here are some great swaps: - Use gluten-free graham crackers for a gluten-free crust. - Dairy-free cream cheese can replace regular cream cheese. These swaps keep the taste while meeting dietary needs. Gluten-free options make this dessert more inclusive. Dairy-free cream cheese still provides creaminess without dairy. Enjoying treats shouldn’t come with restrictions. You can serve these cheesecake cups in fun ways: - Make mini cups for a party or event. - Serve in a large dish for a family gathering. Mini cups are perfect for small bites at parties. They let guests enjoy different desserts without too much hassle. A large dish works well for sit-down meals, making it easy to share. This flexibility makes your dessert ideal for any occasion. To keep your No-Bake Pumpkin Spice Latte Cheesecake Cups fresh, use airtight containers. Glass or plastic containers work well. Make sure to seal them tightly. This helps keep air out and prevents drying. Avoid stacking the cups on top of each other. This can mess up their lovely layers. If you notice any separation in the filling, gently stir it before serving. Yes, these cheesecake cups can be frozen! To freeze, wrap each cup in plastic wrap. Place them in a freezer-safe bag or container. This helps keep them protected from freezer burns. When you want to enjoy them again, take the cups out and thaw them in the fridge. Let them sit overnight for the best results. These cheesecake cups stay fresh in the fridge for up to five days. Always check for signs of spoilage. Look for any change in color or smell. If the texture seems off or if you see mold, it is best to toss them out. Enjoy your delicious treats while they are at their best! Yes, you can use fresh pumpkin. Fresh pumpkin has a bright flavor. However, it takes time to prepare. You need to roast and puree the pumpkin. Canned pumpkin is easier and faster. It is often more consistent in texture. Both options work well in this recipe. You can make this recipe a day in advance. Prepare the crust and filling as usual. Assemble the cups and chill them overnight. This allows the flavors to blend. Just add toppings before serving. This makes it easier for parties or gatherings. There are several great options for crusts. You can use crushed cookies like Oreos. For a gluten-free option, try crushed almond flour cookies. You can also use crushed pretzels for a salty twist. Choose what fits your taste best. Yes, you can make a vegan version. Use vegan cream cheese instead of regular cream cheese. Replace powdered sugar with coconut sugar. For the whipped cream, choose coconut whipped cream. Use a dairy-free butter for the crust. These swaps keep the flavors rich and delicious. This blog post covered making delicious pumpkin cheesecake cups. We explored required ingredients, easy steps, and helpful tips. You learned about variations to fit your tastes and storage methods to keep them fresh. I hope these simple instructions inspire you to create your own treat. Enjoy making these cups for yourself or sharing them with others. You’ll delight in every bite!

No-Bake Pumpkin Spice Latte Cheesecake Cups Delight

- 1 lb ground chicken - 2 tablespoons gochujang (Korean chili paste) - 1 tablespoon soy sauce - 1 tablespoon sesame oil - 1 teaspoon rice vinegar - 1 tablespoon honey - 2 cloves garlic, minced - 1 small onion, finely chopped - 1 carrot, grated - 1 bell pepper, finely diced (red or yellow) - 1 cup water chestnuts, diced - 1/4 cup green onions, chopped - Lettuce leaves (butter or romaine), leaves separated - Sesame seeds for garnish - Large skillet - Spatula - Measuring spoons Gathering these ingredients is the first step. The ground chicken forms the base of the dish. Gochujang gives it a spicy, sweet kick. Soy sauce adds umami, while sesame oil brings a nutty flavor. Rice vinegar and honey balance the heat and enhance the taste. Next, the vegetables add color and crunch. Minced garlic and onion give a rich aroma. Grated carrot and diced bell pepper provide sweetness and texture. Water chestnuts add a nice crunch, and green onions brighten it all up. Don't forget the lettuce! It acts as a fresh wrap for the chicken mix. Lastly, sesame seeds are a fun garnish that adds a bit of crunch. For tools, you'll need a large skillet to cook everything. A spatula helps mix and break up the chicken. Measuring spoons ensure you get the flavors just right. With these ingredients and tools, you're ready to make delicious Gochujang Chicken Lettuce Wraps. 1. Start by heating sesame oil in a large skillet over medium heat. 2. Add chopped onion and minced garlic. Sauté them for 2-3 minutes until the onion turns soft. 3. Next, add the ground chicken to the skillet. Break it apart with a spatula. Cook it for about 5-7 minutes until it’s nicely browned. 1. Now it’s time to add flavor! Stir in gochujang, soy sauce, rice vinegar, and honey. 2. Mix everything well and allow it to cook for another 2-3 minutes. This helps the flavors blend together. 1. Add the grated carrot and diced bell pepper to the skillet. 2. Also, toss in the diced water chestnuts. Stir everything well. Cook for an additional 3-4 minutes. The veggies should be soft but still crunchy. 3. Remove the skillet from heat and fold in the chopped green onions. Now you're ready to create your wraps! Place a spoonful of the chicken mix on a lettuce leaf and wrap it up. Enjoy each bite! To get the best flavor from your Gochujang chicken, start with the right technique. Here are some tips: - Best practices for browning chicken: Use medium heat. Make sure your skillet is hot before adding the chicken. This helps create a nice brown color. Break the chicken apart with a spatula. Keep it moving to avoid burning. - How to sauté vegetables properly: Start with onions and garlic for great flavor. Cook them in sesame oil until the onions are soft. This usually takes about 2-3 minutes. Add your other veggies like bell pepper and carrot next. Stir them in well and cook until they are slightly soft but still crunchy. This keeps them vibrant and tasty. Making your dish look great is key to impressing your guests. Here are some easy ways to present Gochujang chicken lettuce wraps: - Plating suggestions for serving guests: Use a large platter to arrange your filled lettuce wraps. This makes a beautiful display. - Garnishing tips for extra flavor: Sprinkle sesame seeds and green onions on top. This adds color and a nice crunch. You can also serve a small bowl of gochujang on the side. This way, guests can add more spice if they want. You can make this dish your own by changing a few things. Here are some ideas: - Adjusting spice levels with gochujang: If you like it spicier, add more gochujang. Start with an extra teaspoon and taste as you go. - Adding different vegetables or proteins: Feel free to swap out the chicken for turkey or even tofu for a vegetarian twist. You can also add veggies like zucchini or mushrooms for more flavor and texture. {{image_2}} You can switch up the protein in these wraps. Ground turkey works well. It has a milder taste but absorbs flavors nicely. Ground beef is another option. It gives a richer flavor and works well with gochujang. If you're looking for a plant-based choice, try tofu. Press and cube it, then sauté until golden. Tofu soaks up the sauce and adds protein without meat. You don't have to stop at gochujang. Try other sauces to mix it up. Teriyaki gives a sweet twist. Hoisin adds a rich, savory taste. You can also add extra condiments when serving. Sriracha brings heat, while sesame oil adds a nutty flavor. These little touches make each bite special. Feel free to get creative and mix in other cuisines. You can add Asian spices like five-spice powder for a new twist. Try adding some fresh herbs like cilantro for a fresh taste. If you want a lighter version, use lettuce wraps with grilled shrimp or chicken. These wraps can easily become a fusion dish with flavors from around the world. To keep your Gochujang chicken fresh, use airtight containers. Glass or plastic containers work well. Store the chicken mixture in the fridge for up to three days. For the lettuce, wrap the leaves in a damp paper towel. Place them in a sealed bag for best freshness. When you are ready to eat, you can reheat the chicken mixture easily. Use a skillet over medium heat for even warming. Stir it often to avoid burning. You can serve the warmed chicken in fresh lettuce leaves. Add a sprinkle of sesame seeds for extra flavor. Yes, you can freeze Gochujang chicken. Place it in a freezer-safe container. Leave some space at the top since it may expand. To defrost, move it to the fridge overnight. You can also use the microwave for a quick thaw. Just be careful not to overcook it. Gochujang is a Korean chili paste. It has a sweet and spicy taste. You can find it in Asian markets or the international aisle of grocery stores. Look for it in jars or squeeze bottles. Yes, you can make Gochujang Chicken in advance. Cook the chicken mixture and let it cool. Then, store it in the fridge. It stays fresh for up to three days. Absolutely! These wraps are great for meal prep. You can make the chicken mix and pack it separately. Store lettuce leaves in a different container to keep them fresh. The spiciness varies with the amount of gochujang you use. It has a mild heat, but you can adjust it to your liking. If you prefer more spice, add extra gochujang. Serve these wraps with rice or quinoa for a filling meal. You can also pair them with a light salad or steamed veggies. For more flavor, try a side of kimchi. In this blog post, I shared a simple recipe for Gochujang Chicken Lettuce Wraps. We covered the key ingredients, including ground chicken and gochujang, along with the vegetables and kitchen tools needed. I offered step-by-step instructions and helpful tips for cooking. You learned how to customize the dish and made variations for different tastes. Lastly, I discussed how to store leftovers properly. Enjoy making these tasty wraps and get creative with your flavors. This dish is fun, quick, and perfect for any meal!

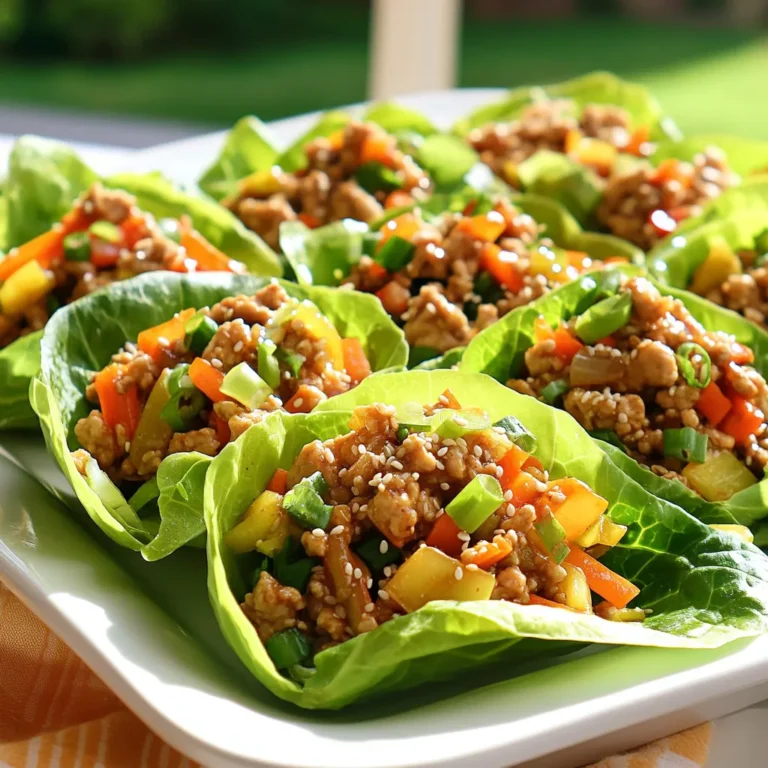
Gochujang Chicken Lettuce Wraps Flavorful and Easy Meal

To make Peanut Butter Banana Overnight Oats, gather these simple ingredients: - 1 cup rolled oats - 2 cups almond milk (or milk of choice) - 2 ripe bananas, mashed - 3 tablespoons peanut butter (smooth or crunchy) - 1 tablespoon chia seeds - 1 tablespoon honey or maple syrup (optional for extra sweetness) - 1 teaspoon vanilla extract - Pinch of salt - Sliced banana and chopped nuts for topping These ingredients come together to create a creamy, delicious meal. The rolled oats provide fiber, while the bananas add natural sweetness. Peanut butter gives a rich taste and healthy fats. Chia seeds bring extra nutrients and help thicken the oats. You can choose any milk you like. Almond milk is a great option for a nutty flavor. If you want more sweetness, add honey or maple syrup. The pinch of salt enhances all the flavors. For toppings, sliced bananas and chopped nuts not only add crunch but also make your dish look beautiful. They bring extra flavor and texture, making your breakfast even more delightful. Enjoy the process of gathering these fresh ingredients, and get ready to create something special! Mixing the Ingredients First, grab a large mixing bowl. Add 1 cup of rolled oats. Pour in 2 cups of almond milk. Next, mash 2 ripe bananas and mix them in. Add 3 tablespoons of peanut butter to the bowl. Then, sprinkle in 1 tablespoon of chia seeds. If you want it sweeter, add 1 tablespoon of honey or maple syrup. Don’t forget to add 1 teaspoon of vanilla extract and a pinch of salt. Stir it all well until everything is mixed together. Spoon into Jars/Bowls Now, take that creamy mixture and spoon it into four small mason jars or bowls. Make sure to leave some space at the top. The oats will expand, so don’t fill them too high. Refrigeration Process Cover each jar or bowl with a lid or plastic wrap. Place them in the fridge overnight. If you can’t wait, let them chill for at least 4 hours. This soaking time helps the oats absorb the milk, making them soft and ready to eat. Adding Toppings In the morning, take the jars out of the fridge. Give the oats a good stir. They should be thick and creamy. If they seem too thick, add a splash of almond milk until you like the consistency. Then, slice a banana and sprinkle it on top. You can also add some chopped nuts for extra crunch. Adjusting Consistency If you want your oats thinner, just add more almond milk. Mix well until you reach your perfect texture. Enjoy your easy and tasty breakfast! Choosing the Right Bananas Pick ripe bananas for the best flavor. Look for bananas with brown spots. They are sweeter and easier to mash. You want bananas that feel soft but not mushy. If you have overripe bananas, this recipe is perfect for them. They add natural sweetness and creaminess to your oats. Substituting Ingredients Feel free to swap ingredients to match your taste. You can use any milk you love: oat milk, soy milk, or cow's milk. If you need a nut-free option, try sunflower seed butter instead of peanut butter. For a vegan touch, use maple syrup instead of honey. Adjust the sweetness to fit your preference. Serving in Clear Jars Using clear jars makes this dish look appealing. It shows off the beautiful layers of oats, bananas, and peanut butter. Choose cute mason jars or small bowls. This way, your breakfast looks as good as it tastes! Garnishing with Extras Add a fun finish with toppings. Sliced bananas look great on top. Chopped nuts add crunch and flavor. For an extra touch, sprinkle cinnamon or cacao nibs on top. This not only adds beauty but also a burst of flavor. {{image_2}} If you want a nut-free version, you can easily swap peanut butter. Here are some great alternatives: - Sunflower Seed Butter: This option is creamy and gives a nice nutty taste. It is safe for nut allergies. - Soy Nut Butter: This butter mimics peanut butter well. It works great in recipes. - Pumpkin Seed Butter: This is another healthy choice. It has a distinct flavor and adds nutrients. These swaps keep your oats yummy while making them safe for all. You can take your peanut butter banana overnight oats up a notch with some fun flavors. Here are some ideas: - Adding Spices or Extracts: Try mixing in a dash of cinnamon or nutmeg. These spices can warm up the taste. A splash of almond extract or coconut extract can add a new twist, too! - Incorporating Other Fruits: Get creative with your fruits! You can add chopped apples, berries, or even peaches. These fruits boost flavor and add more nutrients. Just mix them in before refrigerating. Experiment with these variations to find your favorite taste. You will love how easy it is to switch things up! You can store your peanut butter banana overnight oats in the fridge. They stay fresh for up to five days. Keep them in sealed jars or bowls. If you see any mold or smell a sour odor, throw them away. These are clear signs of spoilage. You can freeze leftovers too. To freeze, spoon the oats into freezer-safe containers. Leave a little space at the top since the oats will expand. Seal the containers tightly and label them with the date. They can last for up to three months in the freezer. When you want to eat them, take the container out. Let it thaw in the fridge overnight. If you need to eat them faster, microwave them for one to two minutes. Stir well before serving. You might want to add a splash of almond milk for creaminess after thawing. Can I use quick oats? Yes, you can use quick oats. They will absorb liquid faster. This change can make your oats softer. If you prefer a creamier texture, quick oats work well. Just adjust the soaking time to a few hours instead of overnight. How can I make it vegan? To make this recipe vegan, use almond milk or any plant-based milk. Replace honey with maple syrup for sweetness. Make sure your peanut butter does not contain honey. These easy swaps keep your breakfast tasty and plant-based. What are the best toppings for overnight oats? The best toppings are sliced bananas and chopped nuts. You can also try berries, seeds, or granola. A drizzle of extra peanut butter adds flavor. Experiment with toppings to find your favorite mix! You learned how to create tasty overnight oats using simple ingredients. We covered mixing, refrigeration, and serving tips to help you achieve the best texture and flavor. I shared ways to customize your oats with nut-free options and extra flavors. Lastly, I explained how to store your oats for freshness. Now, it's your turn to enjoy this healthy breakfast! Make it your own and have fun experimenting.

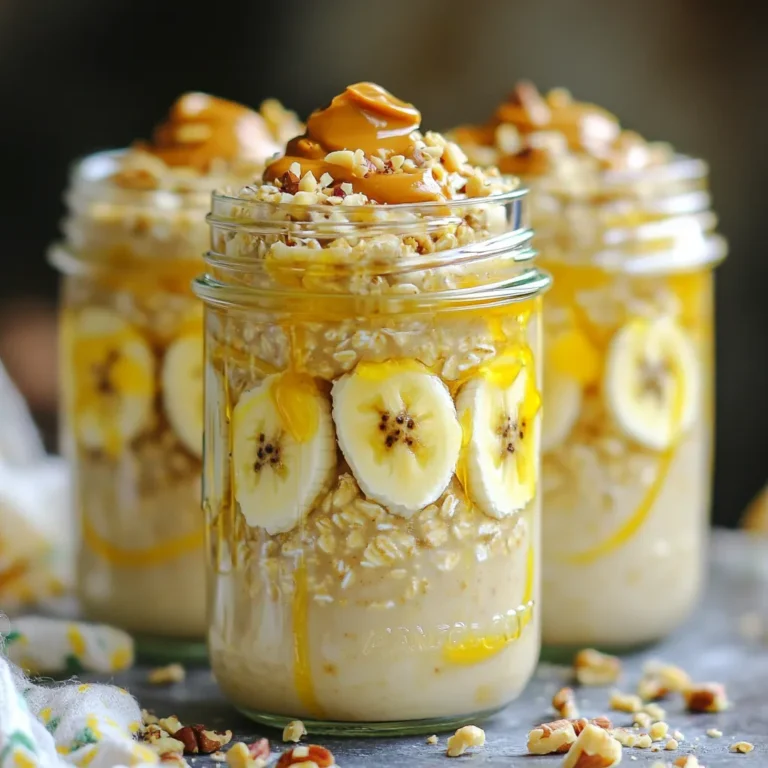
Peanut Butter Banana Overnight Oats Easy Breakfast Delight

- 2 large onions, thinly sliced - 2 tablespoons olive oil - 1 tablespoon balsamic vinegar - Salt and pepper to taste - Store-bought flatbread or homemade - 1 cup Gruyere cheese, grated - 1/2 cup ricotta cheese - Fresh thyme (1 tablespoon fresh or 1 teaspoon dried) - Honey for drizzling - Fresh arugula for garnish To create a rich flavor base, start with onions. Thinly sliced onions caramelize beautifully. The trick is to cook them slowly in olive oil. This step helps them become soft and sweet. It takes about 15 to 20 minutes on medium heat. Stir them often to avoid burning. Next, add balsamic vinegar, salt, and pepper. The vinegar adds depth and a slight tang. This blend brings out the sweetness of the onions. For the flatbread, you can use store-bought or homemade. I find that homemade adds a warm touch. Spread ricotta cheese on the flatbread first. It gives a creamy layer beneath the toppings. Then, pile on the caramelized onions. Follow with a generous sprinkle of Gruyere cheese. This cheese melts perfectly and adds a nutty flavor. Finally, don’t forget the fresh thyme! It adds an earthy aroma and brightens the dish. To finish, drizzle honey over the flatbread after baking. This sweet touch balances the savory flavors. Garnish with fresh arugula for a peppery bite. These simple ingredients come together for a tasty treat. They make each bite a mix of sweet, savory, and creamy. Enjoy making this flatbread! To make the onions, start by heating olive oil in a large skillet over medium heat. Add the thinly sliced onions. Cook them for about 15 to 20 minutes. Stir them occasionally. You want them soft and golden brown. This slow cooking brings out their natural sweetness. Next, stir in the balsamic vinegar. Season with salt and pepper to taste. Cook for another 5 minutes. The vinegar adds a tangy depth to the onions. Once done, set the caramelized onions aside. They will be the star of your flatbread. Now, it’s time to preheat your oven to 400°F (200°C). This step ensures that your flatbread bakes evenly. Take your flatbread and place it on a baking sheet. Spread the creamy ricotta cheese evenly on top. This cheese adds a rich base that pairs well with the onions. Evenly distribute the caramelized onions over the ricotta. Then, sprinkle the grated Gruyere cheese on top. Gruyere melts beautifully and adds a nutty flavor. Lastly, add fresh thyme leaves for an herbaceous note. Bake the assembled flatbread in the preheated oven for about 12 to 15 minutes. Keep an eye on it. The cheese should be melted and bubbly, and the edges of the flatbread should turn golden brown. For the best cheese melt, make sure your oven is fully preheated. A hot oven helps the cheese melt evenly. Once baked, remove it from the oven and let it cool for a minute. Drizzle honey over it for a sweet finish. Garnish with fresh arugula before slicing into pieces. Enjoy your delicious creation! To get sweet, golden onions, start with medium heat. This helps avoid burning. Use a large skillet for even cooking. Thinly slice your onions for faster caramelization. Stir the onions every few minutes. This keeps them from sticking and helps them cook evenly. Add salt when you start cooking. Salt draws out moisture, helping the onions soften. After about 15 minutes, add balsamic vinegar. It adds a rich flavor and enhances sweetness. Cooking for an extra five minutes allows the flavors to blend. For serving, cut the flatbread into bite-sized pieces. Arrange them on a rustic wooden board for a homey feel. Drizzle some honey over the top for a sweet touch. Fresh arugula adds a nice color and a peppery taste. Pair your flatbread with a light white wine or a refreshing sparkling water. These drinks balance the rich flavors of cheese and onions. You can also serve a side salad to add freshness. {{image_2}} If you don’t have Gruyere cheese, don’t worry! You can use other cheeses like mozzarella, fontina, or even aged cheddar. Each cheese brings a different taste. For a fun twist, try mixing two types of cheese. The creaminess of ricotta pairs well with sharp cheddar. This mix adds depth to your flatbread. You can customize your flatbread with various toppings. Try adding fresh spinach, sliced mushrooms, or roasted red peppers for extra flavor. If you want protein, consider chicken, bacon, or even chickpeas. These additions make the dish heartier. Seasonal ingredients can also inspire your toppings. In summer, fresh tomatoes and basil work great. In fall, add pumpkin or butternut squash. Each season brings new flavors, so experiment and enjoy! To store leftover flatbread, allow it to cool first. Wrap it tightly in plastic wrap or foil. You can also place it in an airtight container. This keeps it fresh and prevents it from drying out. If you want to freeze it, place the wrapped flatbread in a freezer bag. Make sure to squeeze out as much air as you can. This helps prevent freezer burn. For reheating, preheat your oven to 350°F (175°C). Place the flatbread on a baking sheet and heat for about 10 minutes. This warms it up nicely and keeps it crispy. You can also use a toaster oven for quick reheating. In the fridge, leftover flatbread lasts about 3 to 5 days. If you freeze it, it can stay good for up to 2 months. Check for signs of spoilage before eating. Look for any mold or an off smell. If the flatbread feels very hard or dry, it’s best to discard it. Staying aware helps you enjoy every delicious bite. Yes, you can prepare this flatbread ahead of time. After baking, let it cool completely. Store it in an airtight container in the fridge for up to three days. If you want to reheat it, preheat your oven to 350°F (175°C). Place the flatbread on a baking sheet and warm it for about 10 minutes. This keeps the cheese melty and the flatbread crisp. If you don't have flatbread, use pita bread or naan. You can also try a thin pizza crust. For a gluten-free option, look for gluten-free flatbreads or use a cauliflower crust. Each choice adds a unique taste and texture to your dish. To make this dish gluten-free, use gluten-free flatbread. For vegan options, swap the cheeses for dairy-free alternatives. Use cashew cheese or vegan ricotta. You can also skip the honey for a completely plant-based flatbread. Always check labels to ensure other ingredients fit your needs. This article explored how to make delicious caramelized onion Gruyere flatbread. You learned about the key ingredients, step-by-step cooking instructions, tips for perfect caramelization, and variations to try. Remember, this flatbread works well for any gathering or snack craving. With the right technique, you create a tasty treat everyone will love. Enjoy experimenting with different cheeses and toppings! Keep this recipe handy for quick meals or impressing guests. Happy cooking!

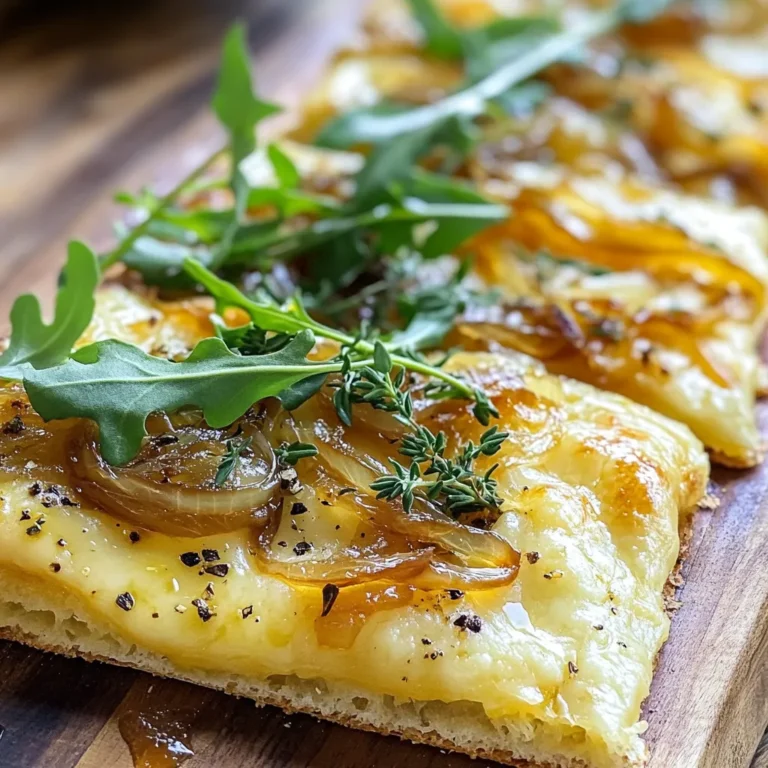
Caramelized Onion Gruyere Flatbread Flavor Boost

- 4 tilapia fillets - 1/2 cup grated Parmesan cheese - 1 cup breadcrumbs (preferably panko) - 2 tablespoons fresh parsley, chopped - 1 teaspoon garlic powder - 1 teaspoon onion powder - 1 teaspoon dried oregano - 1/2 teaspoon salt - 1/4 teaspoon black pepper - 2 tablespoons olive oil - 1 tablespoon lemon juice Gathering fresh ingredients is key to great flavor. The tilapia fillets will shine as the star of your dish. I love using panko breadcrumbs for that extra crunch. Fresh parsley brightens the flavor and adds color. - Calories: 300 - Protein: 25g - Carbs: 20g - Fats: 15g This dish is not only tasty but also packed with nutrients. Each serving gives a good amount of protein, making it filling and satisfying. - Baking tray - Mixing bowls - Parchment paper - Measuring cups - Measuring spoons Make sure you have all your tools ready. This will help the cooking process go smoothly. Using parchment paper makes cleanup easy, too. First, preheat your oven to 400°F (200°C). This helps the fish cook evenly. While the oven heats, grab a mixing bowl. In this bowl, combine the grated Parmesan cheese, breadcrumbs, parsley, garlic powder, onion powder, oregano, salt, and black pepper. Stir until everything is mixed well. In a small bowl, mix the olive oil and lemon juice together. Take each tilapia fillet and dip it in this mixture. Make sure both sides are coated well. After that, press the coated fillet into the breadcrumb mixture. Ensure the fillet is covered on both sides. This gives it a nice crunchy crust. Now, place the coated tilapia fillets on a baking tray lined with parchment paper. This makes cleanup easy. Bake them in the preheated oven for 15 to 20 minutes. Check for doneness by looking for a golden brown crust. The fish should be opaque and flake easily with a fork. The internal temperature needs to reach 145°F (63°C). Once done, take them out and let the fillets rest for a couple of minutes before serving. To get a great crust, I love using panko breadcrumbs. They add a nice crunch that regular breadcrumbs just can't match. Make sure you coat the tilapia fillets evenly. This helps each bite pack a punch of flavor and texture. Spice things up by adding your favorite herbs or spices to the breadcrumb mix. Try some paprika for a little heat, or maybe some dried thyme for a fresh taste. Always adjust the salt and pepper to your liking. A little tweak can make a big difference. When it comes to sides, steamed vegetables or a fresh salad pair well with the tilapia. They add color and balance to your meal. For a lovely finish, garnish your dish with lemon wedges and a sprinkle of parsley. It brightens everything up! {{image_2}} You can easily swap tilapia for other fish. Cod works well and has a mild taste. You could also try haddock or flounder. These fish have a similar texture and cook well. They will all taste great with the Parmesan crust! If you want a gluten-free dish, use gluten-free breadcrumbs. They will give you a nice crunch too. Many brands make them, so look for one that you like. This way, everyone can enjoy the meal without worry. To change the flavor, add different cheeses or spices. For example, try adding some cheddar cheese for a sharper taste. You could also use Italian seasoning for an extra boost. Experiment with garlic or smoked paprika for unique flavors! You can keep leftovers in the fridge for up to three days. Place the tilapia in an airtight container. This helps keep it fresh and tasty. When you are ready to eat, check for any off smells or changes in color. If it looks good, you can enjoy your meal again! If you want to save baked tilapia for later, freezing is a great option. Wrap each fillet in plastic wrap, then place them in a freezer bag. Label the bag with the date. You can freeze the tilapia for up to two months. When you want to eat it, just thaw it in the fridge overnight. To heat up your tilapia while keeping it crispy, use the oven. Preheat it to 350°F (175°C). Place the tilapia on a baking sheet and cover it lightly with foil. Bake for about 10-15 minutes. This method keeps the crust crunchy and the fish juicy. Avoid using the microwave, as it can make the fish soggy. You should bake tilapia for 15 to 20 minutes. Check for a golden crust and flaky fish. The fish is done when its internal temperature reaches 145°F (63°C). Yes, you can use frozen tilapia. First, thaw the fillets in the fridge overnight or under cold water. Pat them dry before coating. Follow the same steps to prepare and bake. I recommend pairing this dish with: - Steamed vegetables like broccoli or green beans - A fresh green salad with lemon vinaigrette - Quinoa or rice for a complete meal - Mashed potatoes for a comforting side This blog post shared a simple recipe for baked Parmesan crusted tilapia. You learned about essential ingredients, nutritional facts, and equipment needed. The step-by-step instructions guide you from preparation to serving. We also explored helpful tips and variations to suit your taste. Always remember, you can adjust flavors and swap proteins to keep it interesting. Enjoy cooking this tasty dish! It’s a quick, healthy option for any meal. Happy eating!

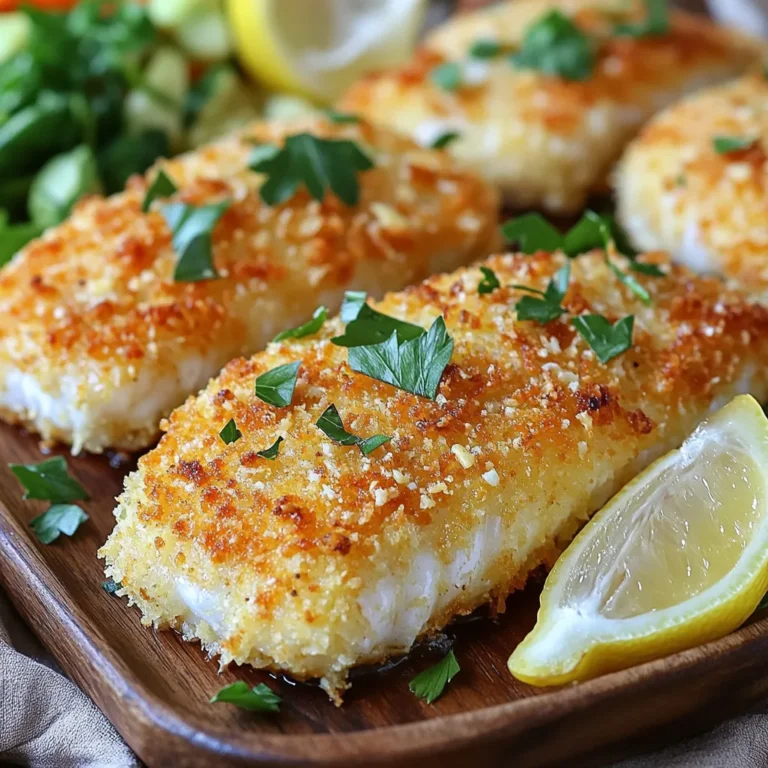
Baked Parmesan Crusted Tilapia Flavorful and Easy

- 1 lb large shrimp, peeled and deveined - 3 tablespoons olive oil - Juice of 2 limes - Zest of 1 lime - 2 tablespoons honey - 2 teaspoons chili powder - 1 teaspoon cumin - 1 teaspoon garlic powder - 1/2 teaspoon salt - 1/2 teaspoon black pepper - Fresh cilantro for garnish - Lime wedges for serving The magic of these Chili Lime Grilled Shrimp Skewers starts with just a few simple ingredients. First, I use one pound of large shrimp. Make sure they are peeled and deveined for an easy bite. The shrimp soak up all the flavors from the marinade. Next, I add three tablespoons of olive oil. This oil helps to keep the shrimp moist while grilling. Then, I squeeze the juice of two limes and add the zest of one lime. The lime juice adds a bright, fresh flavor that balances well with the sweetness of two tablespoons of honey. I spice things up with two teaspoons of chili powder, one teaspoon of cumin, and one teaspoon of garlic powder. These spices bring warmth and depth to each bite. Don’t forget half a teaspoon of salt and black pepper for seasoning. For the finishing touch, I use fresh cilantro as a garnish. It adds a nice pop of color and flavor. Serve with lime wedges for an extra zing. Each ingredient plays a role in creating a dish that is full of flavor and joy. To start, gather your ingredients for the marinade. In a mixing bowl, whisk together the following: - 3 tablespoons olive oil - Juice of 2 limes - Zest of 1 lime - 2 tablespoons honey - 2 teaspoons chili powder - 1 teaspoon cumin - 1 teaspoon garlic powder - 1/2 teaspoon salt - 1/2 teaspoon black pepper Whisk until everything blends well. This mix brings the chili lime flavor to life. Next, add 1 pound of large shrimp that are peeled and deveined. Make sure each shrimp gets fully coated in the marinade. Cover the bowl and place it in the refrigerator. Let it sit for at least 30 minutes. If you want more flavor, let it marinate for up to 1 hour. While the shrimp absorbs all that tasty goodness, it’s time to prepare your grill. Preheat it to medium-high heat. This step is crucial for getting those lovely grill marks. If you’re using wooden skewers, soak them in water for about 30 minutes. Soaking prevents them from burning on the grill. Now comes the fun part—grilling! Carefully thread the marinated shrimp onto the skewers. Aim for about 4 to 5 shrimp per skewer. Make sure they are close but not overcrowded. This allows them to cook evenly. Place the skewers on the grill. Grill for about 2-3 minutes on each side. Watch closely as the shrimp turn opaque and develop nice grill marks. Be careful not to overcook; shrimp can become rubbery. Once done, remove the skewers from the grill. For a fresh touch, sprinkle chopped cilantro over them. Serve right away with lime wedges on the side for a zesty kick. Enjoy your flavorful chili lime grilled shrimp skewers! To make the best chili lime grilled shrimp skewers, use acid in your marinade. Lime juice brightens flavors and tenderizes shrimp. I recommend letting your shrimp marinate for at least 30 minutes. For a stronger taste, marinate for up to an hour. This gives the shrimp time to soak in all the delicious flavors. Avoid overcooking your shrimp. Cook them for about 2-3 minutes on each side. When the shrimp turn opaque, they are ready. Check for nice grill marks, too. These marks show that your shrimp are grilling evenly and look great on the plate. Garnish your skewers with freshly chopped cilantro. It adds color and flavor. Serve the skewers with lime wedges on the side. The extra squeeze of lime juice brings bright flavors to each bite. This simple touch makes your dish look and taste amazing. {{image_2}} You can switch up the flavors in your marinade. Adding different spices or herbs can change the taste completely. Try using smoked paprika for a smoky touch or fresh basil for a bright flavor. You can also use sweeteners like agave or maple syrup. This adds a rich sweetness that balances the lime zest and chili spice. Experiment with what you have on hand for a fun twist! When choosing shrimp, you have options. Fresh shrimp offers the best flavor and texture. Look for shrimp that smell like the ocean. You can also use frozen shrimp, which can be just as good. If using frozen shrimp, ensure they are thawed before marinating. Always choose sustainable seafood. This means looking for shrimp that is caught or farmed in ways that do not harm the environment. Sustainable choices help protect our oceans. Pairing your shrimp skewers with the right sides can make the meal shine. Fresh salads are a great choice. A simple green salad or a zesty corn salad with lime dressing works well. You could also serve it with grains like quinoa or rice for a filling dish. Don't forget about sauces or dips! A creamy avocado dip or a tangy salsa can add extra flavor. These sides will complement the shrimp and make your meal more enjoyable. To keep your chili lime grilled shrimp skewers fresh, store them properly. Place the cooked skewers in an airtight container. This helps lock in flavor and moisture. If you use a glass container, make sure it is safe for the fridge. You can keep them in the fridge for up to three days. If you want to store them longer, consider freezing. Wrap the skewers tightly in plastic wrap, then place them in a freezer bag. They will last up to three months in the freezer. When you want to enjoy the shrimp again, reheating is key. The best method is to use a skillet. Heat it on medium-low heat and add a little olive oil. Place the skewers in the skillet. Cook for about 2-3 minutes on each side. This method helps keep the shrimp juicy and prevents dryness. You can also use the microwave if you're short on time. Place the skewers on a microwave-safe plate. Cover them with a damp paper towel. Heat for about 30 seconds to 1 minute. This keeps the shrimp moist but may not keep the texture as nice. Always check that they are heated through before serving. Yes, you can use frozen shrimp! First, you need to thaw them. To do this, place the shrimp in a bowl of cold water. Change the water every 15 minutes until thawed. This usually takes about 30 minutes. After thawing, make sure to dry the shrimp well with paper towels. This helps the marinade stick better. Cooked shrimp turn from gray to pink. They should also be firm and opaque. The best way to check is to cut one in half. If it is no longer translucent and has a nice curl, it’s done. Cook them for about 2-3 minutes on each side. Don't overcook them. Overcooked shrimp can become rubbery. Yes, you can easily cook these skewers in the oven. Preheat your oven to 400°F (200°C). Place the shrimp skewers on a baking sheet lined with foil. Bake them for about 8-10 minutes. Make sure to turn them halfway. They are done when they are pink and opaque. Enjoy the same great taste even without a grill! Grilling shrimp skewers is a simple and delicious process. By marinating shrimp, preparing your grill, and following best practices, you ensure great flavor. Experiment with different marinades and accompaniments to find your perfect dish. Remember to store and reheat leftovers to maintain taste. Whether you use fresh or frozen shrimp, this recipe offers tasty options for everyone. Enjoy the fun of grilling with family and friends, and savor the flavors you create.

Chili Lime Grilled Shrimp Skewers Flavorful Delight

- 1 cup all-purpose flour - 1 cup whole wheat flour - 1/2 cup granulated sugar - 1 tablespoon baking powder - 1/2 teaspoon baking soda - 1/4 teaspoon salt - 1 cup Greek yogurt (plain, unsweetened) - 1/2 cup milk - 2 large eggs - 1/4 cup vegetable oil - 1 teaspoon vanilla extract - 1 cup fresh blueberries (plus extra for garnish) - Zest of 1 lemon Using these ingredients, we create a delicious treat. The mix of all-purpose and whole wheat flour adds nice texture. The Greek yogurt keeps the muffins moist and tasty. It also adds protein, making them a smart choice for breakfast or snacks. Each muffin has about 150 calories. They contain roughly 4 grams of protein, 24 grams of carbohydrates, and 5 grams of fat. Greek yogurt boosts protein and calcium. Blueberries give fiber and antioxidants. Eating these muffins can help you feel full and energized. 1. Preheat your oven to 375°F (190°C). 2. Line your muffin tin with paper liners or grease it lightly. 3. In a large bowl, whisk together the all-purpose flour, whole wheat flour, sugar, baking powder, baking soda, and salt. 4. In another bowl, mix the Greek yogurt, milk, eggs, vegetable oil, vanilla extract, and lemon zest until smooth. 1. Pour the wet ingredients into the dry ingredients. 2. Stir gently with a spatula until just mixed. A few lumps are okay. 3. Gently fold in the fresh blueberries. This ensures they spread throughout the batter. 1. Divide the batter evenly in the muffin cups, filling each about 2/3 full. 2. Add a few extra blueberries on top for a nice garnish. 3. Bake for 18-22 minutes. To check for doneness, insert a toothpick in the center. If it comes out clean, they are ready! 4. Allow the muffins to cool in the tin for about 5 minutes. Then transfer them to a wire rack to cool completely. To bake perfect Greek yogurt blueberry muffins, follow these tips: - Ensure even baking: Position the muffin tin in the center of the oven. This helps all muffins bake evenly. Rotate the tin halfway through baking for the best results. - Recommended oven temperature accuracy: Always preheat your oven to 375°F (190°C). An oven thermometer can help you check if your oven is accurate. For a great presentation, consider these ideas: - Serving suggestions: Serve the muffins warm. They taste best fresh from the oven. - Optional garnishes: Dust muffins lightly with powdered sugar. You can also add a sprig of mint on the side for a pop of color. Watch out for these common errors: - Overmixing the batter: Mix just until the wet and dry ingredients combine. A few lumps are okay! Overmixing makes muffins tough. - Underbaking or overbaking: Bake for 18-22 minutes. Use a toothpick to check doneness. If it comes out clean, your muffins are ready. If it’s wet, they need more time. {{image_2}} You can easily change some ingredients to fit your needs. For flour, try gluten-free options like almond or oat flour. These can work well in this recipe. You might also want to swap out granulated sugar for natural sweeteners. Honey or maple syrup are great choices. They add a nice touch of flavor and sweetness. Adding spices can really enhance the taste. A pinch of cinnamon or nutmeg brings warmth to your muffins. You can also mix in other fruits. Raspberries or cranberries pair well with blueberries. They add new flavors and colors to your muffins. If you're looking for a vegan option, use plant-based yogurt instead of Greek yogurt. You can also replace eggs with flaxseed meal or applesauce. For a low-sugar version, cut the sugar by half or use a sugar substitute. These tweaks keep your muffins tasty while meeting your dietary needs. To keep your Greek yogurt blueberry muffins fresh at room temperature, place them in an airtight container. This helps keep them moist. You can store them for up to three days. If you see any signs of mold, discard them right away. If you want to chill them, you can refrigerate them. Use a container that seals well to prevent drying out. They will last about a week in the fridge. Always check for freshness before eating. Freezing muffins is a great way to enjoy them later. Wrap each muffin in plastic wrap and then place them in a freezer bag. This keeps air out and helps prevent freezer burn. They can stay frozen for up to three months. When you are ready to eat a muffin, take it out of the freezer. Let it thaw in the fridge overnight or at room temperature for about an hour. You can also reheat it in the microwave for 15-20 seconds. Enjoy your delicious muffin warm! Yes, you can use frozen blueberries. They work well in muffins. Here are some best practices: - Do not thaw them before mixing. This keeps the batter from turning blue. - Fold gently to avoid breaking the blueberries. This helps maintain their shape. - Add a few extra minutes to the baking time. Frozen berries can make the batter cooler. You can easily make these muffins dairy-free. Here are some great alternatives: - Use dairy-free yogurt. Look for coconut or almond yogurt. - Swap milk for plant-based milk. Almond, oat, or soy milk works well. - Choose a dairy-free butter if you want a richer flavor. Yes, you can prepare these muffins ahead of time. Here are some tips for making and storing: - Bake and cool completely. This helps keep them fresh. - Store in an airtight container. They stay moist this way. - Freeze for longer storage. Use a freezer bag, and they last up to three months. - Reheat in the oven or microwave before serving for best taste. This blog post offers a complete guide for making delicious muffins. You learned the essential ingredients, like Greek yogurt and blueberries. I shared tips for mixing and baking, as well as common mistakes to avoid. With easy swaps for ingredients, you can customize your muffins to fit your needs. Remember to store them properly for the best flavor and freshness. Enjoy experimenting with flavors and impress others with your baked goods! Happy baking!

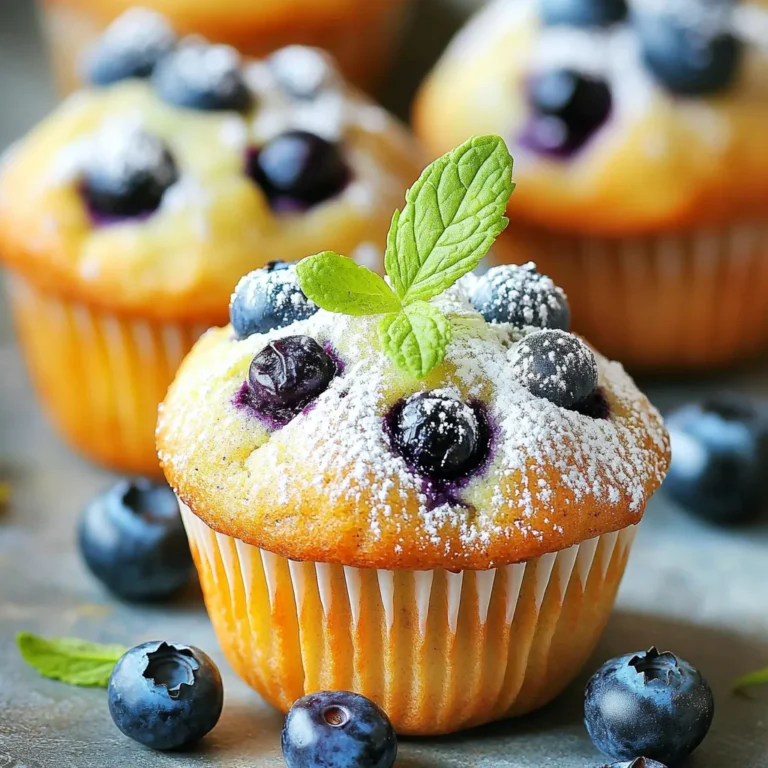
Greek Yogurt Blueberry Muffins Fresh and Tasty Treat

PREV 1 … 7 8 9 … 56 NEXT
secrets pice kitchen

explore

DessertsDinnerAppetizersDrinks

Our Policies

  • Cookie Policy
  • Copyright Policy
  • Disclaimer
  • GDPR Policy
  • Terms Of Use
Back to Top
  • About
  • Contact Us
  • Privacy Policy
© 2025 secrets pice kitchen