FREE DINNER EBOOK! Get your copy!
  • Cookie Policy
  • GDPR Policy
  • Disclaimer
  • Terms Of Use
  • Visit my other site: Fun Cookie Recipes
secrets pice kitchen
  • Home
  • Dinner
  • Desserts
  • Drinks
  • Appetizers
  • Contact
  • About
  • Privacy Policy
  • Home
  • Dinner
  • Desserts
  • Drinks
  • Appetizers
  • Contact
  • About
  • Privacy Policy
  • Cookie Policy
  • GDPR Policy
  • Disclaimer
  • Terms Of Use
Visit my other site: Fun Cookie Recipes

HOME / CATEGORIES /

Latest

To make a warm bowl of gyoza dumpling soup, you need a few key items: - 20 gyoza dumplings (store-bought or homemade) - 4 cups chicken or vegetable broth - 1 cup water - 1 tablespoon soy sauce - 1 teaspoon sesame oil - 1 inch ginger, thinly sliced - 3 green onions, chopped - 1 cup bok choy, roughly chopped - 1 carrot, julienned - Salt and pepper to taste These ingredients create a comforting base for your soup. The gyoza add texture, while the broth gives rich flavor. You can add a few garnishes to make your soup shine: - Fresh cilantro for garnish - Chili oil (optional) Cilantro adds a fresh taste. Chili oil gives a nice kick, if you like spice. If you don’t have some ingredients, don’t worry! Here are some swaps you can make: - Use frozen gyoza if fresh ones are not available. - Swap bok choy for spinach or kale. - Replace chicken broth with vegetable broth for a vegetarian option. These changes keep your soup tasty and easy to prepare. Feel free to mix and match based on what you have! {{ingredient_image_1}} Start by grabbing a large pot. Combine four cups of chicken or vegetable broth and one cup of water. Add one tablespoon of soy sauce and one inch of sliced ginger. Bring this mix to a gentle boil over medium heat. The ginger adds a nice touch of warmth. Once your broth is boiling, it’s time for the gyoza dumplings. Add twenty dumplings to the pot. Lower the heat to a simmer. Cook the dumplings for about six to eight minutes. While they cook, chop one cup of bok choy and julienne one carrot. Add these to the pot after the dumplings have simmered for a bit. Let them cook for two to three minutes until they're tender. Now, stir in one teaspoon of sesame oil and three chopped green onions. Season with salt and pepper to your taste. Carefully remove the pot from heat and toss out the ginger slices. Serve the soup hot in deep bowls. Garnish with fresh cilantro and add chili oil for a kick, if you like. For a fun touch, serve with chopsticks or a spoon. Enjoy! To get the best taste from your gyoza dumpling soup, focus on the broth. Use high-quality chicken or vegetable broth as your base. This will give your soup a rich and savory flavor. Adding soy sauce enhances the umami taste. Don't skip the sesame oil; it adds a nutty aroma. Always taste your soup as you go, adjusting with salt and pepper for balance. A few common mistakes can ruin your soup. First, don't overcrowd the pot with too many dumplings. This can make them stick together. Second, avoid boiling the soup too hard. A gentle simmer helps keep the dumplings intact. Lastly, remember to remove the ginger slices before serving. They can be too strong if left in. Making gyoza dumpling soup ahead of time is easy. You can prepare the broth and chop the veggies in advance. Store them in the fridge for up to two days. When you’re ready to eat, just heat the broth, add the dumplings, and cook as usual. This saves time on busy nights. You can also freeze the soup. Just leave out the dumplings and add them fresh when reheating. Pro Tips Use Fresh Ingredients: Fresh vegetables like bok choy and carrots enhance the flavor and texture of the soup. Opt for seasonal produce for the best taste. Customize the Broth: Experiment with different broths or add spices like star anise or garlic for a unique flavor profile that suits your taste. Gyoza Cooking Tip: Avoid overcrowding the pot when cooking gyoza. This ensures even cooking and prevents them from sticking together. Garnish for Flavor: Fresh cilantro and a drizzle of chili oil not only add a beautiful touch but also elevate the overall flavor of the soup. {{image_2}} You can use many types of gyoza in this soup. Store-bought gyoza saves time. You can find pork, chicken, or shrimp flavors. They all work great in the broth. If you want to try something special, make your own. Homemade gyoza allows you to mix your favorite fillings. Just remember to seal them well. This keeps the flavor inside while cooking. Making a vegetarian or vegan version is easy. Just swap the meat gyoza for vegetable ones. Many brands offer tasty vegetable gyoza. You can also make your own using tofu and veggies. For the broth, use vegetable broth instead of chicken. This keeps the soup rich in flavor. Add mushrooms for an earthy taste. You can also use more greens like spinach or kale. These options make the soup light yet satisfying. If you love spice, add some heat! You can use chili oil for a kick. Just drizzle it on top before serving. You might also add sliced fresh chili peppers to the broth. This gives a nice warmth. For even more flavor, include sriracha or a spicy sauce. Just remember to adjust the amount to your taste. Enjoy the warmth of this spicy twist! To store leftover Gyoza Dumpling Soup, let it cool first. Pour the soup into an airtight container. Make sure to keep the dumplings and broth together for best taste. Store it in the fridge for up to three days. Label the container with the date so you know when to use it. When you’re ready to eat, take the soup out of the fridge. Pour it into a pot and heat over medium heat. Stir it gently to ensure even heating. If it seems too thick, add a splash of water or broth. Heat until it’s hot, but do not let it boil. You can also use the microwave. Just cover it loosely and heat in short bursts. Stir in between to avoid hot spots. If you want to freeze the soup, it’s best to do it before adding the dumplings. Freeze the broth and vegetables in a freezer-safe container. This way, the texture stays nice. You can store it for up to three months. When you’re ready to enjoy it, thaw it in the fridge overnight. Then, add fresh gyoza dumplings and cook as usual. This gives you a fresh taste every time! Yes, you can use frozen gyoza dumplings. They are a great time saver. Just add them directly to your broth. Follow the package instructions for cooking time. This way, you get a quick meal without losing flavor. Gyoza dumpling soup comes from Japan. Gyoza itself is inspired by Chinese potstickers. The soup combines rich broth with tender dumplings. It became popular for its comforting taste. Many families enjoy it on cold days or when sick. Making homemade gyoza is fun and simple. Here’s how: - Dough: Mix flour and water to form a dough. - Filling: Use ground meat, vegetables, and soy sauce. - Shape: Roll out dough and cut circles. Add filling, then fold and pinch edges. - Cook: Steam, pan-fry, or boil the dumplings until done. You can customize the filling to fit your taste. Experiment with different flavors for a unique twist! Gyoza dumpling soup is a comforting dish packed with flavor. We covered the main ingredients, optional garnishes, and helpful substitutions. You learned step-by-step how to make the broth, cook the gyoza, and serve it up. Tips shared help you avoid mistakes and enhance flavor. Variations let you customize the soup to your taste, whether you want it spicy, vegetarian, or with different gyoza. With storage and reheating tips, you can enjoy leftovers easily. Remember, this soup is simple and fun to make, bringing warmth to any meal.

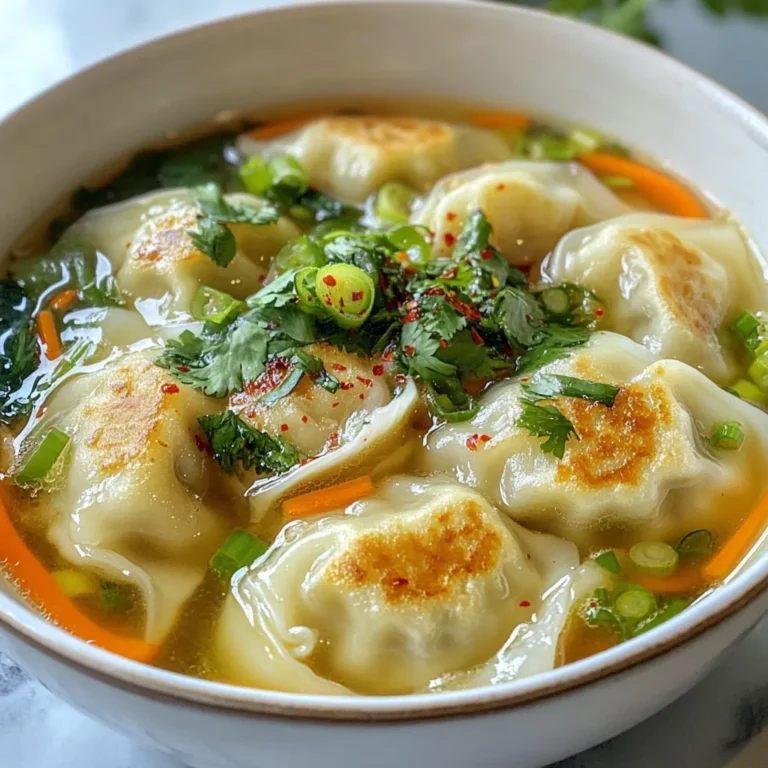
Gyoza Dumpling Soup Delicious and Simple Comfort Food

Fresh strawberries are the star of this drink. They bring bright flavor and sweetness. Use ripe, juicy strawberries for the best taste. Aim for about 2 cups of hulled and sliced strawberries. The brighter the red, the better! Freshly squeezed lemon juice adds a zesty kick. It balances the sweetness of strawberries. For this recipe, use 3/4 cup of lemon juice. You can squeeze the lemons yourself for the freshest flavor. Sugar is key to sweetening your drink. Start with 1/2 cup of sugar. You can adjust this based on your taste. If you want a sweeter drink, add more sugar. For less sweetness, cut back on the sugar. Ice cubes give your drink that frosty texture. You will need 2 cups of ice cubes. Add 1 cup of water to help blend everything smoothly. The ice makes it slushy, which feels great on a hot day. Garnishes make your drink look fancy. Use lemon slices for a bright touch. Mint leaves add a fresh aroma and flavor. These simple touches make your drink feel special and ready for serving. {{ingredient_image_1}} Start by hulling and slicing two cups of fresh strawberries. Place them in a blender. Add three-quarters of a cup of freshly squeezed lemon juice. Next, pour in half a cup of sugar. You can adjust the sugar later based on your taste. Blend the mixture on high until it is smooth. Make sure the sugar dissolves fully before moving on. Once the strawberry mixture is ready, add two cups of ice cubes to the blender. Pour in one cup of water to help with blending. Blend again until the mix becomes slushy and well combined. If you want a thicker texture, add more ice and blend again. This step is key for that refreshing slushy feel. After blending, taste your frozen strawberry lemonade. If it needs more sweetness, add a bit more sugar or lemon juice. Blend briefly to mix in any extra ingredients. Adjust to your liking. This is your chance to make it perfect for your palate. Pour the frozen strawberry lemonade into chilled glasses. For a fun touch, garnish each glass with a lemon slice and a sprig of fresh mint. This not only looks great but adds a nice flavor too. Serve immediately for the best experience. Enjoy the refreshing taste on a hot summer day! When picking strawberries, look for bright red ones. They should smell sweet. Avoid any that are dull or have green spots. Fresh strawberries make your drink taste better. You can also ask your local farm for the best picks. To get that ideal slushy feel, blend your drink well. Start with the strawberries and lemon juice. Then, add ice and water. Blend until it is smooth, then check the texture. If it’s too runny, add more ice. Blend again, and taste it. You want it thick but drinkable. Everyone has different tastes. You can adjust the sugar in your drink. Start with half a cup as the recipe says. Taste it after blending. If it’s not sweet enough, add a bit more sugar. Blend again to mix it well. You can also add more lemon juice for a tangy kick. For a lovely look, serve your drink in chilled glasses. Add ice before pouring. Use lemon slices and mint leaves as garnishes. This adds color and freshness. You can also add a fun straw for style. Enjoy sharing this drink at summer gatherings! Pro Tips Choose Ripe Strawberries: Select strawberries that are bright red and sweet-smelling for the best flavor in your lemonade. Chill Your Glasses: For an extra refreshing experience, chill your glasses in the freezer for about 10 minutes before serving. Adjust Sweetness to Taste: Start with less sugar and gradually add more until you reach your preferred sweetness level. Try Different Fruits: Experiment with other fruits like raspberries or blueberries for a unique twist on your frozen lemonade. {{image_2}} You can mix in other fruits for a fun twist. Try adding blueberries, raspberries, or peaches. Just chop them up and toss them in the blender with the strawberries. Each fruit adds its own flavor and color. This way, your frozen strawberry lemonade becomes a fruity fiesta! Want to make your drink special? Add some vodka or rum to your frozen strawberry lemonade. Start with one ounce per glass. Blend it in with the other ingredients. This gives your drink a fun kick for summer parties. You can also try flavored spirits for extra taste! If you want a lighter drink, use sugar substitutes. Try stevia, honey, or agave syrup. Start with half the amount of sugar called for in the recipe. Taste it and add more if needed. You can also skip the sugar entirely and rely on the natural sweetness of strawberries and lemons! If you have leftover frozen strawberry lemonade, store it in an airtight container. Use a glass jar or a plastic container with a tight lid. This helps keep it fresh and prevents ice crystals from forming. You can also use freezer bags. Make sure to squeeze out as much air as possible before sealing. Label the container with the date, so you know when you made it. Freezing strawberries is easy and keeps them fresh for later. First, wash the strawberries and remove the green tops. Slice them if you like. Then, lay them flat on a baking sheet. Place the sheet in the freezer for about two hours. This prevents them from sticking together. After they freeze, transfer the strawberries to a freezer bag. Be sure to remove any air before sealing the bag. Homemade frozen drinks like strawberry lemonade can last for about 2 to 3 months in the freezer. To keep the best flavor and texture, consume them within this time. Over time, they may lose their taste and get icy. When you're ready to enjoy, just take out what you need and let it sit at room temperature for a few minutes. Then, blend it back to that slushy perfection! Yes, you can use frozen strawberries. They work well in this drink. Just blend them straight from the freezer. It will make your drink extra cold and refreshing. However, fresh strawberries give a brighter flavor. So, choose based on what you have. Homemade frozen strawberry lemonade lasts about 2 to 3 days in the fridge. After that, the texture may change. It can become watery as it melts. If you want to keep it longer, freeze it in an airtight container. It can last up to a month in the freezer. Absolutely! This recipe is already non-alcoholic. Just follow the steps as is. You can also mix it with sparkling water for a fizzy twist. This gives you a tasty, refreshing drink without any alcohol. To make a larger batch, simply double or triple the ingredients. Use a big blender to hold everything. If the blender is small, blend in batches. Remember to adjust the sugar to taste. Always taste before serving, as flavors can change with more ingredients. You learned how to make a tasty frozen strawberry lemonade with simple steps. Fresh strawberries, lemon juice, and ice create a refreshing drink. You can customize sweetness and add fun touches, like mint or other fruits. Remember to store leftovers well for later enjoyment. With these tips and variations, you can enjoy this drink year-round. Try it out and impress everyone with your skills. A bright drink like this always brings smiles. Enjoy the process and get creative!

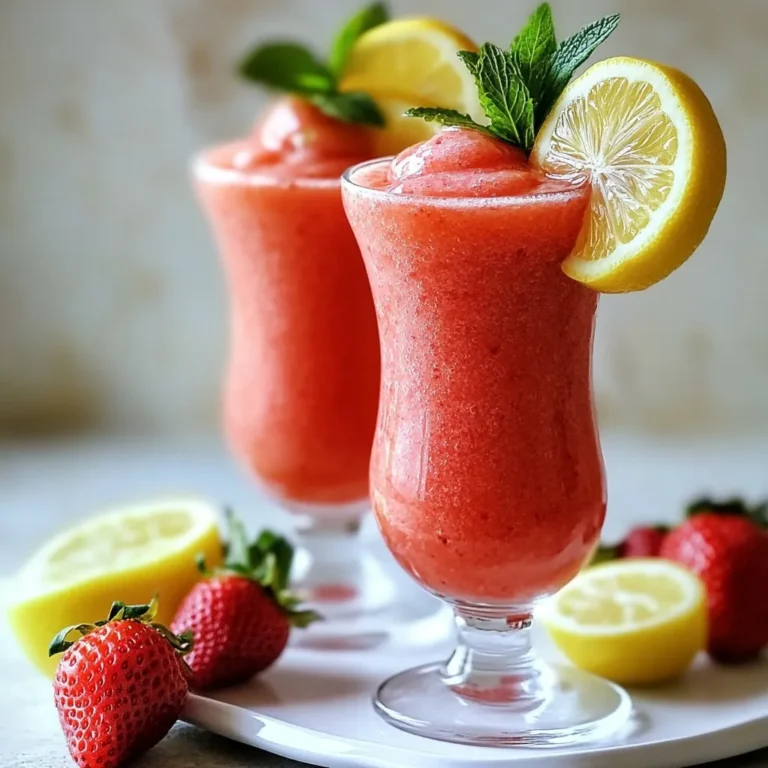
Frozen Strawberry Lemonade Refreshing Summer Drink

- 2 lbs chicken thighs, boneless and skinless - 1 cup all-purpose flour - 1/2 cup cornstarch - 1 teaspoon baking powder - 1 teaspoon salt - 1/2 teaspoon black pepper - 2 large eggs, beaten - 1 cup vegetable oil (for frying) For the Honey Sauce: - 1/2 cup honey - 2 tablespoons soy sauce - 1 tablespoon apple cider vinegar - 1 teaspoon grated fresh ginger - 1 teaspoon minced garlic - 1/2 teaspoon sesame oil - 1 teaspoon chili flakes (optional, for heat) Each ingredient plays a key role in this dish. Use 2 lbs of chicken thighs for juicy meat. The flour and cornstarch combo gives a crunchy coating. You can swap chicken thighs for breasts if you prefer. For the honey sauce, feel free to adjust the amount of honey for sweetness. If you want more heat, add extra chili flakes. You can also use rice vinegar instead of apple cider vinegar. {{ingredient_image_1}} To start, cut the chicken thighs into bite-sized pieces. Use a sharp knife for clean cuts. This helps the chicken cook evenly. After cutting, set the pieces aside in a bowl. This will keep them ready for coating. Next, make the coating mixture. In a large bowl, combine: - 1 cup all-purpose flour - 1/2 cup cornstarch - 1 teaspoon baking powder - 1 teaspoon salt - 1/2 teaspoon black pepper Mix these ingredients well. For coating, dip each piece of chicken in beaten eggs. Then, coat it evenly with the flour mixture. Shake off any extra flour. This step is key for that crispy texture. Now, heat the vegetable oil in a large frying pan. Keep the heat at medium-high. Once the oil shimmers, add the chicken in batches. Don't overcrowd the pan or the chicken won't cook right. Fry for about 5-7 minutes, or until golden brown. Then, remove the chicken and drain it on paper towels. While the chicken fries, prepare the honey sauce. In a small saucepan, combine: - 1/2 cup honey - 2 tablespoons soy sauce - 1 tablespoon apple cider vinegar - 1 teaspoon grated fresh ginger - 1 teaspoon minced garlic - 1/2 teaspoon sesame oil - 1 teaspoon chili flakes (optional) Heat this mixture over low to medium heat. Stir frequently until it bubbles gently. This helps blend the flavors. Once ready, remove it from heat. After frying, place the crispy chicken in a large mixing bowl. Drizzle the warm honey sauce over the chicken. Toss gently to coat each piece evenly. For serving, plate the chicken on a platter. Drizzle any leftover sauce on top. Optionally, sprinkle sesame seeds and sliced green onions for a nice touch. Enjoy your delicious crispy honey chicken! To get that extra crunch on your crispy honey chicken, follow these tips: - Recommended frying techniques: Fry in small batches. This helps the chicken cook evenly. A deep pan or wok works best. It allows for even heat and more oil. - Oil temperature tips: Heat your oil to about 350°F (175°C). Use a thermometer for accuracy. If the oil is too cool, the chicken will soak up oil and become soggy. If it's too hot, it will burn. Once your chicken is crispy, let’s make it shine on the plate: - Ideas for pairing with sides: Serve your chicken with steamed rice or sautéed veggies. It balances the sweet sauce. You can also add a fresh salad for crunch. - Presentation tips for a beautiful dish: Drizzle any extra honey sauce over the chicken. Top with sesame seeds and sliced green onions. This adds color and a nice touch. Avoid these common errors to ensure your dish turns out perfectly: - Overcrowding the pan: This can lower the oil temperature. Fry in batches to keep the heat steady. - Not heating oil adequately: Always test your oil before frying by dropping in a small piece of chicken. If it sizzles, you’re ready to fry! If it doesn’t, wait a bit longer. Pro Tips Use a Thermometer: Ensure the oil is at the right temperature (around 350°F) for perfectly crispy chicken without absorbing too much oil. Let it Rest: Allow the fried chicken to rest on paper towels for a few minutes to maintain its crunch before tossing in the sauce. Adjust the Heat: Tailor the chili flakes in your honey sauce to your preferred spice level, adding more for an extra kick. Fresh Ingredients Matter: Use fresh ginger and garlic for the sauce to enhance the flavor and aroma of your crispy honey chicken. {{image_2}} You can change the flavor of crispy honey chicken easily. If you like heat, add chili flakes. A teaspoon gives a nice kick. You can mix them into the honey sauce for warmth. If you want something different, try teriyaki or sesame sauce. These sauces will give a new twist. Just swap them for the honey sauce and coat your chicken. You do not need to stick to thighs. You can use chicken breasts or drumsticks instead. Each cut has its own taste and texture. If you prefer plant-based meals, try tofu or tempeh. Cut them into bite-sized pieces and follow the same steps. You can still enjoy that crispy texture and sweet sauce. To keep your crispy honey chicken fresh, place it in an airtight container. Make sure it cools before sealing. This method helps maintain its taste and texture. Store it in the fridge for up to three days. If you want to keep it longer, freeze it for up to three months. Just remember, freezing may change the texture a bit. For the best texture, reheating in the oven works great. Preheat the oven to 350°F (175°C). Place the chicken on a baking sheet and heat for about 15 minutes. This keeps the chicken crispy. If you're short on time, you can use the microwave. But note, it may make the chicken softer. Heat in short bursts of 30 seconds. Check often to avoid overcooking. You can pair crispy honey chicken with many tasty sides. Here are some ideas: - Steamed rice - Sautéed vegetables - Fried rice - Garlic bread - Asian-style coleslaw - Mashed potatoes These sides add great flavor and texture to your meal. They also help balance the sweetness of the honey sauce. Yes, you can prepare parts of this dish ahead of time. Here are some tips: - Cut the chicken and coat it a few hours before cooking. - Store the coated chicken in the fridge. This keeps it fresh. - Make the honey sauce early and keep it in the fridge. When you are ready to eat, just fry the chicken and toss it in the sauce. Yes, you can bake crispy honey chicken for a healthier option. Here are the steps: - Preheat your oven to 400°F (200°C). - Place the coated chicken on a baking sheet lined with parchment paper. - Spray the chicken lightly with cooking spray. - Bake for 20-25 minutes, flipping halfway through. This method will give you a crispy finish with less oil. Enjoy a lighter version of this tasty dish! This blog explained how to make crispy honey chicken, from ingredients to serving. I shared tips for achieving the right texture and suggested variations for flavor. Remember not to overcrowd the pan when frying. Storing and reheating properly keeps your meal fresh and tasty. Enjoy experimenting with ingredients and flavors to make this dish your own!

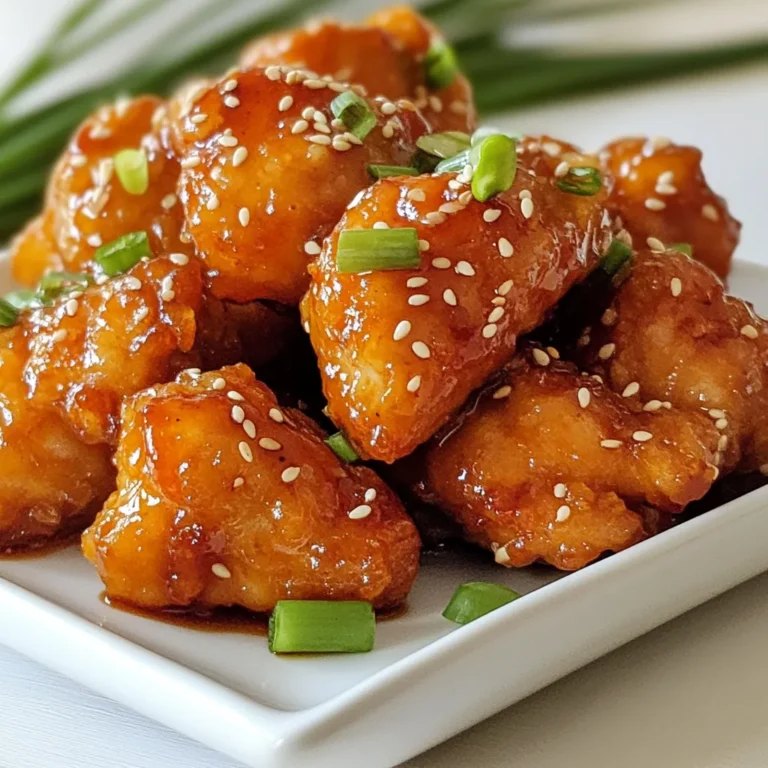
Crispy Honey Chicken Irresistible Recipe Guide

To make this tasty dessert, you will need: - 12 sheets of chocolate graham crackers - 2 cups milk - 1 1/2 cups heavy cream - 1 cup powdered sugar - 1/2 cup unsweetened cocoa powder - 1/4 cup marshmallow fluff - 1 teaspoon vanilla extract - 1 cup semi-sweet chocolate chips - 1/2 cup crushed candy canes (optional, for topping) - Mini marshmallows (for garnish) If you want to change things up, here are some ideas: - Instead of milk, use almond or oat milk for a dairy-free option. - You can swap heavy cream with coconut cream for a vegan twist. - Try using dark chocolate chips instead of semi-sweet for a richer taste. - For a lighter option, use a sugar substitute in place of powdered sugar. Add fun toppings to make your dessert even better: - Sprinkle crushed candy canes on top for a minty crunch. - Use mini marshmallows for a classic hot chocolate feel. - Drizzle chocolate syrup over the top for extra sweetness. - Add whipped cream for a fluffy finish. Each ingredient and topping brings its own flavor. Feel free to mix and match to make it your own! {{ingredient_image_1}} To start, gather your ingredients. You need 2 cups of milk, 1 1/2 cups of heavy cream, 1/2 cup of cocoa powder, and 1 cup of powdered sugar. Heat the milk and heavy cream in a medium saucepan over medium heat. Stir it often. You want it warm, not boiling. When it is warm, take it off the heat. Now, whisk in the cocoa powder, powdered sugar, and 1 teaspoon of vanilla extract. Mix well until smooth. Add in your 1 cup of semi-sweet chocolate chips. Stir until they melt completely. This chocolate layer is rich and creamy, making it the star of the dish. Next, we will make the cream layer. In a separate bowl, whip the remaining 1/2 cup of heavy cream. Use a hand mixer or whisk until you see soft peaks. This means it holds its shape but is still light. Then, gently fold in 1/4 cup of marshmallow fluff. This will give the layer a fluffy texture. Mix carefully so you keep the air in the whipped cream. This layer will be sweet and light, balancing the rich chocolate. Now, it's time to build your lasagna. Grab a rectangular glass dish. Start by laying down 4 sheets of chocolate graham crackers. This forms the base. Next, pour half of the chocolate mixture over the crackers. Spread it evenly. Now, add another layer of 4 graham crackers. Spread half of the cream mixture on top of this layer. Repeat the process. Add another 4 sheets of graham crackers, then the last half of the chocolate mixture, and finish with the remaining cream layer. Spread it evenly on top. Cover the dish with plastic wrap or foil. Chill it in the fridge for at least 4 hours, or overnight. This step helps the layers set nicely. To melt chocolate well, use a double boiler. Place a heat-safe bowl on a pot of simmering water. Stir the chocolate chips gently until they melt. This keeps the chocolate smooth. If you do not have a double boiler, you can use the microwave. Heat the chocolate in short bursts of 20 seconds. Stir between each burst to avoid burning the chocolate. To make light and fluffy whipped cream, start with cold tools. Chill your mixing bowl and whisk in the fridge for a few minutes. Use heavy cream for best results. Whip the cream on medium speed until soft peaks form. Do not overwhip, or it will turn grainy. Gently fold in marshmallow fluff for a sweet twist. When layering, use a spatula to spread evenly. Start with chocolate graham crackers for a sturdy base. Pour half of the chocolate mixture evenly over the crackers. Repeat this process, ensuring each layer is flat. This helps the dessert hold its shape. After the last layer, chill it well. The longer it sits, the better the flavors meld. Pro Tips Use Fresh Ingredients: For the best flavor, use fresh heavy cream and high-quality chocolate chips. This will enhance the overall taste of your lasagna. Chill Overnight: Allowing your lasagna to chill overnight in the refrigerator lets the layers set properly, improving the texture and flavor. Customize Toppings: Feel free to get creative with your toppings! Consider adding crushed nuts, chocolate shavings, or even whipped cream for extra flair. Serve Cold: This dessert is best served chilled. Make sure to keep it in the fridge until you're ready to serve for optimal taste and texture. {{image_2}} You can switch up the flavors in Hot Chocolate Lasagna. For a minty touch, add peppermint extract. Just a teaspoon will do! This gives the dessert a fresh taste. If you love coffee, try adding mocha flavor. Mix in some espresso powder with the chocolate layer. The rich coffee taste pairs nicely with chocolate. If you need a gluten-free version, no problem! Use gluten-free chocolate graham crackers. Many brands offer great choices. You can even use almond flour crackers for a unique twist. The key is to ensure the crackers are gluten-free. This way, everyone can enjoy this tasty treat. You can make a vegan Hot Chocolate Lasagna too! Use almond or oat milk instead of regular milk. For the cream layer, try coconut whipped cream. It gives a nice, creamy texture. Swap the chocolate chips for dairy-free ones. Also, look for vegan marshmallow fluff. These changes keep the dessert tasty and friendly for vegan diets. To keep your Hot Chocolate Lasagna fresh, store it in the fridge. Use a tight lid or cover the dish with plastic wrap. This helps keep moisture in and prevents it from drying out. Make sure to keep it chilled until you are ready to serve. If you want to freeze your Hot Chocolate Lasagna, it’s simple. First, cut it into squares. Wrap each piece tightly in plastic wrap, then place them in a freezer bag. This way, you can enjoy a slice whenever you want! It can last in the freezer for up to three months. In the fridge, your Hot Chocolate Lasagna stays fresh for about five days. After that, the texture and taste may change. If you see any signs of spoilage, it’s best to throw it out. Enjoy your sweet treat while it’s at its best! Yes, you can make Hot Chocolate Lasagna ahead of time. In fact, it tastes better when chilled for a while. I recommend making it the night before. This gives the layers time to set and mix their flavors. Just cover it well with plastic wrap or foil. This keeps it fresh in the fridge until you are ready to serve. The best way to serve Hot Chocolate Lasagna is chilled. You can cut it into squares for easy serving. I love adding mini marshmallows on top for fun. Sprinkling crushed candy canes adds a nice crunch too. You can serve it on a plate or in a bowl. It pairs well with a warm drink, like hot cocoa or coffee. Absolutely! You can use any type of chocolate chips you like. Dark chocolate chips give a rich taste. Milk chocolate chips offer a sweeter flavor. You can also try white chocolate for a twist. Mixing different types can create fun new flavors. Just remember to keep the total amount the same—1 cup in total. This blog post covers how to make a delicious Hot Chocolate Lasagna. We explored the key ingredients, including tasty substitutions and optional toppings. I shared step-by-step instructions for preparing each layer. Tips for melting chocolate and whipped cream ensure your dessert turns out great. We also looked at fun variations, storage options, and answered common questions about this treat. In the end, this dessert can delight anyone. Try it out and enjoy the chocolatey goodness!

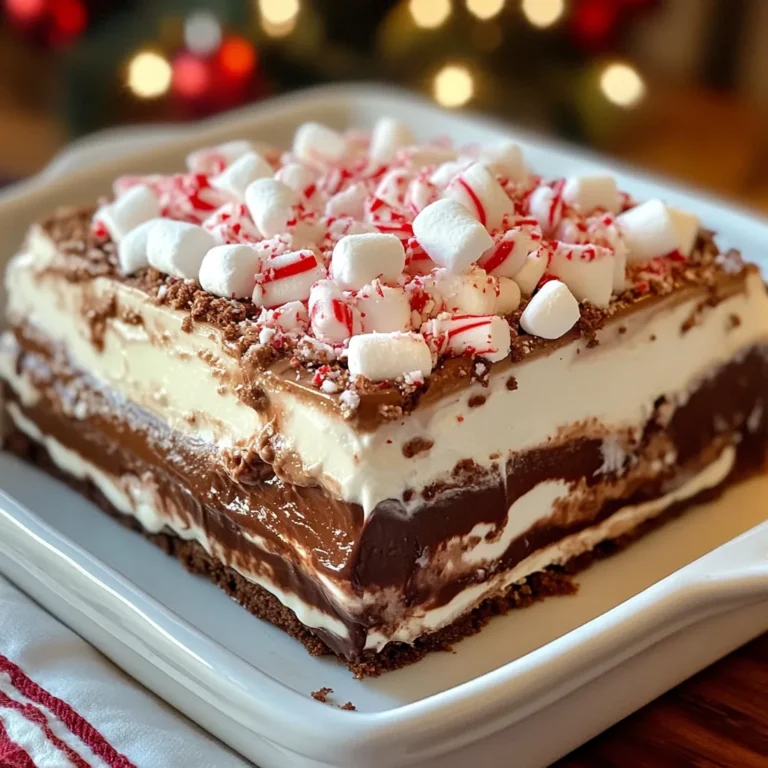
Hot Chocolate Lasagna Delightful Layered Dessert Recipe

- 2 cups cooked chicken, shredded - 1 cup cauliflower florets, steamed and chopped - 1 cup broccoli florets, steamed - 1 cup cream cheese, softened - 1 cup shredded cheddar cheese - 1/2 cup cream or unsweetened almond milk - 2 cloves garlic, minced - 1 teaspoon onion powder - 1 teaspoon paprika - Salt and pepper to taste - 1/4 cup green onions, chopped (for garnish) This casserole is not just tasty; it’s also healthy. Each serving has about 400 calories. It is low in carbs, with roughly 8 grams per serving. You will get around 30 grams of protein and 30 grams of fat. The chicken provides protein, while the cauliflower and broccoli add fiber and vitamins. Cream cheese and cheddar offer calcium and healthy fats. This dish is a great way to enjoy a filling meal without the carbs! {{ingredient_image_1}} - Preheat the oven to 350°F (175°C). - Grease a 9x13 inch baking dish. Start by preheating your oven. This step helps the casserole cook evenly. Greasing the dish stops the food from sticking. You can use cooking spray or a little oil for this. - Mix shredded chicken, cauliflower, and broccoli. - Prepare cream cheese mixture. Next, you will combine your main ingredients. In a large bowl, add the shredded chicken, steamed cauliflower, and steamed broccoli. Mix them well. In another bowl, beat the cream cheese until smooth. Then add cream or almond milk, minced garlic, onion powder, paprika, salt, and pepper. Blend this mixture until it is creamy and well mixed. - Pour cream cheese mixture over the vegetables. - Transfer to the baking dish and add cheddar cheese. - Baking time and tips for doneness. Now, pour the cream cheese mix over the chicken and veggies. Stir everything carefully to coat each piece. Transfer this mix into your greased baking dish. Spread it out evenly and top it with shredded cheddar cheese. Bake the casserole in your preheated oven for 25 to 30 minutes. Look for bubbly cheese and a light golden color. Let it cool a bit before serving. Enjoy your dish with some green onions on top for a fresh look! To ensure even cooking, I recommend cutting your veggies into similar sizes. This helps them cook at the same rate. Use a sharp knife for safe and quick chopping. A large mixing bowl works well for combining your ingredients without making a mess. A spatula is perfect for folding in the cream cheese mixture to ensure everything is well coated. Adding herbs can boost flavor. Fresh thyme or basil works great. If you want a kick, try some red pepper flakes. For cheese, if you want a twist, use mozzarella or pepper jack instead of cheddar. These can add different textures and tastes to your casserole. Serve your casserole hot right from the dish for a cozy feel. Spoon portions onto plates for a more formal look. Garnish each serving with green onions for a pop of color. A sprinkle of fresh herbs can also brighten your plate. Use a colorful dish to make your meal more appealing too. This can turn an ordinary meal into something special. Pro Tips Use Rotisserie Chicken: For a quicker option, consider using store-bought rotisserie chicken. It saves time and adds great flavor. Mix Up the Veggies: Feel free to substitute other low-carb vegetables like zucchini or bell peppers for a different flavor and texture. Cheese Variations: Experiment with different types of cheese, such as mozzarella or pepper jack, to create a unique taste profile. Make Ahead: This casserole can be prepared ahead of time and stored in the fridge. Just bake it when you’re ready to serve! {{image_2}} You can easily swap out ingredients to suit your taste. For low-carb veggie options, use zucchini or spinach. These will keep the dish light and tasty. If you want to change the protein, try turkey or even tofu. Both give a nice texture and flavor. If you need a dairy-free version, use cashew cream instead of cream cheese. Unsweetened coconut milk can replace the cream too. For those who need gluten-free options, check your spices and sauces. Most are naturally gluten-free, making this dish safe for you. Want some heat? Add sliced jalapeños for a spicy kick. You can also make it Mediterranean by adding olives, artichokes, or feta cheese. These changes will make your casserole exciting and full of flavor. Each version brings a new twist to this simple meal. To store your leftover low carb chicken casserole, let it cool first. Once cooled, place it in an airtight container. This helps keep it fresh. I like to use glass containers with lids. They are great for easy heating later. For freezing, use freezer-safe containers. Portion out servings before freezing. This makes it easy to reheat just what you need. When you want to eat it, thaw it in the fridge overnight. Reheat in the oven or microwave until hot. This keeps the taste and texture nice. In the fridge, the casserole lasts about 3 to 4 days. Always check for any signs of spoilage. If it smells off or looks strange, it's best to toss it. For safety, never leave food out for more than two hours. Make sure to store it properly to enjoy later! What can I serve with Low Carb Chicken Casserole? You can serve this dish with a fresh salad. A side of green beans or steamed asparagus works well, too. These sides balance the rich flavors of the casserole. Can I make this dish ahead of time? Yes, you can prepare it a day before. Just cover it and refrigerate. When you're ready, bake it straight from the fridge, adding a few extra minutes to the cooking time. Is this recipe suitable for meal prep? Absolutely! This casserole is great for meal prep. You can divide it into portions and store them in containers. It keeps well in the fridge for easy meals during the week. How do I know when the casserole is done? Look for bubbly cheese and a golden top. A toothpick inserted in the center should come out clean. The casserole should be hot all the way through. Can I use rotisserie chicken instead of cooked chicken? Yes, rotisserie chicken is a great time-saver. Just shred it and mix it in. The flavors of the spices and cheese will blend nicely with it. How many carbs are in the casserole per serving? Each serving has about 6 grams of carbs. This makes it a great option for low-carb diets. Can this be adapted for other diets such as keto or paleo? Yes, this recipe is perfect for keto. Simply use almond milk instead of cream for paleo. You can also add more low-carb veggies to adjust the dish to your needs. This blog post covers a tasty, low-carb chicken casserole recipe packed with nutrients. We went over the main and additional ingredients, step-by-step instructions, and useful tips. You can adapt the recipe to fit different diets or change the flavors. Remember, this dish is great for meal prep and leftovers. With simple storage tips and answers to common questions, you’ll be ready to enjoy this dish anytime. Dive into this healthy recipe and make it your own!

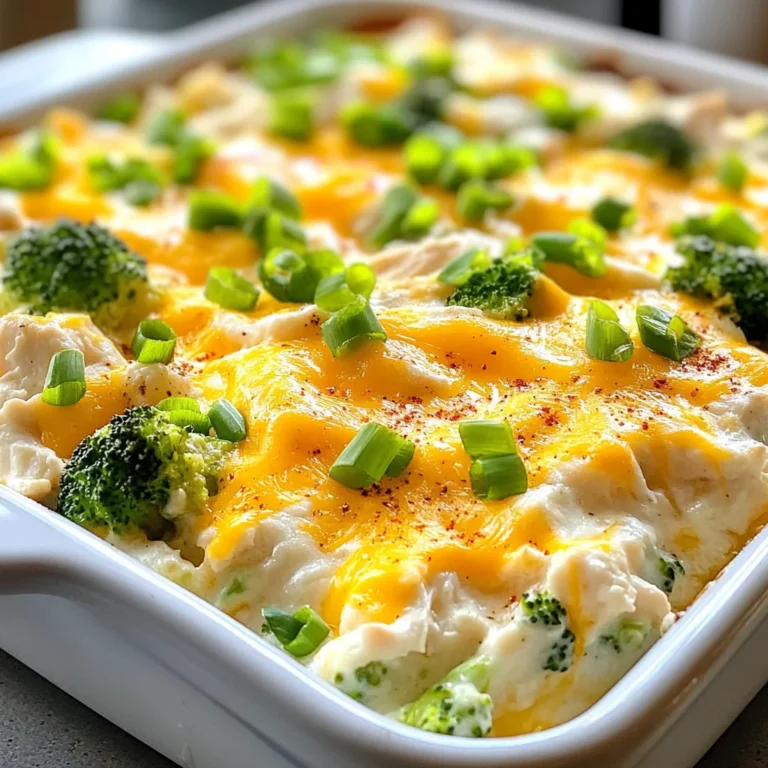
Low Carb Chicken Casserole Simple and Satisfying Meal

- 4 medium sweet potatoes - 1 pound chicken or turkey sausage - 1/4 cup honey - 3 cloves garlic - 2 tablespoons olive oil - Seasoning components: smoked paprika, salt, black pepper, red pepper flakes - Garnish: fresh parsley Gathering fresh ingredients is key to a great dish. Start with sweet potatoes. They give a sweet flavor and a lovely texture. I like to peel and dice them into bite-sized pieces. Next, choose your sausage. I prefer chicken or turkey sausage for a lighter taste. The sausage adds a savory depth to the dish. Honey is the star here. It brings a rich sweetness that balances the savory sausage and sweet potatoes. Use pure honey for the best flavor. Garlic is a must. It adds a wonderful aroma and flavor. Mince three cloves to get the most out of it. For the extra ingredients, olive oil helps the sweet potatoes roast nicely. Seasonings like smoked paprika, salt, black pepper, and red pepper flakes add warmth and spice. If you love heat, add red pepper flakes to taste. Finally, fresh parsley makes a beautiful garnish. It adds color and a burst of freshness. You will love how these ingredients come together. {{ingredient_image_1}} First, preheat your oven to 400°F (200°C). This helps the sweet potatoes cook evenly. Next, grab a large bowl. In it, combine your diced sweet potatoes, 2 tablespoons of olive oil, 1 teaspoon of smoked paprika, 1 teaspoon of salt, and 1/2 teaspoon of black pepper. If you like heat, add 1/2 teaspoon of red pepper flakes. Toss everything well until the sweet potatoes are coated nicely. This step brings out great flavor. Now, heat a large skillet over medium heat. Add the sliced chicken or turkey sausage to the skillet. Cook for about 5-7 minutes until it’s browned. This adds a nice texture. Then, lower the heat to low. Add 3 minced garlic cloves to the skillet. Cook for about a minute until you smell that lovely garlic aroma. Next, pour in 1/4 cup of honey and stir everything. Cook for another 2-3 minutes. This creates a sweet glaze on the sausage. After 20 minutes, take the sweet potatoes out of the oven. Now, add the sausage mixture on top of the sweet potatoes. Gently toss everything together on the baking sheet. This helps mix the sweet flavors. Return the baking sheet to the oven. Roast for another 15-20 minutes. You want the sweet potatoes to be tender and caramelized. Once done, let the dish cool for a few minutes. This step makes for easier serving. To ensure even cooking of sweet potatoes, cut them into uniform pieces. This helps them roast at the same rate. I like to aim for about one-inch cubes. Tossing them in olive oil and spices coats every piece well, making sure they are full of flavor. Adjusting sweetness with honey is simple. If you like it sweeter, add a bit more honey. If you prefer less sweetness, use less. Start with 1/4 cup and taste as you go. You can always drizzle more on top later. For the best baking sheet, use one with a rim. This helps catch any juices and prevents spills. A heavy-duty sheet will distribute heat evenly, leading to nice caramelization. I find that a non-stick or parchment-lined sheet works wonders. For sautéing sausage, a large skillet is ideal. Cast iron or stainless steel pans hold heat well and give a nice brown color. Make sure to let the pan get hot before adding sausage. This helps it brown nicely. When serving, a large bowl works best. It allows for easy mixing and scooping. Garnish with fresh parsley for a bright touch. The green looks great against the orange sweet potatoes. Drizzling leftover honey glaze from the pan adds extra flavor. It also makes the dish look more appealing. A little goes a long way, so drizzle lightly over the top before serving. Pro Tips Pre-soak Sweet Potatoes: Soaking the diced sweet potatoes in water for 30 minutes before cooking can help them achieve a better texture by removing excess starch. Choose Quality Sausage: Opt for high-quality chicken or turkey sausage that is minimally processed for the best flavor and texture in your dish. Add More Veggies: Feel free to toss in other vegetables like bell peppers or onions during the roasting process for added flavor and nutrition. Store Leftovers Properly: Allow any leftovers to cool completely before storing them in an airtight container in the fridge, where they will last for up to 3 days. {{image_2}} You can mix things up in this dish by using different types of sausage. If you want a spicier kick, try chorizo or Italian sausage. Chicken or turkey sausage keeps it light and healthy. For a vegetarian option, use plant-based sausage. This gives you the same great texture without meat. To add more depth, consider adding vegetables like bell peppers or onions. They roast well and add sweetness. You can also think about spices and herbs. A dash of thyme or rosemary can change the flavor. If you love a bit of heat, don't forget the red pepper flakes. This dish pairs well with a fresh salad or crusty bread. A side of greens can balance out the meal. You might also serve it with rice or quinoa for a heartier option. These sides will soak up any extra honey glaze. Enjoy exploring these variations for a unique twist! After enjoying your Honey Garlic Sausage Sweet Potatoes, store any leftovers in the fridge. Place them in an airtight container. This helps keep the dish fresh and tasty. You can use glass or plastic containers. Make sure they seal well to prevent any air from getting in. Leftovers will stay good for about 3-4 days. If you want to save some for later, you can freeze this dish. First, let the food cool completely. Then, place it in a freezer-safe container or a heavy-duty freezer bag. Make sure to squeeze out any excess air. Label the container with the date. This dish can last up to 3 months in the freezer. To reheat, simply take it out of the freezer and thaw it overnight in the fridge. Then, warm it up in the oven or microwave. If using the oven, preheat to 350°F (175°C) and bake until heated through, about 20-25 minutes. Enjoy your meal just like the first time! It takes about 15 minutes to prep. The total cooking time is around 40 minutes. In all, you will need about 55 minutes from start to finish. Yes, you can use different types. Purple or white sweet potatoes work well. They all add a unique taste and texture to the dish. Absolutely! This recipe is great for meal prep. You can store leftovers in the fridge for up to 4 days. Just reheat when ready to enjoy. If you need a substitute for honey, try maple syrup or agave nectar. Both options will add sweetness to the dish. To adjust the spice, add more or less red pepper flakes. You can also omit them if you prefer a mild flavor. This recipe for Honey Garlic Sausage Sweet Potatoes brings delicious flavors together. We covered the main ingredients, cooking steps, and helpful tips. Remember to adjust the sweetness and explore variations to suit your taste. This dish is tasty, easy to prepare, and great for meal prep. With the right storage, you can enjoy it later. I hope you feel inspired to try this recipe and impress yourself and others. Enjoy your cooking journey!

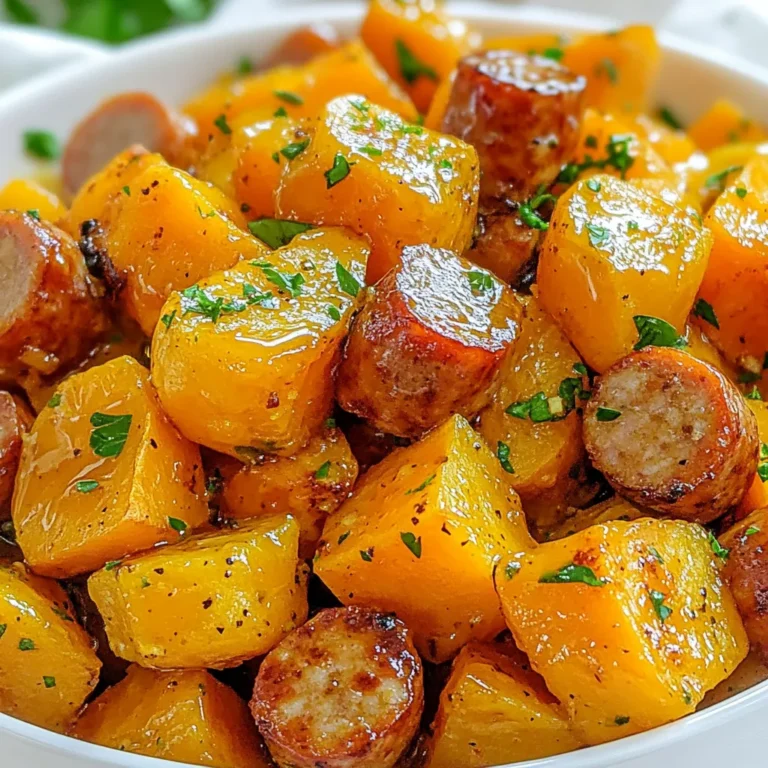
Honey Garlic Sausage Sweet Potatoes Flavorful Dish

- 8 oz spaghetti or your pasta of choice - 2 cups fresh spinach, washed and chopped - 1 cup sliced mushrooms (champignon or button) - 2 cloves garlic, minced - 1/2 cup heavy cream - 1/2 cup grated Parmesan cheese - 2 tablespoons olive oil - Salt and pepper to taste - 1/4 teaspoon red pepper flakes (optional) - Fresh parsley for garnish Gathering the right ingredients makes cooking easier. I like to use fresh spinach and mushrooms. They add great flavor and nutrition. You can use any pasta you enjoy. Spaghetti works well, but feel free to choose your favorite. When you pick mushrooms, look for fresh ones. They should feel firm and have a nice smell. Minced garlic gives this dish a tasty kick. Heavy cream makes the sauce rich and creamy. Parmesan cheese adds a lovely finish. Don’t forget salt and pepper! They bring out all the flavors. If you like spice, add red pepper flakes. Lastly, fresh parsley makes a pretty garnish and adds a touch of freshness. Now that you have everything, you’re ready to start cooking! {{ingredient_image_1}} To start, fill a large pot with water and add salt. Bring it to a boil. Once boiling, toss in 8 ounces of spaghetti. Cook the pasta according to the package instructions until it is al dente. This should take about 8 to 10 minutes. After cooking, drain the pasta in a colander. Remember to save 1/2 cup of the pasta water for later. Set the drained pasta aside. Next, grab a large skillet and heat 2 tablespoons of olive oil over medium heat. Add 2 minced cloves of garlic and 1 cup of sliced mushrooms to the skillet. Sauté for about 5 to 7 minutes until the mushrooms turn tender and golden. Once they are ready, stir in 2 cups of washed and chopped spinach. Cook for another 2 to 3 minutes until the spinach wilts down. Season with salt and pepper to taste. For a kick, you can add 1/4 teaspoon of red pepper flakes if you like. Now it’s time to make the creamy sauce. Lower the heat on the skillet and pour in 1/2 cup of heavy cream. Stir it well and let it simmer for about 2 to 3 minutes. After that, add 1/2 cup of grated Parmesan cheese. Mix until the cheese melts and the sauce becomes creamy and smooth. Take the cooked pasta and add it directly to the skillet with the sauce. Toss everything together gently. If you find the sauce too thick, use the reserved pasta water to reach your desired consistency. Once combined, taste the dish and adjust the seasoning if needed. Serve it hot, garnished with chopped fresh parsley and extra Parmesan cheese if you wish. Enjoy your creamy spinach mushroom pasta! To make your pasta just right, aim for al dente. This means your pasta should be firm but not hard. It should have a slight bite when you chew it. A good way to check is to taste a piece before the time is up. When cooking, always reserve some pasta water. This starchy water helps thicken your sauce later. To do this, simply scoop out half a cup of water before draining the pasta. Keep it handy for later use. Spices can really boost your dish. I love to add a pinch of red pepper flakes for heat. Garlic is also key; it brings a nice aroma and taste. You can also try adding a bit of nutmeg for warmth. For mushrooms, I prefer using button or champignon. They have a mild flavor that pairs well with spinach. You can also explore other types, like shiitake or cremini, for a richer taste. To make the sauce rich, warm the heavy cream gently. This helps blend it smoothly with the other ingredients. Stirring constantly keeps it from burning. If you want lighter options, you can swap heavy cream for half-and-half or non-dairy milk. Just remember that these may change the flavor and texture a bit. Adjust the seasoning as needed to keep it tasty. Pro Tips Use Fresh Ingredients: Fresh spinach and mushrooms will enhance the flavor and texture of your pasta dish significantly. Adjust the Creaminess: If you prefer a lighter sauce, substitute half of the heavy cream with vegetable broth for a healthier option. Perfect Pasta Cooking: Always cook your pasta al dente for the best texture and to prevent it from becoming mushy when mixed with the sauce. Customize Your Cheese: Experiment with different cheeses like feta or goat cheese for a unique flavor profile in your pasta dish. {{image_2}} You can easily boost your meal by adding protein. Great options include chicken, shrimp, or tofu. For chicken, grill or sauté pieces until cooked. Toss them in with your pasta. Shrimp cooks fast, so add them to the skillet right after the garlic. They only need a few minutes. If you prefer tofu, cube it and fry until golden. This adds a nice crunch and flavor. While spaghetti is a classic choice, you can switch things up! Try penne, fettuccine, or even whole wheat pasta. These alternatives can give different textures. If you need gluten-free options, look for brown rice or quinoa pasta. They work well with the creamy sauce and taste great. Feel free to add more veggies! Peas, bell peppers, or zucchini can enhance the dish. You can also use seasonal veggies. In spring, add asparagus or peas. In fall, consider butternut squash or kale. These add color and nutrition, making the dish even better! To store spinach mushroom pasta, let it cool down first. Place it in an airtight container. Make sure to keep it sealed to prevent drying out. This way, it stays fresh longer. You can store it in the fridge for up to three days. I recommend glass or plastic containers. They keep the pasta safe and easy to reheat. For reheating, the best method is to use the stove. Add a splash of water or broth to a skillet. Heat it gently to rewarm without losing texture. Stir often to avoid sticking. You can also use the microwave. Place it in a bowl with a lid, adding a splash of water. Heat in short bursts, stirring in between. Before serving, refresh the dish. Add a sprinkle of Parmesan cheese or a drizzle of olive oil. This step brings back the creamy texture and flavor. Enjoy your delicious spinach mushroom pasta again! Yes, you can make Spinach Mushroom Pasta ahead of time. Here are some tips for meal prep: - Cook the pasta and sauce separately. - Store them in airtight containers in the fridge. - Combine them just before serving to keep the pasta fresh. This dish lasts for about 3 days in the fridge. It may lose some creaminess, but you can add a splash of water or milk when reheating. Absolutely! Spinach Mushroom Pasta is a great vegetarian dish. It contains no meat and is full of healthy veggies. The cream and cheese add richness without any animal products aside from dairy, making it perfect for vegetarians. If you want lighter or dairy-free options, here are some alternatives to heavy cream: - Use coconut milk for a creamy texture with a hint of sweetness. - Try cashew cream, made by blending soaked cashews with water. - For a lighter option, use half-and-half or whole milk. When using substitutes, you may need to adjust cooking times. Coconut milk can take longer to thicken, while milk may require more cheese to achieve creaminess. This blog post guided you through making a tasty spinach mushroom pasta. You learned about the essential ingredients, cooking steps, and helpful tips. Remember, you can customize this dish with proteins and veggies. Don't hesitate to try different pasta types or storage methods. Experimenting makes cooking fun and flavorful. Keep this recipe handy, and enjoy serving it to friends and family. Happy cooking!

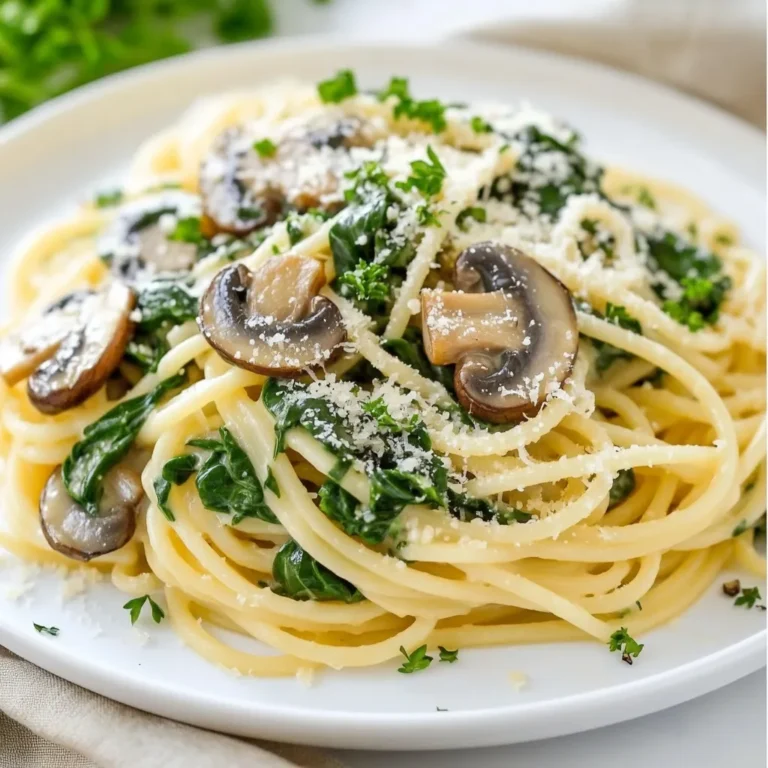
Spinach Mushroom Pasta Simple Creamy Dinner Delight

- 1 cup dried green or brown lentils, rinsed - 4 large carrots, peeled and chopped - 1 medium onion, diced - 2 cloves garlic, minced - 1 stalk celery, diced - 1 teaspoon ground cumin - 1 teaspoon ground coriander - 1/2 teaspoon turmeric - 4 cups vegetable broth - 2 cups water - 1 tablespoon olive oil - Salt and pepper to taste - Fresh parsley for garnish Each serving of Carrot Lentil Soup has about: - Calories: 220 - Protein: 10g - Carbs: 40g - Fats: 5g - Fiber: 12g This soup is great for your body. It has protein from lentils and vitamins from carrots. - Lentils: You can swap green lentils for brown lentils. Both work well. - Carrots: Try using yellow or purple carrots for fun colors. - Broth: If you want, use chicken broth for extra flavor. - Olive Oil: Substitute with coconut oil or butter if preferred. - Spices: Feel free to add more spices like paprika or chili powder for heat. These notes can help you make the soup your own! Enjoy creating your version! {{ingredient_image_1}} 1. Start by rinsing 1 cup of dried green or brown lentils under cold water. 2. Peel and chop 4 large carrots into bite-sized pieces. 3. Dice 1 medium onion and mince 2 cloves of garlic. 4. Dice 1 stalk of celery for extra crunch. 1. In a large soup pot, heat 1 tablespoon of olive oil over medium heat. 2. Add the diced onion, minced garlic, and diced celery. Sauté for about 5 minutes. Look for the onions to turn translucent. 3. Stir in the chopped carrots and cook for another 5 minutes. This helps the carrots soften. 4. Add 1 teaspoon of ground cumin, 1 teaspoon of ground coriander, and ½ teaspoon of turmeric. Stir well, cooking for 2 more minutes. This lets the spices bloom. 5. Pour in 4 cups of vegetable broth and 2 cups of water. Add the rinsed lentils. 6. Bring the mix to a boil, then reduce the heat to low. Cover and let it simmer for 25-30 minutes. Cook until the lentils and carrots are tender. 7. If you want a creamier soup, use an immersion blender to partially blend the soup. Leave some chunks for texture. You can also blend in batches with a standard blender. 8. Season the soup with salt and pepper to taste. - To avoid splatters, place the blender at the bottom of the pot before blending. - Move the blender slowly to fully blend the soup without making a mess. - If you prefer less blending, pulse the blender briefly. This keeps more chunks. To boost the taste of your carrot lentil soup, try these ideas: - Use fresh herbs like thyme or bay leaves during cooking. - Add a splash of lemon juice before serving for brightness. - Top with a dollop of yogurt or sour cream for creaminess. These simple tweaks can lift your soup from good to great! This soup tastes best hot. Serve it with: - Crusty bread or a fresh roll for dipping. - A side salad for crunch and freshness. - A sprinkle of chili flakes if you like heat. These pairings will make your meal feel complete and satisfying. Avoid these pitfalls to make perfect soup: - Don't skip rinsing the lentils to remove dirt and debris. - Ensure you don't overcook the vegetables; they should be tender, not mushy. - Remember to taste as you cook; adjust seasoning to your liking. Staying mindful of these tips will help you create a delicious soup every time. Pro Tips Ingredient Substitution: If you don't have lentils on hand, you can substitute them with canned chickpeas for a different texture and flavor. Spice Adjustment: Feel free to adjust the spices according to your taste; a pinch of cayenne pepper can add a delightful heat. Storage Tips: This soup stores well in the refrigerator for up to 5 days. You can also freeze it for up to 3 months in an airtight container. Garnish Variations: Experiment with different garnishes like a dollop of yogurt or a sprinkle of toasted seeds for added texture and flavor. {{image_2}} You can easily add protein to your carrot lentil soup. For a meat option, add cooked chicken. Shred the chicken and stir it into the soup before serving. This boosts the protein and makes it even heartier. If you prefer plant-based options, try tofu. Cut firm tofu into cubes and add it during the last 10 minutes of cooking. This gives it time to soak up the flavors. This soup is naturally vegetarian because it uses vegetable broth. If you want it to be vegan, just stick to the recipe. Avoid any chicken additions. You can also add more veggies, like spinach or kale, to keep it vibrant and healthy. This keeps the soup filling and adds a nice touch of color. Spices change the taste of your soup. Feel free to experiment! If you like heat, add a pinch of cayenne pepper. For a fresh taste, try fresh herbs like thyme or rosemary. Add them during cooking for a stronger flavor. If you want a sweeter note, a splash of maple syrup can balance the spices nicely. There are endless ways to make this soup your own! To keep your Carrot Lentil Soup fresh, let it cool first. Pour it into an airtight container. You can store it in the fridge for up to five days. Make sure to label the container with the date. This way, you always know when you made it. If you want to save some soup for later, freezing is a great option. Use freezer-safe containers or bags. Leave some space at the top because soup expands when it freezes. You can keep it frozen for up to three months. When you're ready to enjoy it, just thaw it in the fridge overnight. Reheating is simple! Pour the soup into a pot and heat it over medium heat. Stir it often until it warms up. You can also use a microwave. Just heat it in a microwave-safe bowl for a few minutes. Make sure to stir halfway through to heat it evenly. Add some fresh parsley on top for added flavor! You can make Carrot Lentil Soup thicker by blending more of the soup. Use an immersion blender and blend until it reaches your desired thickness. Another option is to add a bit more lentils. Cook them longer to break down and add more body to the soup. Yes, you can use red lentils. They cook faster and turn mushy. This gives the soup a creamier texture. If you want some chunks, keep an eye on the cooking time. Red lentils also add a nice sweetness to the soup. Carrot Lentil Soup is packed with nutrients. Lentils are high in protein and fiber. They help keep you full and support digestion. Carrots provide vitamins A and C, which are great for your skin and eyes. This soup is low in calories and great for heart health. You can store Carrot Lentil Soup in the fridge for about 4 to 5 days. Make sure to keep it in an airtight container. If you want to keep it longer, consider freezing it. It can last in the freezer for about 3 months. You've learned about the key ingredients and how to prepare delicious Carrot Lentil Soup. I shared cooking tips, variations, and storage methods to help you enjoy it longer. Making this soup can be simple and fun. Don't forget to try different proteins and spices to customize flavors. With these insights, you can create a tasty meal that's healthy and satisfying. Enjoy your cooking and savor each bite!

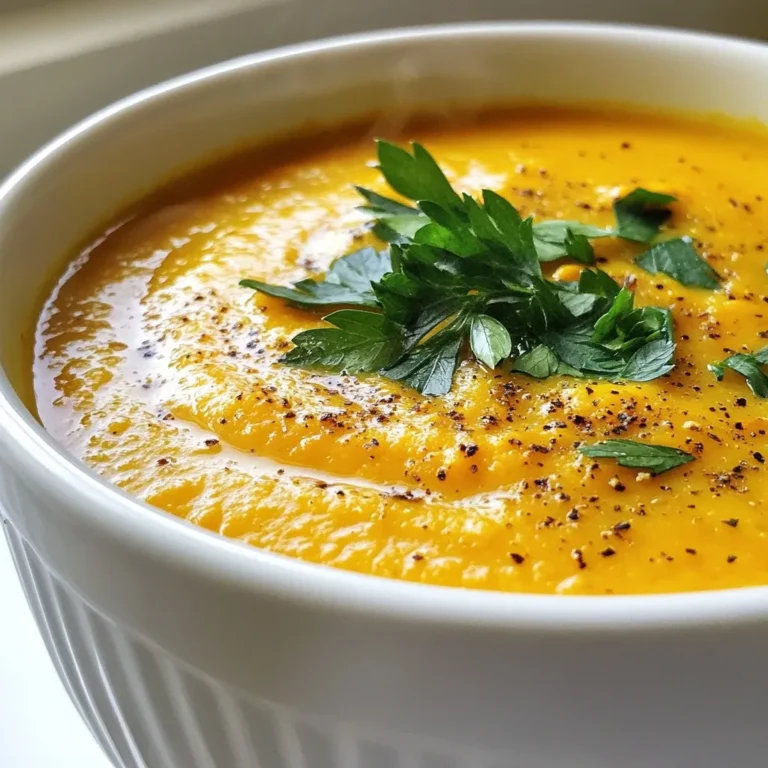
Carrot Lentil Soup Flavorful and Nutritious Recipe

For a tasty Chicken Avocado Melt, gather these key ingredients: - 2 cups cooked chicken, shredded - 1 ripe avocado, mashed - 1 cup shredded cheddar cheese - 1/2 cup cream cheese, softened - 1/4 cup plain Greek yogurt - 1 tablespoon lime juice - 1 teaspoon garlic powder - Salt and pepper to taste - 4 slices of whole grain or sourdough bread - Butter or olive oil (for toasting bread) These ingredients create a rich and creamy filling. The chicken adds protein, while the avocado gives healthy fats. Cream cheese and Greek yogurt make the mix smooth and flavorful. You can add a few optional ingredients to enhance your Chicken Avocado Melt: - 1/4 teaspoon cayenne pepper (for heat) - Fresh cilantro or parsley (for garnish) Adding cayenne pepper brings a spicy kick. Fresh herbs add a burst of color and flavor. Pair your Chicken Avocado Melt with these tasty sides: - A light salad - Fresh fruit - Sweet potato fries These sides balance the richness of the melt. They also add freshness and crunch to your meal. Enjoy experimenting with different combos! {{ingredient_image_1}} 1. Gather all your ingredients. You need cooked chicken, avocado, cheese, and more. 2. In a large bowl, combine the shredded chicken and the mashed avocado. 3. Add the softened cream cheese and Greek yogurt to the bowl. 4. Squeeze in the lime juice and sprinkle in the garlic powder. 5. If you like heat, add cayenne pepper. Mix all the ingredients well. 6. Season with salt and pepper to your taste. 1. Preheat your broiler to high. This step is key for crispiness. 2. Place the slices of bread on a baking sheet. Lightly butter one side of each slice. 3. If you prefer, drizzle olive oil instead of butter. 4. Spoon the chicken and avocado mix onto the unbuttered side of each slice. 5. Top each slice with a generous amount of shredded cheddar cheese. 6. Slide the baking sheet under the broiler. Bake for about 5-7 minutes. 7. Watch closely! You want the cheese bubbly and golden, not burnt. 8. Once done, take it out and let cool for a minute. 1. Serve your Chicken Avocado Melt warm. It’s best fresh from the oven. 2. Garnish with fresh cilantro or parsley for a pop of color. 3. Pair it with a side salad or soup for a complete meal. 4. Enjoy with a cold drink for a refreshing combo. 5. This dish is perfect for lunch or a light dinner. To make your Chicken Avocado Melt shine, use fresh ingredients. Start with warm, shredded chicken. This helps blend flavors well. Mash the avocado just before mixing. It keeps that vibrant green color. Add lime juice early to prevent browning. When you spread the mixture on bread, go thick. This gives each bite a rich taste. One big mistake is overcooking the cheese. Keep a close eye on it under the broiler. If you let it burn, the dish loses flavor. Another error is using stale bread. Fresh bread holds the melt better and tastes great. Be careful with salt. Too much can overpower the dish. Always taste as you go. You can make this melt in a skillet. Just heat it on medium. Butter the bread and add the mix. Cook each side until golden. You can also try a sandwich press. This gives a nice crust. If you want a lighter version, bake it in the oven. Just follow the broiler steps, but set it to 350°F. This method takes longer but cooks through evenly. Pro Tips Choose Ripe Avocados: Make sure to use ripe avocados for a creamier texture in your melt. They should yield slightly to pressure when squeezed gently. Customize Your Heat: Adjust the amount of cayenne pepper based on your spice preference. You can also add diced jalapeños for an extra kick! Experiment with Cheeses: While cheddar is a classic choice, feel free to mix in other cheeses like Monterey Jack or pepper jack for a flavorful twist. Keep an Eye on the Broiler: Broilers can vary in intensity, so keep a close watch while toasting to ensure your cheese doesn't burn. {{image_2}} You can easily change this recipe for different diets. For a gluten-free option, use gluten-free bread. Many brands offer tasty choices. If you're vegan, swap chicken for chickpeas or tofu. Use vegan cream cheese and cheese too. Avocado stays the same and adds creaminess. Want a kick? Add more cayenne pepper for spice. You can also mix in hot sauce for extra heat. For a fresh herb taste, add chopped basil or dill to the mix. These herbs pair well with chicken and avocado. You will enjoy the bright flavors. Cheese lovers can try different types. Swap cheddar for mozzarella or pepper jack. If cream cheese is not your favorite, try hummus or guacamole instead. These swaps keep the dish creamy and tasty. You can even use pesto for a burst of flavor. This makes each melt unique. To store your Chicken Avocado Melt, let it cool first. Place leftovers in an airtight container. This keeps the flavors fresh. Store it in the fridge for up to three days. If you want to keep it longer, consider freezing. When you are ready to enjoy your leftovers, preheat your oven to 350°F (175°C). Place the Chicken Avocado Melt on a baking sheet. Heat it for about 10 minutes or until warm. This method keeps the bread crispy and the cheese melty. If you want to use a microwave, heat it for 1-2 minutes. The microwave is faster but may make the bread soft. To freeze your Chicken Avocado Melt, wrap each piece tightly in plastic wrap. Then, place them in a freezer bag. Make sure to remove as much air as possible. You can freeze them for up to three months. When ready to eat, thaw overnight in the fridge. Then, reheat in the oven for the best taste. A Chicken Avocado Melt is a tasty dish made with chicken and creamy avocado. You mix shredded chicken with mashed avocado, cream cheese, and Greek yogurt. This mix sits on toasted bread, topped with cheese, then broiled until bubbly. It’s a warm, cheesy delight that’s both filling and nutritious. Yes, you can use different cheeses! Cheddar is great, but mozzarella or gouda works too. Each cheese gives a unique flavor. Try mixing cheeses for a fun twist. Just remember to choose a cheese that melts well to keep that gooey texture. To make this recipe ahead, prepare the chicken and avocado mix early. Store it in an airtight container in the fridge. When you’re ready to eat, just toast the bread, top it with the mix, and add cheese. Broil it for a quick, easy meal. The Chicken Avocado Melt is simple and tasty. You learned about must-have and optional ingredients. We covered step-by-step cooking and serving tips. I shared tricks to get it just right and avoid common mistakes. We explored variations and dietary options too. Finally, I gave storage tips for leftovers. With this guide, you can create a delicious meal. Enjoy your cooking and make it your own!

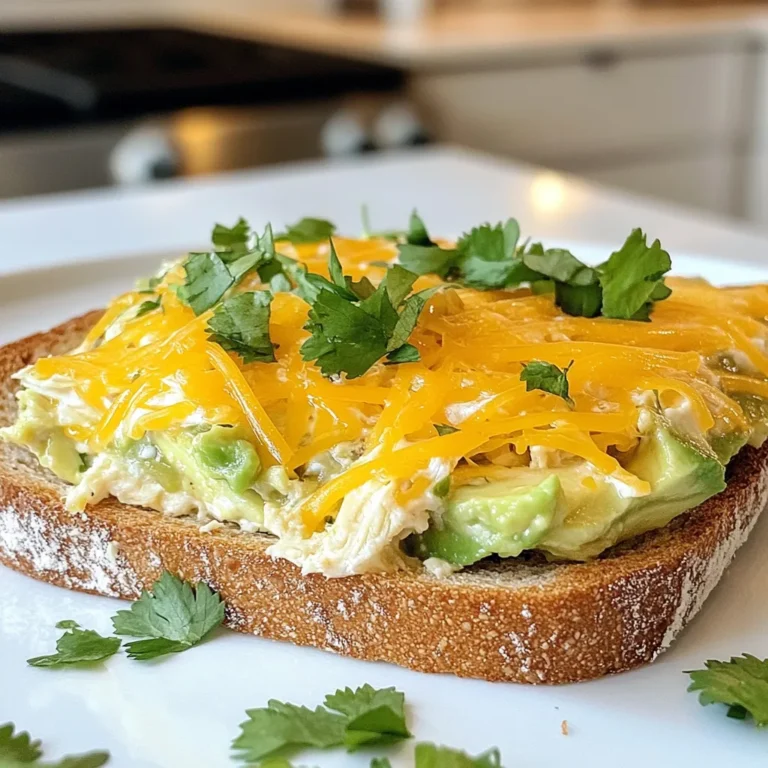
Savory Chicken Avocado Melt Easy Recipe to Try

- 1 pound ground beef or turkey - 1 small onion, finely chopped - 3 cloves garlic, minced - 1 cup uncooked elbow macaroni - 3 cups beef broth - 1 cup shredded cheddar cheese - 1 cup diced tomatoes (canned or fresh) - 1 teaspoon paprika - 1 teaspoon dried oregano - 1/2 teaspoon black pepper - 1/2 teaspoon salt - 2 tablespoons olive oil - Fresh parsley, chopped (for garnish) To make homemade Hamburger Helper, you need a mix of simple ingredients. Choose either ground beef or turkey for your base. I often opt for turkey to keep it lean. The onion and garlic add a wonderful depth of flavor. Don’t skip chopping them finely; it helps them cook evenly. For the pasta, elbow macaroni works best, but feel free to use any short pasta you like. The beef broth and diced tomatoes bring moisture and taste. They meld together during cooking, creating a rich sauce. Seasonings are key in this dish. Paprika and oregano add warmth and zest. Black pepper and salt balance everything. Olive oil is important for sautéing the onions and meat. Finally, don’t forget the cheese! Cheddar gives that creamy finish that makes this dish truly comforting. Garnish with chopped parsley for a fresh touch. This not only looks great but also adds a pop of flavor. With these ingredients, you can create a quick, tasty meal that everyone will love. {{ingredient_image_1}} Start your skillet on medium heat. Add two tablespoons of olive oil. Once hot, toss in one small, finely chopped onion. Sauté for three to four minutes. This step makes the onion soft and sweet. Next, add three minced garlic cloves. Stir them in for about one minute. The smell will be amazing! Now, it’s time for the meat. Add one pound of ground beef or turkey. Break it apart with a spatula as it cooks. Brown the meat until there is no pink left. This should take about five to seven minutes. If there is extra grease, drain it off. After the meat is cooked, add flavor. Sprinkle in one teaspoon of paprika, one teaspoon of dried oregano, half a teaspoon of black pepper, and half a teaspoon of salt. Stir well to coat the meat with the spices. Now, pour in one cup of uncooked elbow macaroni. Then, add three cups of beef broth and one cup of diced tomatoes. Mix everything in the pan well. This is where the magic starts! Bring the mixture to a gentle boil. Once it boils, reduce the heat to low. Cover the skillet with a lid. Let it simmer for about ten to twelve minutes. Stir occasionally to keep the pasta from sticking. You want the macaroni to be tender and soak up most of the liquid. When the pasta is ready, take the skillet off the heat. Sprinkle one cup of shredded cheddar cheese on top. Cover the skillet again for a few minutes. This helps the cheese melt perfectly. Once the cheese is melted, stir it into the pasta mix. This makes it creamy and cheesy. Serve your dish hot. For a nice touch, garnish with fresh chopped parsley. It adds color and flavor! - To ensure perfect pasta texture, cook elbow macaroni until al dente. This means it should be firm but not hard. - Prevent sticking in the skillet by stirring often. Keep an eye on the pasta as it cooks. - Adding more spices can really boost the taste. Try red pepper flakes or Italian seasoning for a kick. - Using different cheese options can change the flavor profile. Mozzarella or pepper jack adds a fun twist. - For leaner meat choices, use ground turkey instead of beef. It’s lower in fat but still tasty. - Vegetable substitutions can add nutrition. Try adding spinach, bell peppers, or zucchini for extra color and flavor. Pro Tips Choose Your Protein: Ground turkey is a great low-fat alternative to ground beef, offering a lighter option without sacrificing flavor. Cheese Variations: Experiment with different types of cheese like pepper jack or gouda for a unique twist on the classic cheesy flavor. Add Veggies: Incorporate other vegetables such as bell peppers or spinach to enhance nutrition and add more color to your dish. Make Ahead: This dish can be made in advance and reheated, making it a perfect option for meal prep or busy weeknights. {{image_2}} You can switch the ground beef for ground turkey or chicken. This makes the dish leaner and lighter. Both options still give great flavor. If you want a vegetarian or vegan dish, use plant-based meat or beans. Lentils also work well. They add protein and fiber. You can use mushrooms for extra texture and taste. These swaps keep your meal tasty while meeting different diets. Try using whole grain macaroni for a healthier choice. Whole grain adds more fiber and nutrients. If you prefer a different cheese, use mozzarella or pepper jack. This can change the taste and make it fun. You can also use dairy-free cheese for a vegan option. These swaps let you enjoy the dish your way. Want some heat? Add jalapeños for a spicy kick. This adds a great flavor boost. You can also stir in some cream to make the dish rich and creamy. This gives it a nice texture and taste. Feel free to experiment with spices, too! Adding chili powder or cumin can change the whole dish. Each of these ideas helps you make the meal your own. To store your homemade hamburger helper, let it cool first. Place it in an airtight container. This helps keep it fresh. You can store it in the fridge for up to three days. When you want to reheat, use the stove or microwave. If using the microwave, heat in short bursts. Stir in between to avoid hot spots. For longer storage, you can freeze your hamburger helper. Use a freezer-safe container and label it with the date. It can last up to three months in the freezer. When you are ready to eat, thaw it in the fridge overnight. Reheat it on the stove, adding a splash of beef broth to help with moisture. Enjoy your meal without losing flavor or texture! Yes, you can make this recipe gluten-free. For the macaroni, use gluten-free pasta. Many brands offer gluten-free elbow macaroni made from rice, corn, or quinoa. These options work well and taste great. You can easily adjust the serving size. To scale up, just double the ingredients. For fewer servings, cut the amounts in half. Keep the same cooking time, but check for doneness a bit earlier for smaller portions. Homemade Hamburger Helper pairs well with many side dishes. Try a fresh green salad for crunch. Steamed broccoli adds color and nutrients. Garlic bread is a classic side that complements this dish nicely. In this blog post, we explored how to make a tasty Homemade Hamburger Helper. We discussed the essential ingredients and steps to cook your meal. You learned helpful tips for perfecting your dish, along with various healthy options and flavor enhancements. With these ideas, you can customize your recipe to suit any taste. Remember, cooking is fun and allows for creativity! Try out these suggestions and enjoy your delicious creation. Happy cooking!

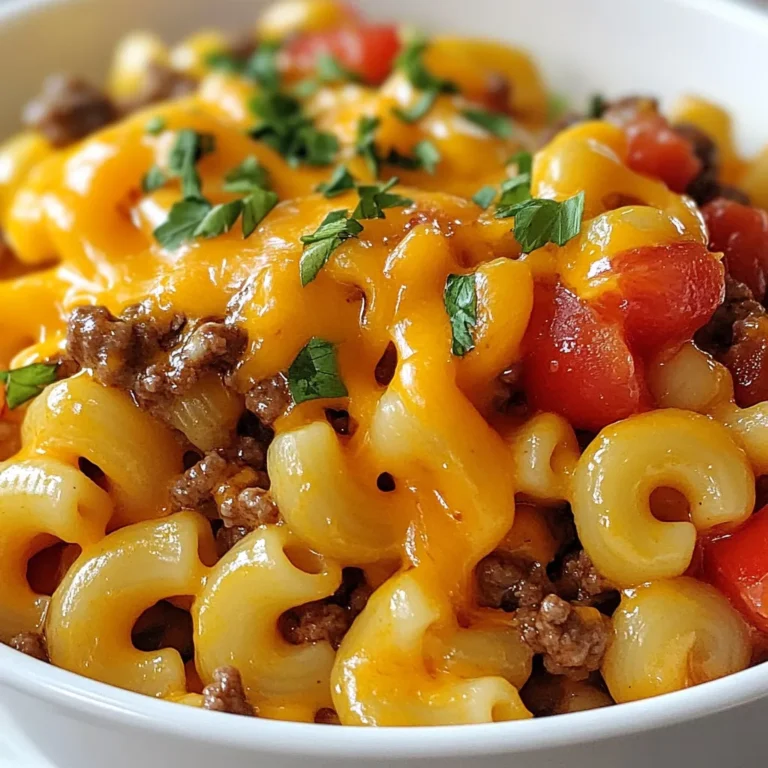
Homemade Hamburger Helper Quick and Tasty Meal

PREV 1 … 82 83 84 … 86 NEXT
secrets pice kitchen

explore

DessertsDinnerAppetizersDrinks

Our Policies

  • Cookie Policy
  • Copyright Policy
  • Disclaimer
  • GDPR Policy
  • Terms Of Use
Back to Top
  • About
  • Contact Us
  • Privacy Policy
© 2026 secrets pice kitchen