FREE DINNER EBOOK! Get your copy!
  • Cookie Policy
  • GDPR Policy
  • Disclaimer
  • Terms Of Use
  • Visit my other site: Fun Cookie Recipes
secrets pice kitchen
  • Home
  • Dinner
  • Desserts
  • Drinks
  • Appetizers
  • Contact
  • About
  • Privacy Policy
  • Home
  • Dinner
  • Desserts
  • Drinks
  • Appetizers
  • Contact
  • About
  • Privacy Policy
  • Cookie Policy
  • GDPR Policy
  • Disclaimer
  • Terms Of Use
Visit my other site: Fun Cookie Recipes

HOME / CATEGORIES /

Latest

To make Spinach Mushroom Orzo, gather these key ingredients: - 1 cup orzo pasta - 2 cups fresh spinach, chopped - 1 cup mushrooms, sliced (cremini or button) - 1 small onion, diced - 2 cloves garlic, minced - 1 cup vegetable broth - 1/2 cup heavy cream - 1 tablespoon olive oil - 1 teaspoon dried thyme - Salt and pepper to taste - Grated parmesan cheese for garnish (optional) Using the right measurements makes a big difference. Here are some tips: - Orzo pasta is the star, but you can swap it for rice or quinoa if needed. - Fresh spinach gives great flavor. If you don't have it, use frozen spinach. Just thaw and squeeze out excess water. - You can use any mushrooms, but I love cremini for their rich taste. Button mushrooms work too. - If you're out of heavy cream, try milk or a dairy-free cream for a lighter option. - Dried thyme is great, but fresh thyme adds more flavor. Use three times more fresh if you have it. Fresh ingredients bring life to this dish. They enhance flavor and nutrition. Fresh spinach adds vibrant color and vital nutrients. Fresh mushrooms provide a meaty texture that makes the meal hearty. Always choose fresh whenever you can. The taste will shine through in every bite. Plus, local farmers’ markets often have the best produce. When you use fresh ingredients, you make cooking fun and rewarding! {{ingredient_image_1}} Gather all your ingredients. You need: - 1 cup orzo pasta - 2 cups fresh spinach, chopped - 1 cup mushrooms, sliced - 1 small onion, diced - 2 cloves garlic, minced - 1 cup vegetable broth - 1/2 cup heavy cream - 1 tablespoon olive oil - 1 teaspoon dried thyme - Salt and pepper to taste - Grated parmesan cheese for garnish (optional) Wash the spinach and mushrooms well. Chop the spinach into small pieces. Slice the mushrooms thinly. Dice the onion small, and mince the garlic finely. This prep makes cooking quick and easy. Heat the olive oil in a large skillet over medium heat. Once hot, add the diced onion. Cook for about 3-4 minutes until the onion looks clear. Next, add the sliced mushrooms. Cook for another 5 minutes. You want them soft and golden. Now, stir in the minced garlic and dried thyme. Cook this for one more minute. The smell will be lovely and fragrant. This base adds great flavor to your dish. Add the orzo pasta to the skillet. Stir it well with the mushroom mix. Next, pour in the vegetable broth. Bring it to a simmer. Cook uncovered, stirring often for about 10 minutes. The orzo should be tender, and most of the liquid should be gone. Once the orzo is ready, stir in the chopped spinach and heavy cream. Cook for another 2-3 minutes. The spinach will wilt nicely, and the mix will become creamy. Season with salt and pepper. Taste it to make sure the flavors are just right. Serve warm and add grated parmesan cheese on top if you like. Enjoy! To make great Spinach Mushroom Orzo, use a large skillet. This helps heat evenly. Start by heating olive oil over medium heat. Sauté the onion first until it turns soft. Then, add mushrooms and let them cook until golden. This step builds a nice flavor base. Always stir often to avoid sticking. When adding garlic and thyme, cook briefly to keep the flavors fresh. To boost flavor, use fresh ingredients. Fresh spinach and mushrooms bring life to the dish. Adding a splash of lemon juice at the end can brighten it up. You can also sprinkle some chili flakes for a touch of heat. If you love cheese, try using different kinds of cheese for depth. Grated parmesan is a classic choice, but feta can add a nice twist. One common mistake is overcooking the orzo. Keep an eye on it so it stays al dente. Another mistake is not seasoning enough. Taste the dish as you cook and adjust salt and pepper. If it feels bland, it likely needs more seasoning. Lastly, avoid adding spinach too early. Add it just before serving to keep its vibrant color and nutrients. Pro Tips Use Fresh Ingredients: Fresh spinach and mushrooms will enhance the flavor and texture of the dish, making it more vibrant and delicious. Adjust Creaminess: For a lighter version, you can replace heavy cream with half-and-half or a plant-based cream alternative while maintaining a creamy texture. Flavor Boost: Consider adding a splash of white wine after sautéing the mushrooms for an extra layer of flavor before adding the broth. Perfect Cooking Time: Keep an eye on the orzo as it cooks; stirring occasionally ensures even cooking and prevents it from sticking to the pan. {{image_2}} You can add protein to make this dish heartier. Chicken or shrimp works great. For chicken, use cooked, diced pieces. Simply stir them in with the spinach. For shrimp, add raw shrimp during the last few minutes of cooking. They cook quickly and add a nice flavor. Both options make the dish filling and tasty. To make this recipe vegan, swap the heavy cream for coconut milk or a nut cream. These alternatives give a creamy texture without dairy. Use vegetable broth with no added animal products too. You can also skip the cheese or use a vegan cheese. These simple swaps keep the dish rich and satisfying. If you need a gluten-free meal, choose gluten-free orzo. Many brands offer this option, so check your local store. You can also use rice or quinoa instead of orzo. They will change the texture but still taste great. Just adjust the cooking time based on what you choose. To store leftovers, let the orzo cool to room temperature. Then, place it in an airtight container. This will keep it fresh for about 3 to 4 days in the fridge. Make sure to label the container with the date. This way, you remember when you made it! If you want to freeze the orzo, first cool it completely. Then, put it in a freezer-safe container or a zip-top bag. Press out as much air as you can before sealing. This orzo can last up to 3 months in the freezer. Just remember to label it! To reheat, you can use the microwave or the stovetop. If using the microwave, place it in a bowl and add a splash of broth or water. This keeps it moist. Heat it in short bursts, stirring in between. If using the stovetop, warm it in a skillet over low heat. Stir occasionally, adding more broth as needed. Enjoy your tasty meal again! Yes, you can use frozen spinach. Just thaw and drain it first. Frozen spinach works well in this dish. It saves time and still offers great flavor. Fresh spinach adds a nice texture, but frozen is a good option. To make this dish vegan, replace heavy cream with coconut cream or cashew cream. Use vegetable broth without any animal products. Omit grated parmesan or use a vegan cheese. These swaps will keep the dish creamy and tasty. You can serve Spinach Mushroom Orzo with a simple salad or garlic bread. A light soup pairs well too. For protein, grilled chicken or roasted chickpeas are great choices. This dish is versatile and complements many sides. This article explored the key ingredients for Spinach Mushroom Orzo, along with their measurements and the need for freshness. We covered simple steps to prepare and cook the dish, plus useful tips to avoid common mistakes. You can also try various proteins or make it vegan and gluten-free. Remember to store your leftovers properly and reheat them well. Enjoy making this hearty dish, and don’t hesitate to get creative with flavors!

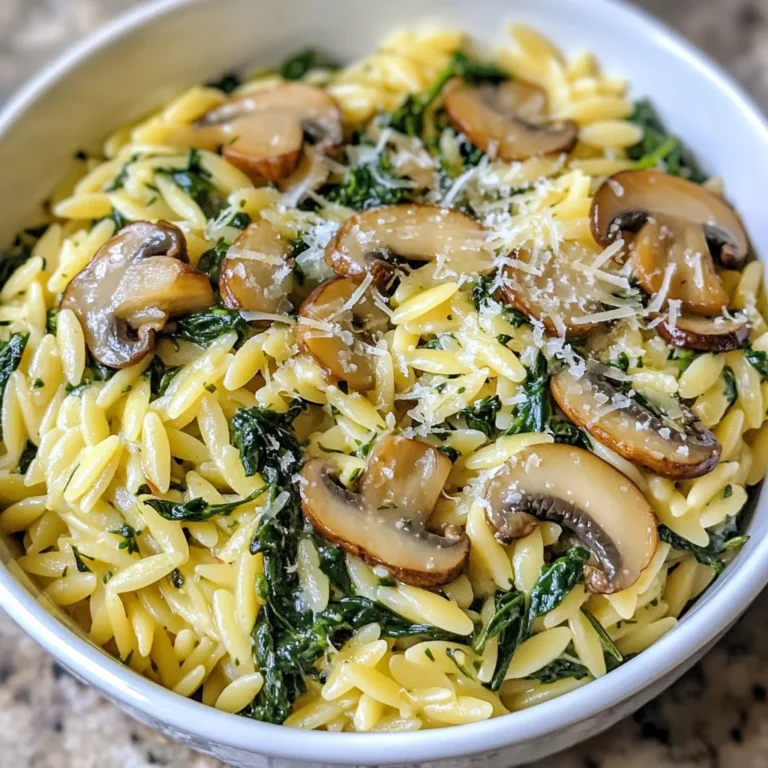
Spinach Mushroom Orzo Flavorful and Easy Recipe

- 1 lb boneless, skinless chicken thighs, thinly sliced - 1 can (14 oz) coconut milk - 3 cups chicken broth - 2 stalks lemongrass, trimmed and crushed - 3-4 kaffir lime leaves, torn into pieces - 1 thumb-sized piece of ginger, sliced - 3 garlic cloves, minced - 2-3 Thai red chilies, sliced (adjust for spice level) - 1 cup mushrooms, sliced (shiitake or button) - 1 medium carrot, julienned - Optional: 1 cup baby spinach or bok choy When I think of Thai Coconut Chicken Soup, I see a warm hug in a bowl. The main ingredients make this dish rich and filling. First, the chicken thighs provide tender bites that soak up the flavors. The coconut milk adds a creamy touch that balances perfectly with the broth. Chicken broth serves as the base, giving the soup a hearty feel. Next, we have the aromatics. Lemongrass gives a fresh, citrusy taste that brightens the soup. Kaffir lime leaves add a unique zest, while ginger brings warmth, and garlic adds depth. Together, they create a wonderful aroma that fills your kitchen. The vegetables add color and texture. Thai red chilies let you control the heat. You can slice them thin for more spice or leave them out for a milder soup. Mushrooms bring an earthy flavor, while carrots add a slight sweetness. If you want to sneak in more greens, toss in baby spinach or bok choy for extra nutrients and color. With these ingredients, you’ll create a comforting bowl of Thai Coconut Chicken Soup that’s perfect for any day. {{ingredient_image_1}} First, grab a large pot. Combine three cups of chicken broth, crushed lemongrass, torn lime leaves, sliced ginger, minced garlic, and Thai red chilies. The chilies add spice, so adjust them if you want less heat. Now, bring this mix to a simmer over medium heat. This step builds a fragrant base for your soup. Once your broth simmers, add the sliced chicken thighs to the pot. Stir them in gently. Cook the chicken for about five to seven minutes. You’ll know it’s done when the chicken is no longer pink. This ensures your soup is both safe and tasty. Next, stir in the sliced mushrooms and julienned carrots. Let them cook in the broth for about three to four minutes. Then, pour in the coconut milk and stir gently. If you like, add baby spinach or bok choy now. Let the soup simmer for another two to three minutes. This final step warms everything through and blends the flavors. Finally, season your soup with fish sauce, lime juice, salt, and pepper to taste. Adjust these to match your flavor preference. Remove the soup from heat and discard the lemongrass stalks and lime leaves. Ladle the soup into bowls, garnish with fresh cilantro leaves, and serve hot. Enjoy your flavorful comfort bowl! To get the best flavor, start with the spice level. Thai red chilies add heat, but you can adjust them. If you prefer it mild, use fewer chilies. For a spicy kick, add more. Taste as you go to find your perfect balance. Next, focus on saltiness. Fish sauce brings umami. If you want a vegetarian option, soy sauce works well. Start with a small amount and increase it slowly. This way, you control the saltiness without overpowering the soup. Garnishing is key to a great bowl. Fresh cilantro leaves not only add color but also a burst of flavor. Just sprinkle some on top before serving. It makes your soup look fancy and fresh. When serving, think about sides. Steamed jasmine rice pairs well with this soup. You can also offer lime wedges. A squeeze of lime brightens the flavors and adds freshness. One big mistake is overcooking the chicken. Cook it until it’s just no longer pink. This keeps the chicken juicy and tender. If you cook it too long, it can become dry and tough. Another error is skipping essential ingredients. Lemongrass and kaffir lime leaves provide unique flavors. Don’t try to replace them with other herbs. They add depth that you cannot get from standard spices. Pro Tips Adjust the Spice Level: Depending on your preference, feel free to add more or fewer Thai red chilies. Start with one and taste as you go to find your perfect heat level. Use Fresh Ingredients: For the best flavor, use fresh lemongrass, ginger, and cilantro. Fresh ingredients can elevate the taste of your soup significantly. Make it a Meal: To make this soup heartier, add cooked rice or noodles directly into the bowls before ladling the soup on top. Storage Tips: This soup can be stored in the refrigerator for up to 3 days. To reheat, add a splash of chicken broth or water to maintain its creamy texture. {{image_2}} If you want a vegetarian or vegan soup, you can use tofu instead of chicken. Tofu absorbs flavors well. Cut it into cubes and add it after the broth simmers. This way, it soaks in all the rich taste. For the broth, swap chicken broth for vegetable broth. This change keeps the soup light and fresh. Do you like it spicy? You can add more Thai red chilies. Slice them thin and drop them in the pot. For a milder soup, reduce the number of chilies or remove the seeds. You can also use chili flakes for a different heat. For varied flavors, try adding a dash of curry powder or some fresh basil. If you don’t have coconut milk, you can use almond or cashew milk. They give a nice creaminess too. For the vegetables, feel free to mix it up. You could add bell peppers, snap peas, or zucchini. These swaps keep your soup interesting and delicious. Once your soup cools, store it right away. Let it sit for no more than two hours. Use airtight containers to keep it fresh. Glass or BPA-free plastic containers work best. Label each container with the date. This way, you know when to use it up. When ready to enjoy your soup again, heat it gently on the stove. Pour the soup into a pot over low heat. Stir often to prevent it from sticking. You can also use a microwave, but do it in short bursts. Heat it for about one to two minutes at a time. Always stir in between to ensure even warming. If you want to freeze the soup, do it before adding coconut milk. You can freeze it in portions for easy meals. Use freezer-safe containers or bags. When ready to enjoy, thaw it in the fridge overnight. Reheat it on the stove and then add the coconut milk. This keeps the flavor and texture just right. To make Thai Coconut Chicken Soup ahead of time, start by preparing the broth. You can simmer the chicken broth, lemongrass, lime leaves, ginger, garlic, and chilies. Once done, let it cool and store in the fridge. You can add the chicken later. When ready to eat, reheat the broth and add chicken, mushrooms, and carrots. Finish with coconut milk and seasonings. This method keeps the flavors fresh and tasty. Yes, you can use canned coconut milk. It adds rich flavor and creaminess. Look for brands that are free of additives. Shake the can well before using. This ensures a smooth blend in your soup. When adding it to the pot, stir gently to combine. This will help keep the coconut milk creamy and delicious. You can serve Thai Coconut Chicken Soup with several tasty options. Here are some great pairings: - Steamed jasmine rice - Fresh spring rolls - Crispy wontons - A light salad with lime dressing These sides enhance the meal and make it even more enjoyable. You can also garnish the soup with fresh cilantro for a pop of color and flavor. You've learned how to make Thai Coconut Chicken Soup from scratch. We covered key ingredients like chicken thighs and coconut milk, plus aromatics such as lemongrass and ginger. The step-by-step guide helps you perfect the broth and ensures your chicken cooks just right. You now know tips for flavor balance and ingredient swaps. Lastly, proper storage can keep your soup fresh. Enjoy your cooking adventure and share your delicious results!

Thai Coconut Chicken Soup Flavorful Comfort Bowl

For this creamy lemon pasta, you need the following items: - 200g fettuccine or spaghetti - 1 cup heavy cream - 1 medium lemon (zested and juiced) - 1 clove garlic, minced - 1/2 cup grated Parmesan cheese - 1 tablespoon olive oil - Salt and pepper to taste - Fresh basil leaves for garnish Measuring is key for a great dish. Here’s a quick guide: - Pasta: 200 grams equals about 7 ounces. - Heavy cream: 1 cup is 240 milliliters. - Lemon: Use one medium lemon for zest and juice. - Garlic: Just one clove, minced. - Parmesan: 1/2 cup is about 50 grams when grated. - Olive oil: 1 tablespoon is 15 milliliters. - Salt and pepper: Add to taste. If you don’t have some items, here are good swaps: - Pasta: Any pasta shape works, like penne or linguine. - Heavy cream: Use half-and-half for a lighter sauce. - Parmesan cheese: Try Pecorino Romano for a different flavor. - Fresh basil: Dried basil can work in a pinch. - Garlic: Garlic powder can be used, but fresh is best. {{ingredient_image_1}} Start by bringing a large pot of salted water to a boil. Add your fettuccine or spaghetti to the pot. Cook it according to the package instructions until it is al dente. This usually takes about 8-10 minutes. Once done, reserve 1/2 cup of the pasta water. Then, drain the pasta in a colander. In a large skillet, heat 1 tablespoon of olive oil over medium heat. Add the minced garlic and sauté it for about one minute. You want it to be fragrant, but do not let it brown. Next, pour in 1 cup of heavy cream and bring it to a simmer. Add the juice and zest of one medium lemon. Stir well to combine. Let the sauce cook for 2-3 minutes until it thickens slightly. Now, stir in 1/2 cup of grated Parmesan cheese. Season your sauce with salt and pepper to taste. If the sauce feels too thick, add some of the reserved pasta water until you get your desired consistency. Finally, add the drained pasta to the sauce. Toss gently to coat every strand with the creamy lemon mixture. Serve right away, garnished with fresh basil and more Parmesan if you like. To make perfect pasta, always use a large pot of water. Salt the water well; it should taste like the sea. Cook the pasta until it is al dente. This means it should be firm but not hard. Save some pasta water before draining. This water helps to adjust your sauce. Add a pinch of salt and pepper to your sauce for depth. Fresh garlic brings a nice kick. The lemon zest adds brightness and aroma. You can also try fresh herbs, like basil or parsley, to boost flavor. For a richer taste, add more Parmesan cheese. Serve the pasta right away for the best flavor. Garnish with fresh basil leaves and extra Parmesan. A sprinkle of lemon zest on top makes it look great. Pair it with a crisp salad or some crusty bread for a full meal. Enjoy a glass of white wine to elevate your dining experience. Pro Tips Use Fresh Lemons: Always opt for fresh lemons over bottled juice for a brighter, more vibrant flavor in your sauce. Adjust Creaminess: If you prefer a lighter sauce, substitute half of the heavy cream with chicken or vegetable broth for a delicious twist. Save Pasta Water: The reserved pasta water is starchy and can help bind the sauce to the pasta, enhancing the overall texture. Add Protein: For a heartier meal, consider adding grilled chicken or shrimp to your creamy lemon pasta for added protein and flavor. {{image_2}} You can easily add proteins to this dish. Chicken or shrimp works great here. For chicken, cook diced pieces in the skillet before adding garlic. Cook until golden and fully done. For shrimp, add them after the garlic. Cook them until they turn pink. Both options boost flavor and make the meal heartier. Adding veggies makes this dish even better! Spinach adds color and nutrients. Just toss it in the sauce for a minute until it wilts. Peas are another tasty choice. They add a sweet taste and pop. Stir in frozen or fresh peas right before serving for a lovely crunch. If you need a gluten-free meal, swap the pasta. Use gluten-free fettuccine or spaghetti. Many brands offer great choices that taste good. Just make sure to check the package for cooking times. This way, you can enjoy this creamy lemon pasta without worry! To store leftovers, let the pasta cool to room temperature. Place it in an airtight container. The creamy lemon pasta stays fresh for 2 to 3 days in the fridge. Make sure to seal the container tightly. This helps keep the flavors locked in. For reheating, use a skillet over low heat. Add a splash of water or cream to keep it moist. Stir gently until warmed through. You can also use a microwave. Place the pasta in a bowl, cover it, and heat for about 1-2 minutes. Stir halfway through for even heating. Freezing creamy lemon pasta is not recommended. The cream can separate and change texture. If you must freeze it, do so without the cream sauce. Cook the pasta and store it in a freezer bag. When you're ready to eat, thaw it overnight in the fridge. Then, make the sauce fresh and combine both for the best taste. Creamy lemon pasta lasts about three days in the fridge. Store it in an airtight container. You can reheat it in a pan on low heat. Adding a splash of water helps revive the creaminess. Yes, you can use any pasta you like. Fettuccine or spaghetti works best, but penne or bowtie can also be great. Just cook according to package directions until al dente for the best texture. Absolutely! You can swap heavy cream for coconut cream or a dairy-free cream. Use nutritional yeast instead of Parmesan for a cheesy flavor. This way, you can enjoy creamy lemon pasta while keeping it dairy-free. In this post, we covered creamy lemon pasta, from selecting key ingredients to storing leftovers. I shared tips for perfect pasta and fun variations to try. Remember, cooking is about experimenting. Feel free to adjust flavors and add your favorite proteins or veggies. This dish is not just tasty; it’s also easy to make. Try it out and enjoy a delicious meal that fits your needs.

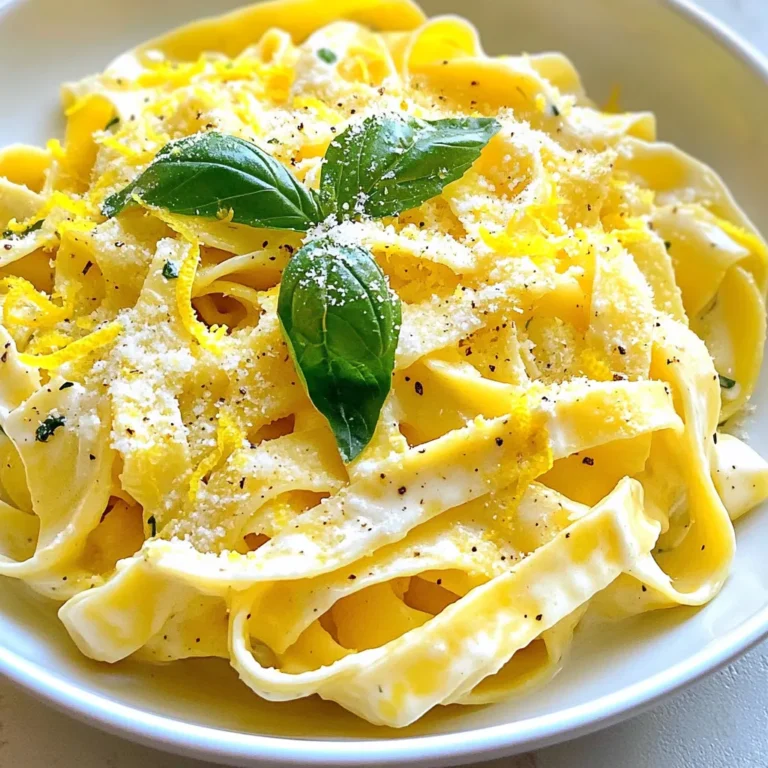
Creamy Lemon Pasta for Two Simple and Tasty Dish

To create the best Loaded Outback Potato Soup, you need these key ingredients: - 4 large russet potatoes, peeled and diced - 1 medium onion, chopped - 2 cloves garlic, minced - 4 cups vegetable broth - 1 cup heavy cream (or coconut cream for a dairy-free option) - 1 cup shredded cheddar cheese - 1 cup cooked bacon bits (optional) - 1/2 cup sour cream (or Greek yogurt) - 1/4 cup chopped green onions (scallions) - 1 teaspoon paprika - Salt and pepper to taste - Fresh parsley, for garnish These ingredients blend perfectly to create a rich and creamy soup. The russet potatoes add a nice texture. The onion and garlic give it a wonderful flavor base. You can play with the recipe. Here are some optional ingredients and substitutions: - Use coconut cream instead of heavy cream for a dairy-free soup. - Swap sour cream with Greek yogurt for a tangy twist. - Add more veggies like carrots or celery for extra nutrients. - Use turkey bacon or omit bacon for a vegetarian option. Feel free to mix and match based on what you have on hand! This Loaded Outback Potato Soup serves about six people. Each bowl is hearty and filling. Here is a rough breakdown of the nutrition: - Calories: About 400 per serving - Protein: 10g - Carbohydrates: 30g - Fat: 28g - Fiber: 4g Remember, the numbers can change based on the ingredients you pick. The soup is rich and comforting, making it perfect for chilly days. {{ingredient_image_1}} Start by peeling and dicing the russet potatoes. You need four large ones for this soup. Next, chop one medium onion and mince two cloves of garlic. These veggies will add flavor and depth. Heat a splash of vegetable broth in a large pot over medium heat. Add the chopped onion and sauté it until it looks soft, about five minutes. Stir in the minced garlic and cook for another one to two minutes. Keep stirring to prevent the garlic from burning. Now, add your diced potatoes to the pot. Pour in the rest of the vegetable broth, making sure the potatoes are covered. Bring it to a boil, then lower the heat to a simmer. Let it cook uncovered for about 15 to 20 minutes. You want the potatoes to be tender. Once they are soft, use a potato masher or an immersion blender to mash the potatoes a bit. This will give your soup a nice texture while keeping some chunks. Next, stir in one cup of heavy cream or coconut cream for a dairy-free option. Bring the soup back to low heat. Add one cup of shredded cheddar cheese and mix until it melts. If you like, toss in some cooked bacon bits for extra flavor. Season with one teaspoon of paprika, salt, and pepper to taste. Let it simmer for five more minutes. This helps all the flavors blend perfectly. When you're ready to serve, ladle the soup into bowls. Top each bowl with a dollop of sour cream or Greek yogurt. Sprinkle chopped green onions and fresh parsley on top for color. This soup is perfect for a cozy night in or a gathering with friends. Enjoy every warm and creamy bite! To get that rich, creamy texture, use heavy cream or coconut cream. Both add smoothness. Stir them in at the end of cooking. This keeps the cream from curdling. Also, mash the potatoes partially. This gives you a nice mix of creamy and chunky. If you want it creamier, blend more of the soup. Just be careful not to over-blend. You want some potato pieces for texture. You can easily adapt this soup. For a dairy-free option, use coconut cream instead of heavy cream. Swap out sour cream for Greek yogurt for a healthier twist. If you want it vegetarian, skip the bacon. You can add more vegetables like carrots or celery for extra flavor and nutrition. Feel free to play with spices. A little chili powder or cumin can give it a nice kick. Serve this soup hot for the best taste. Top it with a dollop of sour cream or Greek yogurt. Add chopped green onions and fresh parsley for color and flavor. This soup goes great with crusty bread or a fresh salad. You can also pair it with a light sandwich. It makes for a cozy meal on a chilly day. Enjoy every spoonful! Pro Tips Choose the Right Potatoes: Russet potatoes are ideal for this soup due to their starchy texture, which helps create a creamy consistency. Enhance Flavor with Broth: Using vegetable broth instead of water adds depth and richness to the soup. You can also use homemade broth for even better flavor. Texture Matters: For a heartier soup, leave some potato chunks intact when mashing. This adds a delightful texture contrast to the creamy base. Garnish for Freshness: Fresh herbs like parsley and scallions not only enhance the presentation but also add a burst of fresh flavor that brightens the soup. {{image_2}} You can easily make a dairy-free version of this soup. Instead of heavy cream, use coconut cream. It gives the soup a rich texture without dairy. You also can substitute sour cream with Greek yogurt or a dairy-free yogurt alternative. This keeps the flavor creamy while being kind to those who avoid dairy. For more nutrition, add extra vegetables to your soup. Carrots and celery work well. Chop them finely and sauté with the onions. You can also add broccoli or spinach for a pop of color. These veggies will enrich the soup and add great taste without overpowering the classic flavor. If you love heat, try adding spices to your soup. A pinch of cayenne pepper or red pepper flakes can spice things up. You can also mix in some diced jalapeños for a kick. For an extra layer of flavor, consider using chipotle in adobo sauce. This will give your soup a smoky, spicy twist that is truly delightful. To store your Loaded Outback Potato Soup, let it cool first. Once cool, transfer it to an airtight container. Make sure to leave some space at the top. The soup can last for about 3 to 4 days in the fridge. Label the container with the date. This helps you keep track of its freshness. When you're ready to enjoy your leftover soup, pour it into a pot. Heat it over medium-low heat. Stir often to prevent sticking. If the soup seems too thick, add a splash of vegetable broth or water. You can also microwave it in a microwave-safe bowl. Heat it in short bursts, stirring in between. This ensures even warming. If you want to keep the soup longer, freezing is a great option. Use freezer-safe containers or bags. Pour the cooled soup inside, leaving some space for expansion. Label each container with the date and type of soup. The soup can last for 2 to 3 months in the freezer. To thaw, place it in the fridge overnight or use the microwave. Reheat as mentioned earlier. This way, you can enjoy a warm bowl anytime you wish! You can use several options instead of heavy cream. Coconut cream works well for a dairy-free choice. It adds a nice sweetness. You can also try half-and-half for a lighter option. For a low-fat choice, use whole milk mixed with a bit of flour. This helps thicken the soup and keeps it creamy. Yes, you can make this soup ahead of time. It keeps well in the fridge for up to three days. Just store it in a sealed container. When you're ready to eat, reheat it on the stove. Add a splash of broth if it thickens too much while sitting. If your soup turns out too thin, don't worry! You can thicken it easily. First, mash more potatoes into the soup. This adds body and texture. You can also mix a tablespoon of cornstarch with cold water, then stir it in. Let the soup simmer until it reaches your desired thickness. This blog offered a detailed guide on making Loaded Outback Potato Soup. We covered key ingredients, cooking steps, and helpful tips for perfect texture. You learned about variations to fit any diet and how to store leftovers properly. In my experience, this soup is a crowd-pleaser. Customize it to your taste and enjoy! With this recipe, impress friends and family at your next meal. Happy cooking!

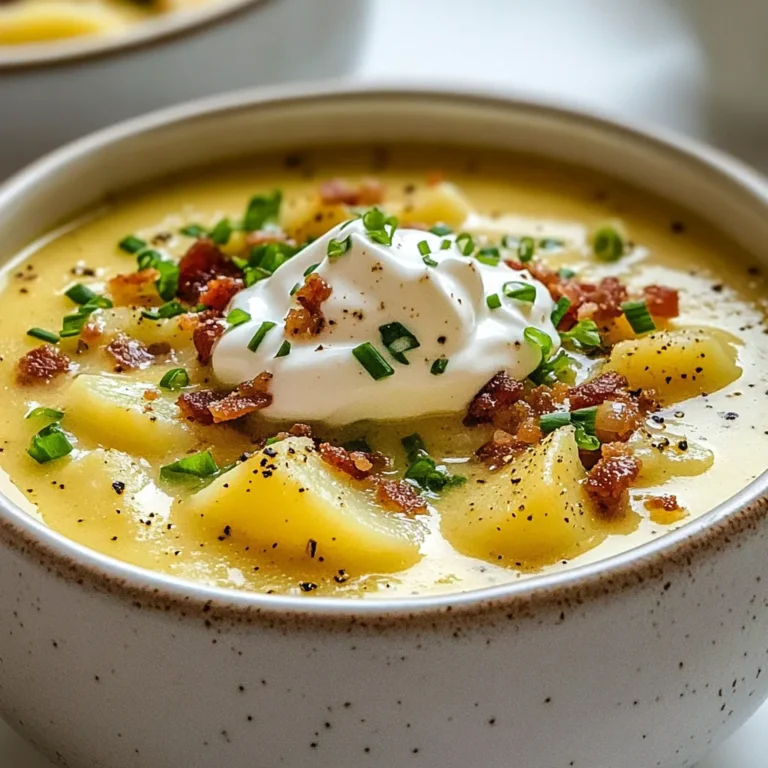
Loaded Outback Potato Soup Creamy and Hearty Delight

To make these delightful cookies, you will need: - 1 cup unsalted butter, softened - 3/4 cup powdered sugar - 1 teaspoon almond extract - 2 cups all-purpose flour - 1/2 teaspoon salt - 1/2 cup finely chopped almonds (for garnish) - 1/2 cup raspberry jam (or your favorite fruit jam) Each of these ingredients plays a key role. The butter gives a rich flavor and a soft texture. Powdered sugar helps create a sweet and melt-in-your-mouth feel. Almond extract adds a warm, nutty taste that pairs perfectly with raspberry. If you want to mix things up, you can try these options: - Swap raspberry jam for strawberry or apricot jam for a different flavor. - Use chopped walnuts or pecans instead of almonds for a unique crunch. - For a nut-free version, skip the nuts altogether or use seeds. These changes can add new twists to your cookies while keeping them delicious. You will need a few basic tools: - Mixing bowl - Electric mixer or whisk - Baking sheet - Parchment paper - Measuring cups and spoons - Tablespoon for rolling dough - Wire rack for cooling These simple tools will help you create perfect cookies every time. Having everything ready makes the process smooth and fun. {{ingredient_image_1}} Start by preheating your oven to 350°F (175°C). Line a baking sheet with parchment paper. This step helps the cookies not stick. In a mixing bowl, beat 1 cup of softened butter and 3/4 cup of powdered sugar together. Mix until light and creamy. Then, add 1 teaspoon of almond extract and blend until smooth. Next, slowly add 2 cups of all-purpose flour and 1/2 teaspoon of salt. Stir the mixture until a soft dough forms. Make sure that everything is well combined. Your dough should feel smooth and easy to handle. Take a tablespoon of dough and roll it into a ball. Place these balls on your baking sheet, leaving about 2 inches between them. Use your thumb or the back of a teaspoon to press down in the center of each ball. This creates a small well for the jam. Now, fill each well with about 1/2 teaspoon of raspberry jam. You can use any fruit jam you like, but raspberry adds a nice tartness. For added crunch and flavor, roll the edges of each cookie in 1/2 cup of finely chopped almonds. Bake your cookies in the preheated oven for 12 to 15 minutes. Look for lightly golden edges as a sign they are done. Once baked, take the cookies out of the oven. Let them cool on the baking sheet for 5 minutes. Then, transfer them to a wire rack to cool completely. Enjoy your delicious raspberry almond thumbprint cookies! To get the best texture for your cookies, use softened butter. Softened butter blends well with sugar, creating a light dough. Beat the butter and powdered sugar until creamy. This method adds air and makes cookies soft. Next, do not overmix the flour. Mix just until combined. Overmixing makes cookies tough. When you roll the dough into balls, keep them about two inches apart. This space allows them to spread and rise evenly. After baking, let the cookies cool on a wire rack. Once cool, store them in an airtight container. This keeps them fresh and soft. If you want to keep them longer, freeze them. Place them in a freezer-safe bag. They can last for up to three months in the freezer. These cookies are great for any occasion. Serve them with tea or coffee for a delightful treat. For a fun twist, pair them with a scoop of vanilla ice cream. You can also dress them up with a drizzle of chocolate on top. This adds a rich flavor that pairs well with raspberry and almond. Pro Tips Chill the Dough: Refrigerating the dough for at least 30 minutes before baking can help the cookies maintain their shape and create a more tender texture. Jam Alternatives: Feel free to experiment with different fruit jams such as apricot, blueberry, or even chocolate ganache for a unique twist on these cookies. Nut Variations: If you're not a fan of almonds, try using finely chopped walnuts or pecans for a different flavor that pairs wonderfully with the jam. Storage Tips: Store the cookies in an airtight container at room temperature for up to a week, or freeze them for longer-lasting freshness. {{image_2}} You can switch out raspberry jam for other jams. Try strawberry, apricot, or blueberry. Each jam brings unique flavors. You can even use lemon curd for a zesty twist. Just choose your favorite fruit spread. Fill the cookies as you normally would. Each choice will change the taste in a fun way. Almonds add a nice crunch to these cookies. However, you can use other nuts too. Try chopped walnuts, pecans, or hazelnuts. Each nut will give a different flavor and texture. Just make sure to chop them finely. Roll the cookie edges in your chosen nut before baking. It adds extra taste and looks great too. You can make these cookies vegan with a few easy swaps. Use vegan butter instead of regular butter. Replace powdered sugar with a plant-based option. To make them gluten-free, use a gluten-free flour blend. This way, everyone can enjoy these delicious treats. Just follow the same steps in the recipe. To keep your Raspberry Almond Thumbprint Cookies fresh, store them in an airtight container. This helps prevent them from drying out. Place parchment paper between layers to avoid sticking. You can keep them at room temperature for up to a week. If you want them to last longer, consider freezing them. To freeze your cookies, first let them cool completely. Then, place them in a single layer on a baking sheet. Freeze them for about an hour. Once frozen, transfer the cookies to a freezer-safe bag. Remove as much air as you can to prevent freezer burn. You can freeze these cookies for up to three months. Raspberry Almond Thumbprint Cookies stay fresh for about one week at room temperature. In the freezer, they last up to three months. For the best taste and texture, eat them within two months. Always check for any signs of spoilage before enjoying your cookies. Yes, you can use many types of jam for thumbprint cookies. Raspberry jam is a classic choice. However, you can swap it for strawberry, apricot, or even peach jam. Each jam adds its own unique flavor. Just make sure the jam is thick enough to hold its shape. To make your cookies softer or chewier, you have a few options. First, try adding an extra tablespoon of butter. This will help keep the cookies moist. You can also try baking them for a shorter time. Remove the cookies when they are just lightly golden. Lastly, store them in an airtight container to maintain their softness. Yes, you can easily make a larger batch of these cookies. Simply double or triple the ingredients. Make sure you have enough baking sheets for all the cookies. Keep an eye on the baking time, as larger batches may need a bit more time in the oven. Enjoy sharing these treats! Raspberry almond thumbprint cookies are fun and easy to make. We covered the key ingredients, tools, and step-by-step instructions to ensure you succeed. I shared tips for perfecting texture, storage, and serving ideas. You also learned about delicious variations and how to keep your cookies fresh. Remember, you can get creative with flavors and textures. Enjoy making these treats for yourself or to share. Happy baking!

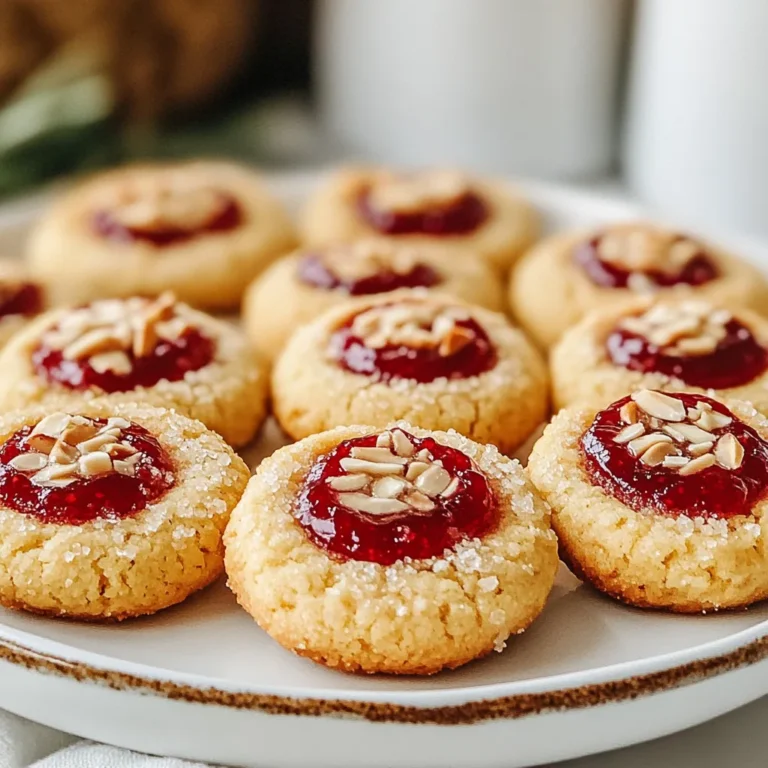
Raspberry Almond Thumbprint Cookies Delightful Treat

To make Spicy Sriracha Shrimp Lettuce Wraps, you need: - 1 lb shrimp, peeled and deveined - 1 tablespoon olive oil - 2 tablespoons Sriracha sauce (adjust for spice level) - 1 tablespoon honey - 2 cloves garlic, minced - 1 teaspoon grated ginger - 1 tablespoon soy sauce - 1 tablespoon rice vinegar - 1 cup shredded carrots - 1 red bell pepper, thinly sliced - 2 green onions, sliced - Fresh cilantro, for garnish - 1 head of butter or iceberg lettuce, leaves separated Each ingredient adds to the flavor and texture. The shrimp gives a nice protein base. Sriracha brings heat, while honey offers a touch of sweetness. You can customize these wraps easily. Try adding sliced cucumbers or diced avocado for extra crunch. Swap shrimp for cooked chicken or tofu for a different taste. If you want less heat, reduce the Sriracha. You can also use lime juice instead of rice vinegar for a tangy twist. Each serving of these wraps has about 250 calories. You get protein from the shrimp, fiber from the veggies, and healthy fats from the olive oil. This meal is low in carbs and packed with vitamins from the fresh ingredients. Enjoy a dish that is not only tasty but also good for you! {{ingredient_image_1}} To start, grab a large bowl. Place the peeled and deveined shrimp inside. Add one tablespoon of olive oil. Next, pour in two tablespoons of Sriracha sauce. If you like more heat, feel free to add more. Then, add one tablespoon of honey for sweetness. Toss in two minced garlic cloves and one teaspoon of grated ginger. Finally, stir in one tablespoon of soy sauce and one tablespoon of rice vinegar. Mix everything well to coat the shrimp. Let it marinate for about 15 to 20 minutes. This allows the shrimp to soak up all those bold flavors. Heat a large skillet over medium-high heat. Once it’s hot, add the marinated shrimp along with the marinade. Cook the shrimp for 3 to 4 minutes. Stir often until the shrimp turns pink and opaque. This means they are fully cooked. When done, remove the skillet from heat. Stir in one cup of shredded carrots and one thinly sliced red bell pepper. The heat will slightly soften the veggies, adding to the dish's freshness. Now it's time to build your wraps! Take a lettuce leaf from your head of butter or iceberg lettuce. Place a generous scoop of the spicy shrimp mixture in the center. Top it with sliced green onions and sprinkle fresh cilantro on top. Now, roll the lettuce leaf around the filling. Your spicy Sriracha shrimp lettuce wrap is ready to enjoy! To make these wraps just right, start with the Sriracha. I use two tablespoons for a good kick. If you want less heat, use one tablespoon. You can add more Sriracha later if needed. Remember, you can always add more spice, but can't take it away. Taste as you mix to find what you love. Cooking shrimp is quick and easy. Heat your skillet to medium-high before adding the shrimp. This helps get a nice sear. Cook them for just 3-4 minutes until they turn pink. Overcooking makes shrimp tough, so watch them closely. Stir often to cook evenly and keep them juicy. These wraps shine when served fresh. Use butter or iceberg lettuce for crispness. Top your wraps with sliced green onions and fresh cilantro for flavor. You can also add lime wedges for a zesty touch. These wraps make a great snack or light meal, perfect for any gathering. Pro Tips Perfectly Cooked Shrimp: Be careful not to overcook the shrimp. They should turn pink and opaque, which usually takes about 3-4 minutes. Remove them from heat as soon as they're cooked to avoid a rubbery texture. Adjusting Spice Level: If you're sensitive to spice, start with less Sriracha and taste as you go. You can always add more, but it’s hard to take it out once it’s in! Fresh Herbs Matter: For the best flavor, use fresh cilantro instead of dried. Fresh herbs elevate the dish and add a burst of flavor to each bite. Creative Wrapping: Experiment with different types of lettuce such as romaine or even collard greens for a unique wrap experience. Each type adds a different texture and flavor! {{image_2}} If shrimp isn't your thing, you can try other proteins. Chicken works great in this dish. Just cut it into small pieces and follow the same marinade steps. You can also use firm tofu for a tasty twist. Tofu absorbs flavors well and adds a nice texture. Just ensure you press it to remove excess water before cooking. For a vegetarian or vegan option, swap shrimp with chickpeas or lentils. Both options give a hearty bite while being plant-based. Use the same marinade to keep the flavor strong. You can also add more veggies, such as mushrooms or zucchini, to make it more filling. Experimenting with sauces can change the flavor profile. If you want something sweeter, try hoisin sauce instead of Sriracha. For a tangy kick, mix in some lime juice with soy sauce. You can also use a peanut sauce for a creamy texture that pairs well with the wraps. Each sauce gives a unique twist to your meal! To store leftover spicy Sriracha shrimp, first let it cool. Place the shrimp mixture in an airtight container. You can keep it in the fridge for up to three days. The shrimp stays juicy, and the flavors meld well. To keep the lettuce fresh, store it separately. Wrap the lettuce leaves in a damp paper towel. Then place them in a bag. This keeps them crisp and ready for your next meal. If you want to freeze the spicy Sriracha shrimp, you can do so! Allow the shrimp to cool completely. Transfer it to a freezer-safe bag. Remove as much air as possible. You can freeze it for up to three months. However, I recommend freezing only the shrimp mixture. The lettuce does not freeze well. It becomes limp and soggy after thawing. To reheat the shrimp, use a skillet for the best results. Place the shrimp in the skillet over medium heat. Stir gently until warmed through, about 5 minutes. You can also microwave the shrimp if you are in a hurry. Heat in short bursts of 30 seconds. Stir in between bursts to avoid overcooking. Always check the shrimp to ensure it is hot all the way through before serving. Yes, you can use frozen shrimp. Just make sure to thaw them first. Place them in cold water for about 15-20 minutes. Pat them dry before marinating. This helps the shrimp absorb the flavors well. Frozen shrimp are often just as tasty as fresh shrimp. You can add many vegetables to spice it up. Try cucumbers for crunch or bell peppers for sweetness. Shredded cabbage adds a nice bite too. You can even include diced avocado for creaminess. Feel free to mix and match as you like. To make this dish gluten-free, use tamari instead of soy sauce. Tamari is a great gluten-free option. Check labels on Sriracha and rice vinegar too. Some brands may contain gluten, so read carefully. With these swaps, you can enjoy these wraps worry-free. This blog post covered shrimp lettuce wraps, from ingredients to storage tips. I shared a detailed ingredient list, options for add-ins, and nutritional info. You learned how to make a tasty marinade, cook shrimp perfectly, and assemble your wraps. I also offered tips for spice levels and serving suggestions. Variations include different proteins and sauces. Lastly, I explained how to store leftovers and answered common questions. Enjoy making these wraps and feel free to adapt them to your taste!

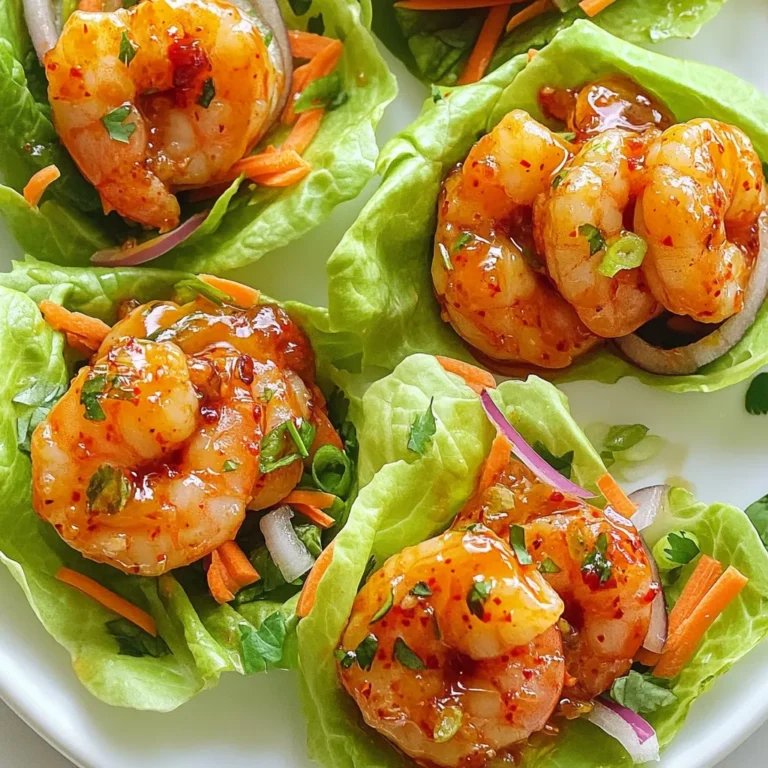
Spicy Sriracha Shrimp Lettuce Wraps Tasty and Fresh

- 2 cups shredded cooked chicken - 8 oz cream cheese, softened - 1/2 cup buffalo sauce (adjust to taste) - 1 cup shredded cheddar cheese - 1/2 cup sour cream - 1/4 cup green onions, chopped - Salt and pepper to taste Gathering the right ingredients is key to a great Keto Buffalo Chicken Dip. Start with cooked chicken, which you can shred yourself or buy pre-cooked. I often use rotisserie chicken for convenience. Next, make sure your cream cheese is softened. This helps it mix well with other ingredients. For the buffalo sauce, you can choose your favorite brand or even make your own. Adjust the amount based on how spicy you like it. Cheddar cheese adds a rich flavor and creamy texture. The sour cream makes the dip smooth and adds a nice tang. Finally, green onions give a fresh crunch and bright color. - Calories per serving: 220 - Carbohydrates per serving: 3g - Protein: 20g, Fat: 15g Each serving of this dip packs a punch in flavor and nutrition. With only 3 grams of carbs, it fits perfectly into a keto diet. You also get a good amount of protein and healthy fats, which help keep you full. This dip is not just tasty; it’s a smart choice too! {{ingredient_image_1}} - First, preheat your oven to 350°F (175°C). This will help cook the dip evenly. - In a large mixing bowl, take the softened cream cheese and buffalo sauce. Mix them until smooth. This makes a tasty base. - Next, add the shredded chicken, sour cream, and half of the cheddar cheese to the bowl. Stir until it blends well. - Season the mix with salt and pepper to taste. This adds flavor. - Now, transfer the dip into a baking dish. Spread it out evenly. - Sprinkle the rest of the cheddar cheese on top. This will create a nice cheesy crust. - Bake in the oven for 20-25 minutes. Look for it to be bubbly and the cheese to be melted. - Once it’s out of the oven, garnish with chopped green onions. They add a fresh touch. - Let the dip cool slightly before serving. This makes it easier to scoop. To get the best flavor, adjust the buffalo sauce to your taste. Start with half a cup, then add more if you want it spicier. This dip should match your heat level. It’s all about your preference! Make sure your cream cheese is softened. Cold cream cheese clumps and won’t mix well. Leave it out for about 30 minutes before you start. You can also microwave it for about 15 seconds. This helps you mix everything smoothly. Serve this dip with fresh sides for a great experience. Celery sticks and cucumber slices add crunch. Low-carb tortilla chips are perfect too. They hold up well to the creamy dip. For a fun presentation, arrange the sides around the dip. Use a colorful plate or dish. This makes it look more inviting. You can also sprinkle some extra green onions on top for a pop of color. Pro Tips Adjust the Heat: If you prefer a milder dip, reduce the amount of buffalo sauce or choose a milder variety. Make it Ahead: This dip can be prepared a day in advance. Just store it in the fridge and bake it when you're ready to serve. Experiment with Cheese: Try different types of cheese like pepper jack or mozzarella for a unique flavor twist. Garnish Creatively: Besides green onions, consider adding crumbled bacon or chopped cilantro for an extra layer of flavor. {{image_2}} You can switch up the cheese in this dip. Blue cheese adds a sharp taste. It pairs well with the spicy buffalo sauce. Mozzarella gives a milder flavor and a stretchy texture. Both options work well, so choose what you like best! Want to mix things up? You can add veggies like spinach or bell peppers. These add color and nutrients. You might also try spices like garlic powder or onion powder. A little heat from cayenne pepper can give it a nice kick! Do you prefer a milder dip? You can reduce the buffalo sauce. Start with 1/4 cup and taste as you go. If you love heat, feel free to add more. You can also include hot sauce on the side for guests to choose. This way, everyone gets their perfect flavor! After you enjoy your Keto Buffalo Chicken Dip, store any leftovers in a tight container. Make sure to let the dip cool to room temperature first. Place the dip in the fridge. It will stay fresh for up to five days. When you want to eat it again, just pull it out and warm it up. To reheat the dip, use the oven or microwave. For the oven, preheat it to 350°F (175°C). Place the dip in a baking dish and cover it with foil. Heat for about 15 to 20 minutes. In the microwave, use a microwave-safe bowl. Heat it in short bursts, stirring in between. This keeps the dip smooth and tasty. Yes, you can freeze this dip! To freeze, let it cool completely. Then, put it in a freezer-safe container. Make sure it is sealed well to avoid freezer burn. You can freeze it for up to three months. When you're ready to eat it, thaw it in the fridge overnight. Reheat it as mentioned above for the best results. Yes, Keto Buffalo Chicken Dip is quite healthy. It has low carbs and high protein. Here are the nutritional benefits of the ingredients: - Shredded cooked chicken: Great source of protein. It helps build muscle and keeps you full. - Cream cheese: Adds creaminess and healthy fats. It makes the dip rich and satisfying. - Buffalo sauce: Low in calories but packs flavor. It gives the dip a nice kick without extra carbs. - Cheddar cheese: Loaded with calcium and protein. It enhances taste and texture. - Sour cream: Adds creaminess and helps with digestion. It also balances the spice from the buffalo sauce. - Green onions: They add flavor and vitamins. They also make the dip look fresh and colorful. Yes, you can make this dip in advance. Here are some meal prepping suggestions: - Prepare the dip: Mix all the ingredients and place them in a baking dish. Cover it tightly with foil or plastic wrap. - Store in the fridge: Keep it in the fridge for up to two days before baking. This saves time on busy days. - Bake before serving: When ready, just pop it in the oven. Bake at 350°F for about 20-25 minutes until bubbly. If you want a change, you can use other proteins. Here are some alternatives: - Shredded turkey: Works great if you have leftovers. It has a similar taste and texture. - Ground beef or turkey: Cook it before adding to the dip. It gives a different but tasty flavor. - Pulled pork: A fun twist! It adds a sweet and smoky taste. - Chopped vegetables: For a vegetarian option, add cauliflower or zucchini. They absorb flavors well and keep it low-carb. This blog post covers a tasty buffalo chicken dip recipe, easy to follow and delicious. We shared ingredients, step-by-step instructions, and helpful tips for perfecting your dip. You can adjust spice levels and even try different cheeses. Storage and reheating ideas make it easy to enjoy leftovers. This dip is fun for any gathering and can fit various diets. Dive in, make this dip, and impress your guests with its flavor!

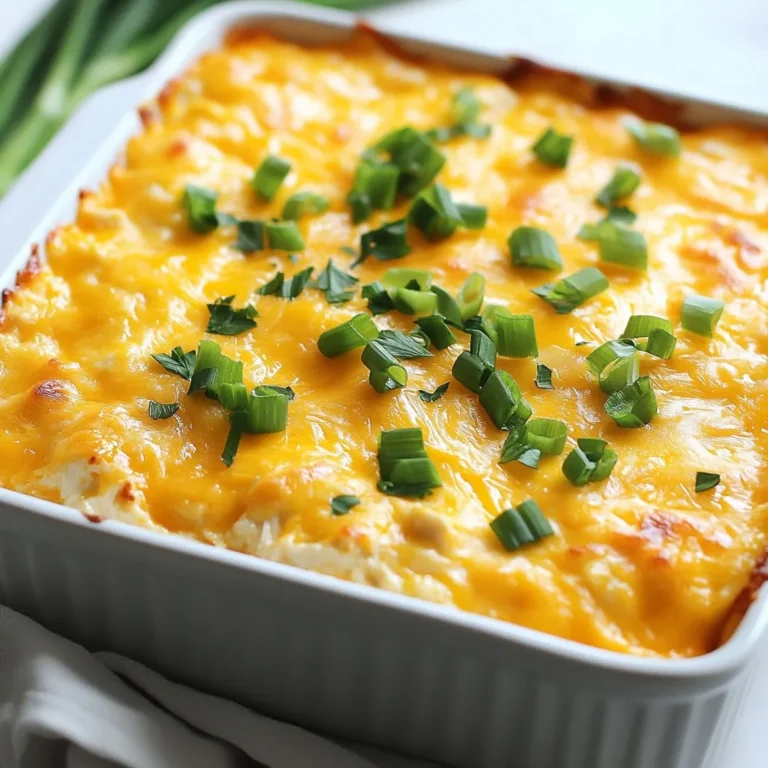
Keto Buffalo Chicken Dip Flavorful and Easy Recipe

- 4 large russet potatoes - 1 pound beef sirloin, thinly sliced - 1 tablespoon olive oil - 1 green bell pepper, sliced - 1 small onion, sliced - 2 cups shredded provolone cheese These ingredients are the heart of your Philly Steak Cheese Fries. The russet potatoes give you the perfect base. Their starchy texture turns crispy when baked. The beef sirloin is a must. It adds a rich, meaty flavor that pairs well with the cheese. Provolone cheese melts beautifully, creating a gooey layer on top. Fresh bell pepper and onion add color and sweetness. - 1 teaspoon garlic powder - Salt and pepper to taste - Optional seasoning suggestions Seasoning is key for flavor. Garlic powder adds a nice kick to the fries. Salt and pepper enhance all the ingredients. You can also mix in other spices like paprika or Italian herbs. These add depth and make your dish even tastier. Remember, seasoning helps bring all the flavors together! {{ingredient_image_1}} Start by preheating your oven to 425°F (220°C). This step is key for crispy fries. Next, wash the large russet potatoes. Slice them into thick fries. Place the fries in a bowl. Toss them with olive oil, garlic powder, salt, and pepper. Make sure they are evenly coated. Then, spread the fries out on a baking sheet in a single layer. This helps them cook well. Bake the fries for 30-35 minutes. Flip them halfway through. This way, they cook evenly. You want them golden brown and crispy. Once they are done baking, remove them from the oven and set them aside. Heat a tablespoon of olive oil in a large skillet over medium-high heat. Add the thinly sliced beef sirloin. Cook for about 3-4 minutes until it turns brown. Then, add the sliced green bell pepper and onion to the skillet. Cook for an additional 4-5 minutes. You want the veggies to be tender. Season the mixture with salt and pepper to taste. Now, layer the cooked fries on a large serving platter. Spoon the beef and vegetable mix evenly over the fries. Then, sprinkle shredded provolone cheese generously on top. Return the dish to the hot oven. Bake for another 3-5 minutes until the cheese melts and bubbles. Enjoy the delicious aroma filling your kitchen! To get fries just right, cut russet potatoes into thick sticks. This will help them cook evenly. Make sure the pieces are about the same size. After cutting, rinse them under cold water. This removes excess starch and helps them crisp up. When you bake the fries, toss them in olive oil, garlic powder, salt, and pepper. Spread them in one layer on a baking sheet. Bake at 425°F for 30-35 minutes. Flip them halfway through. This gives you golden-brown, crispy fries every time. Want to boost flavor? Try adding smoked paprika or cayenne pepper to the fries. Both add a nice kick. You can also use other cheeses. Cheddar, Gouda, or Monterey Jack work well. Mix and match for a fun twist! Pair your Philly Steak Cheese Fries with sauces. A side of ranch or spicy ketchup makes a great dip. You can also drizzle with sriracha for some heat. For plating, use a large serving platter. Layer the fries, then the beef and veggies. Top with cheese and fresh parsley. This makes your dish look colorful and inviting! Pro Tips Cut Uniformly: Ensure that the fries are cut into uniform thickness to promote even cooking and crispiness. Preheat Properly: Make sure your oven is fully preheated before baking the fries to achieve that perfect golden brown finish. High-Quality Cheese: Use fresh, high-quality provolone cheese for the best melting texture and flavor. Let It Rest: Allow the dish to rest for a couple of minutes after baking before serving to let the cheese set slightly. {{image_2}} You can make Philly Steak Cheese Fries with chicken or turkey. Just slice the meat thinly and cook it like beef. This swap gives you a lighter dish. For a meatless option, try mushrooms or tempeh. Both add texture and flavor without meat. They soak up the cheese and spices well. While provolone is classic, other cheeses can work too. Try cheddar for a sharp taste. Swiss cheese adds a nutty flavor. You can even mix cheeses for a unique blend. A combination of cheddar and mozzarella gives a rich, creamy melt. Get creative with your cheese choices! Add jalapeños for a spicy kick. Fresh mushrooms sautéed with the meat boost the umami flavor. You might love a dollop of sour cream on top for creaminess. Chopped green onions add a fresh crunch. These toppings make each bite exciting and full of flavor. To keep your Philly Steak Cheese Fries fresh, store any leftovers in the fridge. Use an airtight container to avoid drying out. Place the fries in one layer if possible. This helps keep them crispy. When you store the beef and cheese mix, keep it separate from the fries. This prevents sogginess and keeps the flavors fresh. To restore the fries' crispy texture, use the oven. Preheat it to 375°F (190°C). Spread the fries on a baking sheet. Heat for about 10-15 minutes until hot. If time is short, you can use a microwave, but it may make the fries soft. If you use the microwave, heat in short bursts to avoid overcooking. Yes, you can freeze Philly Steak Cheese Fries! To do this, let the dish cool completely. Place the fries and toppings in a freezer-safe container. Separate layers with parchment paper to avoid sticking. When you want to enjoy them again, defrost in the fridge overnight. Then, reheat in the oven for best results. This method keeps your fries tasty and enjoyable! Philly steak cheese fries are a tasty dish that mixes fries, beef, and cheese. This dish comes from Philadelphia, famous for its cheesesteaks. It combines crispy fries with savory beef sirloin, peppers, onions, and melted provolone cheese. The union of flavors makes this dish a crowd-pleaser. You get crispy, cheesy, and hearty all in one bite. Making Philly steak cheese fries takes about 50 minutes. You spend around 15 minutes preparing the ingredients, like washing and cutting the potatoes. Next, you bake the fries for 30-35 minutes until they are crispy. While the fries bake, you cook the beef and veggies for about 8-9 minutes. This dish comes together quickly, making it great for a weeknight dinner. Yes, you can prepare some parts of this dish ahead. Cut the potatoes and store them in water to keep them fresh. You can also cook the beef and veggies a day early. Just keep them in the fridge until you need them. When you are ready to eat, bake the fries, layer everything, and melt the cheese. - Best practices for storing: Store leftover fries in an airtight container. To keep them crispy, avoid stacking them. - Reheating tips: Reheat in the oven at 350°F (175°C) for about 10-15 minutes. This restores some crispiness and warmth. Philly Steak Cheese Fries combine crispy fries, savory beef, and melted cheese. You can personalize this dish with spices and toppings you love. Remember to follow the steps for perfect fries and ensure your leftovers stay fresh. This meal can be a fun family treat or a great party snack. Dive in and enjoy creating your own version of this classic dish!

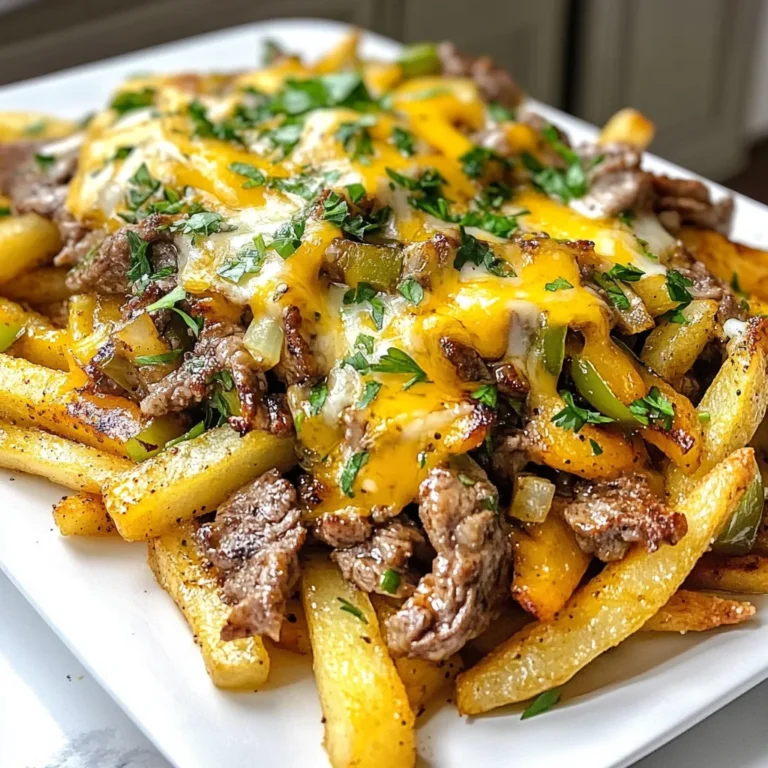
Philly Steak Cheese Fries Irresistible Flavor Delight

To make a tasty Healthy Enchilada Skillet, you need these key ingredients: - 1 tablespoon olive oil - 1 onion, diced - 2 cloves garlic, minced - 1 bell pepper, chopped (any color) - 1 zucchini, diced - 1 can (15 oz) black beans, rinsed and drained - 1 can (14 oz) diced tomatoes (fire-roasted preferred) - 2 tablespoons enchilada sauce (homemade or store-bought) - 1 teaspoon ground cumin - 1 teaspoon chili powder - Salt and pepper to taste - 1 cup corn (fresh or frozen) - 1 cup shredded low-fat cheese (cheddar or Mexican blend) - 1/4 cup fresh cilantro, chopped (for garnish) - 1 avocado, sliced (for serving) These ingredients come together to create a rich flavor. The beans add protein, while the veggies bring freshness. The spices give it that classic enchilada taste. You can switch up the recipe with these optional ingredients: - Jalapeños for heat - Corn tortillas, cut into strips - Different cheese, like pepper jack - Greek yogurt instead of sour cream - Lime juice for brightness Feel free to add or swap items based on what you like. This dish is flexible and fun to make! This dish is not just tasty; it's also good for you. Here are some highlights: - Black beans: High in fiber and protein, they help keep you full. - Zucchini: Low in calories and packed with vitamins, it adds nutrition. - Bell pepper: Rich in vitamins A and C, it boosts your immune system. - Corn: Provides fiber and adds a sweet flavor. - Avocado: Full of healthy fats, it promotes heart health. Using these ingredients makes your meal balanced and nutritious. You get a delicious mix of flavors and health benefits all in one skillet. {{ingredient_image_1}} To start, gather all your ingredients. You will need: - 1 tablespoon olive oil - 1 onion, diced - 2 cloves garlic, minced - 1 bell pepper, chopped (any color) - 1 zucchini, diced - 1 can (15 oz) black beans, rinsed and drained - 1 can (14 oz) diced tomatoes (fire-roasted preferred) - 2 tablespoons enchilada sauce (homemade or store-bought) - 1 teaspoon ground cumin - 1 teaspoon chili powder - Salt and pepper to taste - 1 cup corn (fresh or frozen) - 1 cup shredded low-fat cheese (cheddar or Mexican blend) - 1/4 cup fresh cilantro, chopped (for garnish) - 1 avocado, sliced (for serving) Next, chop your onion, bell pepper, zucchini, and garlic. This step makes cooking easier. Rinse and drain the black beans. These steps prepare you for quick cooking. Start by heating the olive oil in a large skillet over medium heat. Once the oil is hot, add the diced onion. Sauté for about 3-4 minutes until it softens. Then, stir in the minced garlic. Cook for another minute until it smells good. Add the chopped bell pepper and zucchini next. Cook these for 4-5 minutes until they begin to soften. This mix gives a nice base for your skillet. Now, mix in the black beans, diced tomatoes, and enchilada sauce. Add ground cumin, chili powder, salt, and pepper too. Stir it all well. Bring this mixture to a gentle simmer. Cook uncovered for about 8-10 minutes. This step allows the flavors to blend together. After that, stir in the corn and half of the shredded cheese. Make sure everything is evenly mixed. Sprinkle the rest of the cheese on top. Cover the skillet and cook for an additional 3-5 minutes. The cheese should melt nicely. To ensure even cooking, keep your heat at medium. Stir the mixture often, so nothing sticks or burns. If the skillet looks too dry, add a splash of water. This will help keep the mixture moist. Cut your veggies into similar sizes. This helps them cook evenly. Also, don’t rush the simmering step. Allowing time for the flavors to meld is key. Enjoy the process, and your Healthy Enchilada Skillet will turn out great! To make your Healthy Enchilada Skillet pop, focus on spices. You can add a pinch of smoked paprika for depth. A squeeze of fresh lime juice brightens the meal. Fresh herbs like cilantro add a burst of flavor, too. You can swap in a dash of hot sauce for some heat. If you need a gluten-free option, use gluten-free enchilada sauce. You can substitute black beans with pinto or kidney beans if you prefer. For a dairy-free version, try a plant-based cheese or skip the cheese altogether. If you want a low-carb meal, replace the corn with cauliflower rice. Serve your enchilada skillet in a colorful dish to make it pop. Top with avocado slices and fresh cilantro for a nice touch. You can also add a dollop of Greek yogurt or guacamole for creaminess. Pair it with a side salad or tortilla chips for a fun crunch. Enjoy this meal warm for the best taste! Pro Tips Use Fire-Roasted Tomatoes: Opting for fire-roasted diced tomatoes enhances the smoky flavor of your enchilada skillet, giving it an authentic taste. Customize Your Veggies: Feel free to substitute or add other vegetables like corn, spinach, or mushrooms based on your preference or what you have on hand. Control the Heat: If you like it spicy, consider adding chopped jalapeños or a pinch of cayenne pepper to the skillet for an extra kick. Make It Ahead: This dish can be prepared in advance and stored in the refrigerator. Simply reheat when ready to serve for a quick and easy meal. {{image_2}} You can easily make this dish vegetarian or vegan. For a vegetarian version, skip the cheese or use a low-fat cheese option. If you want a vegan option, use plant-based cheese or omit it altogether. You can add more veggies like spinach or mushrooms for extra flavor. These options keep the dish healthy and tasty. Adjusting the spice level is simple. If you like heat, add jalapeños or a pinch of cayenne pepper. If you prefer mild flavors, reduce the chili powder. You can also serve hot sauce on the side. This way, everyone can customize their plates to their taste. If you want to change the protein, try using lentils or chickpeas. Both options add great texture and nutrition. For a meat option, you can add cooked chicken or turkey. Another choice is to use tofu. It soaks up flavors well and makes the dish hearty. To keep your Healthy Enchilada Skillet fresh, let it cool first. Then, transfer it to an airtight container. Store it in the fridge for up to three days. If you want to keep it longer, consider freezing it. When you’re ready to eat leftovers, use the stove or microwave. On the stove, add a splash of water to keep it moist. Heat over medium heat until hot. In the microwave, cover it and heat in 30-second bursts until warmed through. For longer storage, freeze your skillet dish in a freezer-safe container. It can last for up to three months. When you want to enjoy it, thaw it overnight in the fridge. Then, reheat it as described above for the best taste. You can pair this skillet with many sides. I love serving it with brown rice or quinoa. A fresh salad with lime dressing also goes well. You can add tortilla chips for crunch. Sliced avocado adds creaminess and flavor. Absolutely! You can swap black beans for pinto or kidney beans. Any beans you like work great. For veggies, try corn, spinach, or mushrooms. Feel free to add more bell peppers too. This dish is flexible and fun! To make this dish gluten-free, use gluten-free enchilada sauce. Check labels to be sure. Most canned beans and veggies are gluten-free too. Avoid using regular tortillas, or opt for gluten-free ones instead. Enjoy it without worry! Each serving has about 300-350 calories. You get protein from beans and cheese. It also has healthy fats from the olive oil and avocado. This dish is high in fiber, thanks to beans and veggies. It's a balanced meal you can feel good about! In this article, we explored how to make a healthy enchilada skillet. We covered essential and optional ingredients, along with their nutritional benefits. I shared step-by-step instructions, tips for flavor enhancement, and various adaptations for different diets. Lastly, I provided storage tips and answered common questions. Making this dish can be fun and easy. Enjoy creating your own version of this delicious meal!

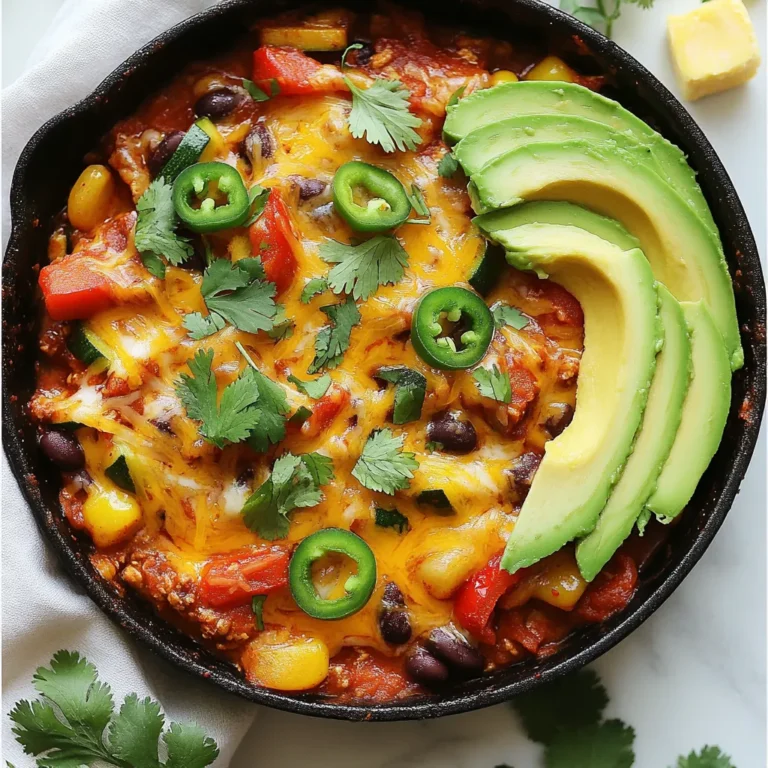
Healthy Enchilada Skillet Flavorful and Quick Meal

To make delicious spinach stuffed chicken breasts, gather these key ingredients: - 4 boneless, skinless chicken breasts - 2 cups fresh spinach, chopped - 1 cup ricotta cheese - ½ cup grated Parmesan cheese - ½ cup cream cheese, softened - 2 cloves garlic, minced - 1 teaspoon dried oregano - 1 teaspoon lemon zest - Salt and pepper to taste - 1 tablespoon olive oil - Toothpicks or kitchen twine for securing chicken You can add a twist to your dish with these options: - ¼ teaspoon red pepper flakes for heat - Fresh herbs like basil or parsley for brightness - Sun-dried tomatoes for a sweet, tangy flavor - A squeeze of fresh lemon juice for zest Seasoning is key to making your dish pop. I suggest: - A pinch of salt to enhance all flavors - Freshly ground black pepper for depth - Lemon zest to add a fresh note - Dried oregano for an earthy touch These ingredients work together to create a rich, creamy filling that complements the chicken. Each bite bursts with flavor, making this dish a favorite at any table. Adjust the seasonings and optional ingredients to suit your taste. Enjoy experimenting! {{ingredient_image_1}} Start by preheating your oven to 375°F (190°C). This step helps cook the chicken evenly. Next, take out a skillet and place it over medium heat. Add a tablespoon of olive oil to the pan. Once the oil is hot, toss in two cloves of minced garlic. Sauté the garlic until it becomes fragrant, which should take about one minute. Now, add two cups of chopped spinach to the skillet. Cook the spinach until it wilts, about two to three minutes. After that, remove the skillet from heat and let the mixture cool for a bit. In a mixing bowl, combine the wilted spinach with one cup of ricotta cheese, half a cup of grated Parmesan cheese, and half a cup of softened cream cheese. Mix in one teaspoon of dried oregano and one teaspoon of lemon zest for flavor. Don't forget to add salt and pepper to taste. If you like a bit of heat, throw in a quarter teaspoon of red pepper flakes. Stir everything together until it is well blended. This filling will bring life to your chicken breasts. Now, grab your four boneless, skinless chicken breasts. Use a sharp knife to carefully create a pocket in each breast. Make sure not to cut all the way through. This pocket will hold your flavorful filling. Generously stuff each chicken breast with the spinach mixture. Once filled, secure the openings with toothpicks or tie them with kitchen twine. This step keeps the delicious filling inside while cooking. Season the outside of each stuffed breast with salt and pepper. You're almost ready to cook! Look for chicken breasts that are firm and pink. The skin should be smooth and free of blemishes. Choose breasts that are even in size. This helps them cook evenly. Fresh chicken breasts feel moist but not slimy. Organic or free-range options often have better flavor. Searing the chicken first gives it a nice brown crust. Heat a skillet over medium-high heat. Add olive oil before placing the chicken in the pan. Cook the chicken for about 4-5 minutes on each side. Then, bake it in the oven to ensure it cooks through. Use a meat thermometer to check for 165°F. Let the chicken rest for five minutes after cooking. This keeps it juicy. Serve the stuffed chicken on a bed of mixed greens. This adds color and freshness. Drizzle some balsamic glaze on top for extra flavor. You can also add roasted vegetables on the side. Quinoa or rice works well for a complete meal. Pair it with a light white wine for a perfect touch. Pro Tips Choose Fresh Ingredients: Using fresh spinach and quality cheeses will enhance the flavor of your stuffing and overall dish. Secure Properly: Make sure to secure the chicken breast tightly with toothpicks or kitchen twine to prevent the filling from spilling out while cooking. Let It Rest: Allowing the chicken to rest for a few minutes after baking helps retain its juices, resulting in a more tender and flavorful meal. Experiment with Fillings: Feel free to add other ingredients like sun-dried tomatoes or mushrooms to the filling for a unique twist on this classic recipe. {{image_2}} You can change the cheese for different flavors. Instead of ricotta, try goat cheese. It adds a tangy taste. Cream cheese can be switched for mascarpone for a richer feel. For a sharper flavor, use feta cheese. Mix and match cheeses to find your favorite. You can add more veggies to the stuffing mix. Chopped mushrooms give a deep, earthy taste. Bell peppers add sweetness and color. Zucchini or artichokes can bring in unique textures. Just make sure to sauté them first so they soften. If you want to switch things up, use turkey breasts or pork tenderloin. They work well with spinach stuffing, too. For a vegetarian option, use large portobello mushrooms. They hold the stuffing nicely and offer a hearty bite. Adjust the cooking time based on your protein choice. After enjoying your spinach stuffed chicken breasts, let them cool first. Place leftovers in an airtight container. Store them in the fridge for up to three days. Make sure to label the container with the date. This helps keep track of freshness. To reheat, use the oven for best taste. Preheat it to 350°F (175°C). Place the chicken on a baking sheet. Cover it with foil to keep it moist. Heat for about 15-20 minutes. Check that the internal temperature reaches 165°F (74°C) before serving. If you want to freeze the chicken, wrap each piece in plastic wrap. Then, place them in a freezer-safe bag. Squeeze out the air to prevent freezer burn. Write the date on the bag. You can freeze them for up to three months. To thaw, move the chicken to the fridge overnight before reheating. Yes, you can prepare the spinach stuffed chicken breasts ahead of time. First, stuff the chicken and secure it. Cover and refrigerate them for up to 24 hours. When you’re ready to cook, just sear and bake as usual. This saves time on busy nights and makes dinner easy. You can serve many sides with spinach stuffed chicken breasts. Here are some great options: - Mixed greens salad: A fresh salad balances the meal. - Roasted vegetables: Carrots, zucchini, or bell peppers add color and flavor. - Quinoa or rice: These grains soak up the juices well. - Garlic bread: It’s a tasty treat with the meal. These sides make the dish even more enjoyable. To check if the chicken is done, use a meat thermometer. Insert it into the thickest part of the chicken. The internal temperature should reach 165°F (74°C). If you don’t have a thermometer, cut into the chicken. The meat should be white and the juices should run clear. If it's pink, it needs more time to cook. Always ensure your chicken is safe to eat. This guide covered how to make delicious stuffed chicken breasts. You learned about ingredients, preparation, cooking steps, and storage. Choosing the right chicken and seasonings is key for flavor. Don't hesitate to try new variations with cheese or veggies. And remember, proper storage helps you enjoy leftovers later. With these tips, you'll impress family and friends every time. Get cooking and enjoy your tasty meal!

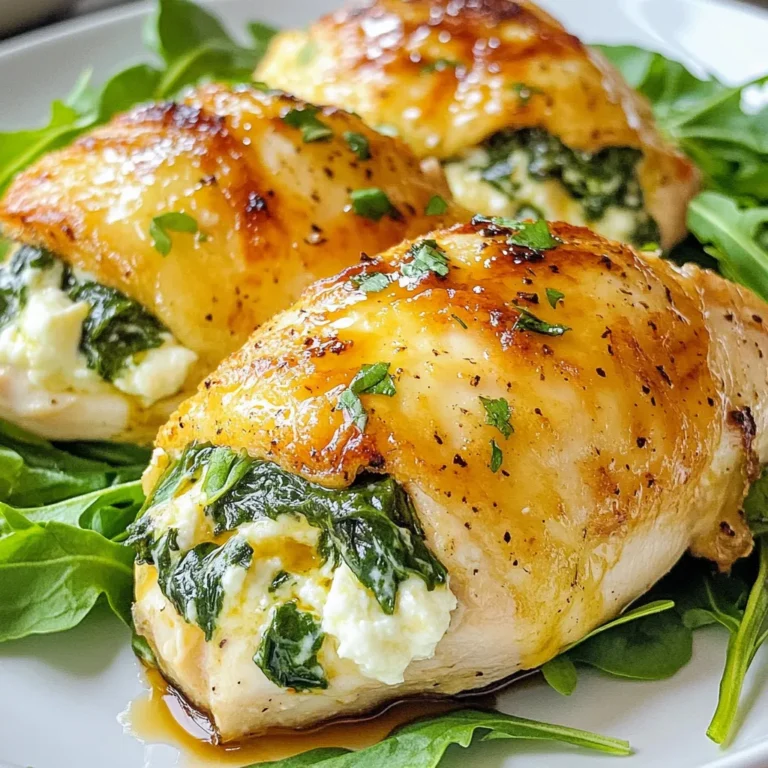
Spinach Stuffed Chicken Breasts Flavorful and Simple

PREV 1 … 83 84 85 86 NEXT
secrets pice kitchen

explore

DessertsDinnerAppetizersDrinks

Our Policies

  • Cookie Policy
  • Copyright Policy
  • Disclaimer
  • GDPR Policy
  • Terms Of Use
Back to Top
  • About
  • Contact Us
  • Privacy Policy
© 2026 secrets pice kitchen