FREE DINNER EBOOK! Get your copy!
  • Cookie Policy
  • GDPR Policy
  • Disclaimer
  • Terms Of Use
  • Visit my other site: Fun Cookie Recipes
secrets pice kitchen
  • Home
  • Dinner
  • Desserts
  • Drinks
  • Appetizers
  • Contact
  • About
  • Privacy Policy
  • Home
  • Dinner
  • Desserts
  • Drinks
  • Appetizers
  • Contact
  • About
  • Privacy Policy
  • Cookie Policy
  • GDPR Policy
  • Disclaimer
  • Terms Of Use
Visit my other site: Fun Cookie Recipes

HOME / CATEGORIES /

Latest

To make spicy garlic ramen noodles, you will need: - 4 packs of instant ramen noodles (any flavor) - 4 tablespoons soy sauce - 2 tablespoons sesame oil - 6 cloves garlic, minced - 1 tablespoon ginger, grated - 1-2 teaspoons red pepper flakes (adjust to taste) - 1 cup vegetable broth - 1 cup mixed vegetables (bell peppers, carrots, green onions) - 2 teaspoons sugar - 1 tablespoon rice vinegar - Sesame seeds for garnish - Chopped green onions for garnish These ingredients blend well, creating a rich and spicy flavor. Not all ingredients have to be the same. You can swap items based on what you have: - Instant ramen noodles: Use any flavor or even fresh noodles if you prefer. - Soy sauce: Tamari or coconut aminos work well for a gluten-free option. - Vegetable broth: Chicken broth adds a deeper taste, but use any broth you like. - Mixed vegetables: Feel free to use frozen vegetables or any favorites you have on hand, like broccoli or snap peas. These substitutes keep the dish tasty and flexible for your needs. Choosing the right instant ramen can elevate your dish. Here are a few trusted brands: - Nissin Top Ramen: A classic choice with many flavors. - Maruchan Ramen: Widely available and offers various tastes. - Samyang Ramen: Known for its spicy options, perfect for those who like heat. These brands provide quality noodles that will work well in your spicy garlic ramen. Start by boiling water in a large pot. Use enough water to cover the noodles well. Once the water boils, add the instant ramen noodles. Cook them according to the package instructions, which is usually about 3-4 minutes. After cooking, drain the noodles in a colander and set them aside. This step is key for a good texture. In the same pot, heat 2 tablespoons of sesame oil over medium heat. Add 6 cloves of minced garlic and 1 tablespoon of grated ginger. Sauté them for about 1-2 minutes until they smell amazing. The garlic and ginger add a rich flavor to the dish. Next, stir in 1-2 teaspoons of red pepper flakes and 1 cup of mixed vegetables. Cook everything for 3-4 minutes. You want the veggies to be tender but still colorful. Now, pour in 1 cup of vegetable broth, 4 tablespoons of soy sauce, 2 teaspoons of sugar, and 1 tablespoon of rice vinegar. Mix well and let it simmer for 3-5 minutes. This helps the flavors blend together. After that, gently add the cooked ramen noodles back into the pot. Toss them carefully to coat them in the sauce. Cook for another 2-3 minutes so everything is hot. Taste it and adjust if you need more soy sauce or red pepper flakes. This step ensures the dish is just right for your taste. To boost the taste of your spicy garlic ramen, you can add more garlic. Fresh garlic gives a strong taste. You might also try using low-sodium soy sauce. This keeps the flavors rich but not too salty. Adding a squeeze of lime juice can brighten the dish. It adds a fresh zing that pairs nicely with garlic. You can also sprinkle in some sesame seeds for crunch. These small touches can make a big difference. To adjust the heat, start with one teaspoon of red pepper flakes. This gives a mild kick. Taste, then add more if you want it spicier. You can also use fresh chili peppers. Slice them thin and toss them in with the garlic and ginger. If the dish gets too hot, add sugar. Sugar balances the heat and adds sweetness. Remember, you control how spicy your ramen can be! When cooking vegetables, cut them into small, even pieces. This helps them cook at the same rate. Add them to the pot after the garlic and ginger are fragrant. Stir often to keep them from burning. Cook until they are bright and tender. This usually takes about 3-4 minutes. Keeping the colors vibrant makes your dish look great. Don't overcook them; you want them to stay crunchy! {{image_2}} You can easily make this dish vegetarian or vegan. Start with vegetable broth. Use soy sauce that is labeled vegan. For a richer taste, add mushrooms or tofu. They soak up the flavor well. Green peas and bok choy also add nutrients and color. This way, you keep it healthy and tasty. Want to boost the protein? Add cooked chicken or tofu. For chicken, use grilled or rotisserie for ease. Dice it into bite-sized pieces and mix it in. If using tofu, press it to remove water, then cube it. Sauté it until golden before adding. Both options make your meal more filling. You can change the flavor with miso or coconut. For miso, stir in a tablespoon when adding the broth. It gives a rich umami taste. For coconut flavor, swap half the broth for coconut milk. This adds a creamy texture and a hint of sweetness. These changes keep the dish exciting and new. To store leftover spicy garlic ramen, let it cool first. Place it in an airtight container. This will keep the flavors fresh and tasty. Store it in the fridge for up to three days. Remember to cover it well to avoid drying out. You can freeze spicy garlic ramen, but it's best to freeze the broth and noodles separately. Let the ramen cool completely. Place the noodles in a freezer bag, squeezing out air. Pour the broth into a container or bag, too. It will last in the freezer for about a month. When you're ready to eat, thaw them in the fridge overnight. To reheat ramen, first, separate the noodles and broth. Heat the broth in a pot over medium heat. Once hot, add the noodles. Stir gently for one to two minutes. If the noodles seem dry, add a splash of water or broth. This keeps the noodles soft and tasty. Enjoy your ramen just like it was fresh! Yes, you can use fresh ramen noodles. Fresh noodles cook faster than instant ones. Adjust your cooking time accordingly. Typically, fresh noodles need only 2-3 minutes in boiling water. They will give your dish a great texture. To lower the spice level, reduce the red pepper flakes. Start with just half a teaspoon. You can also add more sugar or a splash of coconut milk. This helps balance the heat. Adding more vegetables can also tone down the spice. Common garnishes for ramen include: - Sesame seeds - Chopped green onions - Nori (seaweed) strips - Soft-boiled eggs - Pickled ginger These add flavor and make your dish look great. Try different combinations to find your favorite! You learned about the key ingredients for ramen and how to use them. We discussed cooking steps, tips to boost flavor, and many tasty variations. Storing leftovers and reheating gives you more options. With these ideas, you can make ramen that suits your taste. Enjoy experimenting and creating your perfect bowl!

Spicy Garlic Ramen Noodles Flavorful and Easy Recipe

- 1 lb ground chicken - 1 tablespoon olive oil - 1 small onion, finely chopped - 2 cloves garlic, minced - 1 cup heavy cream - 1 cup grated Parmesan cheese - 1 teaspoon Italian seasoning - Salt and pepper to taste - 4 whole wheat hamburger buns - Fresh parsley, chopped (for garnish) For this Chicken Alfredo Sloppy Joe recipe, you need simple yet tasty ingredients. Ground chicken is the star here. It cooks quickly and is juicy. Olive oil adds richness and helps with cooking. The onion and garlic bring depth to the flavor. Heavy cream and Parmesan cheese create a creamy sauce. They blend well to give a rich taste. Italian seasoning adds herbs that make the dish lively. Don’t forget salt and pepper! These seasonings balance the flavors. Lastly, use whole wheat hamburger buns for a healthy touch. They hold the filling well and add a nice texture. Fresh parsley gives a pop of color and flavor. Together, these ingredients make a dish you will love. {{ingredient_image_1}} Sautéing the Onion and Garlic Start by heating olive oil in a large skillet over medium heat. Add the finely chopped onion. Sauté the onion until it becomes soft and translucent, which takes about 4-5 minutes. After that, stir in the minced garlic and cook for 1-2 minutes. You want the garlic to smell great but not burn. Cooking the Ground Chicken Next, add 1 pound of ground chicken to the skillet. Cook the chicken, breaking it apart with a spoon as it cooks. Keep cooking until the chicken is browned and no longer pink, which should take about 7-8 minutes. This step is key for a tasty base. Adding Heavy Cream Once the chicken is fully cooked, reduce the heat to low. Pour in 1 cup of heavy cream. Stir it well to mix it with the chicken. This will create a rich and creamy base for your sauce. Incorporating Parmesan Cheese Gradually sprinkle in 1 cup of grated Parmesan cheese while stirring constantly. This helps the cheese melt into the sauce. Add 1 teaspoon of Italian seasoning, along with salt and pepper to taste. Let the mixture simmer for 2-3 minutes until it thickens slightly. The sauce should be creamy and full of flavor. Toasting the Buns While the sauce simmers, take 4 whole wheat hamburger buns and lightly toast them. You can do this on a skillet or under a broiler until they are golden brown. Toasted buns add a nice crunch to your meal. Serving Suggestions Once everything is ready, serve the chicken Alfredo mixture generously on the toasted buns. For a fresh touch, sprinkle chopped parsley on top. Enjoy your savory Chicken Alfredo Sloppy Joes! Using Fresh Herbs Fresh herbs can boost the flavor of your Chicken Alfredo Sloppy Joes. I like to use parsley or basil. Chop them finely and sprinkle them in right before serving. This adds a bright taste and a pop of color. Adjusting Creaminess If you want a creamier sauce, add more heavy cream. Start with a little and stir well. You can also mix in an extra sprinkle of Parmesan cheese. This will make your dish richer and more flavorful. Sauce Too Thick or Thin If the sauce is too thick, add a splash of chicken broth. Stir well to loosen it up. For a thin sauce, let it simmer longer to thicken. Keep an eye on it so it doesn't burn. Chicken Not Cooking Evenly To cook chicken evenly, break it apart as it cooks. Use a wooden spoon to stir often. This helps it brown all over. If you see any pink, keep cooking until it's fully done. Pro Tips Use Fresh Ingredients: Fresh garlic and herbs can elevate the flavor of your Chicken Alfredo Sloppy Joes, making them more aromatic and delicious. Customize the Sauce: Feel free to add in your favorite vegetables like spinach or mushrooms for added nutrition and flavor. Keep the Buns Toasted: A lightly toasted bun not only enhances the texture but also prevents it from getting soggy from the creamy sauce. Serve Immediately: These Sloppy Joes are best enjoyed fresh off the stove while the sauce is creamy and the buns are warm. {{image_2}} You can mix in some veggies to make this dish even better. Spinach adds a nice touch. It wilts down and blends well with the sauce. Mushrooms are also great. They add texture and a rich flavor. You can sauté them with the onions for a tasty base. Peppers bring color and crunch. Red or yellow peppers add sweetness. Chop them up and toss them in while cooking the chicken. This adds a burst of flavor and makes your meal more colorful. If you want to change the meat, ground turkey works well. It is lean and cooks in the same way as chicken. Ground beef is another good choice. It gives a richer taste, perfect for beef lovers. For a vegetarian option, try using lentils or black beans. They add protein and fiber. You can also use crumbled tofu or tempeh for a meaty feel without meat. These swaps keep the meal hearty and satisfying. To keep your Chicken Alfredo Sloppy Joes fresh, store leftovers properly. Place them in an airtight container. This helps maintain flavor and texture. I recommend refrigerating them within two hours of cooking. How long does it last in the fridge? Properly stored, they can last up to three days. Just make sure to check for any changes in smell or texture. You can also freeze Chicken Alfredo Sloppy Joes. To freeze, let the mixture cool down first. Then, transfer it to a freezer-safe container. Make sure to label it with the date. When you are ready to eat, thaw it in the fridge overnight. To reheat, warm it on the stove over low heat. Stir occasionally to ensure even heating. Best practices for storage include using freezer bags, as they save space. Remove as much air as possible to avoid freezer burn. With these steps, you can enjoy your delicious meal later! Chicken Alfredo Sloppy Joes are a fun twist on the classic Sloppy Joe. This dish combines ground chicken with a creamy Alfredo sauce. The mix sits on warm, toasted buns. The idea is simple yet tasty. You get comfort food with a gourmet touch. This dish has roots in American cooking but takes flavor hints from Italian cuisine. It’s a great meal for busy nights when you want something special. Yes, you can make Chicken Alfredo Sloppy Joes in advance. This meal is perfect for meal prep. Just cook the chicken and sauce as normal. Let the mix cool, then store it in the fridge. You can keep it for up to four days. When you’re ready to eat, reheat the mix in a pan. Toast the buns fresh for the best taste. This way, you save time but still enjoy a tasty meal. If you want to add heat, there are easy ways to do it. You can add red pepper flakes to the sauce. Start with a small amount, like half a teaspoon. Stir it in and taste. You can also use spicy sausage instead of ground chicken. For more heat, try adding sliced jalapeños on top when serving. These tweaks give you a spicy kick without changing the dish too much. Enjoy discovering your perfect heat level! In this post, we explored how to make Chicken Alfredo Sloppy Joes. First, we gathered our key ingredients, like ground chicken, heavy cream, and seasonings. Then, I showed you the step-by-step process from sautéing onions to toasting buns. We also discussed tips for enhancing flavor and solving common issues. You can even try variations like using different proteins or adding vegetables. Remember to store leftovers properly to enjoy later. Now, it’s your turn to make this tasty meal your own!

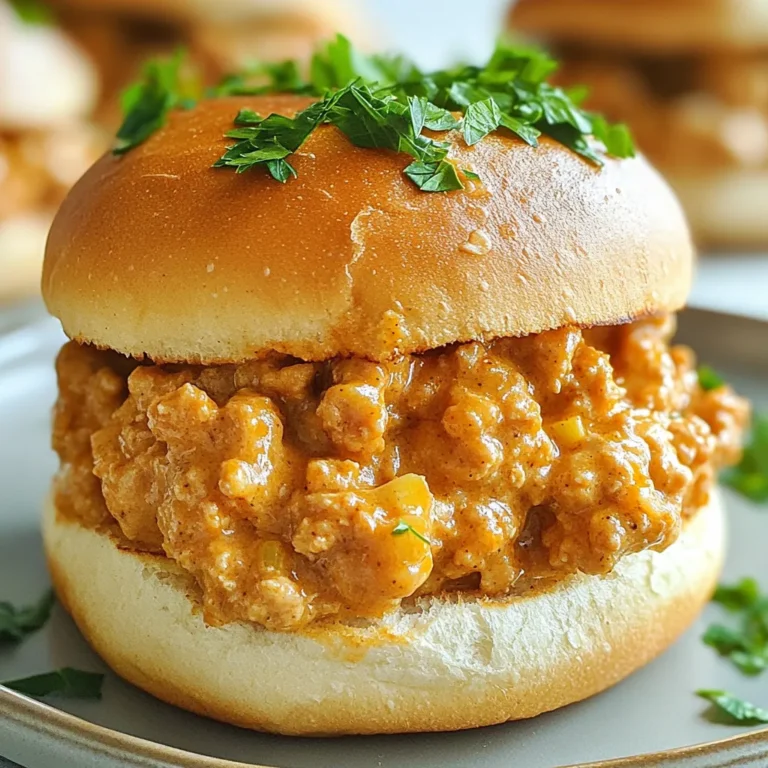
Chicken Alfredo Sloppy Joes Savory and Simple Meal

- 1 cup unsalted butter, softened - 1 cup brown sugar, packed - 1 cup granulated sugar - 2 large eggs - 1 teaspoon vanilla extract - 2 cups all-purpose flour - 1/2 teaspoon salt - 1 teaspoon baking powder - 1 cup semi-sweet chocolate chips - 1 cup chopped pecans (or walnuts) - 1 cup caramel sauce (store-bought or homemade) Using quality ingredients makes a big difference in taste. Fresh butter adds rich flavor. Brown sugar gives a nice depth. Eggs provide structure and moisture. Good chocolate chips melt smoothly, creating a perfect gooey texture. Fresh nuts add crunch and flavor. Using homemade caramel sauce can elevate your bars even more. This care ensures your turtle bars taste fantastic. You can easily adapt this recipe for different diets. If you need it dairy-free, use vegan butter and dairy-free chocolate chips. For a nut-free version, skip the nuts or use seeds instead. If you want a gluten-free option, try using a gluten-free flour blend. These simple swaps allow everyone to enjoy these tasty treats. {{ingredient_image_1}} Start by setting your oven to 350°F (175°C). This heat will help the bars bake evenly. Next, grab a 9x13-inch baking pan. Grease it well with butter or line it with parchment paper. This makes it easy to take out the bars later. In a big mixing bowl, add 1 cup of softened unsalted butter. Then, add 1 cup of packed brown sugar and 1 cup of granulated sugar. Use an electric mixer to combine them. Mix for about 3 to 4 minutes. You want it light and fluffy. Next, add 2 large eggs, one at a time. Mix well after each egg. Finally, stir in 1 teaspoon of vanilla extract until everything is blended. In another bowl, whisk together 2 cups of all-purpose flour, 1/2 teaspoon of salt, and 1 teaspoon of baking powder. Gradually add this dry mix to the wet ingredients. Mix just until combined. Be careful not to over-mix. Gently fold in 1 cup of semi-sweet chocolate chips and 1 cup of chopped pecans. Reserve a bit of each for the top if you want. Spread half of the batter into the prepared pan. Bake this layer for 15 minutes. Take it out and drizzle half of the caramel sauce over it. Spoon dollops of the remaining batter on top. It’s fine if some caramel shows. Bake again for 20 to 25 minutes. The top should be golden brown. Use a toothpick to check if it comes out clean. As soon as the bars are done, drizzle the rest of the caramel sauce on top. Add the reserved chocolate chips and pecans. Let the bars cool in the pan on a wire rack before you cut them into squares. To get the best texture, focus on mixing. Cream the butter and sugars well. This step adds air and makes the bars fluffy. Mix until light and fluffy, about three to four minutes. Don’t over-mix after adding flour; stop once combined. This keeps the bars soft. Store any leftover turtle bars in an airtight container. Keeping them sealed helps maintain their freshness. You can store them at room temperature for up to five days. For longer storage, place them in the fridge. They will last up to two weeks in the fridge. Get creative with toppings to boost flavor. Drizzle extra caramel sauce on top for a sweet treat. A sprinkle of sea salt contrasts well with the caramel. You can also add a dusting of powdered sugar for a sweet touch. Consider using chopped nuts for a crunch. Pro Tips Use Room Temperature Ingredients: Ensure your butter and eggs are at room temperature for better mixing and a fluffier texture. Customize Your Nuts: Feel free to substitute pecans with walnuts or even almonds for a different flavor profile! Watch the Baking Time: Keep an eye on the bars towards the end of baking; they can go from perfect to overbaked quickly. Cool Completely: Allow the bars to cool completely in the pan before cutting to achieve clean, even squares. {{image_2}} If you want to make nut-free turtle bars, it's easy! Just skip the pecans or walnuts. You can replace them with crispy rice cereal. This gives a nice crunch without adding nuts. Another option is to use sunflower seeds. They add a bit of texture and flavor. Your turtle bars will still taste great! You can mix up the chocolate you use in the bars. If you prefer dark chocolate, swap the semi-sweet chips. Dark chocolate adds a rich taste. For a sweeter option, use milk chocolate chips. You could even try white chocolate for a fun twist. Each choice gives a unique flavor to your turtle bars. Seasonal flavors can make your turtle bars special. In fall, add a pinch of cinnamon to the batter. This gives a warm spice that pairs well with caramel. In summer, mix in fresh berries like raspberries or strawberries. They add a burst of flavor and color. You can experiment with different flavors to keep the recipe fresh! To keep your turtle bars fresh, store them in an airtight container. This helps prevent them from drying out. Place parchment paper between layers to avoid sticking. Store at room temperature for up to five days. If you need to keep them longer, freezing is a great option. To freeze turtle bars, cut them into squares first. Place the squares in a single layer on a baking sheet. Freeze for about two hours until solid. Then, transfer them to a freezer-safe bag or container. They can last for up to three months in the freezer. Just thaw them in the fridge before serving. If you want a warm treat, reheat the bars in the oven. Preheat the oven to 300°F (150°C). Place the bars on a baking sheet and warm them for about 10 minutes. You can also use the microwave. Heat a single bar for about 15-20 seconds. Enjoy them warm for that gooey caramel experience! Yes, you can make Turtle Bars ahead of time. Bake them, let them cool, and store them. Keep the bars in an airtight container. They will stay fresh for up to a week at room temperature. If you want to keep them longer, freeze them. Just wrap them well in plastic wrap and foil. When ready to eat, let them thaw at room temperature. If you want a substitute for caramel sauce, try using dulce de leche. It has a similar rich flavor. You can also make your own caramel sauce if you prefer. Just cook sugar and water until it turns golden, then add cream. Maple syrup can work too but will change the taste a bit. You will know the bars are done when the top turns a nice golden brown. A toothpick inserted in the center should come out clean. If it has wet batter on it, bake for a few more minutes. Keep an eye on them to avoid overbaking. Enjoy the lovely smell while they bake! In this post, I covered key ingredients, prep steps, and helpful tips for making Turtle Bars. Quality ingredients matter. This ensures great taste and texture. I also shared options for different diets and fun flavor twists. Remember to store leftovers wisely and follow my reheating tips for the best results. With these ideas, you can create bars that everyone will love. Enjoy your baking and make it your own!

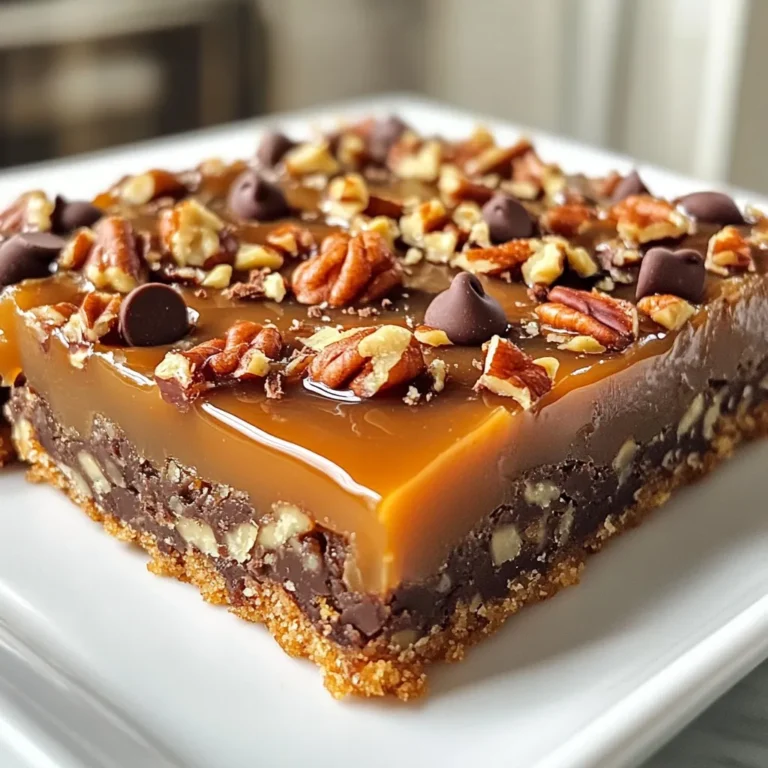
Easy Turtle Bars Delightful and Simple Treat Recipe

- 1 pound chicken thighs, boneless and skinless - 1 cup pineapple chunks (fresh or canned) - 1 bell pepper, sliced (red or yellow) - 1 medium red onion, chopped - ¼ cup teriyaki sauce - 2 tablespoons olive oil - 2 cloves garlic, minced - 1 tablespoon fresh ginger, grated - Salt and pepper to taste - Sesame seeds for garnish - Green onions, sliced for garnish This dish is all about fresh, vibrant flavors. The chicken thighs bring rich taste and tenderness. Pineapple adds a sweet twist that balances the savory teriyaki sauce. I love using bell peppers and red onions for color and crunch. The teriyaki sauce is key here. It gives the dish that classic Asian flavor. I prefer a low-sodium option to keep the dish lighter. Olive oil adds a nice richness and helps with cooking. Garlic and ginger bring warmth and depth. Make sure to have salt and pepper on hand. They help enhance all the flavors. For garnishes, sesame seeds and green onions add a lovely touch. They also give a little extra crunch and brightness to the dish. Gather these ingredients, and you’re on your way to a tasty meal that’s easy to make and hard to resist! 1. Preheat your oven to 400°F (200°C). Line a large sheet pan with parchment paper. This helps keep it clean. 2. In a large bowl, mix the teriyaki sauce, olive oil, minced garlic, and grated ginger. Add salt and pepper to taste. Stir until blended. 3. Add the chicken thighs to the bowl. Make sure they are well coated in the marinade. Let them sit for 10-15 minutes to soak up the flavors. 1. While the chicken marinates, prepare the vegetables. In another bowl, toss together the pineapple chunks, sliced bell pepper, and chopped red onion. This adds color and taste to your dish. 1. Once the chicken is ready, place it in the center of the prepared sheet pan. Surround it with the pineapple and vegetable mixture. 2. Drizzle any extra marinade from the chicken over the vegetables. This boosts the flavor. 3. Bake in the preheated oven for 25-30 minutes. The chicken is done when it reaches an internal temperature of 165°F (74°C) and the vegetables are tender. 4. For a crispy finish, turn the oven to broil for the last 2-3 minutes. Watch closely to avoid burning. 5. Remove from the oven and let it rest for a few minutes. Sprinkle sesame seeds and sliced green onions on top before serving. Enjoy your tasty meal! To ensure your chicken is tender, use boneless, skinless thighs. They stay juicy and cook evenly. Marinate them for at least 10-15 minutes. This helps the flavors soak in well. If you forget to marinate, don’t worry! Just add some extra teriyaki sauce while cooking. For perfect vegetable texture, cut them into similar sizes. This way, they cook evenly. I love using red bell peppers and onions for their sweetness. Pineapple adds a nice burst of flavor and texture too. To enhance flavors, marinate your chicken longer when you can. An hour or more makes a big difference. If you have time, try marinating overnight in the fridge. Always use fresh garlic and ginger for the best taste. They bring out the teriyaki sauce's depth. Serve the dish hot right from the sheet pan. It looks rustic and inviting. For a tasty side, add jasmine rice or quinoa. This makes the meal more filling. Garnishing adds a nice touch. Sprinkle sesame seeds and sliced green onions on top. They add color and crunch. You can also serve with lime wedges for a zesty kick! {{image_2}} You can easily change the protein in this dish. Try using chicken breast or tofu for a plant-based option. Both work well with teriyaki sauce. For vegetables, feel free to mix it up. Broccoli, zucchini, or snap peas add great color and crunch. Use what you have on hand for a fun twist. Want to spice things up? Add red pepper flakes or a pinch of cumin to the marinade. These add warmth and depth to the dish. You can also explore different sauces. Swap teriyaki for hoisin sauce or soy sauce. Each offers a unique flavor profile that keeps this meal exciting. If you need a gluten-free option, choose gluten-free teriyaki sauce. Many brands offer great alternatives that taste just as good. For a low-carb version, skip the pineapple. Instead, add cauliflower rice on the side. This keeps the dish light but still delicious. To keep your Sheet-Pan Teriyaki Chicken & Pineapple fresh, follow these tips: - Refrigerator: Store leftovers in an airtight container. They will stay good for up to three days. Make sure to cool the dish before sealing it. This helps keep out moisture. - Freezing: If you want to save it longer, freeze the leftovers. Place them in freezer-safe bags or containers. They can last for up to three months. When ready to eat, let them thaw in the fridge overnight. Reheating your dish right can make it taste great again. Here are some methods: - Oven: Reheat in the oven at 350°F (175°C) for 15-20 minutes. This keeps the chicken juicy and the veggies crisp. Cover it with foil to prevent drying out. - Microwave: Use a microwave-safe dish and cover it. Heat in short bursts of one minute, stirring in between. This helps heat evenly. To ensure flavor retention, add a splash of fresh teriyaki sauce before reheating. This keeps the dish moist and tasty. How do I know when the chicken is done? The chicken is done when it reaches an internal temperature of 165°F (74°C). You can use a meat thermometer to check this. The juices should run clear. This dish cooks for 25-30 minutes in the oven. Can I use frozen chicken for this recipe? Using frozen chicken is okay, but it may change the cooking time. Make sure to thaw the chicken first for even cooking. If you cook it from frozen, add extra time and check that it reaches 165°F (74°C). What can I serve with Sheet-Pan Teriyaki Chicken? This dish pairs well with jasmine rice or quinoa. You can also serve it with steamed broccoli or a fresh salad for a balanced meal. Is this dish healthy? Yes, this dish can be healthy. It includes lean protein from the chicken and vitamins from the veggies. The pineapple adds natural sweetness and fiber. How many calories are in Sheet-Pan Teriyaki Chicken & Pineapple? One serving has about 350 calories. This can vary based on portion size and added sides. Can I make this in a slow cooker? Yes, you can use a slow cooker. Cook on low for 4-6 hours or on high for 2-3 hours. Add the pineapple and veggies halfway through for best results. How can I make it spicier? To add heat, you can include crushed red pepper flakes or sriracha in the marinade. Adjust to your taste for an extra kick! This blog post covered delicious sheet-pan teriyaki chicken. You learned about key ingredients like chicken thighs, pineapple, and bell peppers. The prep steps guide you through marinating and baking for tender, tasty meals. I shared tips for perfect textures and gave you ideas for variations to meet dietary needs. You’ll also know how to store leftovers and reheat them well. Enjoy this simple, healthy dish that you can adapt! Cooking can be fun, and with these steps, you can impress anyone at your table.

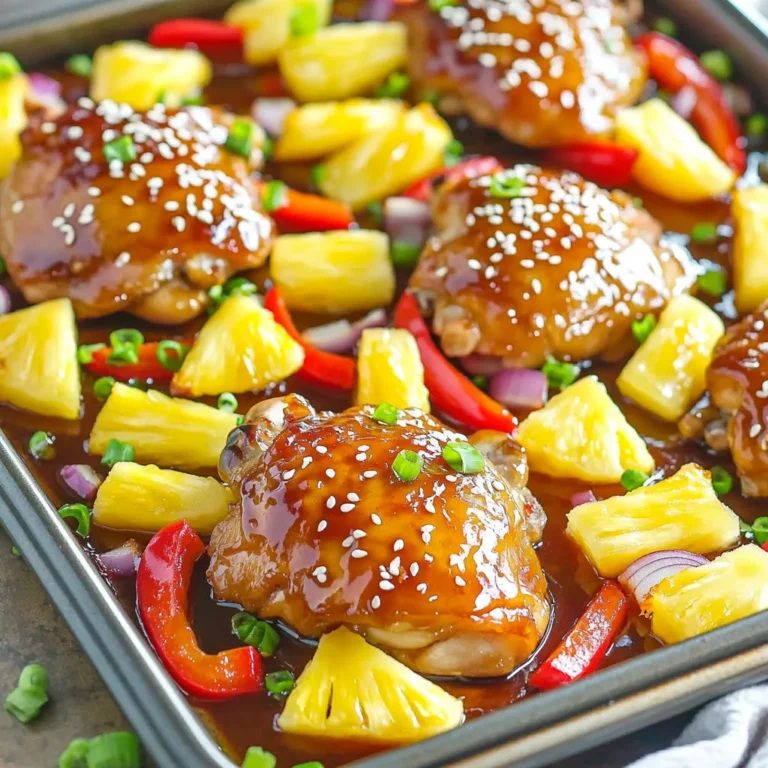
Irresistible Sheet-Pan Teriyaki Chicken & Pineapple Dish

- 1 cup pumpkin puree - 1/2 cup unsweetened cocoa powder - 1/2 cup all-purpose flour - 3/4 cup granulated sugar - 1/2 cup brown sugar, packed - 1/2 cup unsalted butter, melted These main ingredients create the rich base for your brownie loaf. The pumpkin puree adds moisture and flavor. The cocoa powder gives it the deep chocolate taste we crave. Granulated sugar and brown sugar work together for sweetness and depth. All-purpose flour binds the batter, while melted butter adds richness. - 1/2 cup chocolate chips - 1/2 teaspoon pumpkin pie spice - 1 teaspoon vanilla extract Adding chocolate chips brings extra chocolatey goodness. Pumpkin pie spice gives a hint of fall warmth. Vanilla extract enhances the flavors and adds a lovely aroma. - 1 teaspoon baking powder - 1/2 teaspoon salt - Parchment paper Baking powder helps the loaf rise, giving it a soft texture. Salt balances the sweetness and enhances the flavors. Parchment paper makes removal easy and keeps the loaf intact. Each ingredient plays a vital role in making your Pumpkin Chocolate Swirl Brownie Loaf a delicious treat. These choices blend to create a moist, flavorful loaf you will love. First, preheat your oven to 350°F (175°C). This step ensures even baking. Next, take a 9x5-inch loaf pan and grease it well. Line the bottom and sides with parchment paper. This will help you remove the loaf easily later. In a large mixing bowl, combine 1/2 cup of melted unsalted butter, 3/4 cup of granulated sugar, and 1/2 cup of brown sugar. Mix these ingredients until they are well blended. Then, add 3 large eggs, 1 teaspoon of vanilla extract, and 1 cup of pumpkin puree. Stir the mixture until it becomes smooth and creamy. In a separate bowl, whisk together 1/2 cup of all-purpose flour, 1/2 cup of unsweetened cocoa powder, 1 teaspoon of baking powder, 1/2 teaspoon of salt, and 1/2 teaspoon of pumpkin pie spice. This mix adds great flavor. Gradually fold the dry ingredients into the wet mixture. If you want, you can add 1/2 cup of chocolate chips for extra richness. Pour half of the brownie batter into the prepared loaf pan. Spread it out evenly. Then, add about 1/2 cup of pumpkin puree on top of the brownie layer. Use a knife to swirl it gently for a marbled look. Next, pour the rest of the brownie batter on top and smooth it out. Optionally, you can swirl the top again for a decorative effect. Bake it in the preheated oven for 45-50 minutes. Check for doneness by inserting a toothpick in the center; it should come out with a few moist crumbs. - To keep your loaf moist, do not overbake. Check it with a toothpick after 45 minutes. If it comes out with a few moist crumbs, it’s done. - Use room temperature eggs and melted butter for a smooth batter. This helps blend the ingredients well. - To prevent a dense loaf, mix the wet and dry ingredients just until combined. Overmixing can lead to toughness. - Serve slices on a rustic wooden board. It adds charm and looks inviting. - Dust the top with powdered sugar for a sweet touch. - For extra delight, add a dollop of whipped cream or a scoop of vanilla ice cream on the side. - If your loaf is too dry, try adding a bit more pumpkin puree next time. This will boost moisture. - If it’s too moist, check your oven temperature. An oven that’s too cool can cause excess moisture. - For flavor balance, taste the batter before baking. Add more cocoa powder or spices if needed. {{image_2}} You can boost the flavor of your pumpkin chocolate swirl brownie loaf easily. Adding spices like cinnamon or nutmeg will bring warmth. A hint of ginger can also give a nice twist. Try mixing in nuts such as walnuts or pecans for crunch. Dried fruits like cranberries or cherries can add sweetness and texture. Just remember, balance is key when mixing flavors. If you need a gluten-free option, use almond flour or coconut flour. Both work well in this recipe. Just keep in mind that they may change the loaf's texture slightly. For a vegan version, swap the eggs with flax eggs. Mix 1 tablespoon of flaxseed meal with 2.5 tablespoons of water for each egg. Replace butter with coconut oil or applesauce for a moist loaf. You can switch pumpkin with sweet potatoes or apples. Both options will keep the loaf moist and add natural sweetness. This makes it fun for different seasons. For holidays, you can add festive spices like allspice or cloves to enhance the flavor. Tailoring the recipe for different occasions can make it more special. To store your Pumpkin Chocolate Swirl Brownie Loaf at room temperature, let it cool completely first. Then, wrap it in plastic wrap or foil. Store it in a cool, dry place. Make sure it stays away from direct sunlight. This helps keep the loaf moist and fresh. Using airtight containers works best for preserving the loaf's flavor and texture. You can also slice the loaf and store the pieces separately. This way, you can grab a slice whenever you want a treat. For long-term storage, freezing is a great option. First, wrap the loaf tightly in plastic wrap. Then, place it in a freezer-safe bag or container. This keeps out air and prevents freezer burn. Label the bag with the date. To thaw, move it to the fridge the night before you plan to eat it. If you're in a hurry, you can leave it at room temperature for a couple of hours. Reheat slices in the microwave for about 10-15 seconds. This brings back that warm, fresh-baked taste. How long will your loaf last? When stored at room temperature, it should stay good for about 3-4 days. If you keep it in the fridge, it can last up to a week. Signs of spoilage include a dry texture or an off smell. If you see mold, it’s time to toss it out. Always trust your senses; when in doubt, throw it out. Enjoy every slice while it’s fresh! To make this recipe gluten-free, swap out regular flour for gluten-free flour. You can use almond flour, coconut flour, or a store-bought gluten-free blend. Each option adds its own flavor and texture. Almond flour gives a nutty taste, while coconut flour absorbs more moisture. If you use coconut flour, reduce the amount slightly. Yes, you can use canned pumpkin puree. It saves time and is easy to find. Canned pumpkin is smooth and consistent. Fresh pumpkin can taste richer, but canned works well too. Just make sure to choose pure pumpkin, not pumpkin pie filling, for best results. If you want dairy-free options, try using dark chocolate chips or carob chips. You can also chop dark chocolate bars for a similar effect. If you want to skip chocolate altogether, try adding nuts like walnuts or pecans for added crunch. Yes, you can make this recipe ahead of time. Bake the loaf and let it cool completely. Then, wrap it tightly in plastic wrap or foil. Store it at room temperature for up to three days. For longer storage, freeze it for up to three months. Just thaw it overnight in the fridge before serving. Slice the loaf and arrange it on a rustic wooden board for a lovely presentation. Dust with powdered sugar for a touch of sweetness. Add a small dollop of whipped cream or a scoop of vanilla ice cream on the side for extra indulgence. Enjoy it with a warm cup of coffee or tea for a cozy treat. This blog post presented a delicious Pumpkin Chocolate Swirl Brownie Loaf. We covered key ingredients, prep steps, and tips for the best results. Remember, using fresh or canned pumpkin and exploring flavors can elevate your loaf. Don't forget how to store it for the long haul to keep it tasty. With these insights, you can bake a crowd-pleaser. Enjoy impressing friends and family with your baking skills!

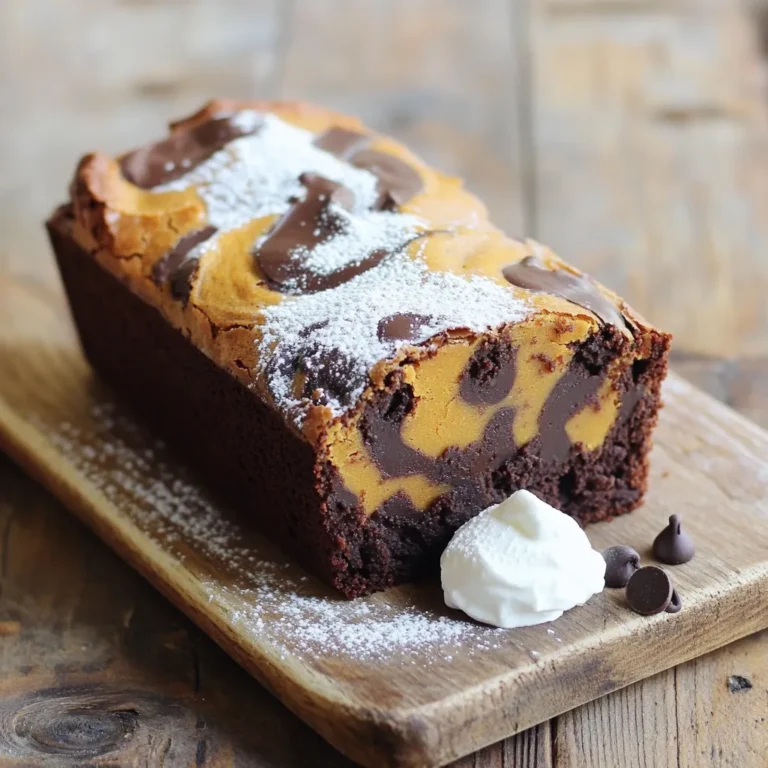
Pumpkin Chocolate Swirl Brownie Loaf Delight Recipe

For these garlic shrimp tacos, you need: - 1 lb large shrimp, peeled and deveined - 4 cloves garlic, minced - 2 tablespoons olive oil These ingredients create a tasty base for the dish. The large shrimp add a nice bite. Minced garlic brings in a wonderful aroma and flavor. Olive oil helps to cook the shrimp and adds richness. To boost the flavor, gather: - 1 teaspoon smoked paprika - 1 teaspoon cumin - 1 teaspoon chili powder (optional) Smoked paprika gives a warm, smoky flavor. Cumin adds an earthy taste that pairs well with the shrimp. If you like heat, chili powder can spice things up. To finish your tacos, prepare: - 1 cup red cabbage, thinly sliced - 1 avocado, sliced - Fresh cilantro, for garnish - ½ cup sour cream or Greek yogurt Red cabbage adds a crunchy texture and vibrant color. Sliced avocado brings creaminess to each bite. Fresh cilantro gives a pop of freshness. Sour cream or Greek yogurt adds a tangy touch to the tacos. These toppings make every bite exciting and delicious! - Gather your marinade ingredients: shrimp, garlic, olive oil, smoked paprika, cumin, lime juice, salt, and pepper. - In a medium bowl, add the shrimp. Then, mix in minced garlic, olive oil, smoked paprika, cumin, lime juice, salt, and pepper. - Toss the shrimp until they are well coated. Let them marinate for 15-20 minutes. This makes the shrimp full of flavor. - Heat a large skillet over medium-high heat. You want it hot for best results. - Add the marinated shrimp to the hot skillet. Cook them for 2-3 minutes on each side. They will turn pink and opaque when done. - Avoid overcrowding the pan. Cook the shrimp in batches if needed. This helps them cook evenly. - In another pan, warm the corn tortillas over medium heat. Heat them for about 30 seconds on each side. They should be soft and pliable. - To assemble the tacos, place a few shrimp on each tortilla. - Add sliced red cabbage, avocado slices, and a drizzle of sour cream or Greek yogurt. - Finish with fresh cilantro. If you enjoy spice, sprinkle some chili powder on top. Enjoy every bite! To make great garlic shrimp tacos, it is key to avoid overcooking the shrimp. Cook them just until they turn pink. This takes about 2-3 minutes per side. Overcooked shrimp can become tough. Marinating the shrimp is also important. Use a mix of garlic, olive oil, and spices. Let them sit for 15-20 minutes. This allows the flavors to soak in. If you can, marinate them longer for even more flavor. For the best taste, I recommend using four cloves of garlic. This amount gives a strong garlic flavor without being too much. If you love garlic, feel free to add more. You can also mix in some extra spices. A teaspoon of chili powder can add heat. You might try adding fresh herbs or a pinch of cayenne for a kick. When plating your tacos, stack them neatly on a plate. Use a clean white plate to make the colors pop. Add a sprinkle of fresh cilantro on top for a vibrant look. For garnish, slice lime wedges and place them on the side. This gives a fresh touch. You can also include extra avocado slices for a creamy bite. {{image_2}} You can swap shrimp for other seafood. Try scallops or fish like tilapia. If you want a meat option, chicken works well too. You can also use tofu for a plant-based choice. For toppings, get creative! Instead of red cabbage, use shredded lettuce or slaw. Add mango salsa for a sweet touch. You could also try a spicy sauce like chipotle mayo. If you love heat, add jalapeños or a dash of hot sauce. You can mix chili powder with smoked paprika for a deeper flavor. Try adding cayenne or a pinch of crushed red pepper. This gives the tacos a nice kick. You can also try infused oils, like chili oil, for a unique twist. For a vegetarian taco, use black beans or grilled veggies. Zucchini, bell peppers, and corn work great. You can also use lentils for protein. For toppings, use avocado, salsa, or a zesty lime crema. These options keep the tacos tasty and hearty without meat. To keep your garlic shrimp tacos fresh, store leftovers in the fridge. Place the shrimp, toppings, and tortillas in separate containers. Use airtight containers to prevent moisture loss. This helps maintain flavors and textures. - Shrimp: Store in a sealed container for up to 2 days. - Tortillas: Wrap in foil or plastic wrap to avoid drying out. - Toppings: Keep red cabbage, avocado, and cilantro in airtight containers. When you want to enjoy your tacos again, reheating is key. For shrimp, warm them gently in a skillet. Heat them on low to avoid overcooking. Stir them often, so they warm evenly. To keep tortillas soft, wrap them in a damp paper towel. Microwave them for about 15-20 seconds. This helps them stay pliable and ready for your delicious shrimp. Enjoy your meal! The best shrimp for tacos are large, peeled, and deveined. Look for shrimp that are fresh and firm. You can use frozen shrimp too; just thaw them in cold water. Fresh shrimp adds a great taste. Yes, you can make parts of these tacos ahead. Marinate the shrimp a few hours in advance. You can also slice the toppings earlier. Just store them in the fridge until you’re ready to eat. Yes, garlic shrimp tacos can be gluten-free. Use corn tortillas, as they are naturally gluten-free. Always check the labels to ensure no gluten ingredients are included in your toppings. To make a simple sauce, mix sour cream with lime juice and a pinch of salt. You can add chopped cilantro for extra flavor. This sauce pairs well with the garlic shrimp and adds a nice creaminess. This blog post covered how to make delicious shrimp tacos from scratch. We talked about key ingredients like shrimp, garlic, and olive oil. Then, we walked through marinating and cooking the shrimp. I shared tips for perfecting flavor and plating your tacos nicely. Remember, you can swap ingredients and even make a vegetarian version. Store leftovers properly and reheat with care. Enjoy making these tacos and impressing your friends and family! Tasty meals like these bring joy to everyone.

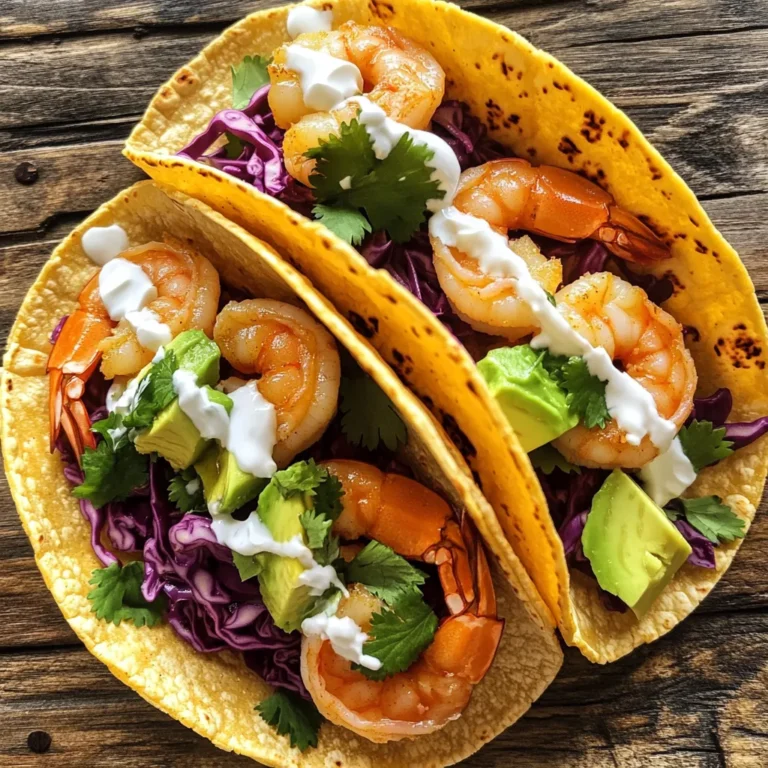
Garlic Shrimp Tacos Flavorful and Easy Recipe

- 1 can of refrigerated cinnamon roll dough (8 rolls) - 1 cup apple butter - 1 tablespoon ground cinnamon - 1/4 cup brown sugar - 1/2 cup chopped walnuts (optional) - 1/4 cup vanilla icing (from the cinnamon roll package) - 1 tablespoon butter, for greasing the skillet - Fresh apple slices and extra walnuts for garnish To make this dish, you will need a few tools: - A 10-inch cast iron skillet - A small bowl for mixing - A medium bowl for tossing - A butter knife or spoon for spreading - An oven mitt for safety You can get creative with your apple butter cinnamon roll skillet! Try adding: - Raisins or dried cranberries for sweetness - A dash of nutmeg for warmth - A sprinkle of powdered sugar on top - Whipped cream for a special touch - Extra fresh apple slices for color and crunch Start by preheating your oven to 375°F (190°C). This is key for even baking. While the oven heats, take a 10-inch cast iron skillet and grease it with 1 tablespoon of butter. This step helps prevent sticking. Make sure to coat the bottom and sides well. In a small bowl, combine 1/4 cup of brown sugar with 1 tablespoon of ground cinnamon. Stir them together until mixed well. This mixture will add a sweet and spicy kick to your rolls. Set this aside for later. Open the can of refrigerated cinnamon roll dough. You will find 8 rolls inside. Cut each roll into quarters. Toss these pieces in the cinnamon sugar mixture until they are well coated. Now, take half of the apple butter and spread it evenly on the bottom of your greased skillet. Next, arrange the coated cinnamon roll pieces in a circular pattern on top of the apple butter. Leave a little space between each piece for even cooking. Spoon the rest of the apple butter over the cinnamon roll pieces. Make sure to cover them well. If you want, you can sprinkle chopped walnuts on top. Now, place the skillet in the preheated oven. Bake for 20-25 minutes, or until the rolls turn golden brown. Once baked, take the skillet out and let it cool for a bit. Drizzle the vanilla icing from the package over the warm rolls. For a nice touch, garnish with fresh apple slices and extra walnuts. Enjoy your delicious apple butter cinnamon roll skillet! To keep your cinnamon rolls from sticking, grease your skillet well. Use one tablespoon of butter. Spread it evenly across the bottom and sides. This step is key for easy serving later. If you want even more assurance, you could use parchment paper. Just cut it to fit the bottom of the skillet. For the best bake, preheat your oven to 375°F (190°C). This ensures an even cook. Bake your cinnamon rolls for 20 to 25 minutes. Look for a golden brown color on top. If you have a toothpick, test the center for doneness. It should come out clean. Let it cool slightly before drizzling icing on top. To boost the flavor, mix in more spices. A dash of nutmeg or allspice can add warmth. You can also add chopped walnuts for a nice crunch. If you like a sweeter taste, drizzle more icing over the top. Fresh apple slices as garnish add both color and flavor. These small changes make the dish even more exciting. {{image_2}} You can switch up the apple butter for other fruit spreads. Try using pumpkin butter for a fall twist. Peach preserves add a sweet flavor that pairs nicely with cinnamon. Berry jams can also work, giving a fresh and tart taste. Each option brings a new vibe to the dish. If you want to change the dough, consider using biscuit dough. It gives a flaky texture that contrasts with the sweet filling. Croissant dough can add a buttery, rich flavor that is hard to resist. You can even use gluten-free dough for a tasty alternative without the gluten. To make this dish nut-free, simply skip the walnuts. You can use seeds like sunflower seeds or pumpkin seeds for a crunch. This way, you keep the texture while making it safe for those with nut allergies. You can also add extra fruit slices for added flavor and texture. To keep your Apple Butter Cinnamon Roll Skillet fresh, let it cool first. Then, cover it tightly with plastic wrap or foil. You can also place it in an airtight container. Store it in the fridge for up to three days. This way, you can enjoy it later without losing flavor. When you're ready to eat the leftovers, preheat your oven to 350°F (175°C). Place the skillet in the oven for about 10-15 minutes. This warms it up and keeps the rolls soft. If you're in a hurry, you can use the microwave. Heat in short bursts of 30 seconds, checking often. You can freeze the Apple Butter Cinnamon Roll Skillet too! First, let it cool completely. Wrap the skillet tightly with plastic wrap, then with aluminum foil. This helps prevent freezer burn. You can freeze it for up to three months. When you're ready to eat, thaw it in the fridge overnight before reheating. Enjoy this treat anytime! Yes, you can use homemade cinnamon roll dough. It adds a personal touch. Just ensure the dough is soft and easy to shape. Roll it out and cut it into pieces like store-bought dough. I love the taste of homemade dough. It can make this recipe even more special. To make this dish ahead, prepare it the night before. You can assemble the cinnamon rolls in the skillet. Cover the skillet with plastic wrap and place it in the fridge. When ready to bake, remove the wrap and let it sit for about 20 minutes. Then, bake as directed. This saves time on busy mornings. If you don't have apple butter, try other fruit spreads. Pumpkin butter or peach preserves work well. You can also use homemade applesauce. Just remember, the texture and sweetness may change. Adjust the sugar in the recipe if needed. Each option brings a unique flavor to the dish. This blog post covered all you need to make tasty cinnamon rolls. We discussed ingredients, tools, and handy tips to prevent sticking and achieve great flavor. You also learned about tasty variations and how to store leftovers. My final thought is to have fun experimenting with flavors. Enjoy baking and sharing these delicious rolls with loved ones!

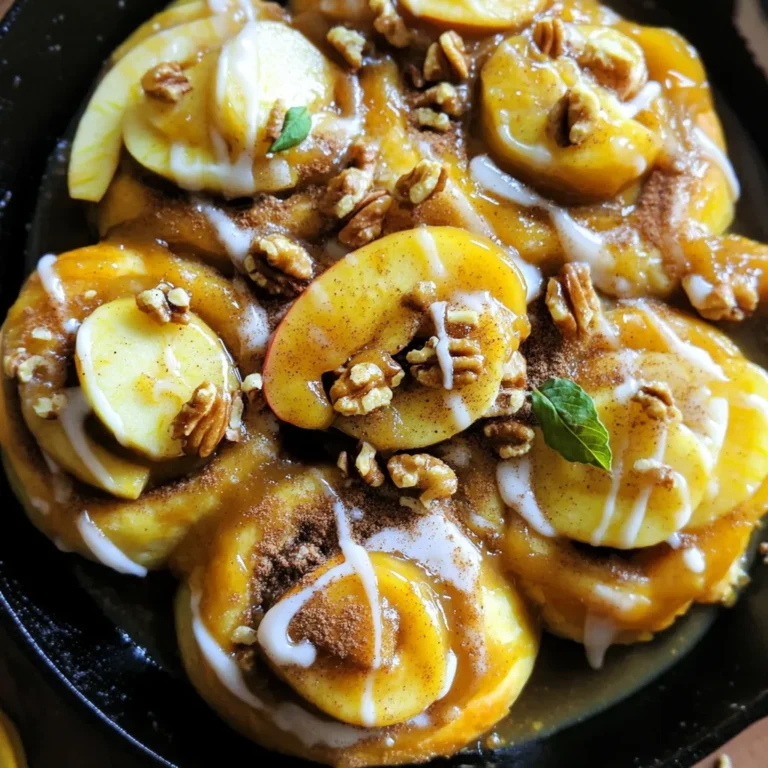
Apple Butter Cinnamon Roll Skillet Delightful Recipe

- 2 cups white chocolate chips - 1 can (14 oz) sweetened condensed milk - 1 teaspoon vanilla extract - 1/2 cup dried cranberries, chopped - 1/4 cup chopped walnuts or pecans (optional) - Pinch of salt You can use dark chocolate chips instead of white chocolate. This gives a richer taste. If you want a nut-free version, skip the walnuts or pecans. You can also swap cranberries for dried cherries or raisins for a twist. When choosing white chocolate, pick high-quality brands. Look for chocolate with cocoa butter in the first few ingredients. This ensures a smoother and creamier fudge. For cranberries, select fresh ones if you can. They should be plump and vibrant in color. Dried cranberries work well too, but make sure they are not too hard or stale. - Lining the baking dish: Start by taking an 8x8 inch square baking dish. Line it with parchment paper. Leave some paper hanging over the edges. This helps you lift the fudge out easily later. - Melting the chocolate mixture: In a medium saucepan, combine 2 cups of white chocolate chips and one can of sweetened condensed milk. Heat this mixture over low heat. Stir it all the time. You want it smooth and melted. - Adding vanilla and salt: Once the chocolate is melted, take the pan off the heat. Stir in 1 teaspoon of vanilla extract and a pinch of salt. This boosts the flavor of your fudge. - Incorporating cranberries and nuts: Now, fold in 1/2 cup of chopped dried cranberries. If you like, add 1/4 cup of chopped walnuts or pecans. Mix until everything is evenly spread out in the fudge. - Pouring into the dish: Pour the fudge mixture into your lined baking dish. Use a spatula to spread it evenly. Make the top smooth for a nice finish. - Refrigeration time and tips: Place the dish in the fridge for at least 2 hours. This helps the fudge set. Keep it cool until firm. When it’s ready, lift the fudge out using the parchment paper. Cut it into small squares for easy serving. How to avoid grainy fudge To keep your fudge smooth, always melt the chocolate slowly. Use low heat and stir well. If the chocolate gets too hot, it can become grainy. Stir in the sweetened condensed milk right away. This helps keep the fudge creamy and soft. Achieving the perfect consistency To get a nice, thick fudge, make sure your chocolate is fully melted. If it feels too runny, let it cool for a few minutes before adding other ingredients. This helps the fudge set better. A pinch of salt will enhance the flavors, so don’t skip it! Presentation ideas for special occasions Make your fudge look festive by cutting it into small squares. Place them on a pretty platter. Drizzle some melted white chocolate on top for a special touch. You can also sprinkle extra dried cranberries for color and texture. This makes it perfect for parties. Pairing suggestions with beverages This fudge pairs well with hot drinks. Try serving it with cocoa or coffee. The sweet fudge balances the rich flavors of the drinks. For a fun twist, serve it with a glass of milk or a dessert wine. Fixing soft fudge If your fudge is too soft, it may not have cooled enough. You can put it back in the fridge for a while. If it still won’t set, try melting it again and add more chocolate chips. Let it cool before pouring it back into the dish. Solutions for uneven cutting To cut your fudge evenly, use a sharp knife. Warm the knife in hot water for a few seconds. Wipe it dry, then slice. This helps the knife glide through the fudge without making a mess. {{image_2}} You can make your fudge even better with some fun flavor add-ins. Adding a few drops of peppermint extract gives it a fresh, minty kick. This is perfect for the holiday season! Just use a teaspoon to start. You can always add more if you love the flavor. Incorporating citrus zest is another great option. Try using orange or lemon zest to add a bright, zesty taste. Just grate a little of the peel and mix it in. It really lifts the flavor and makes the fudge feel festive! If you want a gluten-free fudge, you’re in luck! This recipe already uses no gluten ingredients. Just make sure your chocolate chips are gluten-free. Most brands are, but it’s always good to check. For vegan substitutions, swap the white chocolate with vegan white chocolate chips. You can find these in health stores or online. Use coconut milk instead of sweetened condensed milk for a dairy-free option. Your fudge will still taste amazing! You can change your fudge for different holidays. For Christmas, try adding crushed candy canes on top. For Thanksgiving, add some pumpkin spice to the mix. This makes it seasonal and fun! Festive mixing options can include nuts or dried fruits that match the holiday. For Easter, add pastel-colored sprinkles. For Halloween, mix in mini chocolate candies. Let your creativity shine! To keep your white chocolate cranberry fudge fresh, use an airtight container. A glass or plastic container works well. Place parchment paper between layers if stacking. This prevents sticking. Keep the container in a cool, dry place. Avoid sunlight and heat sources. This helps maintain the fudge's creamy texture and flavor. You can freeze fudge to save it for later. First, wrap the fudge tightly in plastic wrap. Then, place it in a freezer-safe bag or container. Make sure to remove as much air as possible. When you want to enjoy it, take it out and let it thaw in the fridge. This helps keep the texture smooth and creamy. Avoid thawing at room temperature, as it may become too soft. White chocolate cranberry fudge lasts about two weeks in the fridge. If frozen, it can last up to three months. Check for signs of spoilage like an off smell or changes in texture. If the fudge feels dry or crumbly, it's best to discard it. Always trust your senses when it comes to food safety. To make this fudge, follow these simple steps: 1. Line an 8x8 inch baking dish with parchment paper. 2. In a medium saucepan, mix white chocolate chips and sweetened condensed milk over low heat. 3. Stir until the chocolate melts and the mix is smooth. 4. Take off the heat and add vanilla and a pinch of salt. 5. Fold in chopped dried cranberries and nuts if you like. 6. Pour the mix into the dish and smooth the top. 7. Chill in the fridge for at least 2 hours until firm. 8. Lift the fudge out and cut into squares. Yes, you can use regular chocolate. Dark or milk chocolate adds a rich taste. Just remember that the fudge will taste different. It can still be delicious! You might want to adjust the amount of sweetened condensed milk. Regular chocolate is often sweeter than white chocolate. So, taste as you go! If your fudge is soft, don’t worry! You can save it. Here are a few tips: - Chill it longer in the fridge. - If it’s still soft, you can reheat it gently. - Add more chocolate chips and mix until smooth. - Pour it into a clean dish and chill again. Yes, this fudge is great for making ahead! You can prepare it up to a week in advance. Just store it in an airtight container in the fridge. This makes it perfect for parties or gifts. It tastes fresh and stays delicious! To make White Chocolate Cranberry Fudge, gather simple ingredients and follow easy steps. Use quality chocolate and fresh dried cranberries for the best taste. You can customize with nuts and unique flavors too. Don’t forget to store it right, so it stays fresh. Whether for a special event or a tasty treat, this fudge is sure to delight. Enjoy making it and impress your friends and family with your delicious creation!

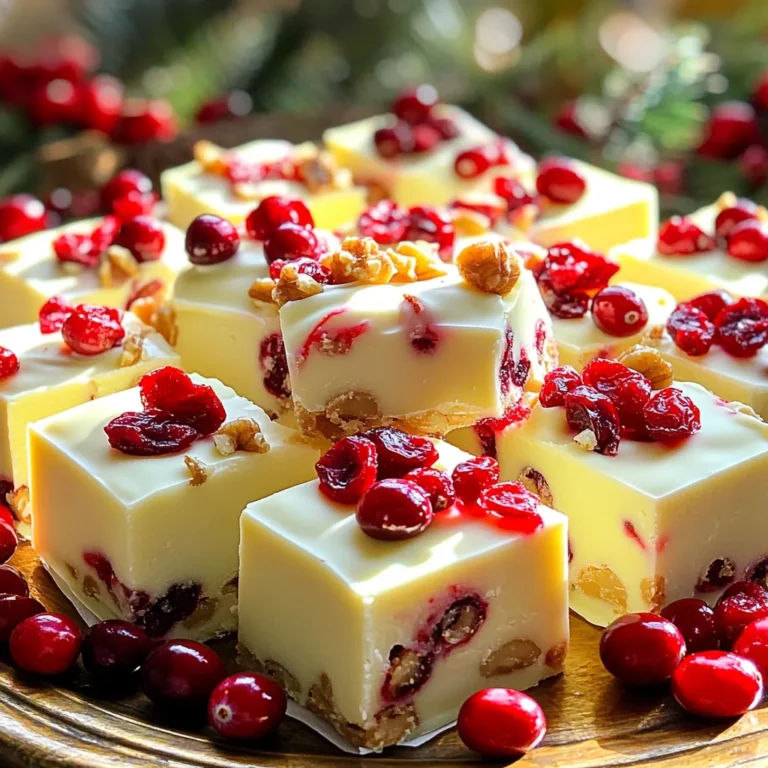
White Chocolate Cranberry Fudge Tasty Holiday Treat

To make Cinnamon Pecan Swirl Bread, you need a few key ingredients. Here’s what you will need: - 4 cups all-purpose flour - 1 packet (2 ¼ tsp) active dry yeast - ½ cup warm milk (110°F) - ½ cup granulated sugar - 2 large eggs, room temperature - ¼ cup unsalted butter, melted - 1 tsp vanilla extract - 1 tsp salt - 1 tablespoon ground cinnamon - 1 cup pecans, chopped - ⅓ cup brown sugar Each ingredient plays a big role in creating rich flavor. The all-purpose flour gives structure, while active dry yeast helps the bread rise. Warm milk activates the yeast. Granulated sugar adds sweetness, and eggs provide richness. Unsalted butter brings moisture and flavor. Vanilla extract enhances the taste. Salt balances sweetness. Ground cinnamon gives that warm spice, and chopped pecans add crunch and nuttiness. Lastly, brown sugar adds depth to the filling. Gather these ingredients before you start. This makes the process smooth and fun. Enjoy the journey of baking this delightful bread! First, you need to dissolve the yeast in warm milk. Use a small bowl and let it sit for about 5 minutes. You want it to look frothy. Next, grab a large bowl. Combine the flour, granulated sugar, and salt. Make a small well in the center. Pour in the yeast mix, melted butter, eggs, and vanilla extract. Mix this all together until a shaggy dough forms. Now it's time to knead. Turn the dough out onto a floured surface. Use your hands to push and fold the dough for about 8 to 10 minutes. You want it smooth and elastic. This texture is important for the final bread. Place it in a greased bowl and cover it with a kitchen towel. Let it rise in a warm spot for about an hour or until it doubles in size. While the dough rises, let's make the filling. In a small bowl, mix the brown sugar, ground cinnamon, and chopped pecans. This mix will give your bread that sweet, nutty flavor. Make sure everything is well combined. Once the dough has risen, punch it down to release the air. Roll it out into a rectangle, about 14 by 24 inches. This size gives you enough space to spread the filling. Evenly spread the filling mixture over the dough, leaving a small border around the edges. Now, it's time to create the swirl. Starting from one long edge, tightly roll the dough into a log. Pinch the seams to seal it well. Place the log seam side down in a greased baking dish. You can shape it into a wreath by pushing the ends together or keep it in a loaf pan for a classic shape. Cover the dough with a towel and let it rise again for about 30 minutes. It should look puffed up. While it rises, preheat your oven to 350°F (175°C). Bake the bread for 25 to 30 minutes until it is golden brown on top. If it browns too quickly, cover it loosely with aluminum foil. This will help it bake evenly. To knead your dough well, start with a clean, floured surface. Place the dough in the center. Use the heel of your hand to push the dough away from you. Fold it over and repeat. You’ll know the dough is ready when it feels smooth and elastic. It should spring back when you poke it. This usually takes about 8-10 minutes. Rising times and temperatures are key for fluffy bread. After kneading, let the dough rise in a warm spot. Cover it with a towel to keep it warm and moist. This first rise should take about 1 hour. After shaping, let it rise again for about 30 minutes. The dough should look puffed and almost double in size. A good rise means a light, airy bread. Want to spice up your bread? Try adding other fillings! You can mix in chocolate chips or dried fruit for a sweet twist. A sprinkle of nutmeg or allspice can also enhance the flavor. For toppings, consider a drizzle of honey or a simple glaze. These little extras make your cinnamon pecan swirl bread even more delightful! {{image_2}} You can make nut-free cinnamon swirl bread by swapping the pecans. Try using sunflowers seeds or pumpkin seeds. They give a nice crunch without the nuts. You can also skip the nuts entirely for a smoother texture. A glaze adds sweetness to your cinnamon pecan swirl bread. To make a simple glaze, mix 1 cup of powdered sugar with 2 tablespoons of milk. Stir until smooth and drizzle it over the warm bread. You can add a splash of vanilla for extra flavor. To make whole wheat cinnamon pecan swirl bread, change some of the flour. Use 2 cups of whole wheat flour and 2 cups of all-purpose flour. This keeps the bread soft while adding more fiber. You may need a bit more milk for the dough, so add it slowly until it's the right texture. To keep your cinnamon pecan swirl bread fresh, wrap it well. Use plastic wrap or foil to cover it. Store it at room temperature for the best taste. Avoid putting it in the fridge, as that can dry it out. If you want it to last longer, consider freezing it. To freeze your bread, let it cool completely first. Then, wrap it tightly in plastic wrap. Place the wrapped bread in a freezer bag. Squeeze out all the air before sealing. It can stay in the freezer for up to three months. When you want to eat it, thaw it on the counter. For a warm treat, you can reheat it in the oven at 350°F for about 10-15 minutes. At room temperature, this bread stays fresh for about three to four days. Make sure to keep it wrapped to avoid drying out. If you store it in a cool, dry place, it will keep its flavor longer. Enjoy your bread while it is soft and flavorful! Yes, you can use instant yeast. You do not need to dissolve it. Just mix it with the dry ingredients. The dough may rise faster, so watch it closely during the first rise. You can use walnuts, almonds, or hazelnuts. Each nut gives a unique taste. If you want a nut-free option, try using sunflower seeds or pumpkin seeds. Look for a golden brown top. The bread should sound hollow when tapped on the bottom. A food thermometer can help too. The inside should reach 190°F. Yes, you can make the dough ahead. After kneading, place it in the fridge. It can stay there for up to 24 hours. Let it come to room temperature before shaping. One slice has about 200 calories. It contains 6 grams of fat, 30 grams of carbs, and 4 grams of protein. This can vary based on specific ingredients and portion sizes used. You learned how to make delicious Cinnamon Pecan Swirl Bread, from ingredients to storage tips. We covered each step, like preparing the dough and shaping the bread. You also got some great ideas for variations, like nut-free and glazed options. Enjoy your fresh, homemade bread with loved ones. Use these tips to impress everyone with your baking skills! Baking can bring joy, so don’t hesitate to try new flavors and methods. Your kitchen is now ready for some sweet success!

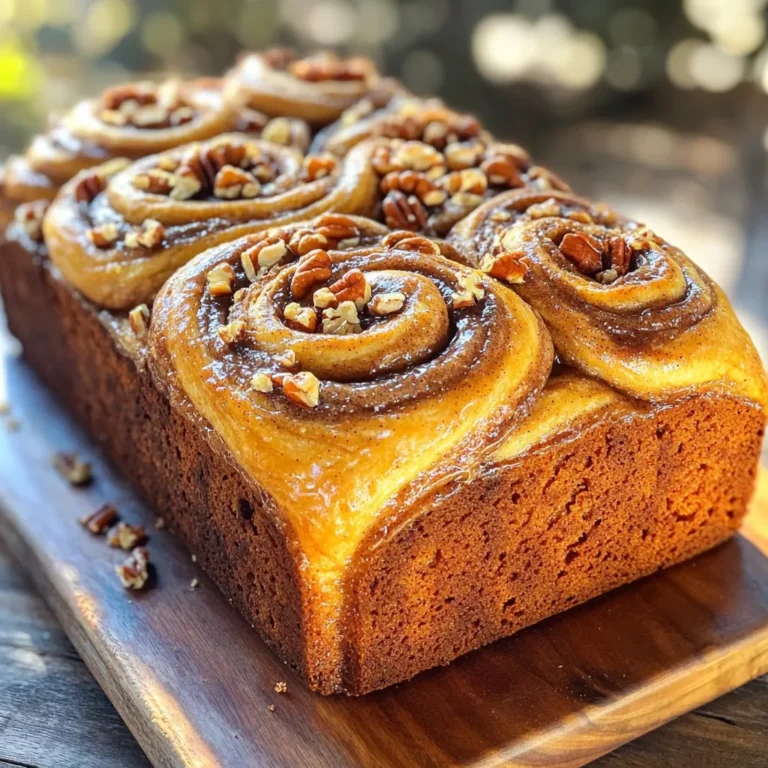
Cinnamon Pecan Swirl Bread Rich Flavorful Delight

When making Pumpkin Spice Granola Clusters, you need simple, wholesome ingredients. Here’s what you will need: - 2 cups rolled oats - 1 cup pumpkin seeds - 1 cup pecans, chopped - 1/2 cup honey or maple syrup - 1/2 cup coconut oil, melted - 1 cup pumpkin puree - 1 teaspoon vanilla extract - 1 teaspoon ground cinnamon - 1/2 teaspoon ground nutmeg - 1/4 teaspoon ground ginger - 1/4 teaspoon salt - 1 cup dried cranberries or raisins (optional) These ingredients blend together to create a tasty and healthy snack. The rolled oats serve as a great base. They provide fiber and energy for your day. Pumpkin seeds add a crunch and boost your minerals. Chopped pecans give a nutty flavor that enhances each bite. You can choose honey or maple syrup for sweetness. Both options work well. Coconut oil adds healthy fats and keeps the granola clusters together. Pumpkin puree gives moisture and a rich pumpkin flavor. The vanilla extract brightens up your mix. The spices—cinnamon, nutmeg, and ginger—bring warmth and comfort. They make this snack perfect for fall. Salt balances the sweetness and enhances all the flavors. If you want a fruity twist, add dried cranberries or raisins. They add a chewy texture that contrasts nicely with the crunchy clusters. Gathering these ingredients prepares you for a delightful cooking experience. Each one plays a role in making your granola clusters both tasty and healthy. 1. First, preheat your oven to 325°F (165°C). This helps the granola cook evenly. Line a baking sheet with parchment paper. This makes cleanup easy and prevents sticking. 2. In a large mixing bowl, add 2 cups of rolled oats, 1 cup of pumpkin seeds, and 1 cup of chopped pecans. Stir these dry ingredients well. This mix gives texture and flavor to your granola. 3. In another bowl, whisk together 1/2 cup of honey or maple syrup, 1/2 cup of melted coconut oil, and 1 cup of pumpkin puree. Add 1 teaspoon of vanilla extract, 1 teaspoon of ground cinnamon, 1/2 teaspoon of ground nutmeg, 1/4 teaspoon of ground ginger, and 1/4 teaspoon of salt. Mix until everything is smooth and combined. This wet mix brings all the flavors together. 4. Pour the wet mixture into the bowl with the dry ingredients. Stir until the oats and seeds are evenly coated. This step is key for good flavor in every bite. 5. Spread the mixture evenly on the prepared baking sheet. Press down firmly to form clusters. Clusters make your snack fun to eat. 6. Place the baking sheet in the preheated oven. Bake for 20-25 minutes. The granola should turn golden brown and smell great. Stir the granola halfway through to ensure even cooking. 7. After baking, remove the sheet from the oven. Let it cool completely on the baking sheet. As it cools, it will harden into nice clusters. 8. Once cool, break the granola into clusters. If you want, mix in 1 cup of dried cranberries or raisins for extra sweetness. 9. Store your granola in an airtight container at room temperature. It stays fresh for up to two weeks. Enjoy this healthy snack anytime! To get that right crunchiness, bake your granola until golden brown. This usually takes about 20-25 minutes. Stir the mixture halfway through for even cooking. To avoid burning, keep an eye on it near the end. Ovens can heat unevenly, so check often. If you want to tweak the spice level, add more cinnamon or nutmeg. You can mix in a bit of allspice for a twist. As for sweeteners, honey and maple syrup work best. They add rich flavors and stickiness that help form clusters. For a fun serving idea, layer granola clusters in clear jars with yogurt and fresh fruit. It looks great and tastes even better! If you want to gift it, pack it in mason jars. Tie a ribbon around the jar for a nice touch. {{image_2}} You can make pumpkin spice granola clusters nut-free easily. Instead of pecans, use seeds. - Sunflower seeds are a great choice. - Use hemp seeds for a protein boost. - Flaxseeds add healthy fats and fiber. These substitutes keep the clusters crunchy and tasty. Adjust the sweetness of your granola clusters to suit your taste. - If you prefer less sweetness, cut the honey or syrup by half. - Try using agave syrup; it has a milder taste. - Coconut sugar is another good option for a unique flavor. Experimenting with sweeteners can lead to fun results. Add your favorite flavors to create a unique twist. - Mix in nutmeg or allspice for extra warmth. - Add cocoa powder for a chocolatey touch. - Dried fruits like apricots or figs provide natural sweetness. These variations keep your granola exciting and delicious. To keep your pumpkin spice granola clusters fresh, use airtight containers. Glass jars or plastic containers work well. Make sure they seal tightly. Store the containers in a cool, dark place. This keeps the granola crunchy and tasty. Pumpkin spice granola clusters last for up to two weeks. Check for signs of spoilage. If you see mold or an off smell, toss the granola. Fresh granola should smell sweet and smell like spices. Yes, you can freeze granola! To freeze, place clusters in a freezer-safe bag. Remove as much air as you can before sealing. When ready to eat, thaw in the fridge overnight. This keeps the texture intact. Enjoy your tasty snack anytime! You can serve pumpkin spice granola clusters in many fun ways. I love putting them in clear jars. It makes a beautiful gift. You can also enjoy them with yogurt and fresh fruits. This makes a tasty breakfast or snack. Yes, you can swap pumpkin seeds with sunflower seeds or chia seeds. These options still add crunch and flavor. Feel free to mix it up based on your taste. To make this recipe vegan, use maple syrup instead of honey. Coconut oil is already vegan. All the spices and pumpkin puree are vegan too. It's an easy switch to fit your diet. Pumpkin spice granola offers many health benefits. The oats provide fiber, keeping you full longer. Pumpkin seeds add protein and healthy fats. Spices like cinnamon may help with blood sugar control. It's a tasty way to snack smart. You can replace coconut oil with olive oil or a nut butter. Both options will still bind the granola well. Just remember, each oil will change the flavor a bit. Experiment to find your favorite! You now know how to make delicious pumpkin spice granola clusters. We covered the key ingredients and detailed preparation steps. I shared tips for achieving the right texture and flavor. You learned about nut-free options and how to store your clusters for maximum freshness. Remember, you can customize this recipe to fit your tastes. Enjoy experimenting with flavors and sharing your tasty treats!

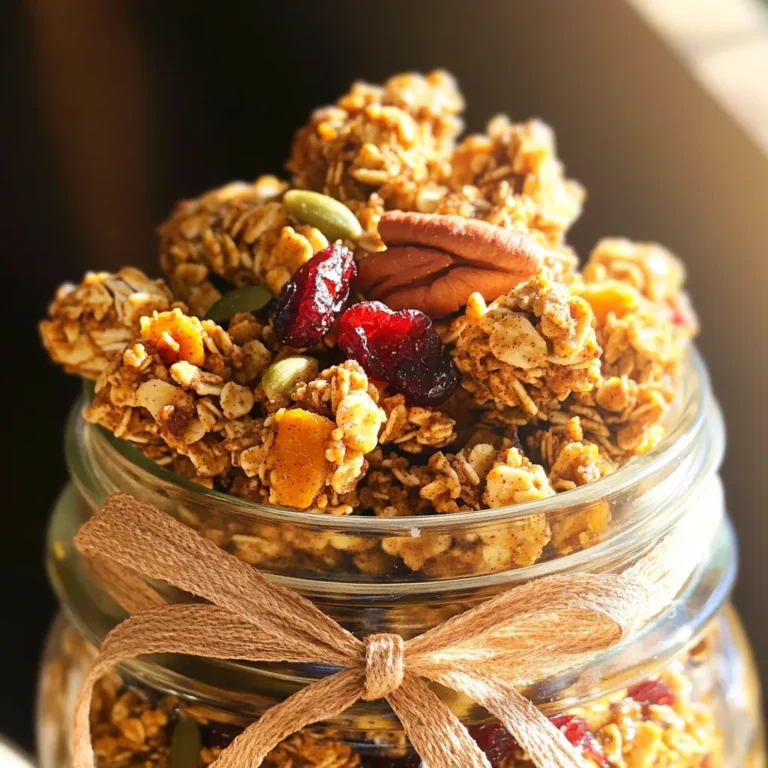
Pumpkin Spice Granola Clusters Tasty and Healthy Snack

PREV 1 … 8 9 10 … 56 NEXT
secrets pice kitchen

explore

DessertsDinnerAppetizersDrinks

Our Policies

  • Cookie Policy
  • Copyright Policy
  • Disclaimer
  • GDPR Policy
  • Terms Of Use
Back to Top
  • About
  • Contact Us
  • Privacy Policy
© 2025 secrets pice kitchen