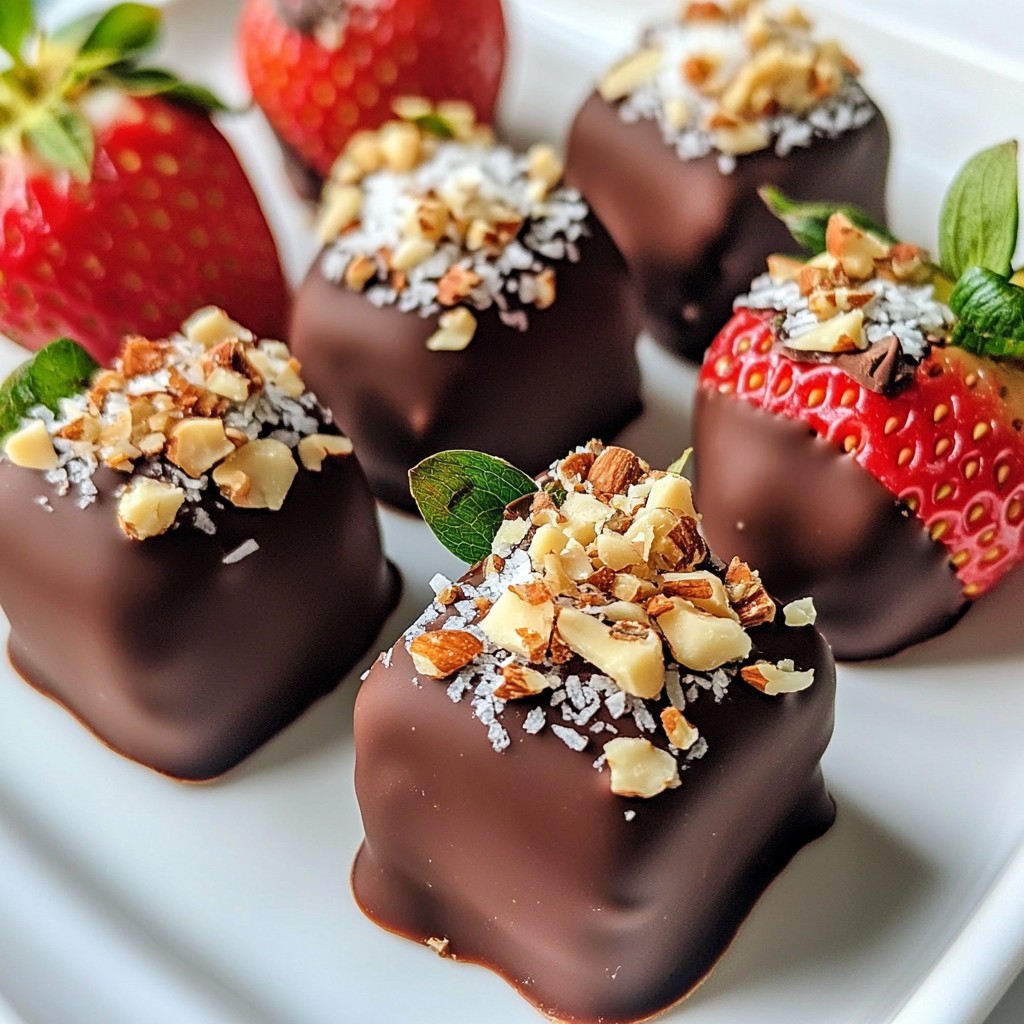
Indulging in chocolate-covered strawberry bites is a joy you can easily create at home. This delightful treat combines fresh strawberries with smooth, melted chocolate for a taste that’s hard to resist. In this guide, I’ll walk you through every step, from gathering simple ingredients to perfecting your dipping technique. Let’s dive in and make these bites a treat for any occasion!
Why I Love This Recipe
- Decadent Indulgence: These chocolate-covered strawberry bites are the perfect treat for satisfying a sweet tooth, with the rich chocolate and fresh strawberries offering a delightful contrast.
- Easy to Make: This recipe is simple and quick, making it great for both novice cooks and busy schedules.
- Customizable Toppings: You can easily customize the toppings with your favorite nuts or coconut, allowing for a personalized touch to each bite.
- Perfect for Any Occasion: Whether it’s a special celebration or just a treat for yourself, these strawberry bites are sure to impress.
Ingredients
List of Ingredients for Chocolate Covered Strawberry Bites
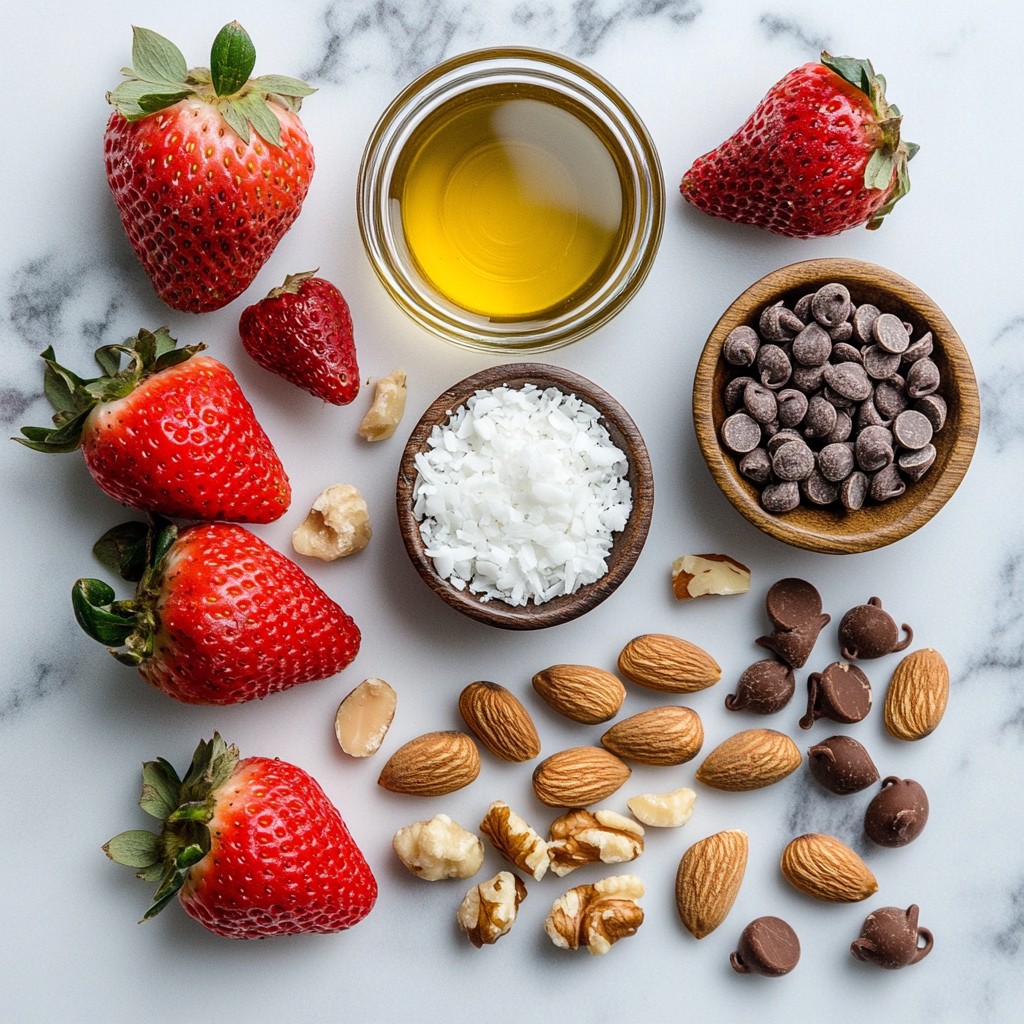
To make these chocolate covered strawberry bites, gather the following ingredients:
- 1 pound fresh strawberries, washed and dried
- 8 oz semisweet chocolate chips
- 2 tablespoons coconut oil (for a shiny finish)
- 1/2 cup crushed nuts (almonds, hazelnuts, or walnuts)
- 1/4 cup shredded coconut (sweetened or unsweetened)
- Pinch of sea salt
Fresh Strawberries Quality Tips
When choosing strawberries, look for bright red ones. They should be firm and plump. Check for no soft spots or mold. Fresh strawberries taste best. Use them as soon as possible for the best flavor. You can also store them in the fridge to keep them fresh longer.
Optional Toppings Suggestions
You can use many toppings to make your bites special. Here are some fun ideas:
- Crushed nuts like almonds or walnuts add crunch.
- Shredded coconut gives a tropical twist.
- Rainbow sprinkles add color and fun.
- Crushed cookies for a sweet crunch.
Try different toppings to find your favorite mix!
Step-by-Step Instructions
Preparation of Baking Sheet
To start, grab a baking sheet. Line it with parchment paper. This step helps later. It makes removing the strawberries easy. You want a clean surface for your treats. Make sure the paper covers the whole sheet.
Melting Chocolate and Coconut Oil
Next, take a microwave-safe bowl. Add the semisweet chocolate chips to it. Then, add the coconut oil. This oil gives a nice shine. Microwave this mixture in short bursts. Use 30 seconds at a time. Stir after each round. Keep going until it’s smooth. Be careful not to overheat the chocolate.
Dipping and Coating Strawberries
Now, it is time to dip your strawberries. Hold each one by the green stem. Gently dip it into the melted chocolate. Cover about two-thirds of the berry. Let any extra chocolate drip off. Quickly sprinkle on crushed nuts or shredded coconut. You can also roll the strawberry in the toppings. This ensures full coverage. Place the dipped strawberry on the prepared sheet. Repeat this for all strawberries. Once finished, sprinkle a pinch of sea salt on top. This adds a great flavor kick. Now, place the baking sheet in the fridge. Let it cool for about 30 minutes. This helps the chocolate harden perfectly.
Tips & Tricks
How to Achieve a Shiny Finish
To get a nice shine on your strawberries, add coconut oil to the chocolate. This small addition makes a big difference. Melt the chocolate and oil together. Stir until it is smooth. The oil helps the chocolate to set with a glossy look. A shiny finish makes your treats look more appealing.
Avoiding Common Mistakes
One common mistake is overheating the chocolate. Heat it slowly in 30-second bursts. Stir after each burst to avoid hot spots. If the chocolate clumps, it can ruin the dip. Also, don’t rush the cooling process. Let the chocolate set in the fridge for at least 30 minutes.
Perfecting the Chocolate Dip Technique
Hold each strawberry by the green stem. Dip it into the melted chocolate about two-thirds of the way up. Let excess chocolate drip back into the bowl. This ensures a nice, even coat. Quickly sprinkle toppings while the chocolate is still wet. This helps the toppings stick well.
Pro Tips
- Choose the Right Strawberries: Select strawberries that are firm, ripe, and free from blemishes for the best flavor and appearance.
- Use Quality Chocolate: Opt for high-quality semisweet chocolate chips for a richer flavor and smoother texture.
- Don’t Overheat the Chocolate: Melt the chocolate in short intervals and stir well to avoid scorching, which can ruin the texture.
- Experiment with Toppings: Get creative with toppings like crushed cookies, sprinkles, or different types of nuts for a unique twist.
Variations
Flavor Combinations
You can mix up the chocolate for fun flavors. Use white chocolate for a sweeter bite. It pairs well with strawberries. Dark chocolate provides a rich taste and balances the fruit's sweetness. Each type of chocolate brings its charm. You might even try milk chocolate for a classic taste. Feel free to combine them too. A mix of white and dark chocolate creates a beautiful look and taste.
Alternative Toppings
Toppings add fun to your chocolate-covered treats. Use crushed nuts like almonds or walnuts for a crunchy texture. They give a nice contrast to the smooth chocolate. You can also sprinkle shredded coconut on top. This adds a tropical twist. Other fun options include colorful sprinkles or crushed cookies. You can get creative with your favorites. Each topping changes the look and flavor of your bites.
Dipping Other Fruits
Don’t stop at strawberries! Many fruits taste great dipped in chocolate. Bananas are a sweet choice. They create a creamy texture that pairs well with chocolate. Oranges bring a bright flavor that is refreshing. You can even dip apples for a crunchy option. Each fruit gives a new twist to this treat. Try different fruits and find your favorite combinations!
Storage Info
How to Properly Store Chocolate Covered Strawberry Bites
To keep your chocolate covered strawberry bites fresh, store them in an airtight container. Use parchment paper to separate layers. This prevents them from sticking together. Place the container in the fridge. Cold helps the chocolate stay firm.
Shelf Life and Best Ways to Keep Fresh
These treats last up to five days in the fridge. For best taste, eat them within three days. Avoid letting them sit out at room temperature too long. Heat can make the chocolate soft and messy.
Freezing Instructions for Longer Storage
You can freeze chocolate covered strawberries for longer storage. To do this, place them on a baking sheet. Make sure they don’t touch. Freeze for about two hours until solid. Then, transfer them to a freezer bag. They can last up to three months. When ready to eat, thaw them in the fridge overnight. Enjoy them fresh!
FAQs
Can I use any type of chocolate for this recipe?
Yes, you can use any type of chocolate. Semisweet chocolate works great for a rich taste. You can also try dark chocolate for a bold flavor. Milk chocolate gives a sweet touch. White chocolate adds a creamy note. Each type gives a unique taste to your treats.
How do I make chocolate covered strawberries without coconut oil?
You can skip the coconut oil if you want. Just melt the chocolate chips on their own. The chocolate may not be as shiny, but it will still taste great. Stir the chocolate well until it’s smooth. This will help get a good coating on your strawberries.
What is the best way to serve chocolate covered strawberry bites?
Serve chocolate covered strawberry bites on a nice platter. Add some fresh mint leaves for color. You can also drizzle extra melted chocolate over them for a fancy touch. These bites are best served fresh, but they can be enjoyed cold too. Perfect for parties or special treats!
Making chocolate-covered strawberry bites is fun and easy. We covered ingredients, fresh strawberry quality, and optional toppings. You learned step-by-step how to prepare, melt chocolate, and coat the strawberries. I shared tips for a shiny finish and techniques for perfecting your dip. You can explore flavor variations and even dip other fruits.
Store your bites properly to keep them fresh. Now, enjoy creating your tasty treats!