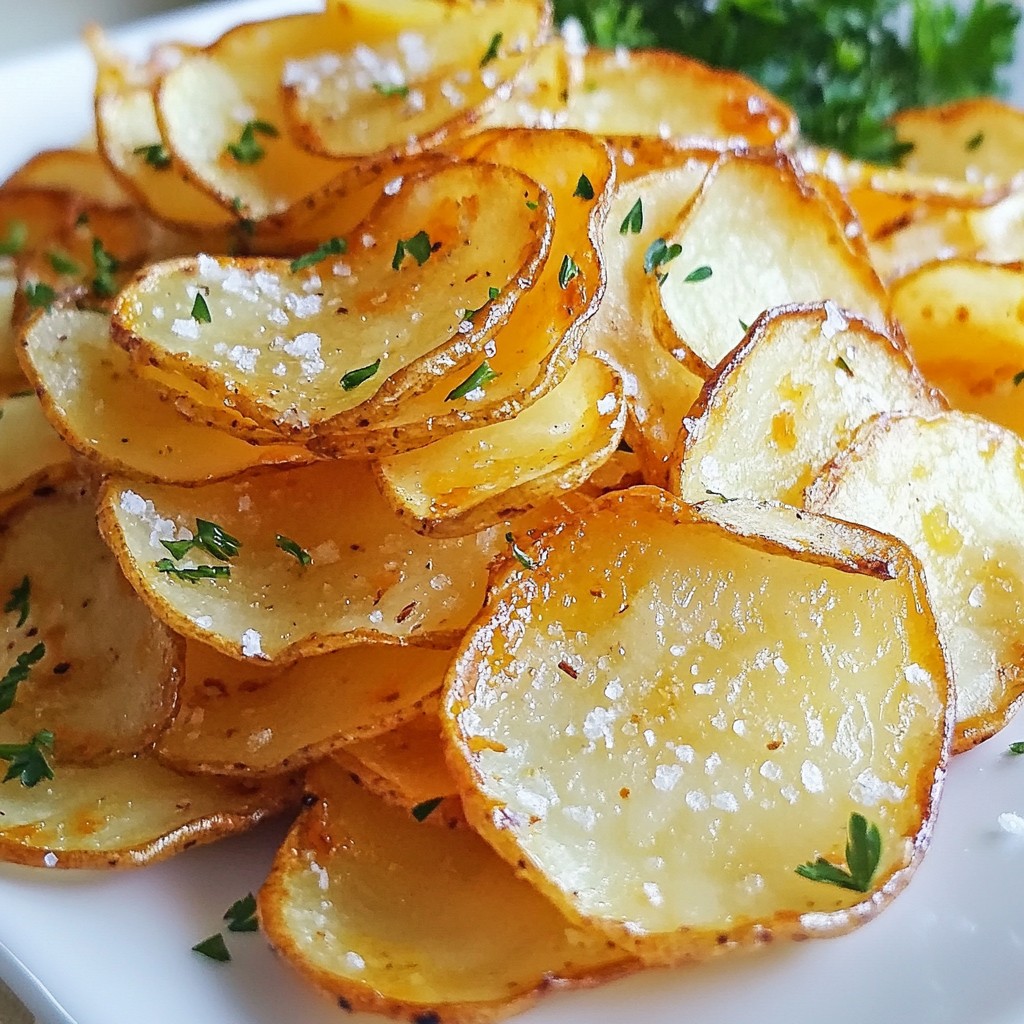
Are you craving something crunchy and tangy? Look no further! In this blog, I'll show you how to make crispy salt and vinegar potato chips that will delight your taste buds. With just a few simple ingredients and easy steps, you’ll enjoy the perfect balance of flavor and texture. Get ready for a homemade snack that beats store-bought any day! Let's dive into the crunchy joy of these delicious chips.
Why I Love This Recipe
- Perfect Crunch: These chips achieve the ultimate crispy texture, making them irresistible right out of the fryer.
- Bold Flavor: The combination of sea salt and vinegar gives these chips a tangy kick that is simply addictive.
- Homemade Goodness: Making chips from scratch allows you to control the ingredients, ensuring a healthier snack option.
- Versatile Snack: These chips are perfect for parties, movie nights, or as a delightful side to your favorite sandwich.
Ingredients
List of Ingredients
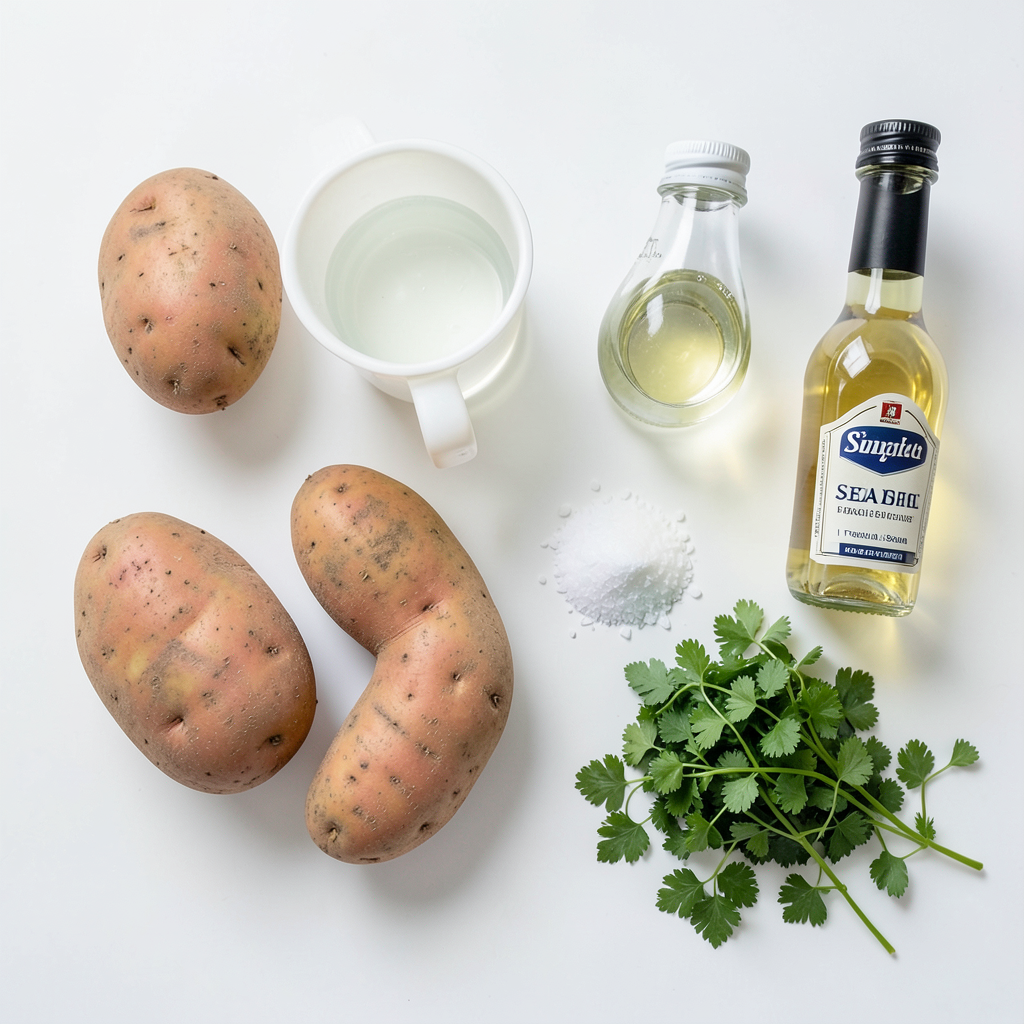
- 4 large russet potatoes
- 1 cup white vinegar
- 1 tablespoon sea salt (plus more for seasoning)
- 1 teaspoon baking soda
- Vegetable oil (for frying)
- Fresh parsley (for garnish, optional)
To make crispy salt and vinegar potato chips, you need just a few simple ingredients. First, choose 4 large russet potatoes. They have the right texture for crispiness. Next, grab 1 cup of white vinegar to give the chips that tangy bite. You will also need 1 tablespoon of sea salt, plus a bit more for extra flavor.
Baking soda is key too; just 1 teaspoon helps draw out moisture. For frying, get vegetable oil, which works best for that perfect crunch. Lastly, fresh parsley adds a nice touch, but it's optional.
These ingredients are easy to find. They make the chips tasty and fun to eat. You can enjoy them as a snack or serve them at parties.
Step-by-Step Instructions
Preparing the Potatoes
First, wash the potatoes well under cold water. This step removes dirt and impurities. Next, peel the potatoes using a peeler. You want to get rid of the skin for a clean chip. Now, slice the potatoes thinly. Aim for about 1/8 inch thick. A mandoline works great for this. This tool helps you achieve uniform slices, which fry evenly.
Soaking Process
Soaking the potato slices is key. It helps remove excess starch. This step makes the chips crispier. Fill a large bowl with ice-cold water. Place the potato slices in the bowl. Add 1 teaspoon of baking soda and 1 tablespoon of sea salt. Stir gently until the salt dissolves. Let them soak for at least 30 minutes. This soaking time is important for the perfect crunch.
Frying the Chips
Now, it’s time to fry the chips. Heat vegetable oil in a pot over medium-high heat. You want the oil to reach 350°F (175°C). Use a thermometer to check the temperature. Once hot, carefully add the potato slices in small batches. Do not overcrowd the pot, as this lowers the oil temperature. Fry the chips for about 3 to 5 minutes. Look for a golden brown color and crispiness.
After frying, use a slotted spoon to lift the chips out. Place them on a paper towel-lined plate to drain excess oil. While the chips are still warm, drizzle them with white vinegar. Sprinkle a pinch of sea salt for extra flavor. Toss gently to coat evenly. For a pop of color, garnish with fresh parsley if you like.
Tips & Tricks
Achieving Maximum Crispiness
To get the best chips, drying the potato slices is key. After soaking them in ice-cold water, drain and rinse well. Pat them dry with paper towels until no moisture remains. This step helps prevent soggy chips. The frying temperature also matters. Heat your oil to 350°F (175°C). A hot oil ensures a quick fry, giving you that perfect crunch.
Seasoning Variations
You can try different salts or seasonings. Sea salt is great, but you can also use garlic salt or onion powder for a twist. If you want some heat, sprinkle cayenne pepper or paprika on top. Mix it up and find what you love!
Presentation Tips
Garnishing with fresh parsley adds a nice touch. Just chop it finely and sprinkle over the chips. It gives color and a fresh taste. Serve your chips in a colorful bowl for an appealing look. You can pair them with dips like ranch or even homemade salsa. These little details make your dish stand out!
Pro Tips
- Choosing the Right Potatoes: Opt for russet potatoes as their high starch content creates the perfect crispy texture.
- Soaking Time: The longer you soak the potato slices, the crispier they will become. Aim for at least 30 minutes, but you can soak them for up to 2 hours.
- Monitor Oil Temperature: Keep the frying oil at a consistent temperature of 350°F (175°C) for even cooking. Use a thermometer for accuracy.
- Season Immediately: Season the chips with vinegar and salt while they're still warm to ensure the flavors stick and enhance the taste.
Variations
Alternative Potato Types
You can use different potatoes to change the texture. While russet potatoes are great for crispiness, consider Yukon Golds. They add a creamy taste. Red potatoes also work well; they keep a bit of bite. Experimenting with these options can give you unique flavors and textures. Each type can change the final crunch.
Vinegar Alternatives
Flavored vinegars bring new tastes to your chips. Malt vinegar has a rich, sweet flavor. Apple cider vinegar adds a fruity kick. You can even try balsamic vinegar for a sweet twist. Each vinegar type can give your chips a different zing. Just remember to adjust the amount to match your taste.
Healthier Versions
If you want a healthier snack, try baking instead of frying. Lay your potato slices on a baking sheet. Brush them lightly with oil and bake at 400°F (200°C) until crispy. This method cuts down on oil. You can also use less salt. Experiment with herbs or spices for flavor instead. This way, you keep the taste but make it better for you.
Storage Info
Storing Leftover Chips
To keep your crispy salt and vinegar potato chips fresh, store them in a sealed bag or container. Avoid leaving them in an open bowl. The air makes them soft. If you have a vacuum sealer, use it. This method helps keep the chips crispy longer. Place them in a cool, dry place away from sunlight.
Reheating Instructions
If your chips lose their crunch, you can easily fix them. Preheat your oven to 350°F (175°C). Spread the chips on a baking sheet in a single layer. Heat them for about 5-10 minutes. This restores their crispiness. Keep a close watch to avoid burning.
Freezing Options
You can freeze homemade potato chips, but it’s not the best choice. Freezing changes their texture. If you must freeze them, let them cool completely first. Wrap them tightly in plastic wrap, then place them in a freezer bag. When ready to eat, thaw them in the fridge, then reheat as mentioned above.
FAQs
How do I make the chips less oily?
To make chips less oily, start with very dry potato slices. After rinsing, use paper towels to remove all water. Hot oil also helps; heat it to 350°F (175°C) before frying. Fry in small batches to keep the temperature steady. This also helps the chips cook evenly. Finally, let them drain on paper towels to soak up any extra oil.
Can I make these chips in an air fryer?
Yes, you can make crispy salt and vinegar potato chips in an air fryer! Start by soaking and drying your potato slices as usual. Instead of frying, preheat your air fryer to 375°F (190°C). Arrange the potato slices in a single layer in the basket. Cook for about 15-20 minutes, shaking the basket halfway through. Keep an eye on them to avoid burning. Once golden and crispy, season with vinegar and salt.
What can I serve with crispy salt and vinegar potato chips?
These chips pair well with many snacks and dips. You might enjoy them with classic dips like sour cream or ranch. For a twist, try a spicy salsa or guacamole. You can also serve them as a side with sandwiches or burgers. The tangy flavor of the chips adds a nice kick to any meal!
You now have all the steps to make crispy salt and vinegar potato chips. From prepping and soaking to frying and seasoning, each step is key to success. Use different potatoes or flavored vinegars for tasty twists. Remember, storing and reheating properly keeps your chips crisp. Try these tips, and elevate your snack game. Enjoy the crunch, the flavor, and the fun of making your chips at home. Happy cooking!