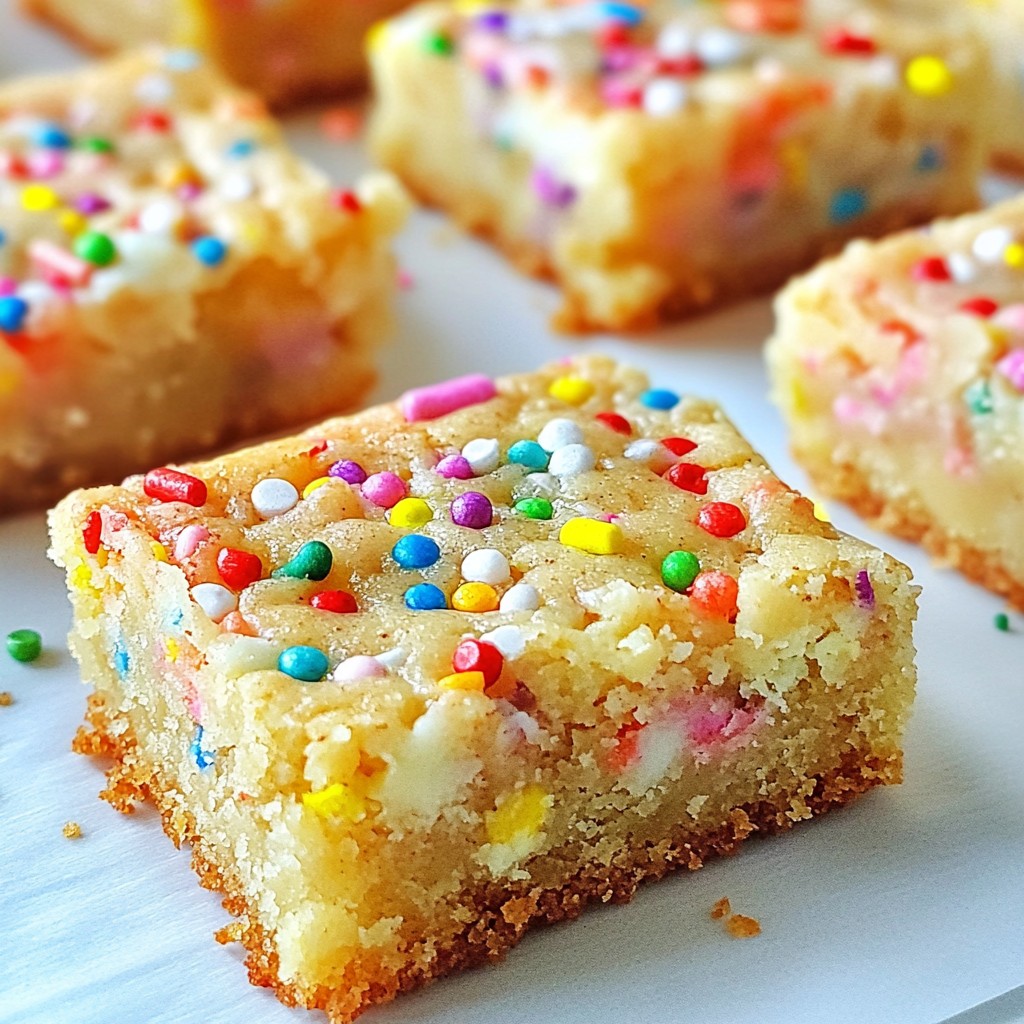
Craving a sweet treat that’s both fun and easy? Funfetti blondies are the answer! This delightful dessert bursts with colorful sprinkles, making them perfect for any occasion. In this post, I’ll guide you through simple steps to create these chewy, buttery bars. Let’s dive into the ingredients, tips, and tricks to make your baking adventure a success. Get ready to impress your friends and family with this tasty delight!
Why I Love This Recipe
- Deliciously Sweet: These blondies are packed with brown sugar and white chocolate, creating a rich, sweet flavor that’s irresistible.
- Fun and Colorful: The vibrant sprinkles make these blondies visually appealing and perfect for any celebration or just a cheerful treat.
- Easy to Make: With simple ingredients and straightforward steps, these blondies are a breeze to whip up, even for beginner bakers.
- Perfect Texture: These blondies strike the right balance between chewy and soft, making each bite a delightful experience.
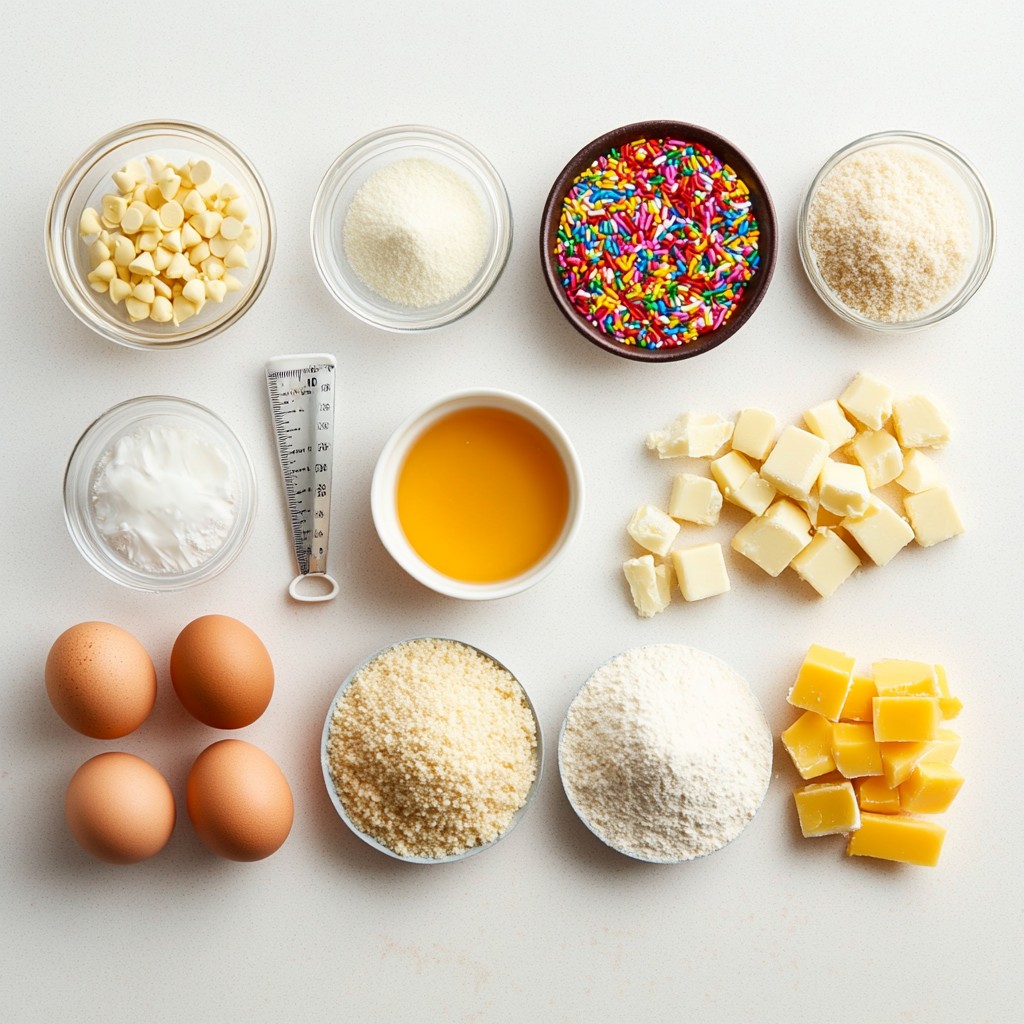
Ingredients
List of Ingredients
To make Funfetti Blondies, gather these ingredients:
- 1 cup unsalted butter, melted
- 1 1/2 cups brown sugar, packed
- 1 teaspoon vanilla extract
- 2 large eggs
- 2 cups all-purpose flour
- 1/2 teaspoon baking powder
- 1/2 teaspoon baking soda
- 1/2 teaspoon salt
- 1 cup colorful sprinkles (plus extra for topping)
- 1/2 cup white chocolate chips (optional)
Ingredient Substitutions
You can swap some ingredients if needed. Use coconut oil instead of butter for a dairy-free option. If you have granulated sugar, that works instead of brown sugar. You can also use almond flour for a gluten-free version. For a fun twist, try adding peanut butter chips or dark chocolate chips instead of white chocolate.
Importance of Quality Ingredients
Using quality ingredients matters a lot. Fresh, unsalted butter gives a rich flavor. The right brown sugar adds moisture and a chewy texture. Good vanilla extract enhances the overall taste. Colorful sprinkles make these blondies fun and appealing. Always choose the best ingredients you can find for the best results. Using high-quality items helps you create a dessert that stands out.
Step-by-Step Instructions
Preparation of the Baking Pan
Start by preheating your oven to 350°F (175°C). This step helps the blondies bake evenly. Next, take a 9x13 inch baking pan. Grease it well with butter or line it with parchment paper. The paper makes it easy to lift out the blondies later.
Mixing Wet Ingredients
In a large mixing bowl, pour in 1 cup of melted unsalted butter. Add 1 1/2 cups of packed brown sugar. Stir these together until they look smooth and shiny. This mix gives your blondies a deep, rich flavor. Then, mix in 1 teaspoon of vanilla extract and 2 large eggs. Keep stirring until everything is well blended.
Combining Dry Ingredients
In a separate bowl, whisk together 2 cups of all-purpose flour, 1/2 teaspoon of baking powder, 1/2 teaspoon of baking soda, and 1/2 teaspoon of salt. This mix adds structure to your blondies. Make sure there are no lumps in the flour. A smooth blend helps the blondies rise well.
Final Mixing and Folding
Now, it's time to combine the dry and wet mixes. Gradually add the dry ingredients into the wet mixture. Stir gently until just combined. Be careful not to overmix; a few flour spots are okay. Finally, fold in 1 cup of colorful sprinkles and 1/2 cup of white chocolate chips, if you choose to use them. This step adds fun and sweetness.
Baking Instructions
Pour the batter into your prepared baking pan. Use a spatula to smooth it out evenly. For a fun touch, sprinkle some extra sprinkles on top. Place the pan in the oven and bake for 25-30 minutes. They are ready when the edges turn golden brown. A toothpick should come out with a few moist crumbs, not wet batter. Once done, let them cool in the pan for 10 minutes. After that, transfer them to a wire rack to cool completely before cutting into squares.
Tips & Tricks
Common Mistakes to Avoid
When making Funfetti blondies, avoid overmixing the batter. Overmixing can lead to tough blondies. Mix just until the flour disappears. Another mistake is using cold eggs. Always use room-temperature eggs for the best texture. Lastly, do not skip the parchment paper. This makes it easy to lift out the blondies after baking.
Cooling and Serving Suggestions
After baking, let the blondies cool in the pan for ten minutes. Then, move them to a wire rack to cool completely. This helps them firm up and makes cutting easier. For serving, cut them into squares. You can add a scoop of ice cream on top. This makes a fun and tasty dessert.
How to Ensure Chewy Blondies
To make sure your blondies stay chewy, use melted butter. This gives them a nice texture. Also, do not bake them too long. Check them at 25 minutes. They should look golden and a toothpick should come out with a few moist crumbs. Finally, allow them to cool completely before cutting. This helps keep them soft and chewy.
Pro Tips
- Use Room Temperature Eggs: Allow your eggs to come to room temperature before mixing them into the batter for a smoother texture and better rise.
- Don't Overmix the Batter: Mix until just combined to ensure your blondies remain soft and chewy rather than dense and tough.
- Chill for Better Cutting: After baking, let the blondies cool completely before cutting. Chilling them in the fridge for 30 minutes makes for cleaner cuts.
- Add Extra Sprinkles: For an extra burst of color and fun, top your blondies with additional sprinkles before baking.
Variations
Adding Different Mix-Ins
You can play with your Funfetti blondies by adding different mix-ins. Try using nuts like walnuts or pecans for a crunchy bite. Chocolate chips are also great. You can swap white chocolate chips for milk or dark chocolate for a different taste. Dried fruit, like cranberries or cherries, adds a nice chew. Each mix-in gives a new twist to your blondies.
Gluten-Free Option
If you want a gluten-free option, you can switch the all-purpose flour. Use a gluten-free flour blend instead. Make sure the blend includes xanthan gum for better texture. This small change keeps your blondies soft and chewy. Your friends won’t even notice they are gluten-free!
Funfetti Theme Ideas for Events
Funfetti blondies are perfect for celebrations. You can color the sprinkles to match your event. Use red and green for Christmas or pastels for Easter. For birthdays, try rainbow sprinkles to add joy. You can even cut them into fun shapes with cookie cutters. This adds a festive touch that everyone will love!
Storage Info
How to Store Leftover Blondies
To store your leftover funfetti blondies, let them cool completely. Then, cut them into squares. Place the squares in a single layer in a container. Make sure to cover the container tightly with a lid or plastic wrap. This keeps the blondies soft and fresh.
Freezing for Longer Storage
If you want to save some blondies for later, freezing is a great option. First, let the blondies cool fully. Wrap each square tightly in plastic wrap. Then place the wrapped squares in a freezer-safe bag or container. You can freeze them for up to three months. When you are ready to enjoy, let them thaw at room temperature.
Best Containers for Storage
The best containers for storing blondies are airtight ones. Use a glass or plastic container with a tight lid. This helps keep the blondies moist. If you use plastic wrap, make sure it covers the entire surface. This extra layer of protection keeps them fresh longer.
FAQs
How do you know when Funfetti Blondies are done?
You can tell when Funfetti Blondies are done by checking the edges. They should be golden brown. Insert a toothpick in the center. If it comes out with a few moist crumbs, you’re good to go. The blondies will continue to cook a bit after you remove them from the oven. This helps them stay soft and chewy.
Can I make these blondies in advance?
Yes, you can make these blondies in advance. They stay fresh for a few days at room temperature. Just store them in an airtight container. You can also chill them in the fridge if you prefer a cold treat. If you want to keep them longer, freezing is a great option.
What is the difference between brownies and blondies?
Brownies and blondies differ mainly in flavor and color. Brownies have cocoa powder, giving them a rich chocolate taste. Blondies do not have cocoa, making them lighter in color. Instead, they have a sweet, buttery flavor from brown sugar. Both are delicious, but they offer unique tastes.
In this post, we covered the key ingredients and their importance. I shared easy steps for mixing and baking, plus tips to avoid common mistakes. We explored fun variations and storage methods for your blondies.
Remember, using quality ingredients makes a big difference. Always cool them properly for the best chewy texture. Now, you’re ready to make delicious funfetti blondies that impress. Enjoy every bite!