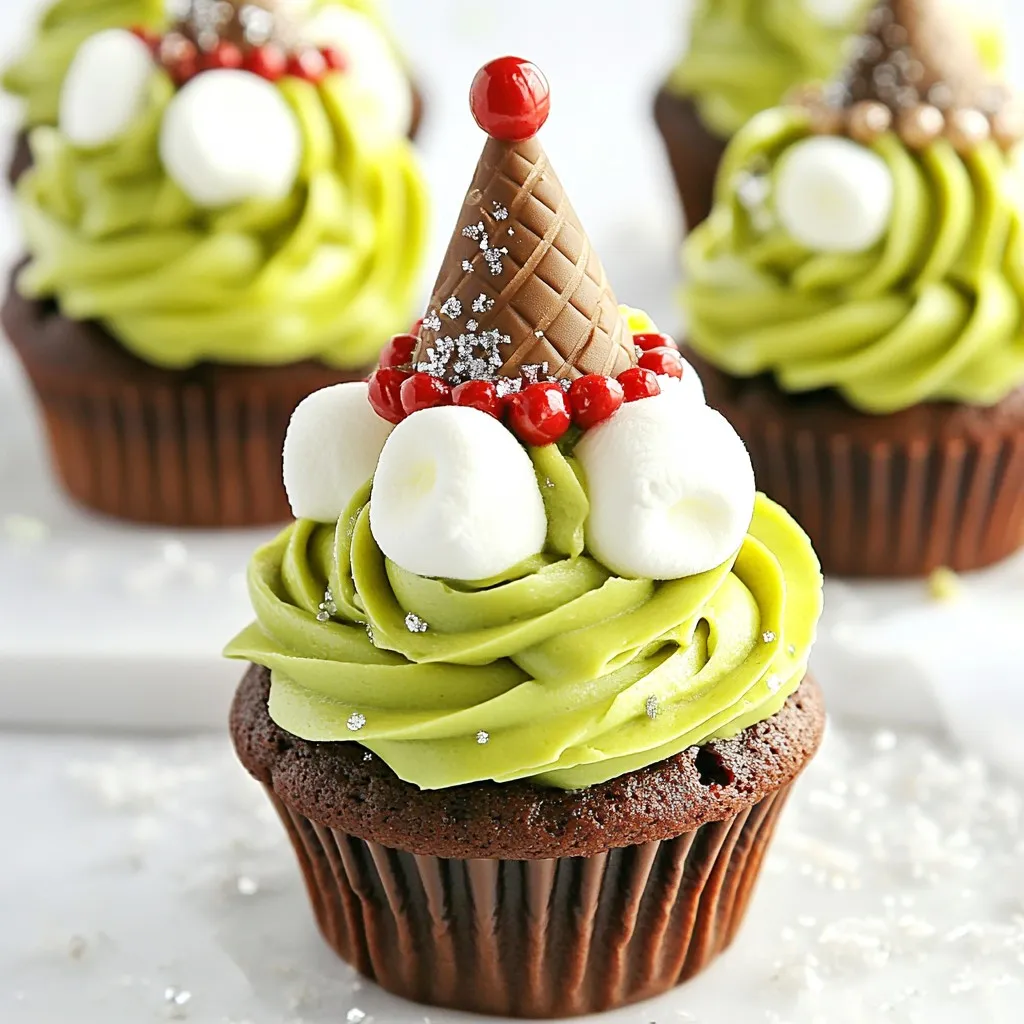
Get ready to bake some magic! Minute Elf Hat Cupcakes are the perfect festive treat for your holiday gatherings. With easy steps and simple ingredients, you can whip up these charming cupcakes that look like little elf hats. I’ll show you how to create these fun desserts that will delight both kids and adults. Let’s dive into this sweet adventure and make your holiday celebrations even jollier!
Why I Love This Recipe
- Festive Presentation: These cupcakes are not only delicious but also visually enchanting, making them a perfect treat for holiday gatherings.
- Fun to Make: Kids and adults alike will enjoy assembling these elf hats, adding a fun and interactive element to your baking experience.
- Chocolatey Goodness: The rich chocolate flavor of the cupcakes pairs perfectly with the sweet green frosting, creating a delightful contrast.
- Customizable: You can easily modify the decorations, using different colors or toppings to match your holiday theme or personal preference.
Ingredients
Complete List of Ingredients
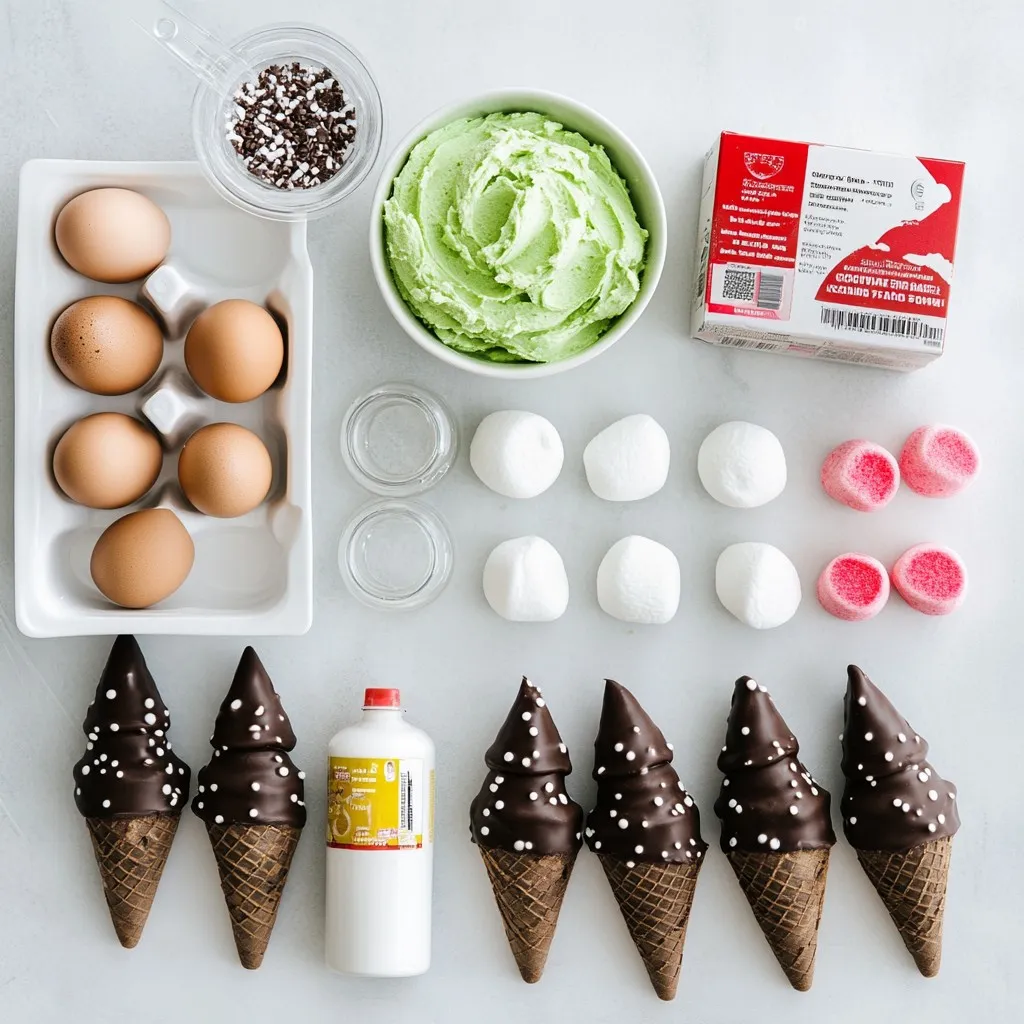
To make Minute Elf Hat Cupcakes, gather these items:
– 1 box chocolate cake mix
– 3 eggs
– 1 cup water
– 1/2 cup vegetable oil
– 1 cup whipped frosting (green)
– 12 chocolate-covered cone-shaped ice cream cones
– 24 mini marshmallows
– Red decorating gel
– Edible glitter (optional)
These ingredients create a fun and festive treat perfect for the holidays.
Optional Ingredients for Extra Flavor
If you want to boost the flavor, try adding:
– A splash of vanilla extract
– A pinch of salt to the batter
These additions can enhance the taste of your cupcakes without much effort.
Ingredient Substitutions
You can swap some ingredients if needed. For example:
– Use water and oil for a richer taste.
– Substitute chocolate cake mix with vanilla or red velvet mix for a twist.
– If you don’t have whipped frosting, you can use store-bought frosting or make your own.
These options make the recipe flexible for what you have at home.
Step-by-Step Instructions
Prepping Your Oven and Cupcake Tin
Start by preheating your oven to 350°F (175°C). This step is key for even baking. While the oven heats, take a standard cupcake tin. Place paper liners in each cup. These liners make it easy to remove the cupcakes later.
Mixing the Cupcake Batter
In a large bowl, combine the chocolate cake mix, eggs, water, and vegetable oil. Mix these ingredients well until you get a smooth batter. This should take about 2-3 minutes. The batter should be thick but pourable. You’ll love the rich chocolate scent as you mix!
Baking and Cooling the Cupcakes
Now, fill each cupcake liner about two-thirds full with the batter. This helps them rise nicely. Bake the cupcakes in your preheated oven for 18-20 minutes. To check if they are done, insert a toothpick in the center. If it comes out clean, they are ready! Let the cupcakes cool completely on a wire rack. This step is important so your frosting won’t melt.
Assembling the Elf Hat Cupcakes
Once cooled, take a knife or cupcake corer to make a small hole at the top of each cupcake. This will hold the ice cream cone hat. Next, use the green whipped frosting to generously frost the top of each cupcake. Make it smooth. Place a chocolate cone-shaped ice cream cone upside down on each frosted cupcake. This creates the elf hat! Use the red decorating gel to add a hat band around the cone’s base. Finally, pop a mini marshmallow on top of each hat for a fun finish. If you want a bit of sparkle, sprinkle some edible glitter on top. Enjoy these festive treats!
Tips & Tricks
How to Ensure Moist Cupcakes
To make sure your cupcakes stay moist, start with fresh ingredients. Use eggs at room temperature. This helps them mix better. Mix the batter just until combined. Overmixing can make cupcakes dry. Fill each liner about two-thirds full. This allows room for rising without spilling. Baking at the right temperature is key. Use an oven thermometer if needed. Lastly, cool cupcakes in the tin for a few minutes before moving them to a wire rack. This helps lock in moisture.
Perfect Frosting Techniques for a Smooth Finish
For a smooth frosting finish, use a good-quality whipped frosting. Start with cooled cupcakes. Apply a generous amount of frosting on top. Use a straight-edged spatula to spread it evenly. If you want a smoother look, dip your spatula in hot water. Wipe it dry, then smooth the frosting. You can also use a piping bag for fun designs. Just make sure to keep the frosting at room temperature. This keeps it easy to spread and shape.
Decorating Ideas for a Seasonal Touch
Get creative with your decorations! After you place the chocolate cone on the cupcake, use red gel for a hat band. Add mini marshmallows on top for a fun finish. If you want a little sparkle, sprinkle edible glitter on top. You can also use colored sugar for a festive look. Try adding small holiday-themed sprinkles around the base. For a group, arrange the cupcakes on a fun platter. Add some holiday decorations for extra cheer.
Pro Tips
- Tip Title 1: Ensure the cupcakes are completely cooled before frosting to prevent the frosting from melting.
- Tip Title 2: For a cleaner cut, use a serrated knife to create the hole for the ice cream cone.
- Tip Title 3: Experiment with different colors of frosting to create a variety of elf hats.
- Tip Title 4: Store any leftover cupcakes in an airtight container to keep them fresh for longer.
Variations
Alternative Flavor Combinations for Cupcakes
You can switch up the flavor of your cupcakes. Instead of chocolate, try vanilla or red velvet cake mix. Each flavor brings its own twist. For vanilla cupcakes, use a vanilla frosting and colorful decorations. Red velvet adds a festive red hue, making them perfect for any holiday.
Different Themes for Elf Hat Cupcakes
You can easily change the theme of your elf hat cupcakes. For a winter wonderland, use white frosting and sprinkle with blue edible glitter. For a gingerbread theme, add cinnamon or nutmeg to the batter. Top with a gingerbread cookie instead of the hat. Kids love a Halloween theme too! Use orange frosting and add candy corn as hats.
Ideas for Using Different Frosting Colors
Frosting color can change the whole look of your cupcakes. Use bright colors for a fun, playful vibe. Pink frosting with a chocolate cone hat looks adorable. Blue frosting can create a frosty effect, great for winter themes. You can even mix colors! Swirl two colors together for a marbled effect. This adds extra fun to your elf hat cupcakes.
Storage Info
How to Store Leftover Cupcakes
To keep your Minute Elf Hat Cupcakes fresh, place them in an airtight container. Make sure the cupcakes are completely cool before storing them. This helps prevent sogginess. You can keep them at room temperature for up to three days. If you want them to last longer, store them in the fridge. Just remember to let them come back to room temp before serving.
Best Ways to Keep Frosting Fresh
If you have leftover green whipped frosting, store it in a separate airtight container. Keep it in the fridge for up to a week. Before using it again, give it a good stir. If it seems thick, you can add a little milk to smooth it out. Always cover it well to avoid drying out.
Freezing Instructions for Cupcakes
You can freeze these cupcakes if you need to save some for later. First, let them cool completely. Then, wrap each cupcake in plastic wrap. Place them in a freezer bag or container. They can last for up to three months in the freezer. When you want to eat them, thaw them in the fridge overnight. Frost them fresh before serving for the best taste!
FAQs
Can I make these cupcakes ahead of time?
Yes, you can make these cupcakes a day or two before your event. Just bake and cool them. Store in an airtight container at room temperature. Frost them just before serving. This keeps the frosting fresh and pretty.
What can I use instead of chocolate cake mix?
If you want to switch things up, try vanilla or red velvet cake mix. These flavors pair well with the green frosting. You can also make a homemade chocolate cake if you prefer from scratch.
How do I make the hats more sturdy?
To make the hats sturdier, use a thicker frosting. You can also dip the base of the ice cream cone in melted chocolate. Let it set before placing it on the cupcake. This adds support and flavor.
Can I use homemade frosting instead of whipped?
Absolutely! Homemade frosting works great. Just ensure it’s thick enough to hold the cone. Cream cheese or buttercream frosts add a nice touch. Feel free to add your favorite flavors to make them special.
You now have all you need to make these fun Elf Hat Cupcakes. From a complete list of ingredients to tips for baking, I’ve got you covered. Remember to try different flavors and themes to mix things up. Proper storage will keep these treats fresh for later. Always feel free to ask questions and explore variations. Happy bakin