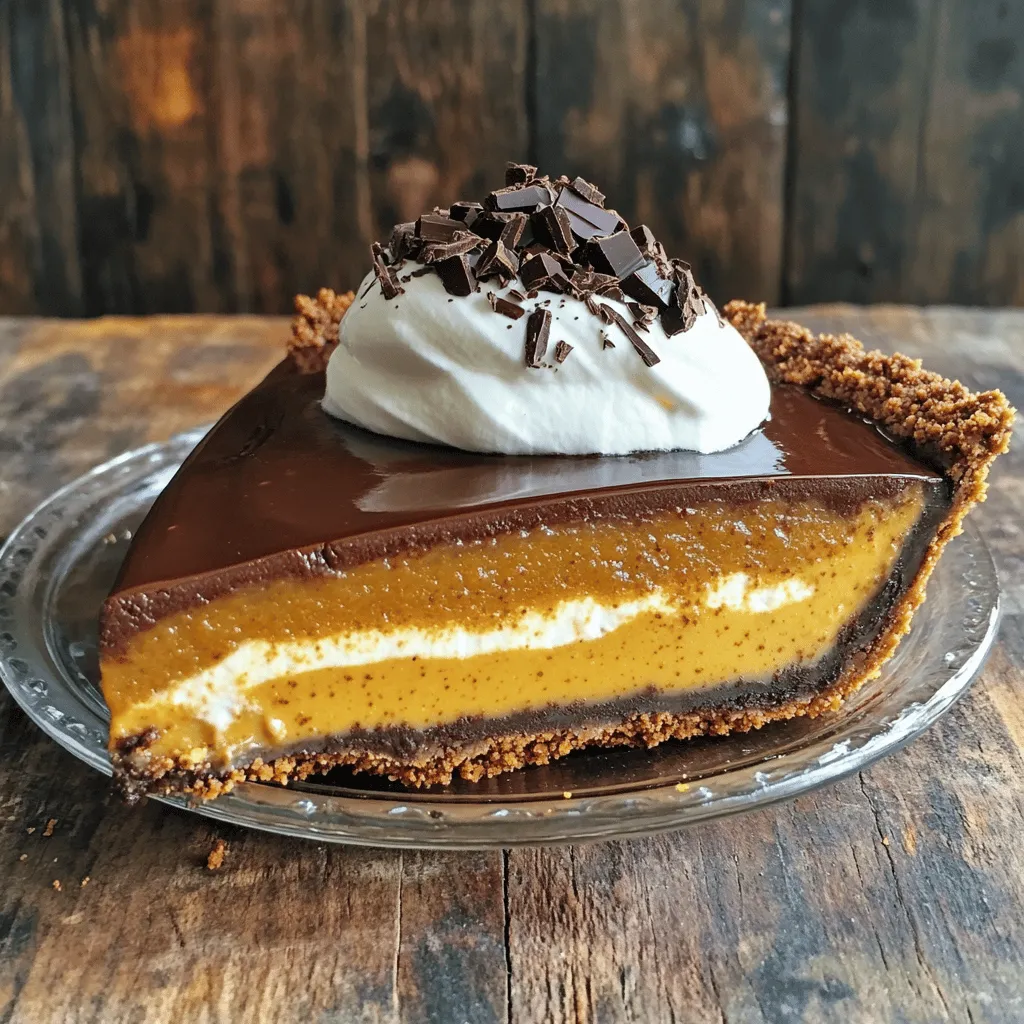
Craving a dessert that’s easy and delicious? This No-Bake Chocolate Pumpkin Pie fits the bill! You’ll love how simple it is to whip up a creamy, rich pie without turning on the oven. In this post, I’ll guide you through step-by-step instructions, share tips, and even suggest fun variations. Get ready to impress your friends and family with this unique treat that combines chocolate and pumpkin perfectly!
Ingredients
List of Ingredients
To make a no-bake chocolate pumpkin pie, gather these simple ingredients:
– 1 ½ cups graham cracker crumbs
– ½ cup unsweetened cocoa powder
– ⅓ cup coconut oil, melted
– ½ cup maple syrup or honey
– 1 cup canned pumpkin puree
– 1 cup cream cheese, softened
– ½ cup powdered sugar
– 1 teaspoon vanilla extract
– 1 teaspoon pumpkin spice
– Whipped cream for topping (optional)
– Dark chocolate shavings for garnish (optional)
Substitutions for Key Ingredients
You can swap some ingredients if you need to. Here are some easy options:
– Graham cracker crumbs: Use crushed cookies like Oreos or digestive biscuits.
– Coconut oil: You can use unsalted butter if you prefer.
– Maple syrup: Honey or agave syrup works well too.
– Cream cheese: Try Greek yogurt for a lighter filling.
– Pumpkin spice: You can mix cinnamon, nutmeg, and ginger if you don’t have pumpkin spice.
Optional Garnishes
Garnishes can make your pie look great and add flavor. Consider these:
– Whipped cream adds a light touch on top.
– Dark chocolate shavings give a nice crunch and rich taste.
– A sprinkle of cinnamon or nutmeg can enhance the flavor.
This recipe is flexible, so feel free to get creative!
Step-by-Step Instructions
Preparing the Crust
First, gather your ingredients for the crust. You need graham cracker crumbs, cocoa powder, melted coconut oil, and maple syrup. In a mixing bowl, combine 1 ½ cups of graham cracker crumbs and ½ cup of unsweetened cocoa powder. Then, add ⅓ cup of melted coconut oil and ½ cup of maple syrup. Mix these until it looks like wet sand.
Next, press this mixture into the bottom and sides of a 9-inch pie dish. Use the back of a measuring cup to press it firmly. This step helps create a strong base. Set the crust aside in the fridge so it can firm up while you prepare the filling.
Making the Filling
Now, let’s make the filling. Take a large mixing bowl and beat 1 cup of softened cream cheese until smooth. This makes the filling creamy and rich. Next, add in 1 cup of canned pumpkin puree, ½ cup of powdered sugar, 1 teaspoon of vanilla extract, and 1 teaspoon of pumpkin spice. Mix everything together until it’s fully blended. The mixture should be thick and creamy.
Layering the Chocolate Filling
It’s time to add some chocolate! Pour half of the pumpkin filling into the crust and spread it evenly. This layer adds a nice base flavor. Now, melt some dark chocolate until it’s smooth. Mix the melted chocolate into the remaining filling until it’s well combined.
Gently pour this chocolate pumpkin mixture on top of the first layer in the crust. Use a spatula to smooth the top. This layering gives the pie a beautiful look and a rich taste.
Chilling and Serving
Cover the pie with plastic wrap and place it in the fridge. Chill it for at least 4 hours, or overnight if you can wait. This helps the pie set and makes it easier to slice.
When you’re ready to serve, take the pie out of the fridge. You can top it with whipped cream and sprinkle dark chocolate shavings on top for a nice finish. Enjoy the creamy, chocolatey goodness!
Tips & Tricks
Tips for the Perfect Crust
To make a great crust, use fresh graham cracker crumbs. If they sit too long, they can lose flavor. Mix the crumbs with cocoa powder for a rich taste. When adding melted coconut oil and maple syrup, combine them well. Press the mixture firmly into the dish. This helps the crust hold its shape. Chill the crust in the fridge while making the filling. This step helps it firm up nicely.
How to Achieve Creamy Filling
For a smooth filling, soften the cream cheese first. Beat it well until there are no lumps. Then, add the pumpkin puree slowly. Mix in the powdered sugar, vanilla, and pumpkin spice. Make sure every ingredient blends well. This will give you a creamy texture. If your filling seems too thick, you can add a splash of milk. This helps it blend more easily.
Suggestions for Flavor Enhancement
To boost flavor, try adding a pinch of sea salt. It can enhance the sweetness. You can also mix in some cinnamon or nutmeg for extra warmth. If you love chocolate, add dark chocolate chips to the filling. They will melt and add richness. For a fun twist, top the pie with crushed nuts or sprinkles. This gives a nice crunch and a pop of color.
Variations
Gluten-Free Option
You can make this pie gluten-free with simple swaps. Use gluten-free graham cracker crumbs instead of regular ones. Many brands offer tasty gluten-free options. Check the label to ensure they are truly gluten-free. You will still get a great crust with the same flavor.
Dairy-Free Version
To make this pie dairy-free, swap out the cream cheese. Use a dairy-free cream cheese alternative. There are many options on the market today. You can also use coconut cream for a rich texture and taste. This keeps the pie creamy without any dairy.
Alternative Sweeteners
If you want to change the sweetness, try different sweeteners. You can use agave syrup instead of maple syrup or honey. You can also use stevia or monk fruit sweetener for a low-calorie option. Just adjust the amount based on the sweetener’s strength. This way, you can enjoy a pie that fits your diet needs.
Storage Information
How to Store Leftovers
To store leftovers, place the pie in an airtight container. You can also cover the pie dish with plastic wrap. This helps keep the pie fresh and tasty. Store it in the fridge for up to four days. Always ensure the pie is cool before covering it.
Freezing Instructions
You can freeze No-Bake Chocolate Pumpkin Pie too! First, let the pie chill completely. Then, wrap it tightly in plastic wrap. After that, place it in a freezer-safe container. This way, you can enjoy it later! The pie can stay frozen for up to two months. When ready to eat, thaw it in the fridge overnight.
Shelf Life of No-Bake Chocolate Pumpkin Pie
The shelf life of this pie varies based on storage. In the fridge, it lasts about four days. If you freeze it, you can keep it for two months. For the best taste, eat the pie within a week if stored in the fridge. Always check for any changes in smell or texture before enjoying it.
FAQs
Can I use fresh pumpkin instead of canned?
Yes, you can use fresh pumpkin. Start with a small pumpkin. Cut it in half and remove the seeds. Roast or steam the pumpkin until soft. Then, scoop out the flesh and puree it in a blender or food processor. This gives a fresh taste to your pie. Just make sure to measure out one cup of puree for the recipe.
How long can I keep the pie in the fridge?
You can keep the pie in the fridge for up to five days. Make sure to cover it well with plastic wrap. This keeps it fresh and prevents it from absorbing other odors in the fridge. If you want to enjoy it later, you can freeze it too.
What if I don’t have graham cracker crumbs?
No worries if you lack graham cracker crumbs! You can use crushed cookies or even crushed nuts. Options like vanilla wafers or digestive biscuits work great too. Just mix them with cocoa powder and melted coconut oil for a tasty crust.
In this blog post, we explored how to make a no-bake chocolate pumpkin pie. We covered the essential ingredients, including possible substitutions and garnishes. I shared step-by-step instructions for preparing the crust and creamy filling. Tips for a perfect result and variations for different diets were included too. Finally, we looked at storage methods and answered common questions.
In summary, making this pie is simple and fun. Try these tips for your next dessert!