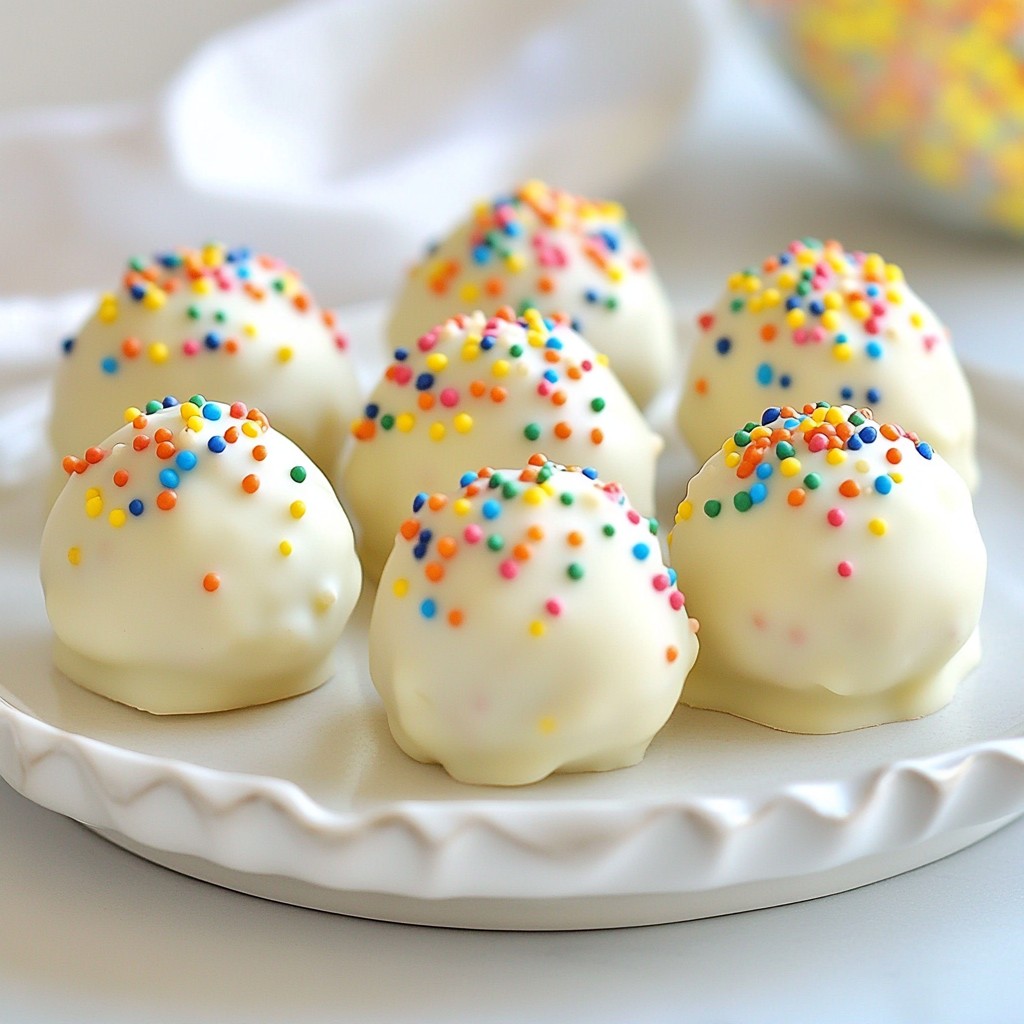
Craving a sweet treat that's fun and easy? These No-Bake Funfetti Cake Batter Truffles are just the answer! Packed with colorful sprinkles and a rich cake batter flavor, they require no baking and only a few simple steps. Whether you’re a novice or a pro in the kitchen, I’ll guide you through each part. Let’s whip up a batch of joy that you can enjoy any time!
Why I Love This Recipe
- Easy to Make: No baking required! These truffles come together quickly and effortlessly, making them a perfect treat even for beginner bakers.
- Customizable Flavors: You can easily swap out the extracts or add different mix-ins, allowing you to personalize the truffles to suit your taste.
- Fun Presentation: The vibrant rainbow sprinkles not only add a pop of color but also make these truffles ideal for celebrations and parties.
- Deliciously Decadent: These truffles are rich and indulgent, offering a delightful burst of cake batter flavor in every bite.
Ingredients
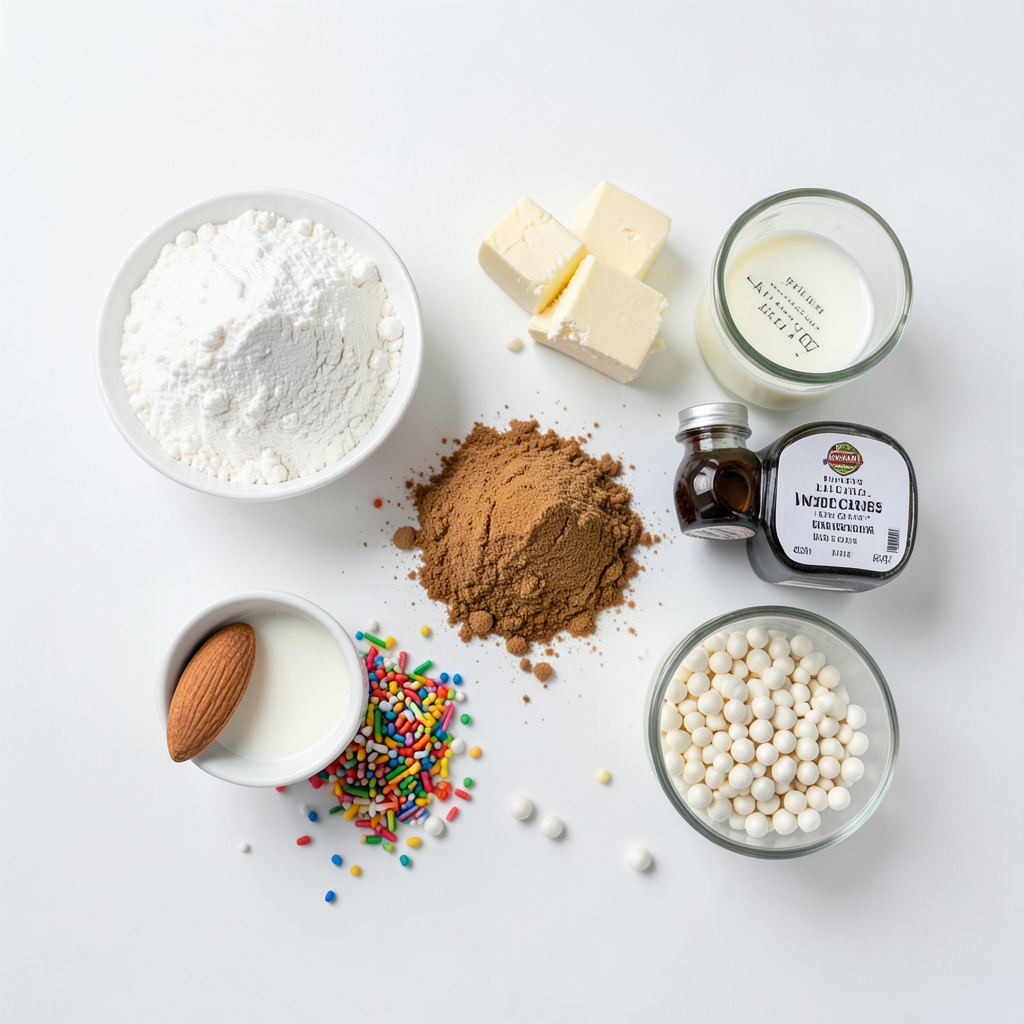
Complete Ingredient List
To make No-Bake Funfetti Cake Batter Truffles, gather these ingredients:
- 1 cup all-purpose flour
- 1/2 cup unsalted butter, softened
- 3/4 cup brown sugar, packed
- 1 teaspoon vanilla extract
- 1/2 teaspoon almond extract (optional)
- 1/4 cup milk
- 1 cup rainbow sprinkles
- 1 cup white chocolate chips (for coating)
Substitute Options for Allergies
If you have allergies, there are great swaps:
- Use gluten-free flour for a gluten-free option.
- Replace butter with vegan butter or coconut oil for dairy-free.
- Use almond milk instead of regular milk for lactose-free.
- Swap white chocolate with dairy-free chocolate chips if needed.
Importance of Quality Ingredients
Using quality ingredients makes a big difference. Fresh butter adds a creamy taste, while good flour gives the right texture. Using real vanilla extract enhances the flavor. Bright, fresh sprinkles bring joy to your truffles. Always choose ingredients you trust for the best results. This ensures a treat that tastes amazing and looks appealing.
Step-by-Step Instructions
Prepping the Flour
To start, we need to treat the flour. This step is very important. It helps kill any bacteria. First, preheat your oven to 350°F (175°C). Then, spread the flour on a baking sheet. Bake it for 5 minutes. After that, let the flour cool completely. This step makes your truffles safe to eat.
Mixing and Incorporating Ingredients
Now, let’s mix our base. In a large bowl, cream together the softened butter and brown sugar. You want this to be smooth and creamy. Next, stir in the vanilla and almond extracts. Mix well until everything is combined. Now, we will add the heat-treated flour. Do this slowly, alternating with the milk. Mix until you have a smooth dough. Finally, fold in the rainbow sprinkles gently. This adds color and fun to your truffles.
Shaping and Chilling the Truffles
It’s time to shape our truffles! Take about 1 tablespoon of dough. Roll it into a ball using your hands. Place these balls on a parchment-lined baking tray. Make sure to leave some space between each one. Once you shape all the dough, place the tray in the fridge. Chill the truffles for about 30 minutes. This helps them set and hold their shape.
Coating and Decorating
For the final touch, we need to coat the truffles. First, melt the white chocolate chips. Use a microwave-safe bowl. Heat in 30-second intervals, stirring until smooth. Next, dip each chilled truffle into the melted chocolate. Allow any excess chocolate to drip off. Place the coated truffles back on the parchment-lined tray. While the chocolate is still wet, sprinkle extra rainbow sprinkles on top. This adds a fun finishing touch! Finally, return the tray to the fridge for about 15-20 minutes. This helps the chocolate harden. Your no-bake funfetti cake batter truffles are now ready to enjoy!
Tips & Tricks
How to Achieve the Perfect Truffle Consistency
To get the best truffles, the right mix is key. You want your dough to be smooth but firm. If it feels too sticky, add a tiny bit more flour. If it’s too dry, a splash of milk will help. The dough should hold its shape when rolled. Test one truffle first. If it falls apart, adjust the mix until you find the right balance.
Melting Chocolate: Common Mistakes to Avoid
Melting chocolate can be tricky. Always use a microwave-safe bowl. Heat the chocolate in short bursts. Start with 30 seconds, then stir. This keeps the chocolate from burning. If it clumps, it may be too hot. Let it cool slightly, then stir again. You want a smooth, glossy finish for coating your truffles.
Keeping Truffles Fresh and Tasty
To keep your truffles at their best, store them in the fridge. Use an airtight container to prevent them from drying out. They can last up to a week this way. If you want to keep them longer, freeze them. Just make sure to separate layers with parchment paper to avoid sticking. When you're ready to eat, let them thaw in the fridge. This keeps them delicious and fresh!
Pro Tips
- Heat-Treat the Flour: Always heat-treat your flour to eliminate any bacteria before using it in no-bake recipes.
- Chill for Best Results: Make sure to chill the truffles sufficiently before coating them in chocolate to help them hold their shape.
- Use High-Quality Chocolate: Opt for high-quality white chocolate for coating to ensure a smooth and delicious finish.
- Customize Your Sprinkles: Feel free to experiment with different types of sprinkles or even colored chocolate chips for a unique twist!
Variations
Flavor Variations with Different Extracts
You can switch up the flavor of your truffles with different extracts. Instead of vanilla, try using peppermint extract for a refreshing twist. You can add coconut extract for a tropical vibe. Almond extract gives a nice nutty flavor that pairs well with the sweetness. Just remember to adjust the amount based on your taste. A little goes a long way!
Using Dark or Milk Chocolate for Coating
While white chocolate is a classic choice for coating, dark or milk chocolate offers a richer taste. Use dark chocolate for a deeper flavor that balances the sweetness of the truffles. If you prefer milk chocolate, it will add creaminess. Melt any chocolate you choose in the microwave, just like you would with white chocolate. The truffles will be just as delicious!
Adding Unique Mix-Ins or Sprinkles
You can make these truffles even more fun by adding mix-ins. Try mini chocolate chips or crushed nuts for a crunchy texture. You can also use flavored sprinkles to match any holiday or theme. Consider adding crushed up cookies or candy bars for extra flavor. Get creative! The options are endless, and it makes your truffles unique every time.
Storage Info
Best Practices for Refrigeration
To keep your truffles fresh, store them in an airtight container. Place parchment paper between layers to avoid sticking. Keep the container in the fridge. This helps the truffles stay firm and tasty. Enjoy them chilled for the best flavor.
Freezing Truffles for Long-Term Storage
You can freeze these truffles for later. Place them on a baking sheet in a single layer. Freeze them for about an hour until firm. Then, transfer the truffles to a freezer-safe bag. Remove as much air as possible. They will last for up to three months in the freezer.
Shelf Life: How Long Do They Last?
When stored in the fridge, these truffles last for about a week. If frozen, they can stay good for up to three months. Always check for any off smells or changes in texture before eating. Enjoy your sweet treats while they are fresh!
FAQs
Can I bake these truffles instead of no-bake?
No, you can’t bake these truffles. They are designed to be no-bake treats. Baking changes the texture and flavor. They will not be the same fun, soft bites if baked.
Do I need to heat-treat the flour?
Yes, you must heat-treat the flour. This step removes any harmful bacteria. Spread the flour on a baking sheet and bake it for five minutes at 350°F. Let it cool before mixing it in.
How can I make these truffles gluten-free?
To make gluten-free truffles, use gluten-free all-purpose flour. This swap keeps the texture similar to the original. You may need to adjust the liquid slightly based on the flour you choose.
Are there vegan options for this recipe?
Yes, you can make vegan truffles! Use vegan butter and dairy-free milk. Replace white chocolate with a vegan chocolate option for coating. These swaps keep the treat rich and tasty.
Where can I buy pre-made cake batter truffles?
You can find pre-made cake batter truffles at specialty candy shops or online. Many bakeries also offer them. If you want a quick treat, check local grocery stores for options.
You learned how to make delicious cake batter truffles. We covered the key ingredients, substitutes for allergies, and tips for quality. The step-by-step guide will help you shape and chill your truffles perfectly. We explored variations in flavor and coating that make each batch unique. Remember the best storage practices to keep them fresh. Overall, making these truffles is fun and rewarding. Enjoy customizing your treats and sharing them with friends!