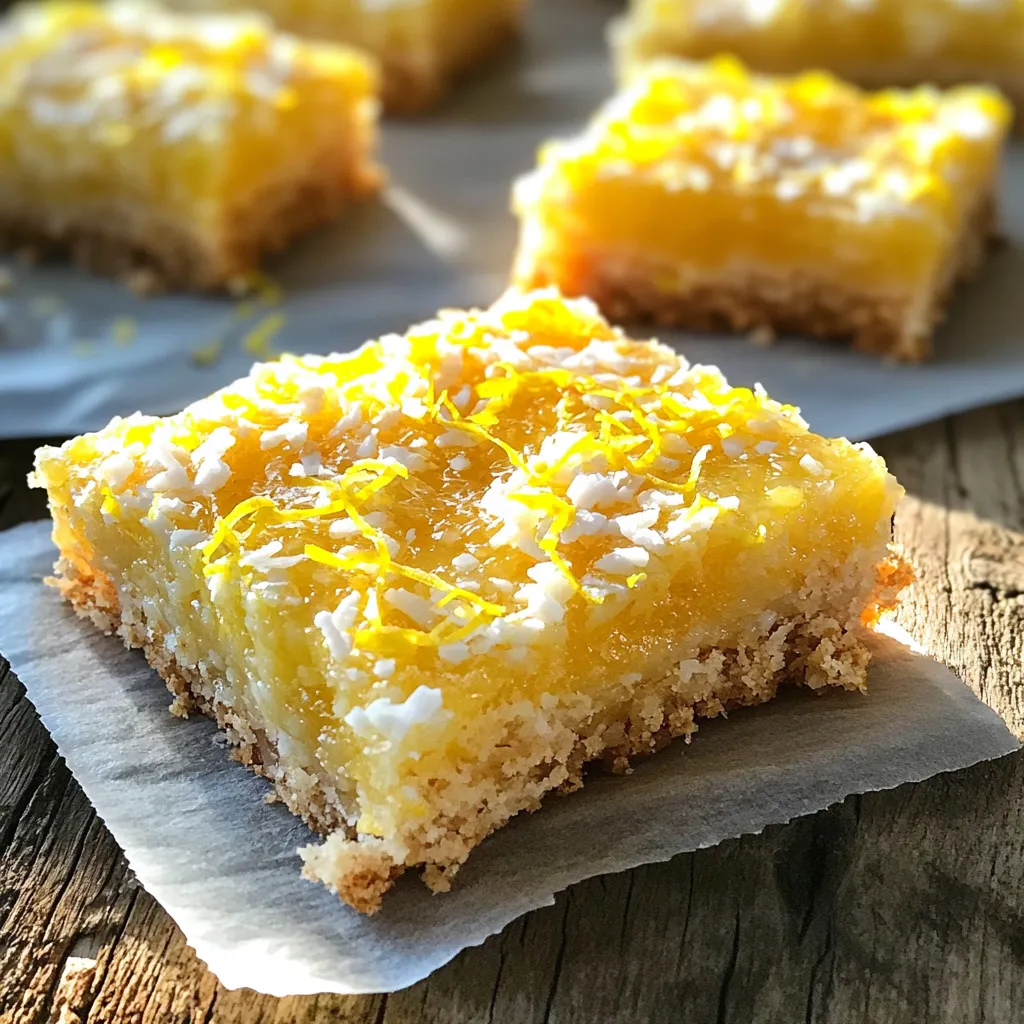
Looking for a refreshing treat that’s simple to make and delightful to eat? My No-Bake Lemon Coconut Bars are the perfect snack for you! With bright lemon flavor and a hint of coconut, these bars are a breeze to whip up. You don’t even need to turn on the oven! Join me as I share how to create this tasty, no-fuss dessert that everyone will love. Let’s get started!
Ingredients
List of Ingredients
To make these no-bake lemon coconut bars, gather:
– 1 ½ cups almond flour
– 1 cup shredded unsweetened coconut
– 1/3 cup maple syrup
– 1/4 cup coconut oil, melted
– 2 teaspoons vanilla extract
– Zest of 2 lemons
– 1/4 cup fresh lemon juice
– A pinch of sea salt
– Optional: Extra shredded coconut for garnish
Substitutions and Alternatives
You can swap almond flour for oat flour or all-purpose flour if needed. Use agave syrup instead of maple syrup for a different taste. Coconut oil can be changed to unsalted butter. If you don’t have fresh lemons, lemon juice from a bottle works too. You can add a dash of lemon extract for extra flavor.
Importance of Quality Ingredients
Using fresh and high-quality ingredients makes a big difference. Fresh lemons provide a bright taste that enhances the bars. Good maple syrup adds natural sweetness, while pure vanilla extract boosts flavor. Quality coconut adds a rich texture. When you choose better ingredients, your bars will taste amazing and feel satisfying.
Step-by-Step Instructions
Preparation Overview
Making no-bake lemon coconut bars is simple. You need basic tools like mixing bowls and a baking dish. Gather all your ingredients first. This makes the process smoother and more fun. You can prep in about 15 minutes. The bars will set in the fridge, so plan for at least two hours.
Detailed Cooking Process
1. Mix Dry Ingredients: Start by combining the almond flour and shredded coconut in a medium bowl. Stir well until they blend nicely.
2. Mix Wet Ingredients: In another bowl, whisk together the maple syrup, melted coconut oil, vanilla extract, lemon zest, lemon juice, and a pinch of sea salt. Mix until smooth.
3. Combine Mixtures: Pour the wet mixture into the dry mixture. Stir until it forms a dough-like consistency. It should feel sticky but hold together.
4. Prepare the Baking Dish: Line an 8×8-inch baking dish with parchment paper. Leave some overhang for easy removal later.
5. Press the Mixture: Firmly press the mixture into the bottom of the dish. Make sure it’s even and compact so it sets well.
6. Chill: Refrigerate the bars for at least 2 hours. If you want them firmer, freeze for 30 to 60 minutes.
Final Touches and Serving Suggestions
Once set, use the parchment paper to lift the bars out of the dish. Cut them into squares or bars. For a lovely finish, sprinkle extra shredded coconut on top. These bars are perfect for snacks or dessert. Serve them cold for a refreshing treat!
Tips & Tricks
Common Mistakes to Avoid
When making no-bake lemon coconut bars, I see some common mistakes. First, do not skip the salt. It enhances the flavors. Second, ensure your coconut oil is melted. If it’s solid, your bars won’t mix well. Lastly, press the mixture firmly into the dish. This helps the bars hold their shape when cut.
How to Achieve the Perfect Texture
To get the right texture, focus on your mixing. Combine the almond flour and coconut well. Then, mix the wet ingredients until smooth. When you combine both, stir until you see no dry spots. The mixture should feel like dough. If it’s too crumbly, add a bit more maple syrup. For a firmer bar, chill for longer in the fridge.
Serving and Pairing Suggestions
I love serving these bars chilled. They taste great with a cup of tea or coffee. For a fun twist, add fresh fruit like berries on the side. You can also sprinkle extra coconut on top for a nice look. Another idea is to drizzle a bit of honey for added sweetness. Enjoy these bars as a snack or dessert!
Variations
Flavor Modifications
You can make these bars your own by adding nuts or fruits. For a crunchy bite, try mixing in chopped almonds or walnuts. They add texture and flavor. If you prefer something fruity, consider adding dried cranberries or blueberries. They bring a nice sweetness and color to the bars. Just fold them in gently to keep the texture right.
Healthier Options
Want a low-carb or vegan version? You can swap out the almond flour for coconut flour. This change keeps the bars low in carbs. For a vegan twist, use agave syrup instead of maple syrup. This small shift keeps your snack plant-based. Always check your ingredients to ensure they fit your health goals.
Theme-Based Suggestions
If you love holiday treats, you can change these bars for special occasions. For a festive touch, add a dash of cinnamon or nutmeg. This gives a warm, cozy flavor perfect for winter. You can also make them bright for a summer picnic. Add fresh fruit slices on top or a drizzle of dark chocolate. This makes them look special and taste amazing too.
Storage Info
Best Practices for Storing Bars
To keep your no-bake lemon coconut bars fresh, store them in an airtight container. Make sure to place parchment paper between layers if stacking. This prevents sticking and keeps them neat. You can store them in the fridge or at room temperature. For best taste, I recommend the fridge.
How Long Do They Last?
When stored properly, these bars last about one week in the fridge. If you keep them at room temp, they will stay fresh for up to three days. Always check for any signs of spoilage before eating. The bars may lose some zest after a few days, but they remain tasty.
Freezing Instructions
You can freeze these bars if you want to store them longer. Wrap each bar in plastic wrap or foil. Then place them in a freezer-safe bag or container. They can last up to three months in the freezer. To enjoy, simply thaw them in the fridge overnight before serving. This way, you always have a sweet treat ready!
FAQs
Can I use different types of flour?
Yes, you can try different flours. Almond flour gives a nutty taste and a soft texture. If you want a gluten-free option, you can use coconut flour. However, coconut flour absorbs more moisture. You may need to adjust the liquid in the recipe. For a more classic approach, you might consider oat flour. Remember, the taste and texture will change with each flour.
How do I know when the bars are set?
You will know the bars are set after chilling them for at least two hours. They should feel firm to the touch. If you can press gently and the bars hold their shape, they are ready. For a firmer texture, try freezing them for about 30-60 minutes. This helps them set more quickly and makes cutting easier.
Can these bars be made in advance?
Absolutely! These bars are great for meal prep. You can make them up to a week in advance. Just store them in the fridge in an airtight container. If you want to keep them longer, you can freeze them. They can last in the freezer for up to three months. Just remember to thaw them in the fridge before enjoying!
In this post, we explored the essential ingredients and their quality. We walked through step-by-step cooking instructions and shared tips to avoid common mistakes. You learned about tasty variations and smart storage practices.
Quality ingredients and good techniques make a big difference in your bars. With these insights, you’re ready to create delicious treats that suit any occasion. Enjoy experimenting and make it your own!