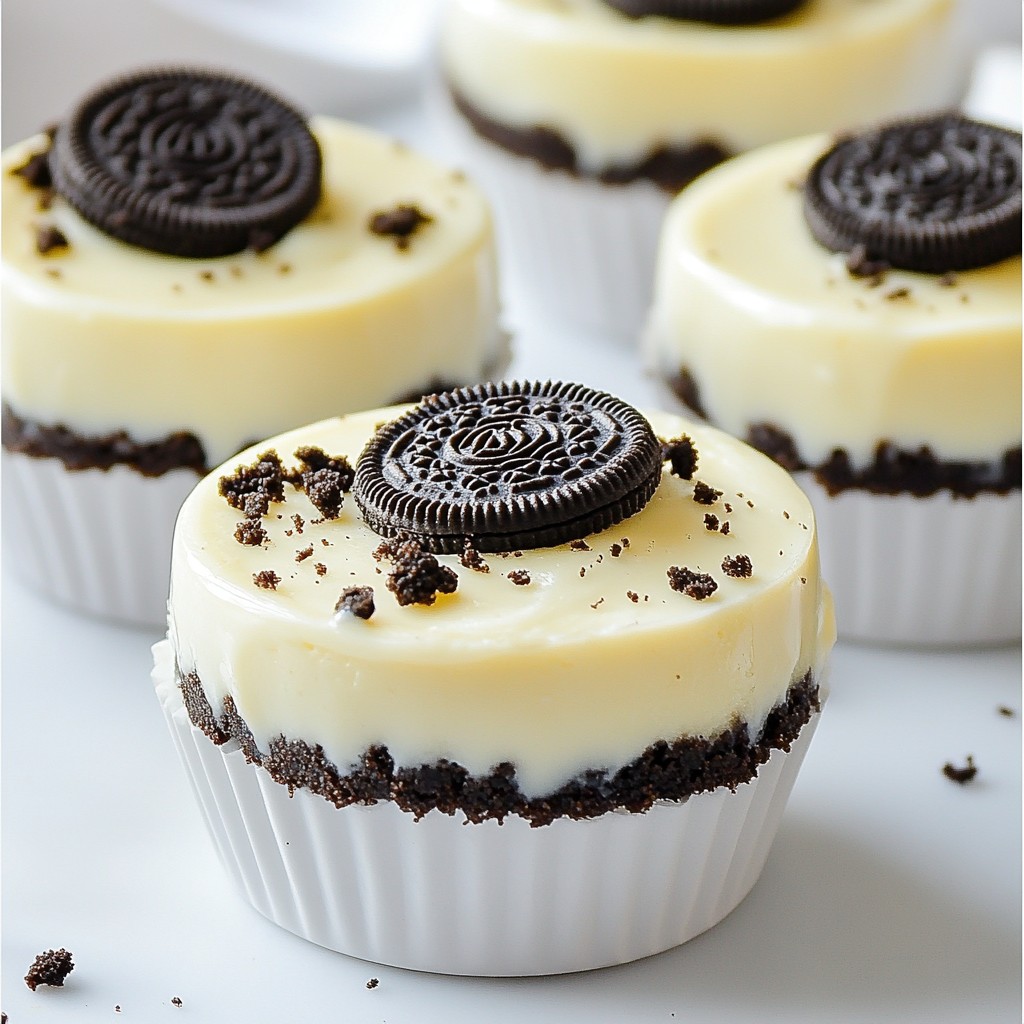
If you love quick and delightful desserts, you're in for a treat! My No-Bake Oreo Cheesecake Cups are easy to make and taste amazing. With just a few ingredients, you can create a dessert that everyone will enjoy. No baking means less mess, and each cup is creamy and sweet. Let’s dive into how to whip up this treat that will impress your friends and family!
Why I Love This Recipe
- Easy to Make: This no-bake recipe requires minimal effort and time, making it perfect for any occasion.
- Decadent Flavor: The combination of creamy cheesecake and chocolatey Oreo crust creates a delightful flavor explosion.
- Perfect for Parties: These individual cups are not only cute but also easy to serve, making them a hit at gatherings.
- Customizable: You can easily adapt the recipe by adding different toppings or mix-ins to suit your taste.
Ingredients
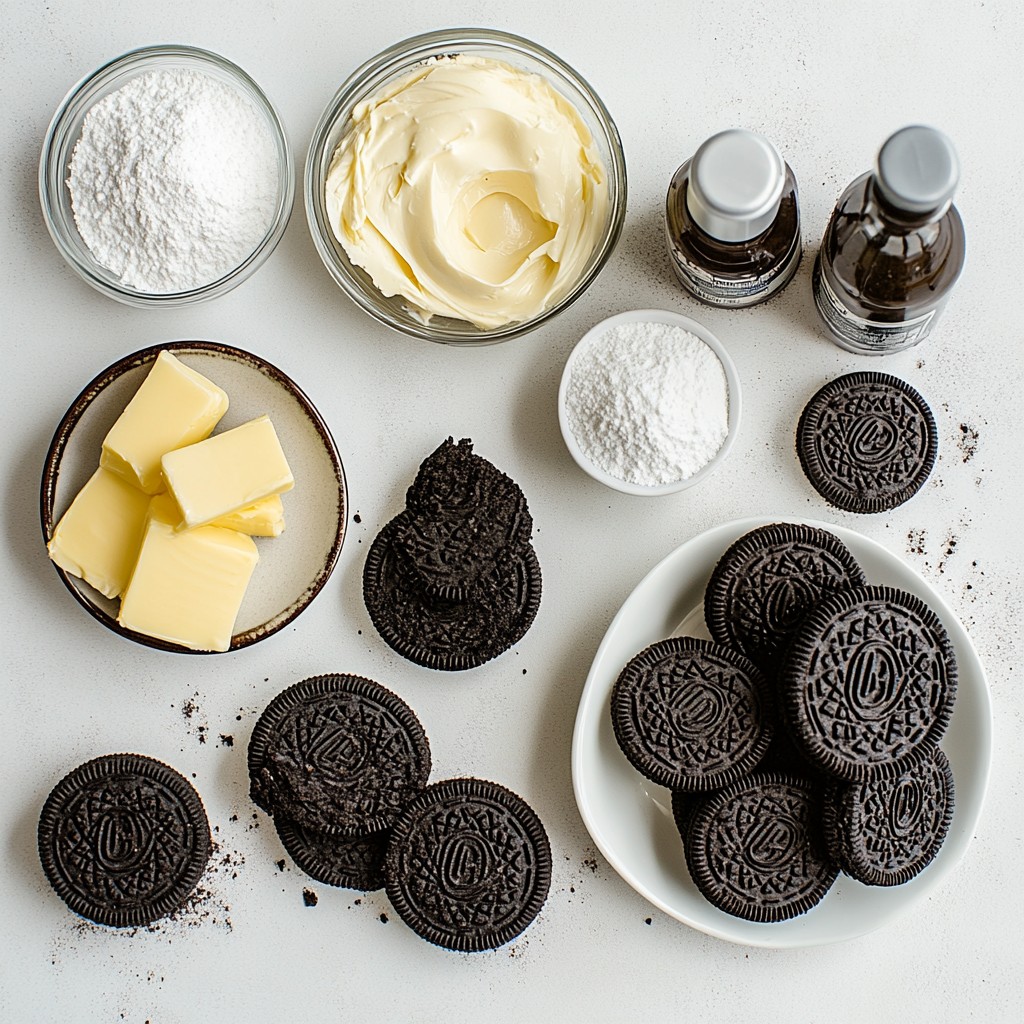
List of Ingredients
- 1 package (16.6 oz) Oreo cookies
- 4 tablespoons unsalted butter
- 2 (8 oz) packages cream cheese
- 1 cup powdered sugar
- 1 teaspoon vanilla extract
- 1 cup heavy whipping cream
- Extra Oreo cookies for garnish
Ingredient Substitutions
- You can use any chocolate sandwich cookie instead of Oreo cookies.
- For a dairy-free option, try using vegan cream cheese.
- If you want less sugar, consider using a sugar substitute.
The main star of this recipe is the Oreo cookies. They give the dessert its rich and chocolatey taste. To make your life easier, use crushed Oreo cookies. This saves time and effort. You can crush them in a bag with a rolling pin or use a food processor. Just make sure the pieces are small.
Next, we need butter. Unsalted butter helps the crust stick together nicely. If you want a healthier option, you could try coconut oil instead. It adds a hint of flavor too.
The cream cheese gives the cheesecake its creamy texture. I recommend using softened cream cheese. This helps it mix smoothly. If you want a dairy-free choice, there are several brands of vegan cream cheese available.
Powdered sugar adds sweetness and helps thicken the filling. You can use less if you prefer a less sweet treat.
Vanilla extract adds a warm flavor that balances the sweetness. You can skip it, but I think it makes the dessert better.
Heavy whipping cream is crucial for the cheesecake filling. It adds volume and makes it light. You can whip it until stiff peaks form. This step is key to a fluffy texture.
Lastly, use extra Oreo cookies for garnish. They make the dessert look pretty and add more flavor. You can crush them or leave them whole for a nice touch.
With these ingredients, you can create a simple and sweet treat that everyone will love!
Step-by-Step Instructions
Preparation of Oreo Crust
1. In a medium bowl, mix crushed Oreo cookies with melted butter.
2. Stir until all the cookie crumbs are coated in butter.
3. Take the mixture and divide it among your serving cups.
4. Press the cookie mix firmly into the bottom of each cup.
Making the Cheesecake Filling
1. In a large bowl, beat the softened cream cheese until it is smooth.
2. Gradually add powdered sugar and vanilla extract.
3. Mix until everything is well combined and creamy.
Combining and Setting the Mixture
1. In another bowl, whip the heavy cream until stiff peaks form.
2. Gently fold the whipped cream into the cream cheese mixture.
3. Spoon the fluffy cheesecake mix over the Oreo crusts in the cups.
4. Fill each cup to the top, then refrigerate for at least 4 hours.
5. Before serving, crush some extra Oreo cookies and sprinkle them on top.
Tips & Tricks
Achieving Ideal Texture
Softened cream cheese is key for a smooth filling. Take it out of the fridge an hour before mixing. This helps it blend easily. If it’s too cold, you may get lumps.
Whipping cream adds lightness. Whip it until stiff peaks form, but don’t overdo it. Over-whipping can make it grainy. It should look fluffy and hold its shape well.
Serving Suggestions
Keep the cheesecake cups chilled for a cool treat. They taste best after at least four hours in the fridge. You can also serve them at room temperature if you prefer a softer texture.
Presentation matters. Use clear cups to show off the layers. Top each cup with crushed Oreos for a fun look. Fresh fruit or chocolate shavings are great for added flair too.
Troubleshooting Common Issues
If your filling is runny, try adding more whipped cream. Gently fold in the cream until it thickens up. You can also chill the mixture longer before filling the cups.
Adjusting sweetness is easy. Taste the filling before you fill the cups. If it’s too sweet, add a bit of cream cheese. This balances the flavors and makes it just right for your taste.
Pro Tips
- Use Room Temperature Cream Cheese: Ensure your cream cheese is at room temperature for a smoother, creamier filling without lumps.
- Chill for Best Results: Allow the cheesecake cups to chill overnight for the best texture and flavor development.
- Customize the Garnish: Feel free to add toppings like chocolate sauce or whipped cream for an extra indulgent treat.
- Keep It Fresh: Store any leftovers in an airtight container in the refrigerator for up to 3 days.
Variations
Flavor Variations
You can change the flavor of your cheesecake cups easily.
- Adding melted chocolate: Melt some chocolate and mix it into the cream cheese. This gives a rich taste.
- Using flavored cream cheese: Choose strawberry, pumpkin, or any flavor you like. This adds a fun twist.
Topping Ideas
Toppings make your cheesecake cups even better.
- Alternative toppings beyond Oreo cookies: Try crushed nuts, sprinkles, or fresh fruit. These add color and taste.
- Seasonal garnishes: Use peppermint for winter or berries in summer. Seasonal toppings keep it fresh and exciting.
Portion Size Alternatives
You can adjust the size of your cheesecake cups for any occasion.
- Making mini versions: Use shot glasses or small cups for bite-sized treats. They are perfect for parties.
- Adjusting servings for larger gatherings: You can easily double the recipe. This way, everyone gets a cup!
Storage Info
Proper Storage Techniques
To keep your No-Bake Oreo Cheesecake Cups fresh, store them in the fridge. Use airtight containers to prevent them from drying out. If you make extras, separate the cups with parchment paper. This keeps the topping intact and avoids sogginess.
Freezing Instructions
You can freeze these cheesecake cups for later. First, cover each cup with plastic wrap. Place them in a freezer-safe container. They can last up to three months in the freezer. When you're ready to enjoy them, move the cups to the fridge. Let them thaw overnight for the best taste and texture.
Shelf Life
These delicious cheesecake cups last up to five days in the fridge. Check for any signs of spoilage before eating. If they smell off or if the filling looks watery, it’s best to toss them. Always trust your senses to keep your dessert safe and tasty.
FAQs
How long do No-Bake Oreo Cheesecake Cups need to set?
No-Bake Oreo Cheesecake Cups need at least 4 hours to set. I like to let them sit overnight for the best taste and texture. The chilling time helps the filling firm up. This way, your cups will be easier to serve and enjoy.
Can I use other types of cookies for the crust?
Yes! You can use other cookies for the crust. Some great options include chocolate cookies or graham crackers. Each type will change the flavor a bit. Experiment with your favorites to find a new twist.
What's the best way to ensure my cheesecake is creamy and not gritty?
To keep your cheesecake creamy, make sure to use softened cream cheese. Beat it until it is very smooth. Also, sift the powdered sugar before mixing it in. This step helps avoid any lumps in your filling.
Can I add other flavors to the cheesecake filling?
Absolutely! You can add flavors like melted chocolate or fruit puree. Just mix in a little after adding the powdered sugar. This way, you can create a whole new taste for your cheesecake cups.
How far in advance can I make these cheesecake cups before serving?
You can make these cheesecake cups up to two days in advance. Just keep them covered in the fridge. This allows the flavors to blend, making them even better when you serve them.
You now have a straightforward recipe for No-Bake Oreo Cheesecake Cups. We covered the key ingredients, precise steps, and helpful tips. You learned about variations, storage, and common questions. These small treats are easy to make and fun to enjoy. Remember, you can customize each cup to your taste. Now, get busy in the kitchen and impress your friends with these delicious desserts! Enjoy the process and have fun.