No-Bake S’mores Cheesecake Cups Delicious and Simple

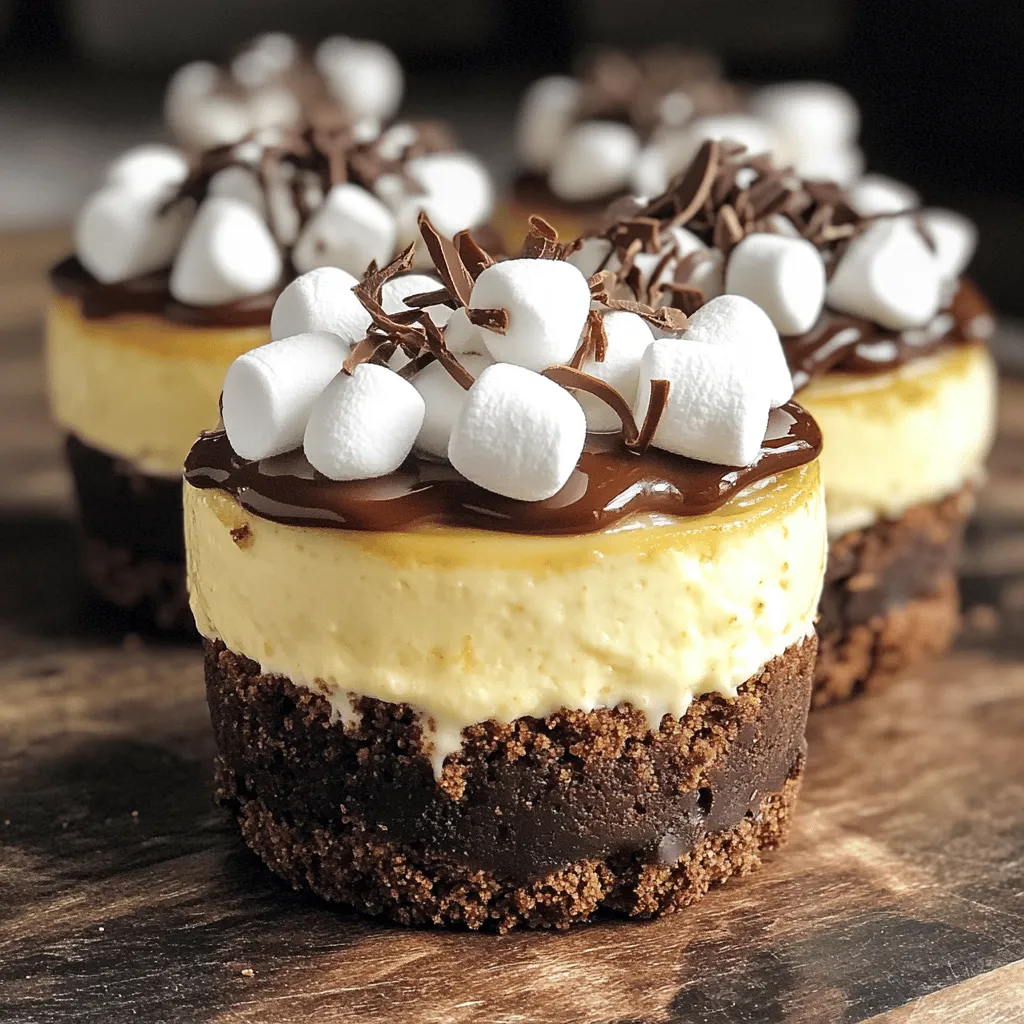
Are you ready to dive into a dessert that combines the joy of s’mores with creamy cheesecake? In this blog post, I’ll show you how to make No-Bake S’mores Cheesecake Cups that are not just delicious, but also super simple to prepare. With easy ingredients and step-by-step instructions, you’ll impress friends and family in no time. Get ready to enjoy a sweet treat that’s perfect for any occasion!

To make No-Bake S’mores Cheesecake Cups, you will need: - 1 cup graham cracker crumbs - 1/4 cup unsweetened cocoa powder - 1/3 cup melted unsalted butter - 2 cups cream cheese, softened - 1/2 cup powdered sugar - 1 teaspoon vanilla extract - 1 cup whipped cream - 1 cup mini marshmallows - 1/2 cup chocolate chips, melted - Additional mini marshmallows and chocolate shavings for topping Gather these items before you start. Having everything ready makes cooking easy and fun. You can add these toppings for extra flavor: - Toasted mini marshmallows - Chocolate shavings - Extra melted chocolate - Crushed graham crackers These toppings add a nice touch. They make the cups look great and taste even better. You can make swaps if you don’t have something. For example: - Use Oreo crumbs instead of graham crackers for a twist. - Swap the cream cheese for a dairy-free cream cheese to make it vegan. - Use honey or maple syrup instead of powdered sugar for sweetness. Feel free to get creative! Cooking is all about making it your own. To start, gather your ingredients. You need graham cracker crumbs, cocoa powder, and melted butter. In a medium bowl, mix the crumbs, cocoa, and butter. Stir until the crumbs look like wet sand. This mixture will form a tasty base for your cups. Next, take serving cups or jars. Divide the crust evenly between them. Press it down firmly at the bottom. This creates a strong base. Place the cups in the fridge while you make the filling. Now, let’s make the cheesecake filling. In a large bowl, add softened cream cheese. Use an electric mixer to beat it until smooth. Then, add powdered sugar and vanilla extract. Mix these until they blend well together. Next, fold in the whipped cream gently. This step adds fluffiness to your filling. Be careful not to stir too hard; you want to keep that nice airy texture. Time to layer the cups! Spoon the cheesecake mixture over the chilled crust. Fill each cup to the top. While the filling is soft, drizzle melted chocolate over it. This adds a rich flavor. Now, sprinkle mini marshmallows on top. If you like, drizzle a bit more melted chocolate over the marshmallows. This gives them extra sweetness. Chill the cups in the fridge for at least two hours. This allows the flavors to meld and the cups to set. If you want toasted marshmallows, use a kitchen torch or broiler carefully. Before serving, add more mini marshmallows and chocolate shavings on top. This makes them look great and adds a bit of crunch. Enjoy your delicious No-Bake S’mores Cheesecake Cups! To get a smooth cheesecake, start with softened cream cheese. Cold cream cheese can clump. Beat the cream cheese until it's creamy and fluffy. Mix in the powdered sugar and vanilla next. This keeps the filling smooth. When you fold in the whipped cream, be gentle. This helps keep the airy texture. If you mix too hard, the filling can get dense. These cups are great for parties or family dinners. You can serve them in small jars or cups. For a fun touch, add a toasted marshmallow on top. Use a kitchen torch for a smoky flavor. You can also drizzle more melted chocolate over the top for extra sweetness. Serve with graham crackers on the side for crunch. One mistake is not chilling the cups long enough. They need at least 2 hours to set. If you skip this step, they can fall apart when served. Another mistake is overmixing the whipped cream. This leads to a dense filling. Finally, don’t skip the crust preparation. A firm crust holds everything together. {{image_2}} You can tweak the classic s’mores cheesecake cups to fit your taste. Try using Oreo crumbs instead of graham cracker crumbs for a chocolatey twist. This small change gives a richer flavor and texture. You can also swap the mini marshmallows for crushed candy bars or peanut butter chips. This adds a fun surprise in every bite. For a fruity version, mix in fresh berries or a layer of fruit preserves. These alternatives bring new flavors and keep the dessert exciting. Making these cups gluten-free is easy. Just use gluten-free graham crackers or almond flour for the crust. For a vegan version, replace the cream cheese with a plant-based alternative. Use coconut cream or cashew cream for a rich texture. Switch the powdered sugar with a vegan sweetener. You can also find vegan whipped cream at stores. These swaps let everyone enjoy this treat without missing out. Seasonal flavors can make your s’mores cheesecake cups even more special. In fall, add pumpkin spice to the filling for a cozy taste. During winter, try peppermint extract for a refreshing holiday twist. You can also mix in seasonal fruits like strawberries in spring or apples in autumn. Top with crushed nuts or toffee bits for extra crunch. These small changes make your dessert feel fresh and festive. To keep your leftover cheesecake cups fresh, place them in the fridge. Use an airtight container or cover them with plastic wrap. This will stop air from making them dry. The cool temperature keeps the cream cheese filling nice and firm. Enjoy your treats within three days for the best taste. If you want to save some for later, you can freeze them. First, let the cups chill completely. Then, cover each cup tightly with plastic wrap. Place them in a freezer-safe container. This helps keep them fresh. You can freeze the cups for up to one month. When ready to enjoy, move them to the fridge overnight to thaw. These no-bake s'mores cheesecake cups last well if stored properly. In the fridge, they are good for about three days. If you freeze them, they stay tasty for up to a month. For the best flavor, try to eat them fresh. Yes, you can use store-bought whipped cream. It saves time and works well. Just make sure it is fresh and fluffy. This will help keep your cheesecake light. If you want, you can also make your own for a richer taste. These cheesecake cups need to chill for at least 2 hours. This time helps the layers set well. If you can wait longer, chilling overnight is even better. This way, the flavors meld together nicely. Absolutely! You can prepare these cups a day ahead. Keep them in the fridge until you are ready to serve. This makes them perfect for parties or gatherings. Just add any toppings before serving for the best look. This blog post guides you through making delicious cheesecake cups. We covered key ingredients, step-by-step instructions, and helpful tips. You learned about variations and easy substitutions, perfect for any diet. Now, you can craft tasty treats at home with ease. Remember the tips to avoid common mistakes. These cheesecake cups are fun to make and share. Enjoy your creamy creations and impress your friends with your skills!

Ingredients

List of Ingredients

To make No-Bake S’mores Cheesecake Cups, you will need:

– 1 cup graham cracker crumbs

– 1/4 cup unsweetened cocoa powder

– 1/3 cup melted unsalted butter

– 2 cups cream cheese, softened

– 1/2 cup powdered sugar

– 1 teaspoon vanilla extract

– 1 cup whipped cream

– 1 cup mini marshmallows

– 1/2 cup chocolate chips, melted

– Additional mini marshmallows and chocolate shavings for topping

Gather these items before you start. Having everything ready makes cooking easy and fun.

Optional Toppings

You can add these toppings for extra flavor:

– Toasted mini marshmallows

– Chocolate shavings

– Extra melted chocolate

– Crushed graham crackers

These toppings add a nice touch. They make the cups look great and taste even better.

Ingredient Substitutions

You can make swaps if you don’t have something. For example:

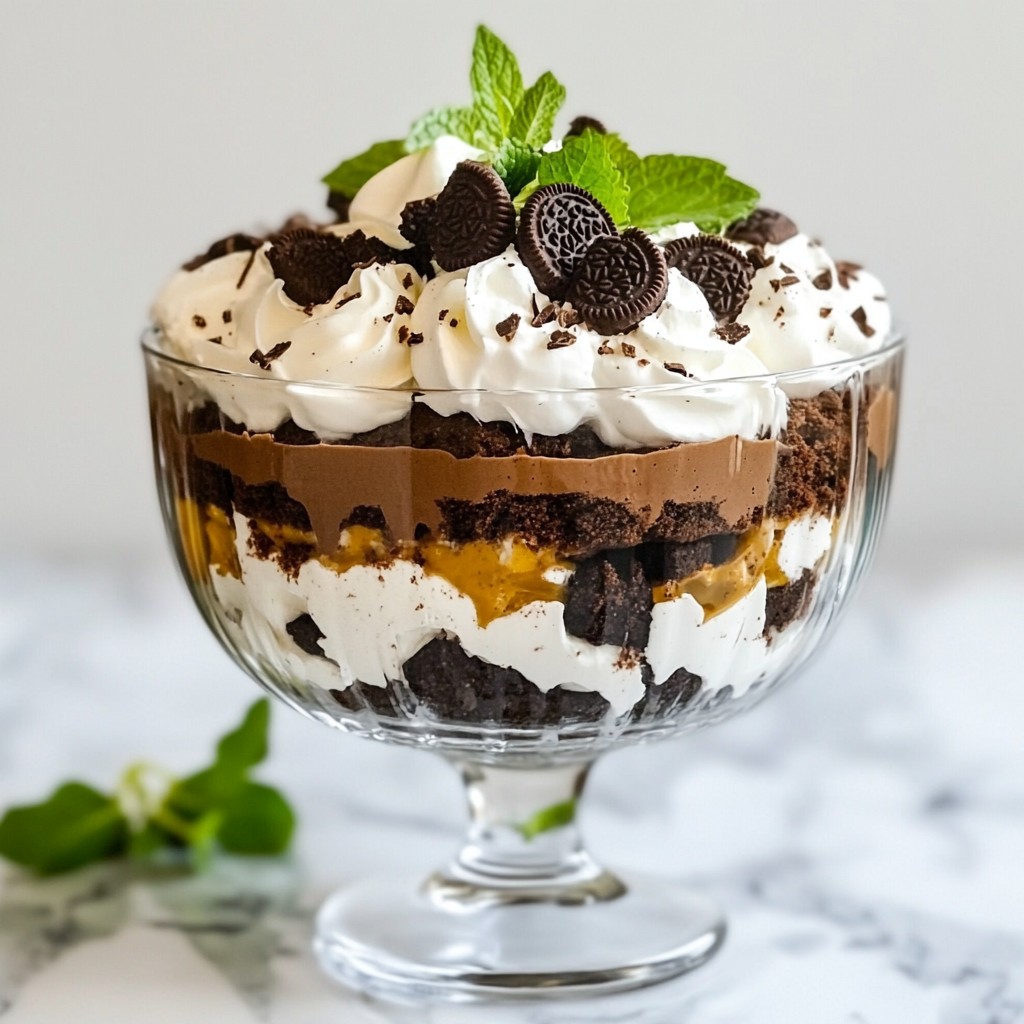
– Use Oreo crumbs instead of graham crackers for a twist.

– Swap the cream cheese for a dairy-free cream cheese to make it vegan.

– Use honey or maple syrup instead of powdered sugar for sweetness.

Feel free to get creative! Cooking is all about making it your own.

Step-by-Step Instructions

Preparing the Crust

To start, gather your ingredients. You need graham cracker crumbs, cocoa powder, and melted butter. In a medium bowl, mix the crumbs, cocoa, and butter. Stir until the crumbs look like wet sand. This mixture will form a tasty base for your cups.

Next, take serving cups or jars. Divide the crust evenly between them. Press it down firmly at the bottom. This creates a strong base. Place the cups in the fridge while you make the filling.

Making the Cheesecake Filling

Now, let’s make the cheesecake filling. In a large bowl, add softened cream cheese. Use an electric mixer to beat it until smooth. Then, add powdered sugar and vanilla extract. Mix these until they blend well together.

Next, fold in the whipped cream gently. This step adds fluffiness to your filling. Be careful not to stir too hard; you want to keep that nice airy texture.

Assembling and Chilling the Cups

Time to layer the cups! Spoon the cheesecake mixture over the chilled crust. Fill each cup to the top. While the filling is soft, drizzle melted chocolate over it. This adds a rich flavor.

Now, sprinkle mini marshmallows on top. If you like, drizzle a bit more melted chocolate over the marshmallows. This gives them extra sweetness.

Chill the cups in the fridge for at least two hours. This allows the flavors to meld and the cups to set. If you want toasted marshmallows, use a kitchen torch or broiler carefully.

Before serving, add more mini marshmallows and chocolate shavings on top. This makes them look great and adds a bit of crunch. Enjoy your delicious No-Bake S’mores Cheesecake Cups!

Tips & Tricks

Perfecting the Cheesecake Texture

To get a smooth cheesecake, start with softened cream cheese. Cold cream cheese can clump. Beat the cream cheese until it’s creamy and fluffy. Mix in the powdered sugar and vanilla next. This keeps the filling smooth. When you fold in the whipped cream, be gentle. This helps keep the airy texture. If you mix too hard, the filling can get dense.

Serving Suggestions

These cups are great for parties or family dinners. You can serve them in small jars or cups. For a fun touch, add a toasted marshmallow on top. Use a kitchen torch for a smoky flavor. You can also drizzle more melted chocolate over the top for extra sweetness. Serve with graham crackers on the side for crunch.

Common Mistakes to Avoid

One mistake is not chilling the cups long enough. They need at least 2 hours to set. If you skip this step, they can fall apart when served. Another mistake is overmixing the whipped cream. This leads to a dense filling. Finally, don’t skip the crust preparation. A firm crust holds everything together.

Variations

S’mores Cheesecake Cup Alternatives

You can tweak the classic s’mores cheesecake cups to fit your taste. Try using Oreo crumbs instead of graham cracker crumbs for a chocolatey twist. This small change gives a richer flavor and texture. You can also swap the mini marshmallows for crushed candy bars or peanut butter chips. This adds a fun surprise in every bite. For a fruity version, mix in fresh berries or a layer of fruit preserves. These alternatives bring new flavors and keep the dessert exciting.

Dietary Adaptations (Gluten-Free, Vegan)

Making these cups gluten-free is easy. Just use gluten-free graham crackers or almond flour for the crust. For a vegan version, replace the cream cheese with a plant-based alternative. Use coconut cream or cashew cream for a rich texture. Switch the powdered sugar with a vegan sweetener. You can also find vegan whipped cream at stores. These swaps let everyone enjoy this treat without missing out.

Seasonal Flavors and Add-ins

Seasonal flavors can make your s’mores cheesecake cups even more special. In fall, add pumpkin spice to the filling for a cozy taste. During winter, try peppermint extract for a refreshing holiday twist. You can also mix in seasonal fruits like strawberries in spring or apples in autumn. Top with crushed nuts or toffee bits for extra crunch. These small changes make your dessert feel fresh and festive.

Storage Info

How to Store Leftover Cups

To keep your leftover cheesecake cups fresh, place them in the fridge. Use an airtight container or cover them with plastic wrap. This will stop air from making them dry. The cool temperature keeps the cream cheese filling nice and firm. Enjoy your treats within three days for the best taste.

Freezing Instructions

If you want to save some for later, you can freeze them. First, let the cups chill completely. Then, cover each cup tightly with plastic wrap. Place them in a freezer-safe container. This helps keep them fresh. You can freeze the cups for up to one month. When ready to enjoy, move them to the fridge overnight to thaw.

Shelf Life

These no-bake s’mores cheesecake cups last well if stored properly. In the fridge, they are good for about three days. If you freeze them, they stay tasty for up to a month. For the best flavor, try to eat them fresh.

FAQs

Can I use store-bought whipped cream?

Yes, you can use store-bought whipped cream. It saves time and works well. Just make sure it is fresh and fluffy. This will help keep your cheesecake light. If you want, you can also make your own for a richer taste.

How long do these cheesecake cups need to chill?

These cheesecake cups need to chill for at least 2 hours. This time helps the layers set well. If you can wait longer, chilling overnight is even better. This way, the flavors meld together nicely.

Can I make these in advance?

Absolutely! You can prepare these cups a day ahead. Keep them in the fridge until you are ready to serve. This makes them perfect for parties or gatherings. Just add any toppings before serving for the best look.

This blog post guides you through making delicious cheesecake cups. We covered key ingredients, step-by-step instructions, and helpful tips. You learned about variations and easy substitutions, perfect for any diet.

Now, you can craft tasty treats at home with ease. Remember the tips to avoid common mistakes. These cheesecake cups are fun to make and share. Enjoy your creamy creations and impress your friends with your skills!

To make No-Bake S’mores Cheesecake Cups, you will need: - 1 cup graham cracker crumbs - 1/4 cup unsweetened cocoa powder - 1/3 cup melted unsalted butter - 2 cups cream cheese, softened - 1/2 cup powdered sugar - 1 teaspoon vanilla extract - 1 cup whipped cream - 1 cup mini marshmallows - 1/2 cup chocolate chips, melted - Additional mini marshmallows and chocolate shavings for topping Gather these items before you start. Having everything ready makes cooking easy and fun. You can add these toppings for extra flavor: - Toasted mini marshmallows - Chocolate shavings - Extra melted chocolate - Crushed graham crackers These toppings add a nice touch. They make the cups look great and taste even better. You can make swaps if you don’t have something. For example: - Use Oreo crumbs instead of graham crackers for a twist. - Swap the cream cheese for a dairy-free cream cheese to make it vegan. - Use honey or maple syrup instead of powdered sugar for sweetness. Feel free to get creative! Cooking is all about making it your own. To start, gather your ingredients. You need graham cracker crumbs, cocoa powder, and melted butter. In a medium bowl, mix the crumbs, cocoa, and butter. Stir until the crumbs look like wet sand. This mixture will form a tasty base for your cups. Next, take serving cups or jars. Divide the crust evenly between them. Press it down firmly at the bottom. This creates a strong base. Place the cups in the fridge while you make the filling. Now, let’s make the cheesecake filling. In a large bowl, add softened cream cheese. Use an electric mixer to beat it until smooth. Then, add powdered sugar and vanilla extract. Mix these until they blend well together. Next, fold in the whipped cream gently. This step adds fluffiness to your filling. Be careful not to stir too hard; you want to keep that nice airy texture. Time to layer the cups! Spoon the cheesecake mixture over the chilled crust. Fill each cup to the top. While the filling is soft, drizzle melted chocolate over it. This adds a rich flavor. Now, sprinkle mini marshmallows on top. If you like, drizzle a bit more melted chocolate over the marshmallows. This gives them extra sweetness. Chill the cups in the fridge for at least two hours. This allows the flavors to meld and the cups to set. If you want toasted marshmallows, use a kitchen torch or broiler carefully. Before serving, add more mini marshmallows and chocolate shavings on top. This makes them look great and adds a bit of crunch. Enjoy your delicious No-Bake S’mores Cheesecake Cups! To get a smooth cheesecake, start with softened cream cheese. Cold cream cheese can clump. Beat the cream cheese until it's creamy and fluffy. Mix in the powdered sugar and vanilla next. This keeps the filling smooth. When you fold in the whipped cream, be gentle. This helps keep the airy texture. If you mix too hard, the filling can get dense. These cups are great for parties or family dinners. You can serve them in small jars or cups. For a fun touch, add a toasted marshmallow on top. Use a kitchen torch for a smoky flavor. You can also drizzle more melted chocolate over the top for extra sweetness. Serve with graham crackers on the side for crunch. One mistake is not chilling the cups long enough. They need at least 2 hours to set. If you skip this step, they can fall apart when served. Another mistake is overmixing the whipped cream. This leads to a dense filling. Finally, don’t skip the crust preparation. A firm crust holds everything together. {{image_2}} You can tweak the classic s’mores cheesecake cups to fit your taste. Try using Oreo crumbs instead of graham cracker crumbs for a chocolatey twist. This small change gives a richer flavor and texture. You can also swap the mini marshmallows for crushed candy bars or peanut butter chips. This adds a fun surprise in every bite. For a fruity version, mix in fresh berries or a layer of fruit preserves. These alternatives bring new flavors and keep the dessert exciting. Making these cups gluten-free is easy. Just use gluten-free graham crackers or almond flour for the crust. For a vegan version, replace the cream cheese with a plant-based alternative. Use coconut cream or cashew cream for a rich texture. Switch the powdered sugar with a vegan sweetener. You can also find vegan whipped cream at stores. These swaps let everyone enjoy this treat without missing out. Seasonal flavors can make your s’mores cheesecake cups even more special. In fall, add pumpkin spice to the filling for a cozy taste. During winter, try peppermint extract for a refreshing holiday twist. You can also mix in seasonal fruits like strawberries in spring or apples in autumn. Top with crushed nuts or toffee bits for extra crunch. These small changes make your dessert feel fresh and festive. To keep your leftover cheesecake cups fresh, place them in the fridge. Use an airtight container or cover them with plastic wrap. This will stop air from making them dry. The cool temperature keeps the cream cheese filling nice and firm. Enjoy your treats within three days for the best taste. If you want to save some for later, you can freeze them. First, let the cups chill completely. Then, cover each cup tightly with plastic wrap. Place them in a freezer-safe container. This helps keep them fresh. You can freeze the cups for up to one month. When ready to enjoy, move them to the fridge overnight to thaw. These no-bake s'mores cheesecake cups last well if stored properly. In the fridge, they are good for about three days. If you freeze them, they stay tasty for up to a month. For the best flavor, try to eat them fresh. Yes, you can use store-bought whipped cream. It saves time and works well. Just make sure it is fresh and fluffy. This will help keep your cheesecake light. If you want, you can also make your own for a richer taste. These cheesecake cups need to chill for at least 2 hours. This time helps the layers set well. If you can wait longer, chilling overnight is even better. This way, the flavors meld together nicely. Absolutely! You can prepare these cups a day ahead. Keep them in the fridge until you are ready to serve. This makes them perfect for parties or gatherings. Just add any toppings before serving for the best look. This blog post guides you through making delicious cheesecake cups. We covered key ingredients, step-by-step instructions, and helpful tips. You learned about variations and easy substitutions, perfect for any diet. Now, you can craft tasty treats at home with ease. Remember the tips to avoid common mistakes. These cheesecake cups are fun to make and share. Enjoy your creamy creations and impress your friends with your skills!

No-Bake S’mores Cheesecake Cups

Indulge in the ultimate dessert with these No-Bake S’mores Cheesecake Cups! Perfectly layered with a chocolatey graham cracker crust and a creamy cheesecake filling, these treats are topped with mini marshmallows and drizzled with melted chocolate for a delicious twist on a campfire classic. Quick and easy to make, these cups are sure to impress. Click through for the full recipe and start creating your sweet masterpiece today!

Ingredients
  

1 cup graham cracker crumbs

1/4 cup unsweetened cocoa powder

1/3 cup melted unsalted butter

2 cups cream cheese, softened

1/2 cup powdered sugar

1 teaspoon vanilla extract

1 cup whipped cream

1 cup mini marshmallows

1/2 cup chocolate chips, melted

Additional mini marshmallows and chocolate shavings for topping

Instructions
 

Prepare the crust: In a medium bowl, combine the graham cracker crumbs, cocoa powder, and melted butter. Mix until all crumbs are well coated and resemble wet sand.

    Assemble the crust: Divide the crust mixture evenly among serving cups or jars, pressing it down firmly at the bottom to create a stable base. Place the cups in the refrigerator to set while you prepare the filling.

      Make the cheesecake filling: In a large mixing bowl, beat the softened cream cheese with an electric mixer until smooth and creamy. Add the powdered sugar and vanilla extract, mixing until fully incorporated.

        Fold in the whipped cream: Gently fold the whipped cream into the cream cheese mixture until well combined and fluffy. Be careful not to deflate the whipped cream too much.

          Layer the filling: Spoon the cheesecake mixture over the chilled crust in each cup, filling them to the top. Drizzle melted chocolate over the cheesecake layer while it's still soft.

            Add marshmallows: Sprinkle mini marshmallows on top of the cheesecake filling. For an extra layer of flavor, you can also drizzle a bit more melted chocolate on top of the marshmallows if desired.

              Chill the cups: Place the cups back in the refrigerator for at least 2 hours or until set.

                Toast the marshmallows (optional): If you want a toasted flavor, use a kitchen torch to carefully toast the marshmallows before serving, or you can place them under a broiler for a few seconds (with watchful eyes!) until lightly browned.

                  Serve and enjoy: Before serving, sprinkle additional mini marshmallows and chocolate shavings on top for presentation.

                    Prep Time: 15 minutes | Total Time: 2 hours 15 minutes | Servings: 6 cups