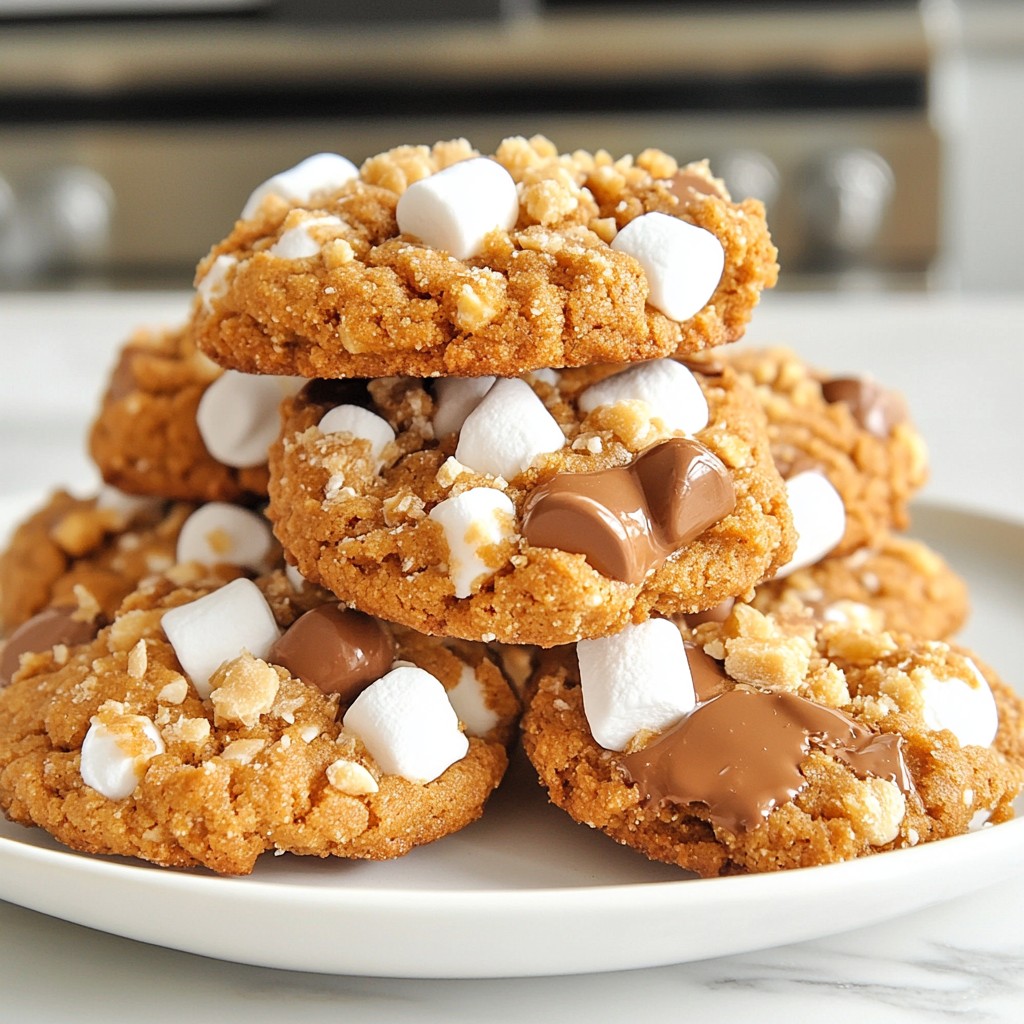
Craving a sweet treat that’s simple and fun? Let’s make S’mores No-Bake Cookies together! These cookies combine chocolate, marshmallows, and graham crackers for an easy twist on the classic campfire treat. You won’t need an oven, just a few simple ingredients and tools. Get ready to indulge in a delightful dessert that’s quick to whip up and perfect for any occasion! Let’s dive in!
Why I Love This Recipe
- Quick and Easy: This recipe takes just 15 minutes to prepare, making it perfect for last-minute cravings or gatherings.
- No Baking Required: Enjoy the classic s'mores flavor without the need for an oven, ideal for warm days or busy kitchens.
- Customizable Ingredients: You can easily swap ingredients like peanut butter for almond butter or use different types of chocolate.
- Fun for Everyone: Kids and adults alike will love these no-bake cookies, making them a hit at parties or family gatherings.
Ingredients
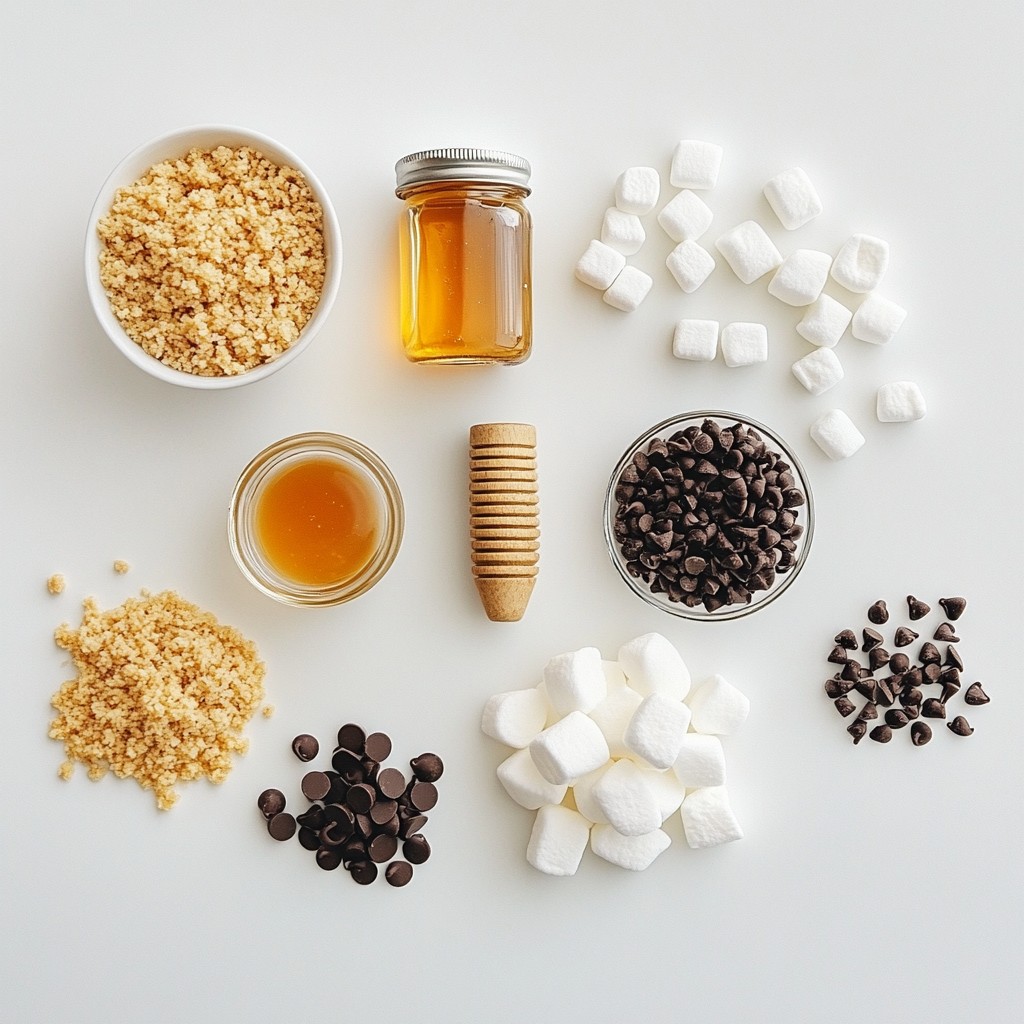
Essential Ingredients for S’mores No-Bake Cookies
To make S’mores No-Bake Cookies, you need these key ingredients:
- 1 cup graham cracker crumbs
- 1/2 cup creamy peanut butter
- 1/4 cup honey or maple syrup
- 1 cup mini marshmallows
- 1/2 cup semisweet chocolate chips
- 1/4 teaspoon vanilla extract
- Pinch of salt
These ingredients come together to create a delicious, chewy treat. The graham cracker crumbs give a nice crunch. Peanut butter adds creaminess. Honey or maple syrup brings sweetness. Mini marshmallows and chocolate chips add fun flavors and textures.
Alternative Options
You can swap some ingredients if needed. For peanut butter, try almond or cashew butter. These options still keep the cookies creamy. If you want a lower sugar option, use a sugar substitute in place of honey. Agave syrup also works well as a sweetener.
Recommended Tools and Equipment
To make these cookies, gather these tools:
- Medium mixing bowl
- Cookie scoop or your hands
- Parchment paper
- Baking sheet
- Refrigerator
These tools help you mix, shape, and chill your cookies. The parchment paper keeps cookies from sticking. A cookie scoop makes uniform shapes, but your hands work too. Enjoy making this tasty treat!
Step-by-Step Instructions
Preparing the Base Mixture
To start, grab a medium bowl. Add 1 cup of graham cracker crumbs into the bowl. Next, scoop in 1/2 cup of creamy peanut butter. Then, pour in 1/4 cup of honey or maple syrup. Don't forget the 1/4 teaspoon of vanilla extract and a pinch of salt. Now, mix everything together until it forms a sticky dough. This mixture is the foundation of your cookies. It should be thick but easy to handle.
Incorporating Marshmallows and Chocolate
Once your base is ready, it's time to add some fun. Gently fold in 1 cup of mini marshmallows. You want to keep them whole for that gooey texture. After that, add in 1/2 cup of semisweet chocolate chips. Mix carefully so the marshmallows and chocolate are evenly spread throughout the dough. This step adds that classic s’mores flavor with each bite.
Shaping the Cookies
Now, it’s time to shape your cookies. Line a baking sheet with parchment paper. Use a cookie scoop or your hands to form small balls or patties from the mixture. Place them onto the sheet. Once all the cookies are on the sheet, gently flatten each one. This gives them the classic cookie shape. Finally, pop the baking sheet into the fridge for about 30 minutes. This helps the cookies firm up. After chilling, your s’mores no-bake cookies are ready to enjoy!
Tips & Tricks
How to Achieve the Best Texture
To get the best texture for your S’mores No-Bake Cookies, keep a few tips in mind. First, use creamy peanut butter. It blends well and makes a smooth dough. Next, mix the ingredients until they form a sticky mass. This helps the cookies hold together nicely. Also, let the cookies chill in the fridge for 30 minutes. This step firms them up and makes them easier to eat.
Common Mistakes to Avoid
Avoid these common mistakes to ensure great cookies every time. Don’t skip the salt. A pinch of salt balances the sweetness. Also, don’t overmix the dough once you add the marshmallows and chocolate chips. Gently fold them in to keep some texture. Lastly, be careful not to skip chilling. If you don’t chill, the cookies may fall apart.
Enhancing Flavor with Extra Ingredients or Toppings
Want to add more flavor to your cookies? You can mix in chopped nuts for a crunchy bite. Try adding dried fruits like raisins or cranberries for a sweet twist. You can also drizzle melted chocolate on top before chilling. This adds a nice touch and makes them look pretty. For a fun twist, use flavored nut butters like almond butter. These simple changes can make your cookies even more delicious.
Pro Tips
- Chill the Mixture: Ensure that the mixture is properly chilled before forming the cookies. This helps them hold their shape better.
- Use Fresh Ingredients: For the best flavor and texture, make sure your marshmallows and chocolate chips are fresh. Stale ingredients can alter the taste.
- Experiment with Add-Ins: Feel free to customize your cookies by adding nuts, dried fruit, or different types of chocolate chips for a unique twist.
- Storage Tips: Keep any leftover cookies in an airtight container in the fridge to maintain their freshness for up to a week.
Variations
Transforming the Recipe with Different Nut Butters
You can change the flavor by using different nut butters. Try almond butter for a nutty taste. Cashew butter adds a creamy twist. Sunflower seed butter works well for nut-free diets. Each option brings its own unique flavor to the cookies.
Adding Additional Mix-Ins (e.g., nuts, dried fruits)
Mix in your favorite nuts or dried fruits for added texture. Chopped walnuts or pecans give a nice crunch. Dried cranberries or cherries add a sweet, fruity kick. Feel free to experiment with different mix-ins to make it your own.
Gluten-Free and Vegan Adaptations
Making these cookies gluten-free is simple. Use gluten-free graham crackers to keep the recipe safe for those with gluten issues. For a vegan version, swap honey for maple syrup. You can also use vegan chocolate chips. These small changes keep the cookies tasty and suitable for all diets.
Storage Info
Best Practices for Storing No-Bake Cookies
To keep your S’mores No-Bake Cookies fresh, store them in an airtight container. Place a layer of parchment paper between the layers if you stack them. This will prevent sticking. Keep them in the fridge for the best taste and texture. Avoid leaving them out for long periods. Heat can melt the chocolate and marshmallows, making them messy.
How Long Do They Last?
These cookies stay fresh for up to one week when stored properly. If you notice any changes in smell or texture, it’s best to toss them. Always check for signs of spoilage before enjoying your treats. If you want to make a big batch, consider freezing some for later.
Freezing Options for Longer Shelf Life
You can freeze S’mores No-Bake Cookies for up to three months. To freeze, wrap each cookie tightly in plastic wrap. Then, place them in a freezer-safe bag or container. When you’re ready to eat them, let them thaw in the fridge. This keeps the cookies tasty and fresh. Enjoy your sweet treat anytime!
FAQs
Can I use different types of chocolate chips?
Yes, you can use different types of chocolate chips. Milk chocolate, dark chocolate, or even white chocolate can work well. Each type adds a unique flavor to your S’mores No-Bake Cookies. If you love a sweet taste, go for milk chocolate. For a richer taste, choose dark chocolate.
What is the best way to serve S’mores No-Bake Cookies?
These cookies taste best chilled. After they firm up in the fridge, serve them on a nice plate. You can add extra mini marshmallows or a drizzle of melted chocolate on top for fun. Pair them with a glass of cold milk for a tasty treat.
Can these cookies be made ahead of time?
Absolutely! You can make these cookies a day or two ahead. Just store them in an airtight container in the fridge. They stay fresh and delicious. This makes them perfect for parties or snacks when you're busy.
You learned how to make easy S’mores No-Bake Cookies. We covered key ingredients, tools, and step-by-step instructions for perfect results. I shared tips for texture and flavor, plus fun variations. Storing these cookies is simple, ensuring their tasty goodness lasts longer.
Keep experimenting with different nut butters and mix-ins. Enjoy your delicious treats!